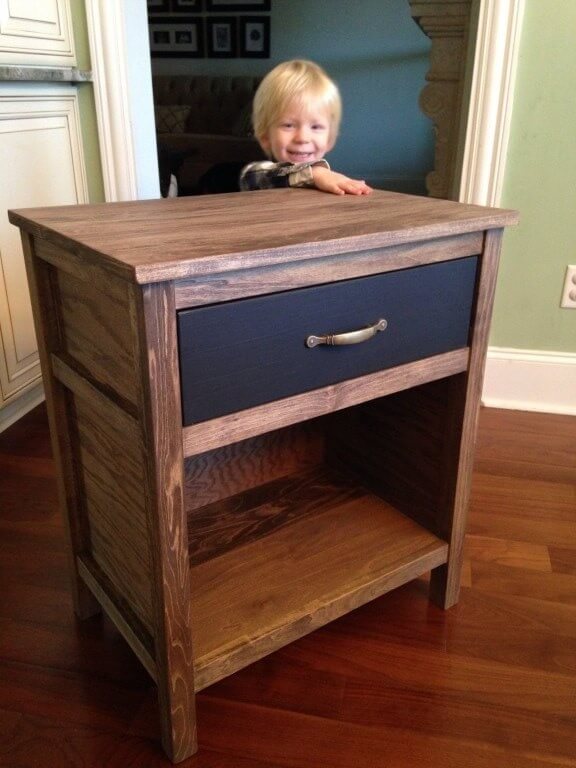
So our friends have a baby boy on the way and for a baby gift I wanted to build them a little something. After talking to them about what they needed we decided on a nightstand. Since their nursery is on the smaller side they need a nightstand that could double as a bookshelf, this time I opted for a custom design by yours truly.
As always if you have any questions don’t hesitate to comment below and especially don’t forget to post pictures of your finished products in the comments! ENJOY!
Tools Required
Material List
If your planning on staining this, I would recommend building it in red oak. I have tried to use materials that are convenient to most at the big box stores. You could always do it in a pine but from my experience, its worth the extra money to go with a hardwood or copper for something like this. Have a gander at some copper size tables to get a better idea of what I mean.
- 4x 2”x2”x36”
- 3x 1”x2”x6’
- 1x 1”x6”x8’
- 2x 1”x4”x6’
- 1x ½”x24”x48” (plywood)
- 1x ¼”x24”x48” (drawer bottom)
- Drawer Pull
- 1-¼” Pocket Hole Screws
- ¾” Wood Screws
- Wood Glue
Cut List:
| Qty: | Dimensions: | Notes: |
| 4x | 2 x 2 x 27.25” | |
| 6x | 1 x 2 x 20” | Only cut 2 pieces per 6’ board |
| 6x | 1 x 2 x 12.5” | Only cut 2 pieces per 6’ board |
| 4x | 1 x 4 x 20” | Only cut 2 pieces per 6’ board |
| 2x | 1 x 4 x 13” | Only cut 1 piece per 6’ board |
| 2x | 1 x 4 x 17.25” | Only cut 1 piece per 6’ board |
| 3x | 1 x 6 x 24” | |
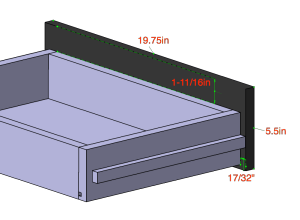
| 1x | 1 x 6 x 19.75” | |
| 6x | ¾ x ½ x 12.5” | This can be cut using some leftover scrap |
| 2x | ½ x 12.5 x 23.25” | |
| 1x | ½ x 20 x 23.25” | |
| 1x | ¼ x 12 x 17.75” | If you don’t have a dado blade don’t cut this yet |
How to Build a Nightstand with a Drawer
If you decide to take on this project I highly recommend you download the printable PDF below to have with you during the build. To do so just click the button below and subscribe to get weekly updates. In return I’ll instantly email you the PDF for free! It’s a win-win.
Step 1:
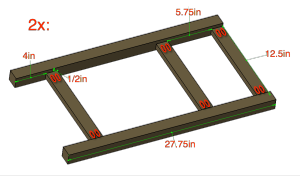
Start out by assembling the two sides first. Drill 2 pocket holes in both ends of the 1x2x12.5” boards.
When screwing and gluing the boards together I would suggest using a small piece of the ½” plywood as your ½” spacer and cut a ¼” piece as a space on the outward facing side (bottom side in this picture).
Clamp the 2x2x27.5” to the 1x2x12.5” board (sandwiched between your ½” and ¼” spacers) and glue and screw together, as shown below with 1-¼” pocket hole screws. Make sure to wipe off any excess glue (Hint: Glue doesn’t stain).
Step 2:
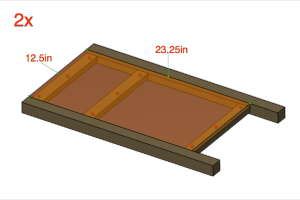
After assembling your sides, glue and screw your ½”x12.5”x23.25” plywood panels to the 1x2x12.5” boards using nine ¾” countersunk wood screws.
Make sure to wipe off any excess glue (Hint: Glue doesn’t stain).
Step 3:
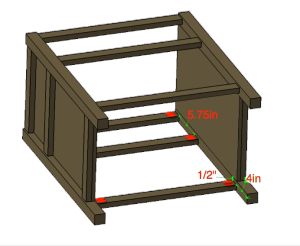
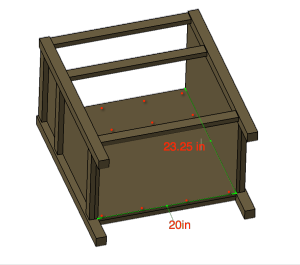
Now, to make the front and back, drill 2 pocket holes in both ends of the 1x2x20” boards. (When screwing and gluing the boards together I would suggest using your ¼” spacer from step 1 to support the 1×2 board on the outward facing side; this should leave you with the ½” of space needed for your back panel.) Glue and screw together the 1×2’s to the 2×2 corner posts, as shown below, with 1-¼” pocket hole screws.
Make sure to wipe off any excess glue (Hint: Glue doesn’t stain).
Step 4:
To finish off the box, screw and glue the ½”x20”x23.25” plywood back panel to the rear 1x2x20” boards with twelve ¾” wood screws.
Make sure to wipe off any excess glue (Hint: Glue doesn’t stain).
Step 5:
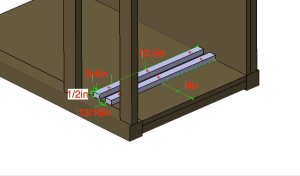
Add the rails for the drawer, as shown, leaving a 13/16” gap (just over ¾”) to accept the rail on the drawer. Remember to pre-drill your holes and then screw and glue the rails in place, with 3/4” wood screws.
Make sure to wipe off any excess glue (Hint: Glue doesn’t stain).
Step 6:
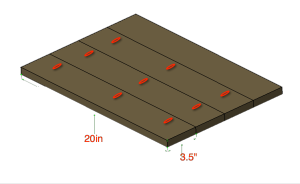
Assemble the lower shelf by drilling three pocket holes in three of the four 1x4x20” boards. Next, glue and screw one board at a time making sure to keep a flat shelf by clamping at each screw point.
(Note: If you have any 1×3 scrap handy, I suggest you substitute the last board for it, being as, in the next step we have to cut 1” off the back.)
Make sure to wipe off any excess glue (Hint: Glue doesn’t stain).
Step 7:
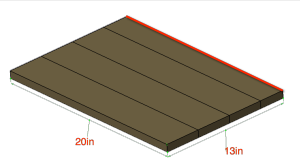
Take the lower shelf that you have just assembled and cut 1” off the back.
Yes, I know you could have just used a 1×3, and if you had the scrap laying around you should have, but it doesn’t make sense to buy a 1x3x6’ just for this now does it?
Step 8:
Drill pocket holes in each end of each board and then three along the front and back of the shelf.
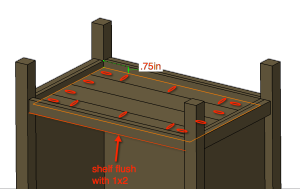
Wedge the shelf in place. You should have ¾” between the bottom of the shelf and the bottom of your frame. Also, make sure that the top of your shelf is flush with the 1×2 on the front, as shown in the picture.
Clamping everything together, screw the shelf in place, with 1-¼” pocket hole screws. You will notice that I didn’t say anything about gluing. Well, trying to glue and wedge this shelf in place will make quite a mess and with this many screws hold the shelf in place I think it will be more than okay.
Step 9:
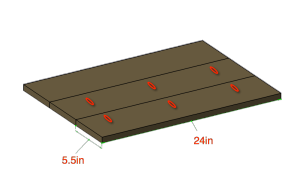
Now, on to the top. Drill three pocket holes in two of the three 1x6x24” boards. Making sure to keep your top as even as possible, glue and screw each board together. Make sure you clamp the boards by the hole when screwing together with 1-¼” pocket hole screws.
Make sure to wipe off any excess glue (Hint: Glue doesn’t stain).
Step 10:
To attach your top, drill two or three pocket holes on the inside of all sides.
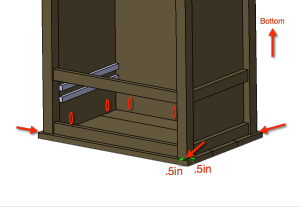
Keeping a ½” over-hang on all sides from the corner posts, screw and glue your top in place with 1-¼” pocket hole screws.
Make sure to wipe off any excess glue (Hint: Glue doesn’t stain).
Step 11:
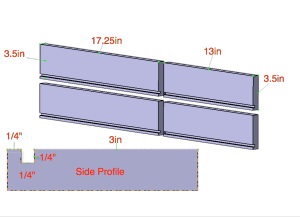
Cutting the groove as shown in the sides, front and back of the box is really easy with a dado blade. Or you can take two side by side passes with a table saw or circle set to a depth of ¼”.
Don’t fret if you don’t have a dado blade and this looks intimidating, just skip the groove. You can always make the bottom panel in the steps ahead large enough that you can just tack it to the bottom.
Step 12:
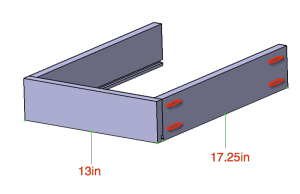
Drill two pocket holes in each end of the front and back boards (the longer ones!)
Now screw and glue ONLY one side with 1-¼” pocket hole screws.
Make sure to wipe off any excess glue (Hint: Glue doesn’t stain).
Step 13:
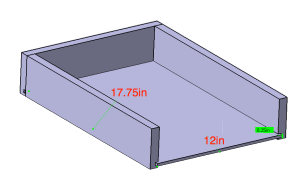
This is an easy one, just slide your ¼” plywood (12”x17.75”) in the grove.
Note: If you did not cut the groove you will need to make your drawer bottom 18.75”x13” and tack with finishing nails.
Step 14:
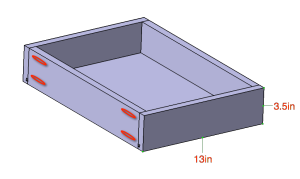
Now fit the last side in place and screw and glue it together with 1-¼” pocket hole screws.
Make sure to wipe off any excess glue (Hint: Glue doesn’t stain).
Step 15:
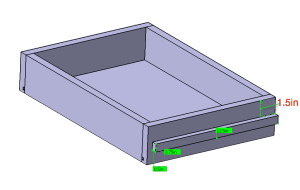
Now, with ¾” wood screws, screw and glue the .5x.75×12.5” rails to the sides of the drawer. Make sure to keep one side flush to the front and maintaining 1.5” from the top of the drawer.
Make sure to wipe off any excess glue (Hint: Glue doesn’t stain).
Step 16:
Finally, attach the 1x6x19.75” drawer front with two 1-¼” wood screws.
Note: Depending on the drawer pull you picked out and the hardware it came with you may need to add the hardware to the drawer front beforehand.
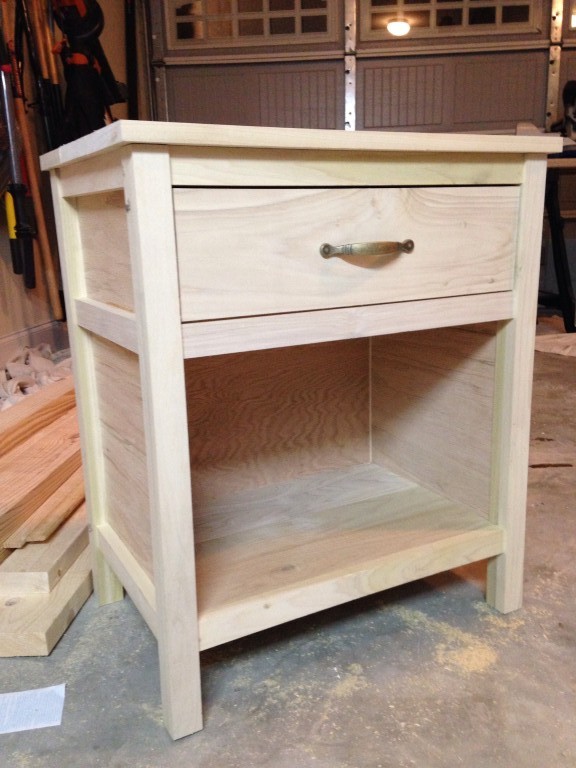
Cooper night stand with drawer, unfinished.
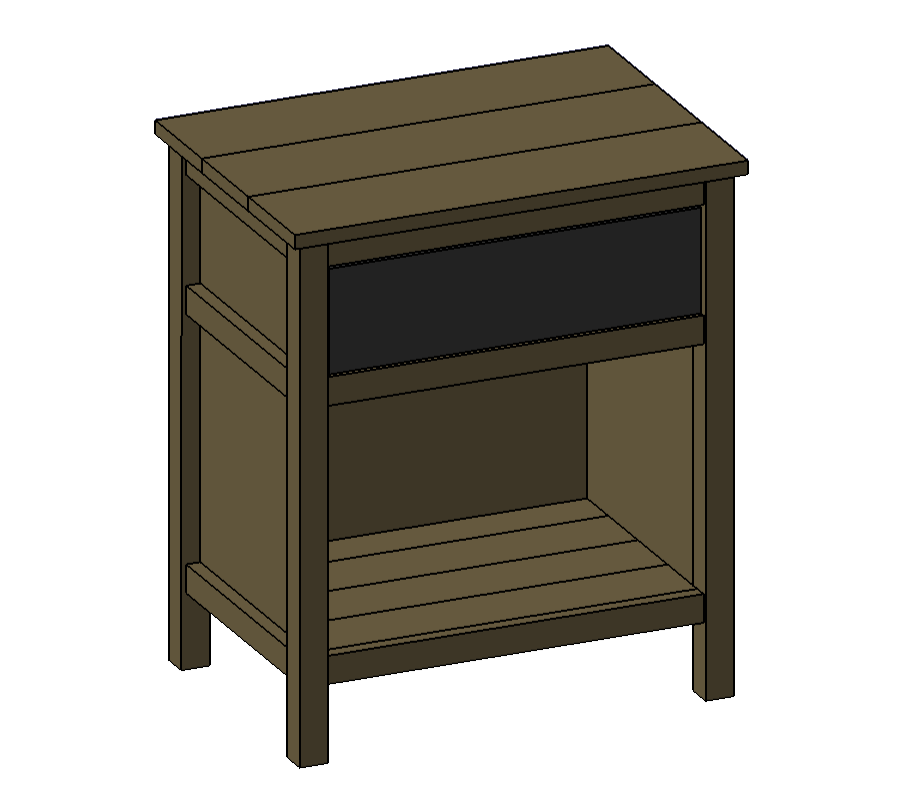
Cooper Night Stand Completed
Finishes:
For this project I choose the following combination stain:
As for a sealant, I went with 4 coats of Rustoleum Zinsser Bulls Eye Shellac on the nights stand and Minwax Paste Finishing Wax on the drawer front.
For other finishing ideas please take a look at our finishes page where my wife Jamie lays out, step-by-step how to’s on different popular and beautiful finishes and techniques.
As always if you have any questions don’t hesitate to comment below and especially don’t forget to post pictures of your finished products in the comments! ENJOY!

