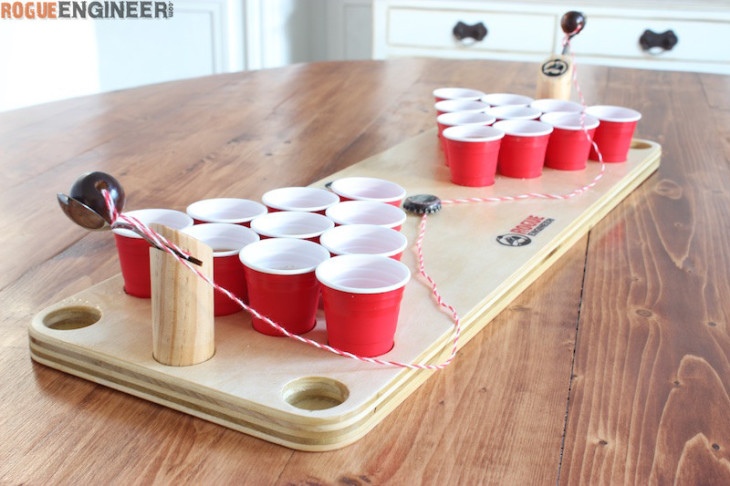
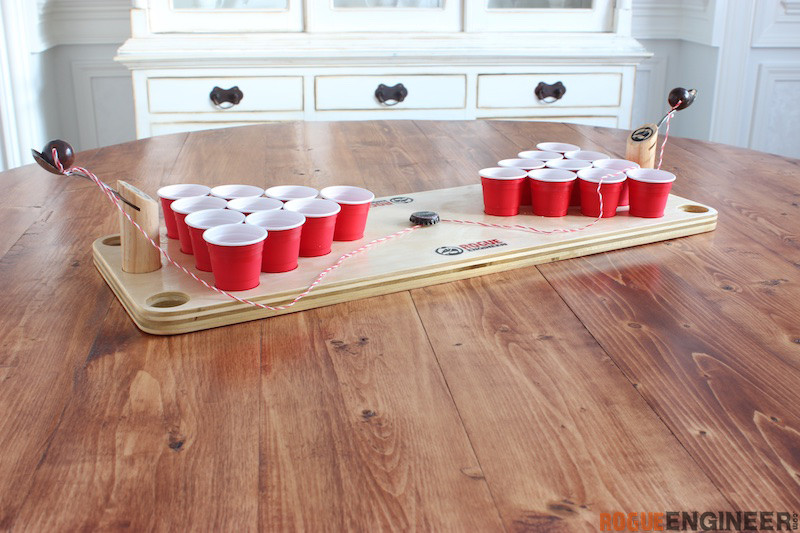
While I haven’t played beer pong since my college days, when I flipping through my Uncommon Goods magazine I saw this mini beer pong game and it looked like the perfect project for my scrap plywood. Plus I know several folks that this would make a good Christmas present for!
For sneak peeks of our upcoming projects be sure to follow me on Facebook and Instagram. Also, follow me on Pinterest to get tons of projects plans from all around the web!
Required Tools
- Drill
- Forstner Bits
- I used 1-3/8″ and 1-1/4″
- Miter Saw
- Table Saw
- Tape Measure
- Pencil
- Safety Glasses
Materials
- Scrap 3/4″ Plywood (8-1/2″ x 22″)
- 1-1/4″ dowel
- Large Wood Beads
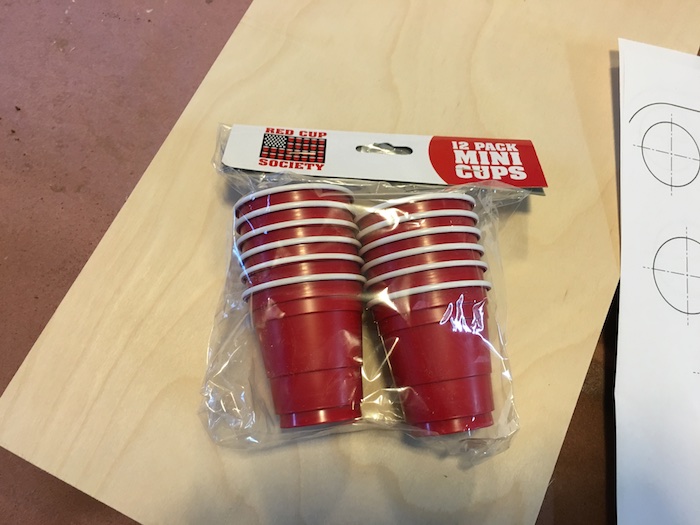
- Mini Red Cups
- Tasting Spoons
Disclosure: The links provided in the “materials” and “required tools” sections are affiliate links. If you would like to support our site and help keep our content free come find out more about how we can make money with no extra cost to you.
How to build a Mini Beer Pong Table
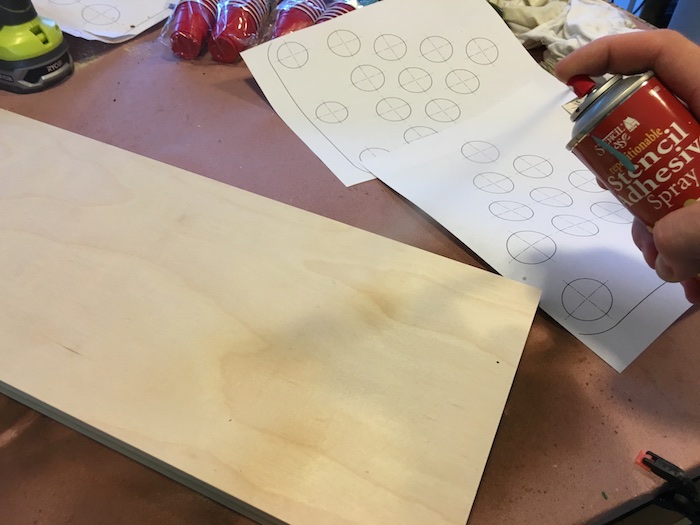
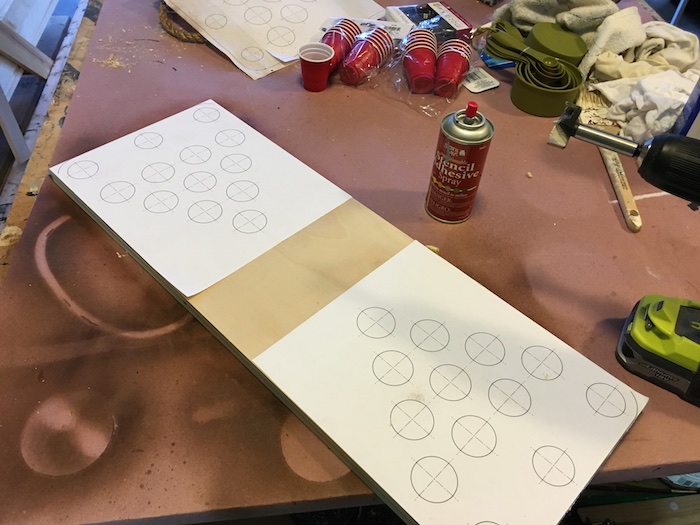
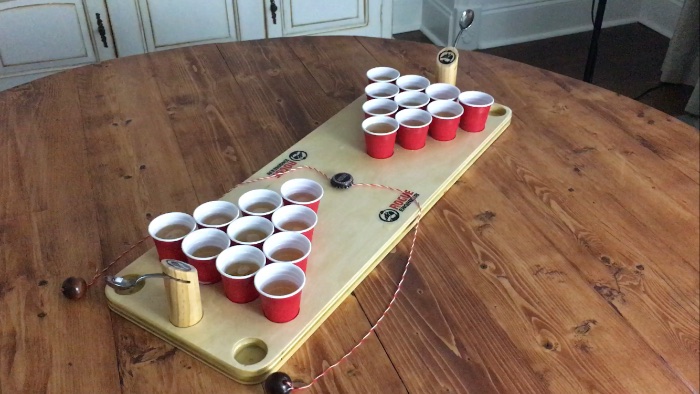
I found these mini red cups at the dollar store. If you’re lucky enough to get the same ones or the same size then you can use the template I drew up.
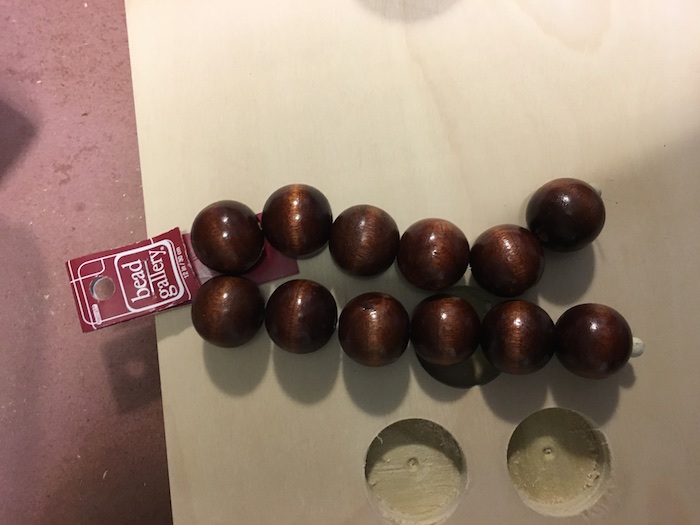
For the balls I found these large wooden beads at Michael’s.
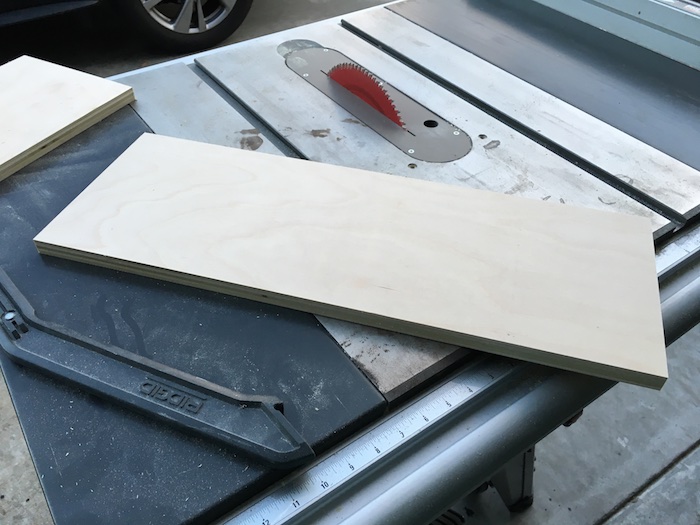
First, you’ll need to cut down a piece of scrap 3/4″ plywood to 8-1/2″ x 22″. If you use different cups and the diameter is larger than 2″ you may need to make your board a bit wider.
I drew out a template and attached with spray adhesive. If you have cups that are the same size (almost 2″ diameter) then print out this template to use as a guide.
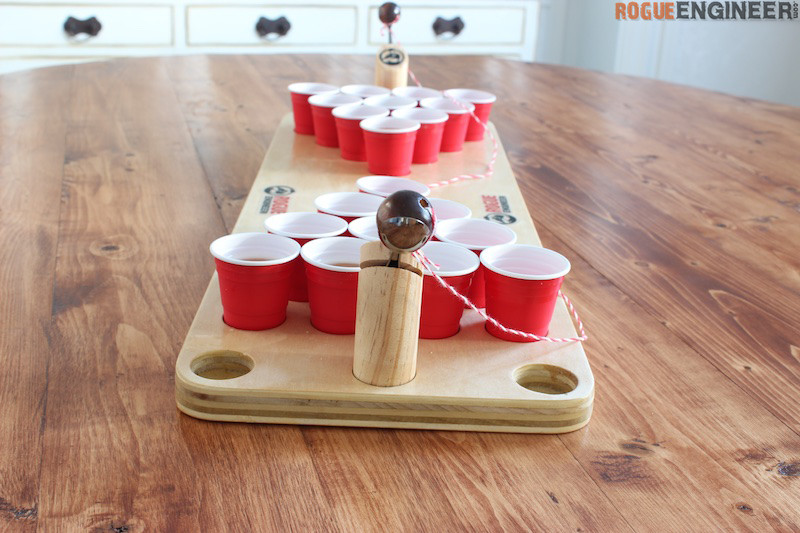
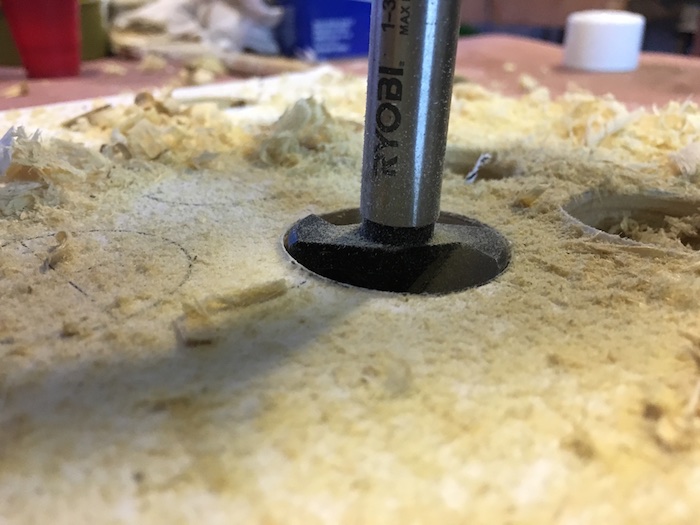
Then, I bored 1-3/8″ holes about 1/2″ deep. I used the bottom of the bit as a guide. The three holes at each end of the boards are for the shooter and should be drilled at the same size as the dowel used for the shooter. In this case it’s 1-1/4″.
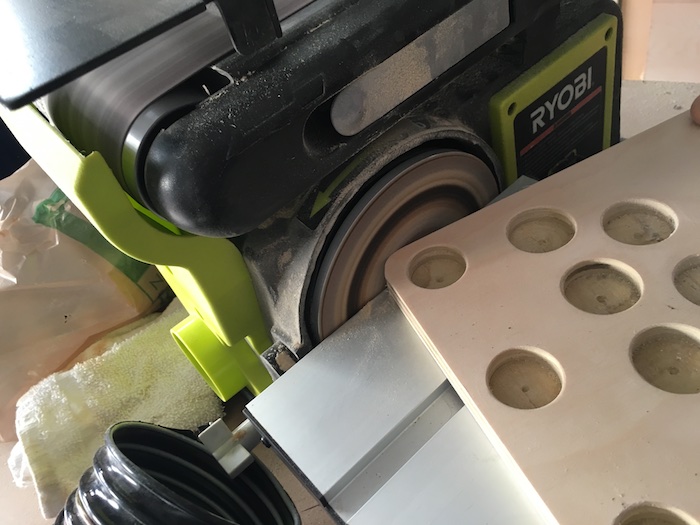
To round the corner I used a sanding wheel but you could also use a jig saw and sand smooth.
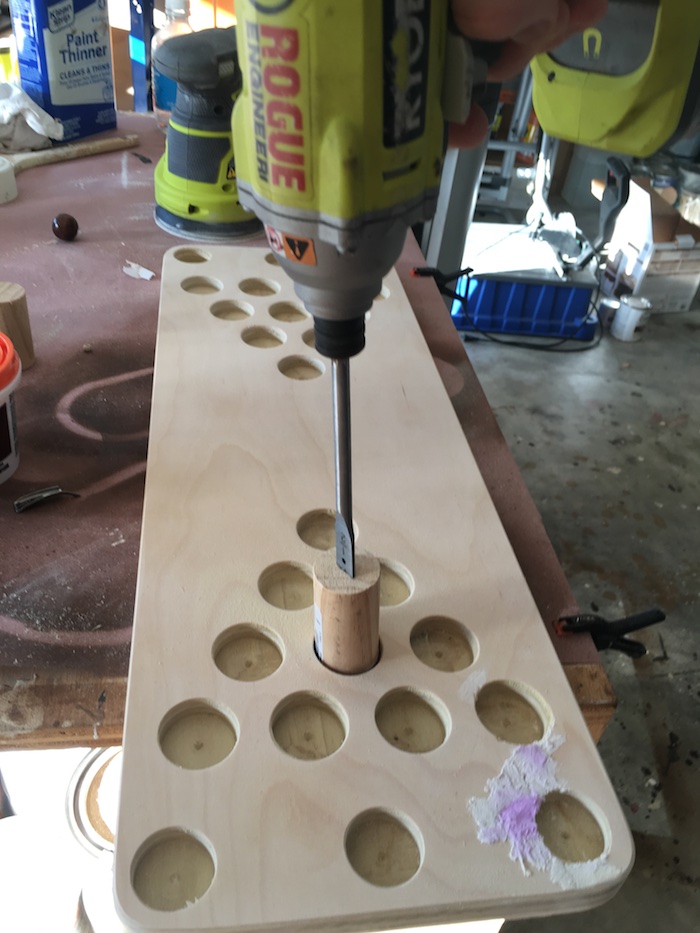
TO make sure the bottom of the holes were smooth I made this little sander. Using an extra piece of the dowel I stapled a small square of sandpaper to the bottom and then tapped a wood bit into the top. Attached it to the drill and voila.
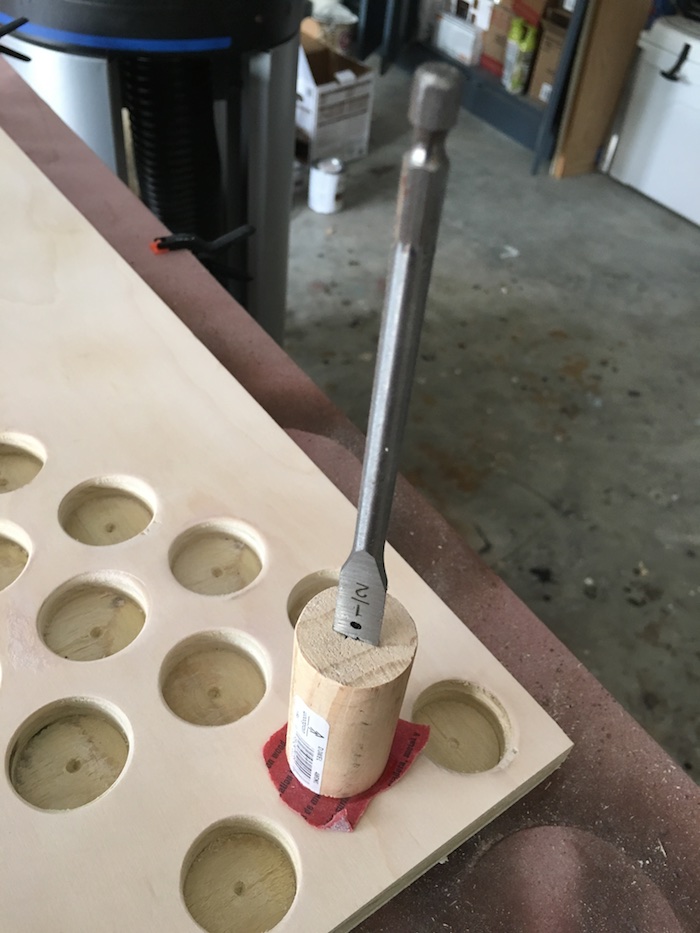
It worked for the larger holes but not for the smaller three. Those I had to do by hand.
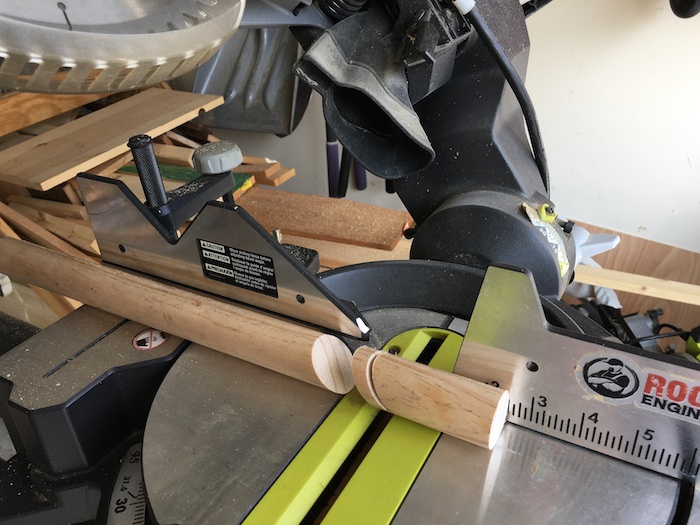
For the shooter, I came up with a design that is very easy to make. It might not be the best shooter out there and I would love to see what others could come up with so feel free to create your own. For mine, I started with a 35 degree notch cut with a miter saw about 2/3 of the way through to hold the small spoon.
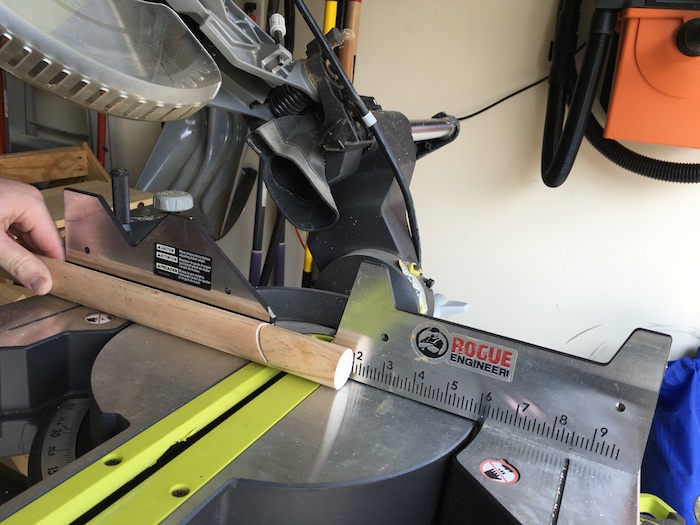
Followed by another 35 degree cut 1/2″ beyond the notch.
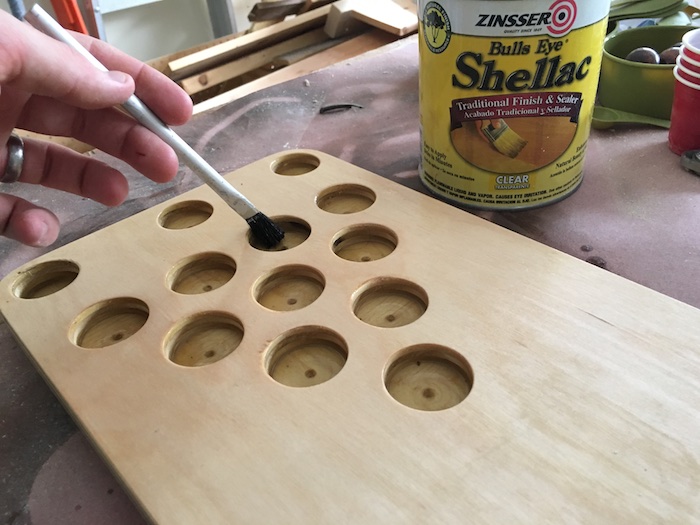
Then I sealed the whole thing with shellac.
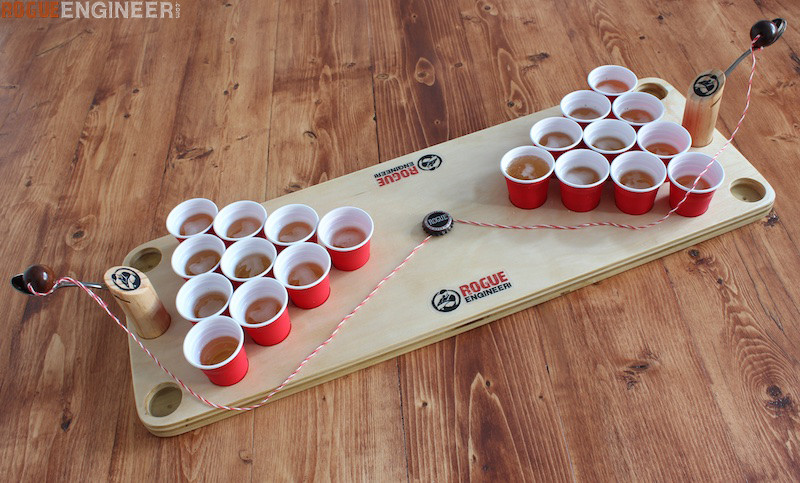
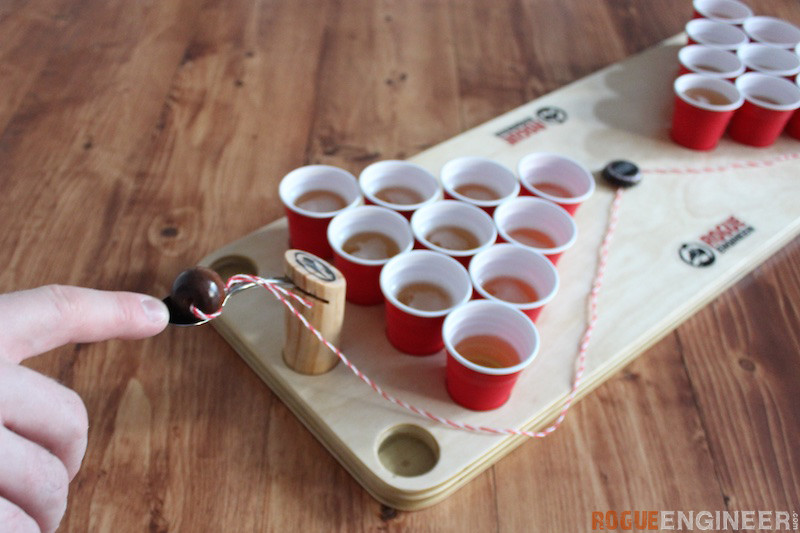
Then, I put a screw in the center of the board.
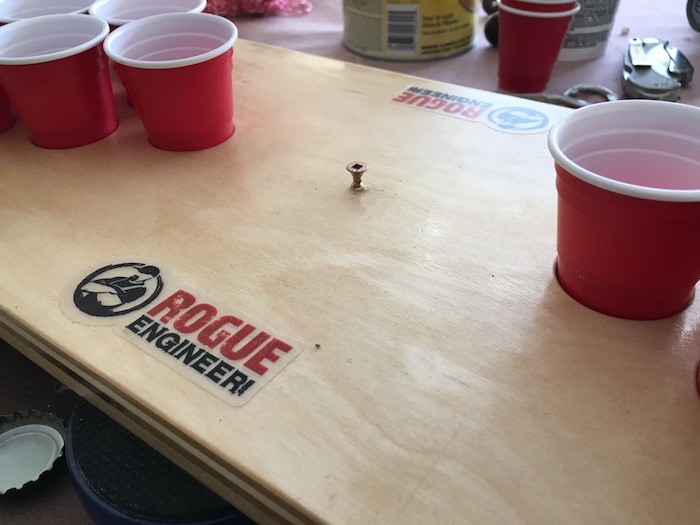
Tied two of the wooden beads with string and attached them to the screw. After that, I attached a bottle cap with hot glue to hide the screw. This project couldn’t be finished without adding some Rogue Engineer stickers!
I hope you liked it. The shooters take a little getting use to but as I said, I’d love to see what other contraptions you all come up with!
Questions? Comments?
As always, if you have any questions don’t hesitate to comment below and especially don’t forget to post pictures of your finished products in the comments! ENJOY!