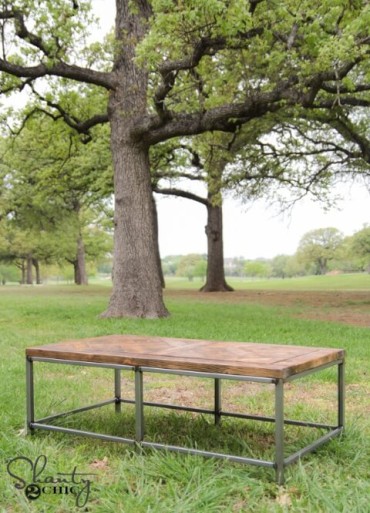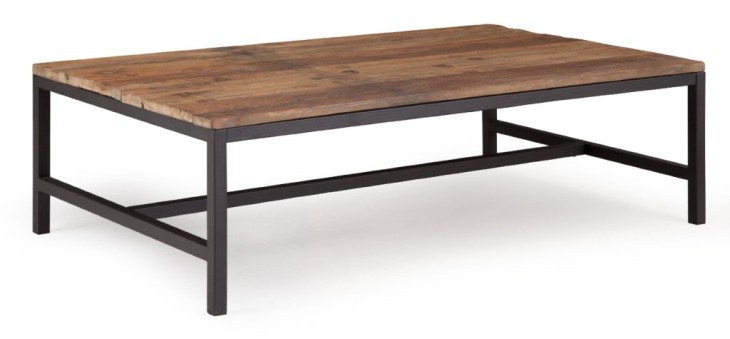
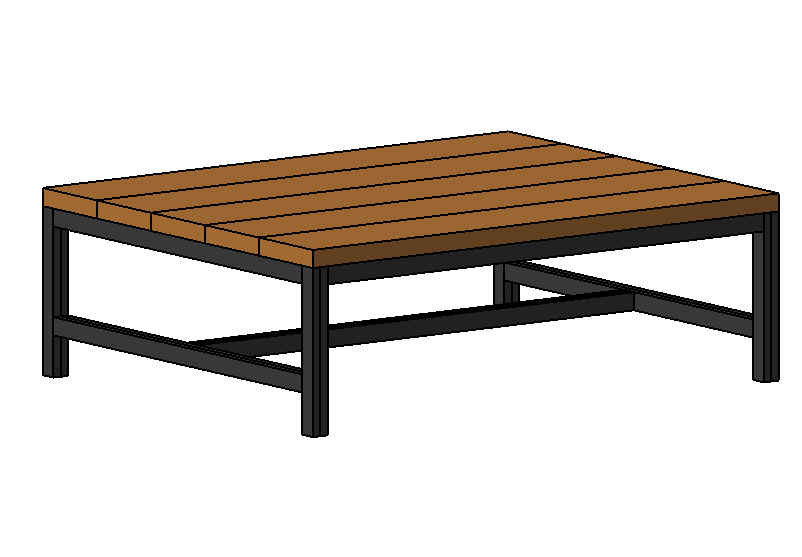
Ever since I started looking around for coffee tables I have been obsessed with the Elliot coffee table from Zuo but I really didn’t want to pay almost $500 for it. I toyed around with the idea of having a local weld shop put together a base for me but after doing some recent projects where I waxed a chalkboard painted surface I realized that this was just the look I needed and for a faux metal base and way cheaper. Here are the plans to build this rustic coffee table with a faux metal base.
Required Tools
- Miter Saw
- Kreg Pocket-Hole Jig
- Brad Nailer
- Cordless Drill
- Level
- Square
- Tape Measure
- Safety Glasses
- Ear Protection
Materials
- 3x 2 x 8 x 8′
- 4x 1 x 2 x 8′
- 4x 1 x 2 x 6′
- 1-1/4″ Coarse Washer-Head Pocket Screws
- 2-1/2″ Coarse Washer-Head Pocket Screws
- 18 Gauge 1-1/4” brad nails
- Wood Glue
- 14x Right Angle Brackets (Optional: See step 5)
- 28x 3/4” Wood Screws (Optional: See step 5)
Cut List

Cut List (Print this out)
Coffee Table Plans
As always if you have any questions don’t hesitate to comment below and especially don’t forget to post pictures of your finished products in the comments! ENJOY!
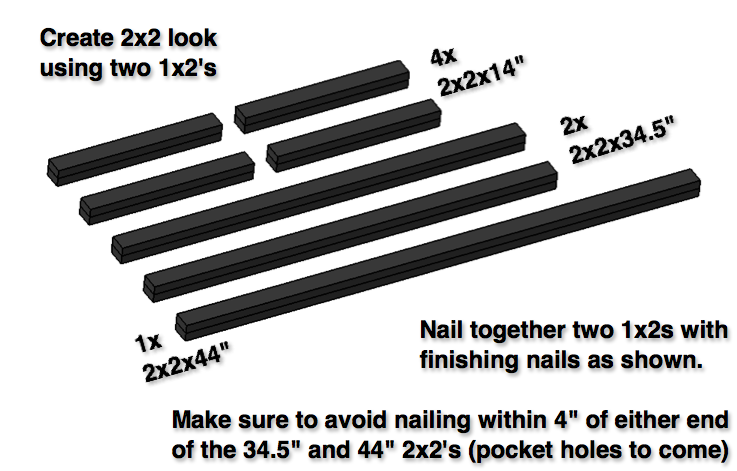
Step 1: Create faux 2×2’s
Step 1: Create faux 2×2’s
Using eight of the 1x2x14″ boards create four faux 2×2’s by glueing one on top of the other as shown and nailing them together using 1-1/4″ finishing nails.
Also, create two faux 2x2x34.5″ post and one 2x2x44″ post by using the same method detailed above. When nailing together the 34.5″ and 44″ boards, make sure to avoid nailing with 4″ of either end since we will need this space later on for pocket holes.
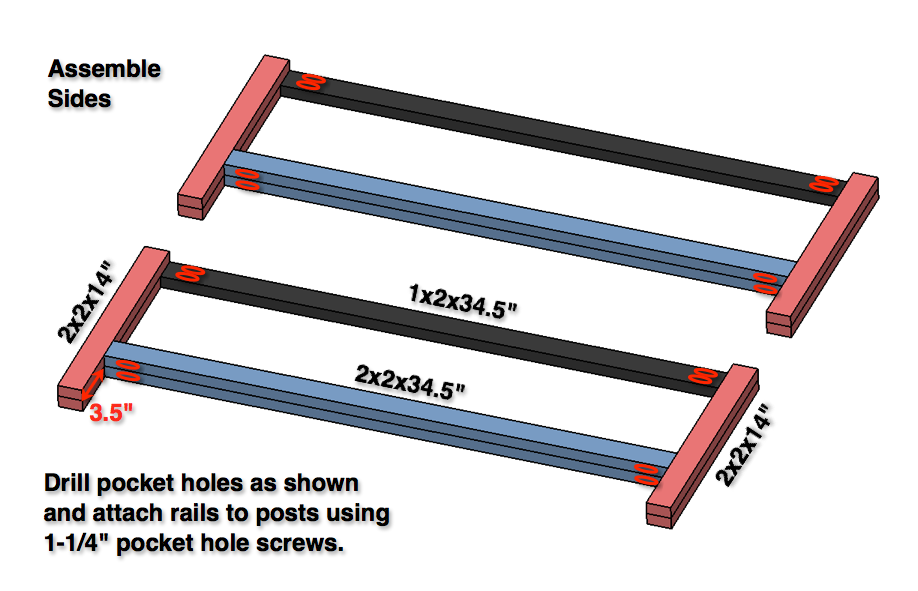
Step 2: Assemble the sides
Step 2: Assemble the sides
Start by drilling pocket holes in both ends of the remaining 1x2x34.5″ boards as well as the two 2x2x34.5″ posts we created in the first step.
Assemble the sides using 1-1/4″ pocket hole screws as shown.
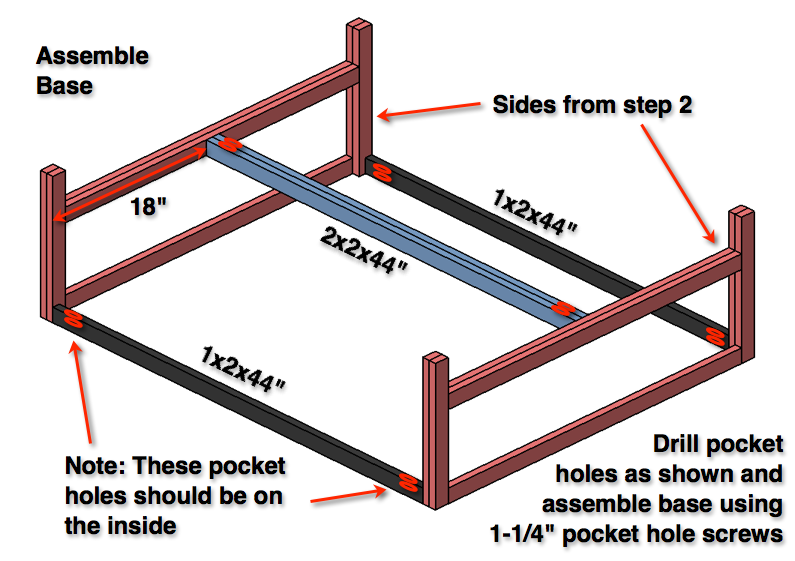
Step 3: Assemble the base
Step 3: Assemble the base
As shown, drill two pocket holes in each end of the remaining two 1x2x44″ boards as well as the 2x2x44″ post you created in step one.
Assemble the base using 1-1/4″ pocket hole screws as shown.
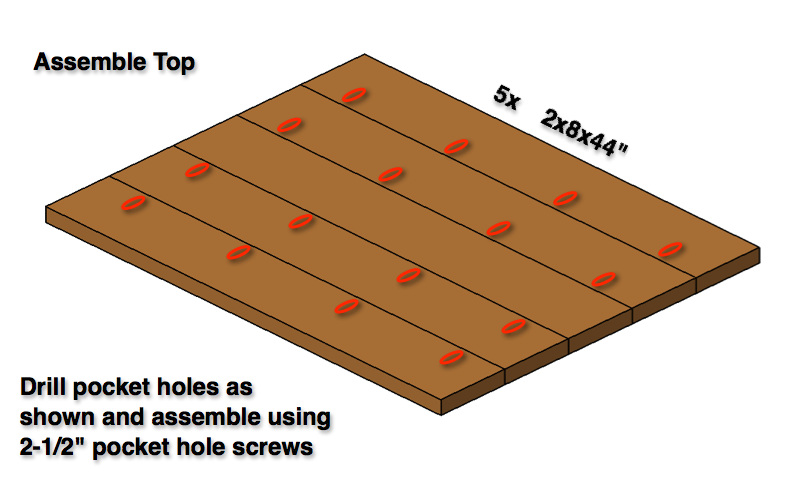
Step 4: Assemble the top
Step 4: Assemble the top
Drill four evenly spaced pocket holes in four of the five 2x8x44″ boards as shown.
Assemble the top using 2-1/2″ pocket hole screws as shown.
Note: Since the top and the bottom have different finishes now is a good time to skip ahead and prepare your surfaces and finish accordingly.
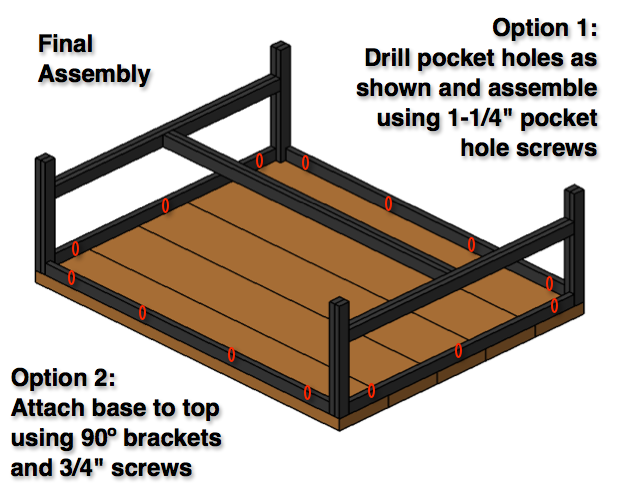
Step 5: Final Assembly
Step 5: Final Assembly
Now for final assembly you have two options.
Option 1: Drill pocket holes as shown and attach with 1-1/4″ pocket hole screws. This method could result in the pocket holes encroaching on the underside of the rail which would only be visible from the ground level.
Option 2: If you’re anal about things like things like this and really just don’t want to drill these pocket holes, you could use right angle brackets and 3/4″ wood screws instead.
Finish
Top:


Base:

Seal:

As always if you have any questions don’t hesitate to comment below and especially don’t forget to post pictures of your finished products in the comments! ENJOY!