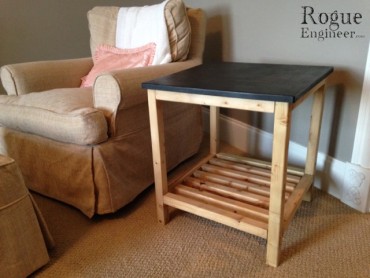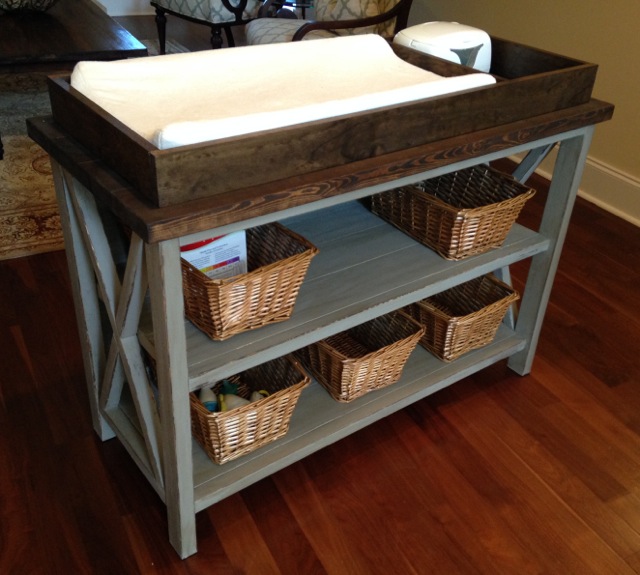
Finished

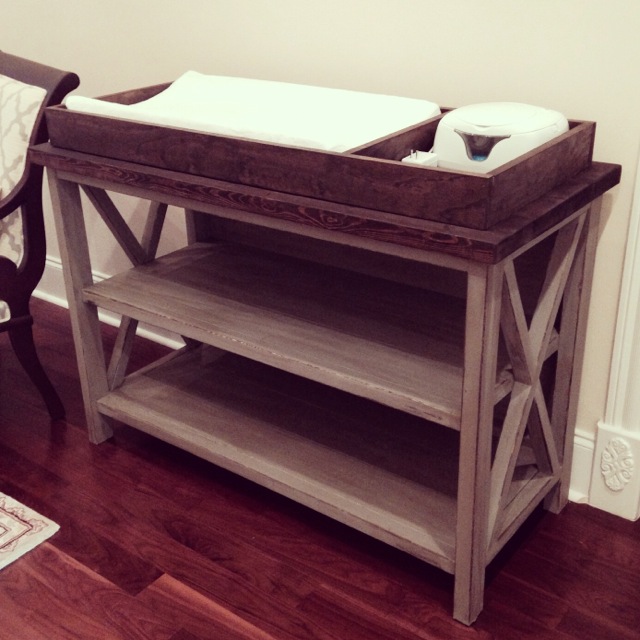
Unfinished, front view
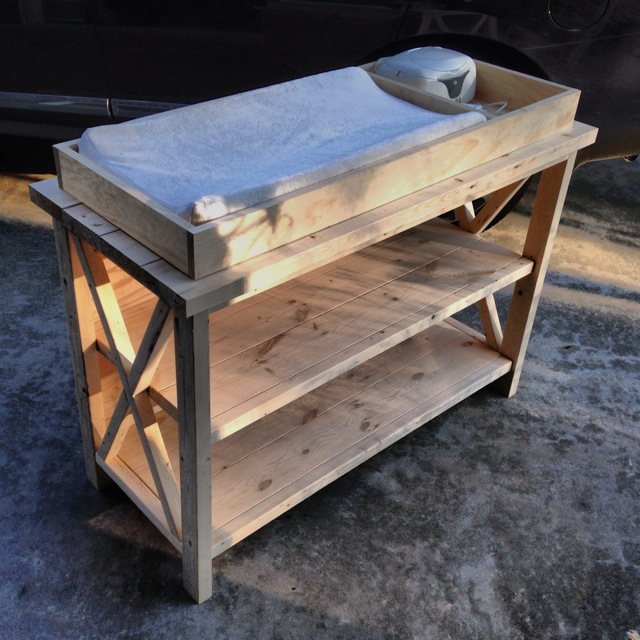
Unfinished, side view
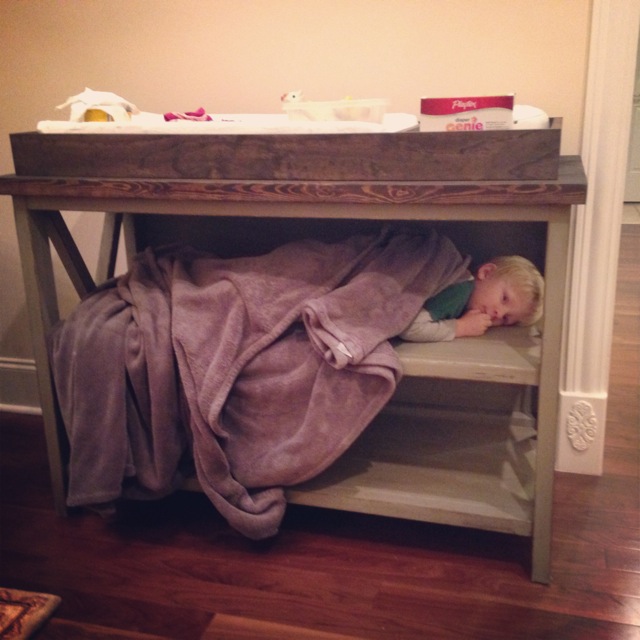
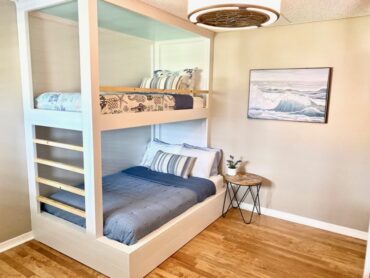
It doubles as bunk beds
With a new baby on the way the list of projects can seem to be endless. One that was at the top of the list was a DIY changing table. My inspiration for this DIY changing table came from the Pottery Barn Belmont buffet and if you want to build that take a look at Ana White’s plans for it. Below I have provided detailed baby changing table woodworking plans for you to enjoy. Please post your results in the comments.
Tools Required:
Materials:
- 1x 1 x 4 x 8′
- 1x 1 x 4 x 6′
- 4x 2 x 2 x 8′
- 3x 2 x 3 x 8′
- 5x 2 x 6 x 8′
- 1x 1/4 x 24 x 48″ plywood (I went with sandply)
- 2-1/2″ #8 Coarse Pocket Hole Screws
- 2″ #8 Coarse Pocket Hole Screws
- 1-1/4″ #8 Coarse Pocket Hole Screws
- 2″ Wood Screw
Recommended Changing Pad: Summer Infant 4-Sided Changing Pad
Cut List:
When I started building furniture in my free time I always wanted to see it come together as fast as possible. Even though maybe the frame came together quickly the rest took some time. Thats why I now cut most/all my wood at once and I recommend you do the same. Hopping between the saw and the pocket hole jig waste a lot of time, and if your free time is limited like mine you’ll agree in the end that this is the only way to go.

Cut List: Print this out

Angled Cuts: Print this out
Before you get started… sand, sand, SAND!
It is best to sand all the cut wood before you start assembling. It’s so much easier to do now then once its assembled especially with all the tight corners. Please know that this kills me too, but I promise its worth it and you’ll be thanking me in the end. For a more in depth instructions take a look at our how to sand whitewood post.
Instructions
As always if you have any questions don’t hesitate to comment below and especially don’t forget to post pictures of your finished products in the comments! ENJOY!
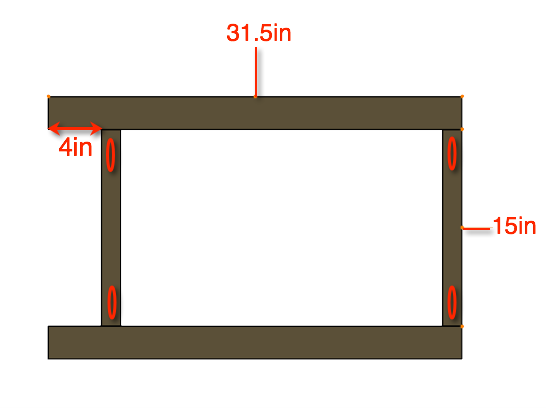
Step 1: Assemble sides together (Make two of these!)
Step 1: Assembling sides
Drill pocket holes in each end of the 15in 2×2’s. Next, screw and glue them to the 31.5in 2×3’s as shown in the picture. Remember, we need two of these.
Note: Know that the pocket holes will be on the inside of the changing table, therefore, you should choose the uglier sides of your wood to be on this side.
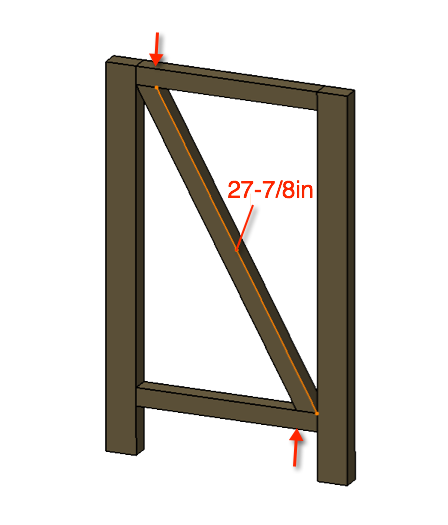
Step 2: Screw in longer diagonal slat.
Step 2: Assembling sides
Attach the longer angled 2×2 with 2″ wood screws from the top and the bottom as shown. Make sure to glue these joints as well.
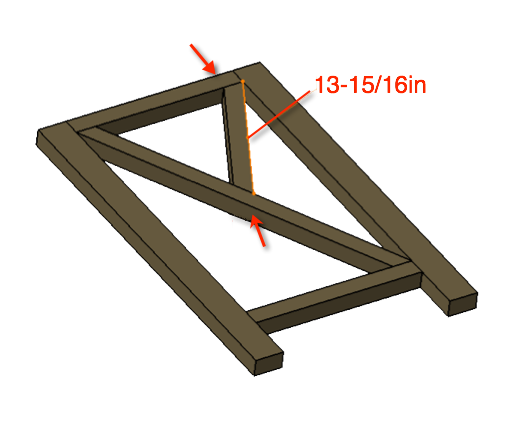
Step 3: Screw in upper slat.
Step 3: Assembling sides
Screw and glue the smaller angled 2×2 in the upper right position with 2″ wood screws. As shown, place the lower screw slightly off from center and at an angle of the 2×2. (As you can see in the next step we will be coming right behind it with a pocket hole screw.)

Step 4: Screw in lower slat.
Step 4: Assembling sides
Using the Kreg jig, drill a pocket hole in the remaining smaller angled 2×2’s as shown in the picture. (Make sure you pocket hole is in the correct side)
Screw and glue the lower slat of the X in with one 2″ wood screw and one 2-1/2″ pocket hole screw, as shown.

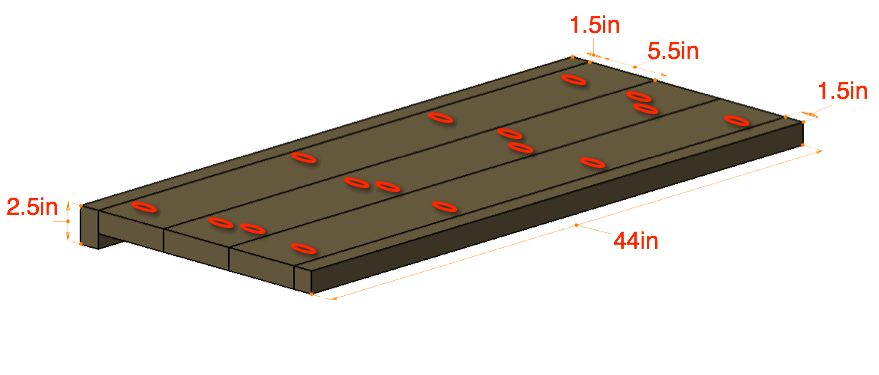
Step 5: Assembling the top
Step 5: Assembling Top
Drill four pocket holes, evenly spaced, in three of the 49 inch 2×6’s. You should choose the uglier sides of your wood to be on this side.
Clamp to maintain a flat surface and screw and glue together, as shown, with 2-1/2″ pocket hole screws.
I suggest giving this another sanding to smooth the top once assembled.
Step 6: Assemble middle shelf
Step 6: Assembling Middle Shelf
Drill pocket holes, evenly spaced, in the three 44 inch 2×6’s as shown in the picture. You should choose the uglier sides of your wood to be on this side.
Clamp to maintain a flat surface and screw and glue the three 2×6’s and two 2×2’s together, as shown, with 2-1/2″ pocket hole screws.
I suggest giving this another sanding to smooth the top once assembled.
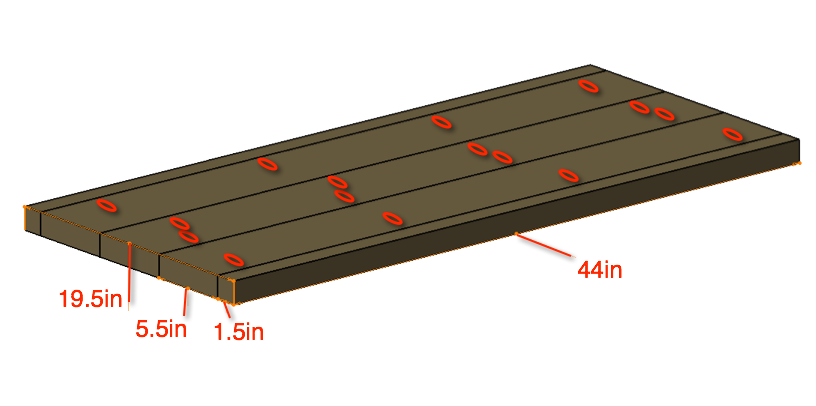
Step 7: Assemble bottom shelf
Step 7: Assembling Bottom Shelf
Drill pocket holes, evenly spaced, in the three 44 inch 2×6’s as shown in the picture. You should choose the uglier sides of your wood to be on this side.
Clamp to maintain a flat surface and screw and glue the three 2×6’s, sandwiched between the 2×2 and the 2×3, as shown, with 2-1/2″ pocket hole screws.
I suggest giving this another sanding to smooth the top once assembled.
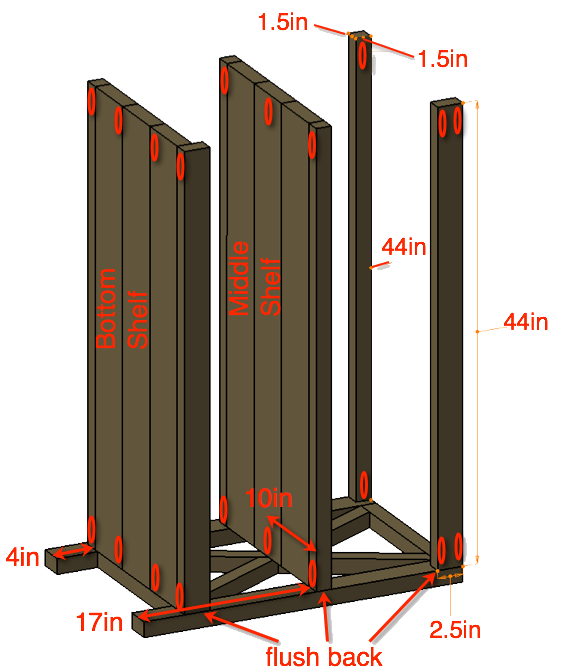
Step 8: Attach the shelves and top rails to one side
Step 8: Assembling Table
Drill the pocket holes, as shown in the shelves and upper rails. Make sure to notice that the middle shelf has three pocket holes, one at each end and one at the middle of the X (this is not the center). Make sure the back of the shelves are flush with the back of the side first and mark where your pocket holes should go.
With the top rails flush with the outside top corners of the side panels, attach with 2″ pocket hole screws as shown. Assure that your shelves are square and attach with 2″ pocket hole screws as shown.
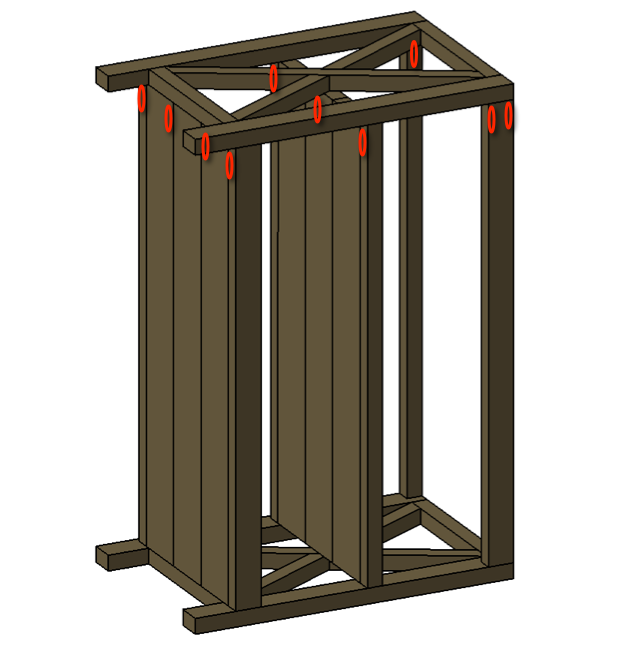
Step 9: Attach the opposite side
Step 9: Assembling Table
With the top rails flush with the outside top corners of the side panels, attach with 2″ pocket hole screws as shown. Assure that your shelves are square and attach with 2″ pocket hole screws as shown.
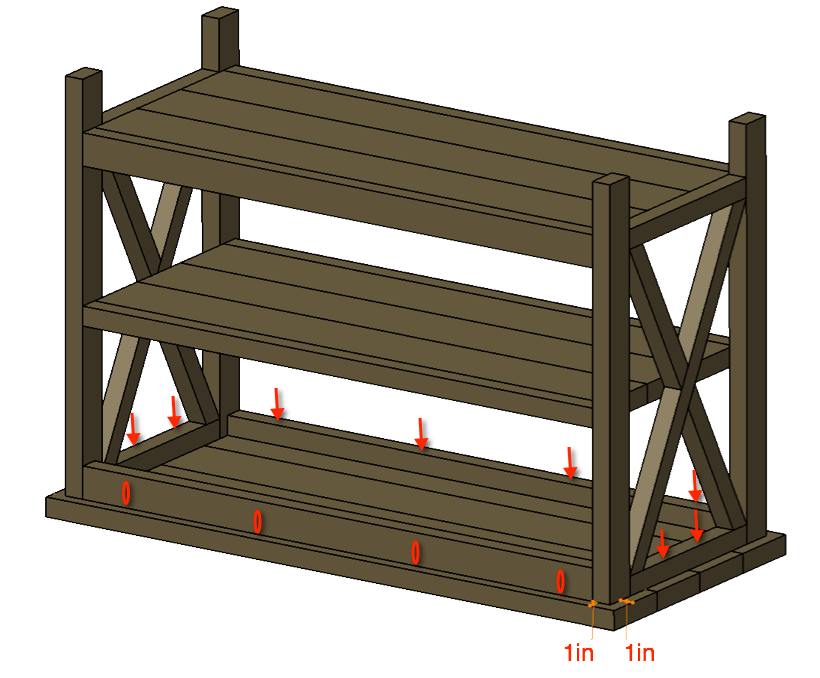
Step 10: Screw on the top
Step 10: Assembling Table
Finish off your table by adding the top. To do so you should drill four pocket holes in the back rail (2×3), as shown.
Attach the top with four 2″ pocket hole screws in the back rail and 2″ wood screws through the 2×2’s as designated by the arrows in the picture.
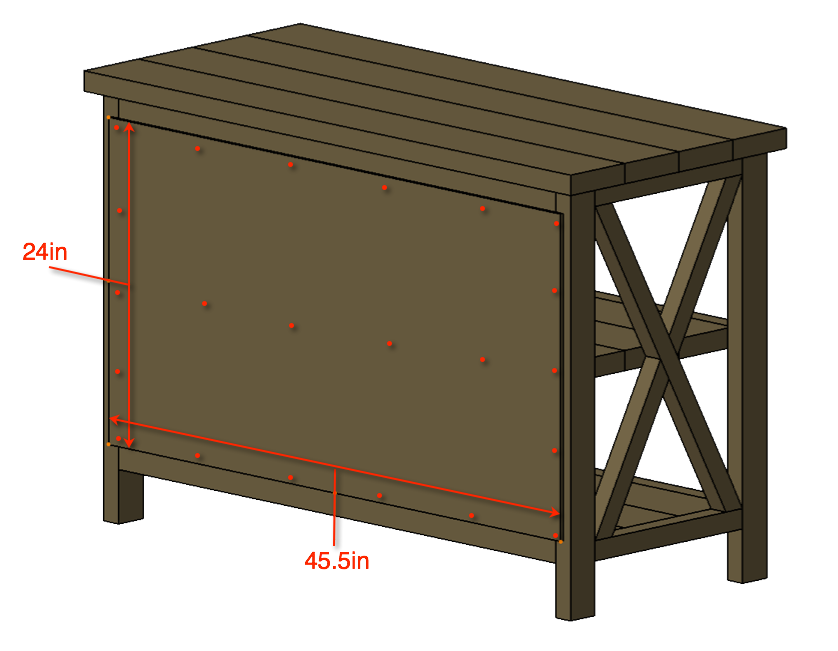
Step 11: Adding the back panel
Step 11: Adding Back Panel
Cut your 1/4″ plywood to 24×45.5″ and nail or screw it to the back as shown in the photo. It is wise to draw a line across the back to show you where to nail.
Note: I used a finishing nailer for this with 1-1/4″ brads but if you don’t have a nailer you can just as well use screws.
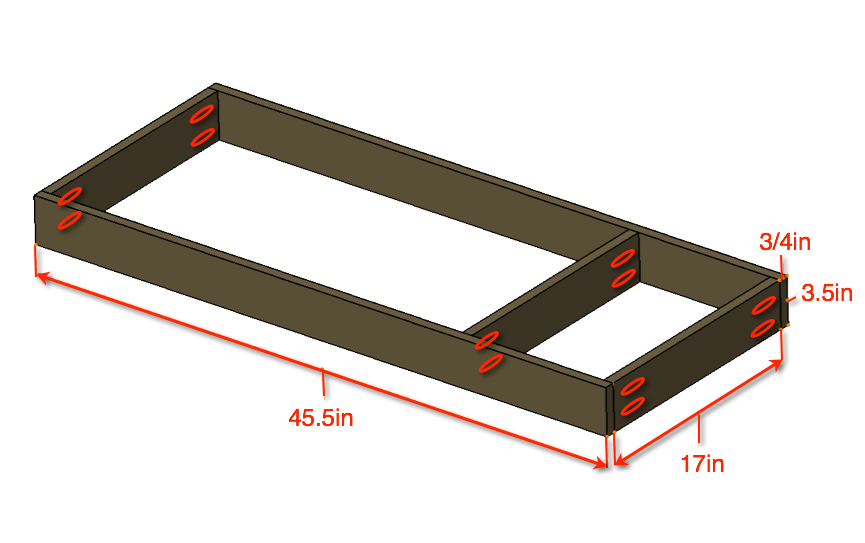
Step 12: Assembling the Topper
Step 12: Assembling Topper
Drill your pocket holes at each end of the 1x4x17″ boards. (Make sure to adjust your jig for 1″ material).
Make sure to place your pocket holes where they will be the best concealed. The two boards on the right in the picture should actually have the holes on the opposite side (But I can’t show that now can I?). Assemble your topper as shown with 1-1/4″ pocket hole screws, making sure to glue the joints.
Important Note:
If your going to stain the top like we did then now is a good time to do so. Make sure to stain both the top and the topper prior to installing the topper.
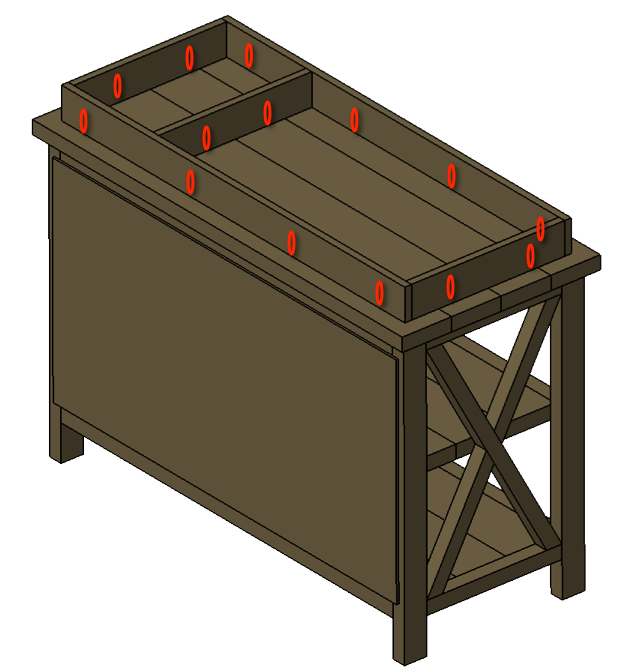
Step 13: Installing the Topper
Step 13: Installing Topper
Drill the pocket holes as shown, except for the right hand board, those should be on the opposite side to best conceal them.
Attach the topper with with 1-1/4″ pocket hole screws.
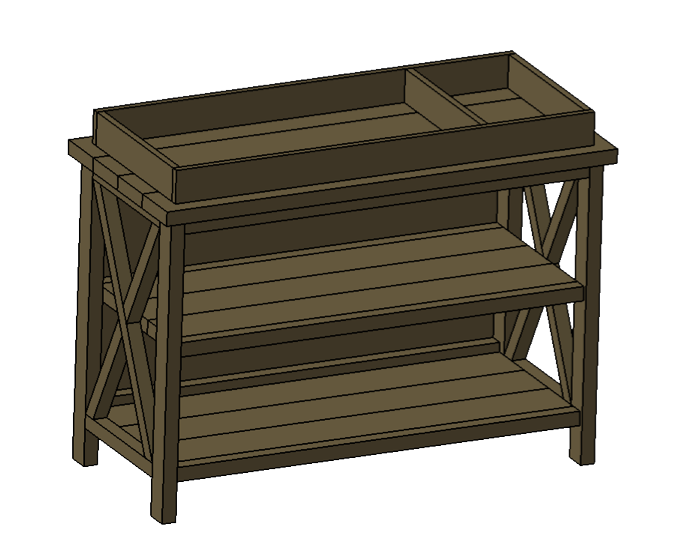
Complete – Rustic X DIY Changing Table
Finish
By: Jamie Rantz (aka Rogue Engineer’s wife)
To be completely honest with you, I had no clue where this project was headed when I started it. I just knew that I wanted the finished piece to be something I could use anywhere in my house and not just as a changing table. When I woke up that morning and actually had energy, which doesn’t happen often being 8 months pregnant, I went out to the garage and started throwing things together.
I wasn’t sure if I wanted a distressed look, but I wanted the option to do so just in case! With that in mind here is the combination of finishes I chose to go with.
Preperation Color Protectant
Top & Topper 1. Sanding
2. Pre-Stain Wood ConditionerMinwax Dark Walnut Stain Minwax Water-Based Polycrylic
Table Base 1. Sanding
2. Pre-Stain Wood Conditioner (edges)1. Minwax Dark Walnut Stain (edges)
2. Mix of paint samples we had laying aroundMinwax Finishing Wax
As always if you have any questions don’t hesitate to comment below and especially don’t forget to post pictures of your finished products in the comments! ENJOY!