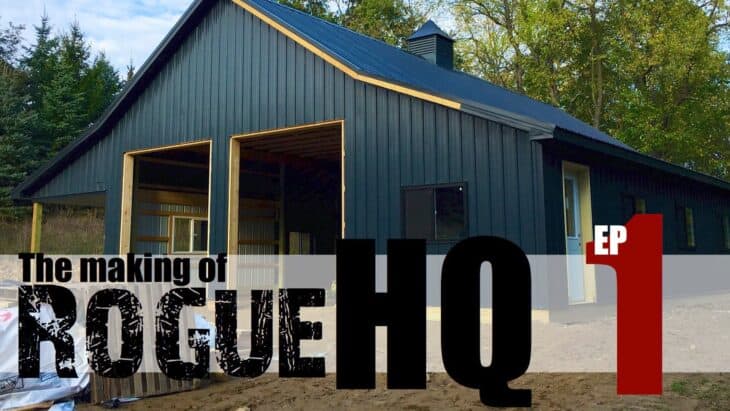
Earlier this year, while we were taking on our first house flip, we bought 5 acres of land that we would one day build our dream home and workshop on. It’s always been a dream of ours to build our own home just the way we wanted it and now we not only get that opportunity but we get the chance to build a one of a kind workshop specifically designed for our lifestyle and this little business we call Rogue Engineer. This will be the first episode of many in the making of the Rogue HQ.
Before I get started on the details of the Rogue HQ I wanted to say that I am incredibly grateful for the blessings and opportunities that we have been given. Jamie and I both have amazing parents that work hard and were able to instill those values, along with many others, in us growing up. Not only did they set us up for success but they are there anytime we need them and we can never thank them enough. Beyond that, from college up to now, God has presented us with some amazing opportunities. They have required a lot of weekends, late nights, and risks to realize but they were totally worth it. Alright, with that out of the way, let’s get back to the making of the HQ.
If you love this stuff as much as we do, you might want to consider following us on Instagram where we post sneak peeks and behind the scenes clips in our stories. Also, did you know you can get tons of projects plans from all around the web when you follow us on Facebook and Pinterest!
Full Project Video
Check out the full project video below and don’t forget to subscribe on YouTube so you won’t miss future videos!
The Design
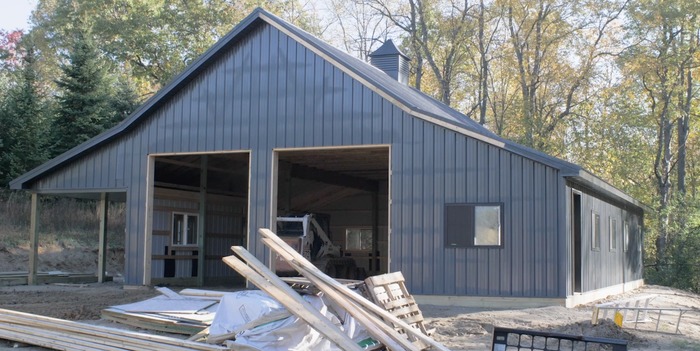
We picked out where we wanted the barn to go on the 5 acres we purchased and came up with a 44′ wide by 50′ long spot for it to fit nicely. The next decision was to build a pole barn or conventional garage. The difference is that a pole barn has 4×6 and 6×6 treated posts that go into the ground below the frost line and sit on a concrete footing where as a conventional garage would have a concrete footing from above grade to below the frost line all the way around the entire perimeter. Then you would pour a slab and stick frame it just like a house. We opted for the pole barn because it is a little cheaper and I thought the structure would actually be a little stronger having the post going into the ground vs having a seam at ground level. With that large of a structure and not many interior walls it could flex a bit in higher winds.
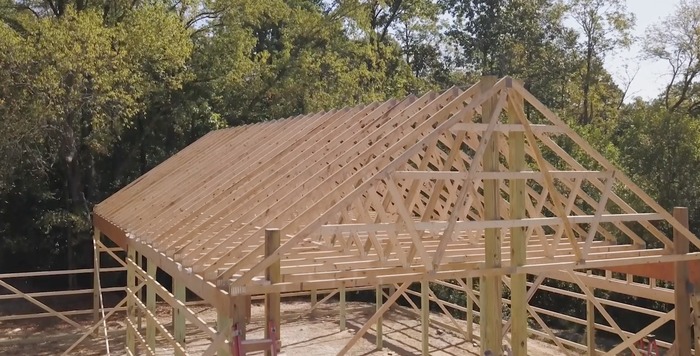
Another big decision was what it was going to look like. This “barn” as we like to call it, is going to be sitting in front of our house, so it has to look good. We knew we couldn’t go with a typical box with a roof on it so we decided to reduce the width of the pole barn and add 10′ lean-tos on the sides to make up the difference. We went with a steeper roof (8/12 pitch) over the center and less steep on the lean-tos (4/12) to give it a traditional barn look. The only problem with that was that now we have all these posts in the inside of the barn.
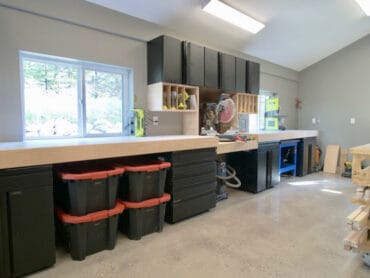
Below I have a floorplan that I put together for you to see what the inside will look like. Most of the posts will be buried but inside the workshop and the garage we had to upgrade the beam span that far without requiring posts.

Preparing the Site
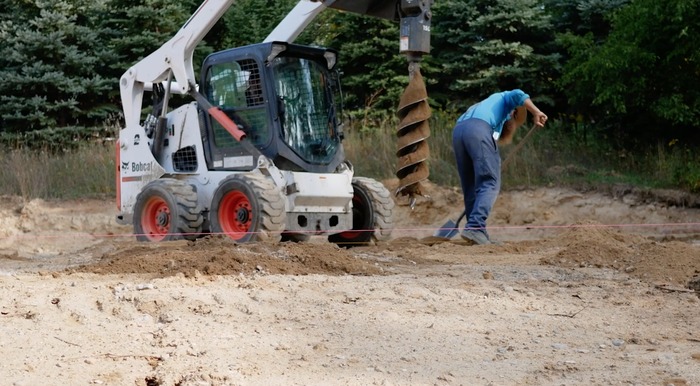
First I had to level out the site. For that I used my father-in-law’s Bobcat to cut out a small hill and level out the site as best I could. After getting it near level I rented a ride on compactor to pack down the soil that I had disturbed. Then I ordered a ton (well actually 50 tons) of gravel and used that to create a solid level base for the barn and soon to be slab by leveling it out with the Bobcat and compacting it again.


Framing
This started off by laying out the post locations and digging a lot of holes. Lucky for us we had the Bobcat and were able to borrow and auger attachment from a friend so we made quick work of it. For the rest of this project I hired a local Amish carpenter and his crew to do the majority of the work. I know my limitations and I wanted it done right and quick so I thought this was best.
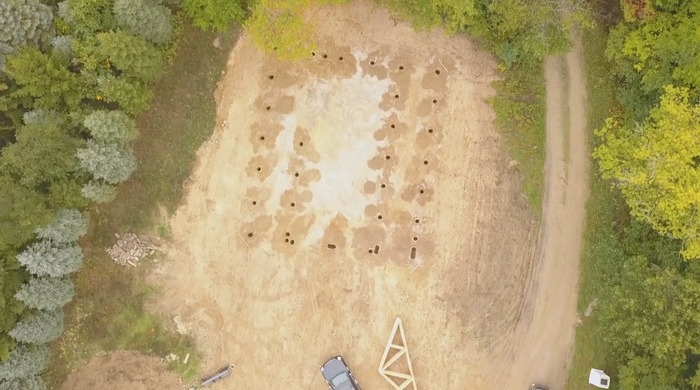
With the holes dug they were able to get the posts set and start hanging the headers.
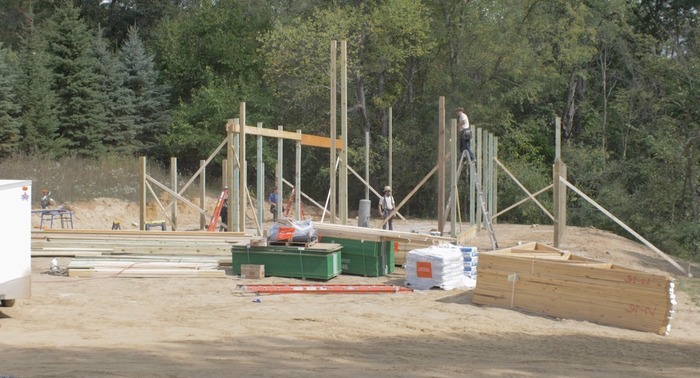
Seeing these guys set the trusses was pretty amazing. If you haven’t watched the video go back up to the top and check it out.
The Roof
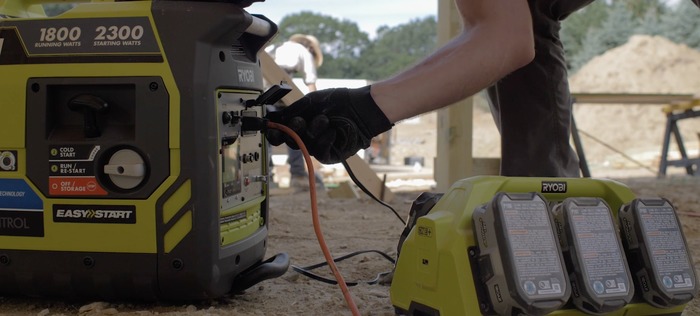
Once the got to the roof sheathing you could see their air powered circular saw was slowing them down so I decided to juice up the job site with my inverter generator from Ryobi and circular saw. This helped speed things up for sure and they were glad to have it.
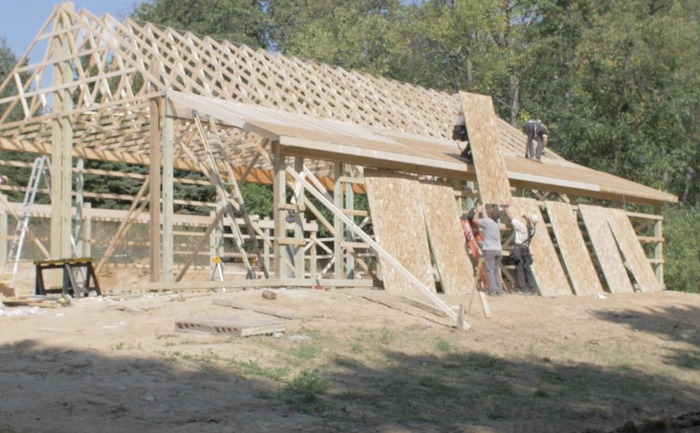
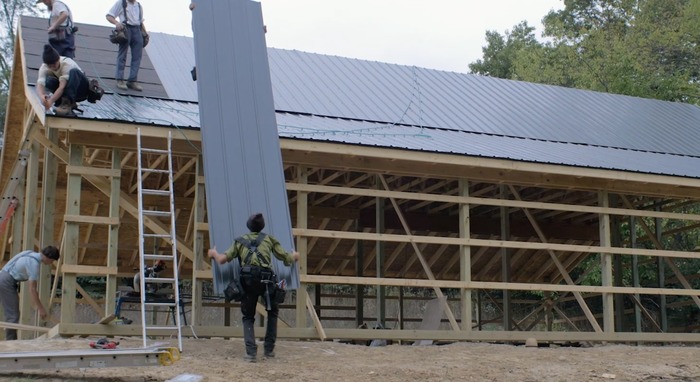
With the sheathing and roofing felt in place, they began installing the steel roof. We went with black for a modern look.
Windows and Siding
Now it was time for siding. You’ll see below that, after framing out and installing the windows they stapled on little strips of roofing felt to prevent any water that gets behind the metal from making its way inside.
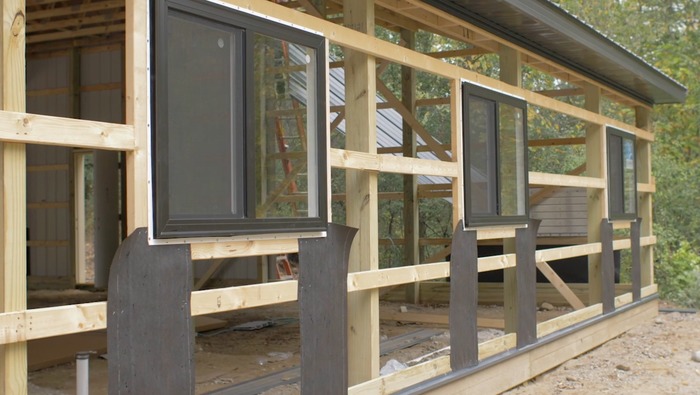
With the windows in they finished up the siding in no time. And we love how it turned out. The roof line and copula give it that traditional barn look but the colors we went with really add a modern twist.
I hope you all like how it is progressing and I’d love to hear your thoughts below so please comment, share and let us know what you think!