

Dress Up Center / Bookshelf
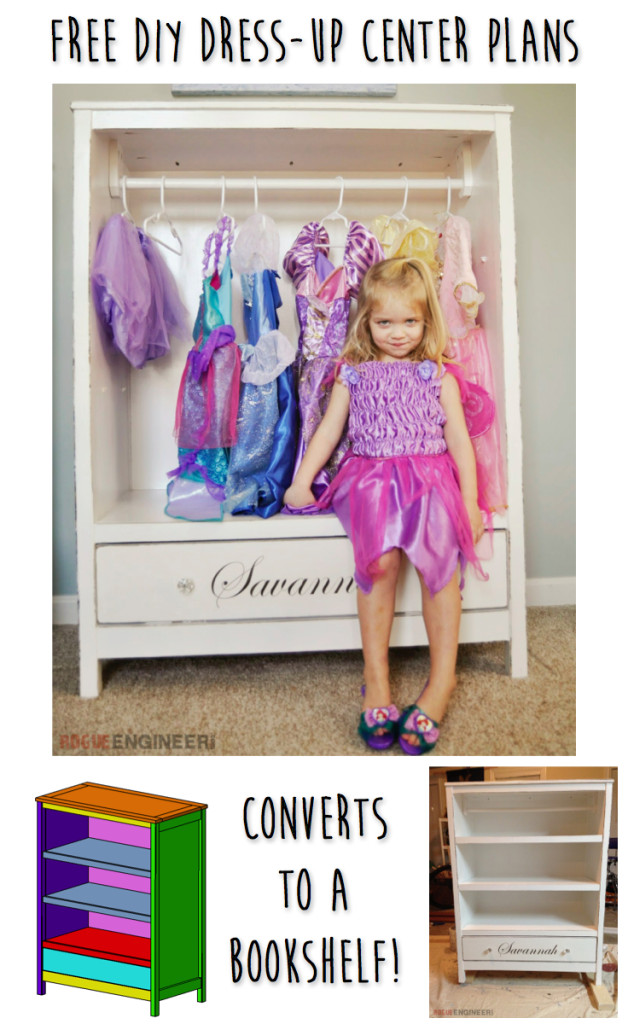
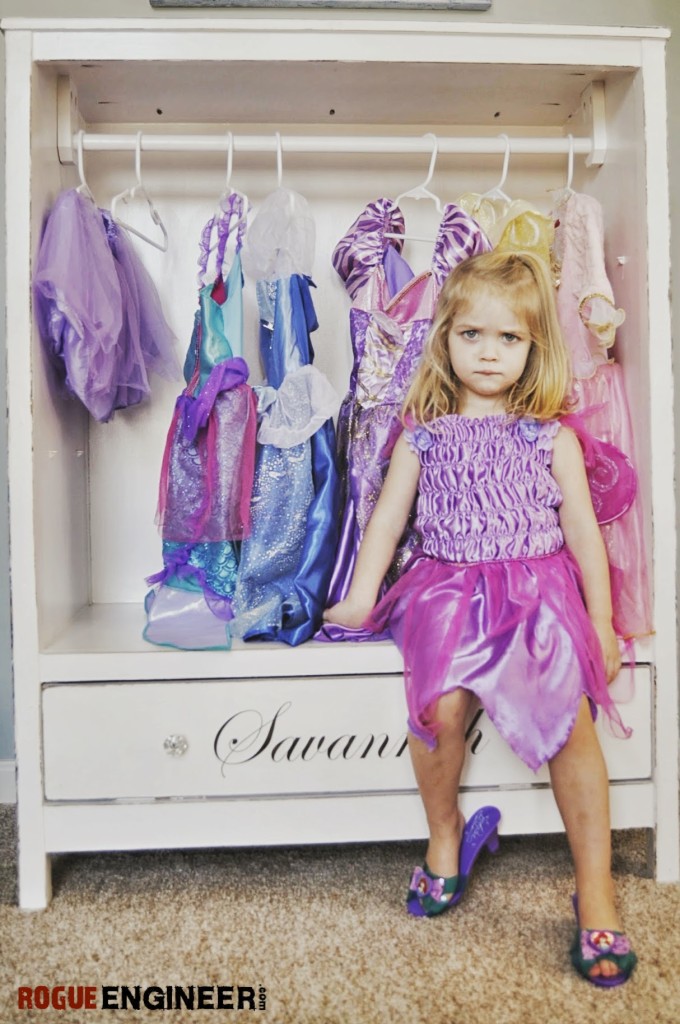
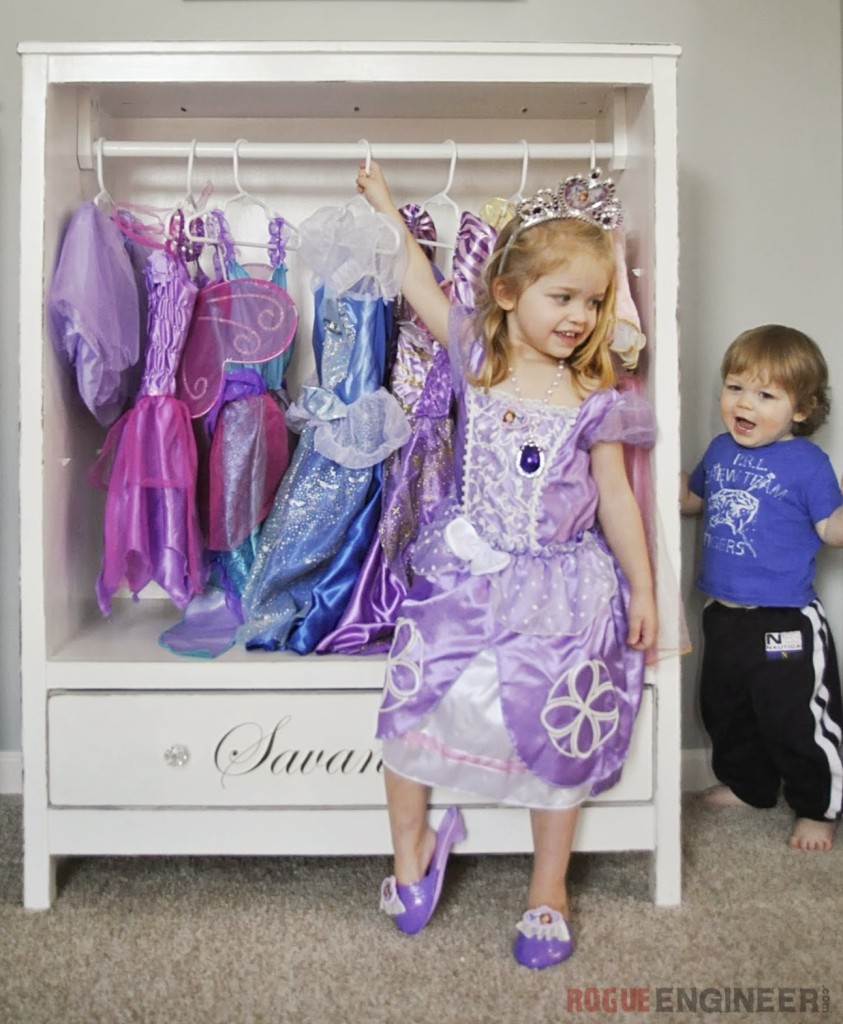
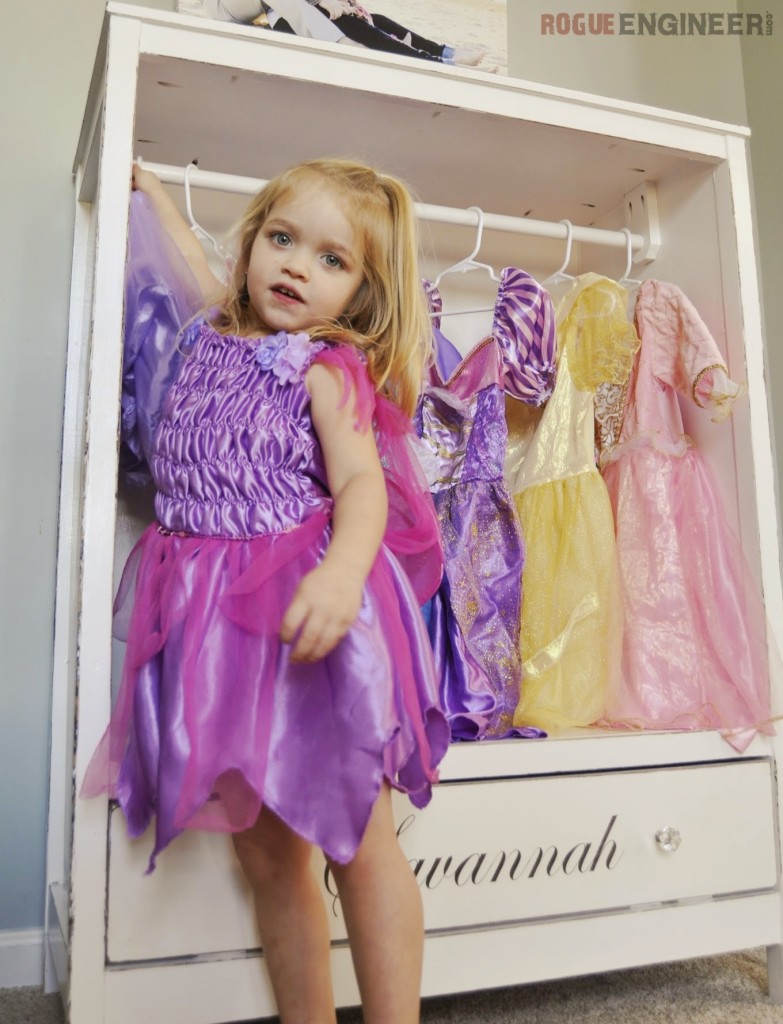
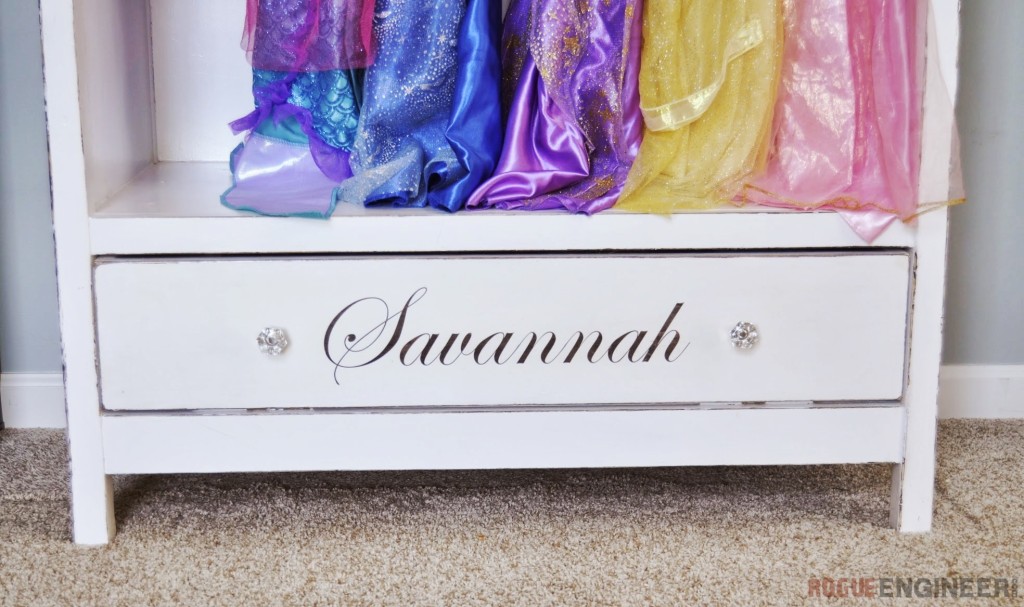
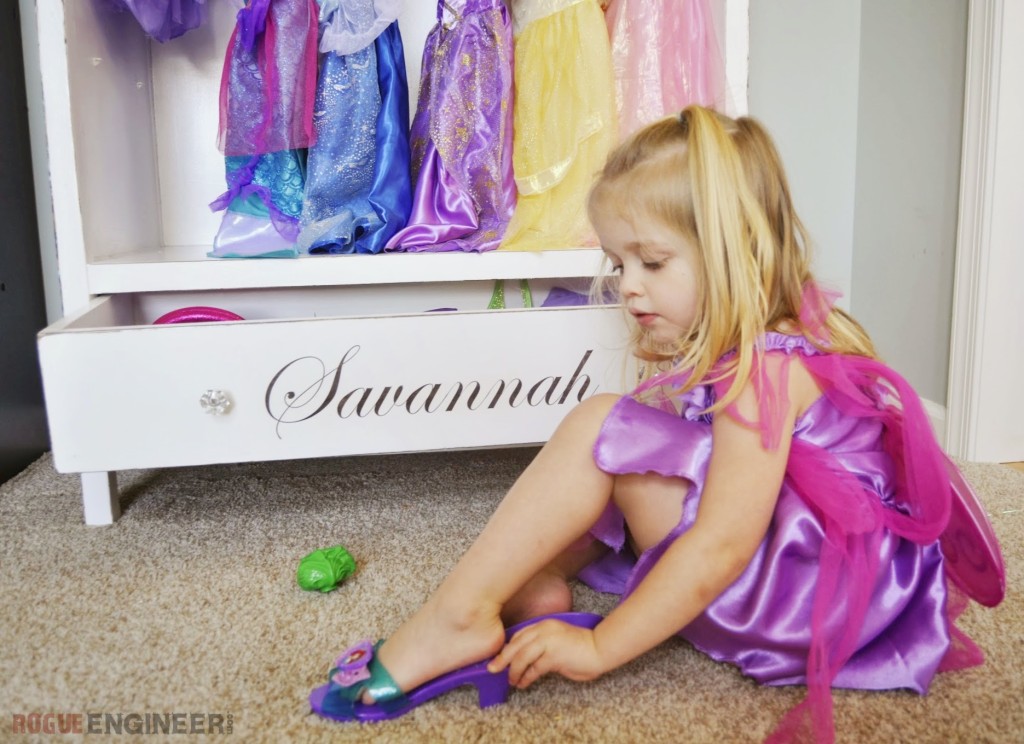
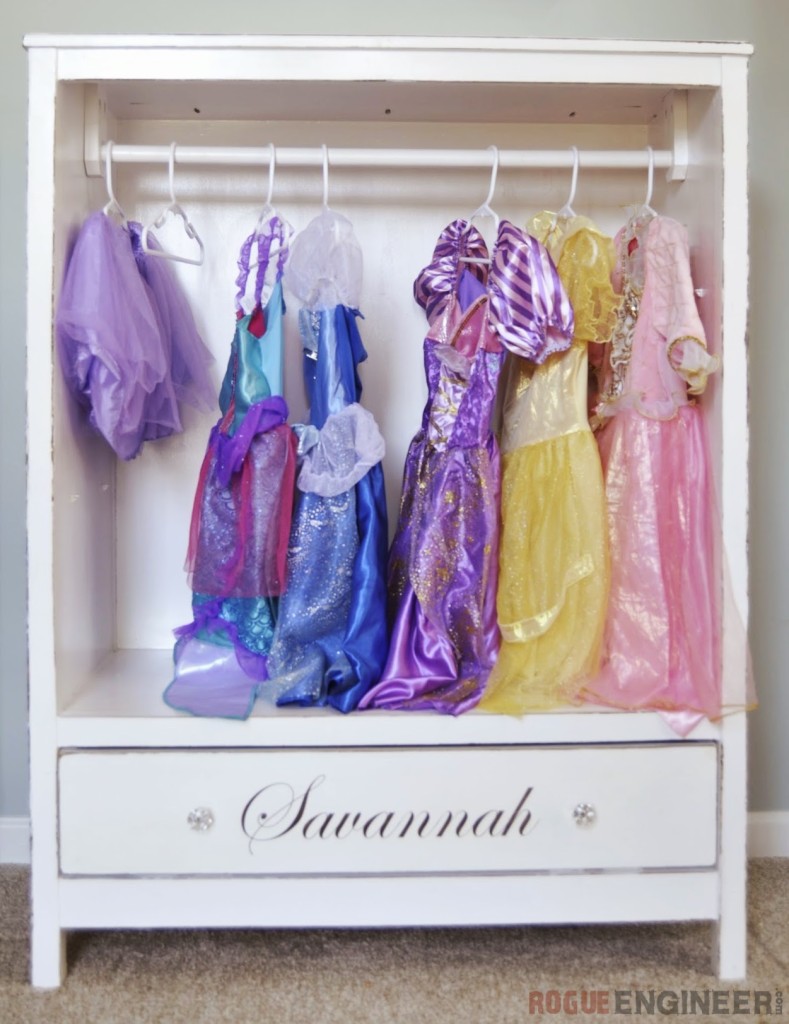
So yes, I realize this plan has been a long time coming! Last Christmas I wanted to build something special for my cute little niece. My brother and sister-in-law said how much she enjoyed her dress up clothes so naturally she would need a place to store them. No ordinary closet would do, and the dress up centers for sale looked a little too childish or cheap. I not only wanted to build her something beautiful but something that would out last this short “dress up” stage. So I decided on a style that I liked and I included removable shelves and made the rod and supports easily removal as well. Making this is a timeless piece that could be used for a long time.
Required Tools
- Miter Saw
- Circular Saw
- Kreg Pocket-Hole Jig
- Kreg Rip-Cut Circular Saw Guide (Optional but strongly encouraged for breaking down plywood)
- Cordless Drill
- Brad Nailer
- Level
- Tape Measure
- Safety Glasses
- Ear Protection
Materials
- 2x 1/2″ x 48″ x 96″ plywood
- 4x 1 x 3 x 72″
- 2x 1 x 2 x 72″
- 2x 2 x 2 x 96″
- 1x 1 x 6 x 48″
- 2x Drawer Knobs
- 16″ Drawer Slides
- 1″ Pocket Hole Screws
- 1-1/4″ Pocket Hole Screws
- 1″ Wood Screws
- 1-1/4″ Brad Nails
Cut List
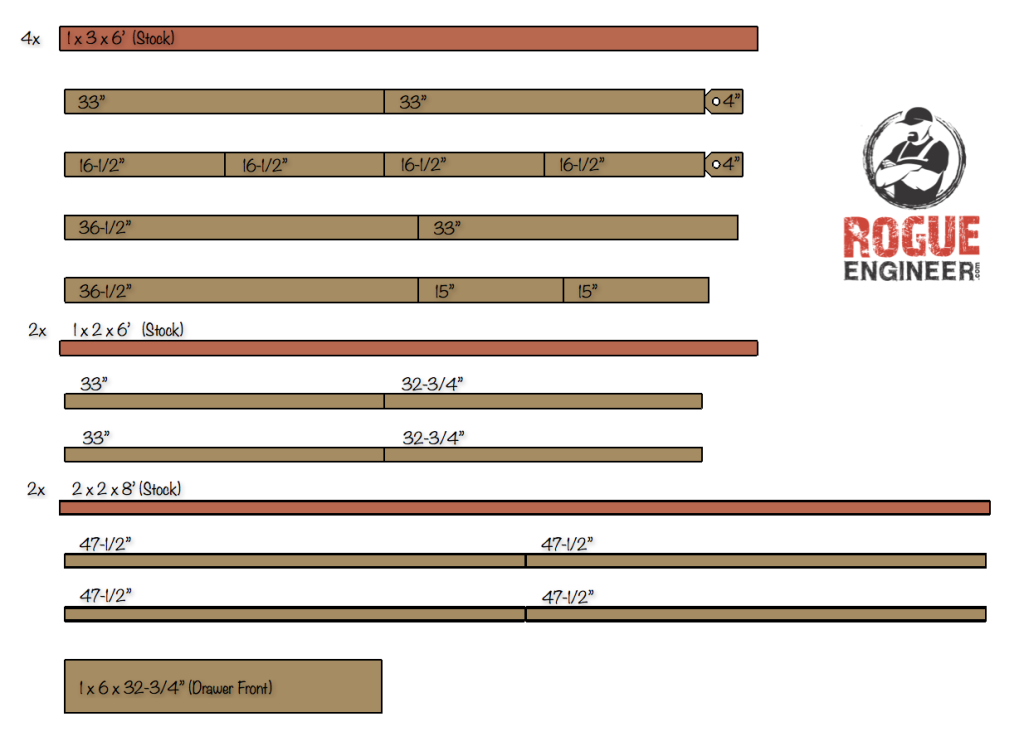
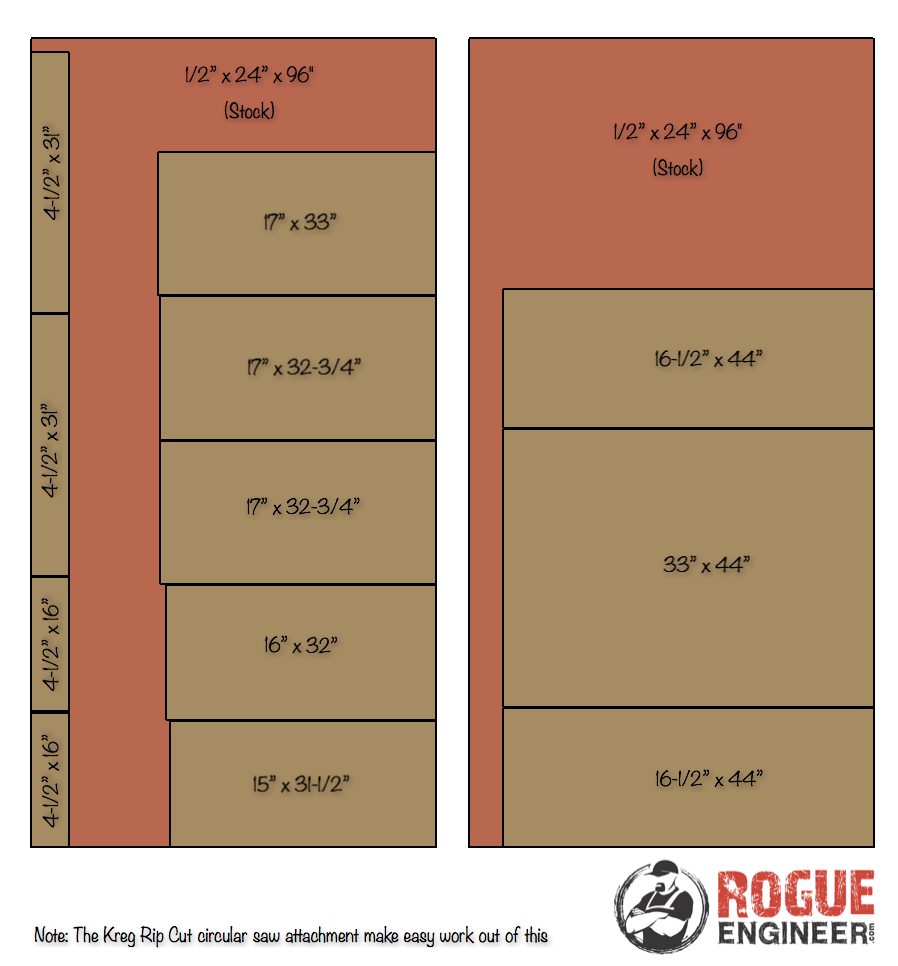
Dimensions

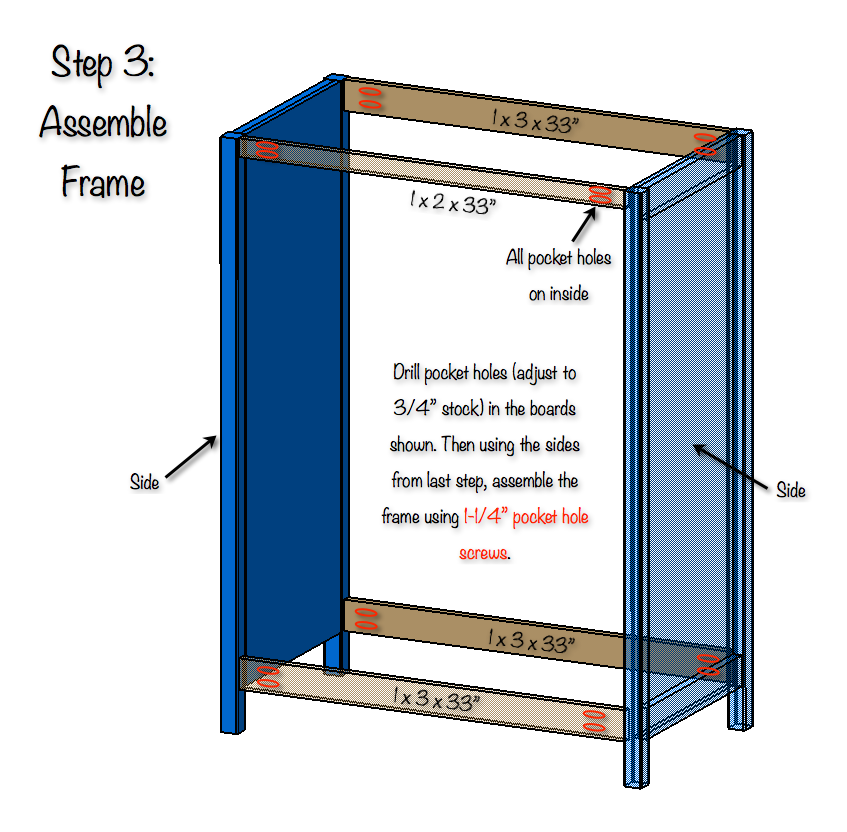
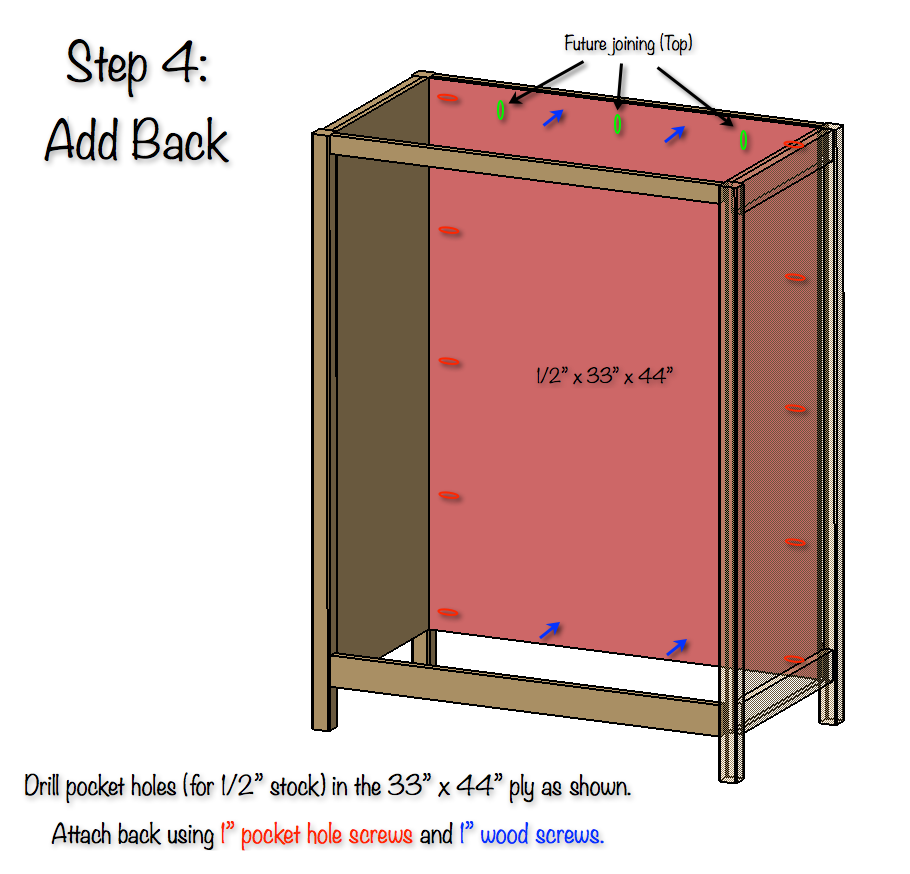
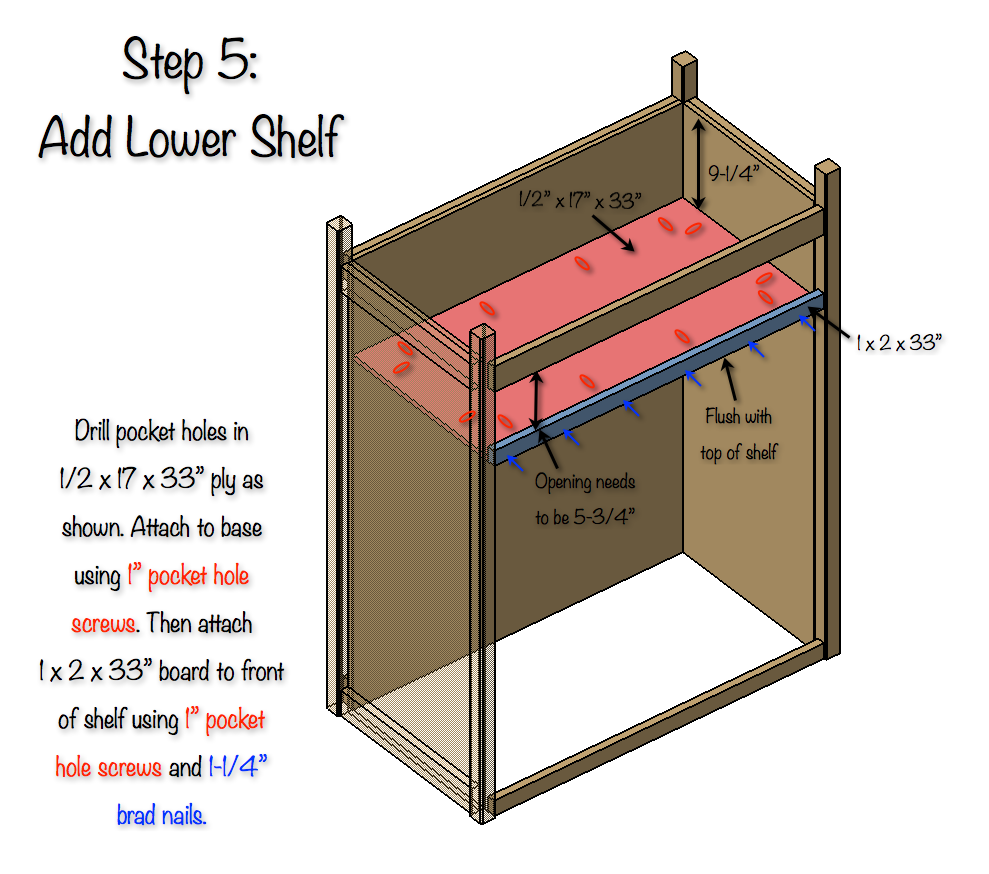
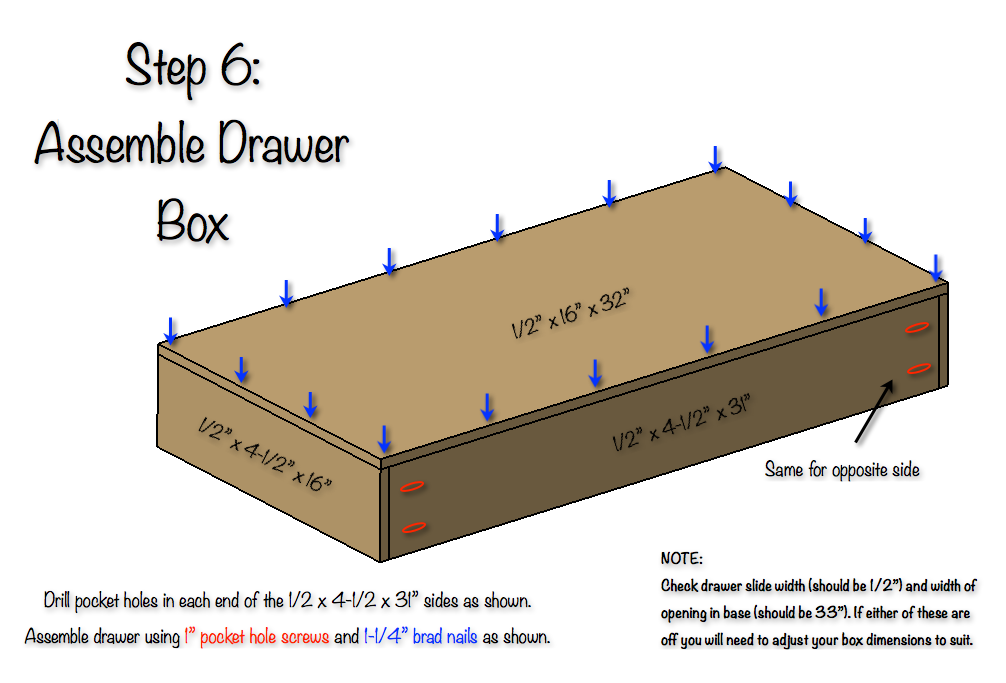
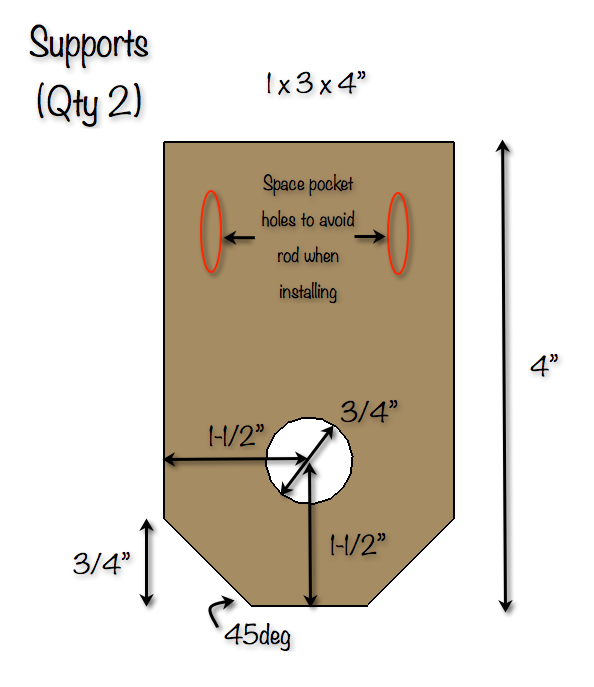
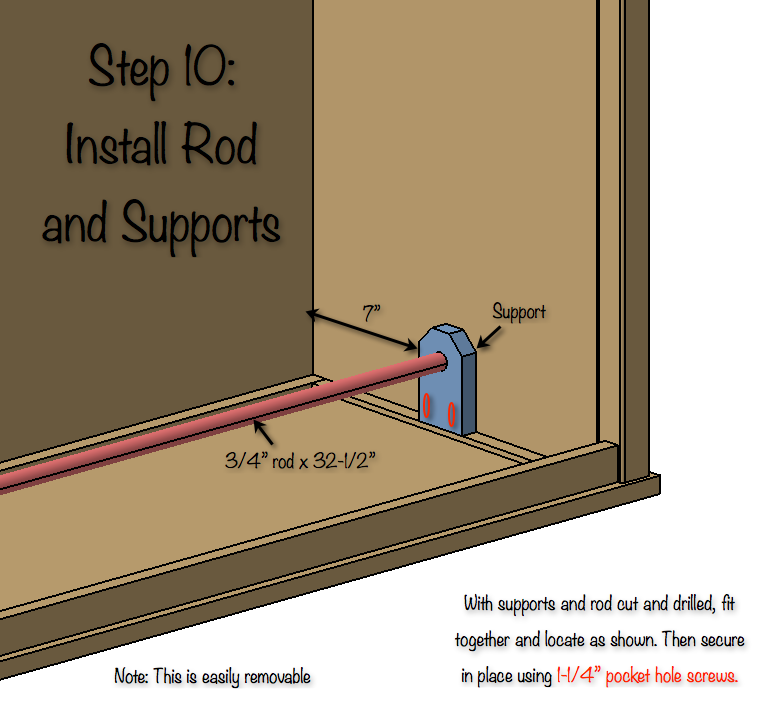
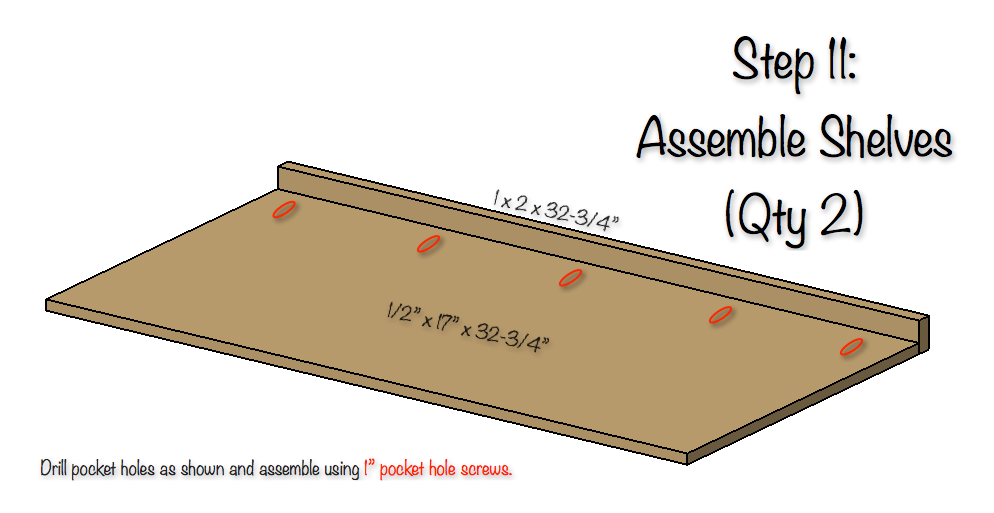
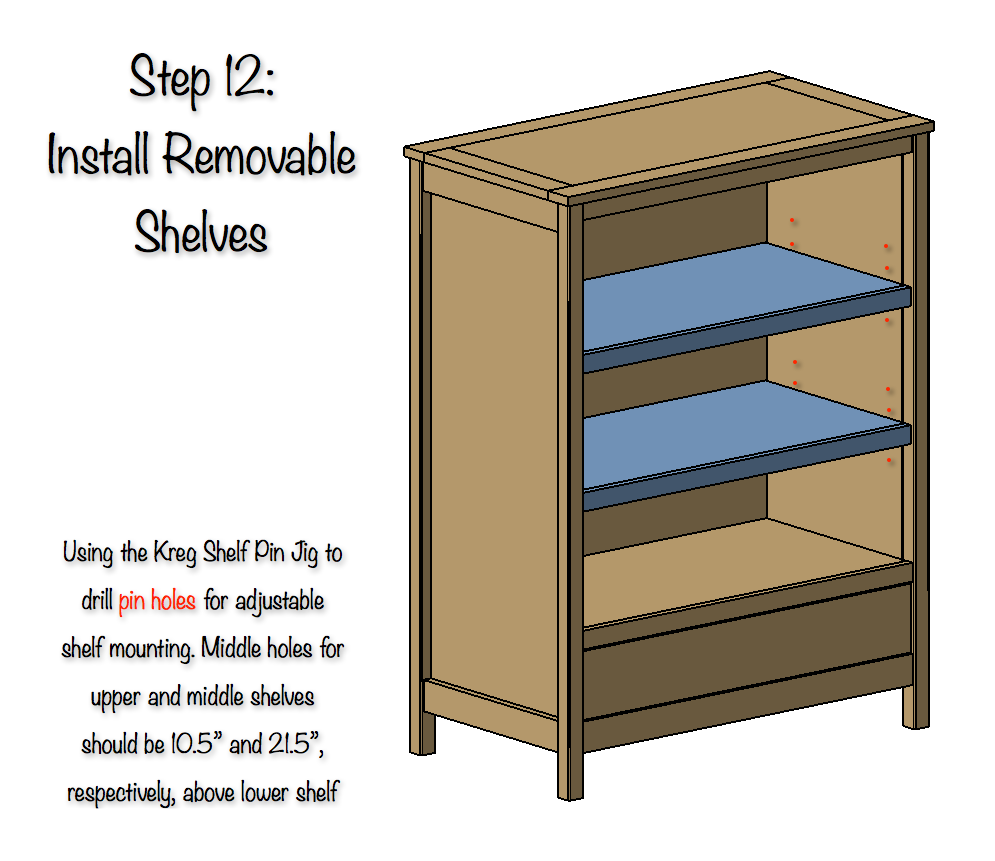
Dress Up Center Plans
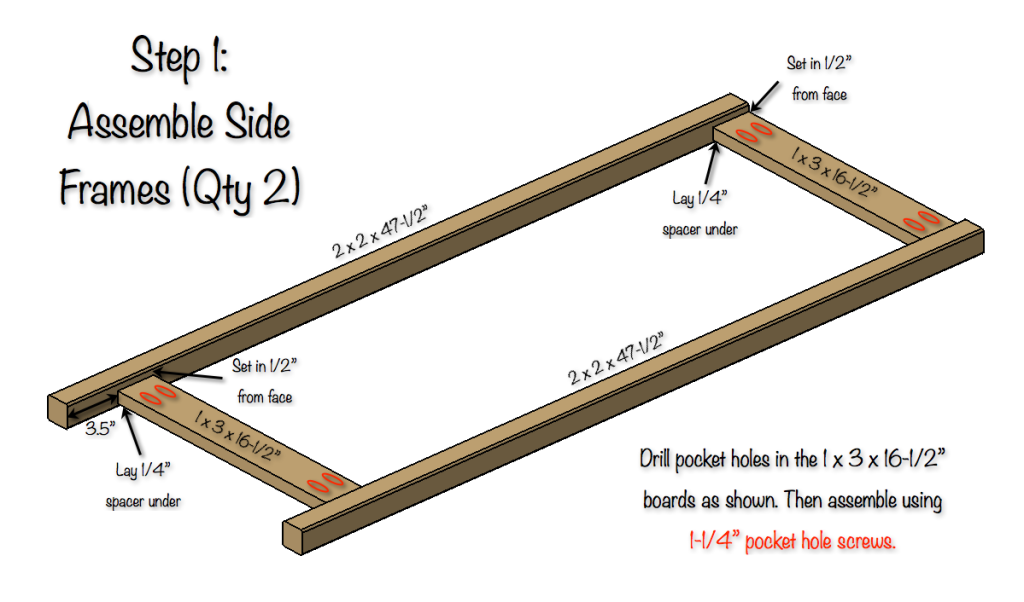
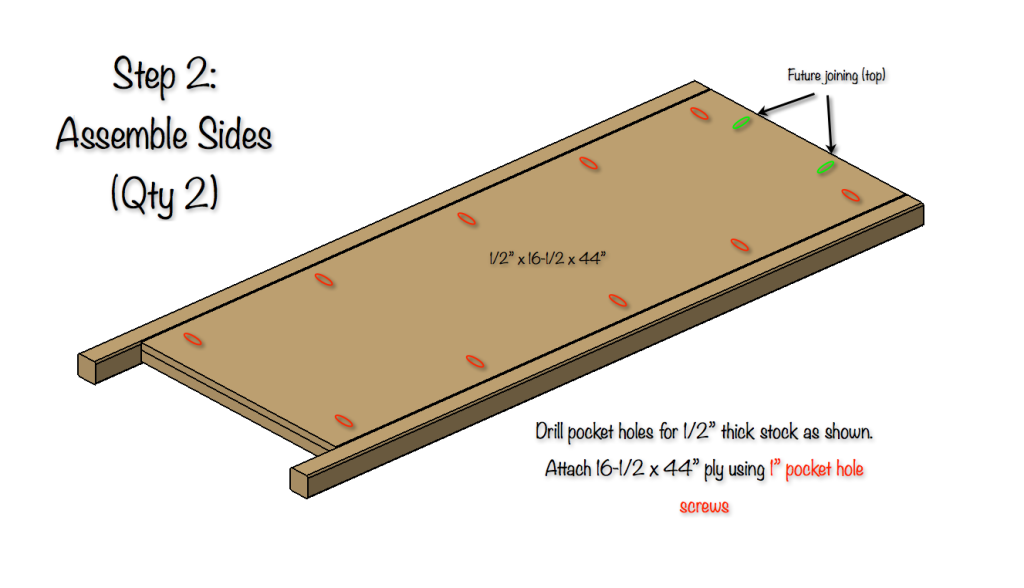
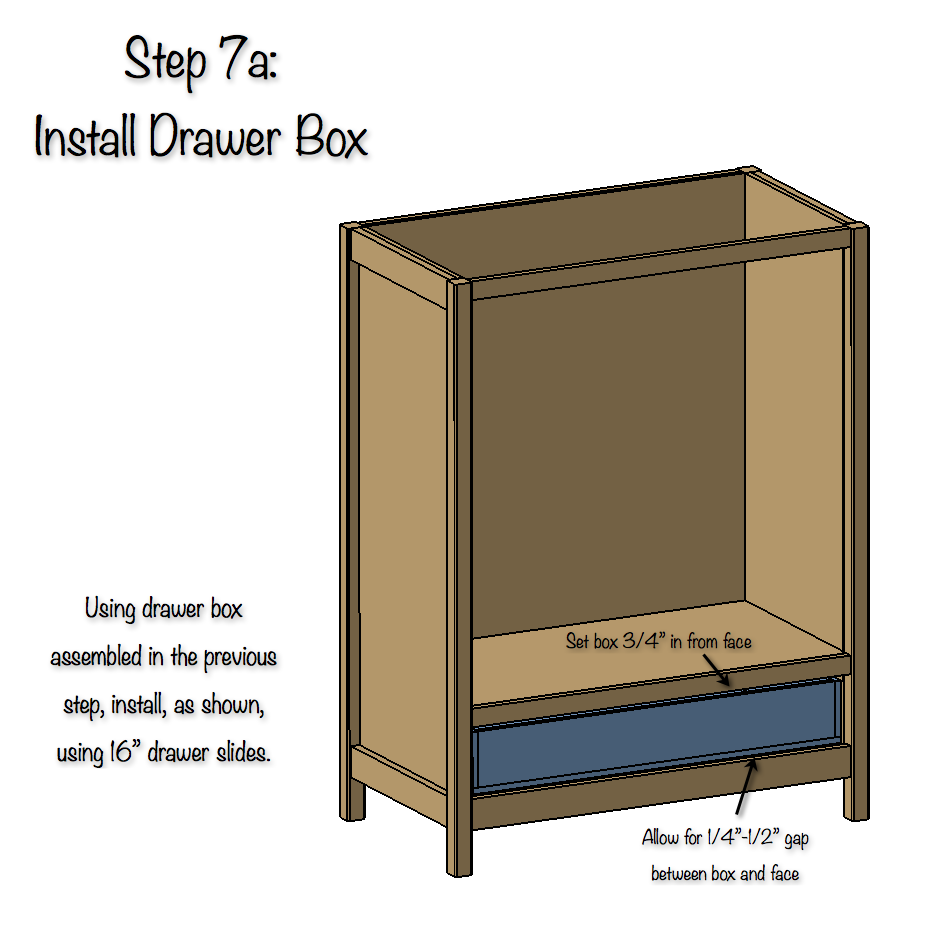
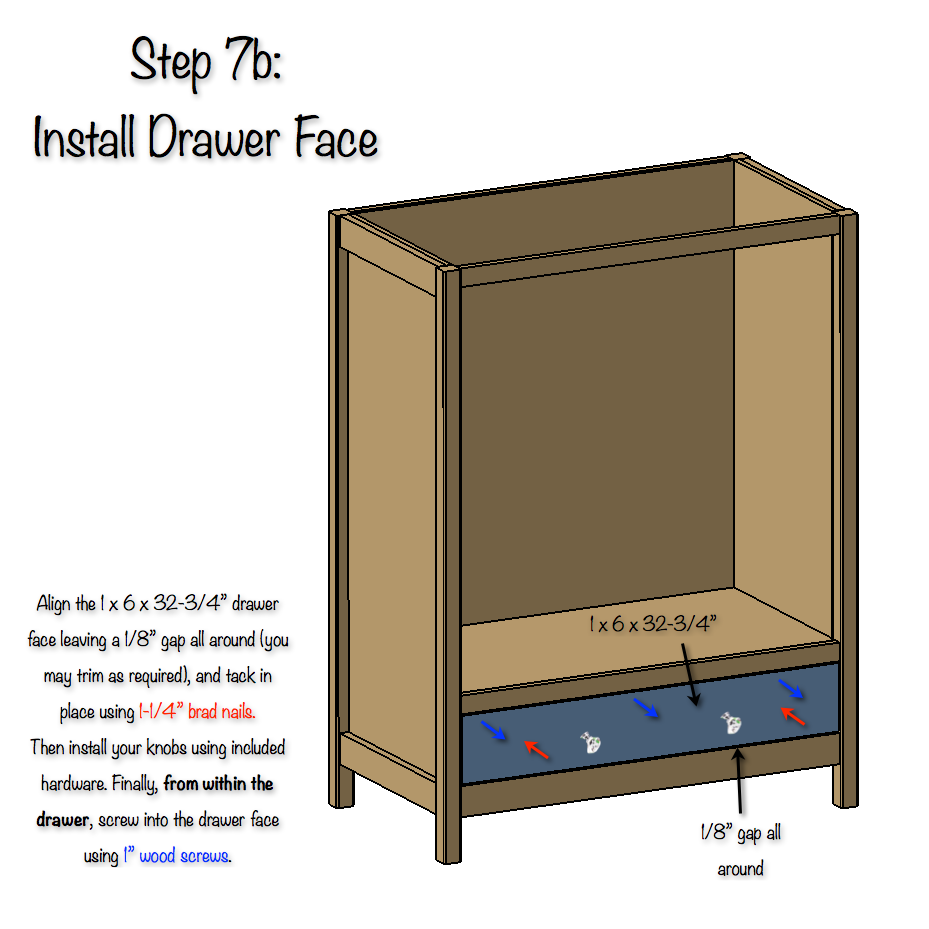
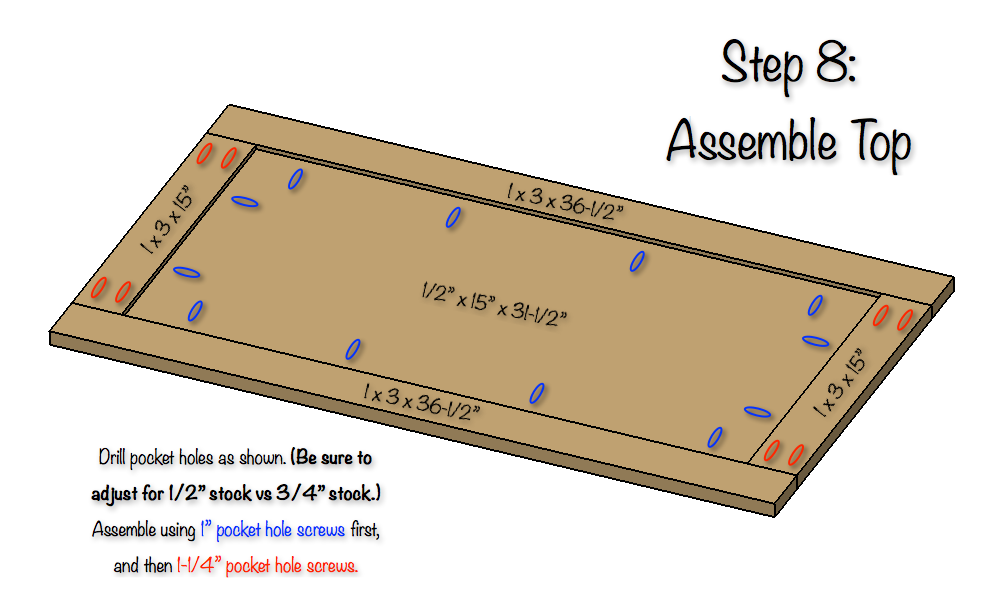
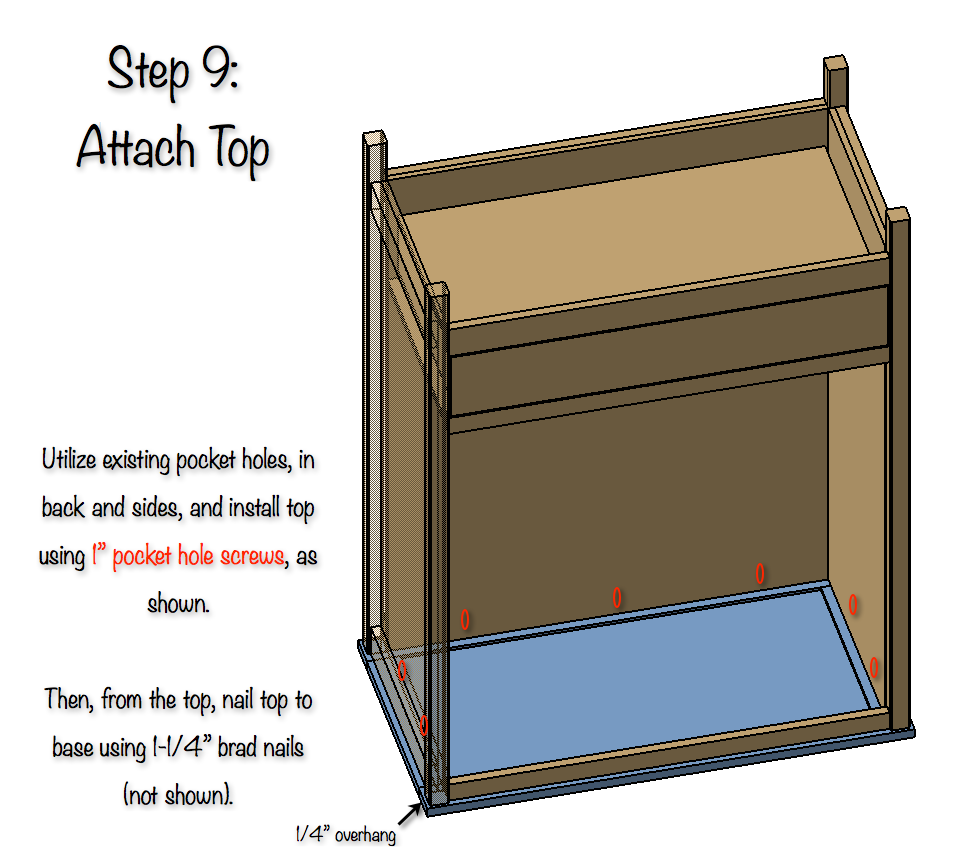
Finishing
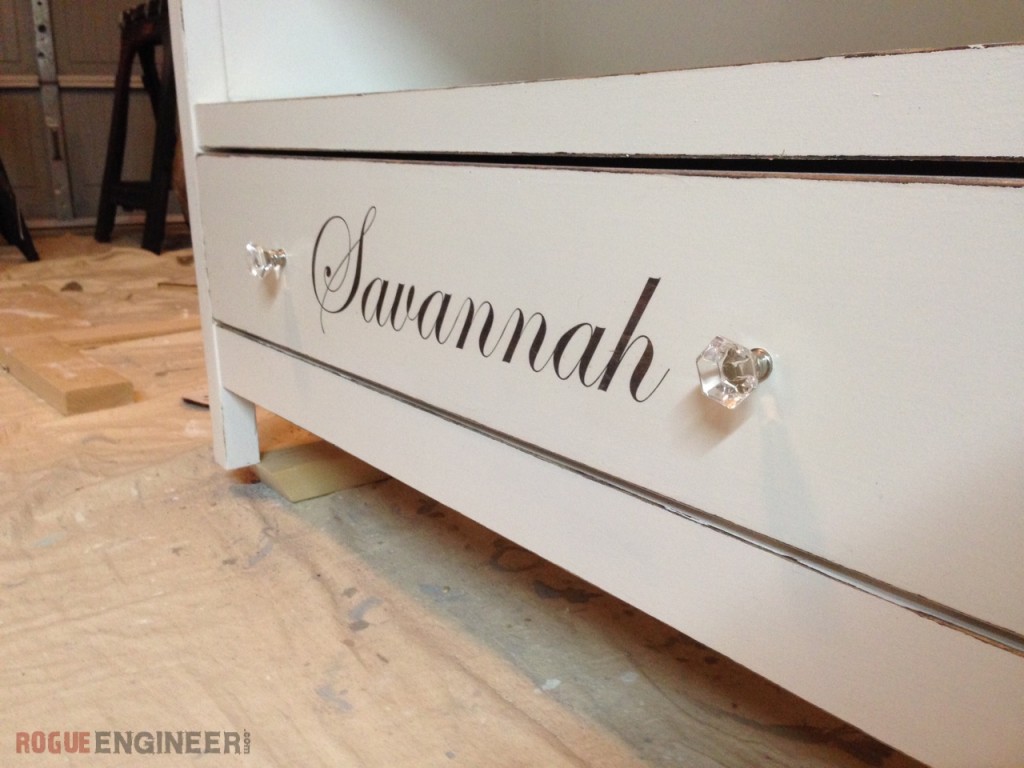
For the finish we went with a dark walnut stain as the base coat. Then painted over it with a flat white and distressed it to allow the stain to show through.
My wife will be posting a tutorial on distressed finishing and when she does I will link up to it!
Comments
As always if you have any questions don’t hesitate to comment below and especially don’t forget to post pictures of your finished products in the comments! ENJOY!
Hi! I stumbled across your site – LOVE LOVE LOVE they oh so easy plans!!!! I would like to build this dress up center but don’t see a link to the plans…can you please provide it? Thank you!!!
The plans are now available. Enjoy! And be sure to post a pic in the comments when you’re done!
Thank your so much Rebecca for the compliments. I have received quite a few inquiries for these plans and yes I am a slacker. I have yet to get around to it but I promise its next on my list. Check back in the next couple weeks for the plans.
Jamison Rantz Fantastic! Thank you! 🙂
Great design and thank you so much for publishing the plans! We’re just getting started (no finished product yet) but wanted to mention there appears to be an error in the cut-list diagram for the plywood sheets. In your diagram you list the sheets as: 1/2″ x 24″ x 96″; should those be: 1/2″ x 48″ x 96″?
Again great work and thank you!
Good catch Tom I’ll fix that right away!
Thank you again for the great design! Our daughter is going to love this and it was a fun project for my wife and I to put together.
Wow that turned out great Tom! I love the detail you added on the inside and on the door! Good work
Reattaching photo that was removed
[…] could consider re-purposing an old piece of furniture to display your children’s clothing. Rouge Engineer offers a free do-it-yourself plan for a dress-up centre that any little princess would adore. […]
I can not wait to get started on this! Thank you for the great plans. Did you ever post the tutorial on distressed finishing? If so where? Thanks
No problem Jeff. You can get the distressed finish tutorial here:
https://rogueengineer.com/distressed-finish-tutorial/
Made this for our 2 year old for Christmas. She loves it and picked the paint and drawer pulls.
Thanks for the plans!
Excellent job Frank! Looks like she’s already putting it to good use as I’m sure she will for many years to come. Thanks for sharing.
Reattaching photo that was removed
Thanks for the plan. I modified it a bit, hope you don’t mind. Here’s a photo, if I can get it to upload.
I’d love to see how it turned out Michael. Looks like the photo didn’t show up though. This is usually due to file size. If it’s a large file, run it through tinypng.com to shrink the file size and try again.
Thanks ! I sent a pic to you thru Messenger, but I’ll try it here again for your site.
… And those are your Lawn Dice in the bk/ground.
Reattaching photo that was removed
That looks awesome Michael! London is a lucky girl. I’m sure she’ll enjoy it for many years to come.
Reattaching photo that was removed:
I’d love to see how it turned out Michael. Looks like the photo didn’t show up though. This is usually due to file size. If it’s a large file, run it through tinypng.com to shrink the file size and try again.
Built this for my 6-year old’s birthday. She loves it!
Thanks for the plans!
Great job Aaron! This turned out great and it looks like she’s already putting it to good use! Thanks for sharing.
Reattaching photo that was removed
I’m hoping that this will work for storage in my master bath. Now has a useless corner cabinet with lots of completely wasted space. We live in a Mobile home and they don’t build much that is good or sturdy so I’m going to fix that.
That sounds like a great idea Cathy!