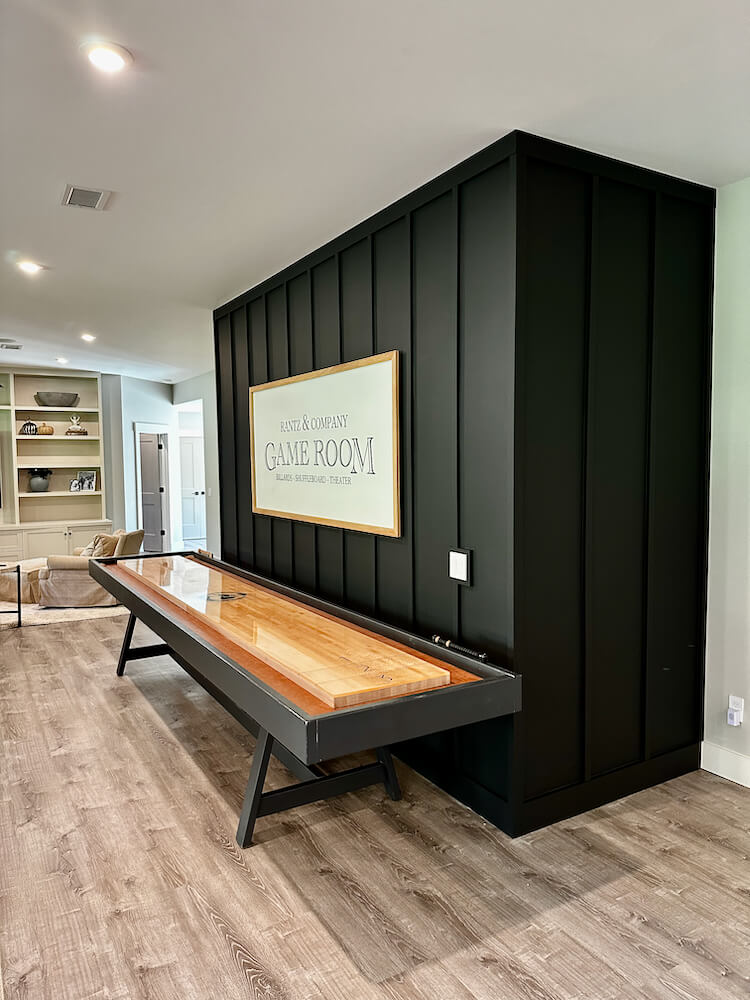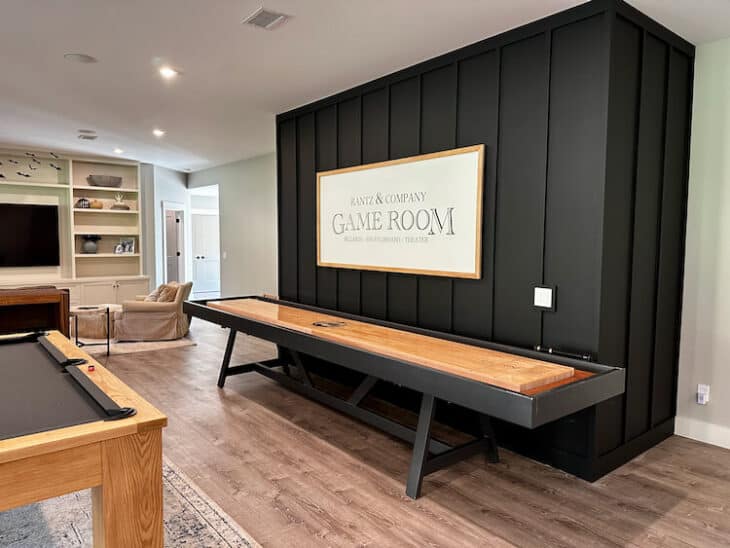
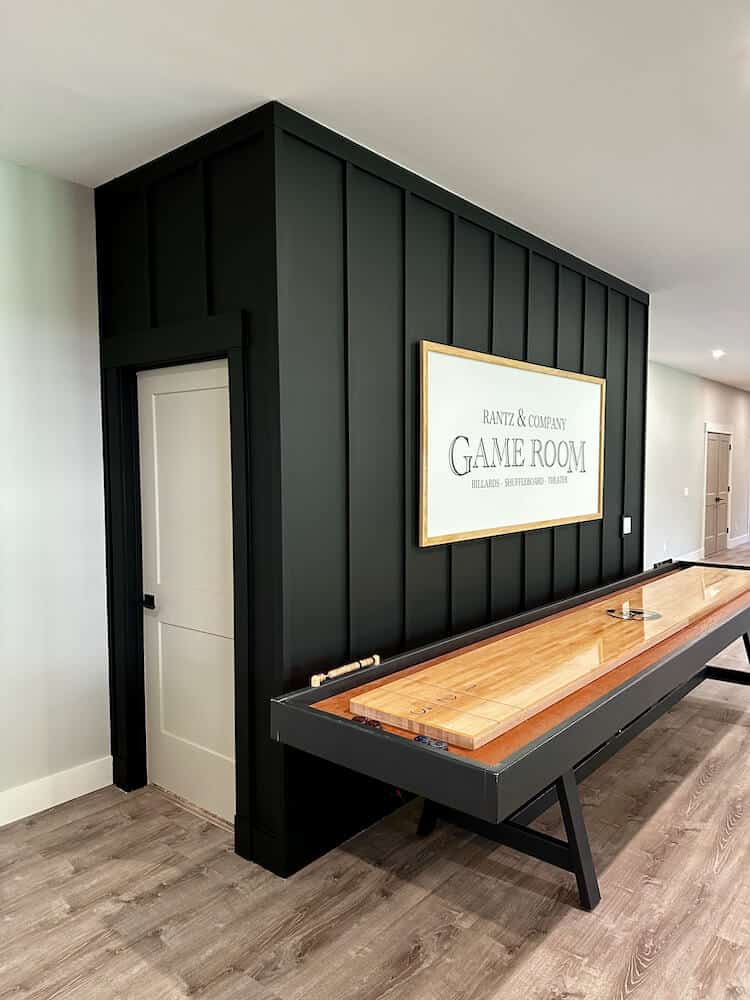
Our basement is definitely coming along. Little by little we have been turning it into the space we’ve always wanted. However the center wall in our basement is a long wall with a bump out which was all the same color. To differentiate the space and add a little pizzazz we decided on a board and batten feature wall. This is an inexpensive and easy way to spruce up a bare wall. Oh and we made a personalized game room sign that really sets it off. Read on for all the details on exactly how it came together.
Project Video

How to Make a Board and Batten Feature Wall
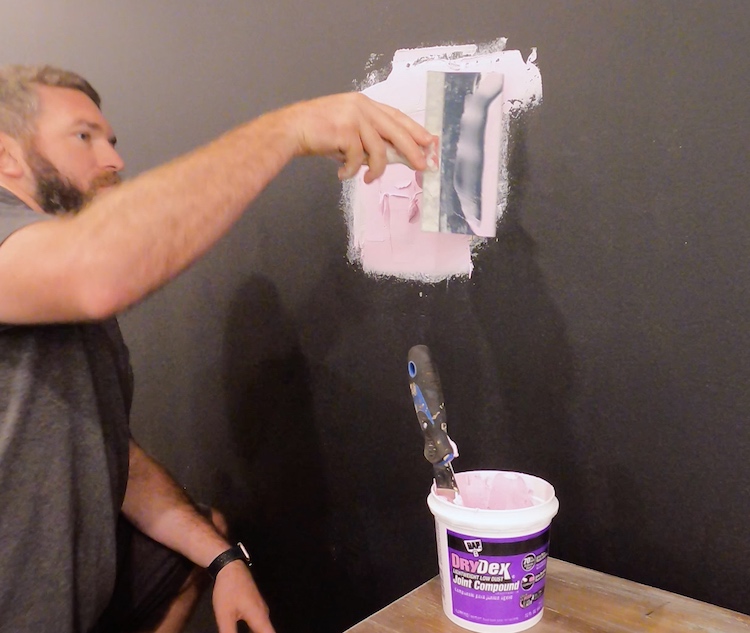
- Patching Any Holes
We had a central vacuum port in the middle of our wall that we wanted to move. I was able to remove the port and, with a small piece of drywall, I patched the hole (leaving a 2″ paper boarder on the drywall to act as the tape) and coated it with DAP DryDex Joint Compound. I then sanded it smooth and it was ready for paint.
- First Coat of Paint
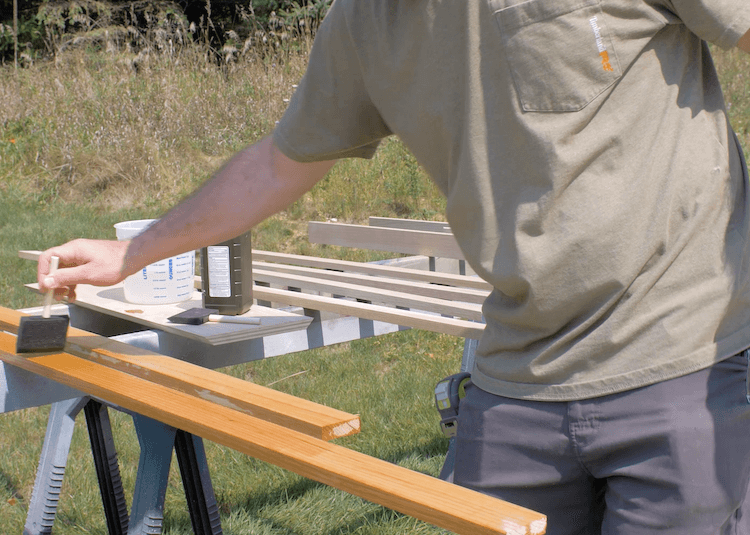
Before installing the battens, we opted to apply the first coat of paint which was a lot quicker with the batten not in the way.
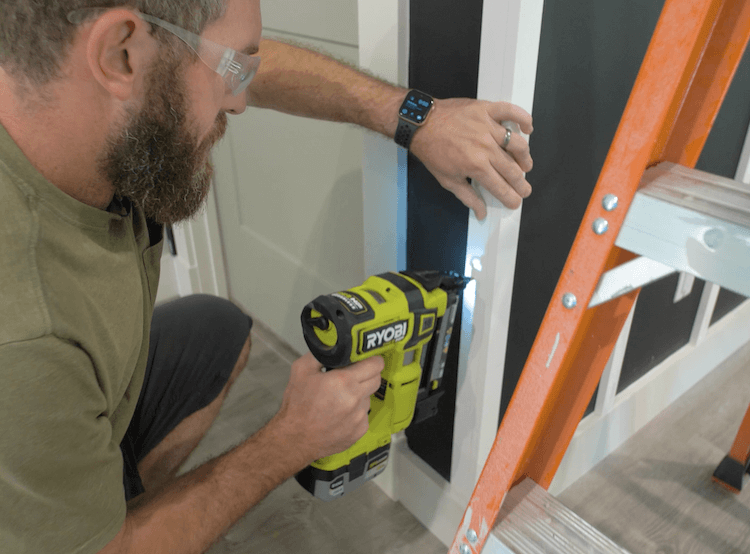
- Install Top Batten
For the top batten, I went with a 1×4. I pre-painted this board and mitered the corners before installing it with 2in brad nails into the studs.
- Laying Out the Batten Spacing
Board and batten walls, traditionally have the battens spaced 12″-16″ apart. I like the wider spacing so we went with a spacing as close to 16″ as possible, while still making sure they were equally space. Below is a formula that should help you figure this out.
Feature Wall Length = Wall Length + (Thickness of board(s) used on outside corners)
Number of Battens = (Feature Wall Length / 16″) + 1 (Rounded to nearest whole number)
Note: Round down for larger spacings and up for smaller spacing.
Spacing = (Feature Wall Length – Width of 1 Batten) / (Number of Battens – 1)
Mark the inside edge of the first batten, then measure over (using spacing calculated) and mark the far edge of the next batten. Continue to do so over the entire wall. - Installing the Battens
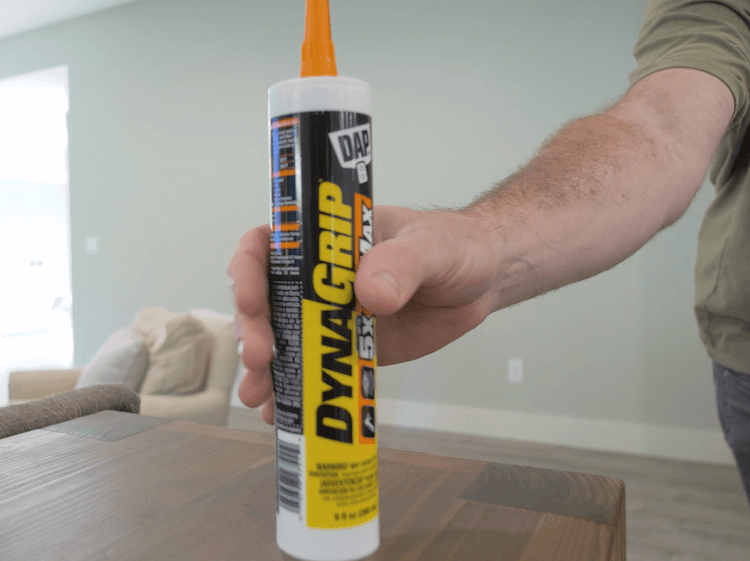
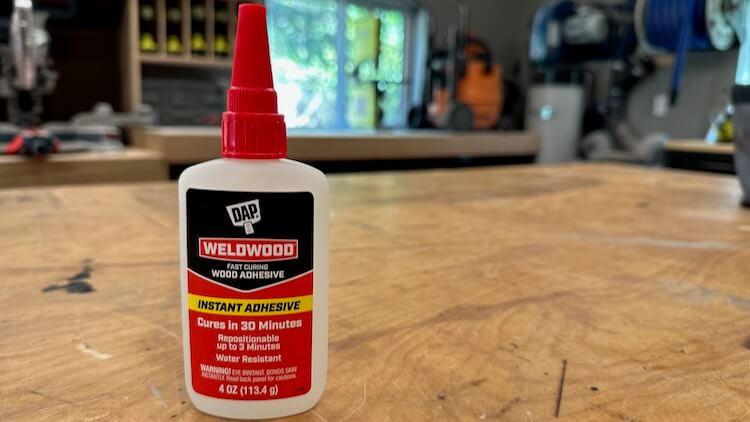
Since these battens are vertical, there will most likely be no stud behind them to nail into. To make sure they stay attached to the wall you will want to glue them with DAP DynaGrip HD Max which will ensure a fast and strong bond between the batten and drywall.
Simply apply a bead of DAP DynaGrip HD Max to the back of the 1×2 batten strip after cutting to length.
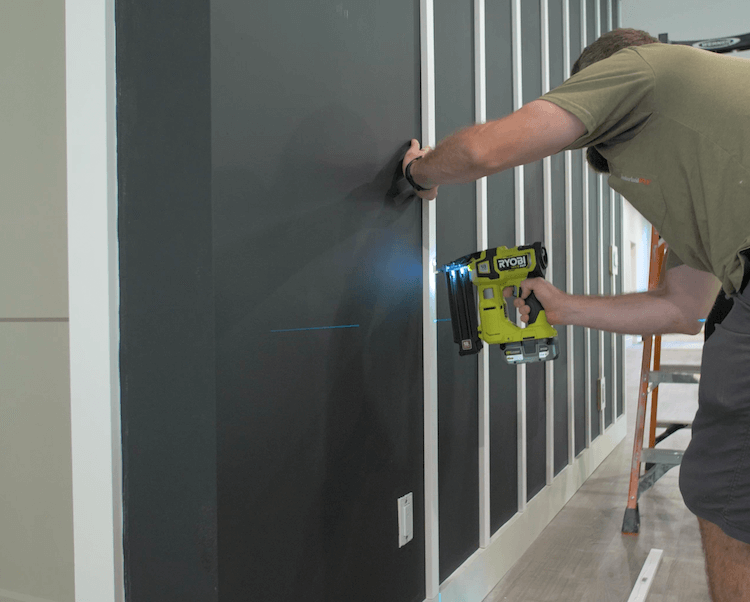
Then use a laser level to ensure plumb and tack to the drywall with 1-1/4″ 18g brad nails.
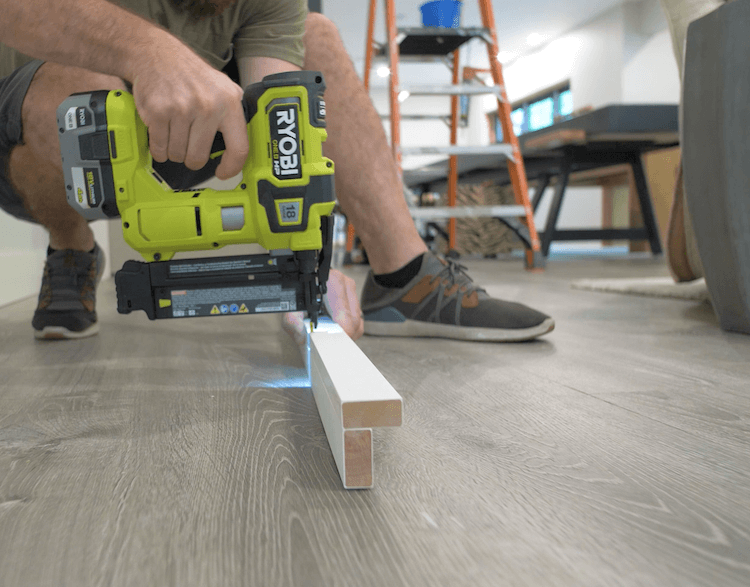
- Installing the Corners
I started by assembling the corners on the ground with 1-1/4″ brad nails to ensure they were nicely aligned.
I then installed the corner assembly with 2″ brad nails into the studs.
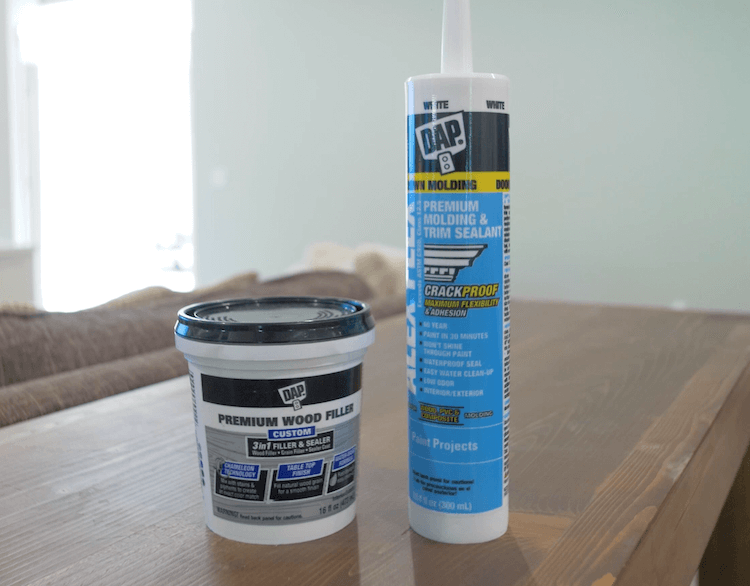
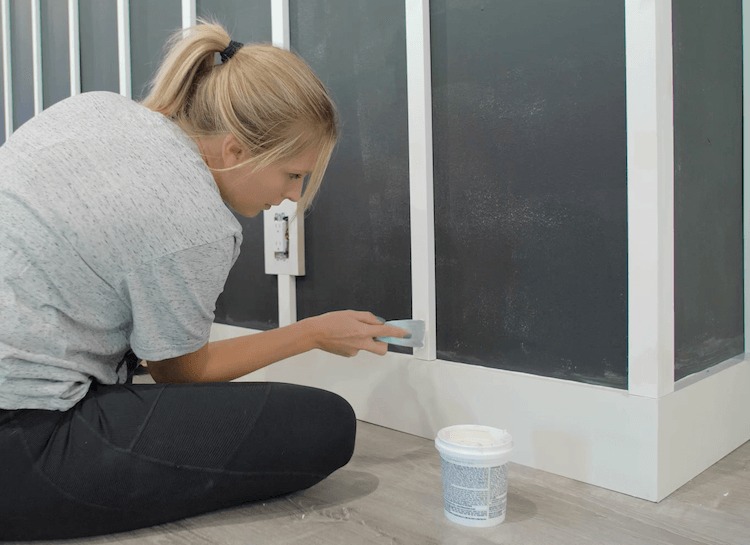
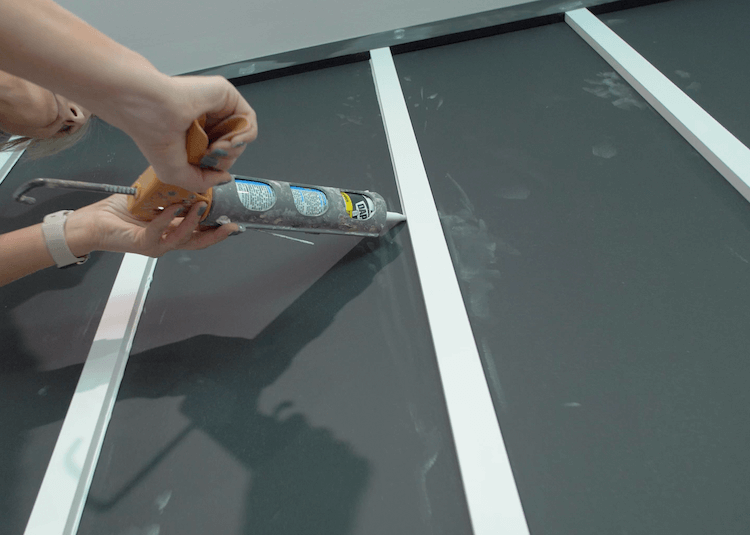
- Caulk and Fill
To make sure the feature wall looks as good as it can you will want to fill any nail holes with DAP Premium Wood Filler and caulk in the battens and other joints with DAP Alex Flex which is guaranteed to not crack and is paint ready in 30 mins.
Using a putty knife you can apply the wood filler to any nail holes. Then come back and sand smooth when dry.
Apply the caulk to any joints you want to hide and then wet you finger and run it over the joint to give it a nice round over.
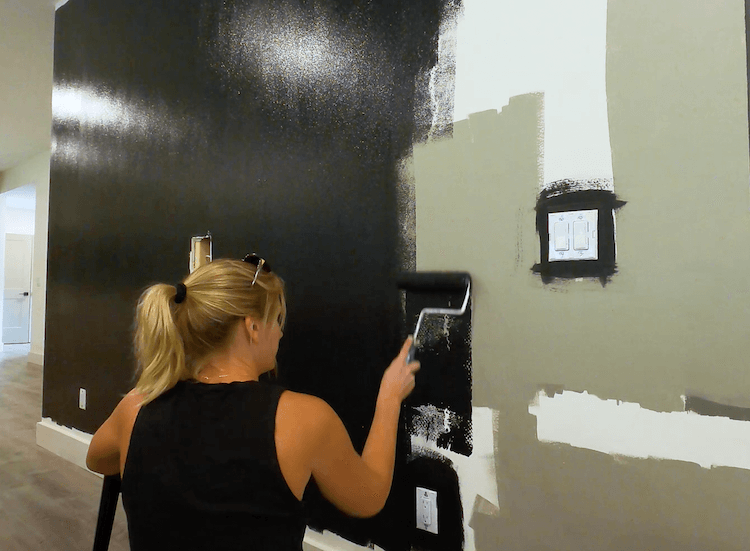
- Final Coats of Paint
Now apply the final coat of paint (which may actually require 2 coats) by cutting in the battens and rolling in between. We started by not painting the baseboards and door trim but ultimately opted to paint those black as well and were incredibly happy with how it turned out.
- Sign Backing
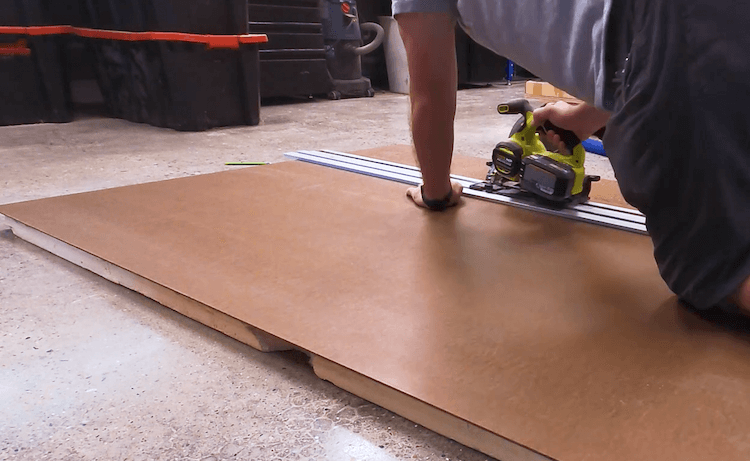
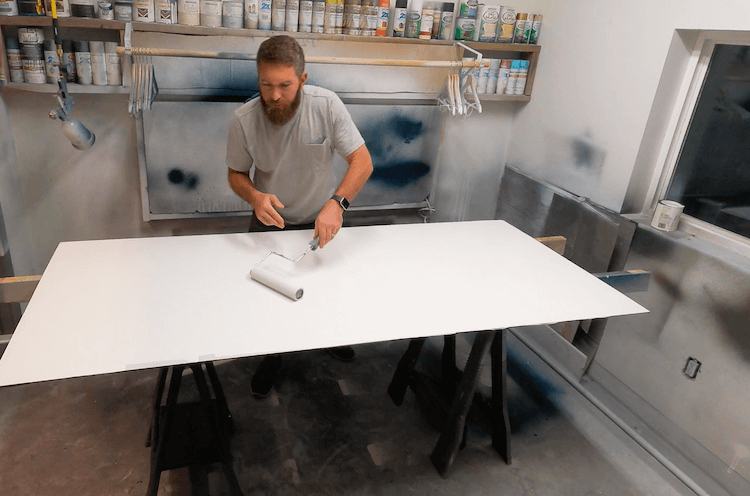
To add a personalized touch to this wall we wanted to make a sign. For this I cut down a 1/4″ MDF sheet to the dimensions I wanted.
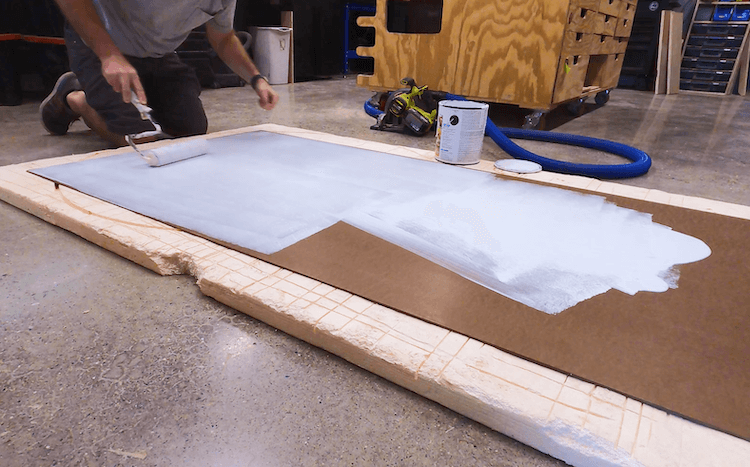
Knowing how MDF sucks up paint, I sealed the surface first with a coat of primer.
And then finished up with a few coats of flat white paint.
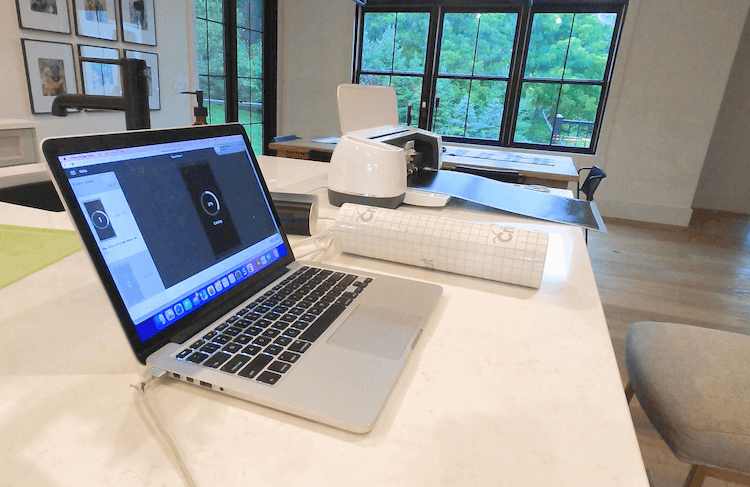
- Vinyl Cut Signage
Using our Cricut vinyl cutter I was able to design the sign and cut it out of black vinyl.
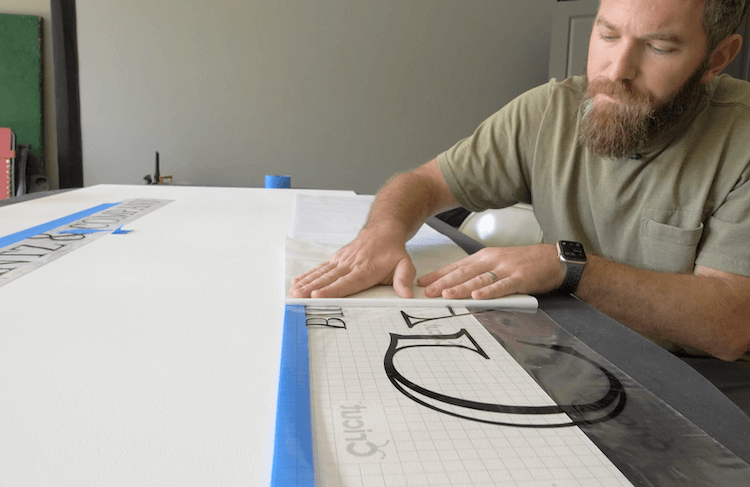
After weeding the excess vinyl and applying the transfer tape, I aligned it on the sign to get it centered and spaced properly. I then taped it in place on the bottom edge before flipping it over and removing the paper backing.
After flipping it back over and pressing the vinyl in place, I then removed the transfer tape to reveal the vinyl signage!
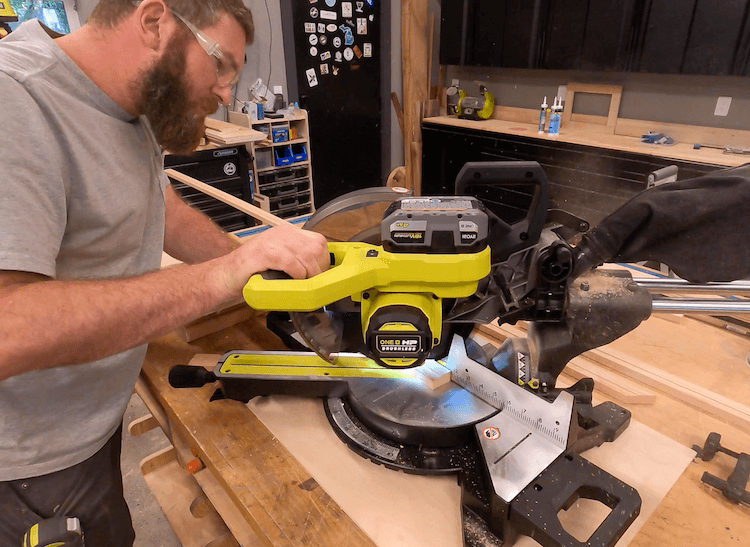
- Assembling the Frame
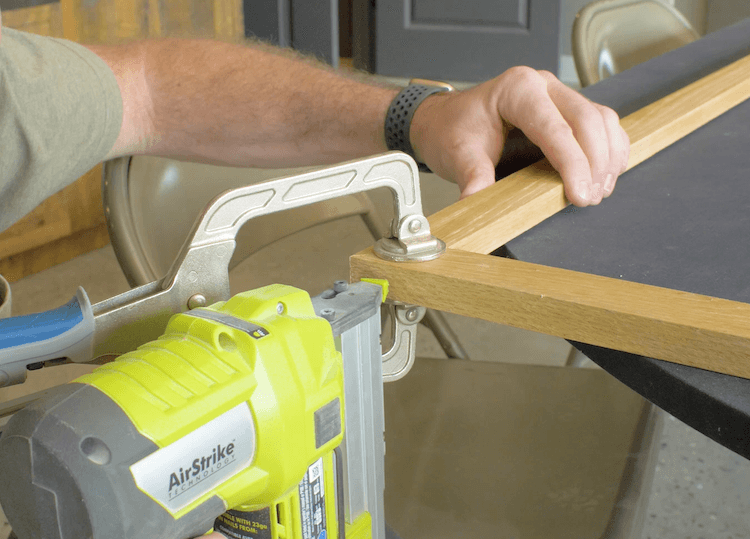
I then moved on to the frame. For this I used red oak 1x2s. I cut a 45 degree miter on each end such that the frame would overlap the sign by about 3/4″.
To take out some of the red in the oak I applied peroxide then a lye mixture before applying a wipe on polyurethane.
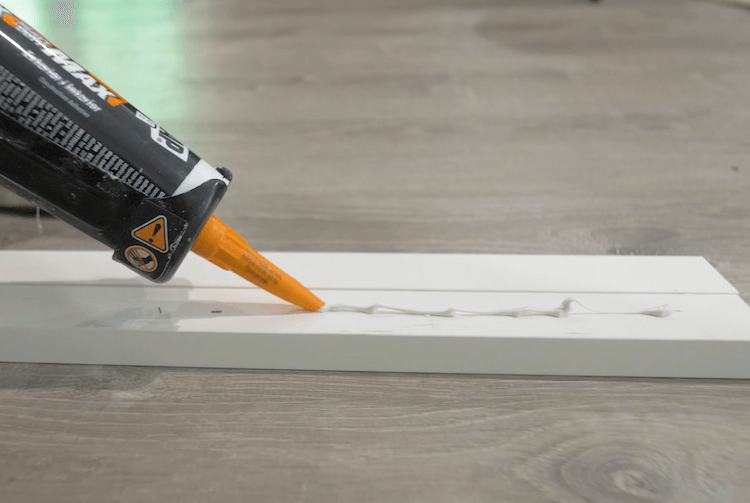
Finally I assembled the frame with DAP Weldwood Instant Wood Adhesive and 1-1/4″ pin nails.

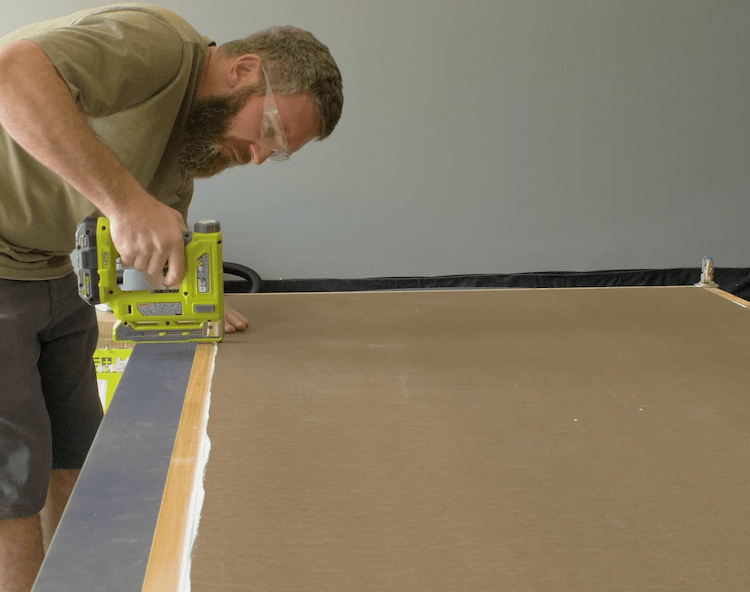
I then attached the backing to the frame with staples every 6″ or so.
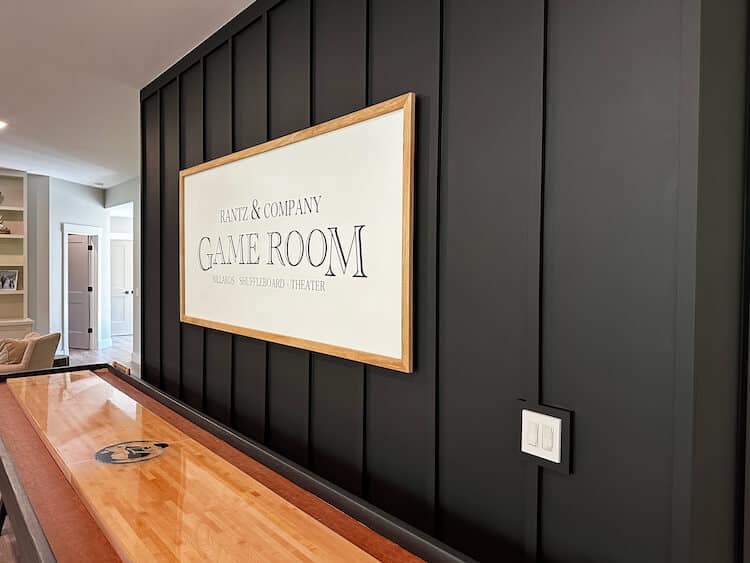
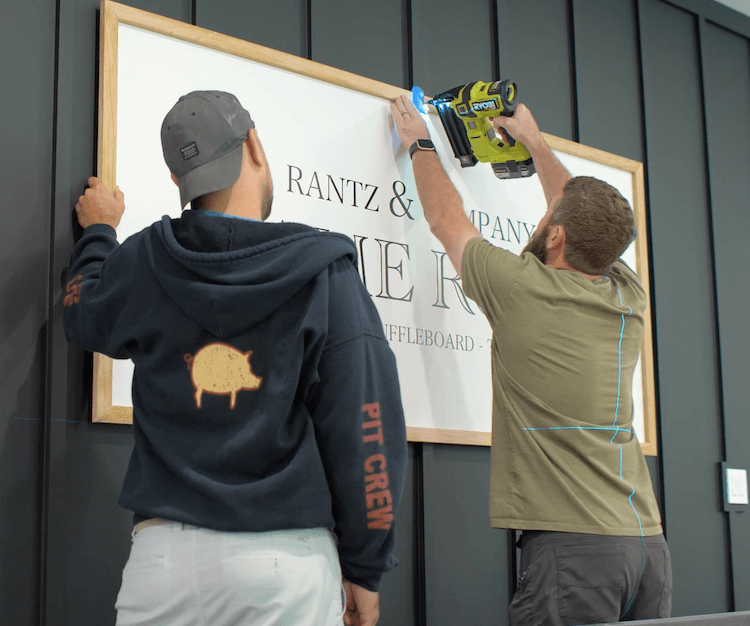
- Installing the Sign
Using a laser level I made sure the sign was centered and level before attaching it to the battens with 2″ brad nails.


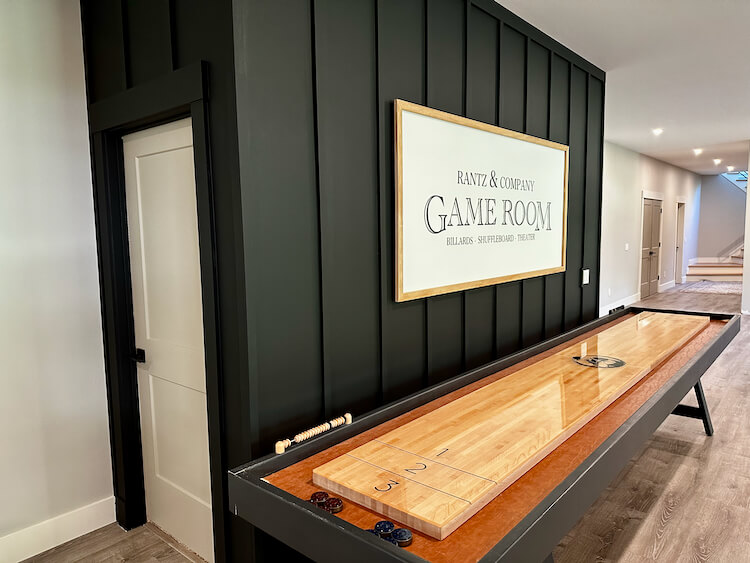
We love how this wall turned out. It definitely changes the entire space and really is the perfect game room accent wall. Let me know what you think in the comments and if you try this project, post a picture in the comments to show it off!