

X-Leg Herringbone Dining Table
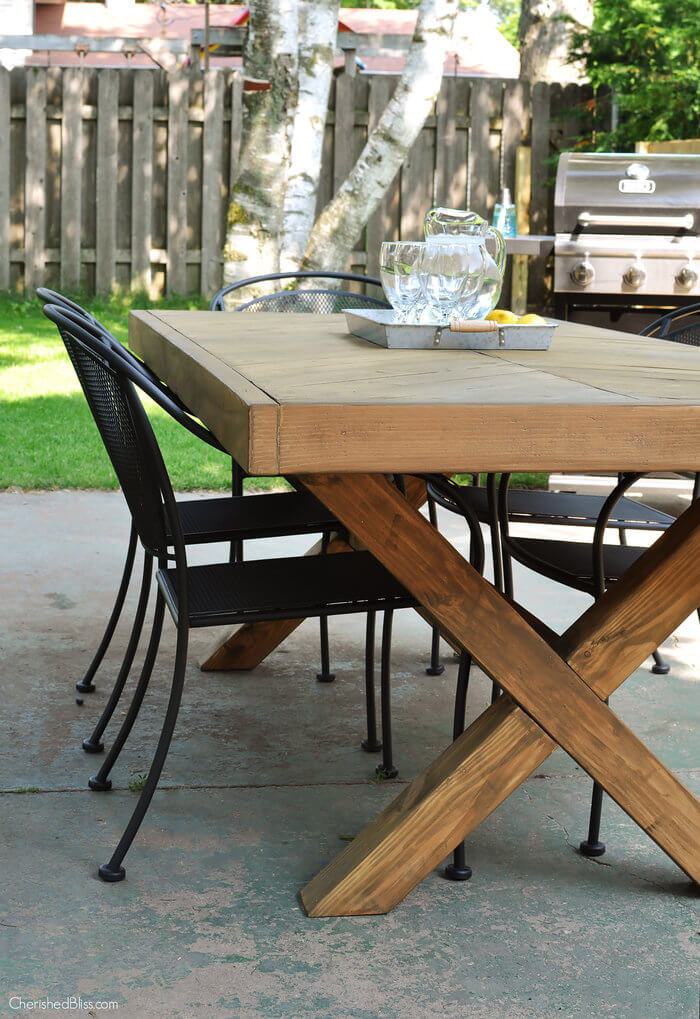
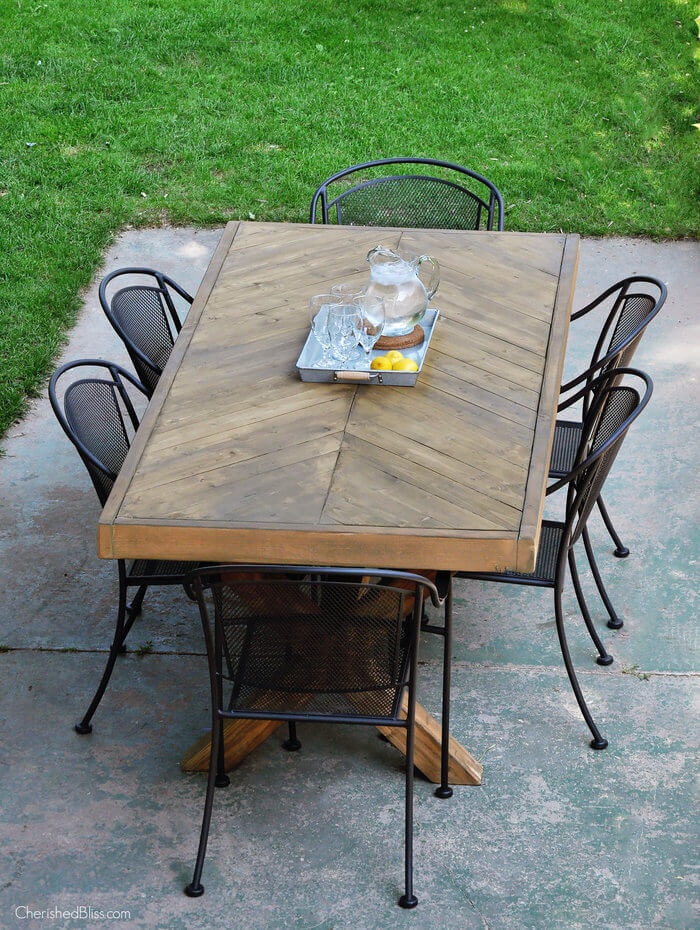
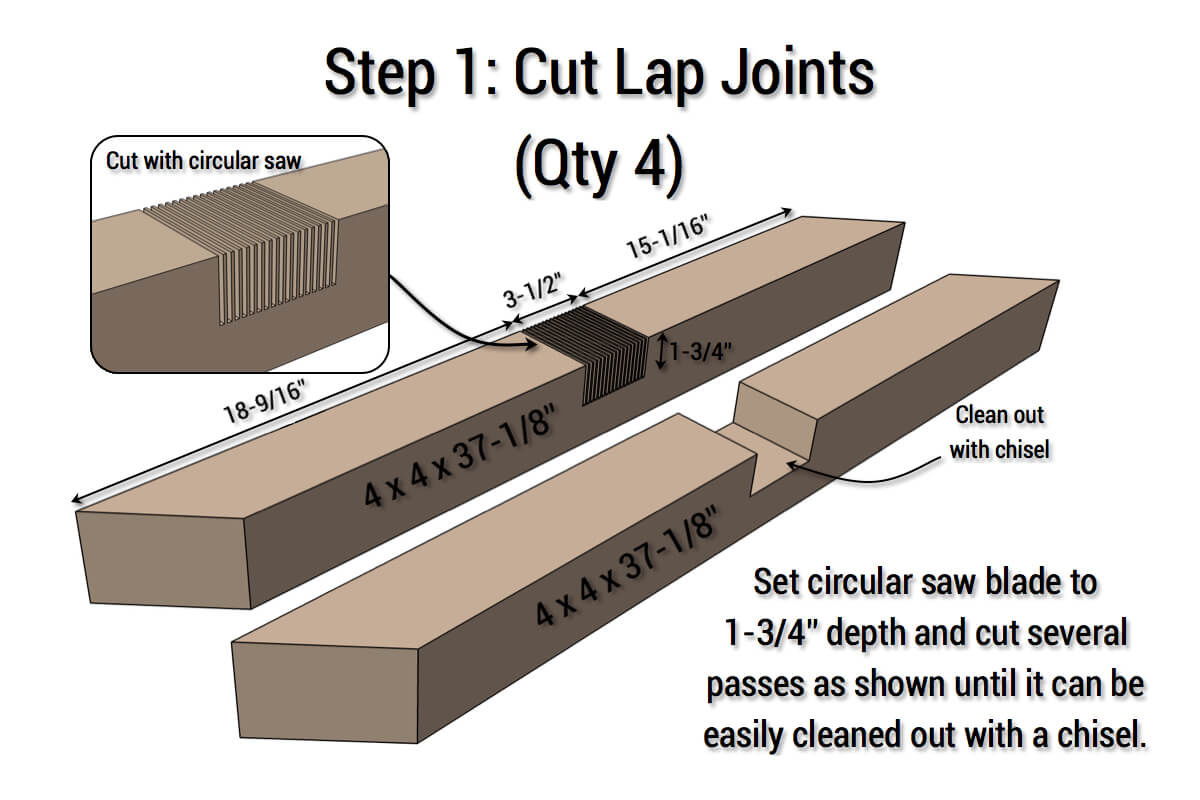
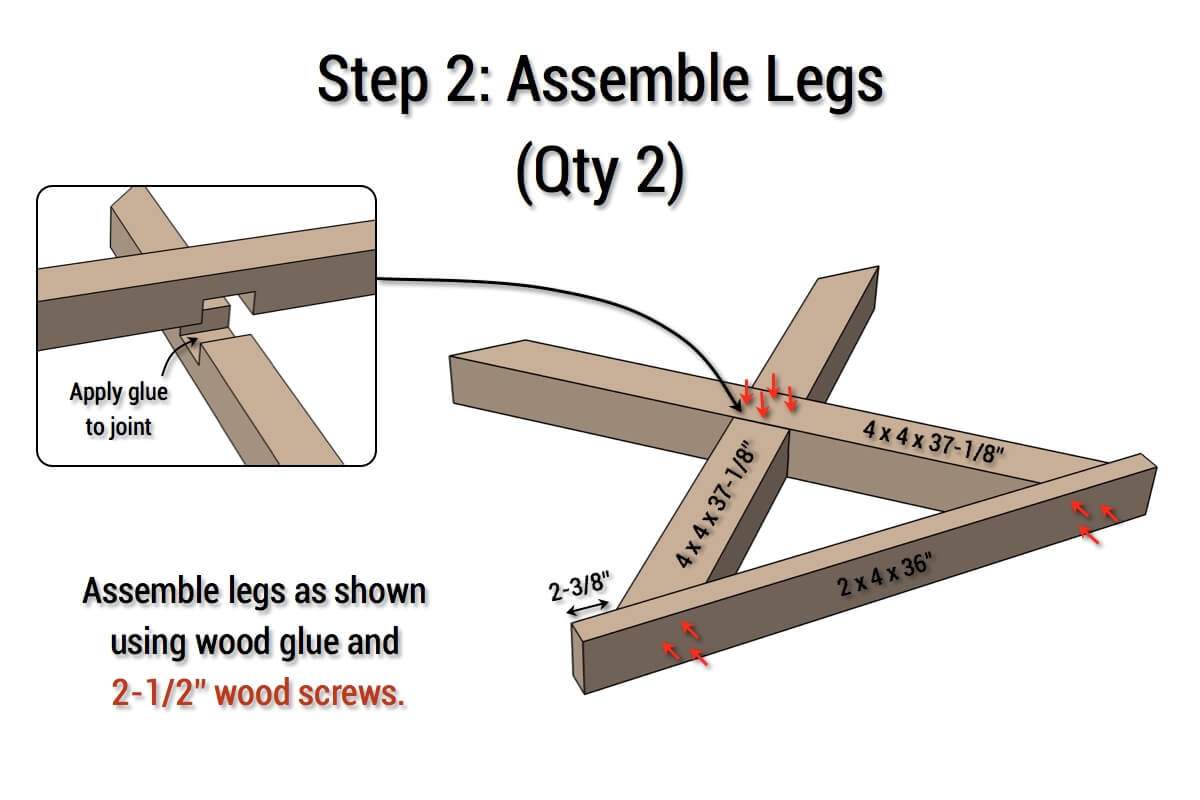
When Ashley from the blog Cherished Bliss wrote and asked me to help her with the plans for an outdoor table with X legs and a herringbone top I was totally honored but I knew I had my work cut out for me. I went to work on the plans and after talking with Ashely, we decided to go with a 4×4 X leg with lap joint. This might look difficult but if you look at step 1 you’ll see that cutting the joint is actually quite simple. And then there is that herringbone top. When she said thats what she wanted I new it would require a lot of miter cuts but when you look at the finished product you can see it was all worth it! I hope you enjoy the plans and make sure to check out Ashley’s build post for photos of the build.
For sneak peeks of our upcoming projects be sure to follow me on Facebook and Instagram. Also, follow me on Pinterest to get tons of projects plans from all around the web!
Time to Complete
1 Wknd
Skill Level
Intermediate
Required Tools
Materials
- 3x – 4 x 4 x 8′ Untreated Pine
- 8x – 2 x 4 x 96″ Premium Studs
- 11x – 1 x 4 x 8′ Common Boards; Pine
- Link is to 6′; 8′ not listed online
- 2-1/2″ Kreg Pocket Hole Screws (Coarse)
- 1-1/4″ Brad Nails
- 2-1/2″ Wood Screws
Disclosure: The links provided in the “materials” and “required tools” sections are affiliate links. If you would like to support our site and help keep our content free come find out more about how we can make money with no extra cost to you.
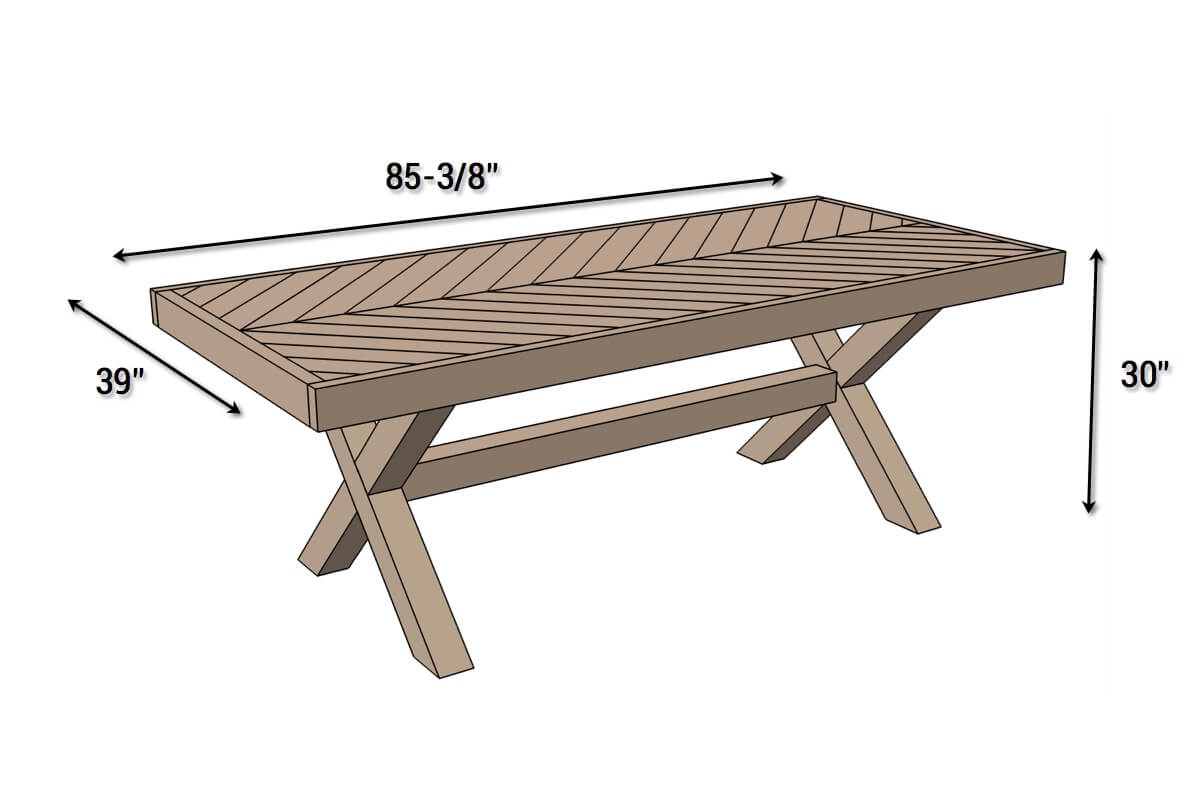
Dimensions
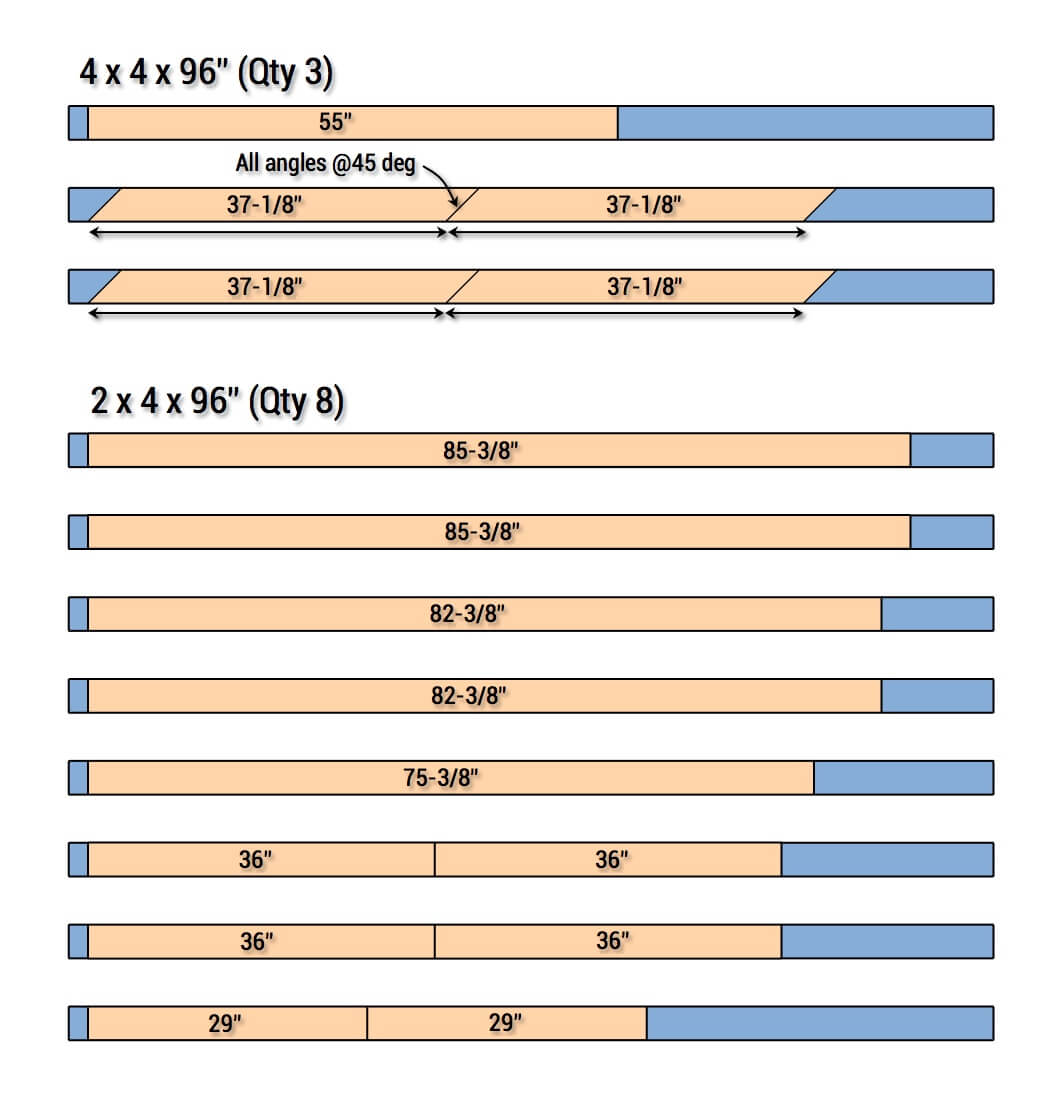
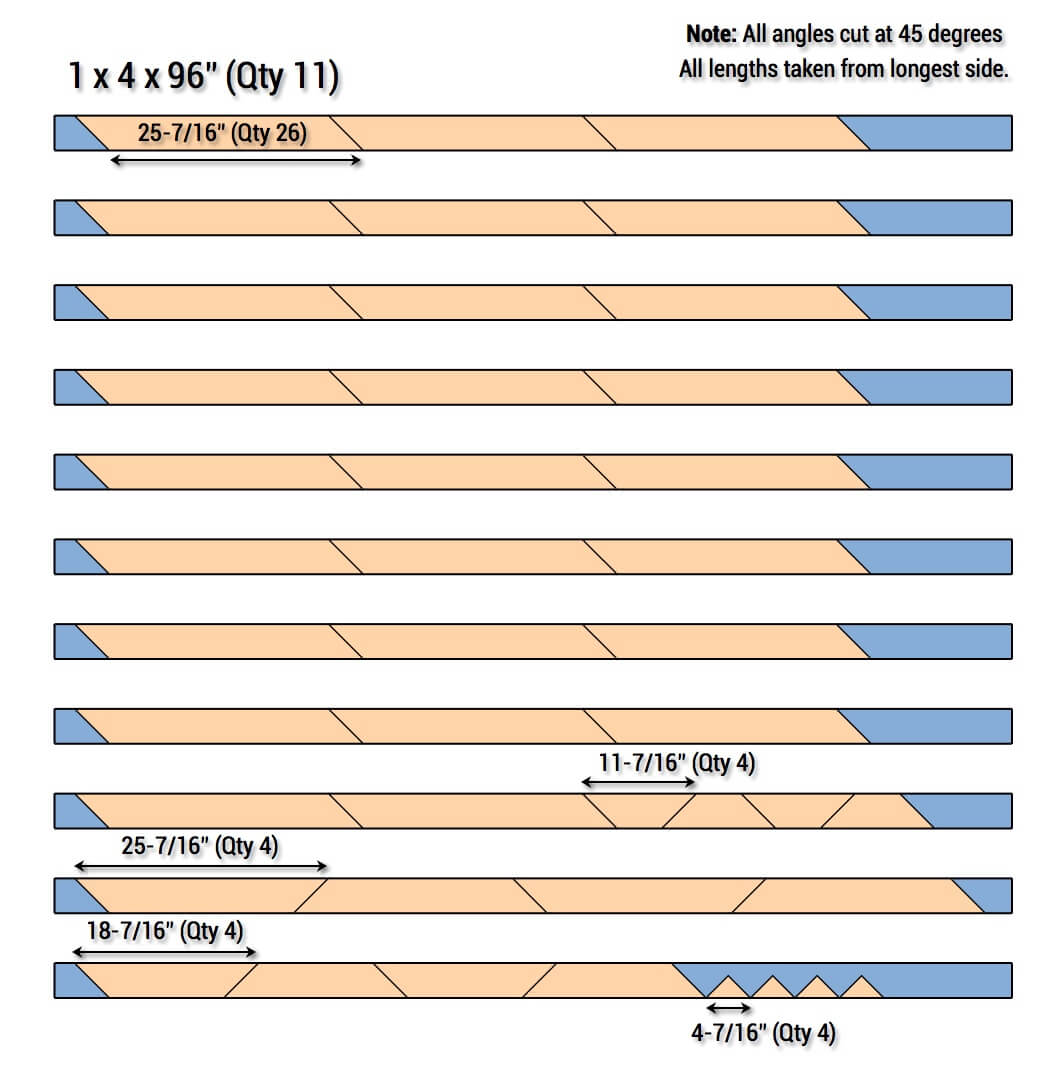
Cut List
How to Build an X-Leg Herringbone Table
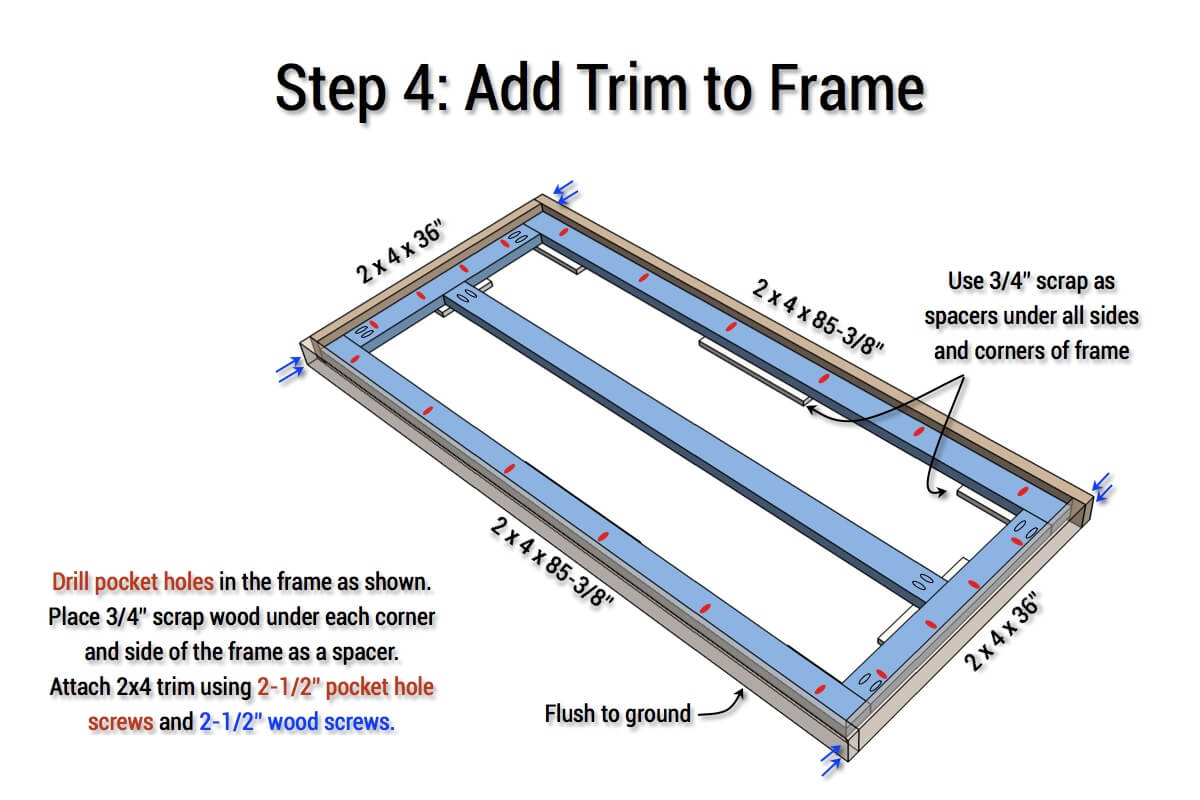
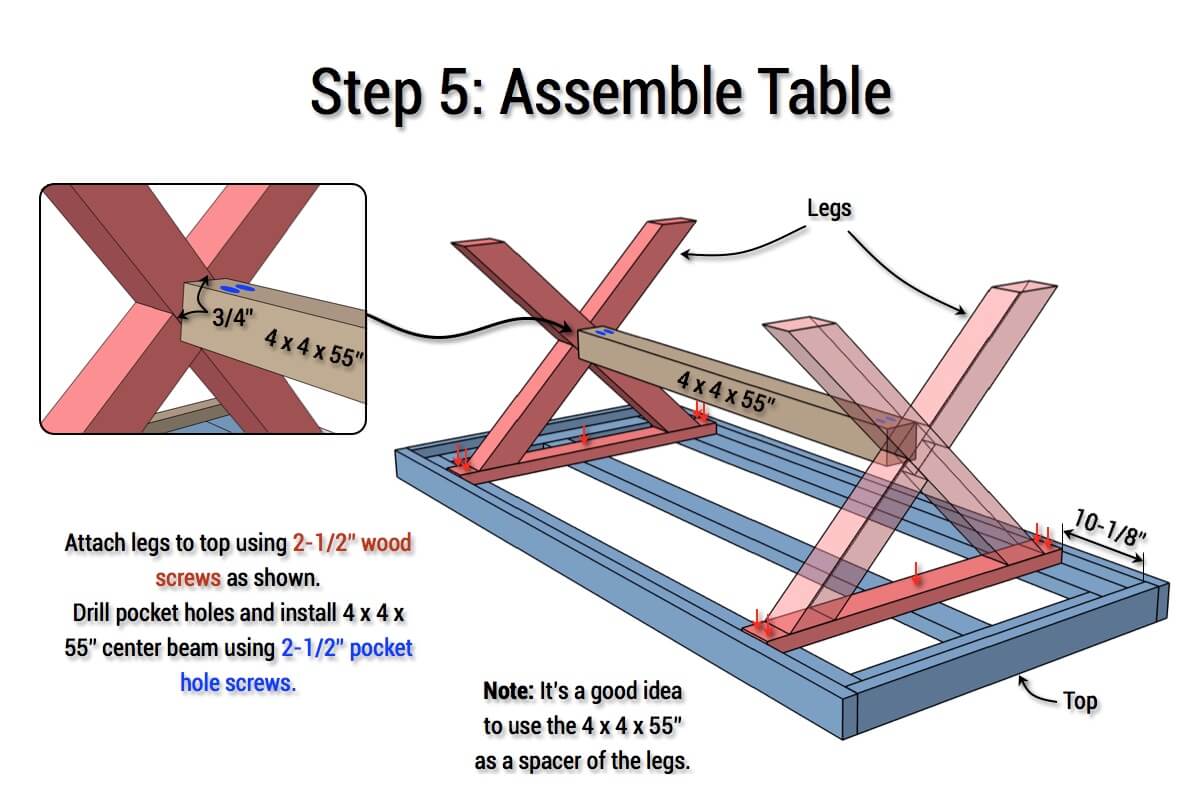
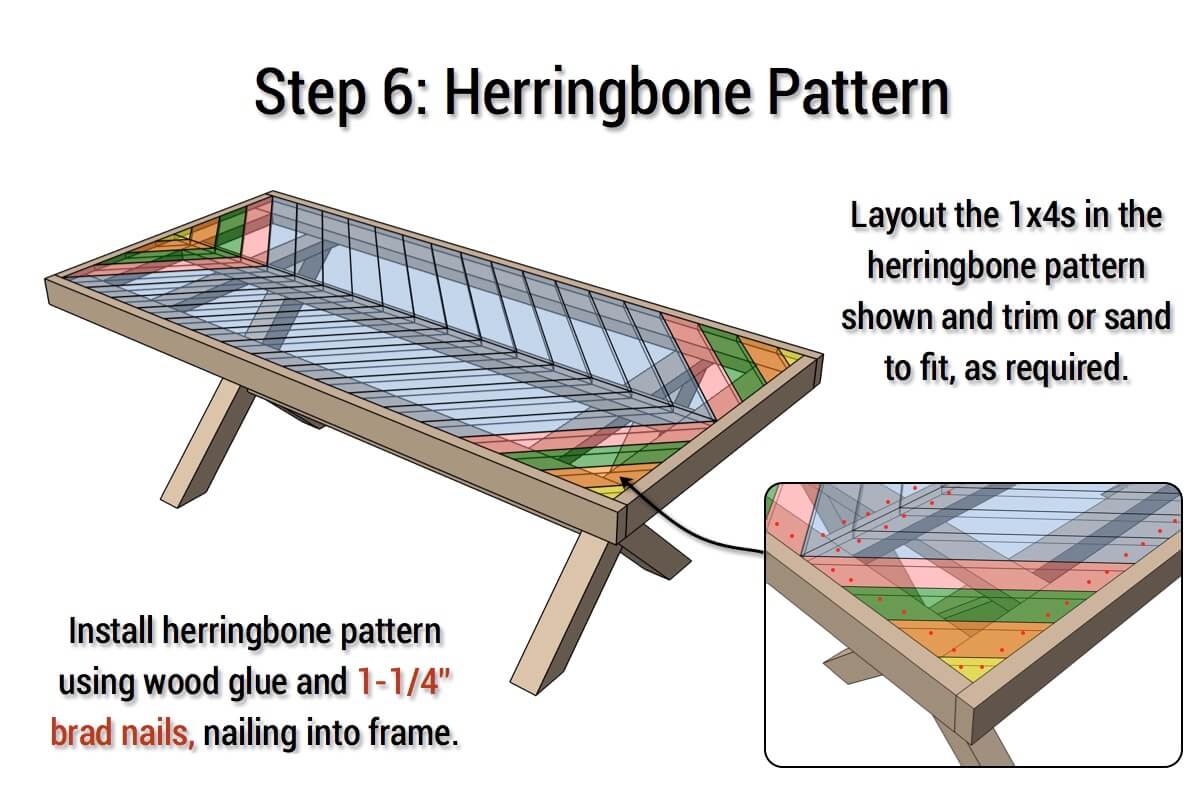
Questions? Comments?
As always, if you have any questions don’t hesitate to comment below and especially don’t forget to post pictures of your finished products in the comments! ENJOY!
Interesting table. It does look easy to build. I may adopt the design to make a breakfast table for inside the house. Thanks for sharing . . . Ron
Ron, I would love to see how it turns out if you do!
Is the table top a herringbone or chevron design?
it’s a herringbone pattern for the top.
Okay maybe it is a chevron pattern.. SMH..
Could you add an umbrella hole to this?
Yes you could, thats a great idea
Would you need to reinforce the center leg brace if you added the umbrella hole, if so what would you recommend?
I honestly don’t think you would need to reinforce it. It’s more than sufficient already.
Do you mind me asking what program you use to create your plans? Thanks!
I would recommend anyone starting out use SketchUp. You can download and start using it for free, which is great. The program I use is not meant for this type of design so I don’t even want to mention it. I will be making the transition soon myself.
I have seen a lot of folks recommending the Kreg HD on some of these type projects. I have the K5 and love it. You don’t have it listed on your needed tools but I was wondering what your thoughts are on it. Thanks for the great plans.
Yes, I think this would be a great application for the Kreg HD as it would only make it stronger however it’s not required and your K5 will do you just fine.
Love this thanks.
One quesiton – you’re recommendeing untreated wood, but its an outdoor table. Won’t the elements kill it?
If you stain and apply a few coats of spar urethane it will be fine. Treated is required if you’re going to leave it unfinished.
Do have any recommendations to help with the legs? Having trouble getting them level thanks
Find the long leg and sad it down or add those threaded leveling feet. I feel your pain.
Perfect. Thanks for the suggestion. We are trying to picking a stain. If we went with a dark stain would you still see the design of the herringbone or would it all blend together
That’s a good question. I could see that happening but you could knock down the edges of the boards with a sander to make the seams more noticeable.
What size bench would you recommend for this table? Planning on making the x brace bench. Thanks
I would think 75″-80″ would be a good length.
Hello! I’m wanting to build this for an indoor table. Do you have suggestions regarding using the untreated 4×4 indoors? Will they eventually crack once they are dried out? I love the look of a 4×4 instead of using (2) 2x4s but don’t want to compromise the integrity of the table. Thanks!
I think untreated 4x4s would work fine. You shouldn’t have any issues with cracking.
We are currently working on this table. Which stain/finish did you use? Thank you!
She used Thompson’s WaterSeal wood stain & sealer in Moroccan Brown.
I’ve had a hard time finding Untreated 4×4’s…any help?
thanks for your plans!
Very nice work! Thank you for sharing.
How strong do you think the x-legs are? I’d like to use the legs for a 2×4 clamped tabletop – about 24 2×4’s held with all-thread. Math works out to about 275lbs tabletop alone.
This table is beautiful! I love it! How might you recommend modifying for an umbrella hole?
You could drill a hole in the top and the 4X4 beam to incorporate an umbrella.
Thanks so much for the plans! They were very easy to follow and I love the table that my husband and I built!
I’m making this this table over the next two weekends. Question – I’m in the military and move frequently so I want to make the table top and legs/base be detachable for when its time to move. Any recommendations?
Sorry for the slow reply Paul, and thank you for your service. For a table that moves with you: attach the top with figure-8 fasteners or Z-clips instead of screws through the aprons (they unscrew clean every time and still let the wood move), and put threaded inserts with bolts where the base meets the top structure so the legs break down with a hex key. Label the parts on the underside and it’ll go back together square every move.
Wow! This table turned out great! Thanks so much for sharing. I hope you enjoy your outdoor space a ton this summer.
how did you finish this? Its a beautiful stain!
I’m making this this table over the next two weekends. Question – I’m in the military and move frequently so I want to make the table top and legs/base be detachable for when its time to move. Any recommendations for how to do it?
Hey Paul. You could just unscrew, move, and screw together the top and base again. If the holes start to strip out, just screw in a new location.
Another way of doing it is use bolts to secure the legs and use a spade bit to make the indent of the bolt on which ever herring bone lays across the top of it. You won’t need to rescrew any new holes that way and keep the structural integrity of the table.
Awesome plans! I just finished staining a similar table and had a question about sealing. I’ve seen you’ve used the Varathane Poly in some of your other posts. Do you know how it compares to Minwax’s Helmsman Spar Urethane as far as looks? I generally don’t like the look that the Helmsman Urethane gives. Even when I’ve used the satin finish it’s too glossy and “plastic” for the look I want. Any recommendations for a more natural looking exterior sealer that still provides the protection? Thanks in advance!
I’ve used the Varathane Poly many time sand never felt it gave the plastic look. You can also get it in a satin finish which won’t give a gloss look at all.
James – If you are interested in sealing it with a sealer and good varnish you should consider CPES (Clear Penetrating Epoxy Sealer) and Epiphanes. CPES is used widely within the marine industry on wood boats and wood deck pieces for its sealing qualities. Similarly, Epiphanes is some of the best marine spar varnish there is with some of the best UV protection. For my table I stained with a normal oil-based stain, gave it two coats of the CPES so the wood soaked it up real well, gave it four coats of Epiphanes, and finished it with 2 quick coats of the Epiphanes matte finish. Totally sealed, but with a far more natural look than typical poly coat.
Wow the table looks great! Thanks for sharing. I am going to have to give that a try out my next outdoor project. Thanks for all the info, its much appreciated.
Hi Paul – do you have a recommendation on brand? You do the CPES first, then regular Epiphanes and then the Epiphanes matte finish?
Have you had any issues with using pine for outdoor furniture? I can’t find 4×4’s in pine locally but it sounds like cedar/redwood/oak are much better for outdoor. Doug fir is what’s readily available at my local Home Depot/lowes for dimensional lumber/studs. Everybody I’ve talked to is also advising to use dried wood for furniture, especially outdoor furniture. Is that what you used?
So far we’ve had no issues using pine on outdoor furniture. Though I do recommend a good sealer. However, we have been using cedar a lot recently on our outdoor pieces. I’ve been lucky to find this at our local Lowes.
Ya that is lucky. Not easy to find in CA. What did you use for the finishing on this? I almost have everything together to start on sanding/finishing. I think I’ve decided on doing one stain for the frame/legs then 2 different stains for the pattern. It sounds like pre-conditioner and spar urethane is the way to go (especially with pine) but I can’t decide on good stain for outdoor use. There’s a lot of indoor stain. Does the spar urethane basically make indoor stain usable outside? Gel stain has come up a lot for pine to avoid blotchiness.
This table was built by my friend Ashley, she used Thompson’s WaterSeal wood stain & sealer in Moroccan Brown for the finish.
Did you use the kreg hd since this calls for joining 2×4’s? I have the k4 which only goes up to 1 1/2″ thickness.
No I didn’t use a Kreg HD, the K4 will work fine. The actual thickness of a 2×4 is 1 1/2″
Sorry I meant to say for the 4×4 center beam. I ended up just getting the HD. I’ll probably end up using the HD screws for everything that needs 2 1/2 inch screws, pocket hole or not. They seem very sturdy.
Jacob, did you ever get an answer to this? I’m going to go buy the smaller Kreg Jig but I don’t really want to buy both sizes.What would be the alternatives to attaching the 4×4 so I can avoid purchasing the HD Kreg Jig for po KET holes over 1.5″”
I was wondering how the brad nails are holding up? I’ve read that they can rust out over time, especially if you live in a place with very different temperatures throughout the seasons. If so, do you have any recommendations for something that might be more weather proof?
If the are galvanized then they should be alright. Also it depending the the coating you put onto, this should help to protect them as well.
Jamison, Each time I look at the hardware stores (big box, orange or blue) for pine, nearly all of the pieces are warped or damaged. Where do you suggest buying good straight lumber in pine? I really want to build this table. Do you have any thoughts, tips or suggestions about warped lumber?
Bart, we bought ours at out local HomeDepot. I won’t say its easy to find good lumber. We often spend some time in making sure we get the best piece possible. You can also find a local mill to get lumber, they may have better options.
Thanks for the plans! We just finished the table this past weekend. I am looking at building benches for this. My wife wants one to be a corner bench that will wrap around the end as well and then a normal bench on the other side. Do you have any ideas on a plan for these that will work? Thanks in advance!
This turned out great! Awesome finish on this table. I have a few bench plans on my site, but none for a wrap around. Im sure it would be easy enough to customize that.
I just finished the whole table top and was wondering if you had any problems with tabletop boards separating over time. Is the glue and brad nails sufficient to keep it together?
I didn’t personally build this table, but from what I know there hasn’t been an issue with it. I would suggest a good coat of poly to help protect it from the elements.
I am obsessed with this table! Only problem is we need something smaller, the one we like in store was 48×60. Doesn’t have to be that exactly but around that size. Do you have advice on customizing this plan? Thanks in advance! Your pieces are amazing!
Thanks. As for the top you can adjust as needed without any real issues. For the base, the length can be changed to whatever you need, but the width you will need to keep the same.
Finally finished this. Thx for the plans!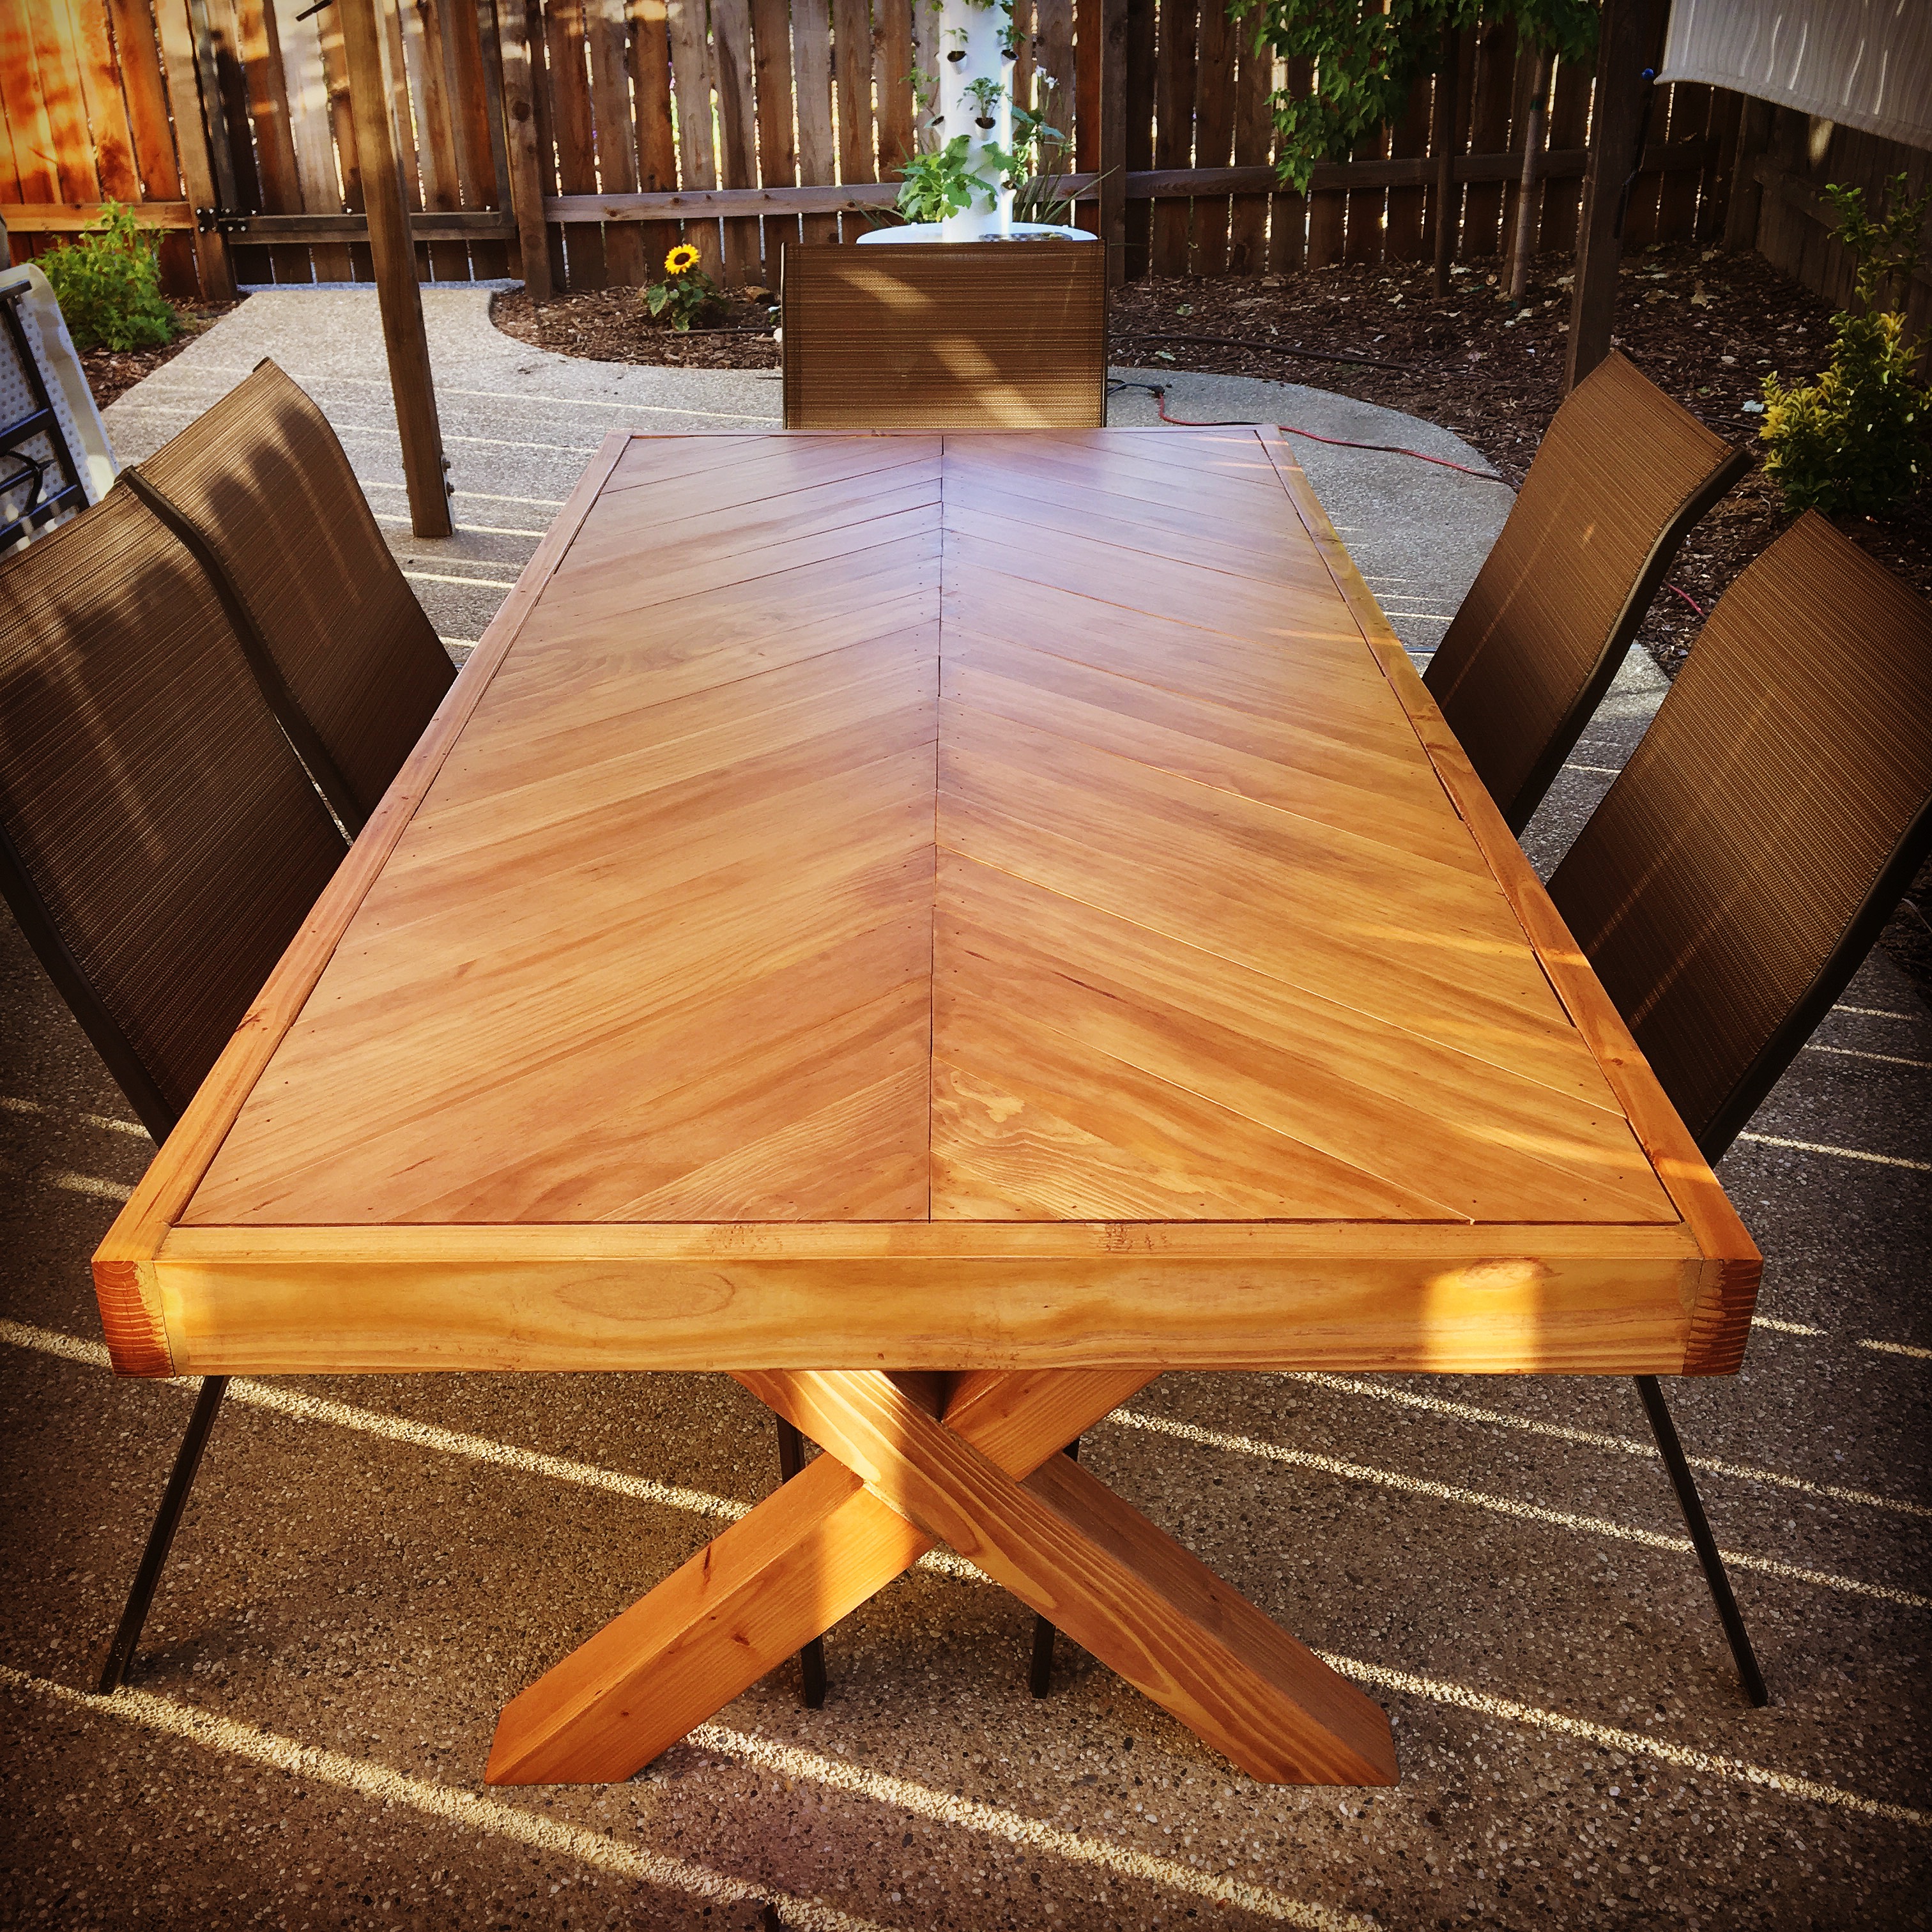
WOW! This looks amazing.
whats the finish on this table. looks amazing!
Hi Jacob,
Is this your typical building pine you see at home depot? What stain did you use?
Thanks for the plans! I built this table and bench using reclaimed wood from an old fence. I used the Helmsman Spar Urethane to seal it. Very pleased.
AWESOME! Great way to use some old fencing. Good work man.
Is there a calculation for the X-Leg on the Herringbone table? I am going to make the width of the table 30″.
I’m in the middle of building the frame for this table and was wondering how much, if any, space should be left between the herringbone slats in order to let the wood expand/contract in climates with large temperature differences thoughout the year. Thank you!
If you are in the middle of building it now, you won’t need to leave a gap since it’s summer and humidity is high so the wood will only contract.
Just finshed the table a few weeks ago, thanks for the plans!
What stain did you use Scott? The Moroccan Brown? Thanks.
This is SUCH a gorgeous table. Questions – the person I’m building for wants a full 96″ table, will this put too much stress on the stretcher? They also want for there to be a board under the X legs. I’m thinking of doing a rounded edge 2×4 under (similar to the top board) with a 1×4 footer to make the look they want. Can I just cut the X 2 inches shorter and it still match up/work?
I did a twist on the plans and made a coffee table. I had a glass top made too.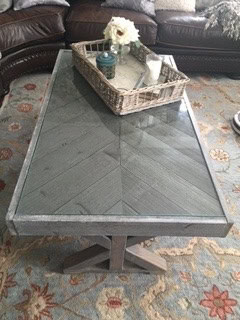
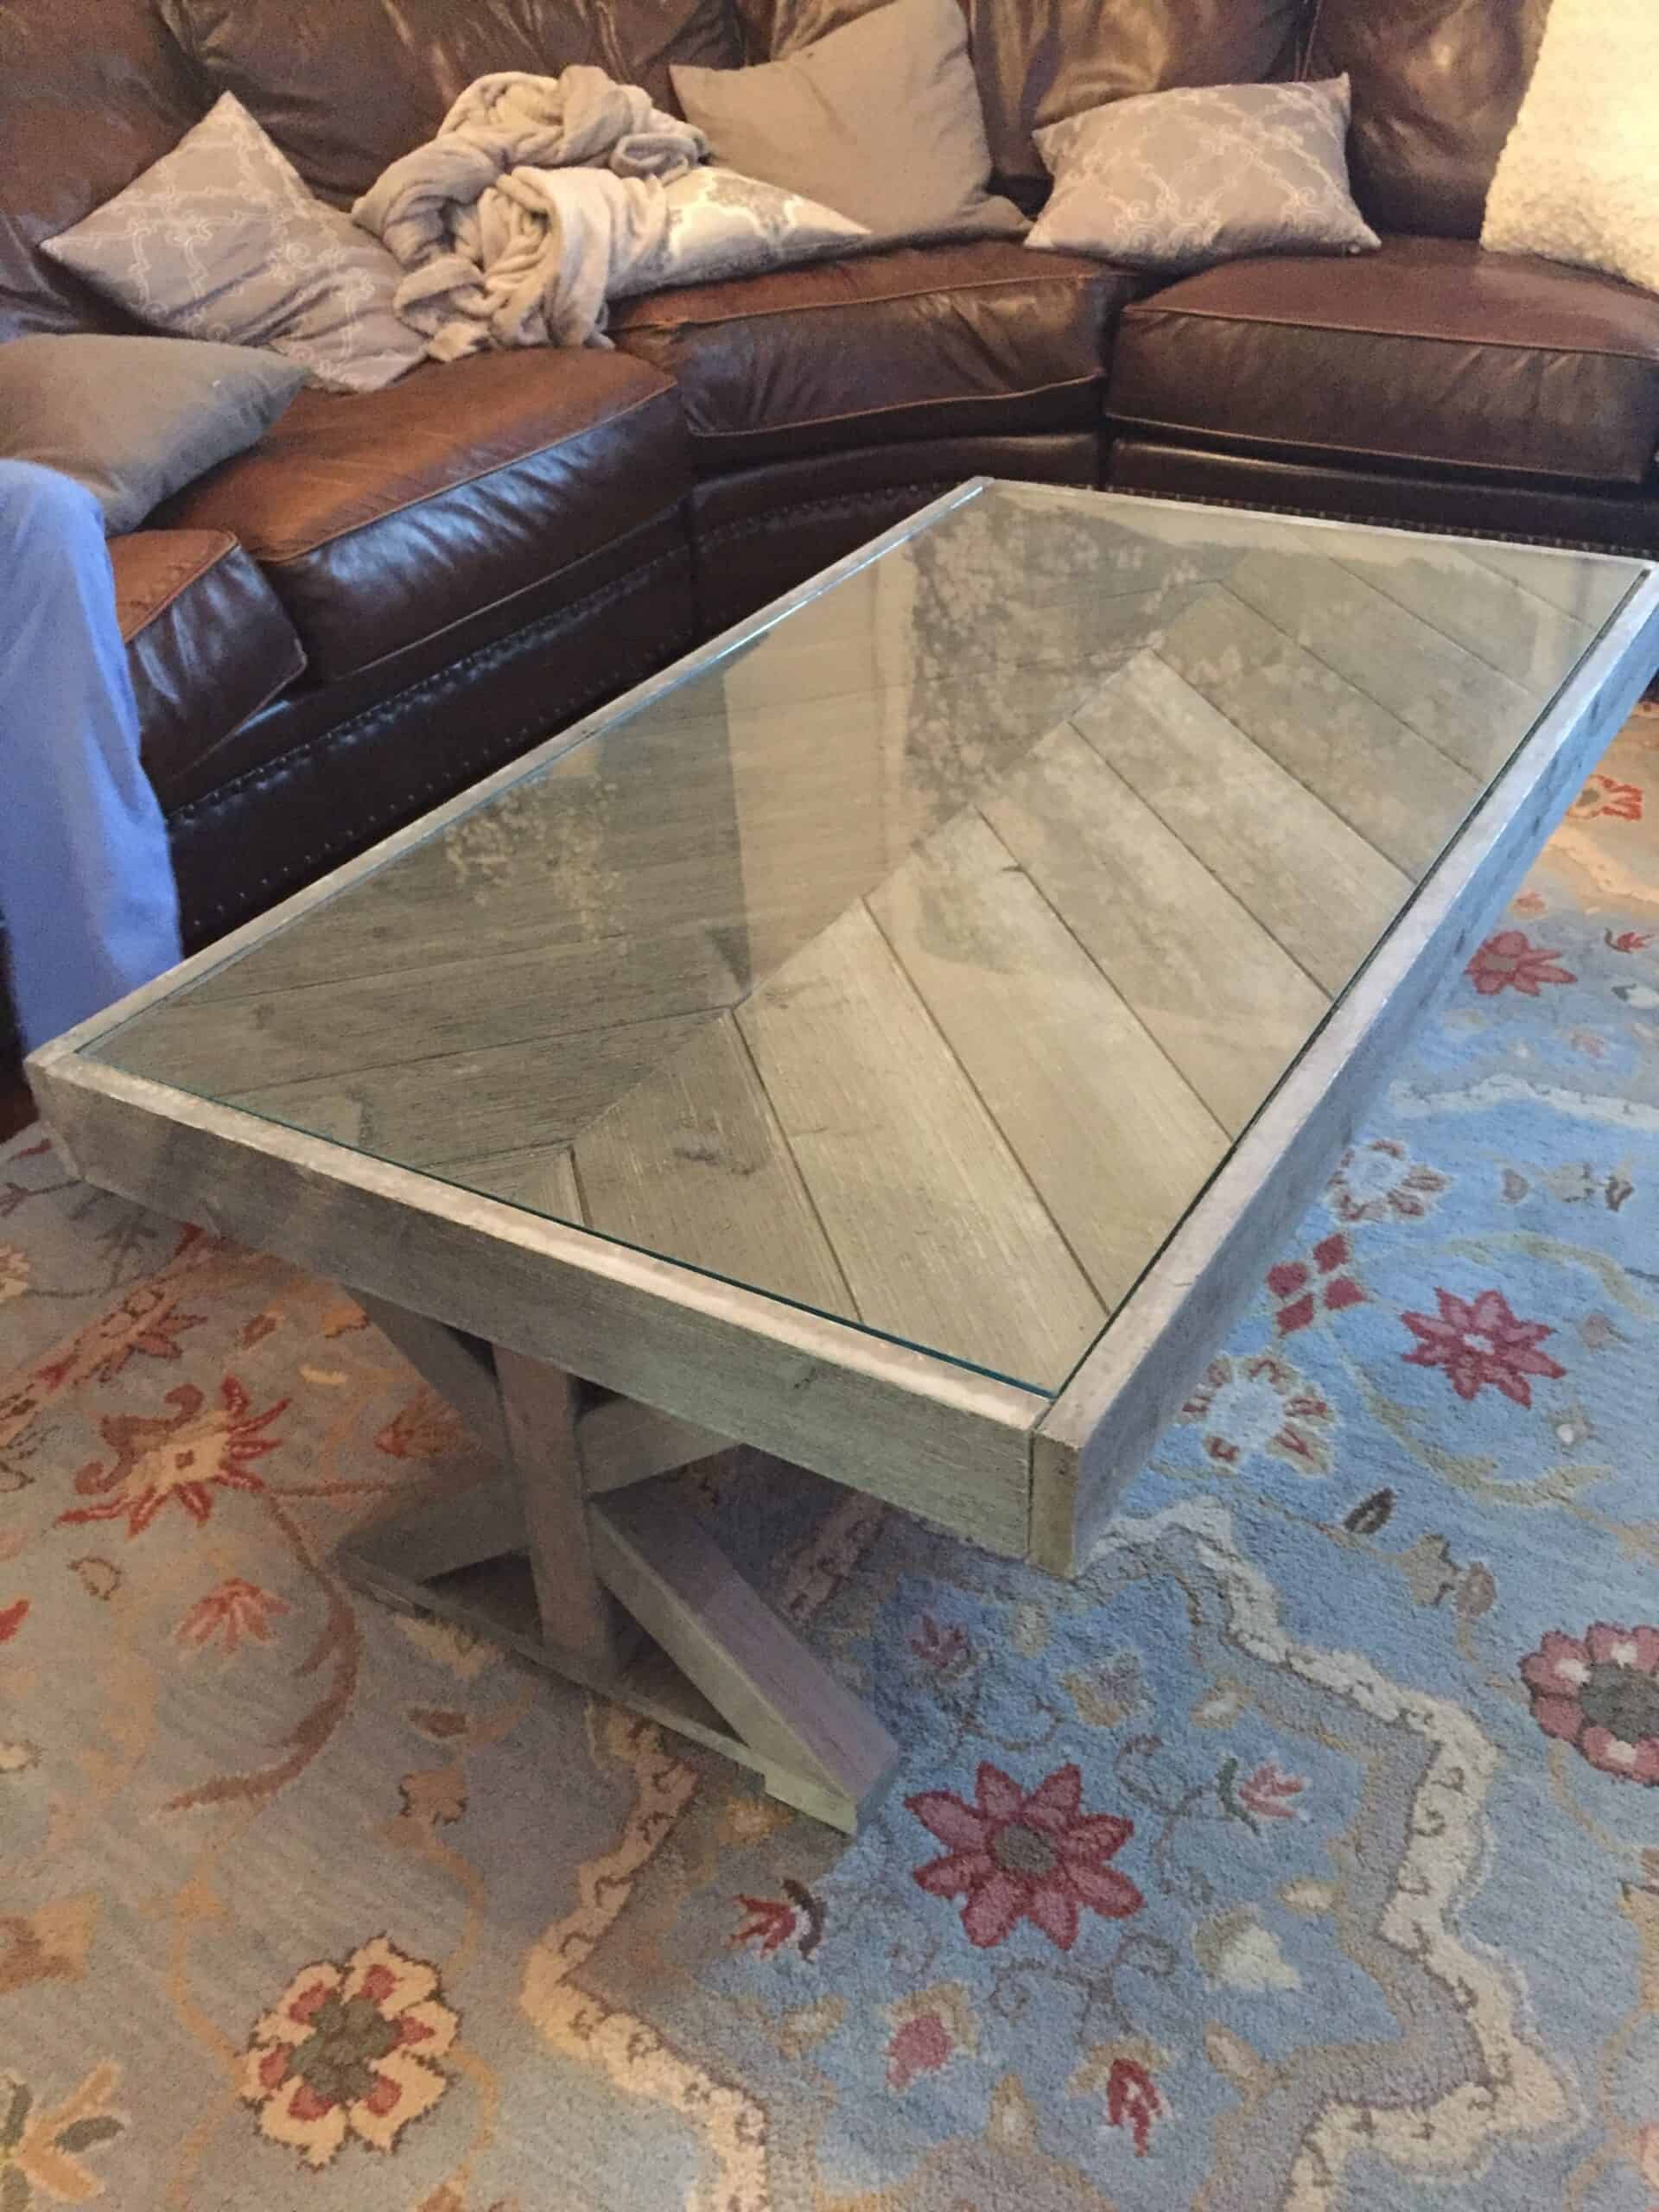
That is awesome. Looks great as a coffee table. Nice work.
Just finished staining! We stained is white! Because we hav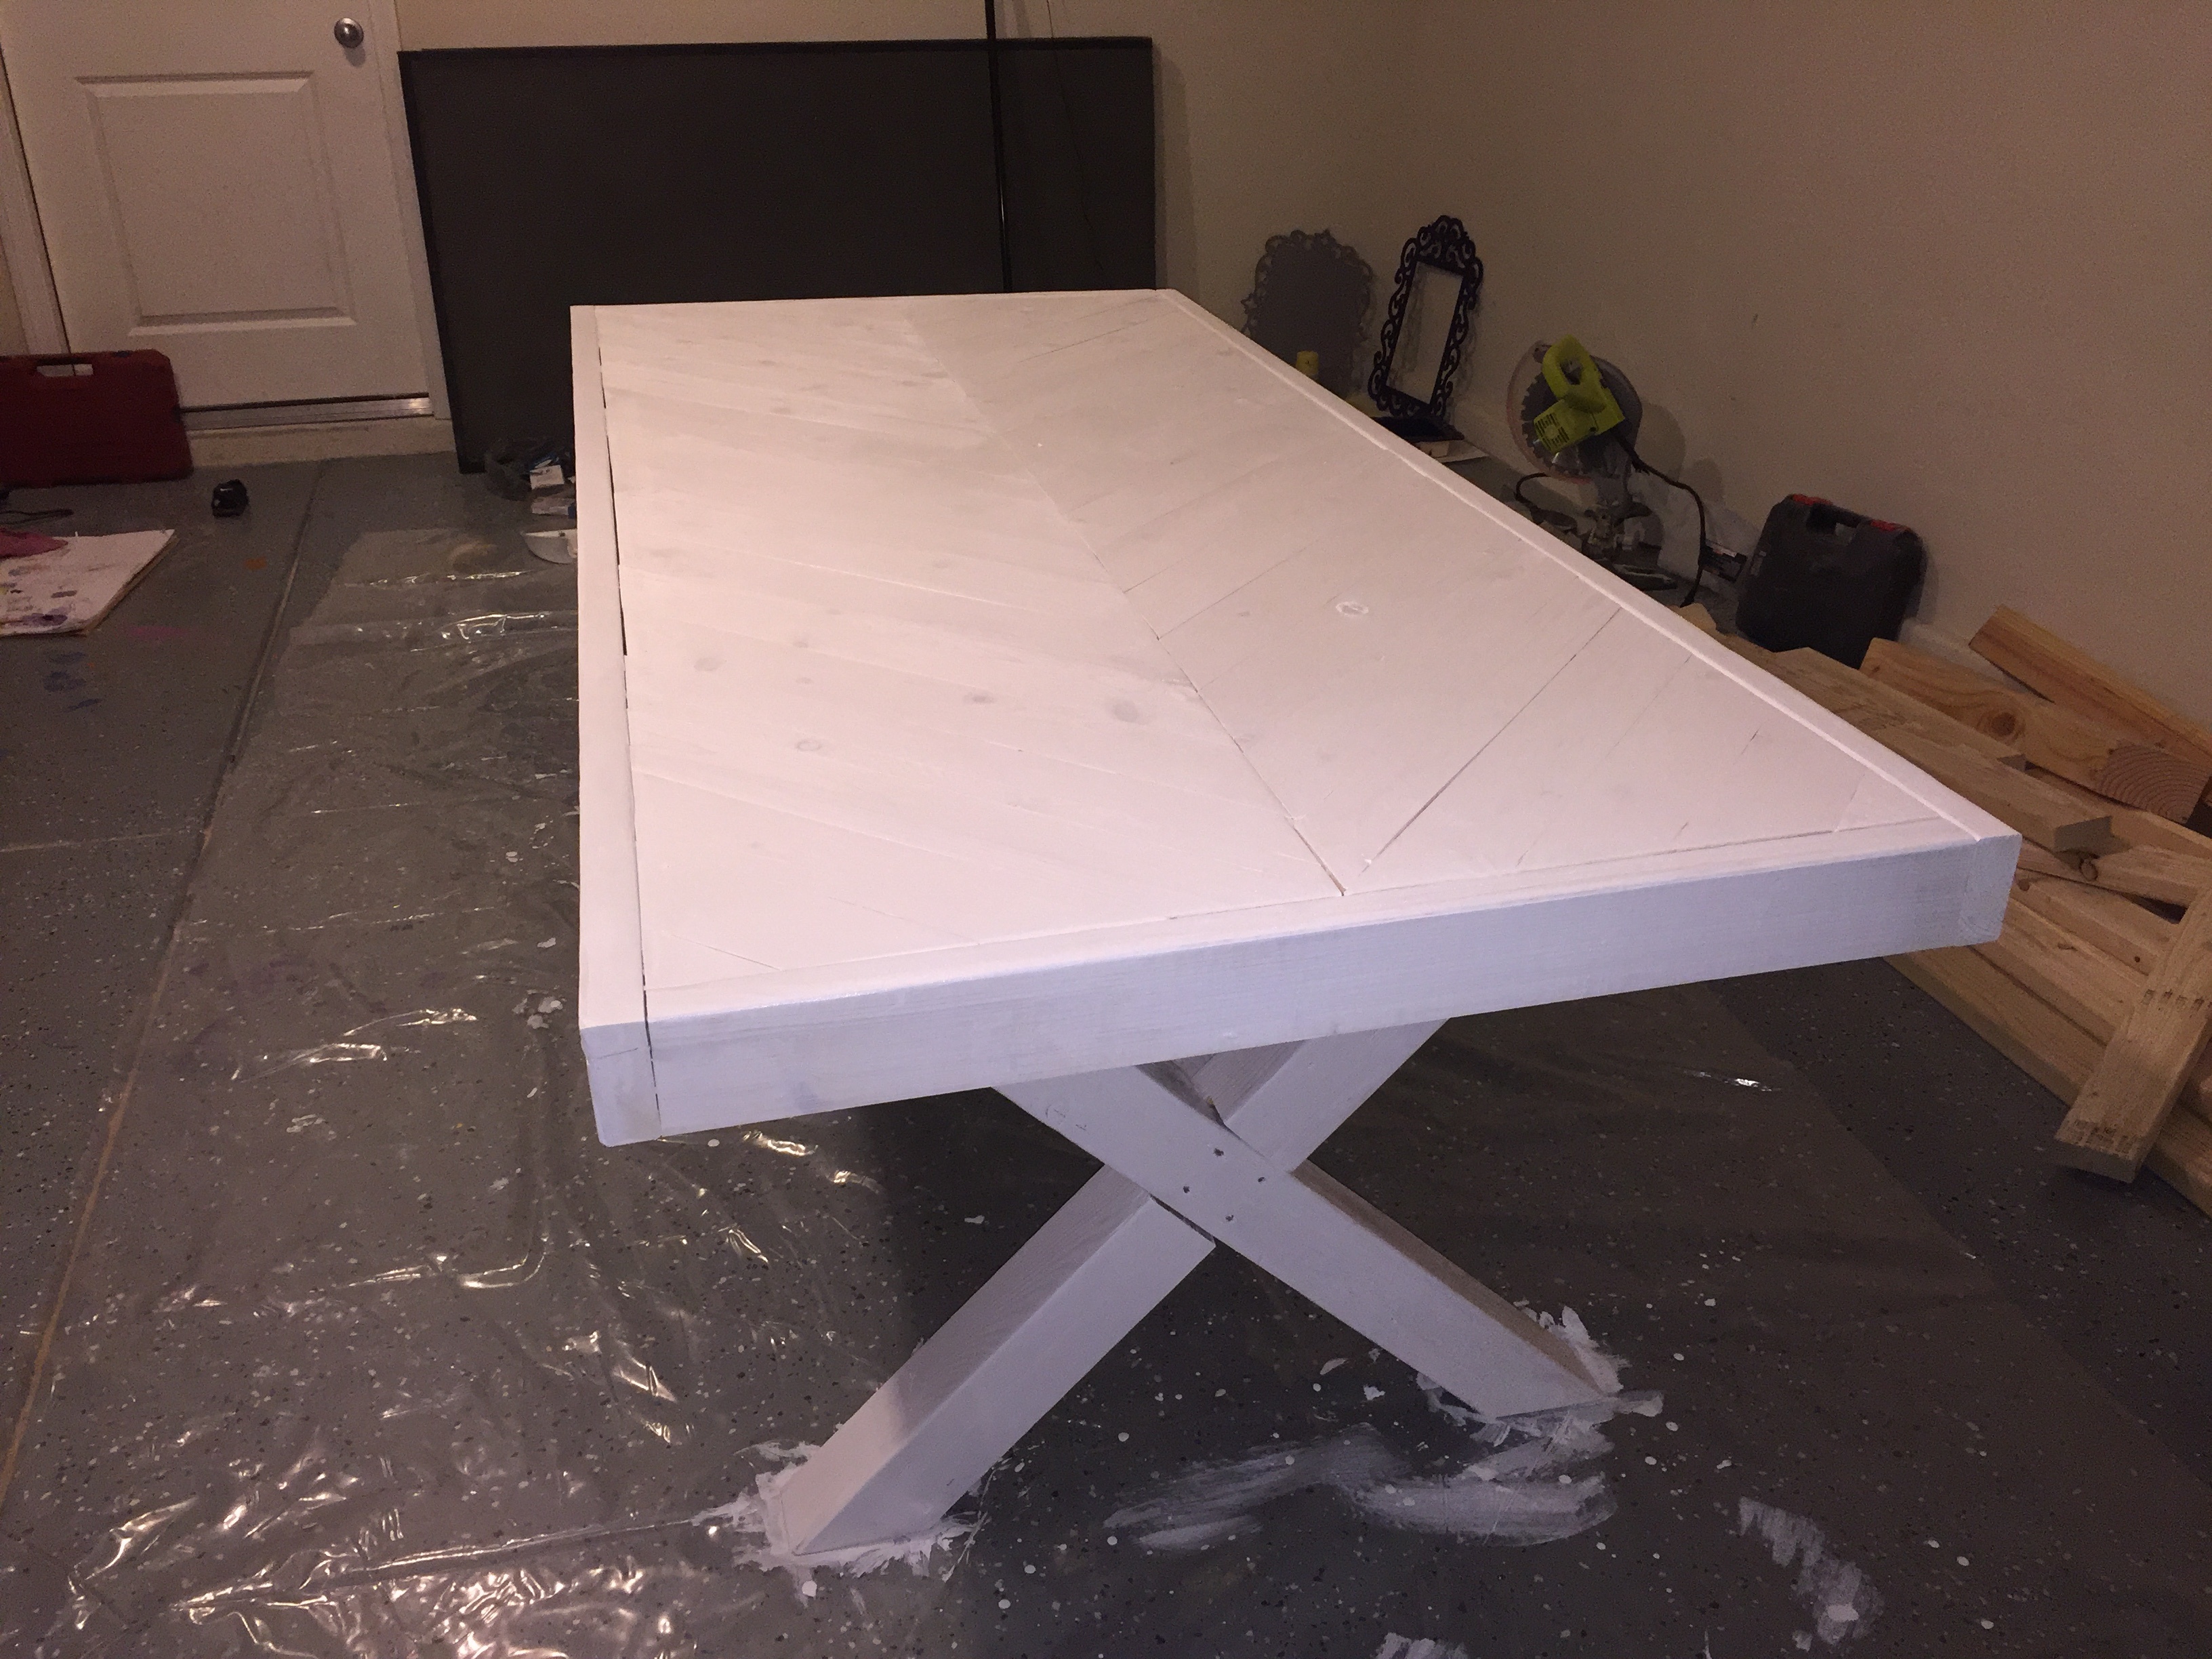
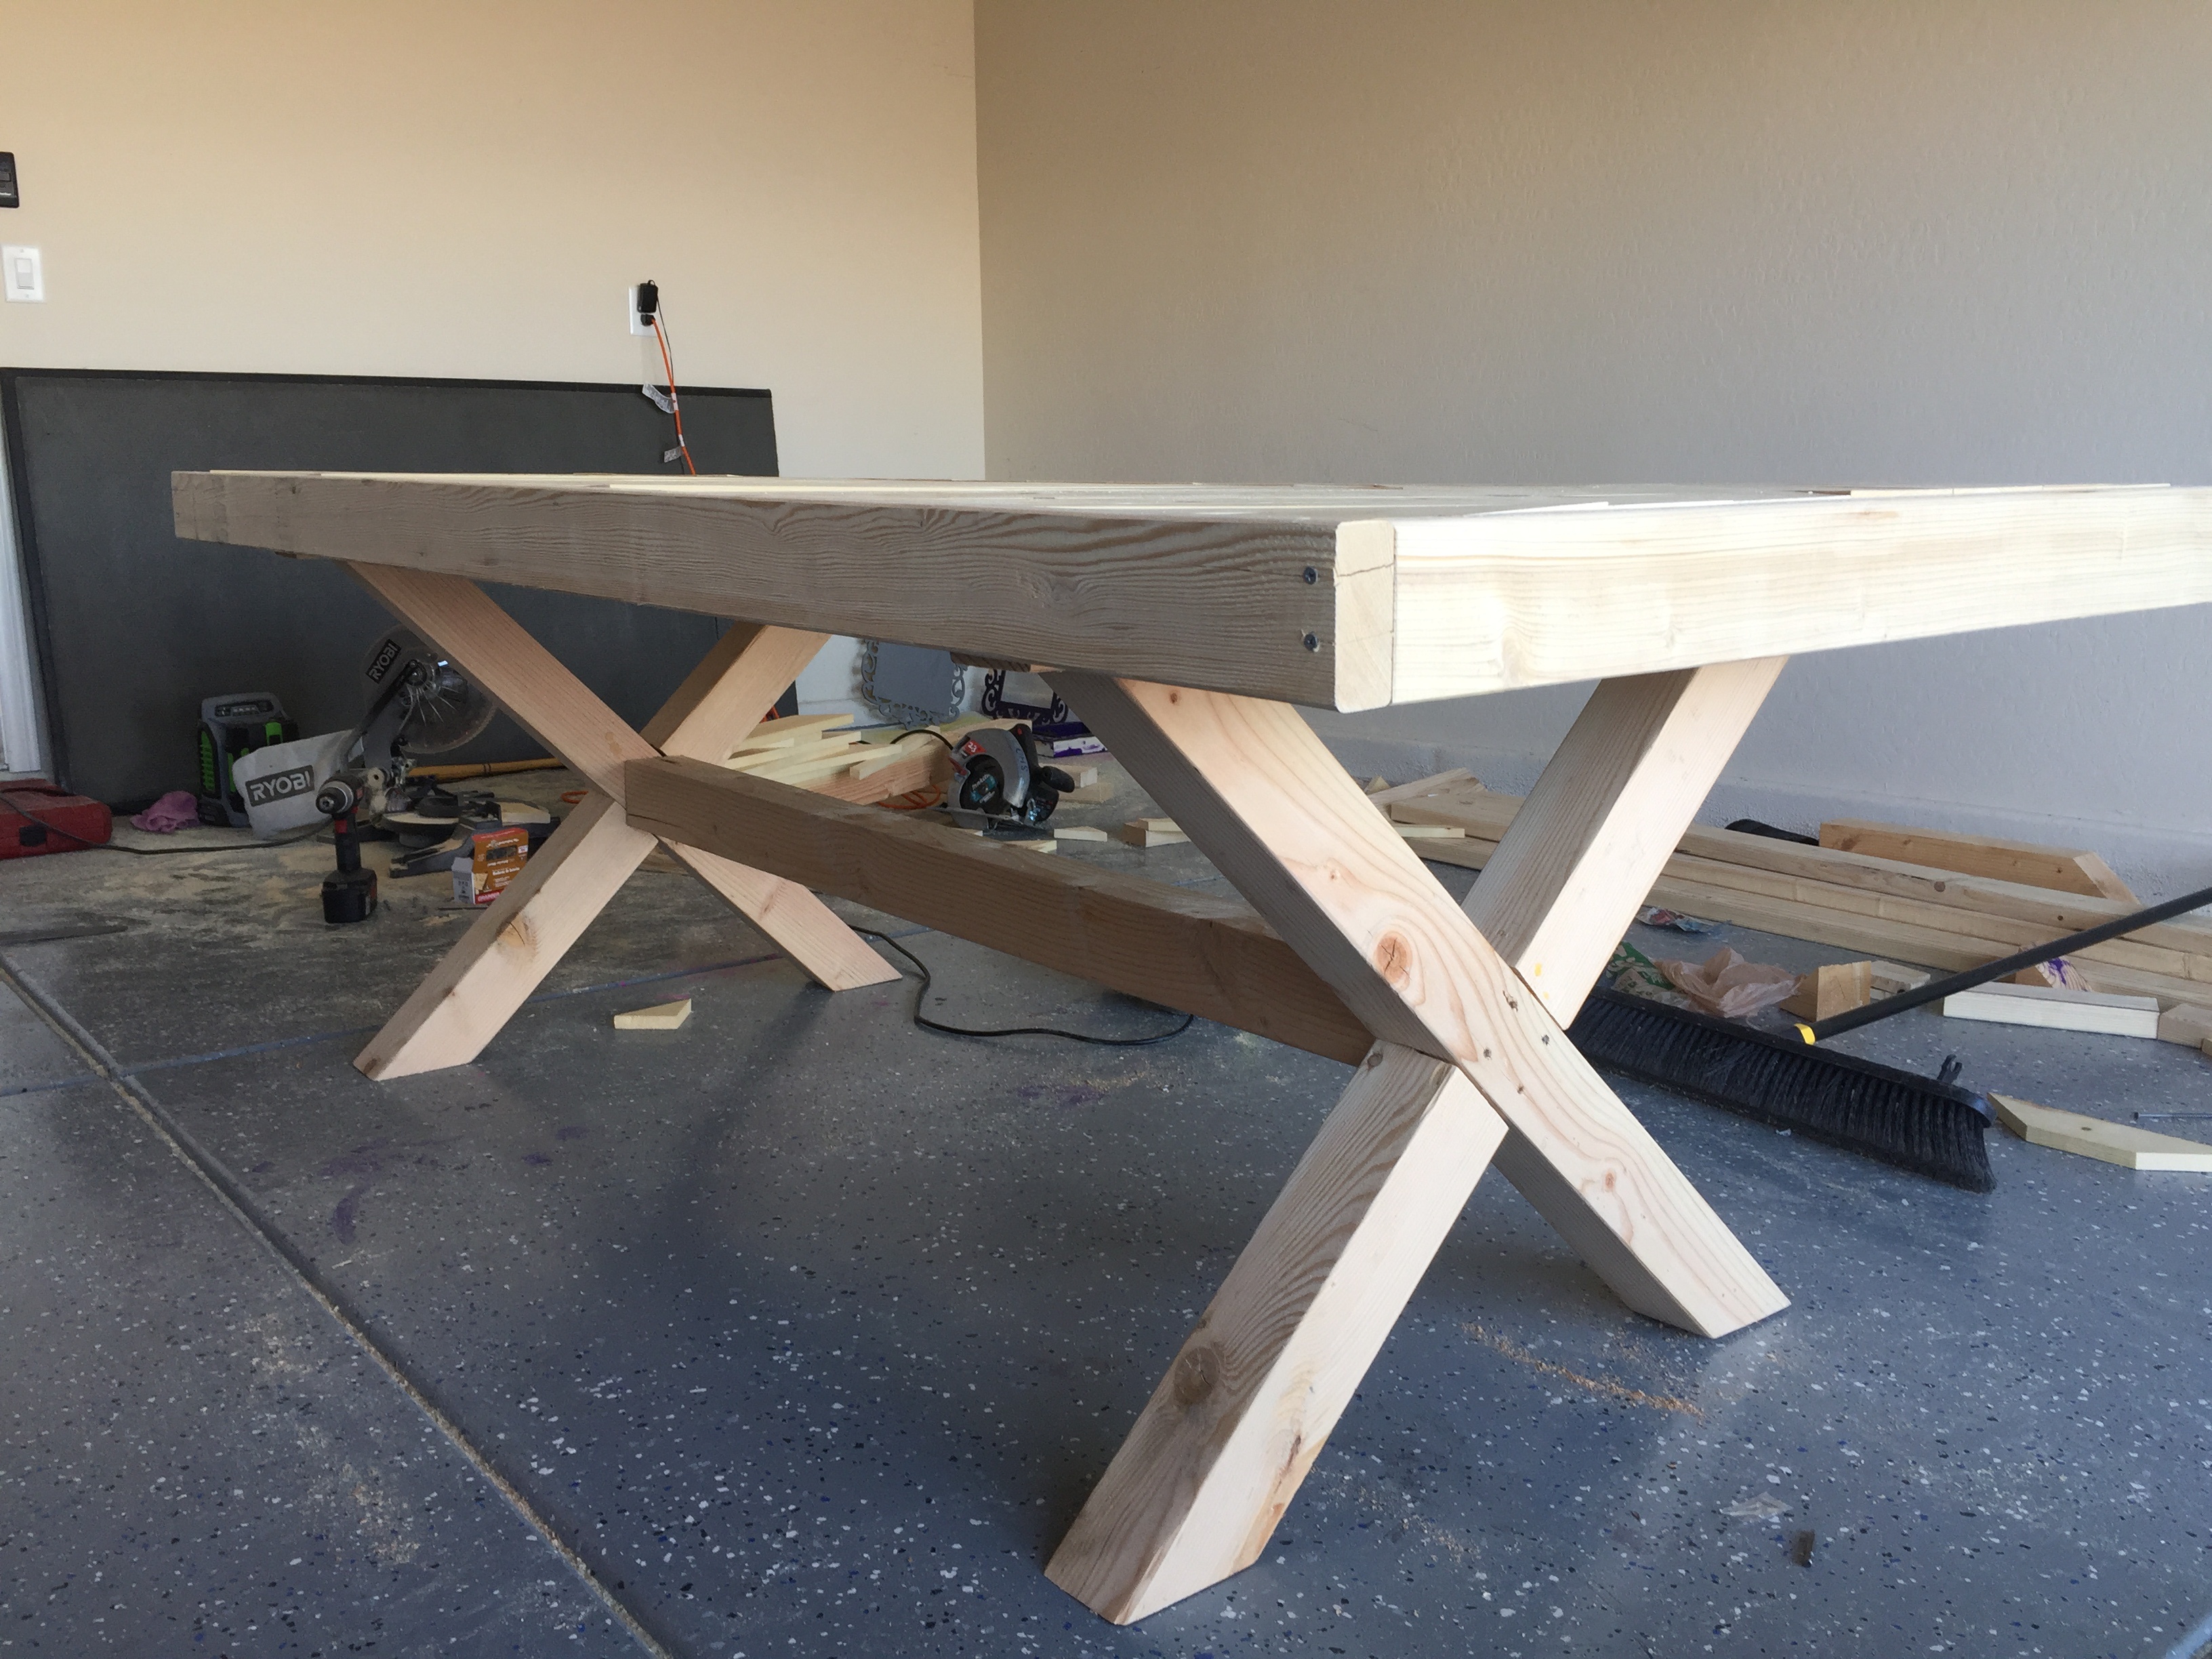 e a multicolored wood flooring and we needed a pop. Plans are great. Barely spent anything to make this. We haven’t had room a dining for a dinning room table for years but we do now and this is going to be the perfect addition to our new home. We are also adding a glass top.
This looks great! Thanks for sharing. The white stain was a great choice for this table.
I built one out of Honduran mahogany. Messy backyard (I know). Finished with just teak oil. Very pleased with results!
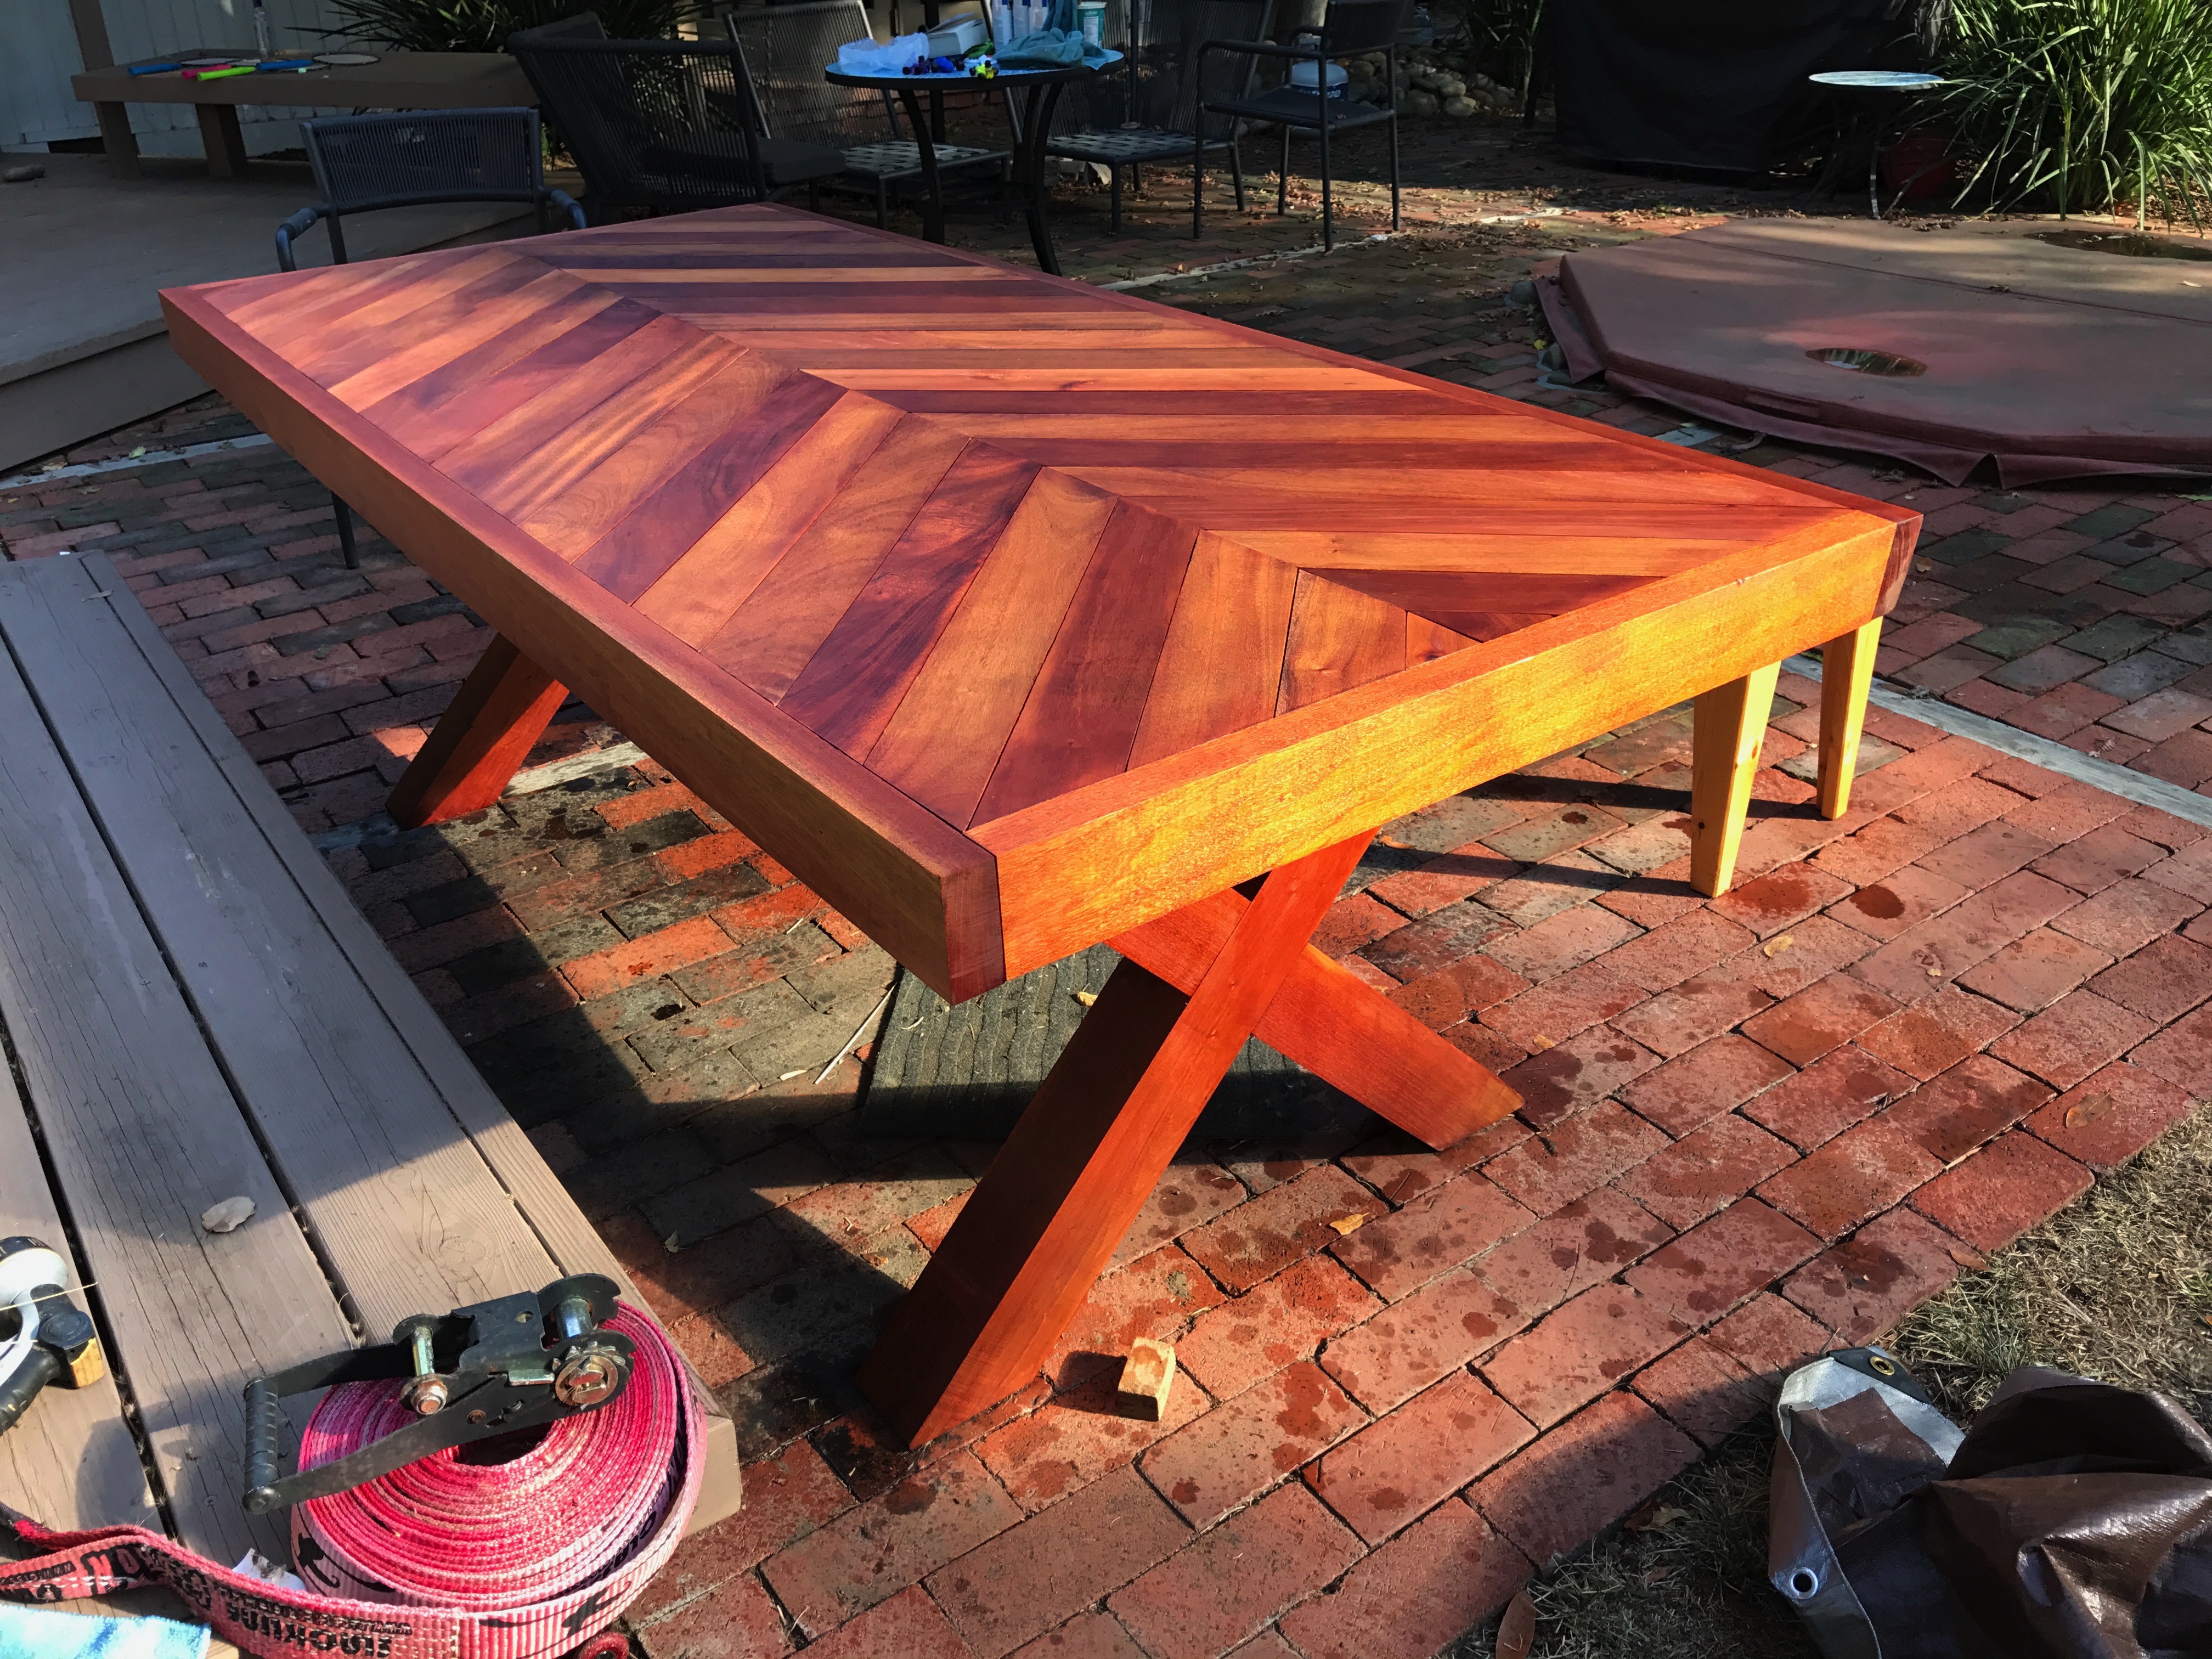
That looks great! Thanks for sharing.
My wife and I had a great time putting this together. Great plans, thank you!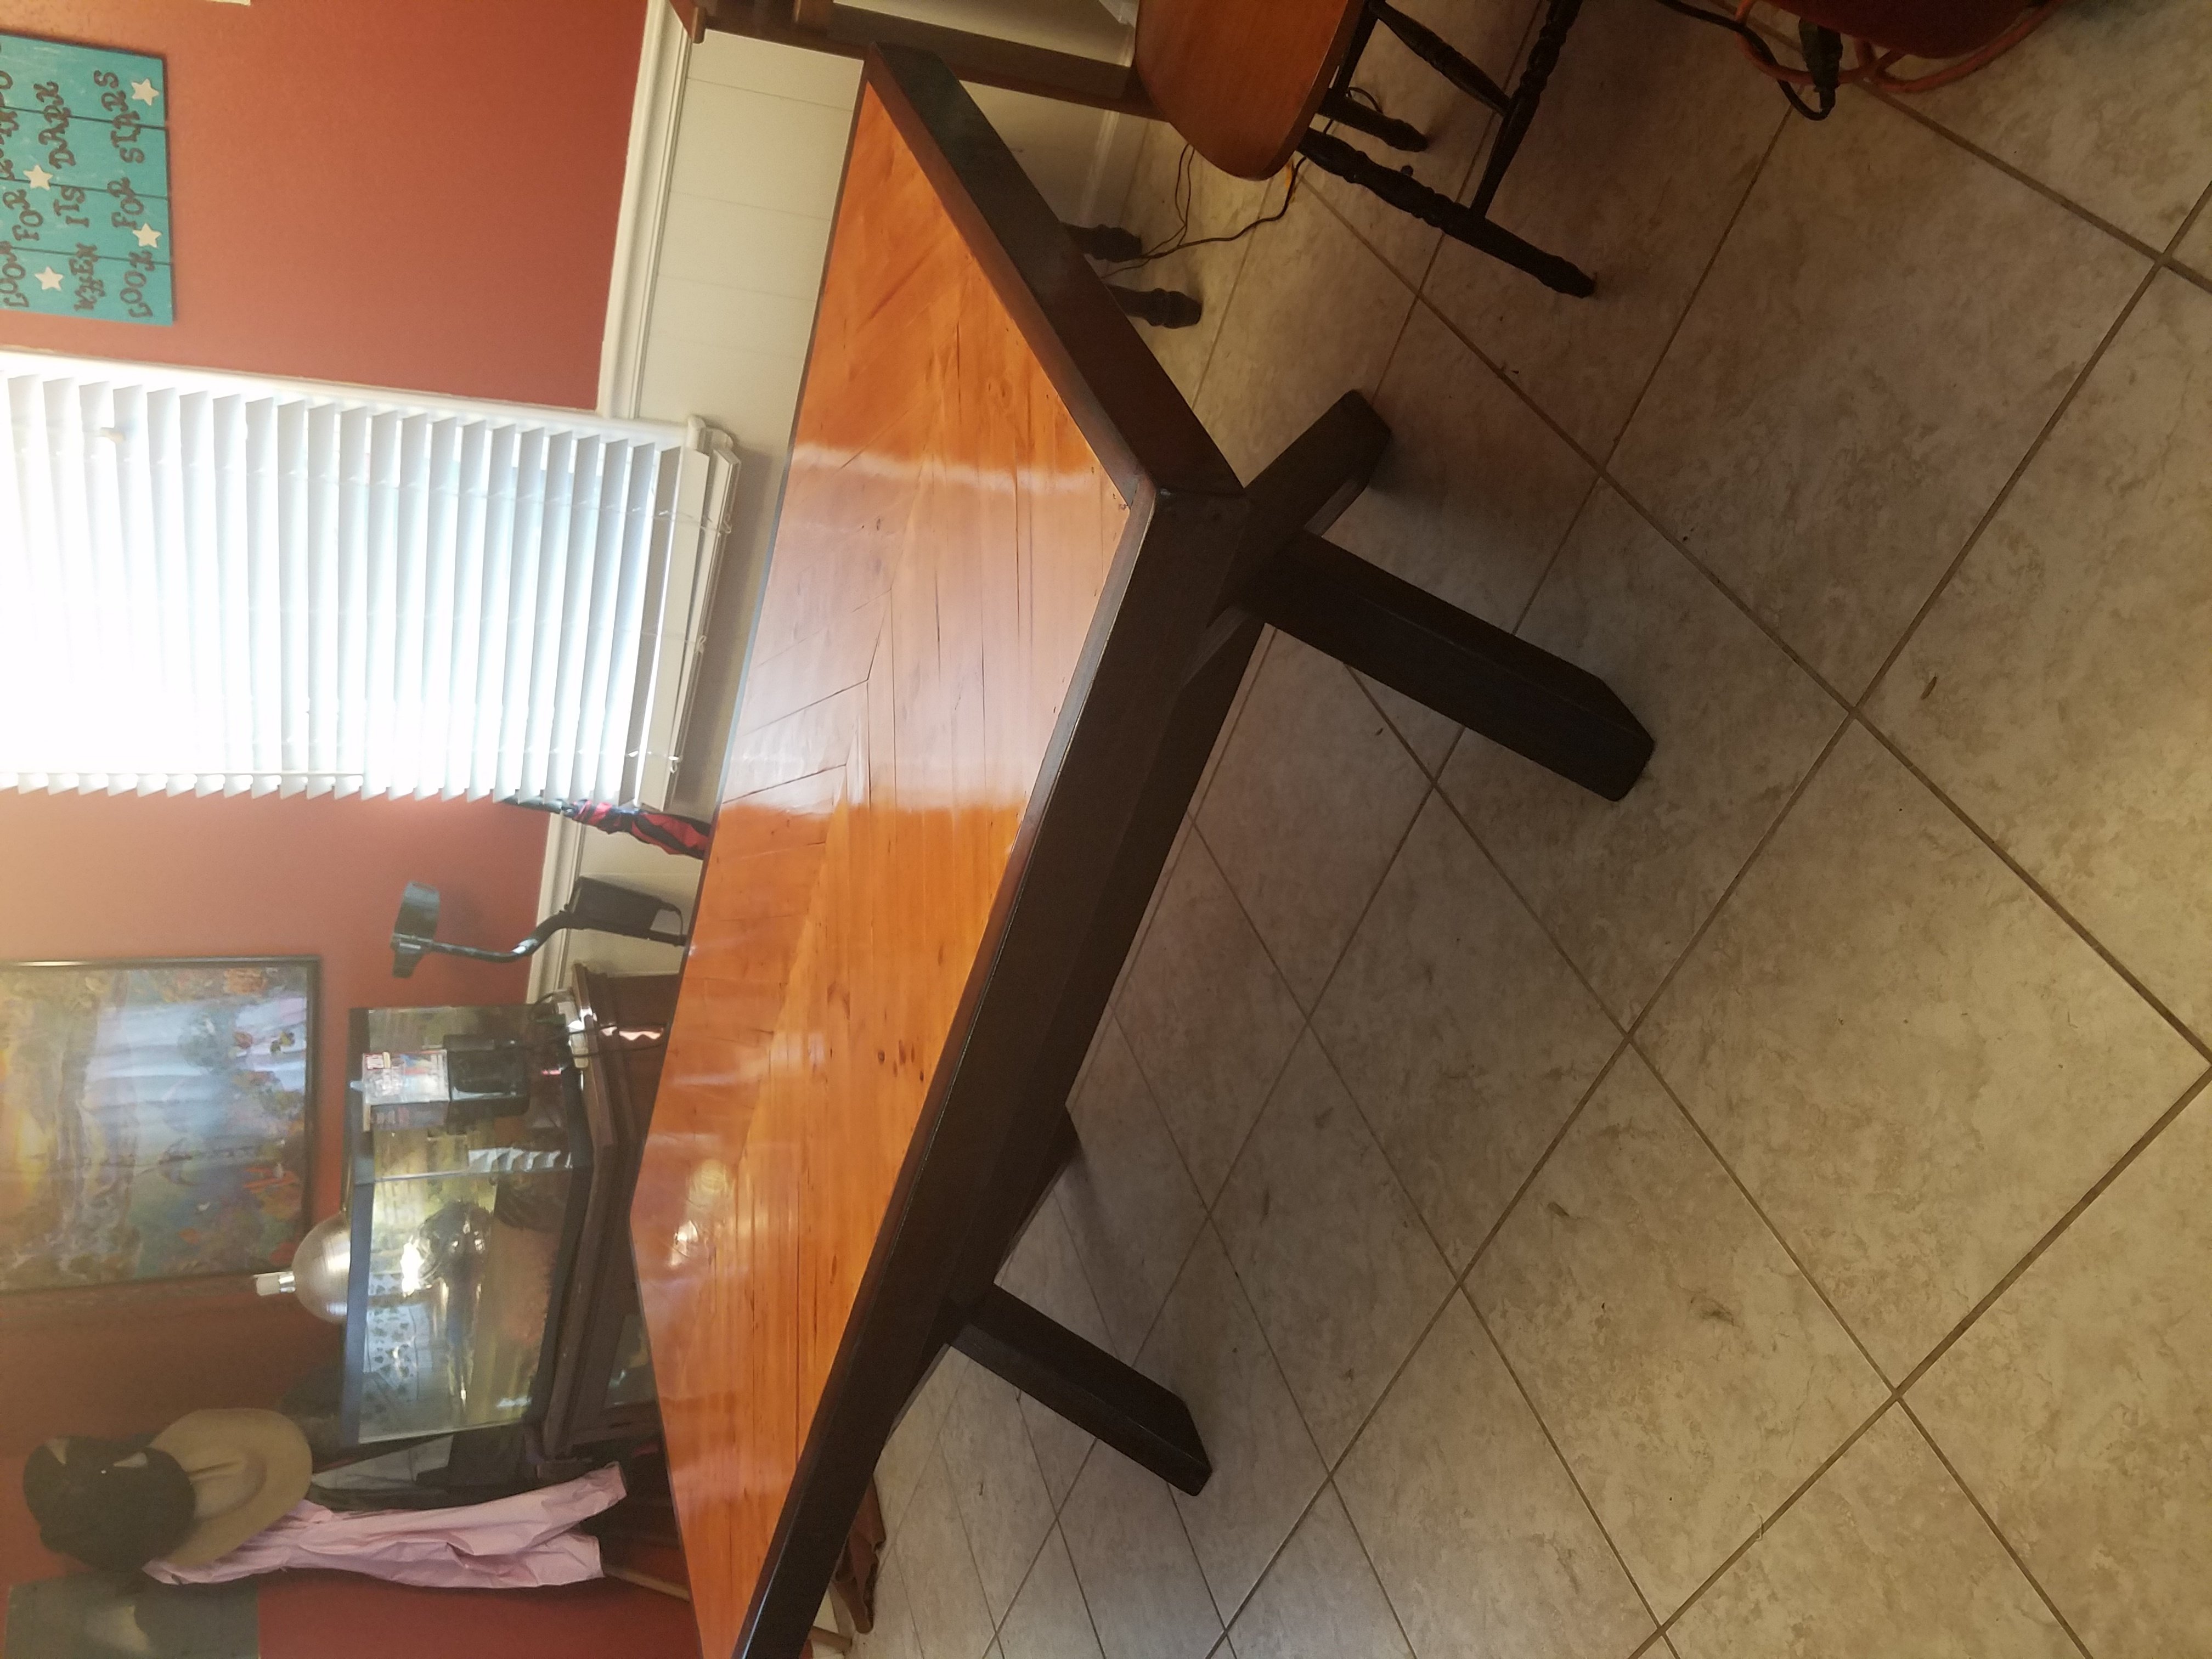
That came out beautiful! Glad you two had a good time building it, that’s the whole point. Thanks for sharing the photo.
My wife and I had a great time putting this together. Great plans, thank you.
Looks very nice. For those who have built this, have the herringbone boards started developing gaps between the boards, and how much?
I’m considering using a slightly modified version of this for indoors.
Hey Guys! Just finished the construction and getting ready to sand and stain. Does anyone have recommendations for wood putty? I was thinking of filling in all of the gaps with it. Thoughts?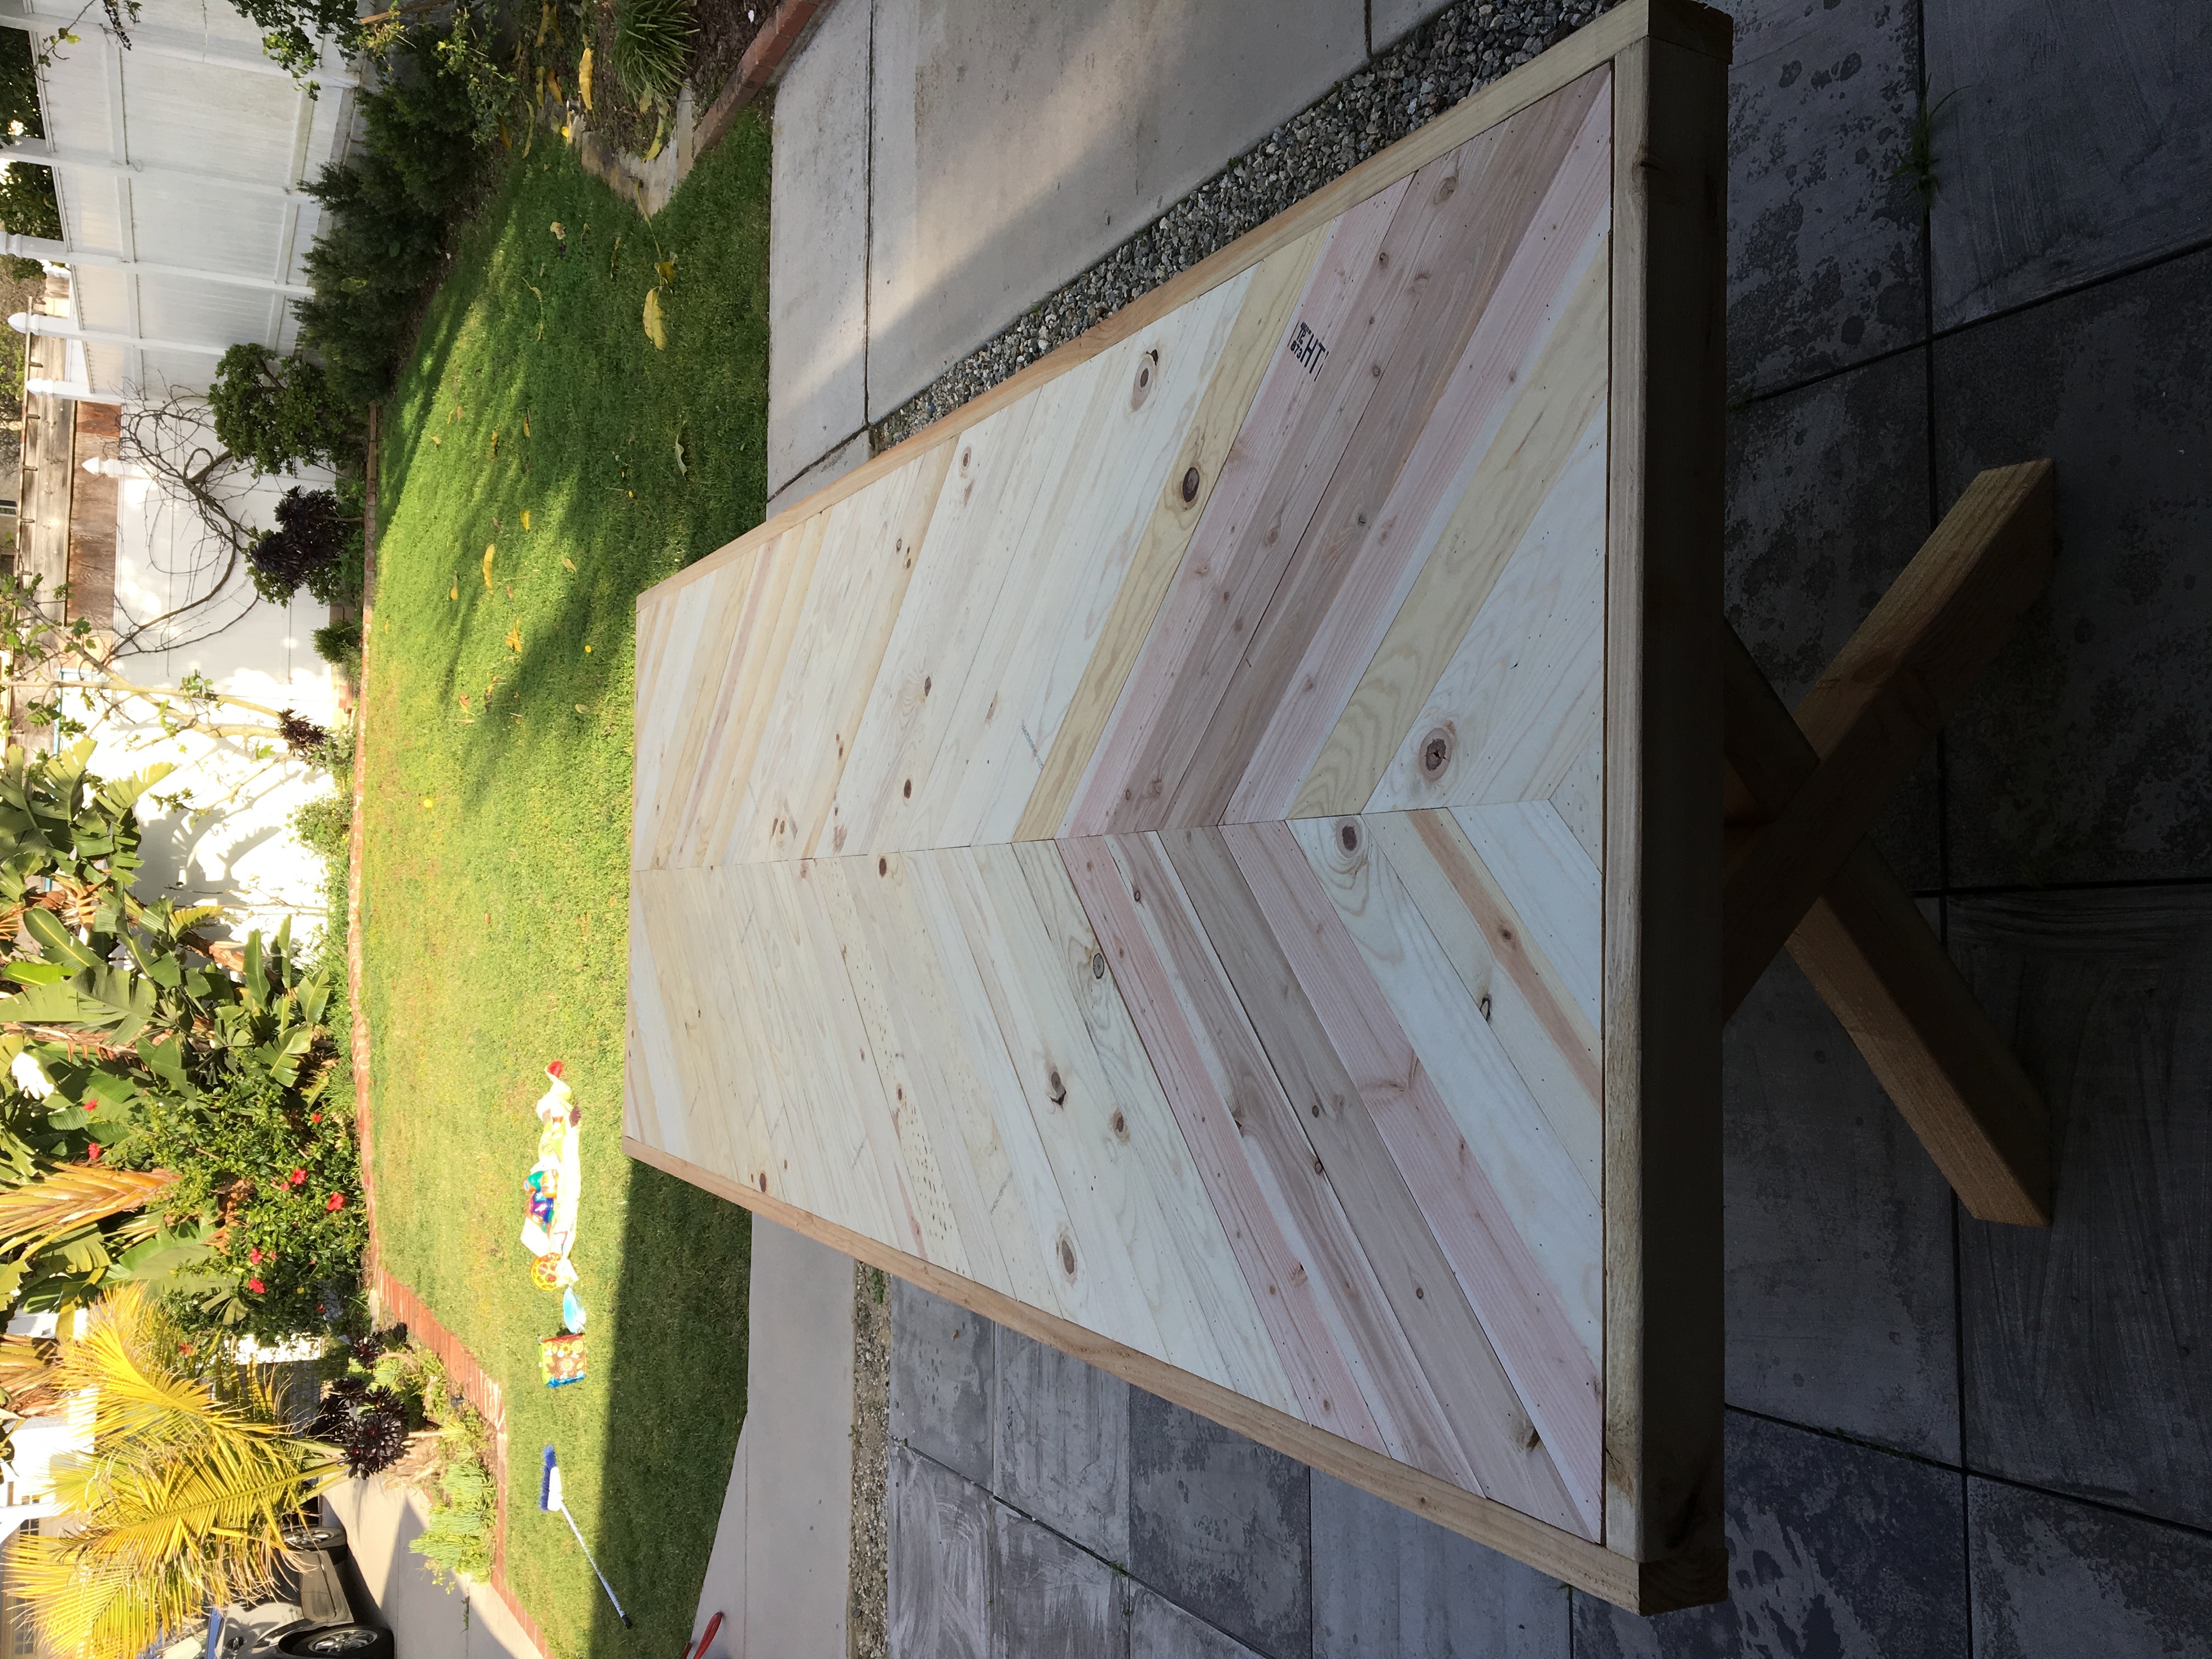
Would I be able to use a galvanized pipe for the brace?
Thanks for the plans! The table was a perfect addition to our cottage on the lake. I scaled the plans a bit and made a matching bench. Quite a fun project!
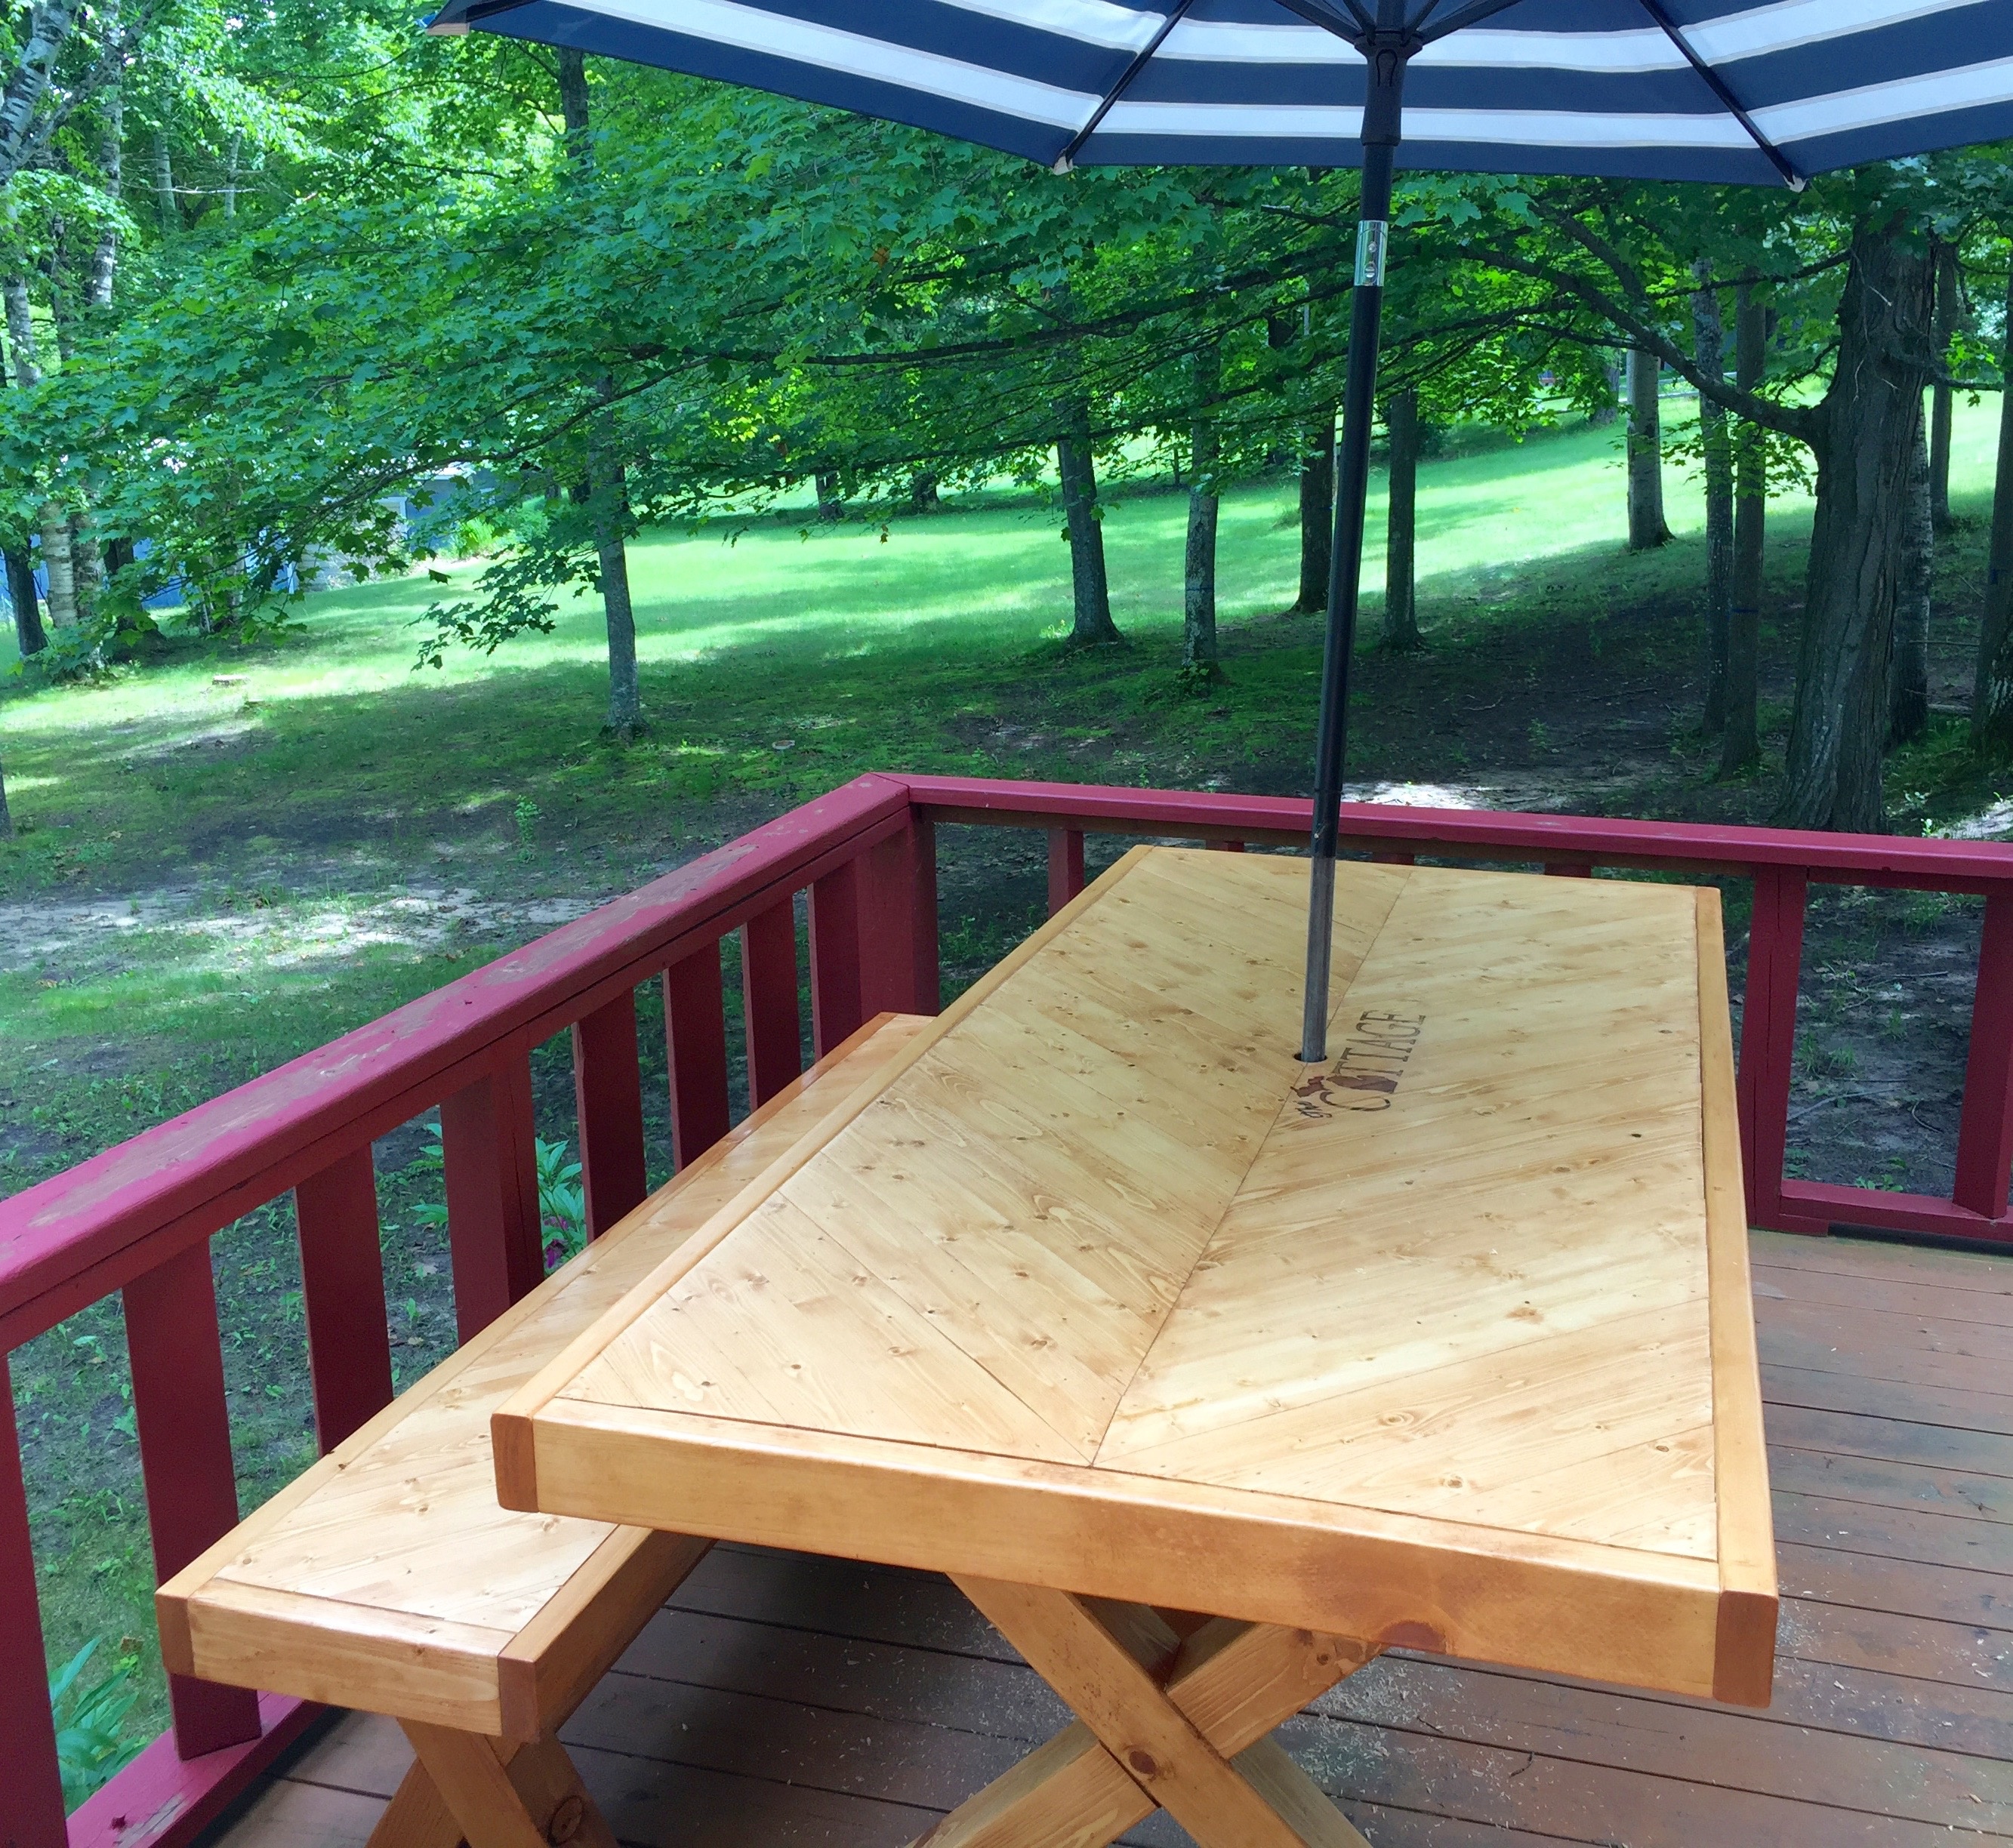
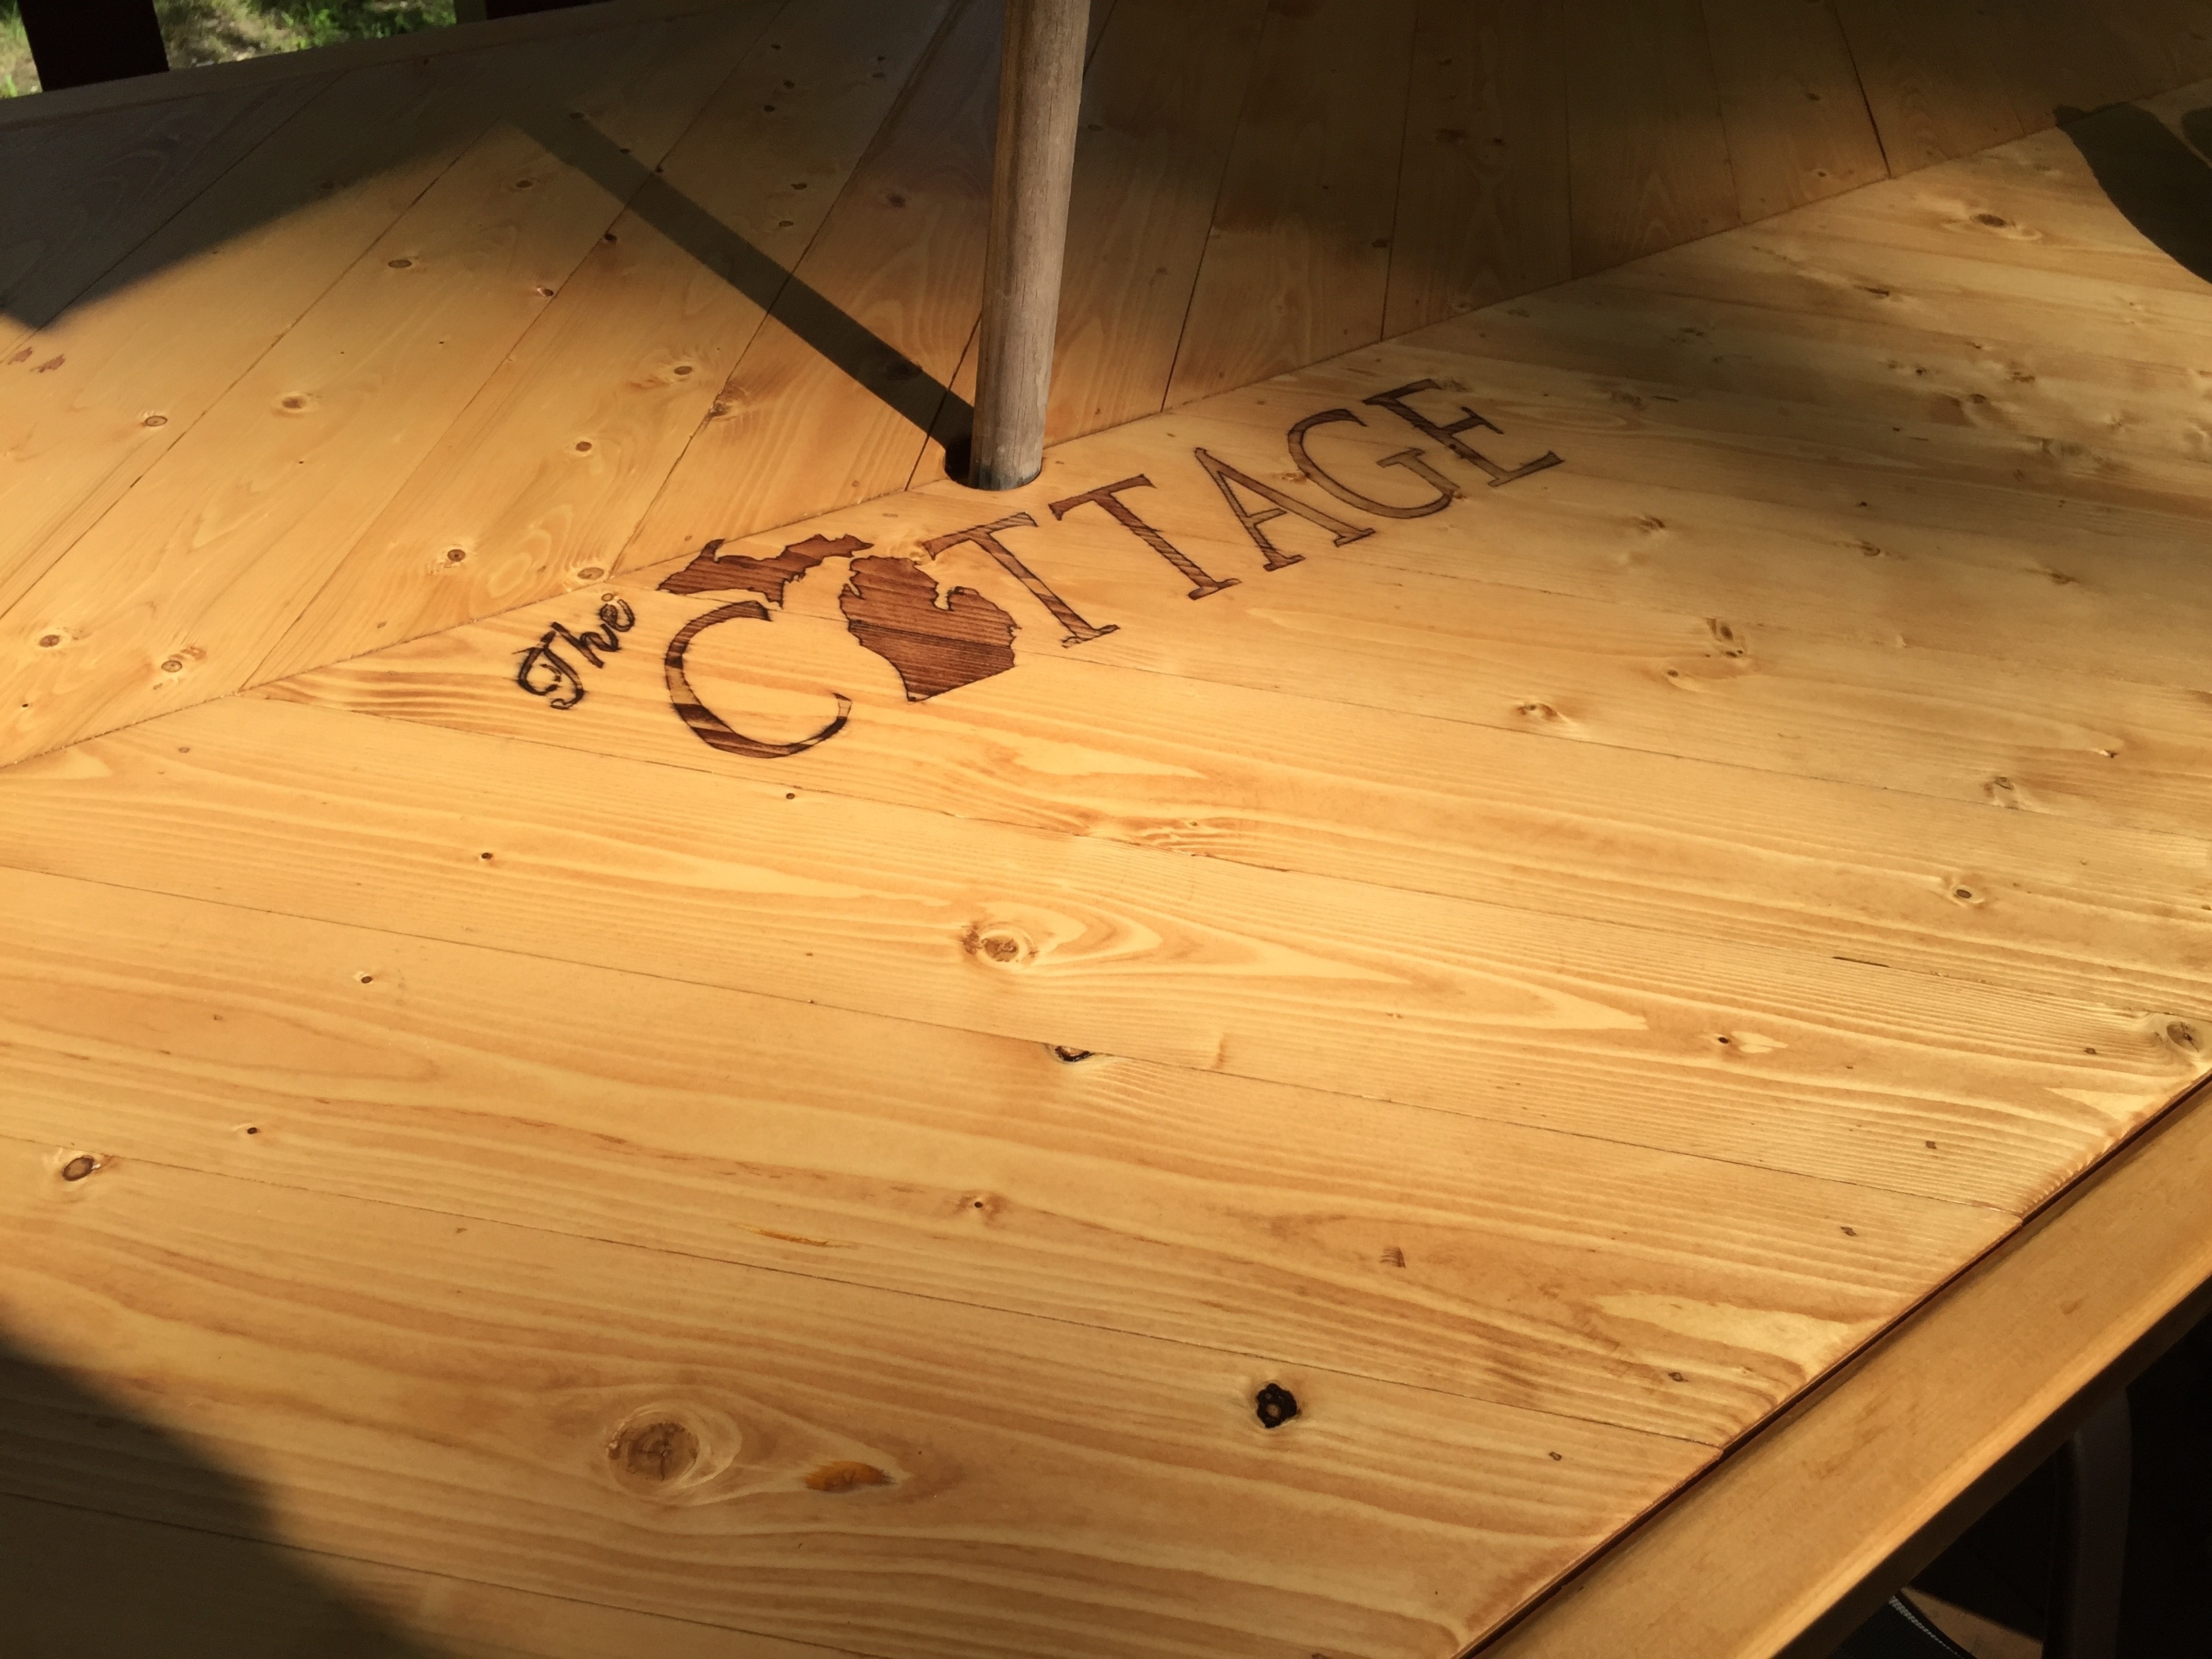
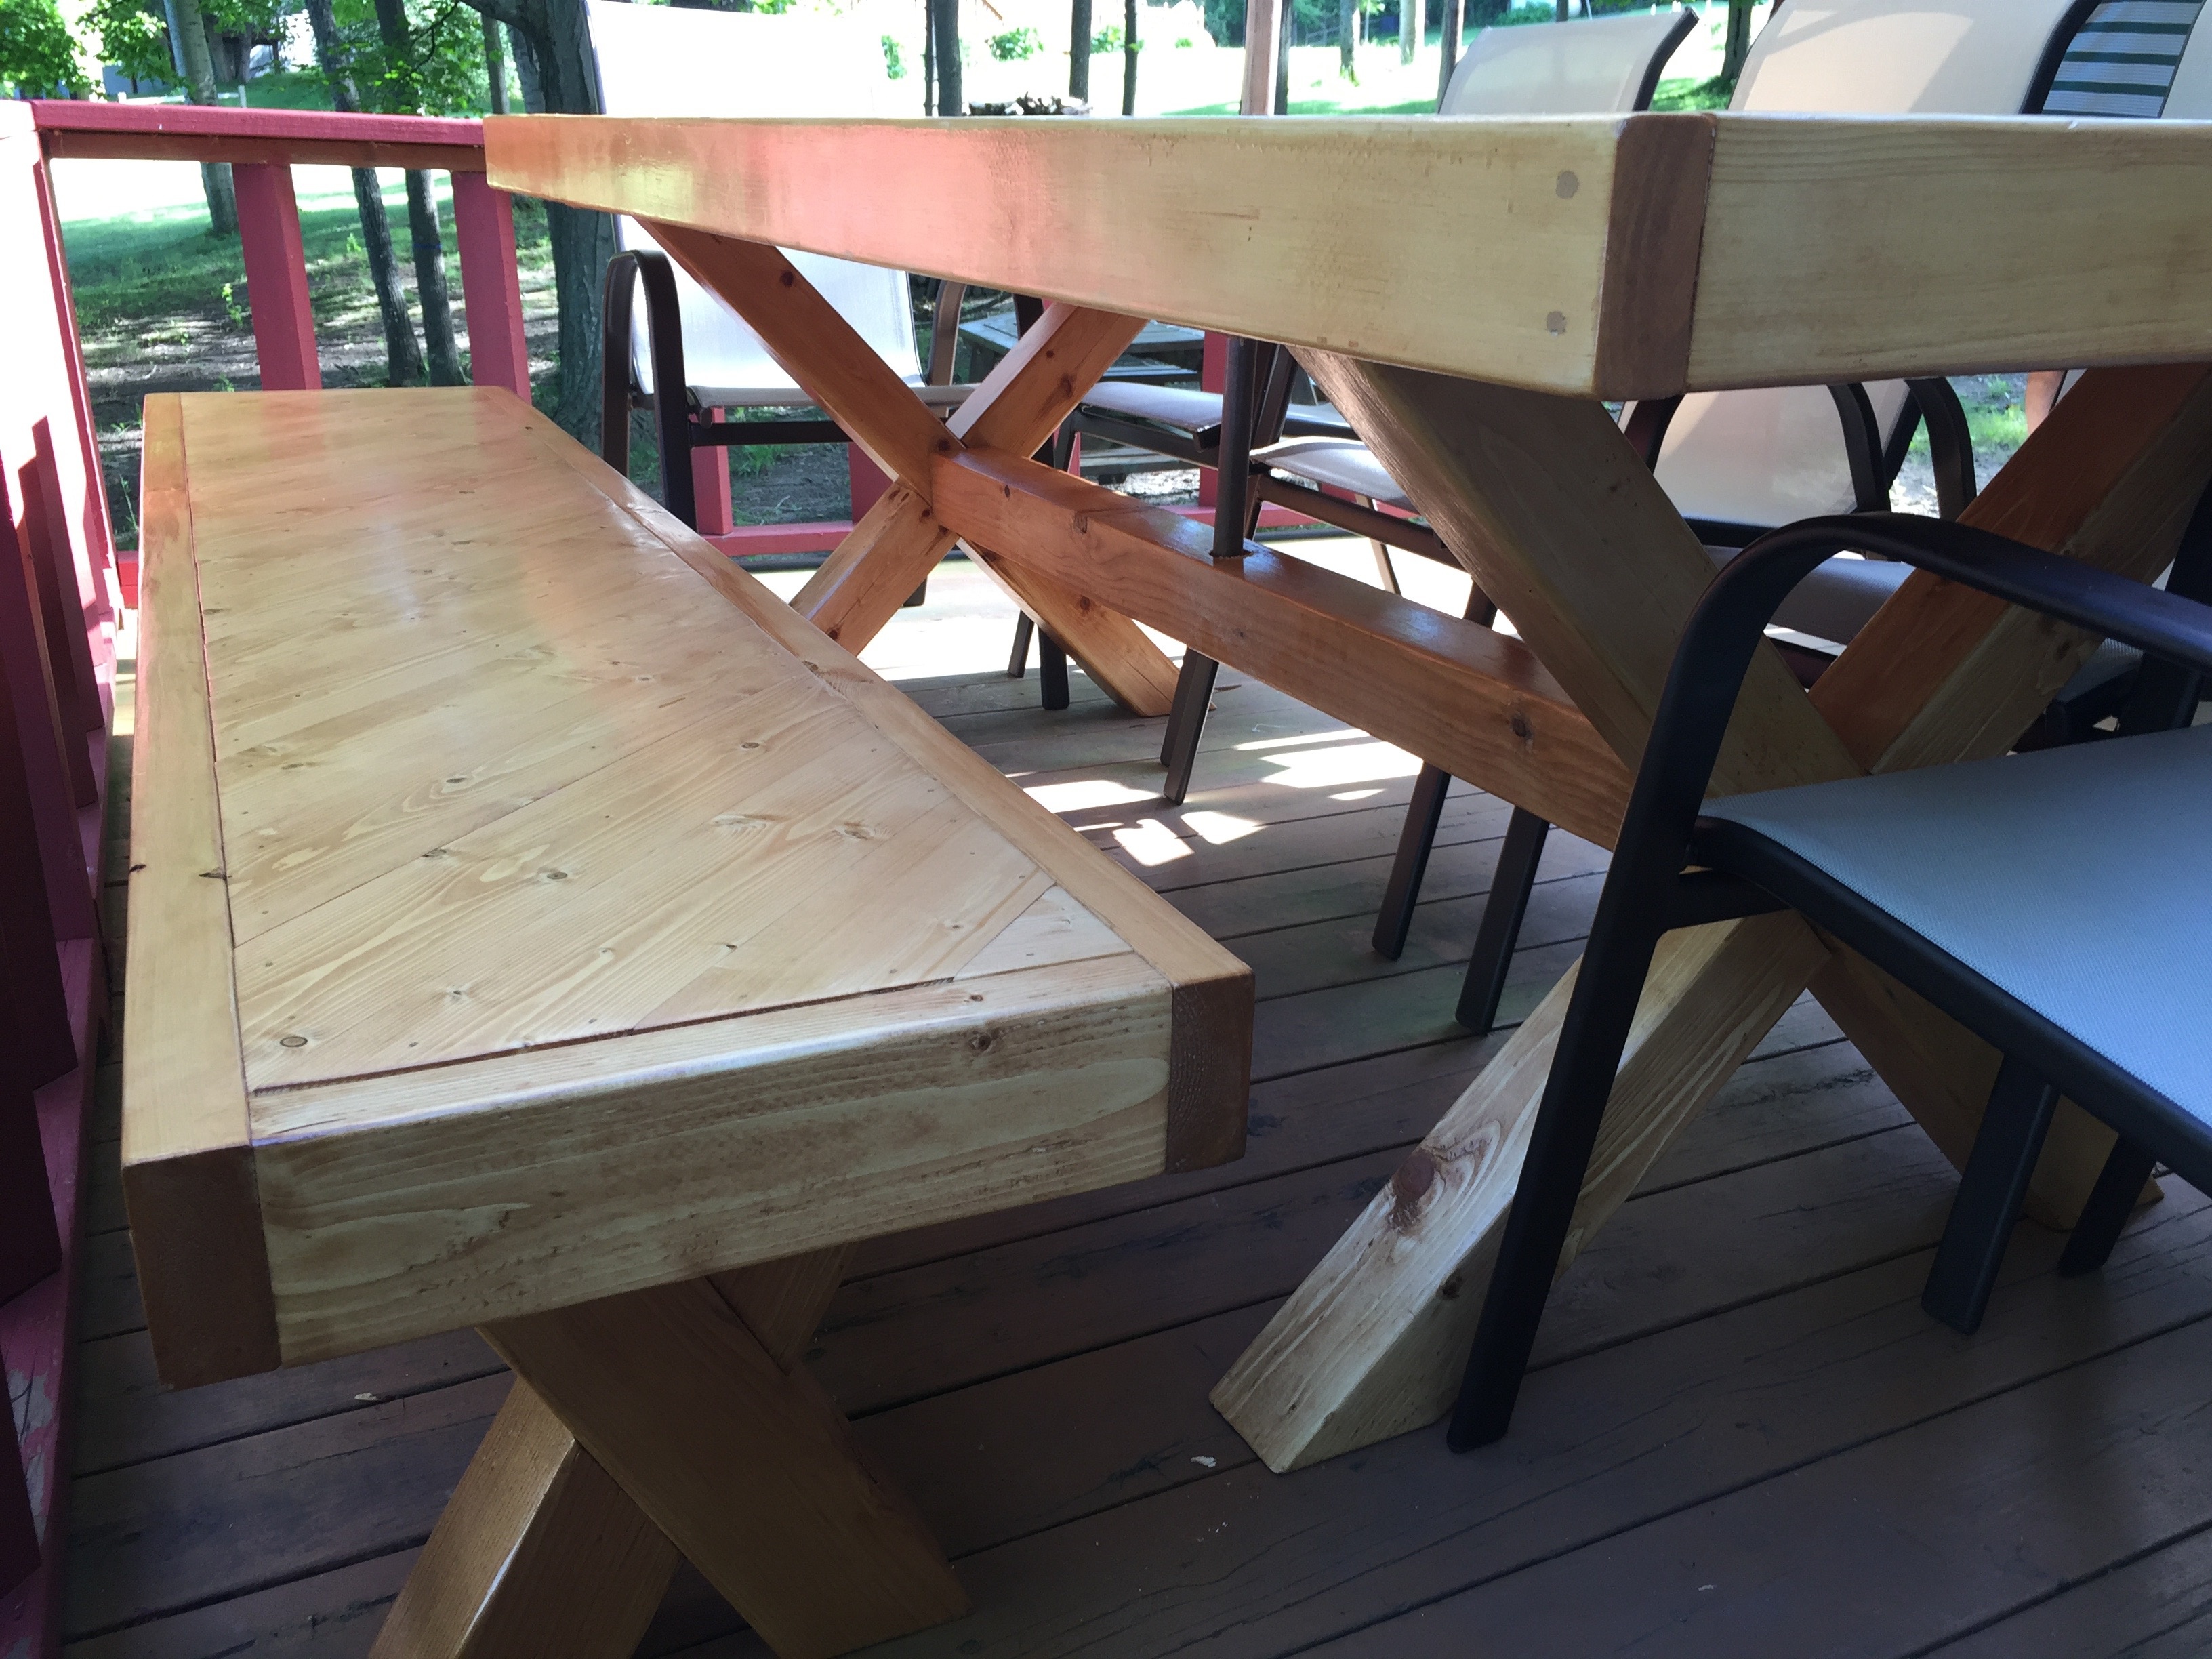
Ben. Could you share your bench plans. I would like to do the same.
Hi I love the legs on this but would love a concrete top, is thay something that would be possible?
why are you using untreated pine for the 4×4’s? does it make a diference if treated or untreated? I could understand if It was treated lumber you are using for a surface you eat off of Thank you sharing the plans. I look forward to making this table.
I went a little different. I mixed cedar and northern pine two tone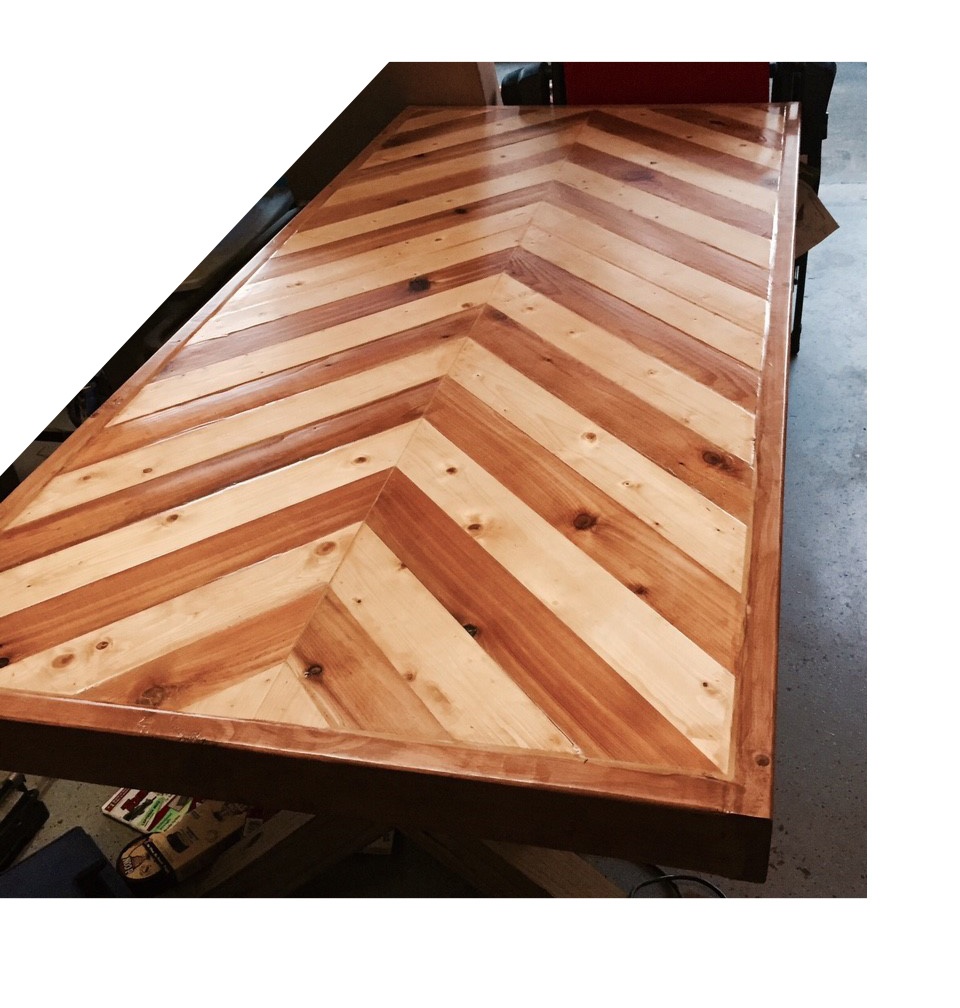
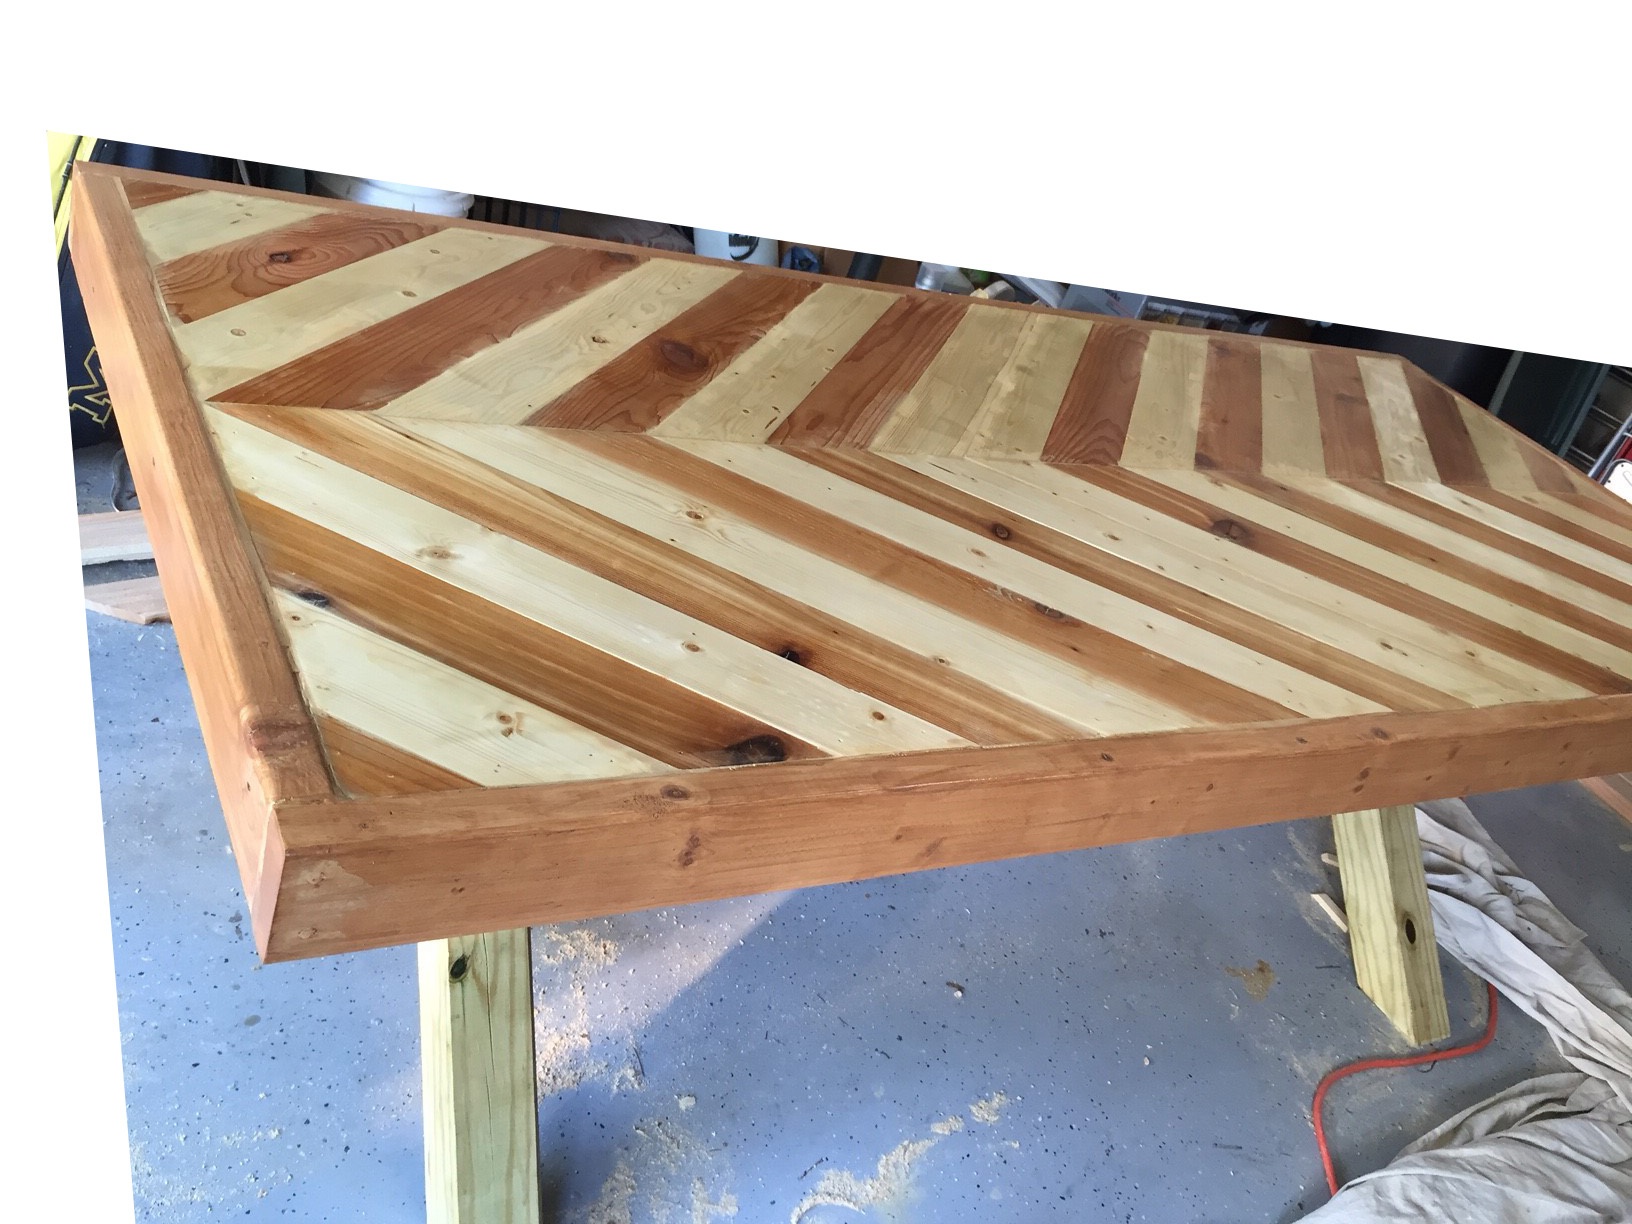
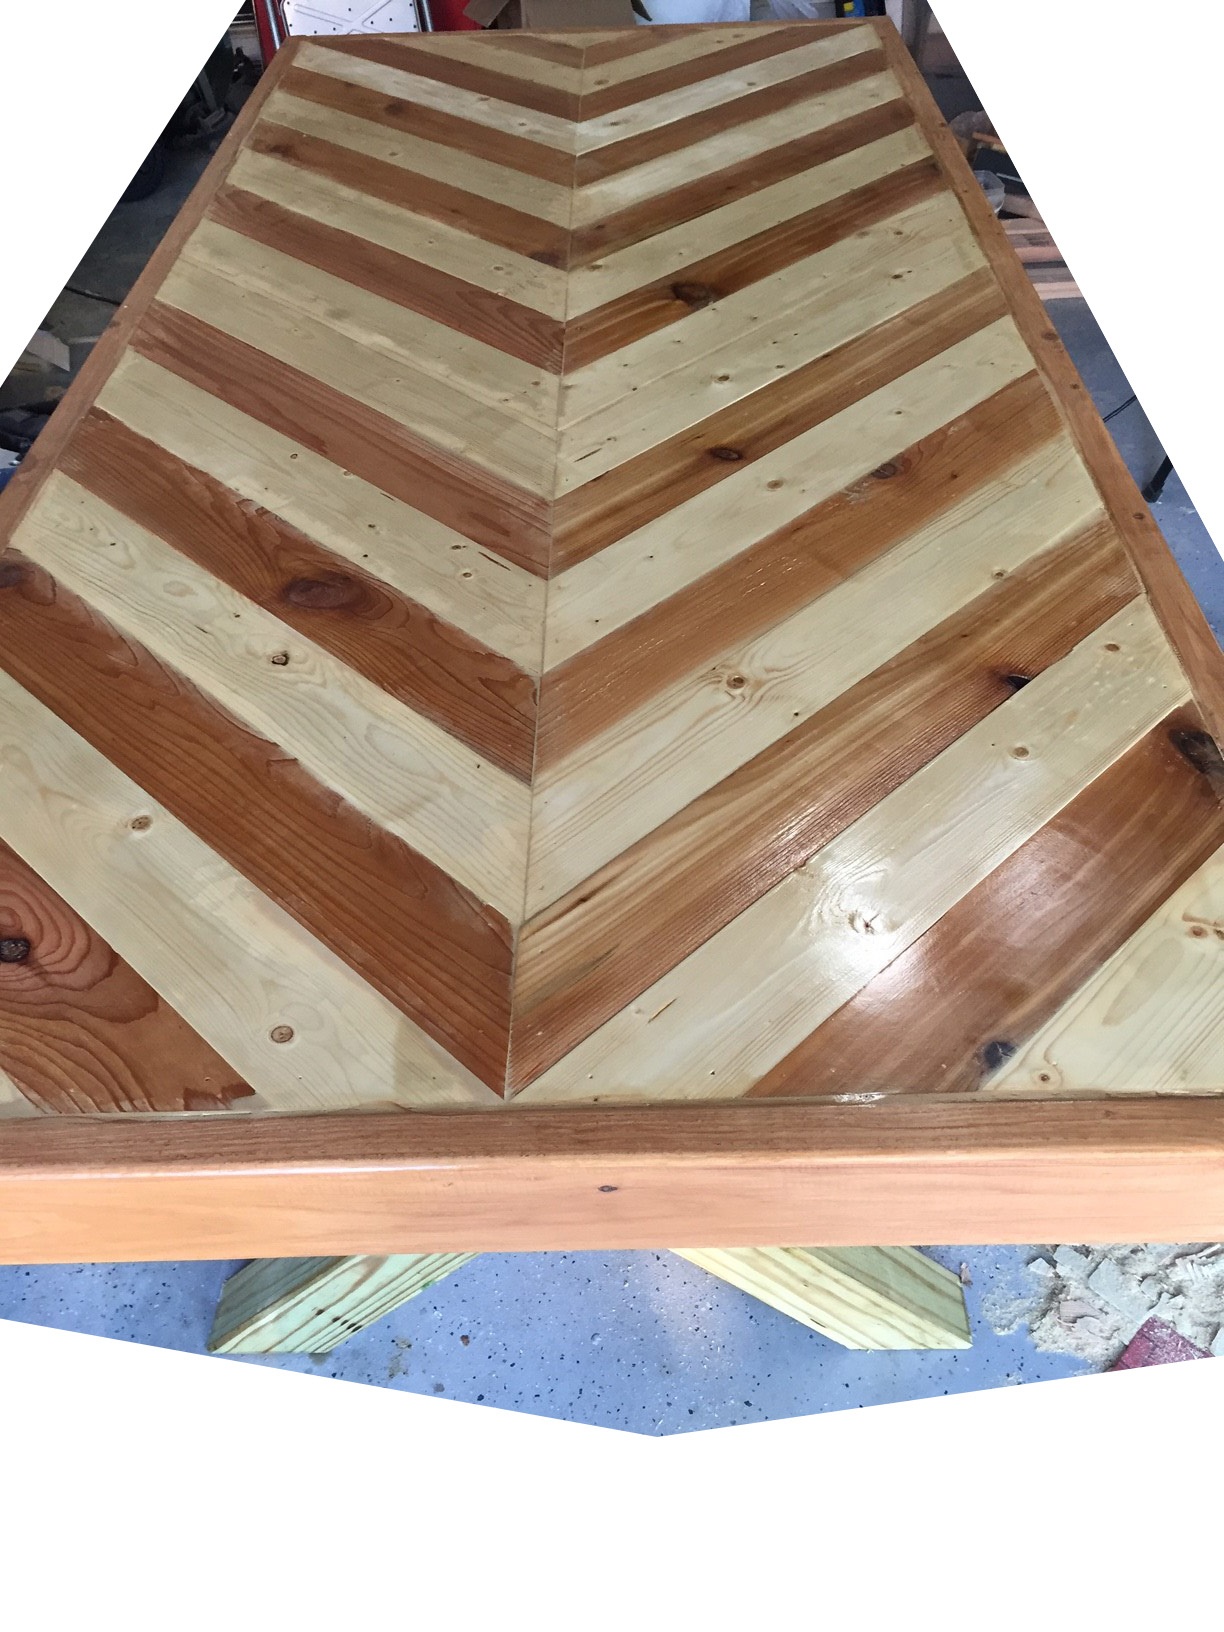 .
.
We are making this table for our indoor dining table. Can you recommend a good indoor stain and protectant that would give a similar color but protect the table from everyday use and kids?! Thanks. Ps…thanks for the plans!
Thanks for the plans! i dis some small changes (a bit longer, and 45 degrees ends on the 2″ by 4″ on the table borders). What do you typically use to fill gaps in between boards? I ended up using epoxy, but any recommendation is welcomed!
Hello Pablo, i was wondering if you’d be able to send me a picture of your 45° corner angle. Im on step 4 but am curious if it would look better the way you did it
Hello Pablo, I really like the look of your table. How did you attach the table top boards to the frame? I don’t like the idea of the nail heads showing in the top. Did you screw them in from underneath or just fill in the nail holes? Thanks,
Hi Kelvin, thanks for your message. I just glued them to the frame underneath! (since I didn’t like the idea of the nail heads showing up, as you).Rgds!
Just finished staining! We stained is white! Because we hav https://uploads.disquscdn.c… https://uploads.disquscdn.c… e a multicolored wood flooring and we needed a pop. Plans are great. Barely spent anything to make this. We haven’t had room a dining for a dinning room table for years but we do now and this is going to be the perfect addition to our new home. We are also adding a glass top.
I went a little different. I mixed cedar and northern pine two tone. Because of the width of boards I had to rip a partial board in middle of table. I still like it, and no complaints yet. https://uploads.disquscdn.c… https://uploads.disquscdn.c… https://uploads.disquscdn.c… .
What adjustments would be needed to make the x legs for a 48″ wide table?
Thanks for the plans, they were well done. I added benches, made everything last year and left outside to get weathered. They are stained and finished now and I think look great on our patio. https://uploads.disquscdn.c… https://uploads.disquscdn.c…
I have the whole table built and ready for finishing. Just curious if you recommend waiting to seal and stain with pressure treated wood? The plans are great, thank you!
*Chevron. This is herringbone: https://uploads.disquscdn.c…