

Sawhorse Coffee Table
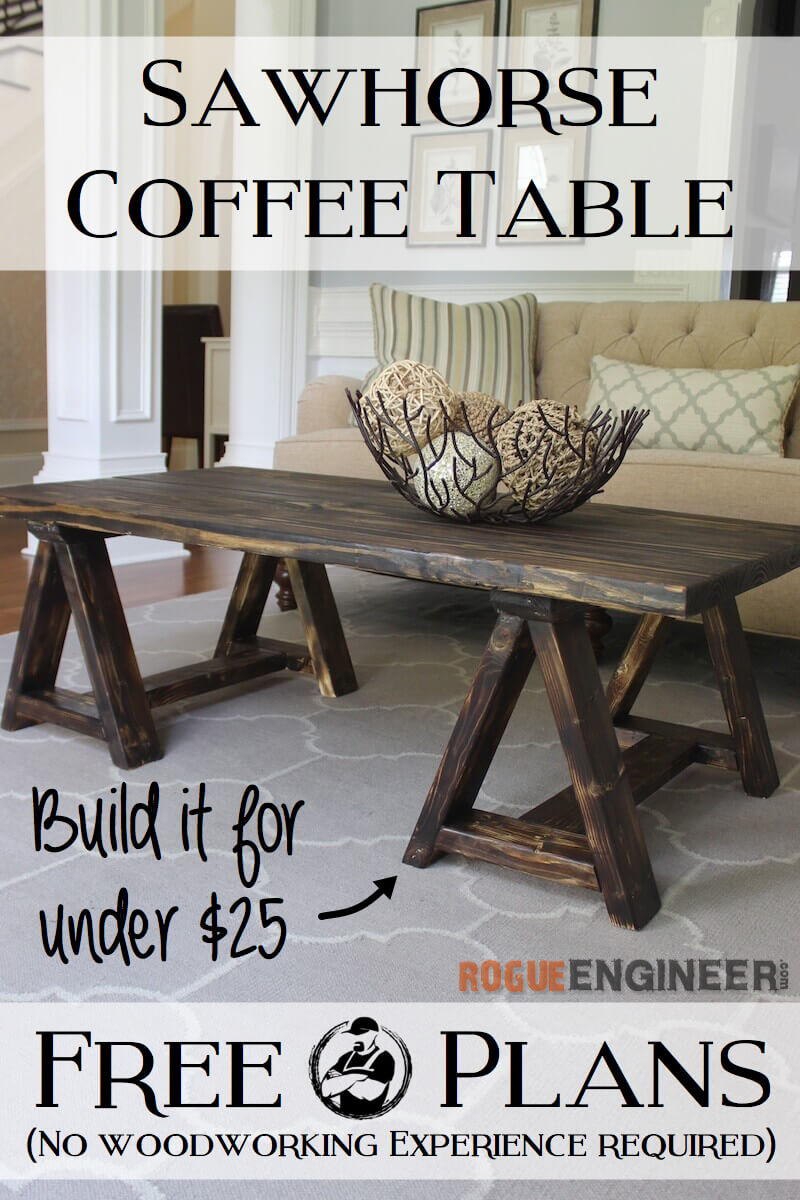
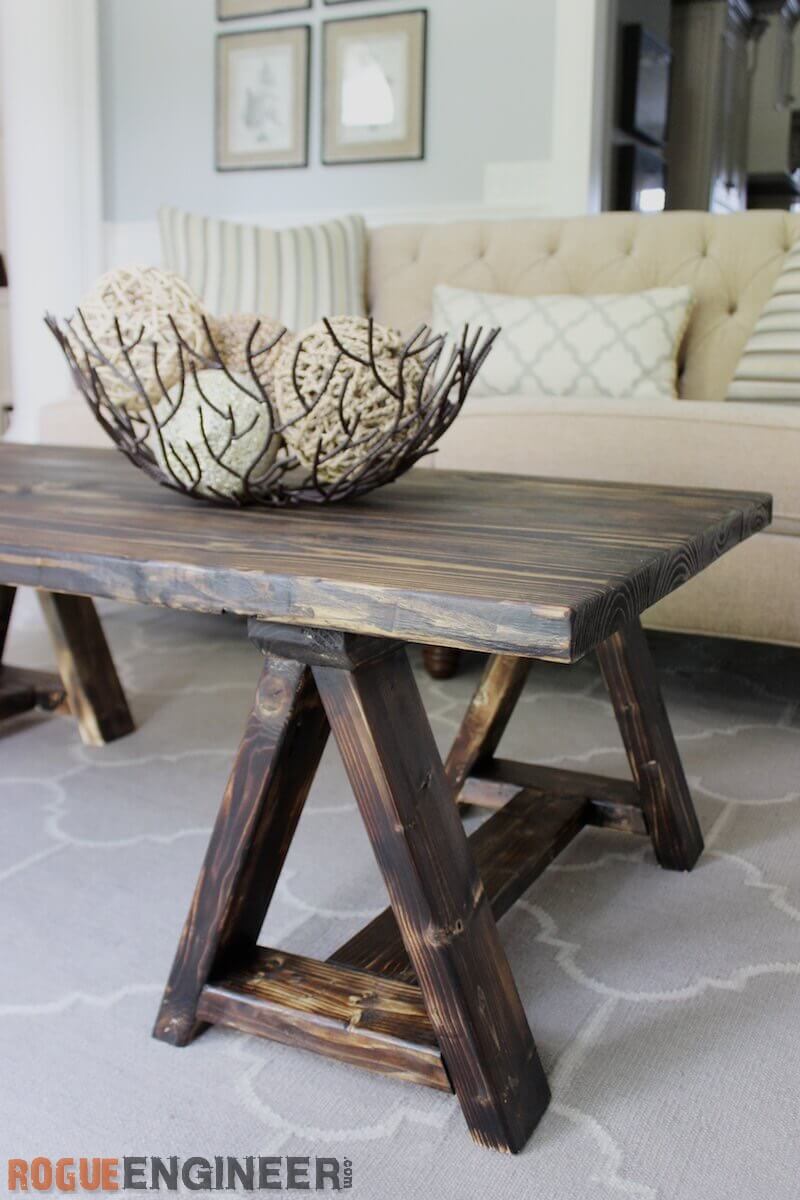
As always, we love shopping around for furniture ideas. When we came across this sawhorse coffee table my first thought was “that’s an easy build” but the best part is that you can build it for under $25! For those of you who have yet to dive into the world of DIY building, this is the perfect project to start. Enjoy!
For sneak peeks of our upcoming projects be sure to follow me on Facebook and Instagram. Also, follow me on Pinterest to get tons of projects plans from all around the web!
Required Tools
Materials
- 2x – 2 x 8 x 10′ Untreated Kiln Dried Lumber
- 3x – 2 x 4 x 96″ Premium Studs
- 2-1/2″ Kreg Pocket Hole Screws (Coarse)
- 2-1/2″ Wood Screws
Disclosure: The links provided in the “materials” and “required tools” sections are affiliate links. If you would like to support our site and help keep our content free come find out more about how we can make money with no extra cost to you.
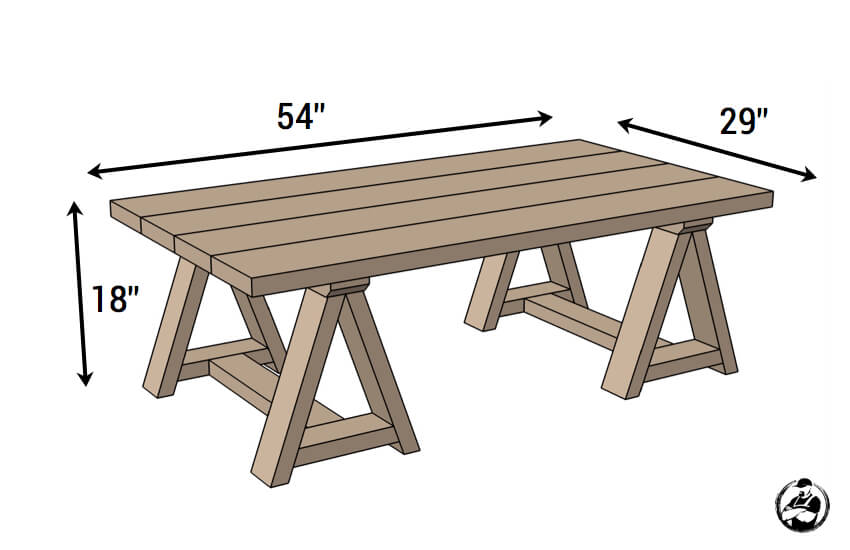
Dimensions
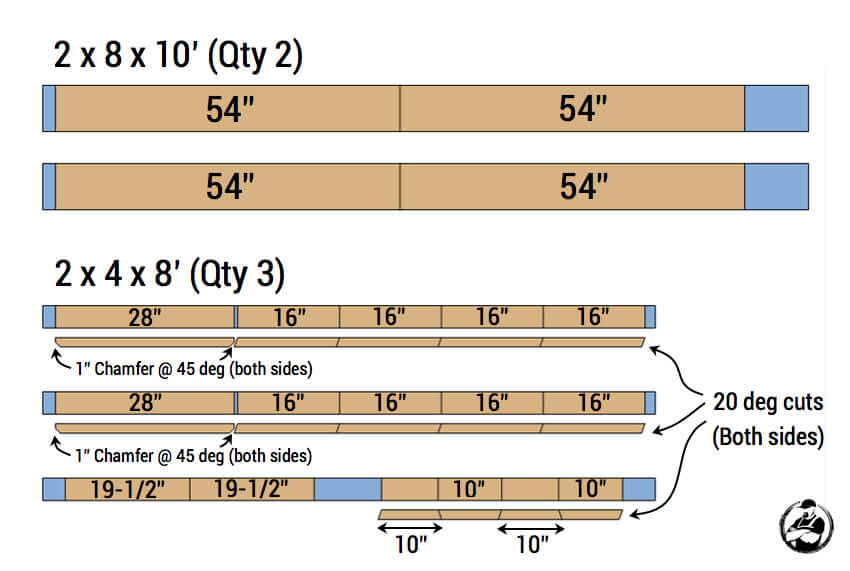
Cut List
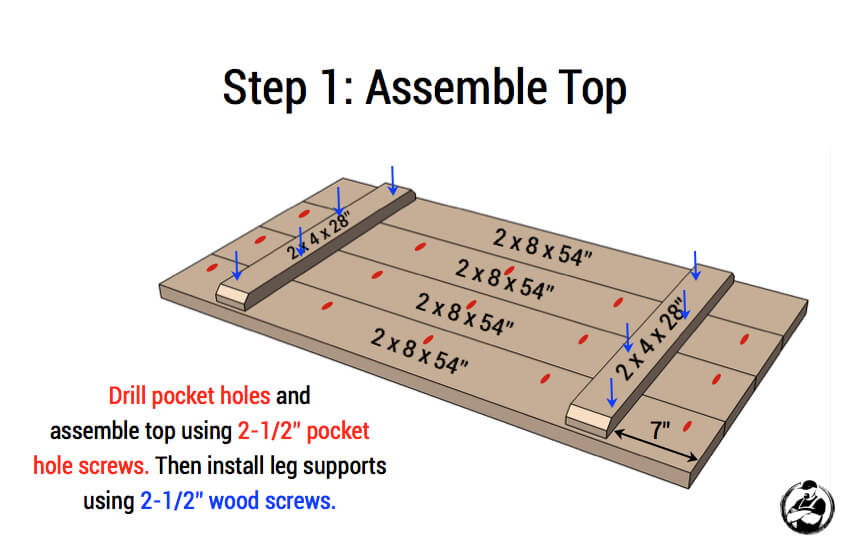
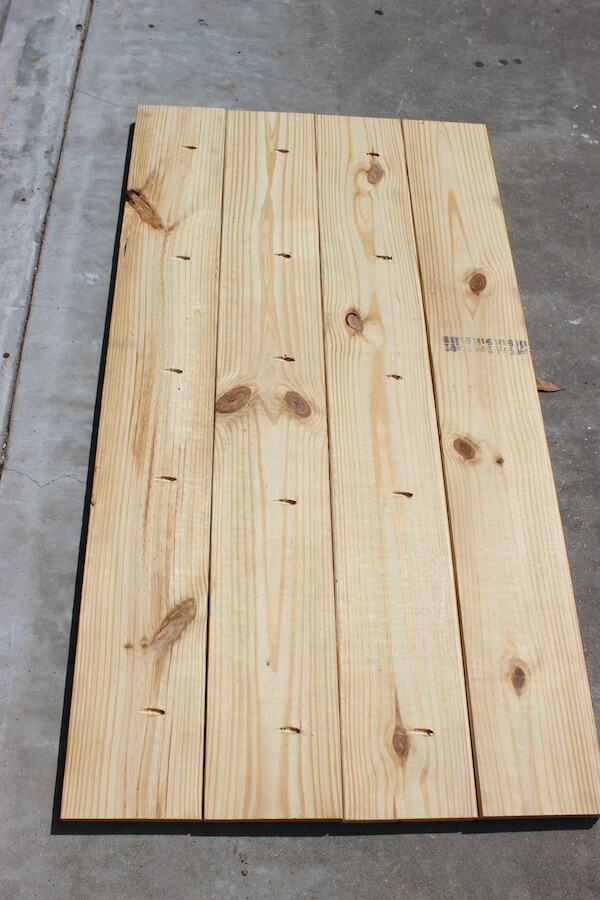
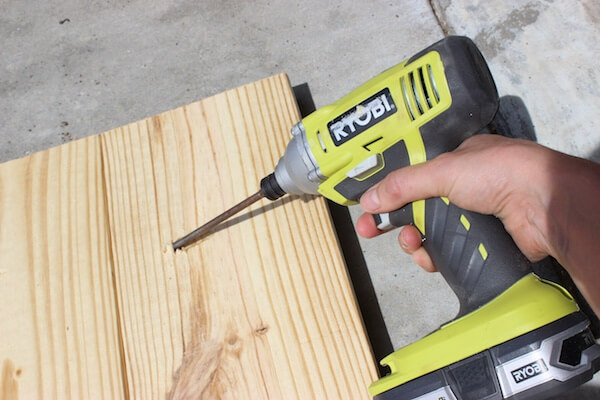
How to build a Sawhorse Coffee Table
Following these step-by-step plans you can build your own sawhorse coffee table for under $25 in lumber.
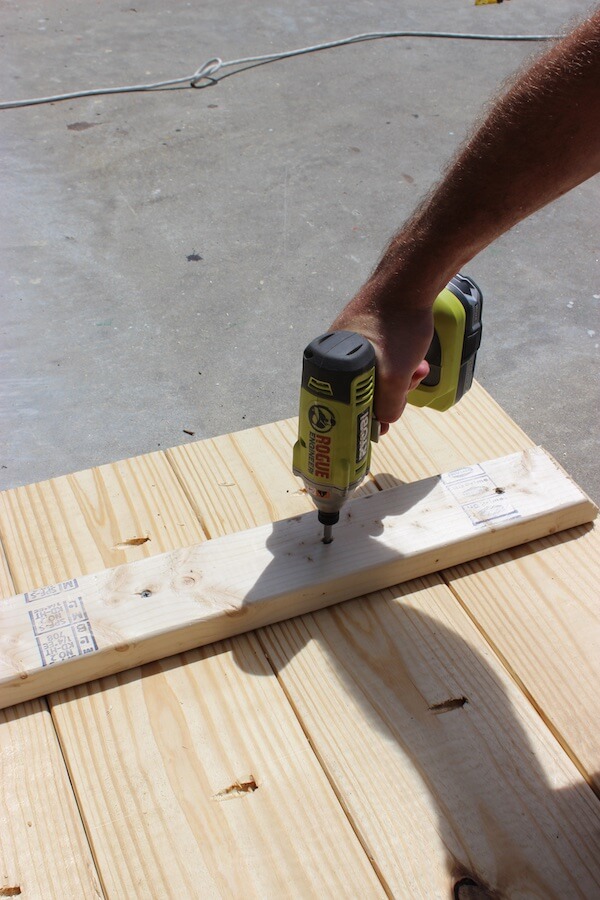
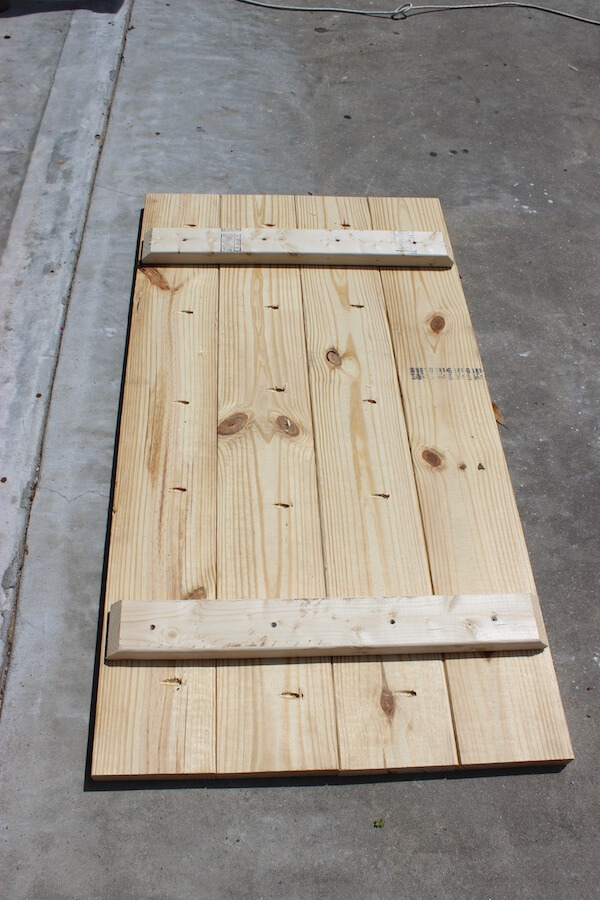
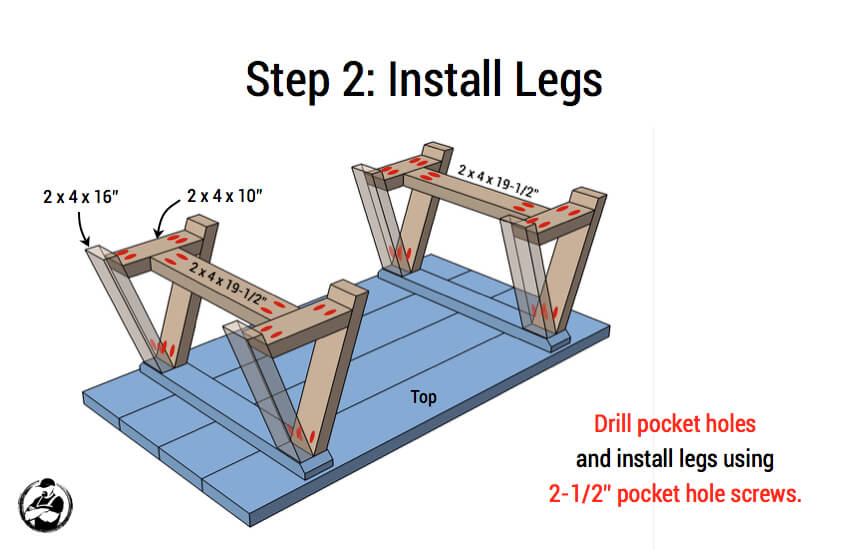
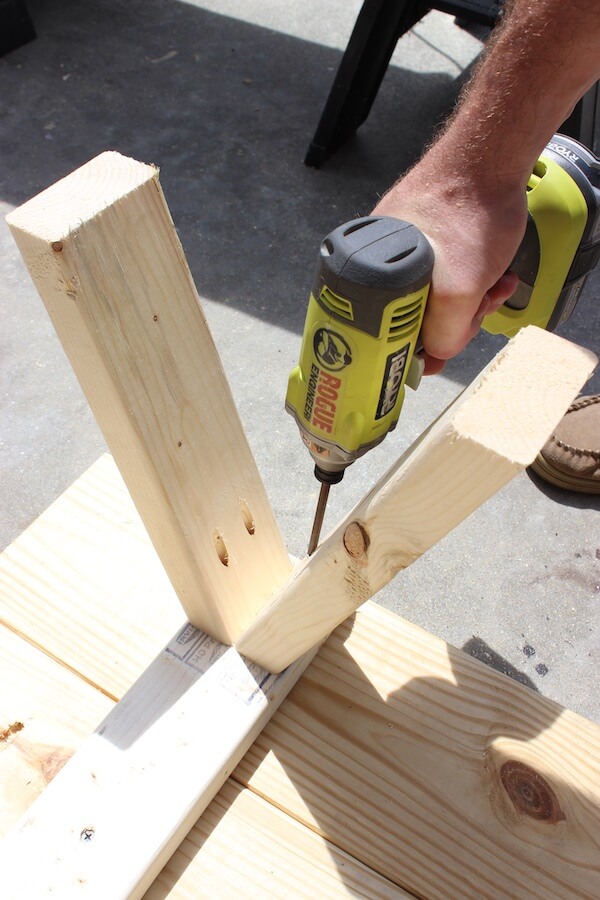
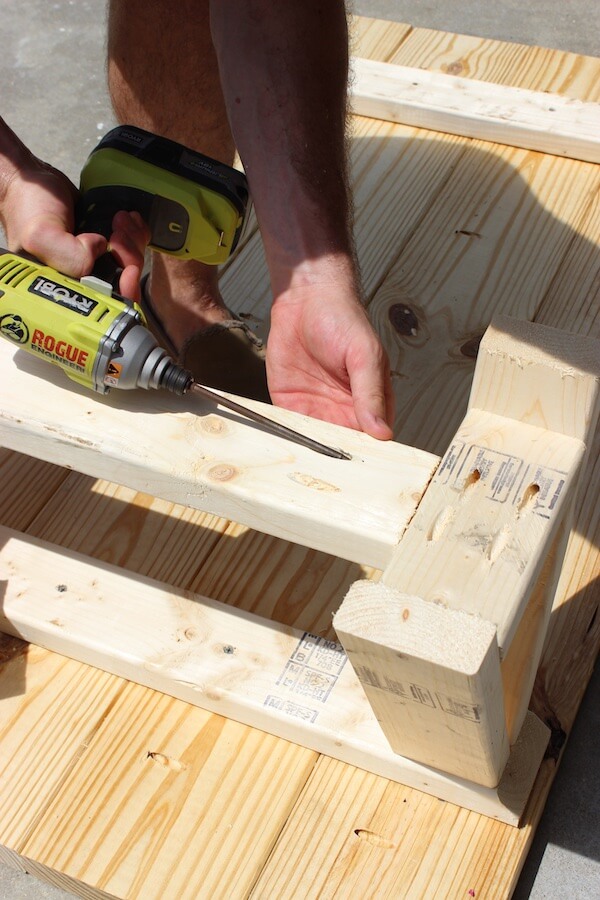
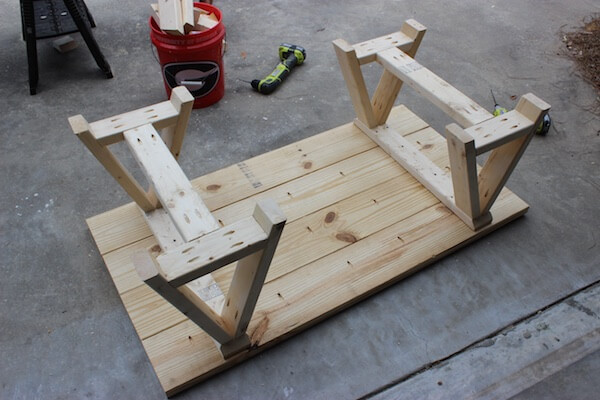
Finishing
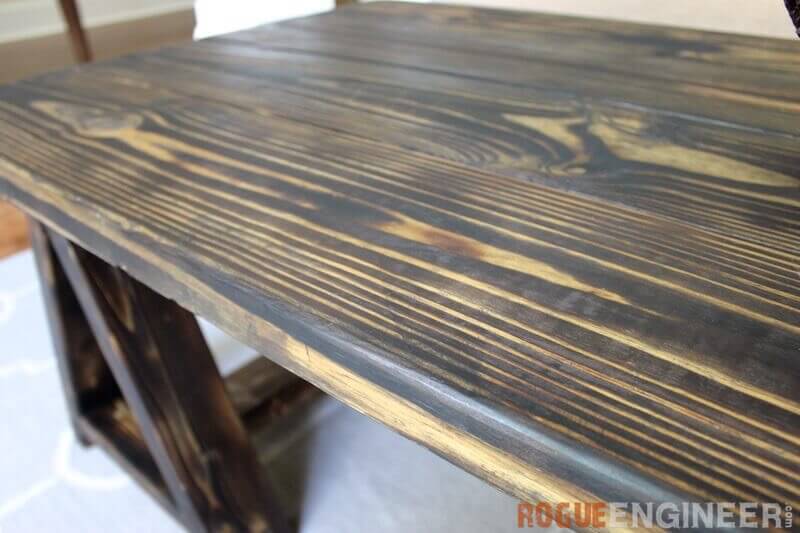
We decided to try something new with this finish. When wandering around our local Home Depot (which happens A LOT) we came across a torch and of course decided we had to give it a shot. After we built this table we figured what better time to then now to torch some wood!
Since this was my first time torching something it was definitely a learn as you go process. One thing I learned was to make long even strokes across the surface (picture was before this lesson was learned). This keeps the burn looking even across the entire piece and more natural. Second lesson I learned is that torching is AWESOME!
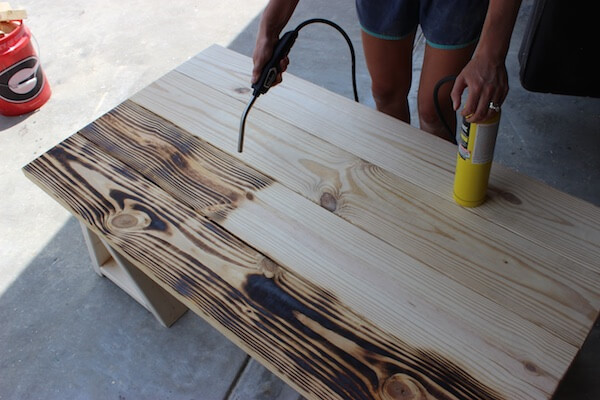
So to complete the finish on this table I stained over top of the torched wood with Rust-Oleum Summer Oak. Then topped that off with Rust-Oleum Triple Thick Polyurethane in a matte finish.
Questions? Comments?
As always, if you have any questions don’t hesitate to comment below and especially don’t forget to post pictures of your finished products in the comments! ENJOY!
Can you link which torch you used for this project? Awesome job.
Thanks Zoe. The link to the torch I used is below:
http://www.homedepot.com/p/Bernzomatic-BZ8250HTKC-Map-Pro-Hose-Torch-Kit-331665/203391035
Wow, this is beautiful! Can the plans be altered to make a dining table?
Thanks Naomi! For the dining table I’d refer you to the Ana White / Shanty2Chic collaboration. Those plans can be found at the link below:
http://ana-white.com/2013/05/plans/sawhorse-outdoor-table
Sure would be nice to link our sites together with that picture of that beautiful Norwalk sofa
signed ; your Father in law
That’s a good idea.
Finished my first project! Had to work without a pocket hole jig, but still managed pretty easily! Thanks for the plans 🙂
That looks great! Thanks for sharing. There is still time to put the Kreg Jig on your Christmas list 🙂
Reattaching photo that was remove
Reattaching photo that was removed
I really liked this build thought it was awesome. For the price you really can’t beat it. Will try to get and image up that is small enough to upload.
Awesome! Thanks Robert and Happy building!
Awesome work! Thanks Robert and Happy building!
Love the torched wood!
This is definitely on my make list! Can I ask why untreated wood?
I used untreated wood because the table is being used indoor and treated lumber has a greenish tint to it. Treated lumber is also heavier and has a higher moister content.
I was using a flame spreader on my torch and to my dismay it popped off and fell onto the table. By the time I could grab a pair of pliers to pull it off it left a deep burn in the table top. I was pretty bummed for about 30 seconds until I realized it looked pretty cool. So I ended up using that, a spring and a large washer to burn the top in random places for a distressed look. Some pre-stain conditioner, three coats of Minwax gunstock stain and three coats of poly and it turned out pretty good. Thanks for a fun project.
Awesome work man! I like the finish and that was a great idea using the washer and spring like you did.
Thanks man. It was very rewarding and the wife loves it. I’ve been a carpenter for years but I have never made any furniture and learned a lot. I also learned the difference between the knock off Kreg jig and the real thing. The cheap one is a $50 paper weight. Struggled with it for days, wasted a whole set of legs, bought a real Kreg jig and some 2×4’s at Lowe’s and was done assembling in less than an hour. Dunno why I have to keep learning the same lesson about cheap tools 🙂
I have a couple custom tables to build for friends and then I’ll be building your Farmhouse table and benches. The one with the square legs. I’m soooo looking forward to it. I’ve helped build some farmhouse kitchens over the years and love the style. I’ll follow up with a pic when I’m done with that project.
Kreg does make some great stuff. Can’t wait to see how the table and benches turn out!
Hello. I just saw the plan for your Sawhorse Coffee Table and really like the look and style. I live in a small house and do not have a seperate dedicated area for dining. For this reason I’ve been trying to find a coffee table that could be easily converted, when needed, to double as a dining table. How difficult would it be to modify the design of this table so the top rests snugly on the saw horses as a coffee table, but is not permanently attached? This way the top could be lifted, the saw horses designed so they could be tipped on end and be positioned in a way that provides a stable base for the top to snugly rest on, except now it would be at the proper height for a dining table.
Finished table with pecan stain.
Really nice finish Dan! Thanks for sharing.
Thank you sir. Now doing one of your side tables with black finish.
Do you have an end table design to match this coffee table?
Not at the moment.
Thanks for the great instructions. Now my wife wants me to build her a kitchen table, so I say it was a success!
haha thats how it all starts! But the table looks awesome! Happy budding man!
Could you please let me know what kind of wood you used?
we used pine for this project.
Thanks!
Hi! We assembled the top and its bowed unfortunately. Not sure where we went wrong. Do you have any advice? Thanks for this tutorial!
Sorry to hear that, Crystal, and sorry this reply took so long. A bowed top can happen with wood movement overtime. Two fixes: if it’s mild, flip the top bow-side up in the sun on damp grass for an afternoon (sounds like a trick, works surprisingly often), or flatten it with a hand plane or belt sander across the high spots. Next option: build a new top and make sure to alternate the end-grain ring direction board to board.
First big project I’ve done since I was kid. Made me realize how much I miss making something and the sense of accomplishment from a finished project, thanks.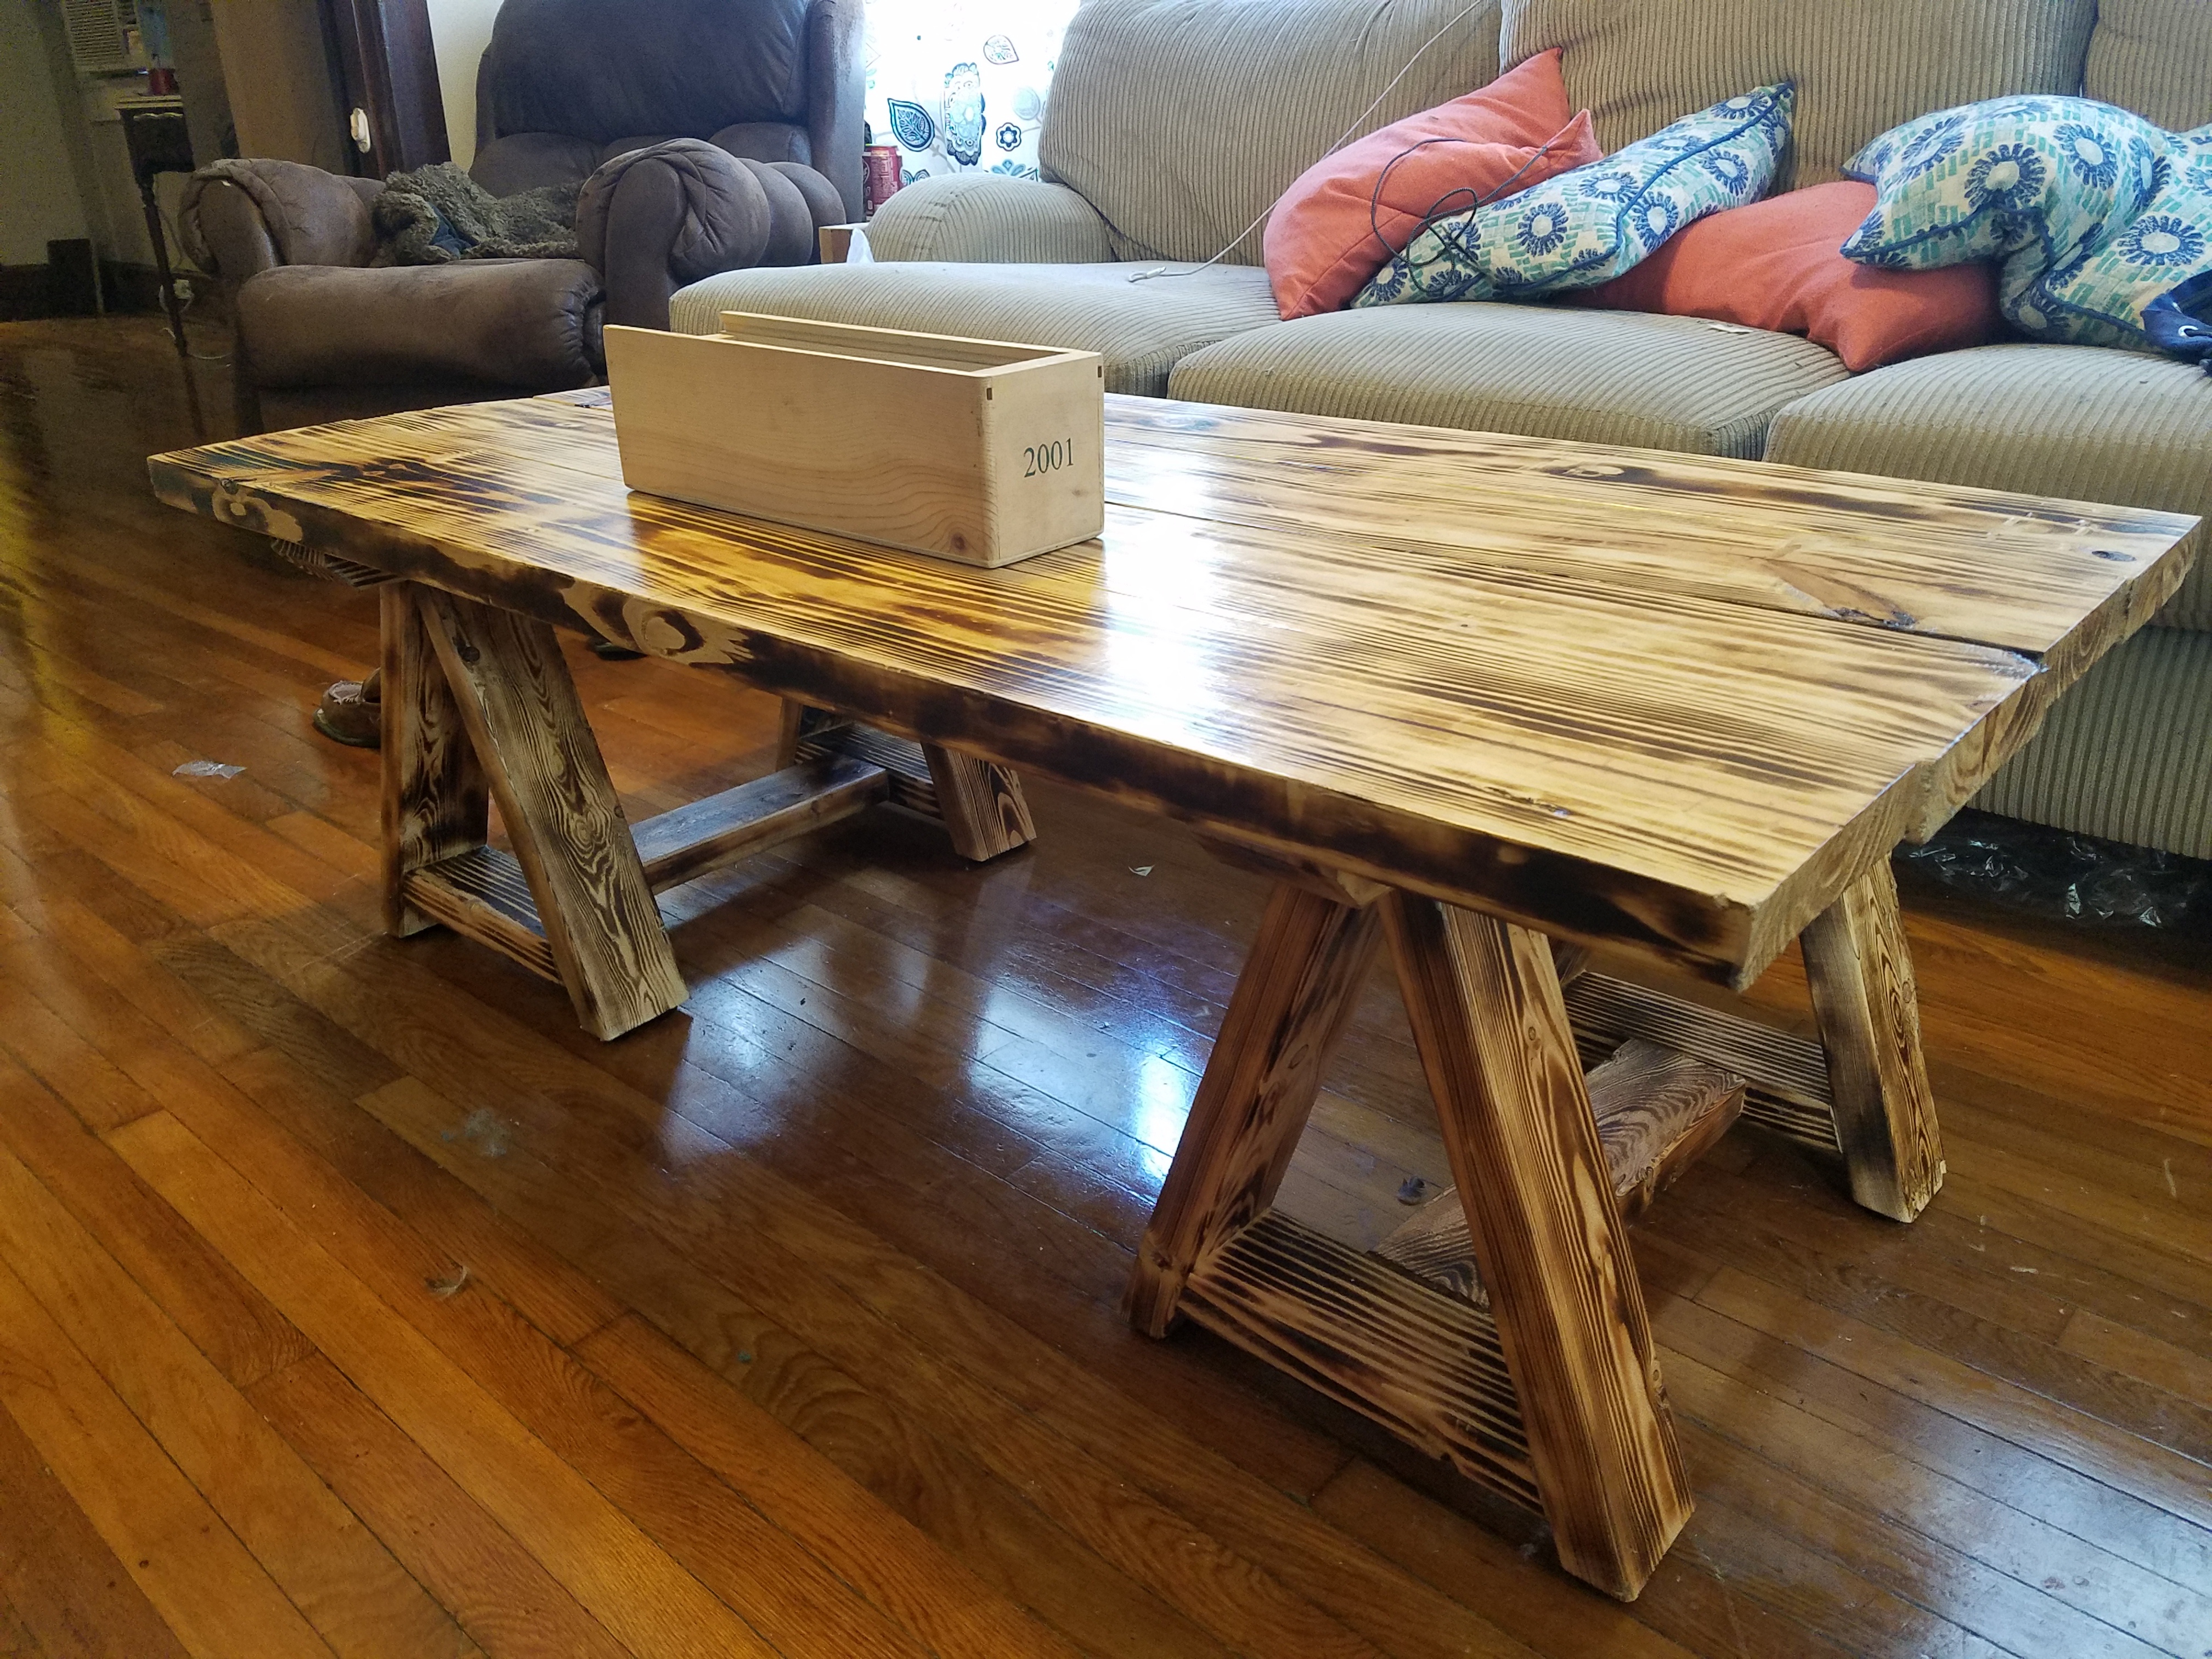
Love your site! We just tried this plan, the table looks great but we used the same stain and can not get this look. We did torch and that part looks like what is pictured but the stain has more red than dark.
I saw this plan a few years ago and finally got around to building it. First time building anything like this, but I’m totally hooked. I’m wondering how you keep all four boards level with each other. I laid them out on the concrete, drilled the poket holes, I didn’t move the settings on the jig once I started, yet I have two that sit a little lower than the other two. I hope that makes sense as my picture does not demonstrate what I am referring to. Any advise?There are a number of things that I got wrong on this, but I’m proud of my build nonetheless! Thank you, and I look forward to posting again soon with more success! https://uploads.disquscdn.c…