
Basic Crown Molding
Installing crown molding is a nice upgrade that can be done to just about any room. The problem is that it is more frustrating than you could ever imagine. I’ve installed crown in a handful of rooms now and the process has gotten easier and easier. I’ve picked up a few tips, tricks, and jigs that I think could make life easier for you if you plan to take on this task. I must preface this post by saying that I am not a master trim carpenter by any means and have no interest in taking on a complex trim job. This post will outline how to install crown in a simple room with flat ceilings. That is it.
For sneak peeks of our upcoming projects be sure to follow me on Facebook and Instagram. Also, follow me on Pinterest to get tons of projects plans from all around the web!

Required Tools
Materials
- Crown Moulding (Spring Angle TBD in step 1)
- 1-1/2″ Narrow Crown Staples
- Glue
Disclosure: The links provided in the “materials” and “required tools” sections are affiliate links. If you would like to support our site and help keep our content free come find out more about how we can make money with no extra cost to you.
How to Install Crown Molding
Step 1: Determine your Spring Angle
After doing much research on this topic I came to the conclusion that the crown needs to be seen! If you have high ceilings then you want the crown to be flatter on the ceiling. If you are adding crown to a mantle you would want it to lay flatter against the wall so you would use a smaller spring angle. Below I have outlined my “rule of thumb” but by all means if you want a different look then change it up.
- 10’+ Ceilings = 52 deg spring angle
- 8′ Ceilings = 45 deg spring angle
- Mantle = 38 deg spring angle
Also note that crown molding that has a 38 deg spring angle, also has a 52 deg spring angle if you flip it upside down.
Step 2: Determine your Miter
Use an angle finder to determine the angle of the corner. Then divide that by 2 to find your miter cut. Do note that not all rooms are perfect and these corners could be off by a few degrees. You’d be surprised how a matter of a few degrees can throw off a corner so make sure you don’t skip this step.
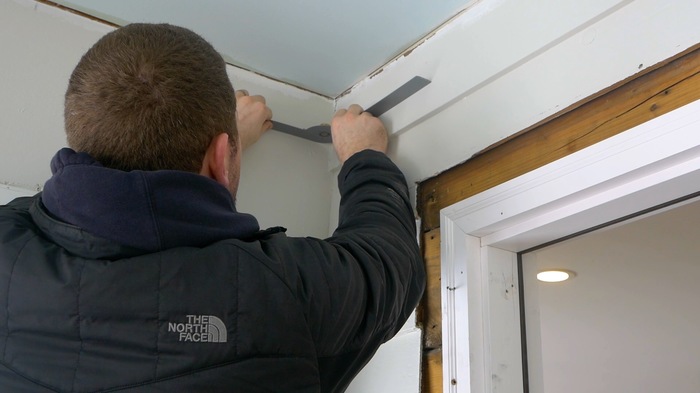
Step 3: Making a Guide
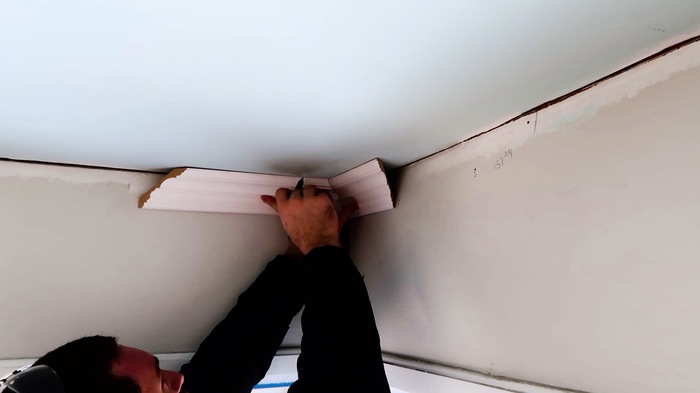
Before actually installing any crown I have found it useful to make a guide. You can do this by cutting two small pieces of crown (see step 4 for cutting) and glueing (hot glue or super glue) or stapling them together to form the angle you are trying to achieve. Then place the guide in the corner and trace the top and bottom. This will help you with where to measure from as well as actually placing the crown correctly to have both pieces line up nicely.
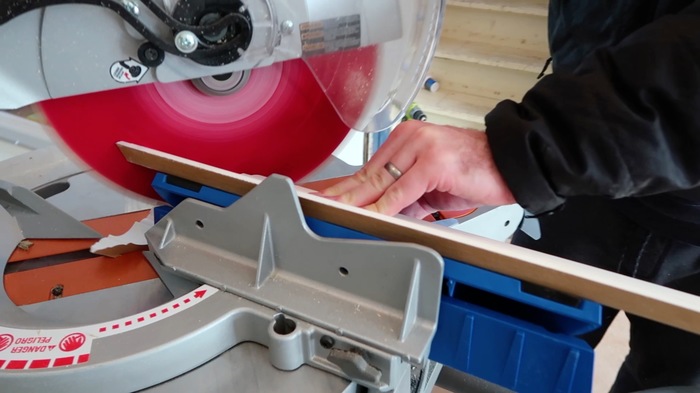
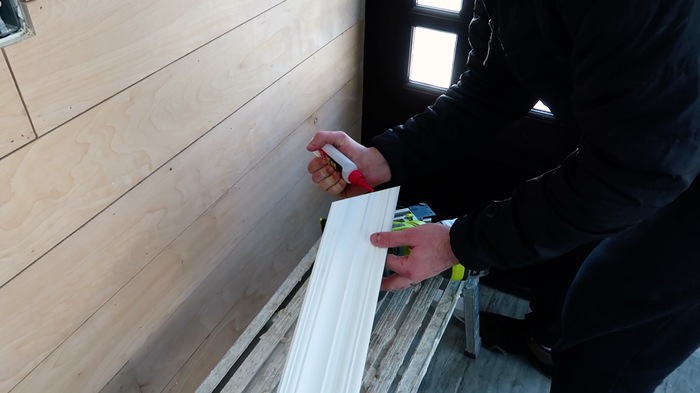
Step 4: Cutting the Crown
Use the lines you laid out with the guide in each corner to measure the length of crown you will need. One thing that I have come to realize quickly is that a crown jig is worth the investment and will take some of the complexity out of the project. I use the Kreg Crown-Pro jig which is nice because it is adjustable for any spring angle which means fewer parts. Basically this jig holds the spring angle so you only have to worry about the miter cut. While compound miter saws have the capability to cut a compound angle, I can guarantee you will get confused and will run into problems. Plus for under $30, it is worth it to maintain your sanity and limit you trips to the hardware store.
A word of advice would be to double-check your measurement and how you have your crown positioned. Are you cutting it upside down? Don’t ask how I know this. Also, save yourself a trip to Home Depot and cut it a little long. You can always trim it down. You can’t go back and add more.
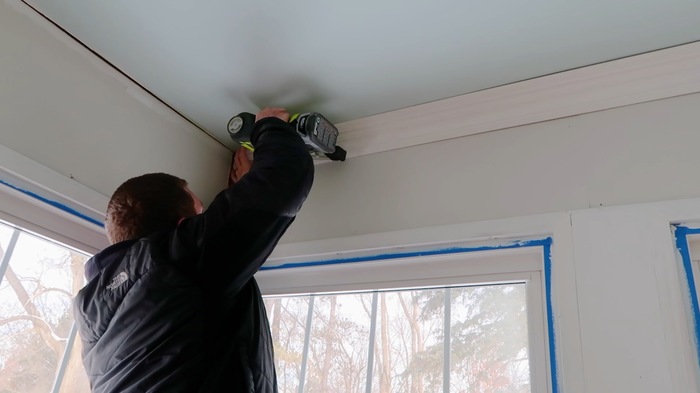
Step 5: Installing the Crown
Having a second set of hands is nice for this part. I use a narrow crown stapler with 1-1/2″ narrow crown staples. This will give you the best results as the staple will not pull through the MDF that most crown is made of like a brad nail will. While this is the preferred method, if you don’t have or want to invest in this tool then a brad nailer should work fine. Just watch for the nails pulling through.
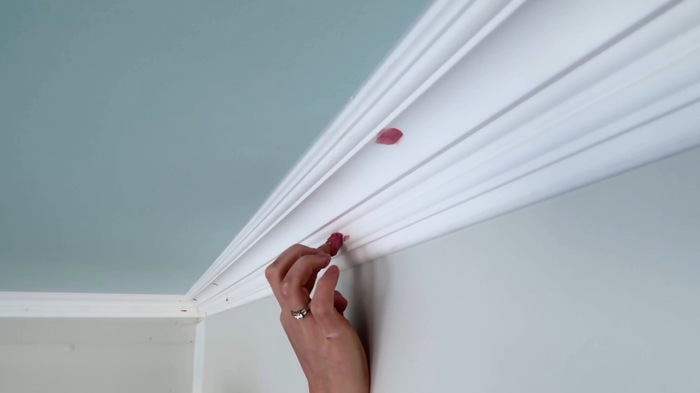
Step 6: Gluing the Joints
Whenever you are making a joint make sure to glue it. I used Rapid Fuse so that it bonds in a minute or so. The joints can be hard to nail so this is a good idea to make sure they don’t come apart.
Step 7: Caulk and Fill
Caulk the top and bottom edges as well as the corners. Then fill the staple holes with wood filler and sand smooth.
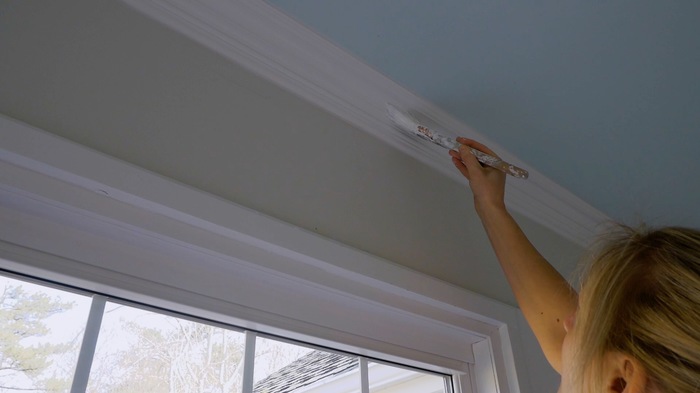
Step 8: Paint
After everything is dry and wiped down you can finish with a white semi-gloss trim paint or whatever is used for the other trim in the house. If you’re not good at cutting in then you’ll want to use painters tape. Luckily my wife is a rock star.
Questions? Comments?
As always, if you have any questions don’t hesitate to comment below and especially don’t forget to post pictures of your finished products in the comments! ENJOY!
Fantastic! I am inspired to give it a try
Cope the inside corners! You’ll get better looking results and not have to worry about miter angles. Still have to use miter cuts for outside corners though.
Measure twice, cut once!
You have a great point about cutting it long. I’m still looking, but have yet to find a board stretcher at any of the hardware stores. 😉
Its alot easier to paint the crown before installing it. Then once you patch your holes give it a quick touch up.