

DIY Bedside Table Plans
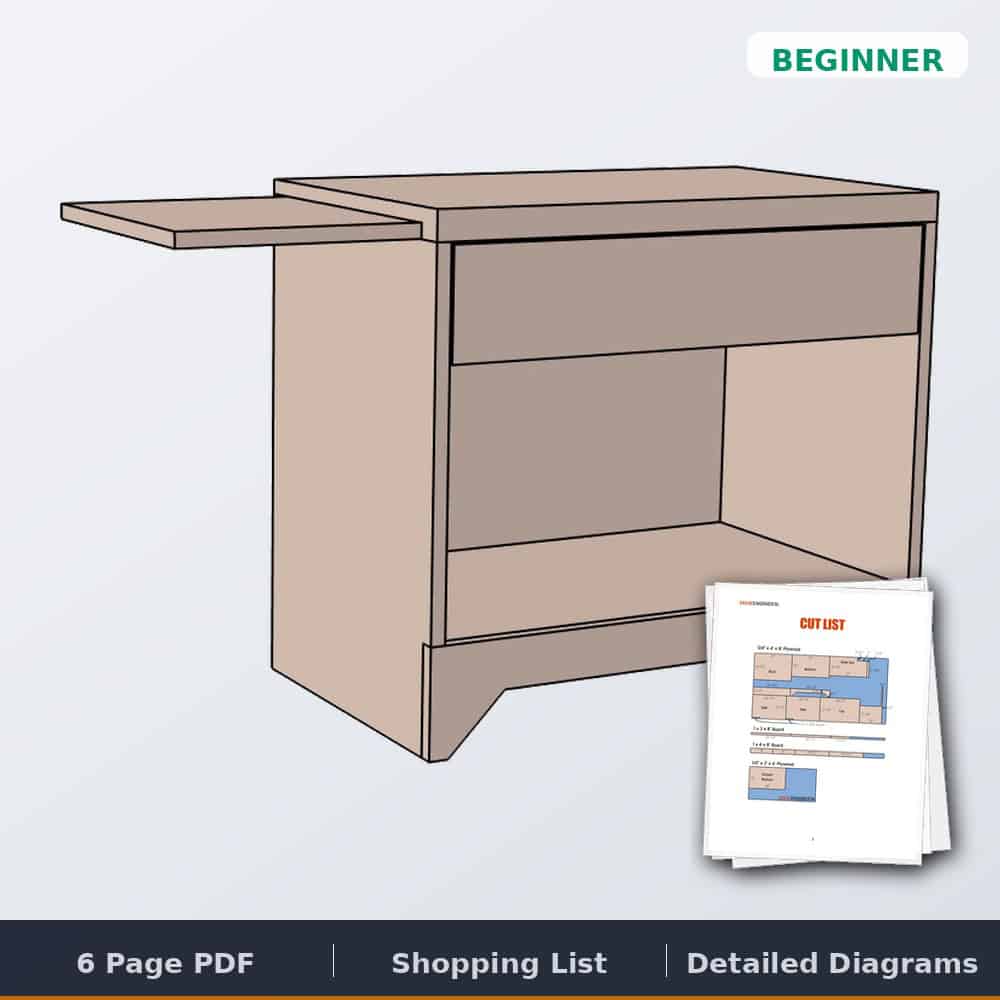
Quick answer: This bedside table is a plywood-and-pine build with a full-extension drawer — pocket holes for the case, drawer slides that glide like store-bought, and proportions sized for real bedrooms. Free tutorial below; the printable PDF is $10.
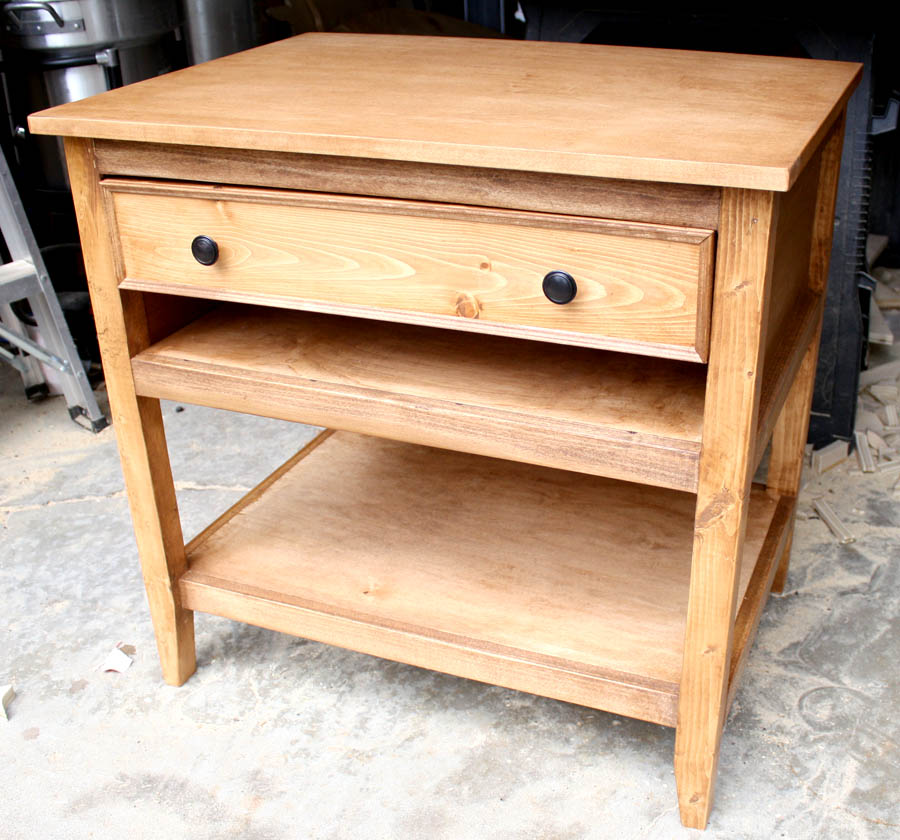
A bedside table has a simple job — hold the lamp, the book, and the phone — but the store-bought ones that do it with any style cost several times the lumber bill on this one. This build gives you a proper drawer on full-extension slides and a shelf below, from half a sheet of plywood and a handful of pine boards.
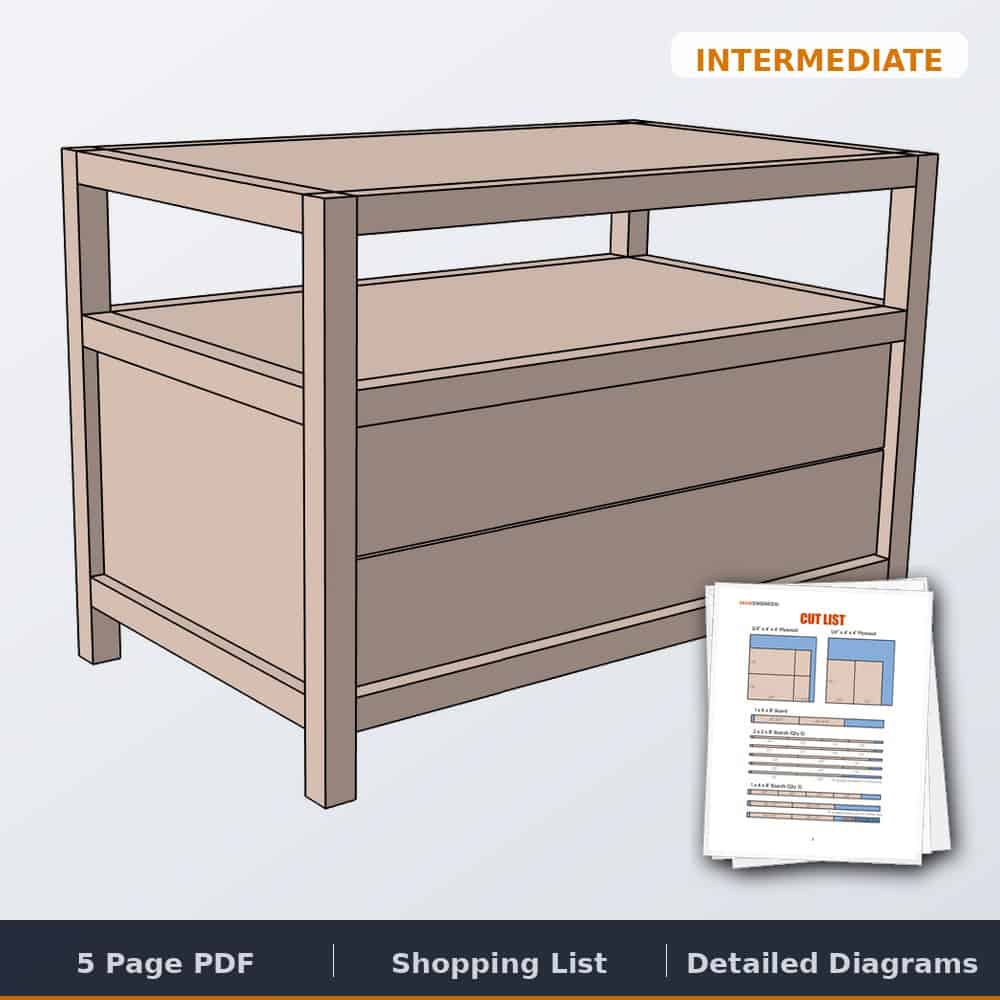
Bedside Table Plans
The complete printable PDF — full cut list, dimensioned diagrams, and all nine assembly steps including the drawer.
Tools & materials
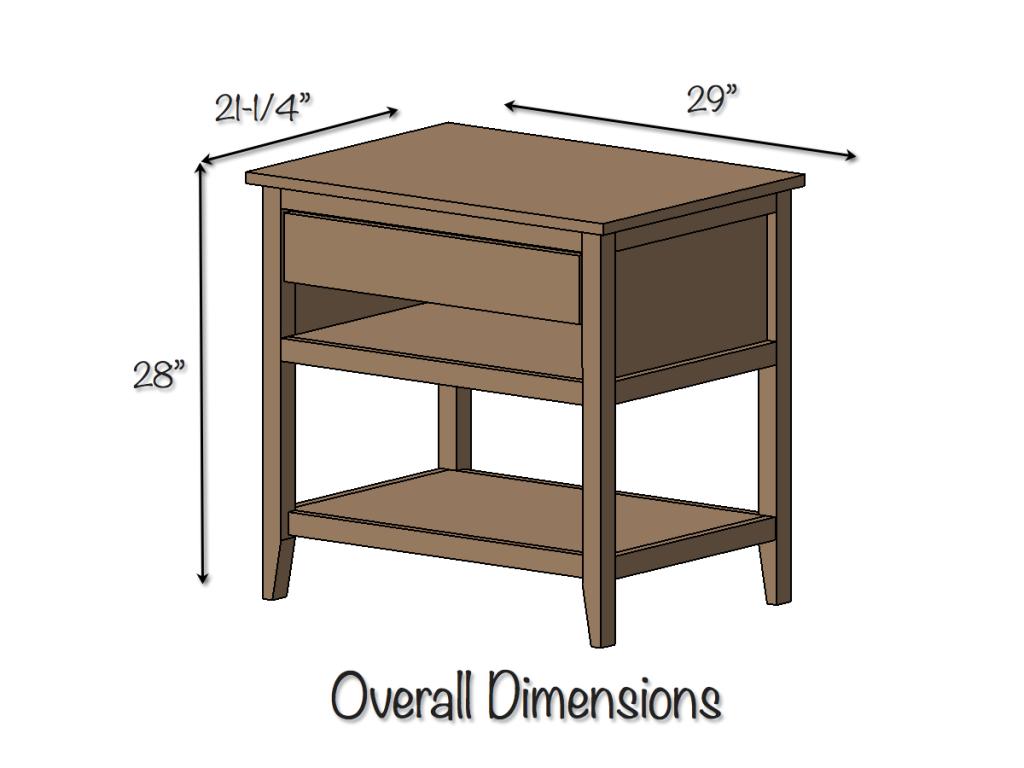
Dimensions
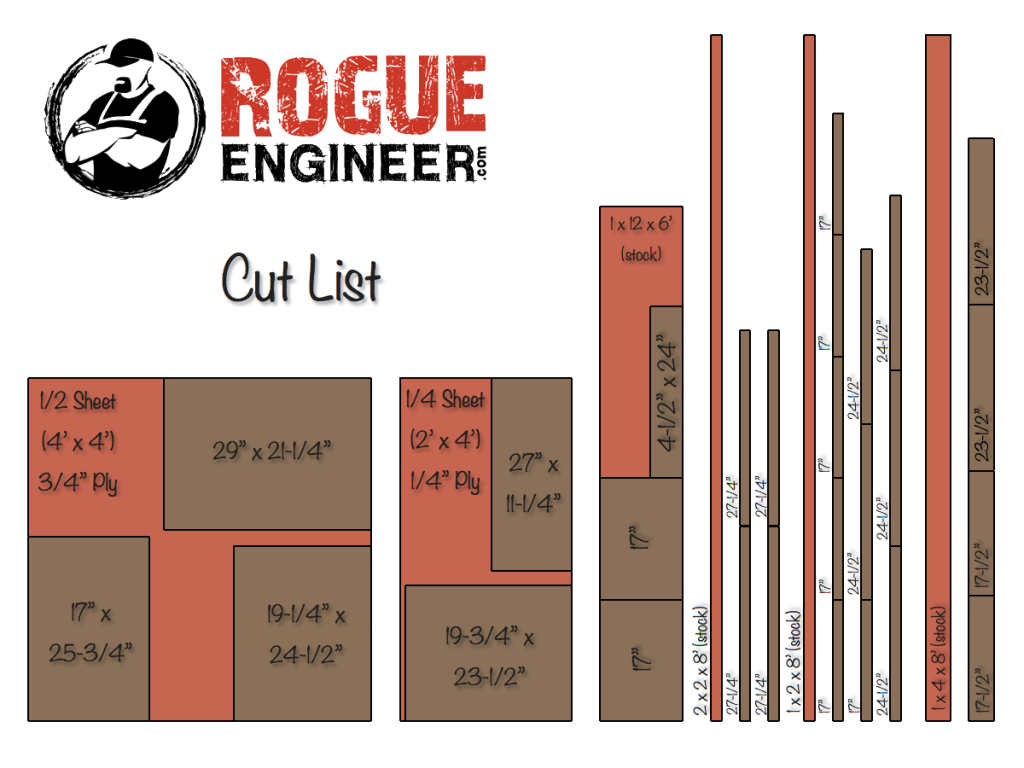
Cut list
The build, step by step
Step 1
Step 2
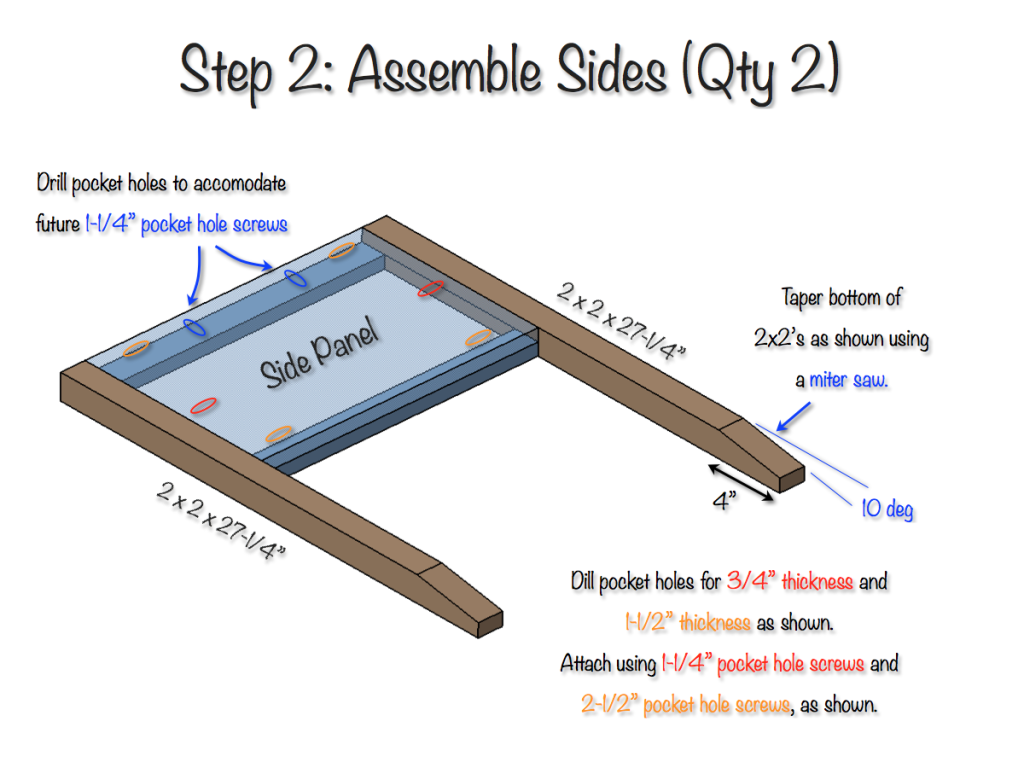
Step 3
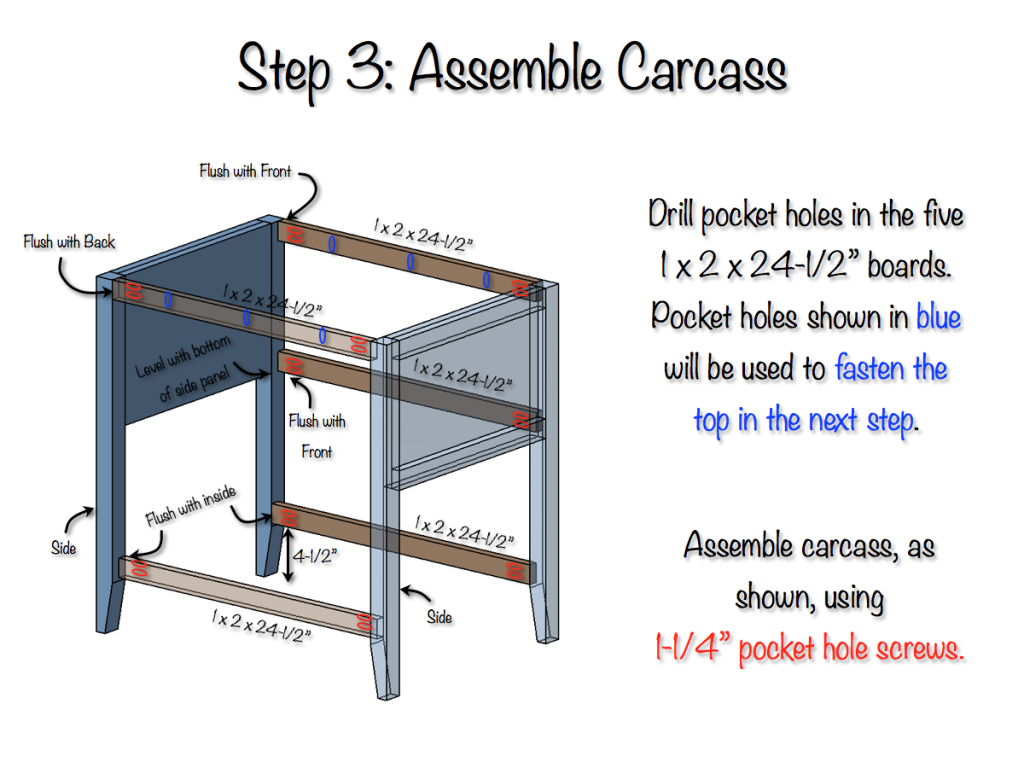
Step 4
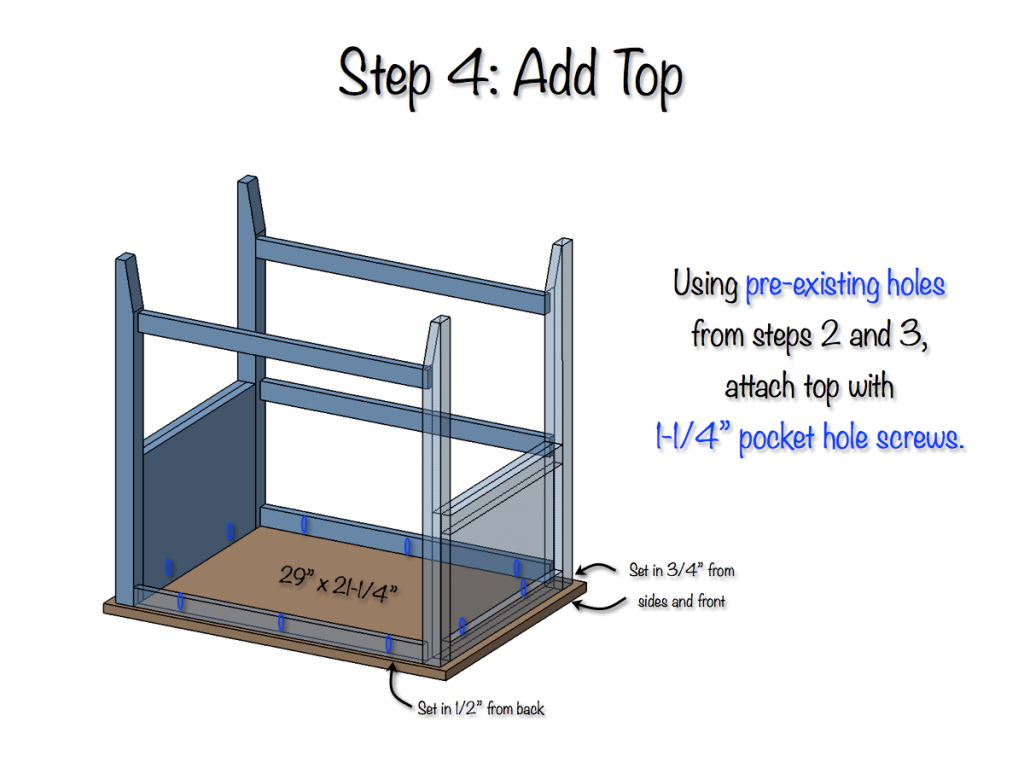
Step 5
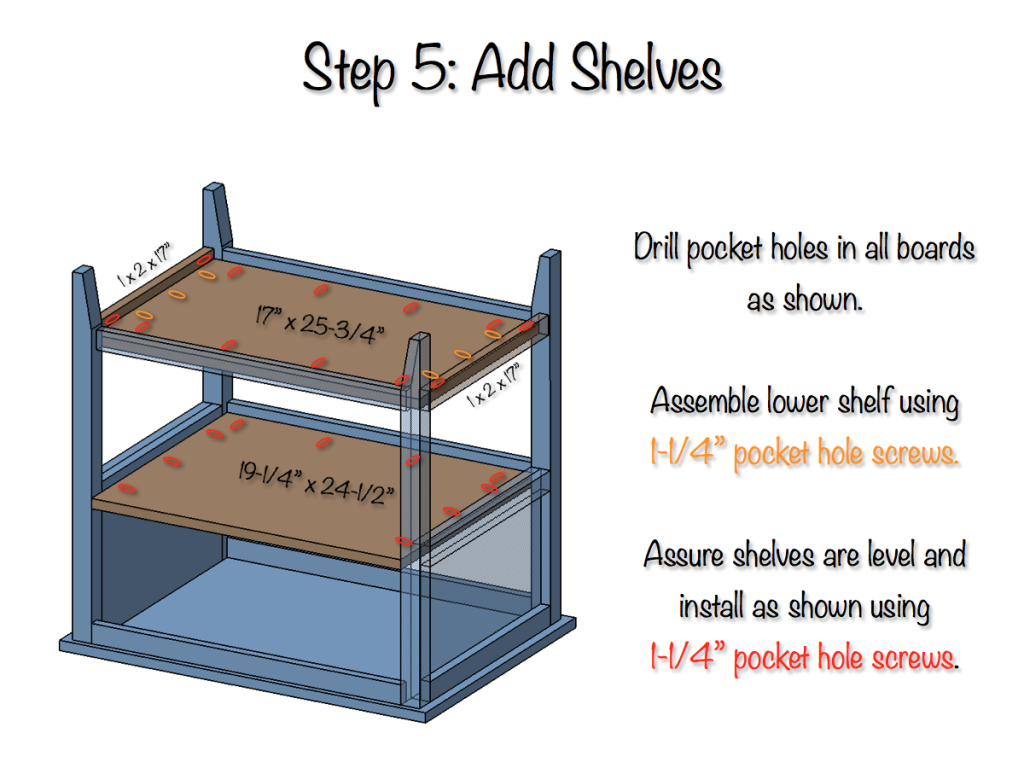
Step 6
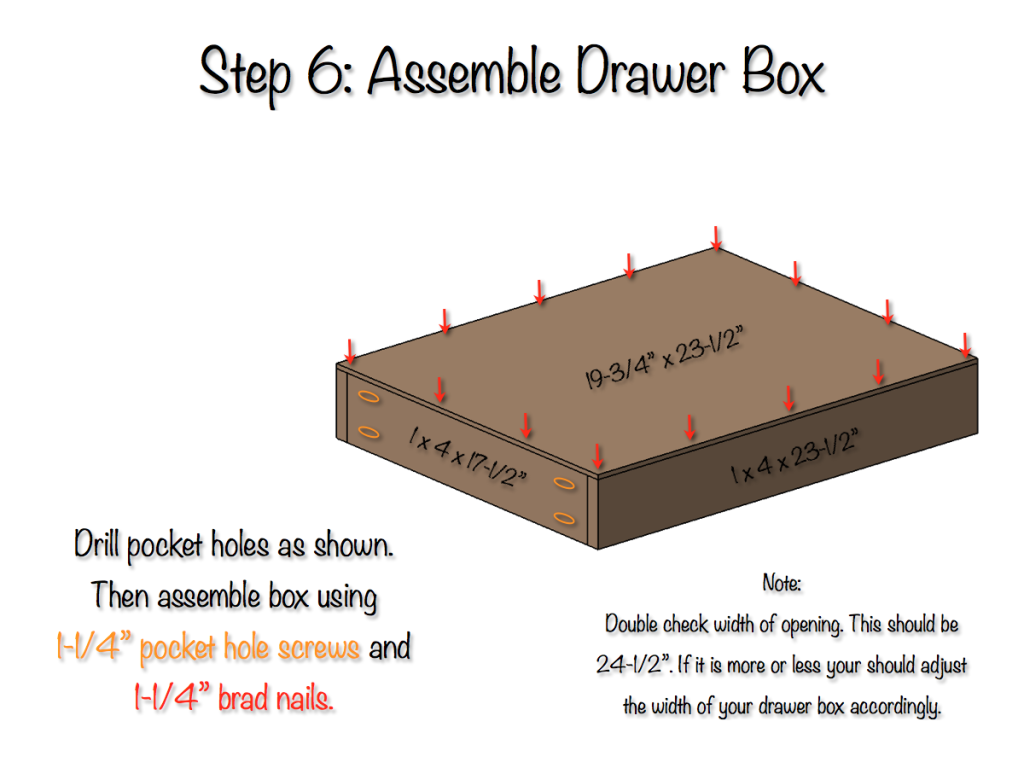
Step 7
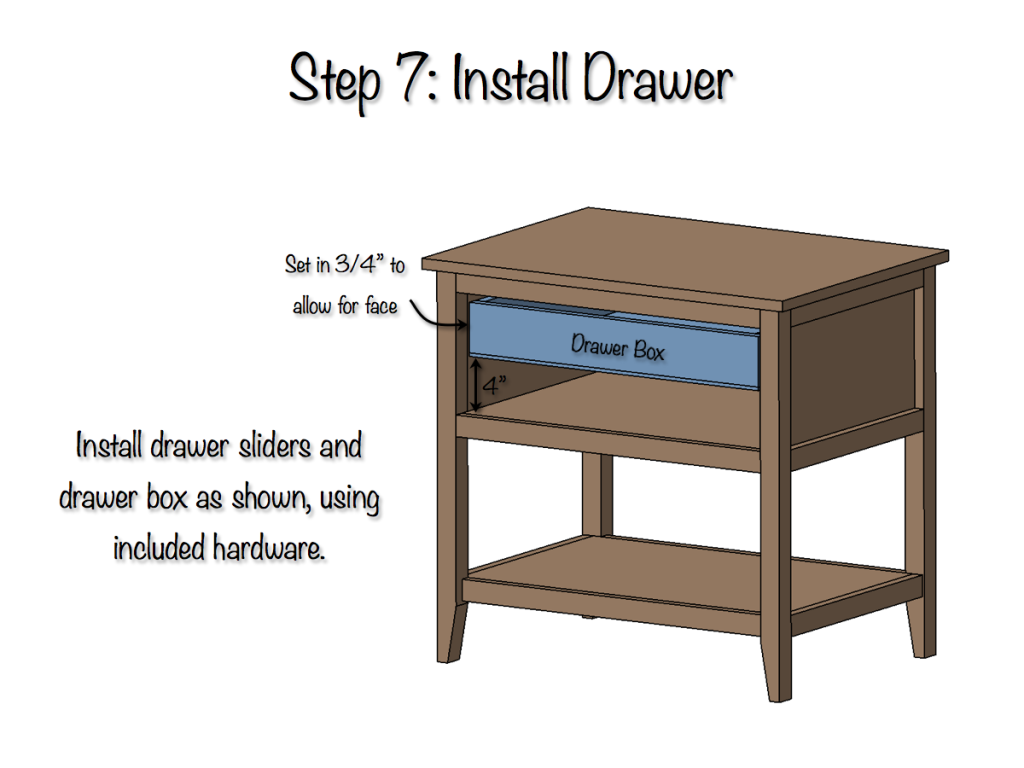
Step 8
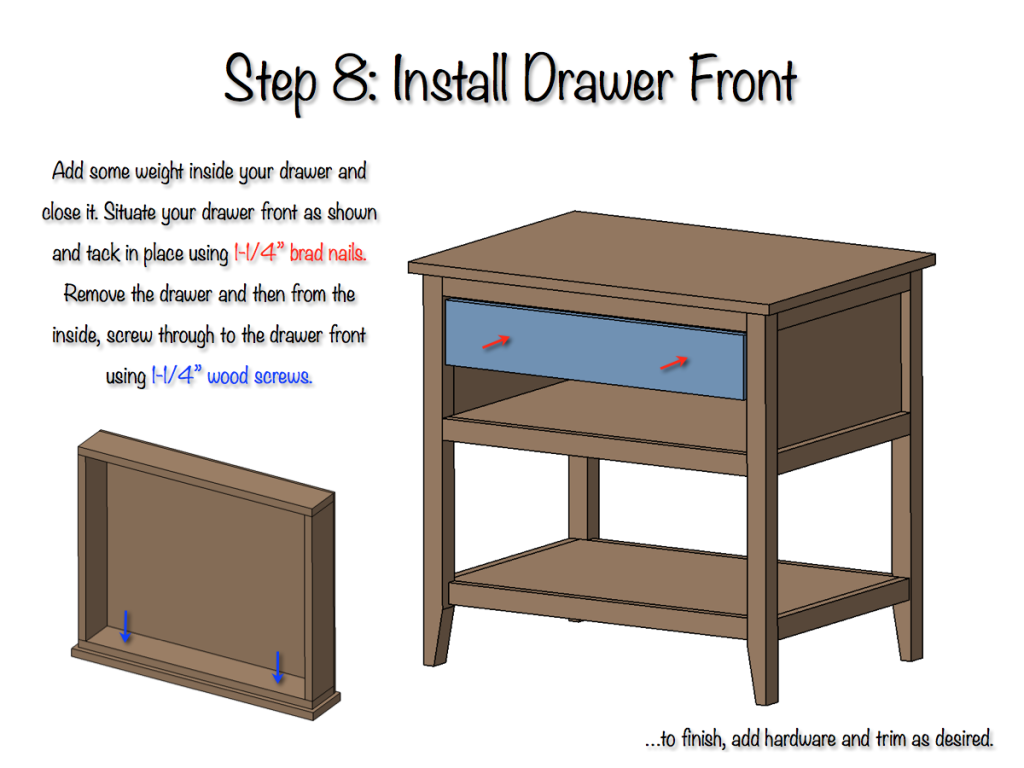
Step 9
Every dimension, the full cut list, and the printable diagrams for each step are in the plans above.
Finishing
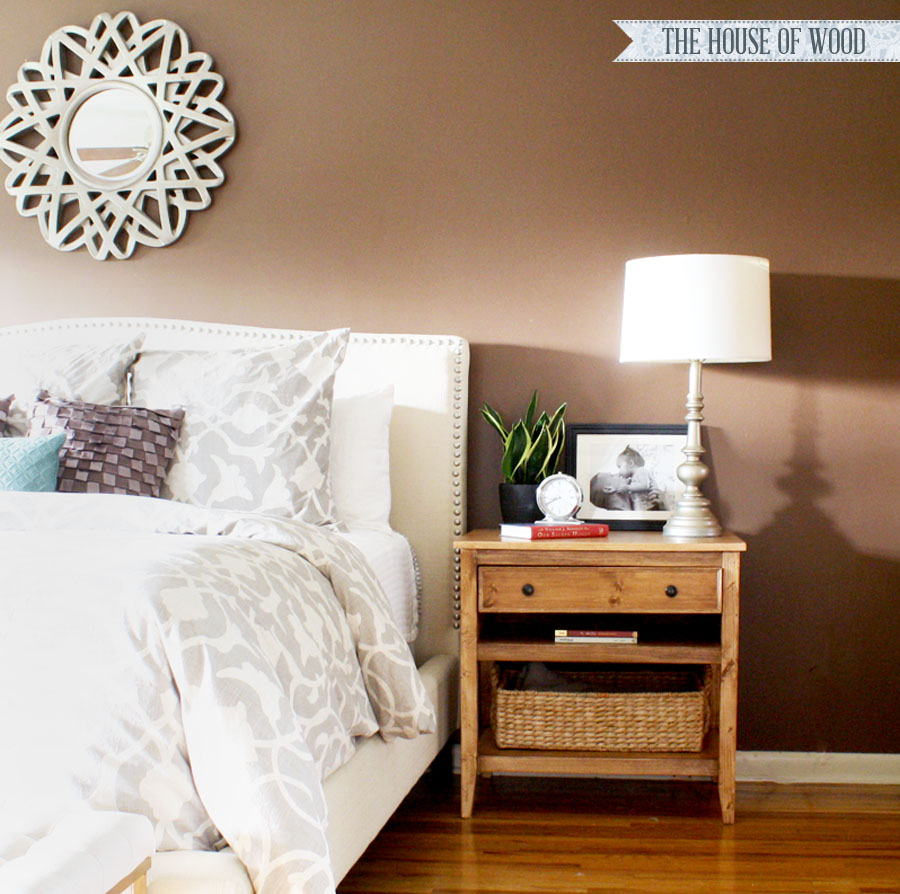
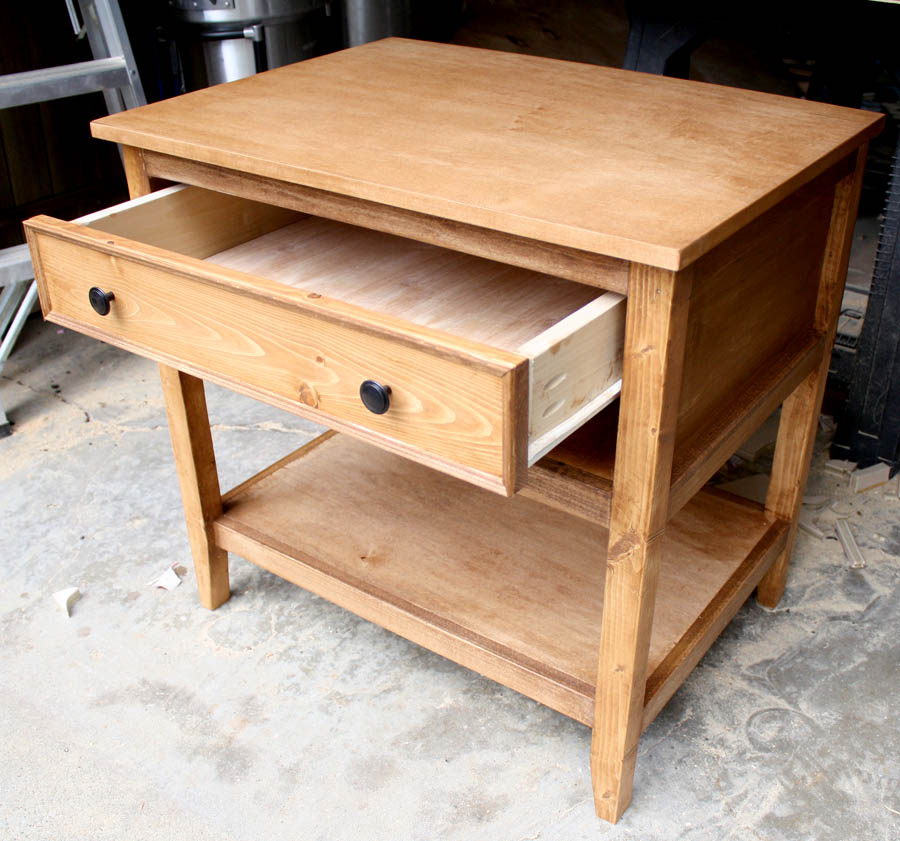
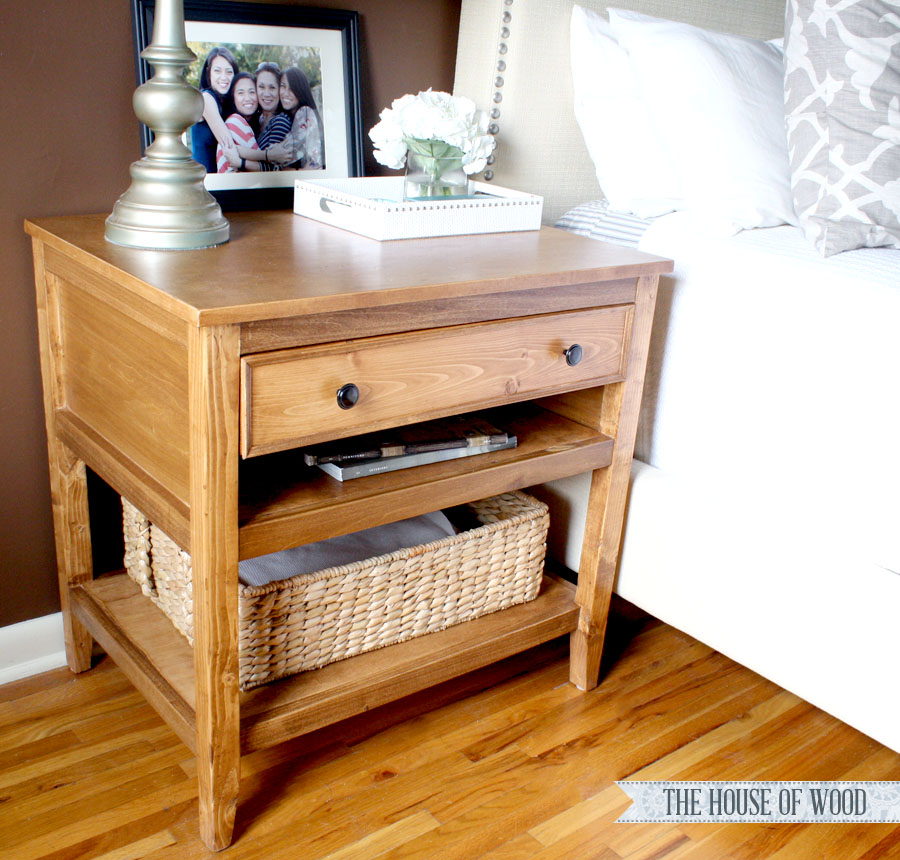
We finished ours with stain on the pine and paint on the case — the close-up shots above show how the drawer front trim dresses it up.
Bedside Table Plans
The complete printable PDF — full cut list, dimensioned diagrams, and all nine assembly steps including the drawer.
Questions? Comments?
As always, if you have any questions don’t hesitate to comment below — and don’t forget to post pictures of your finished builds in the comments! ENJOY!
[…] guys. You’re in luck. My aerospace engineer friend, Jamison from Rogue Engineer kindly offered to draw up some diagrams for me, since I am a complete window-licker when it […]
Im very new to the woodworking world and just have a couple questions if you dont mind.
What kind of wood did you use for the nightstand?
Where did you get the lumber from?
I’ve heard that getting lumber from the box stores isn’t a good idea because it is usually used in construction and not for furniture.
Im looking forward to trying this project out, are there any other tips that you can throw at me to help me get started.
Thanks
Hey Jorge!
My friend Jen Woodhouse built this nightstand out of construction grade lumber from a big box store. Like her, myself and many others use this type of lumber to build furniture. It’s more than strong enough, forgiving, and very inexpensive which makes it an attractive option. I know thousands of projects that have been done with wood like this with no problem at all.
Now, I don’t call myself a woodworker, I’m more of a DIY’er but many true woodworkers will frown on this because most of them are looking to build a very precise piece of fine furniture which this type of wood is not the best for.
Hope this helps!
I built mine from reclaimed material – pine, oak and birch plywood.
I just finished building this bedside table. It was my first piece of furniture besides a doghouse. I used popular boards from Lowes and I think it turned out great. I thought the wood was great. The only issues I had are my skill level and the fact that I only had a skill saw. It’s going in my bedroom so a few flaws isn’t going to bother me. Better than no table at all! All I need to do left is the poly finish.
I can’t see any flaws @Steph Jake Zant! And I can’t believe you did all this with a skill saw. Awesome work! As good as this turned out I’m sure it won’t be your last project. I look forward to seeing more of your work. Be sure to post your future projects in the member project gallery. (https://rogueengineer.com/member-projects/)
Steph Jake Zant – you did a fantastic job! I don’t see any flaws and to have done it with a skill saw…nice work. Maybe I can convince my husband we don’t need a lot of tools for me to build our furniture ;). How much would you say it cost you for the materials?
Beautiful job!!!
Reattaching photo that was removed
Hello,
It looks all joints are butt joints and nailed together. Ate such joints strong enough? Do you recommend cutting grooves at joints by chisle, inserting and neiling/screwing?
Thanks and regards,
The butt joints with glue and nailing are plenty strong with a night stand. If you were supporting more weight another method of joining might be required.
If you look again, I think you will find that screws were used on all the butt joints. Nails were used to attach the panel in the back and the drawer bottom. I would recommend cutting a kerf in the drawer sides and sliding the plywood panel into it before gluing and screwing together. Pocket screw joints are very strong, if you use the right length screw. They do not satisfy the purist for joinery and woodcraft but are perfect for functionality and required skill level.
[…] DIY Bedside Table with Drawer and Shelf | Free Plans. Aug 24, 2014 – So my good friend Jen Woodhouse from House of Wood built this amazing bedside table for her master bedroom with no plans what so ever. […]
[…] DIY Bedside Table with Drawer and Shelf | Free Plans. Aug 24, 2014 – Complete with drawer and shelf, this bedside table not only looks beautiful, it's functional too. … If you want to see how her build went, which I encourage you to do, let her … DIY Moroccan Side Table Plans – Rogue Engineer … […]
[…] DIY Bedside Table with Drawer and Shelf | Free Plans. Aug 24, 2014 – So my good friend Jen Woodhouse from House of Wood built this amazing bedside table for her master bedroom with no plans what so ever. […]
Just finished a Video assembly guide for making this table. I made it out of Pine and it turned out Amazing!
Check out the video if anyone needs help.
https://youtu.be/_aLv_jywsPA
That turned out great Bryce and your video is awesome! Thanks for sharing!
Reattaching photo that was removed
Thank you again for sharing all your creativity. I love building furniture. Your website is the best, hands down, for instructional guidance. This is my second piece I have completed with your instructions. Thank you again. Please keep up the AWESOME work!
No problem and thank you so much Suz! This looks amazing. Great work!
Reattaching photo that was removed
[…] DIY Bedside Table […]
[…] DIY Bedside Table […]
[…] DIY Bedside Table […]
[…] DIY Bedside Table […]
Just wanted to share some expierence with the build. Use caution when using a softer wood. I used cheap soft wood from Home Depot as I have with some of your other projects but in these case when attaching the sides with the cross pieces the legs would break apart with the screws. So I used glue and with the screws as well. Thanks for you and this site. I build as much from here as I can! Congrats on the pursuing it full time!
Thanks so much Josh!
I made this table from your plans. This the first time I’ve ever posted to your (or any other site). I appreciate your plans and love making things like this. I hope to post many more…
Wow! this is awesome. Great work. The finish you did on this looks great. Thanks for sharing man and keep on building!
[…] DIY Bedside Table […]
[…] style sheds are perfect for storing lawn furniture & more! Accent your backyard with wooden. Diy bedside table with drawer and shelf free plans. Free and easy plans for a diy bedside table. Complete with drawer and shelf, this bedside table […]
[…] rogueengineer.com […]
Thank you for sharing these plans! You make it sound simple for me to try! 🙂 My husband pointed to this nightstand and said he wanted this one! I have one question though… I would like to avoid to use plywood… Can I use 1xs for making shelves?
Yes you can use 1xs for making the shelves. Glad you are going to give it a try. Be sure to share some pictures when you are done and happy building!
Great project and great plans! Thanks Rogue Engineer!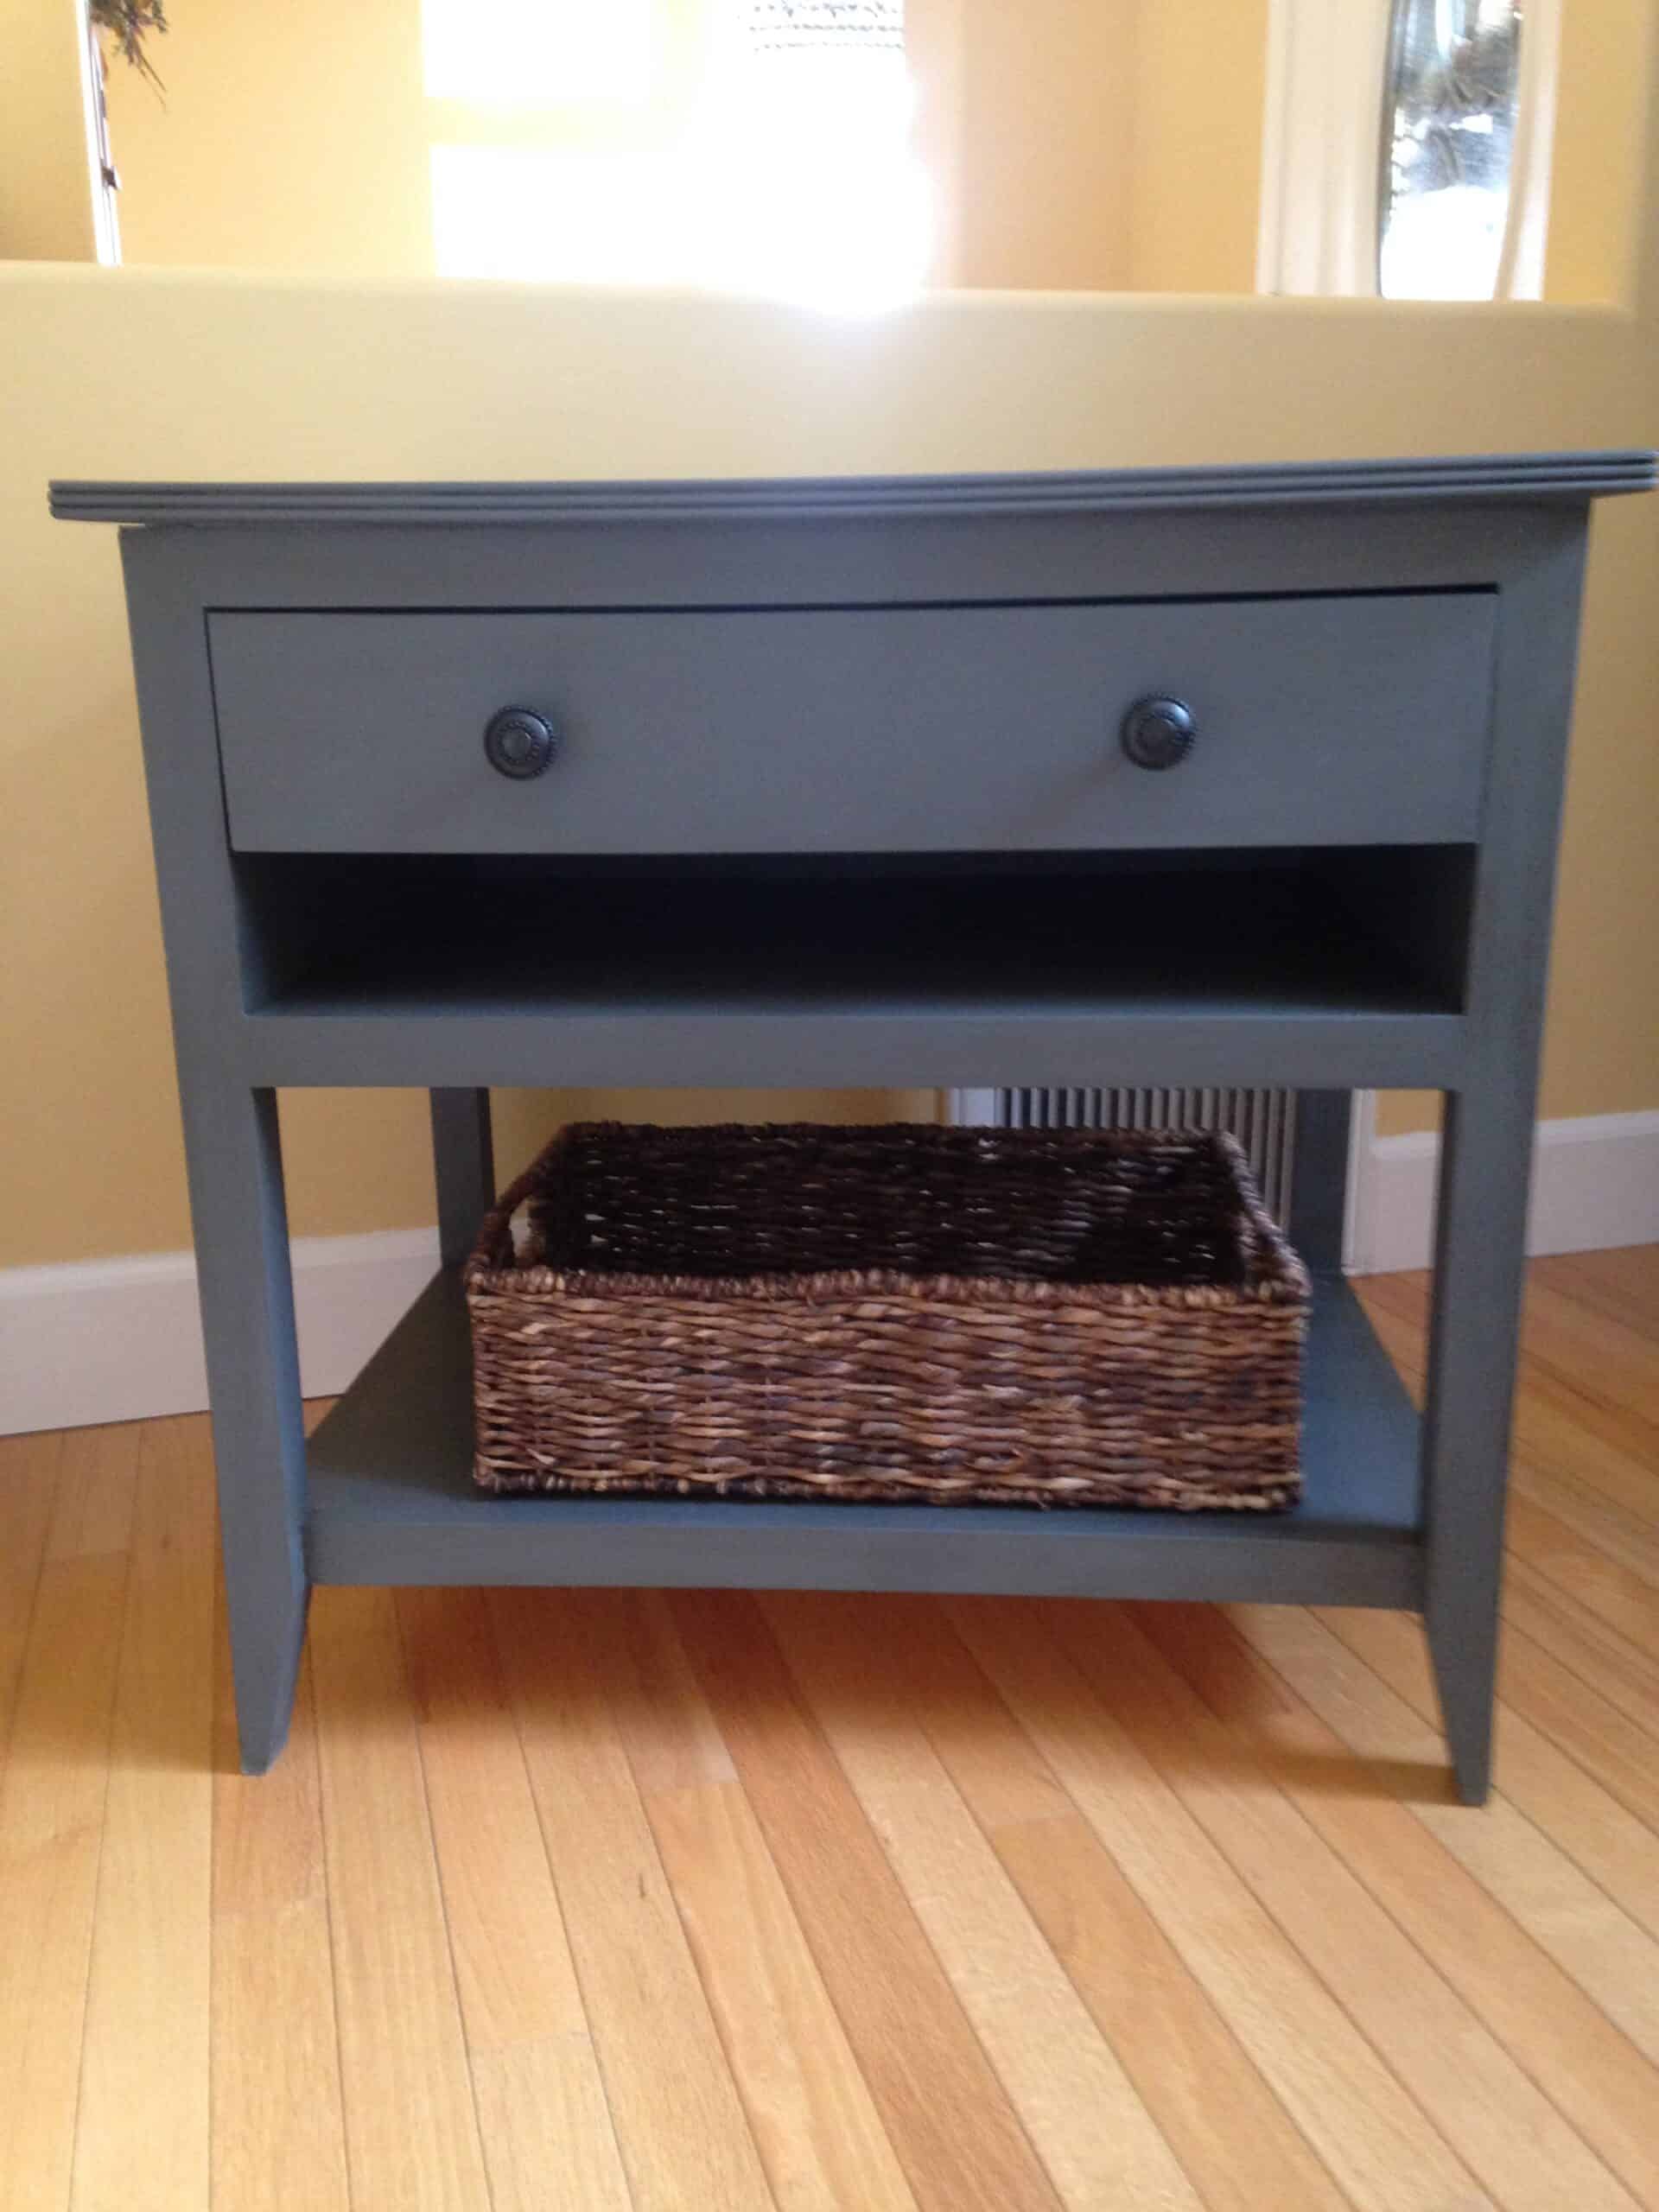
Saw a couple questions about the 10 degree tapers on the legs, here is how I did mine using a piece of 2×2 scrap, a speed square and a clamp. Just insert your leg flush to the corner of the scrap wood and the speed square then cut with your miter angle set to 10 degrees.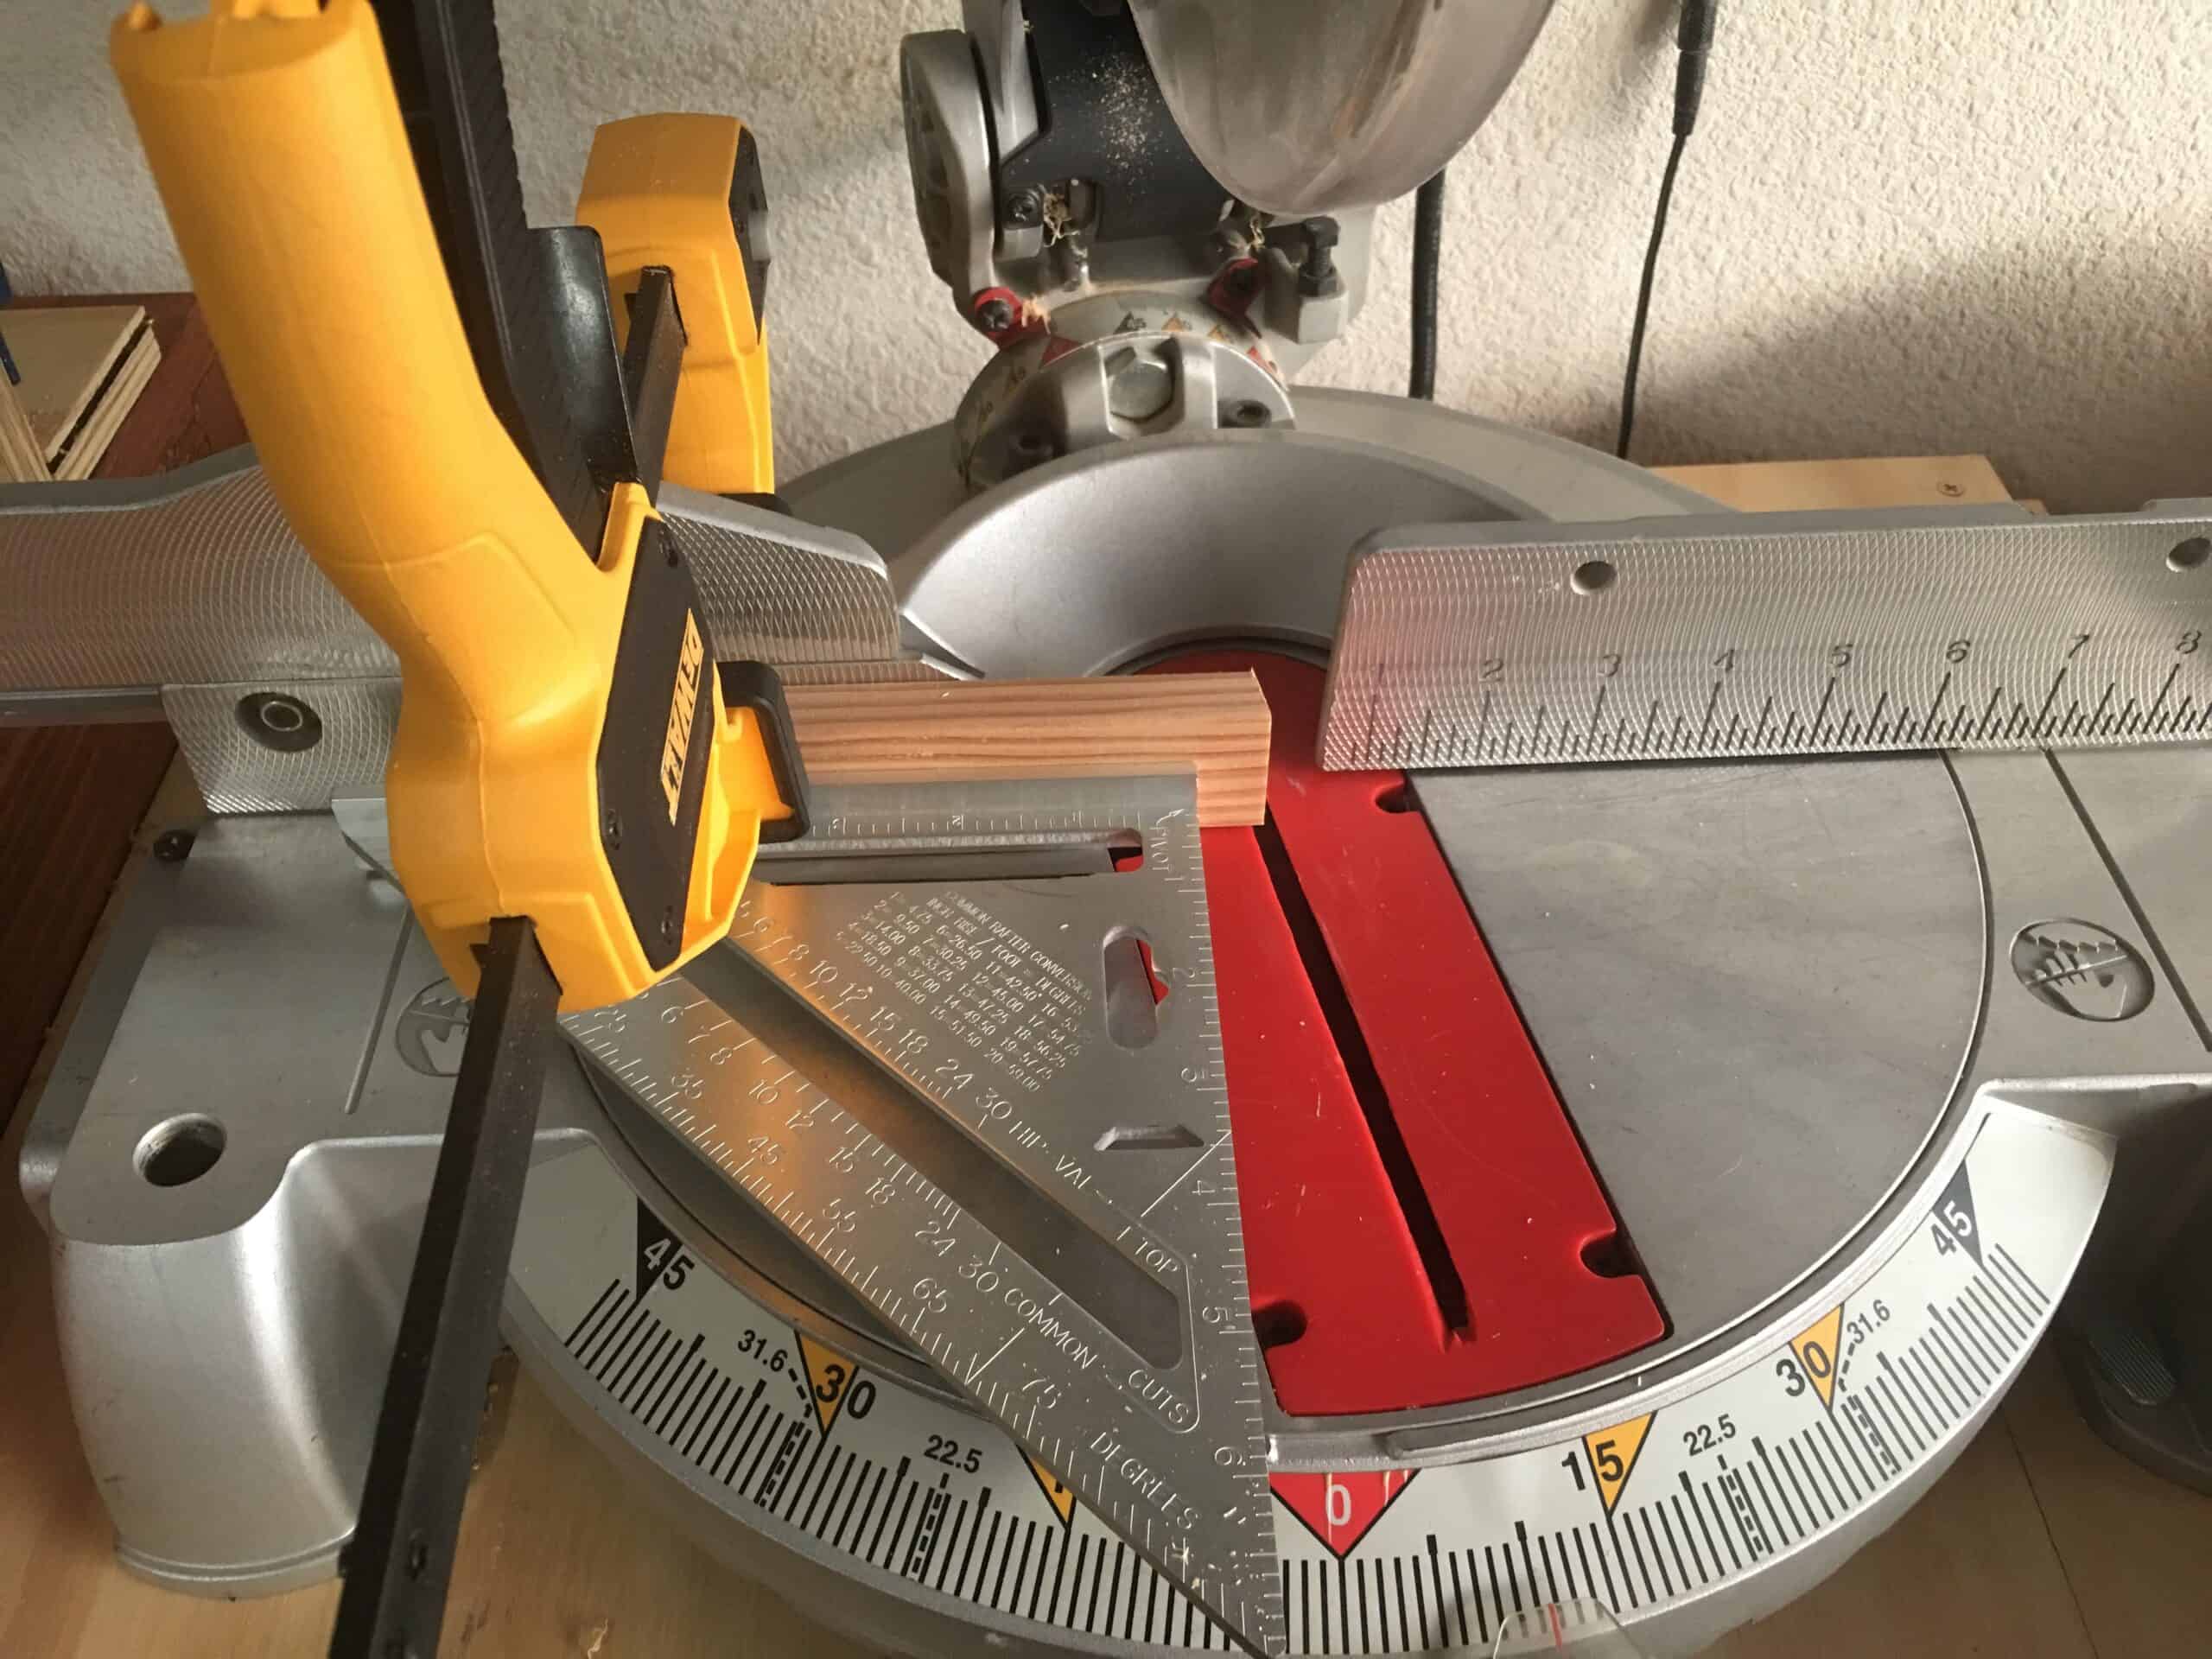
Any certain wood you wood recommend? Would be the biggest thing I have built and not a ton of wood working experience but I have some.
I really want to build two of these tables! I’m having some difficulty, though, finding quality 2×2 lumber for the legs. What species did you use? I don’t want to use pine or any softwood.
Because of size restrictions in my room, I would need to reduce the width of these by 8” and to keep things more proportional looking I suppose the depth would be best being reduced by 8” as well. If i do this, is all i have to do literally reducing all width and length related cuts by 8”? Or are there other considerations I need to make? Also in the plans where it shows to make pocket screw holes, are there specific measurements to where i make these holes or is it mostly an eyeballing it sort of thing? One more thing, I noticed the drawer in the photos on this plan has a nice edging on the outer edge. Was this just trim that was added or was the edge routed to that shape?
My stepdaughter LOVES this piece! Thank you for the plans!! I’m attaching my finished project made completly from reclaimed materials. She later used a dark stain on it.https://uploads.disquscdn.c…She needs a new clothes dresser and tall lingerie dresser — and she wants them all to match this design. I think I can just alter the dimensions and make it work. Anyone have suggestions?
how much is the price for all the materials
I had a question on the dimensions for this project. Are the dimensions you listed rough or final?
looks amazing
Jamison, Thank you for the great instructions. https://uploads.disquscdn.c… https://uploads.disquscdn.c… https://uploads.disquscdn.c…
Hi! What type of lumber did you use for this bedside table? Do you but regular 1x’s and rip them down on a table saw or do you buy 1x’s that have square corners? Thanks in advance for your help!
Looks great. Nice work on bedside table.
planning to do this build, but noticed your build sheet shows 96″ of 2×2 but the plans call for qty 4 27.25 x 2″, which is 109″+
OK, never mind. I see it calls for Qty 2 boards. I can read after all.