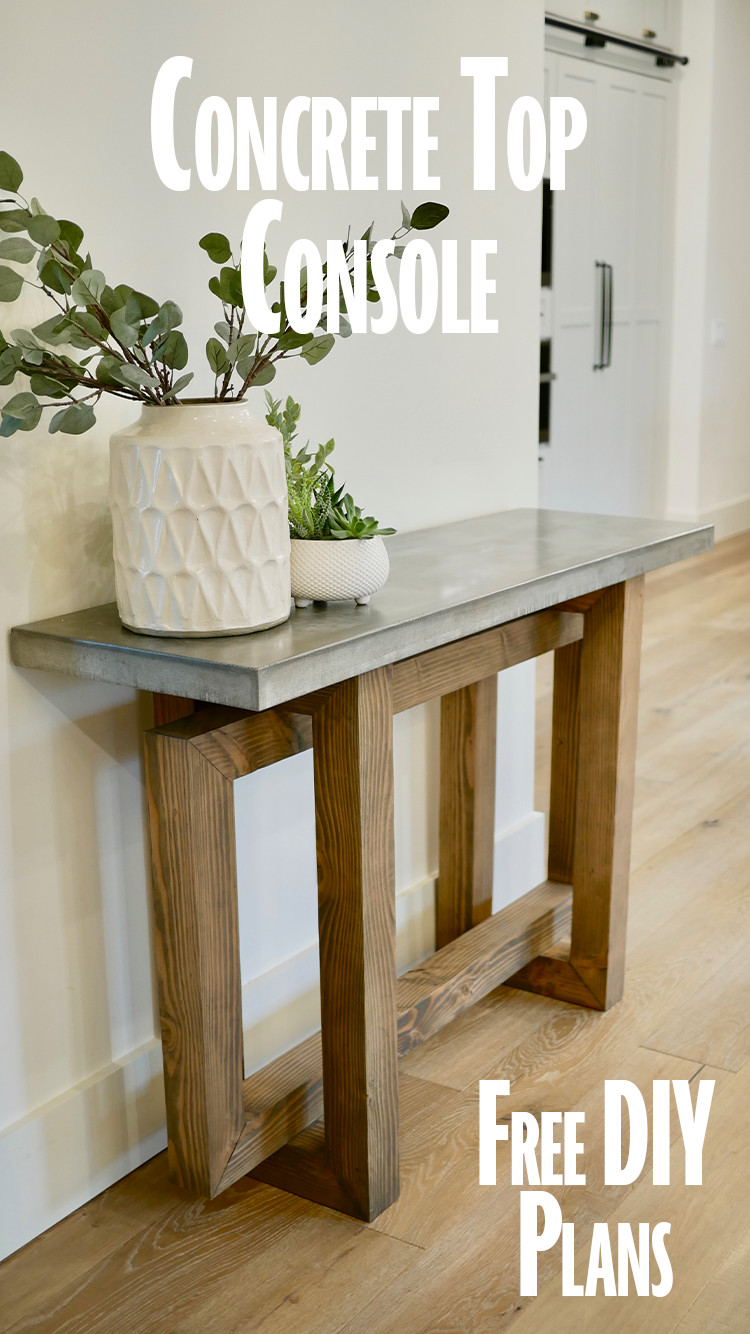
Concrete Top Console Table
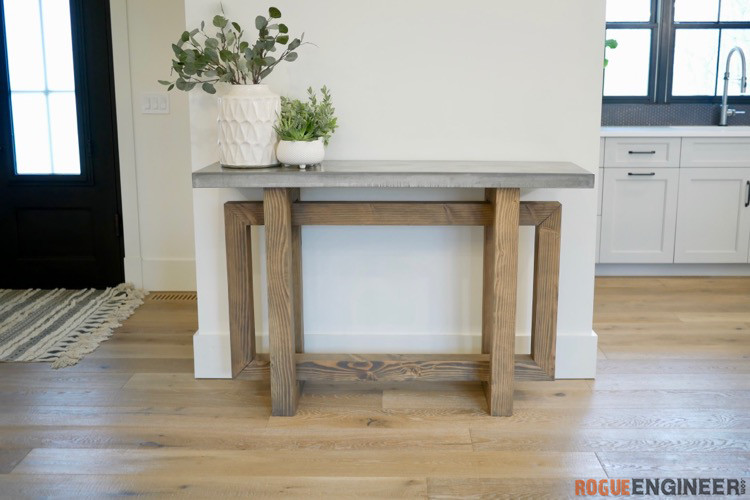
We have this wall in our house that desperately needed a cool console table. After scouring the web we came across a console table with concrete top from the Heston Collection at Restoration Hardware that we loved. It looked relatively easy to build and we have been dying to try a concrete project so we decided that this was the one. Read on to see how we built this $1500+ Restoration Hardware table for under $200.
If you like this look but want a different piece of furniture, look to Jen Woodhouse for the rest of the collection. She has plans for the bookshelf, side table, coffee table and dining table!
Time to Complete
1 Wknd
Estimated Cost
$150-200
Skill Level
Intermediate
If you love this stuff as much as we do, you might want to consider following us on Instagram where we post sneak peeks and behind the scenes stuff in our stories. Also, did you know you can get tons of projects plans from all around the web when you follow us on Facebook and Pinterest!
Tools
Materials
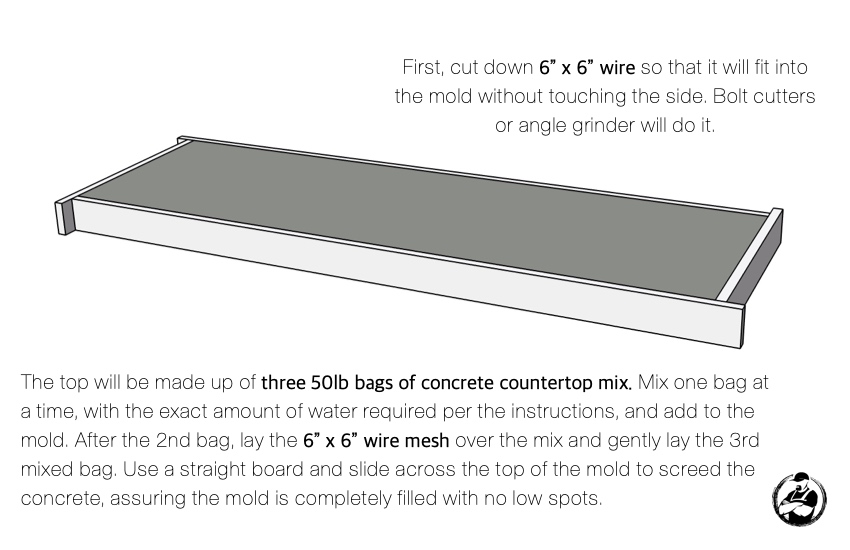
- (3) 50lb Bag Concrete Countertop Mix
- High strength concrete mix can be used and mixed with flow control for increased fluidity.
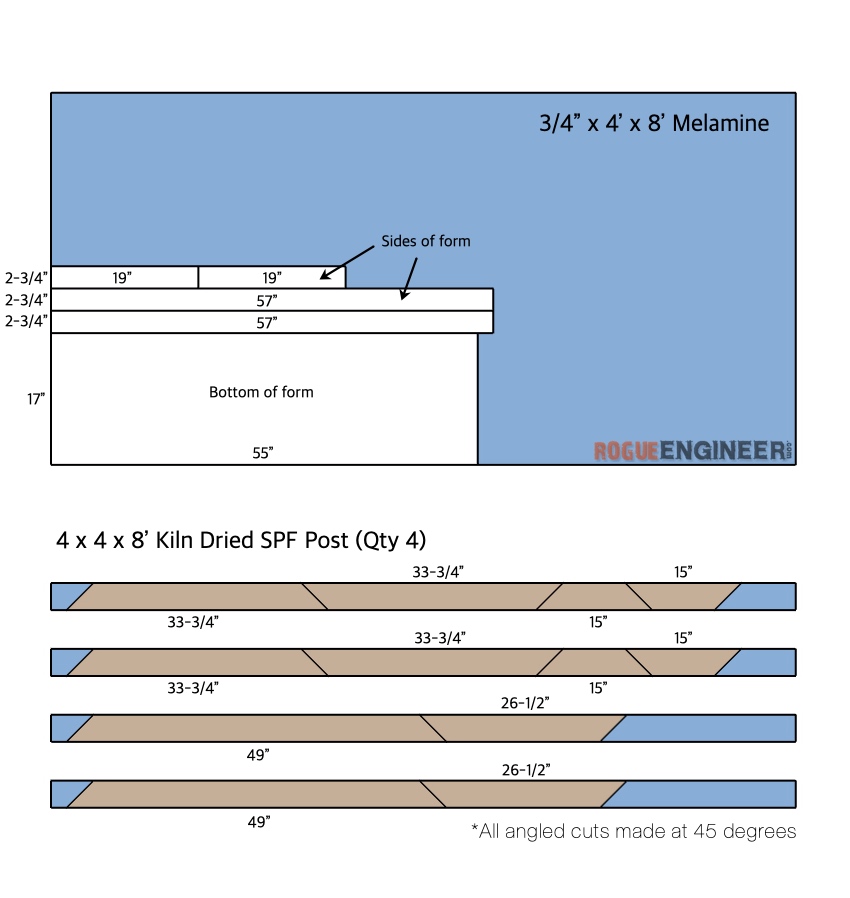
- 3/4” x 4’ x 8’ Melamine
- 100% Silicone
- 6″ x 6″ Wire Mesh (Remesh)
- (4) 4 x 4 x 8′ Kiln Dried SPF Posts
- 3/4″ Pine Dowel
- 5″ Wood Screws
- 1-5/8″ Wood Screws
- Wood Glue
- Diablo SandNet Discs
- Stone Sealer
Disclosure: The links provided in the “materials” and “required tools” sections are affiliate links. If you would like to support our site and help keep our content free come find out more about how we can make money with no extra cost to you.
Dimensions
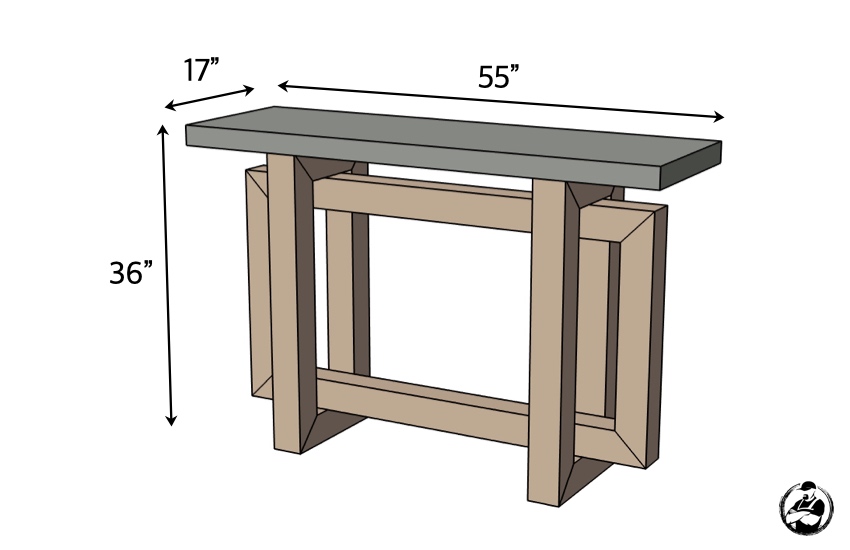
The tutorial below will show you the steps required to make your own console table with concrete top.
Total Time: 2 days
Cut List
While I do realize there is going to be a lot of melamine waste, make sure to save it as it makes for great future concrete forms.
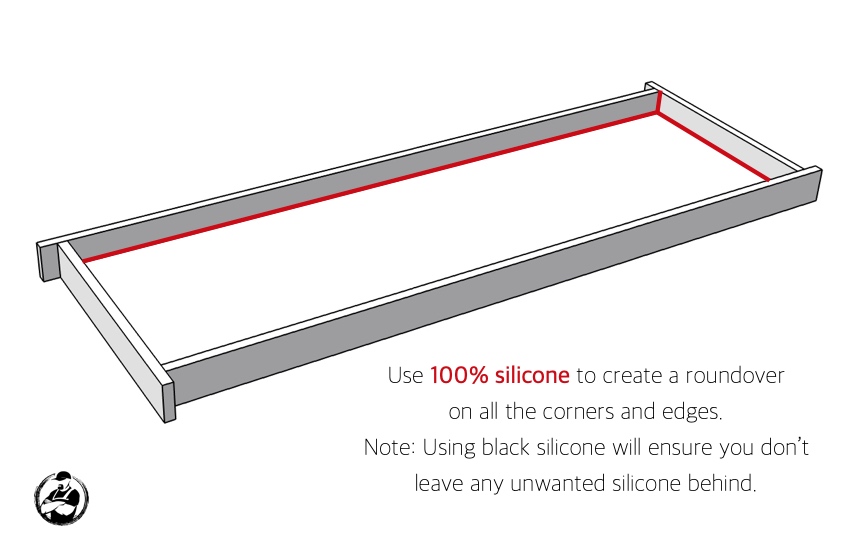
Assembling the Concrete Form

Creating Roundovers
Pouring the Concrete Top
Polishing the Concrete
After allowing ample time to cure, you can remove the top from the form by unscrewing the sides and pulling them off. Then carefully flip it over and begin the finishing process. The surface should be pretty smooth but to get a nicely polished surface start by removing any imperfections with a 120 grit sanding disc on an random orbital sander.
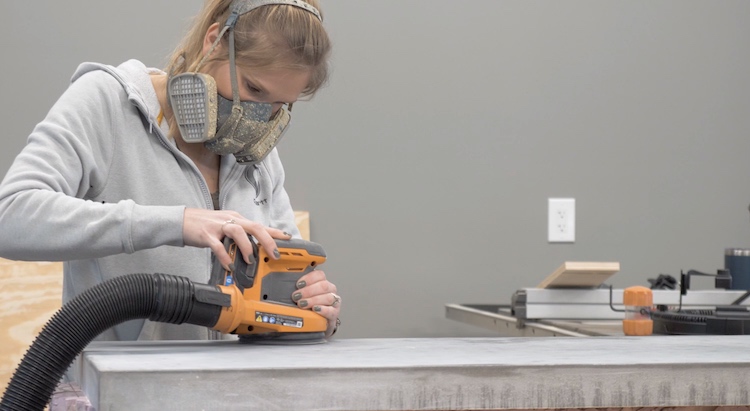
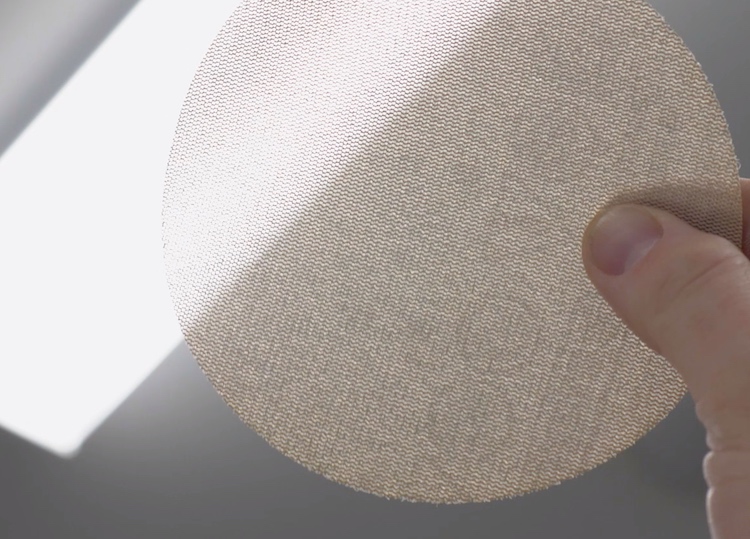
For applications like this where the finer particles would gum up typical sandpaper, I recommend the Diablo SandNet sanding discs. Not only are they easy to knock the dust out of (since they are a mesh disc), but they last way longer than ordinary sandpaper and they go all the way up to 400 grit for a polished finish. After the 120 grit is done you can move up to 220 grit and finish it off with 400 grit.
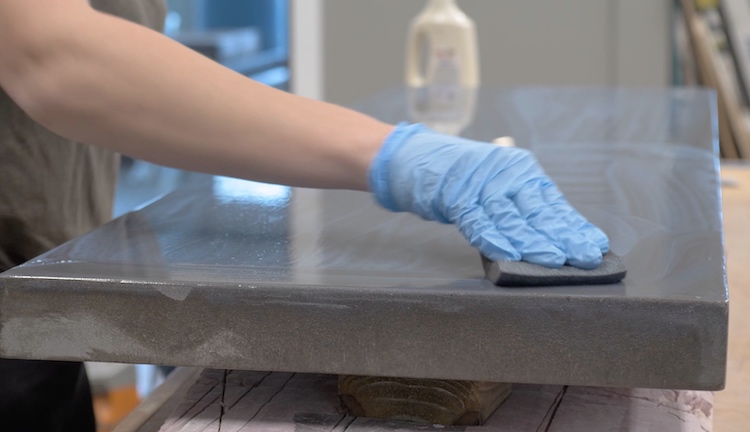
Sealing the Concrete
There are many different ways to seal concrete and prevent staining. Some use wax. You can also use a low luster penetrating sealer like I did, or you can use one that adds a bit of shine to the surface. Or, if you like the natural look and character of ring marks from wet glasses and evidence that the surface has been used then don’t add any sealer at all. Your call.
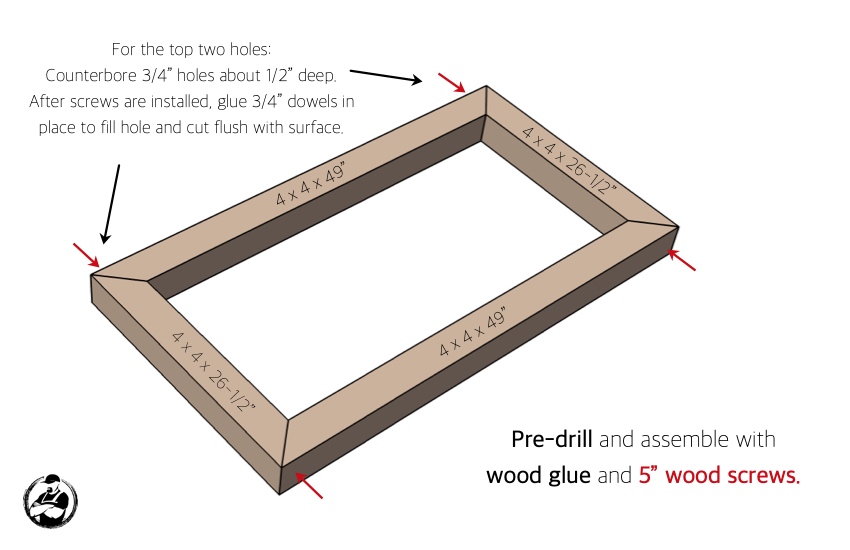
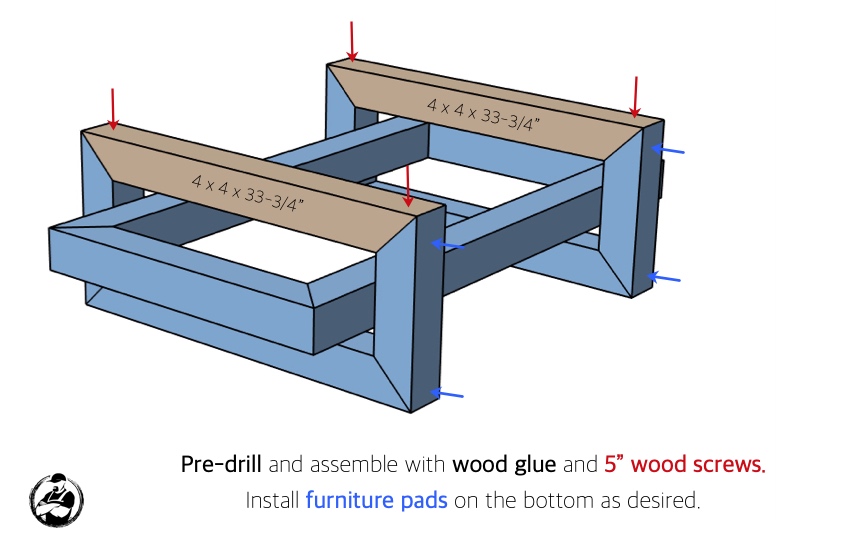
Assembling the Large Rectangle
Attaching the Legs
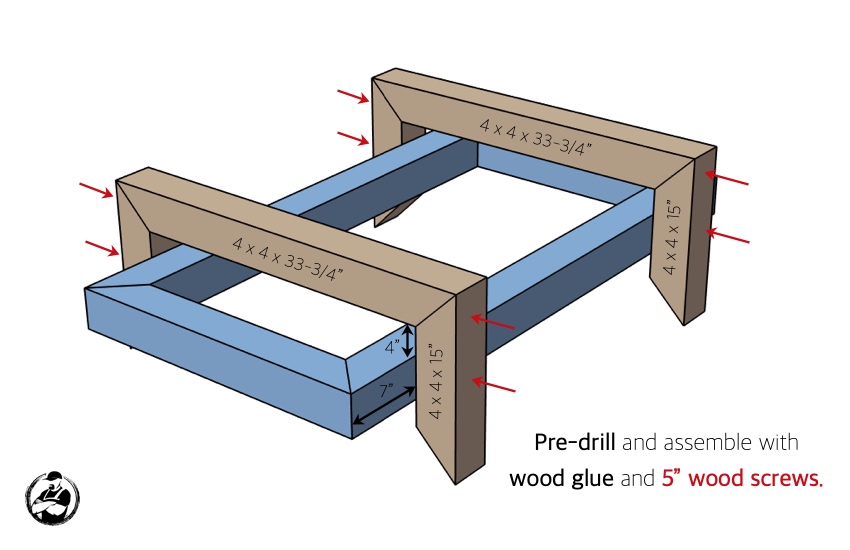
Attaching the Legs (cont.)
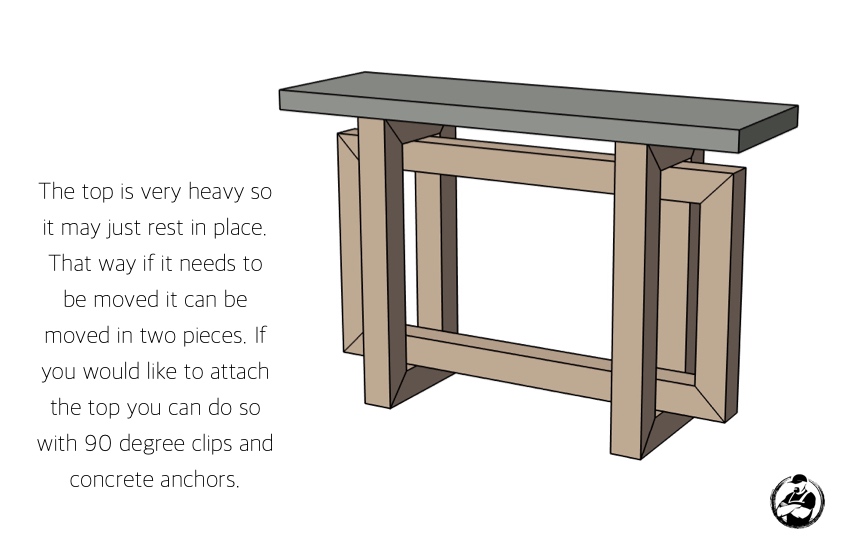
Setting the Concrete Top