
Epoxy River Pub Table
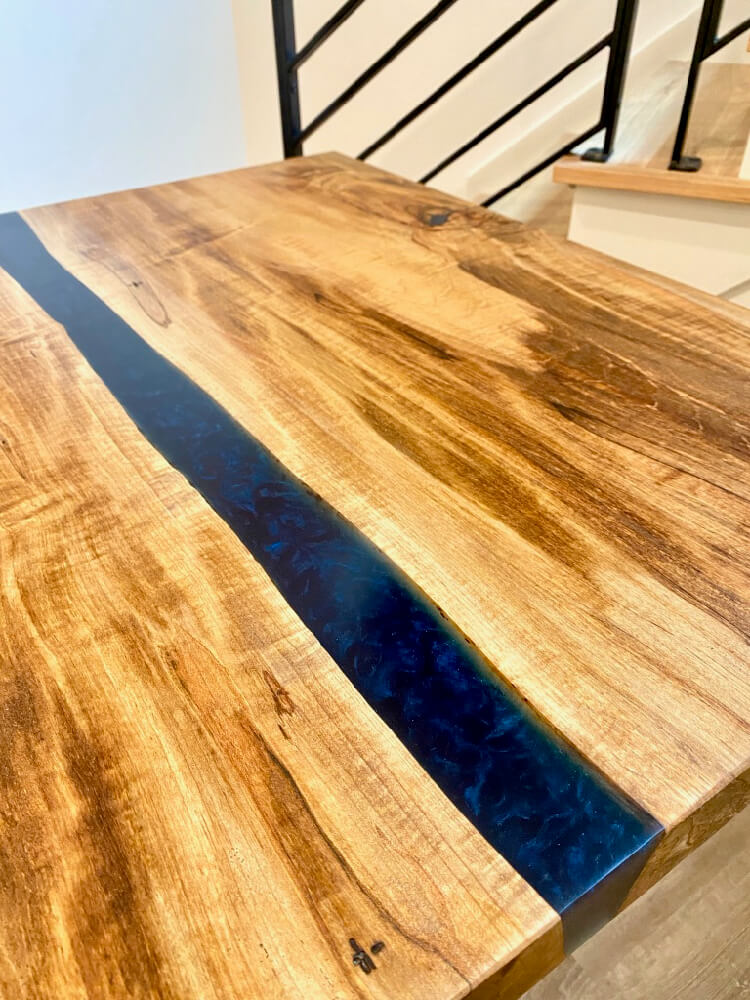
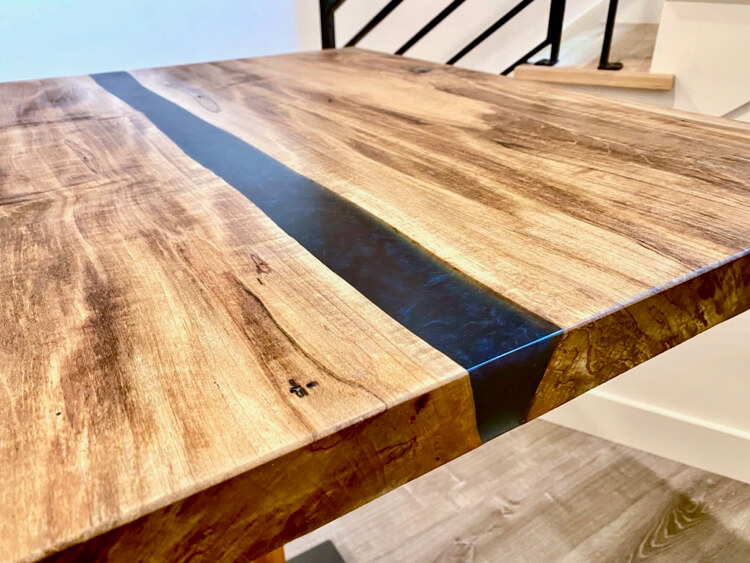
A few weeks ago, Rustoleum reached out and asked if I could make them a pub table for their showroom using their new Watco Super Glaze Pre-Tinted Epoxy. We settled on a 36″ x 36″ square pub table with an blue metallic epoxy river and I was excited to take on the project. After some searching I was able to find a great slab and table base that really made this project hard to give back. Check out the tutorial below to see exactly how the process went!

If you love this stuff as much as we do, you might want to consider following us on Instagram where we post sneak peeks and behind the scenes stuff in our stories. Also, did you know you can get tons of projects plans from all around the web when you follow us on Facebook and Pinterest!
Disclosure: This project was sponsored by Rustoleum however the design and opinions are 100% my own.
Full Project Video
Wanna see how it all came together? Check out the full project video below and don’t forget to subscribe on YouTube so you won’t miss future videos!
How to Make an Epoxy River Pub Table
This tutorial will walk you through the process I took to build a pub table with a live edge epoxy river feature!
Total Time: 3 days
Select the Slab and Cut Determine the River Location
I had an 80″ long slab but needed a 36″ square table. While most river tables are created by ripping the slab down the middle and turning the live edges in towards one another, this one would require the full width of the slab on bothe sides.
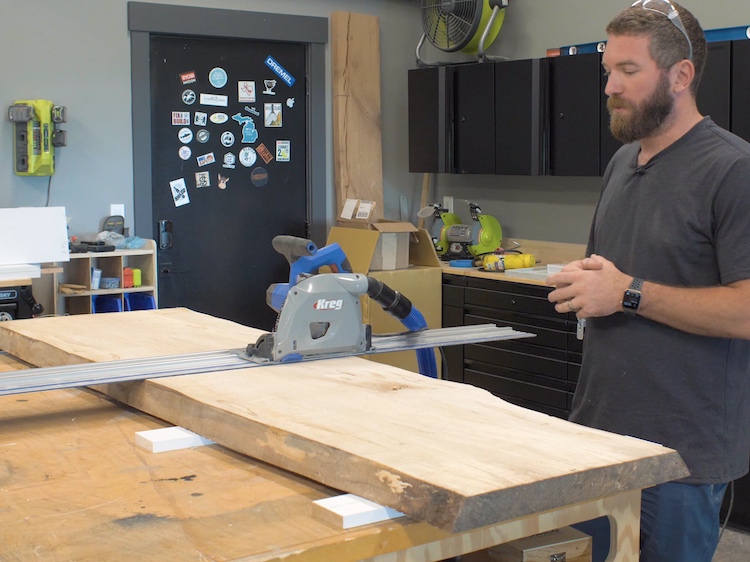
So I started by cutting the slab in half with a crosscut in the middle using a track saw.
Then I checked to see how the river would look and made sure both slabs were about the same length.

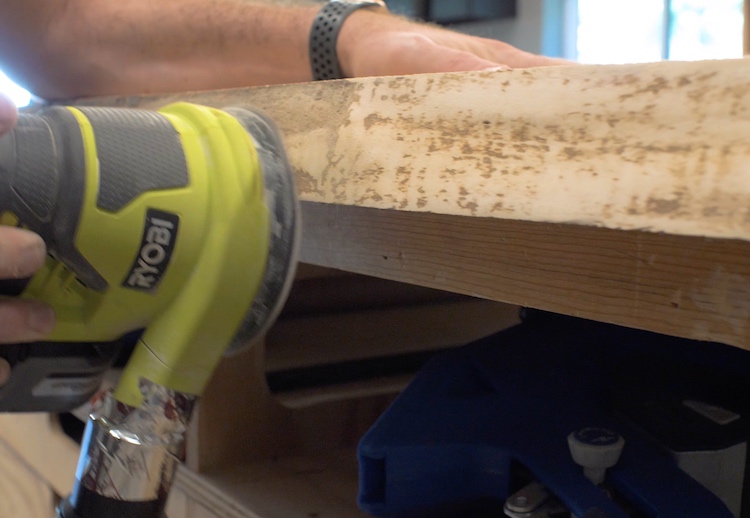
Preparing for the Pour
To start preparing for the pour I sanded the live edges to remove any loose material.
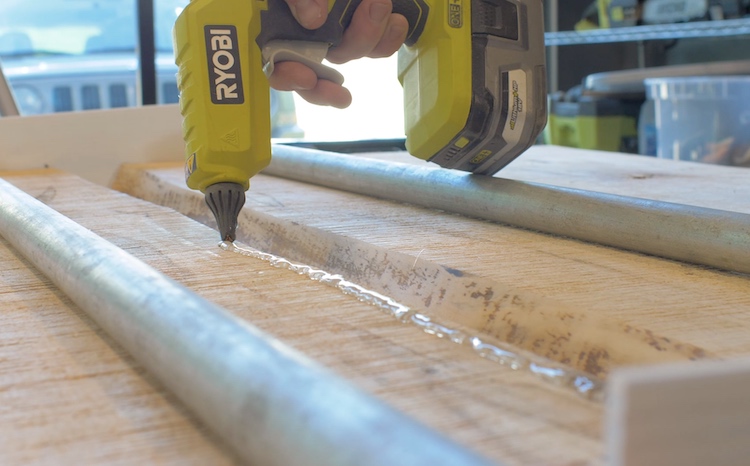
Once that was done I started on the form. Rather than building a form for the entire top I opted to used a yard sign as the bottom of the form and sealed it to the slab with hot glue.
I put hot glue under the edge of each slab and then came back and filled the bottom of the river to assure not epoxy would leak out. However, I didn’t do a good enough job and some still leaked. Probably because the ping-pong table I had this on was not completely flat.
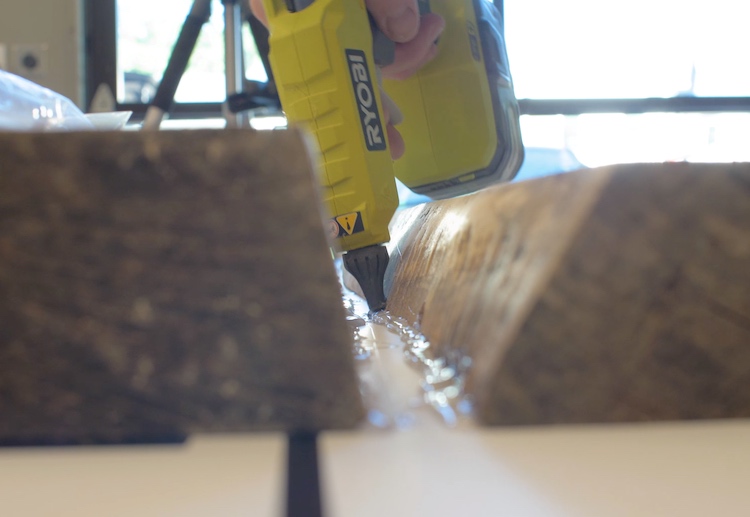
I also bent the ends of the yard sign up and glued those to the ends of the slab. Clamps were added to make sure they didn’t pop off.
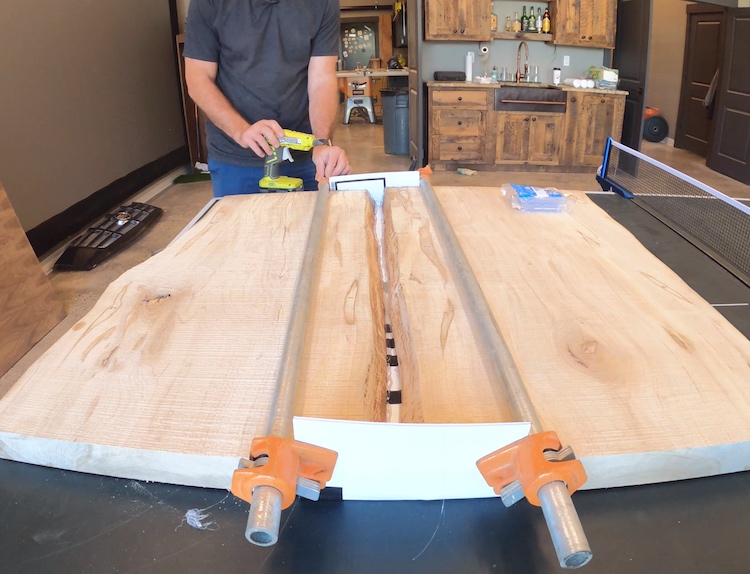
Since the two slabs weren’t the same exact thickness, to prevent any epoxy from flowing to far over the top, I created a dam of hot glue on each side of the top of the river.
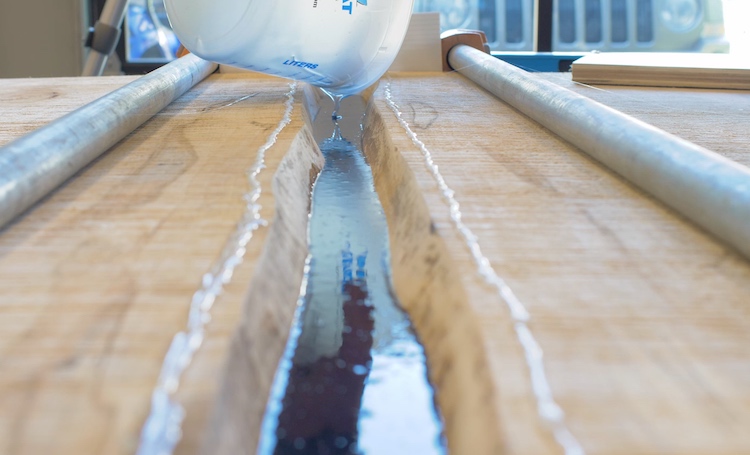
Pouring the Epoxy
For this project I used Watco Super Glaze pre-tinted epoxy. This is an, easy to use, two part epoxy that already comes tinted in the color I wanted. Simply pour part A and B into a mixing container and start mixing.
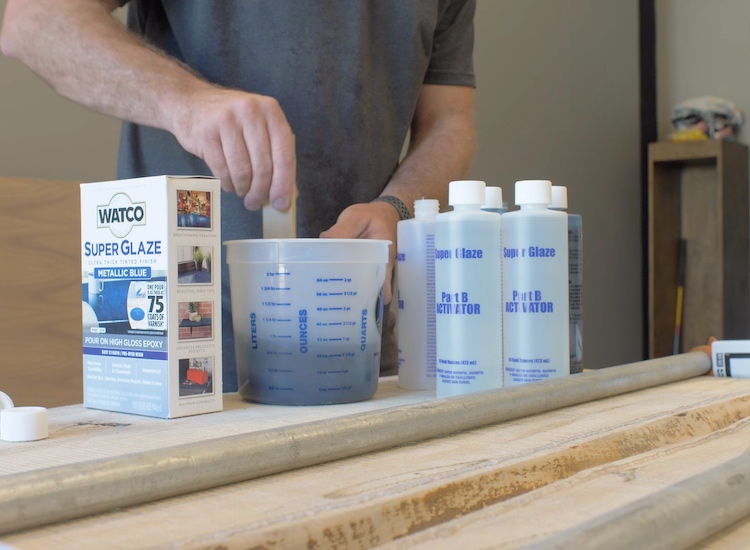
This river required 2.5 kits to fill the void and I allowed it to cure for a full day before removing it from the form.
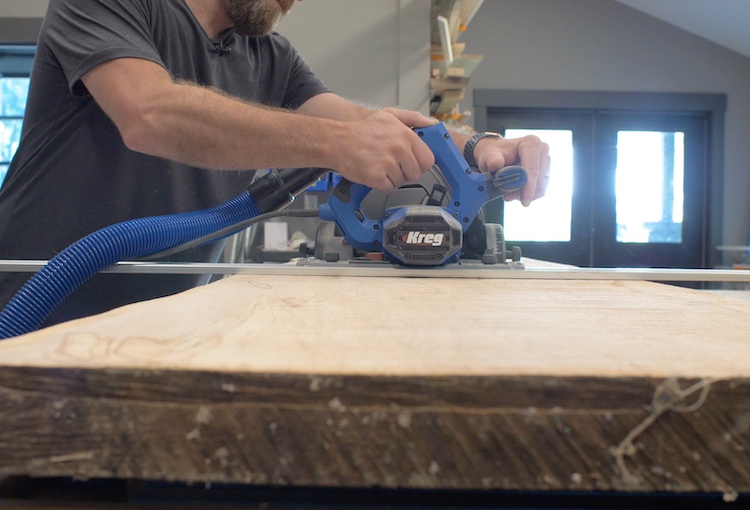
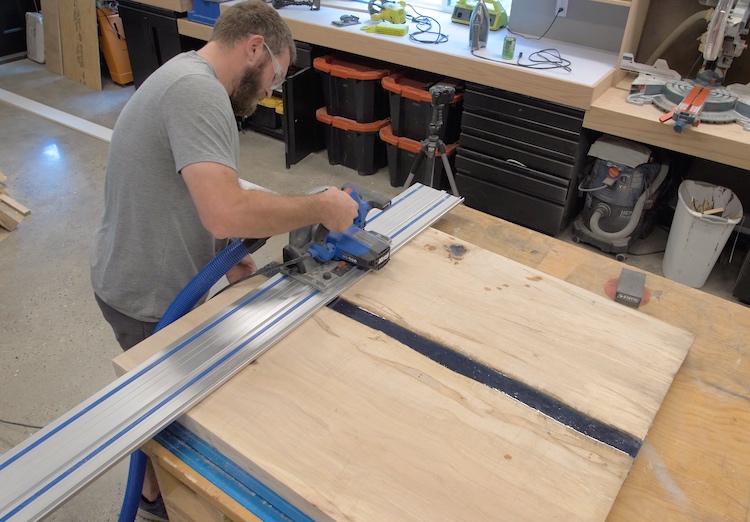
Cutting to Size
After removing it from the form I was able to use my track saw to cut the top down to the final 36″ x 36″ square.
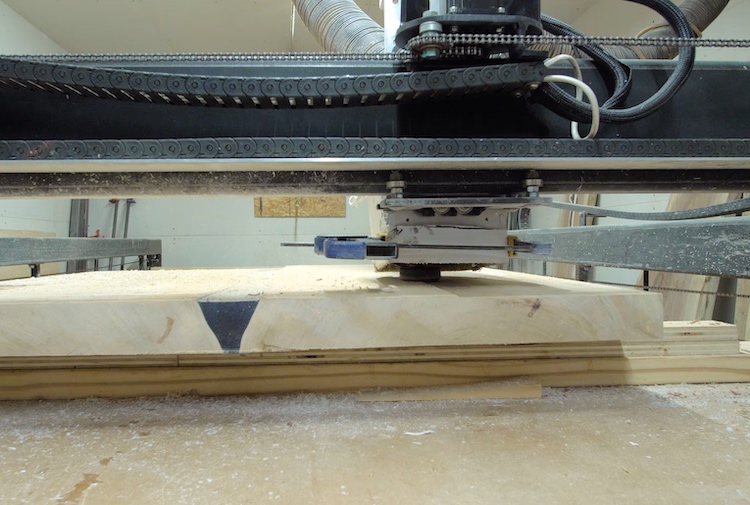
Flattening the Top
Since the slab was not perfectly flat we needed to find a way to get it there. I was able to bring the slab to a buddy of mine that has a CNC (@getwoodworked) to have him flatten the top and bottom. This could also be done us with a handmade flattening jig for your router.
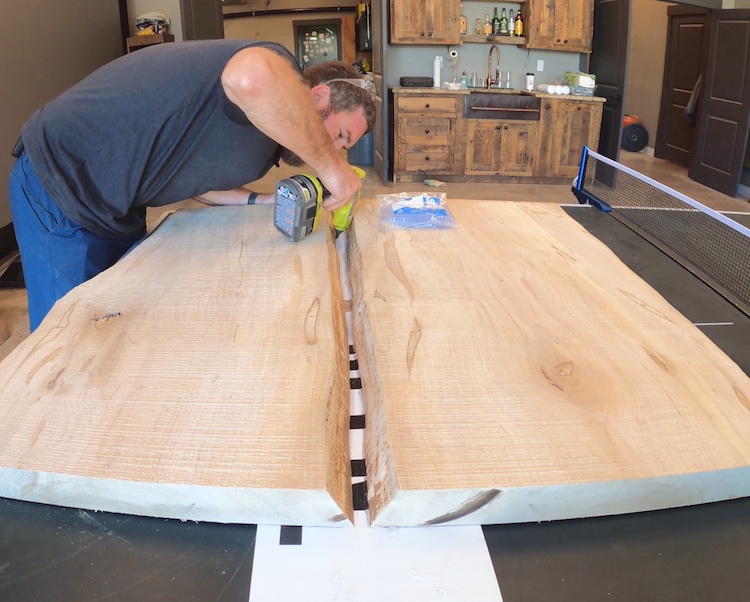
Sanding
This is the not-so-fun part. I started by sanding with 80 grit to get all the cutter marks out from the CNC. I then worked my way up to 220 and finally 400 on the epoxy.
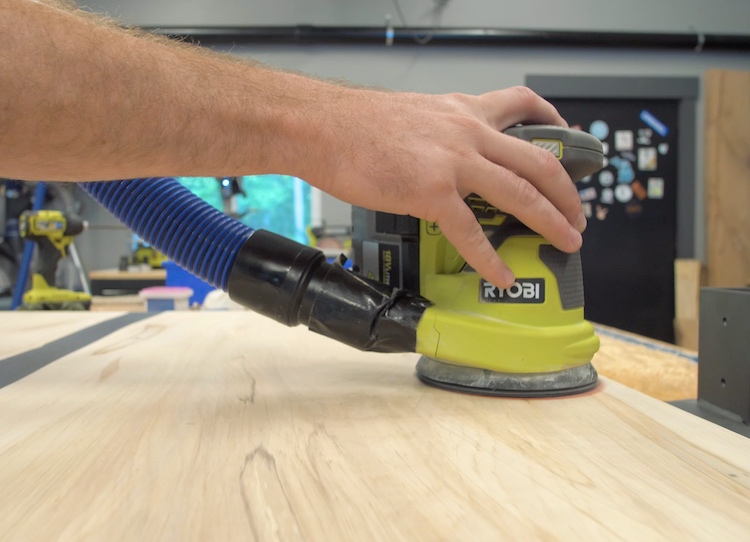
After I was done with the orbital sander I used a quart sheet sander with 800 grit, 1000 grit and 1500 grit on the epoxy to get a good shine before polishing with a buffer and finishing pad.
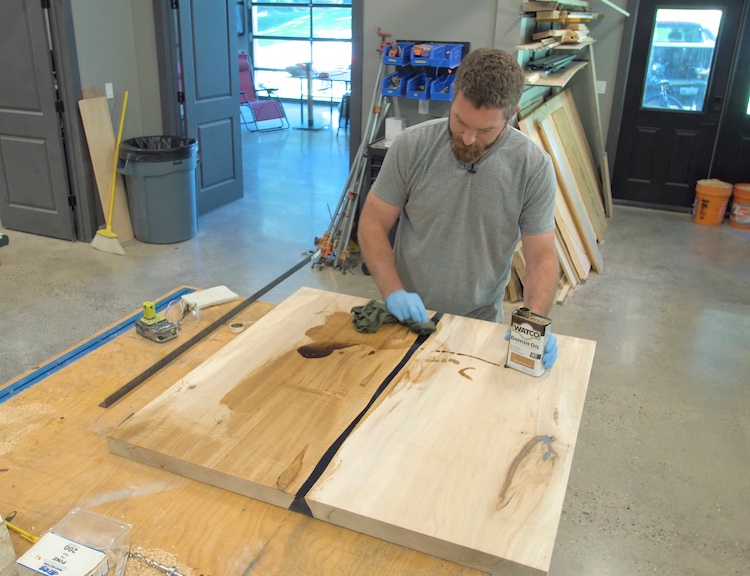
Finishing the Bottom
I then sealed the bottom of the top with 2 coats of Watco Danish oil in a medium walnut.
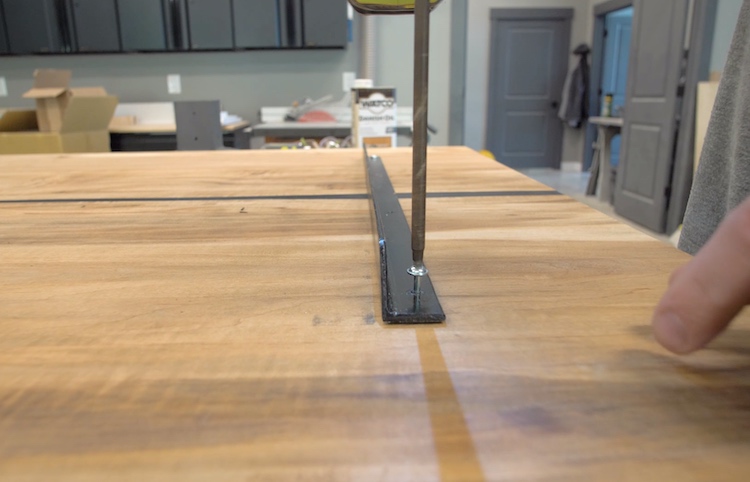
Before flipping it over and finishing the top I cut some 1″ steel angle that would be secure to the bottom, across the grain, to combat any cupping.
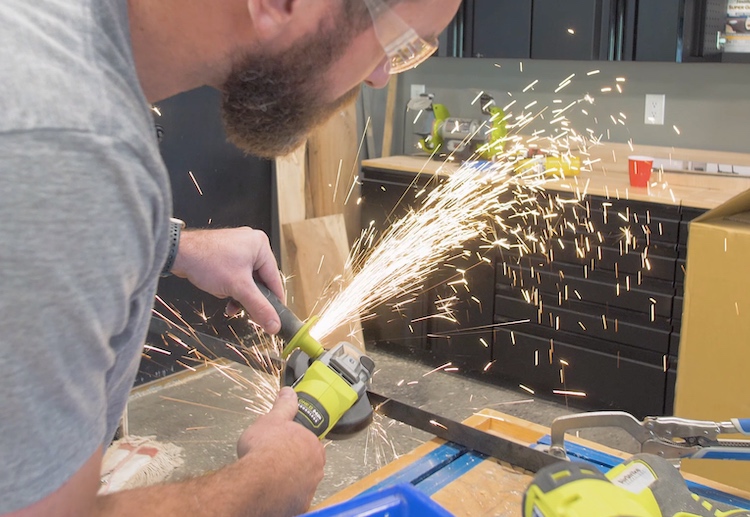
The steel angles got mitered at both ends, holes drilled, painted and secured with 1-1/4″ wood screws.
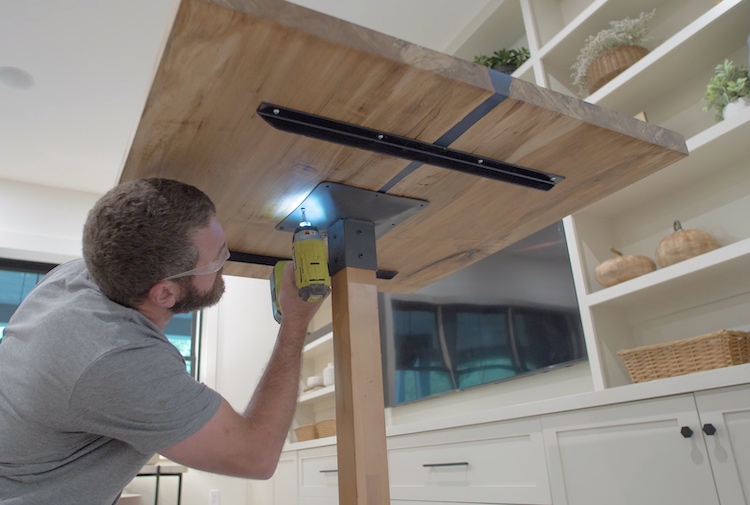
Assembling Base and Attaching Top
For the base, I went with a stock option from WebstaurantStore.com for about $130. This was a great looking solid base for a great price so it made sense. After getting it assembled, I centered the top on it and attached from the bottom with the included screws.
Questions? Comments?
As always, if you have any questions don’t hesitate to comment below and especially don’t forget to post pictures of your finished products in the comments! ENJOY!