DIY Kayak Rack: A Freestanding Rack for 6 Kayaks, With a Metal Roof
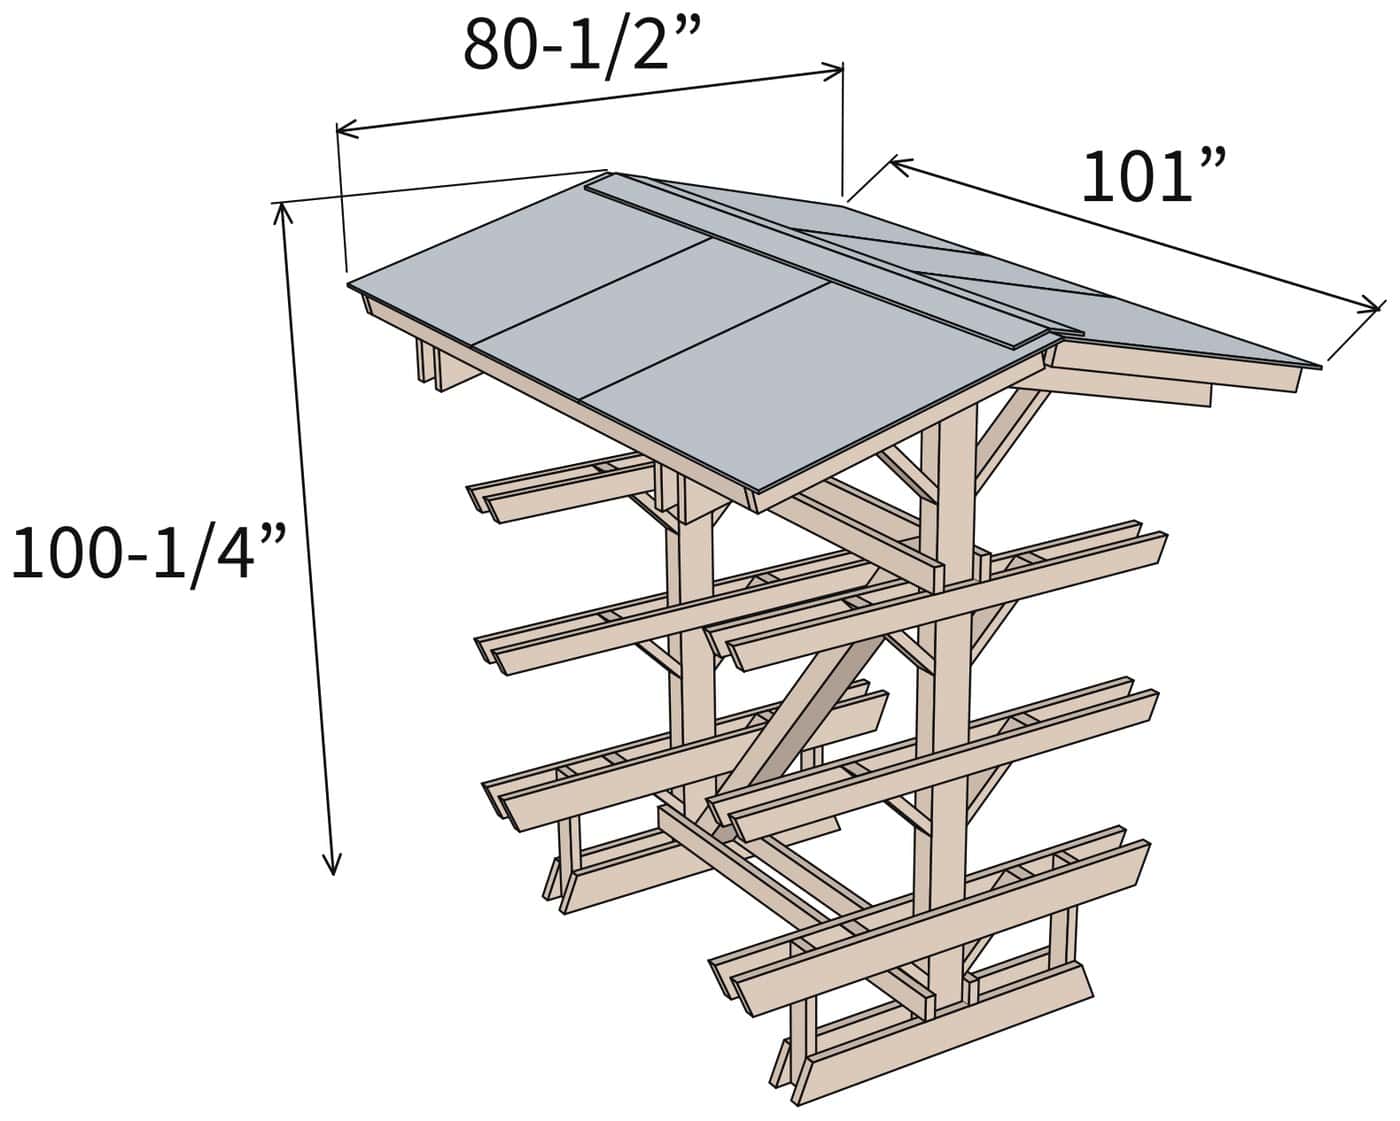
Quick build: This DIY kayak rack is a freestanding kayak storage rack that holds six kayaks, three high on each side, under a metal gable roof. It’s two end frames built around 4×6 posts with 2×6 and 2×4 arms, tied together with stretchers and a 4×6 diagonal, and anchored to the ground. Mine is 101″ long, 80-1/2″ wide and 100-1/4″ tall, and the plan prices it at about $665 in lumber, screws, roofing and anchors. Mine came to about $630, counting the screws at the plan’s price (I already had them). It’s a weekend build. The kayak rack plans come in 8 designs: 2, 3, 4 or 6 kayaks, open or with a roof. Documented by Jamison Rantz, November 2026.
Kayak Rack Plans: $20
A one-page shopping list priced line by line, a cut list with every board drawn, and a drawing for every step with the screws counted at every joint. Eight designs: 2, 3, 4 or 6 kayaks, open or with a roof.
Get the Plans →One of our favorite things to do out at the lake is get on the water. We’ve got three kayaks and three paddleboards, so everybody can go. The problem was storing them. They either sat in the water or piled up on the shore.
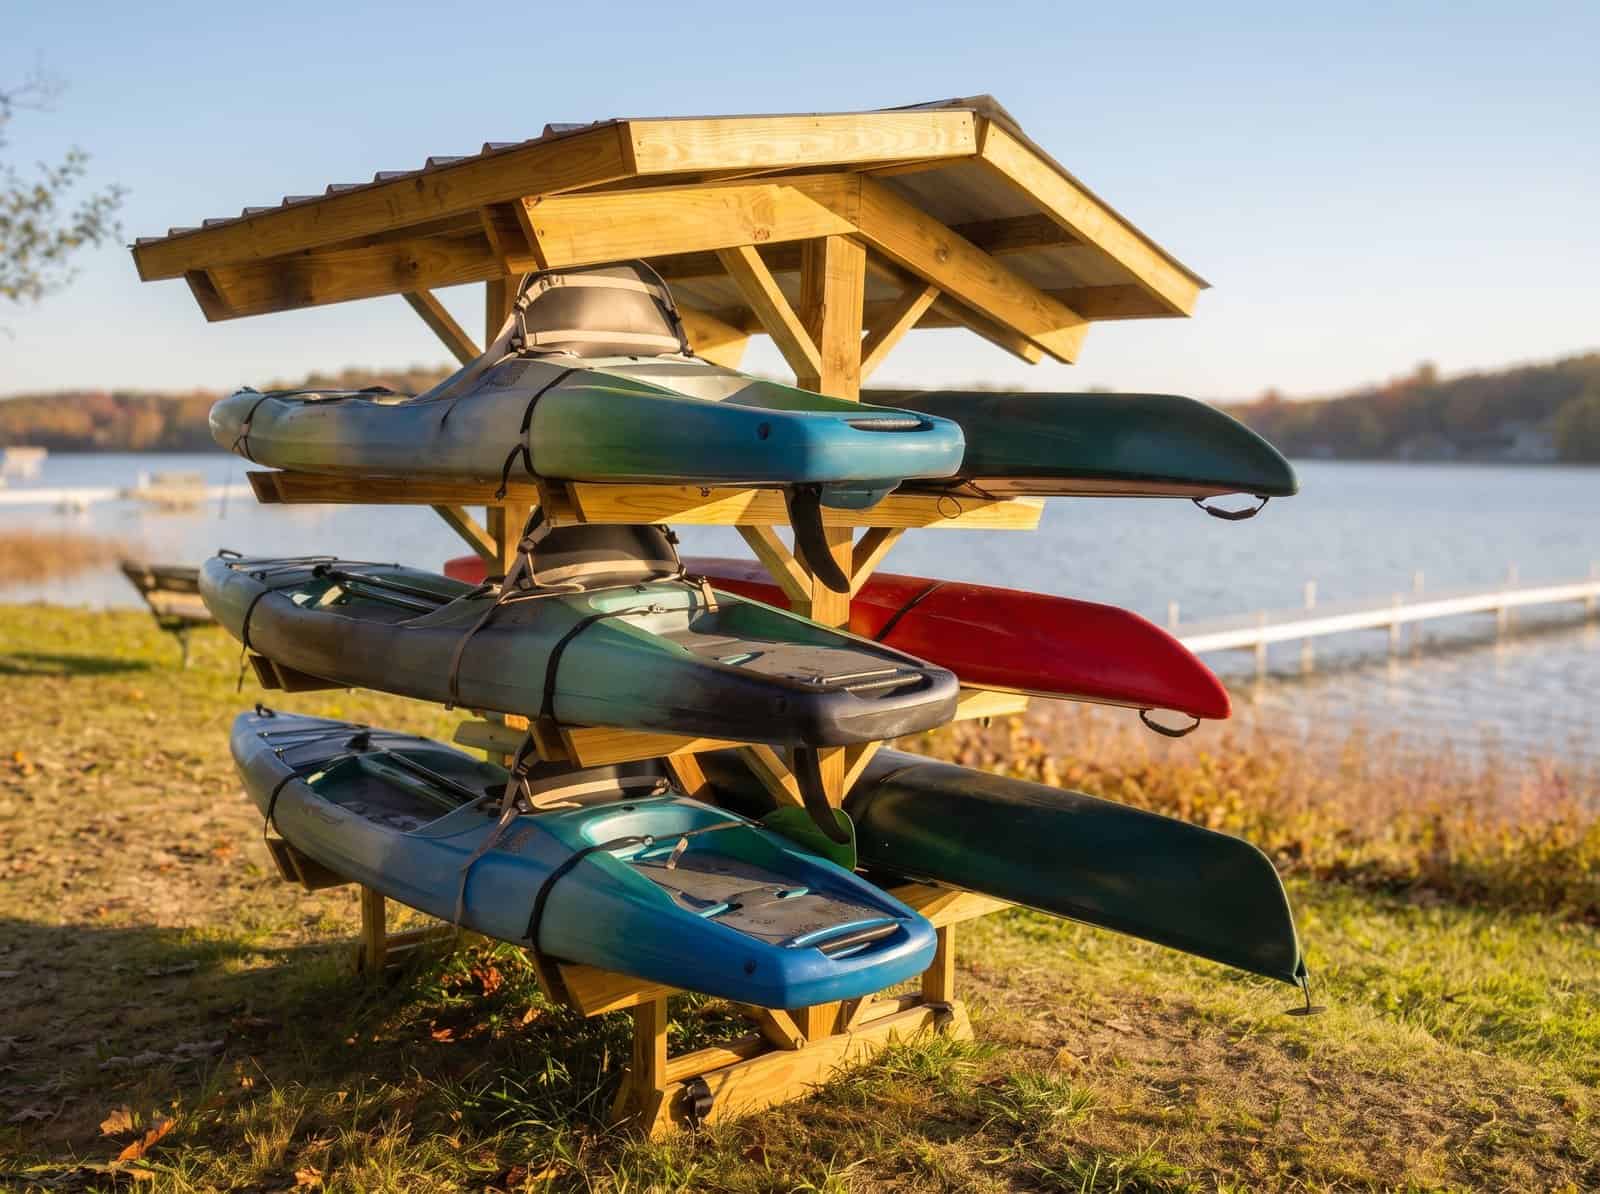
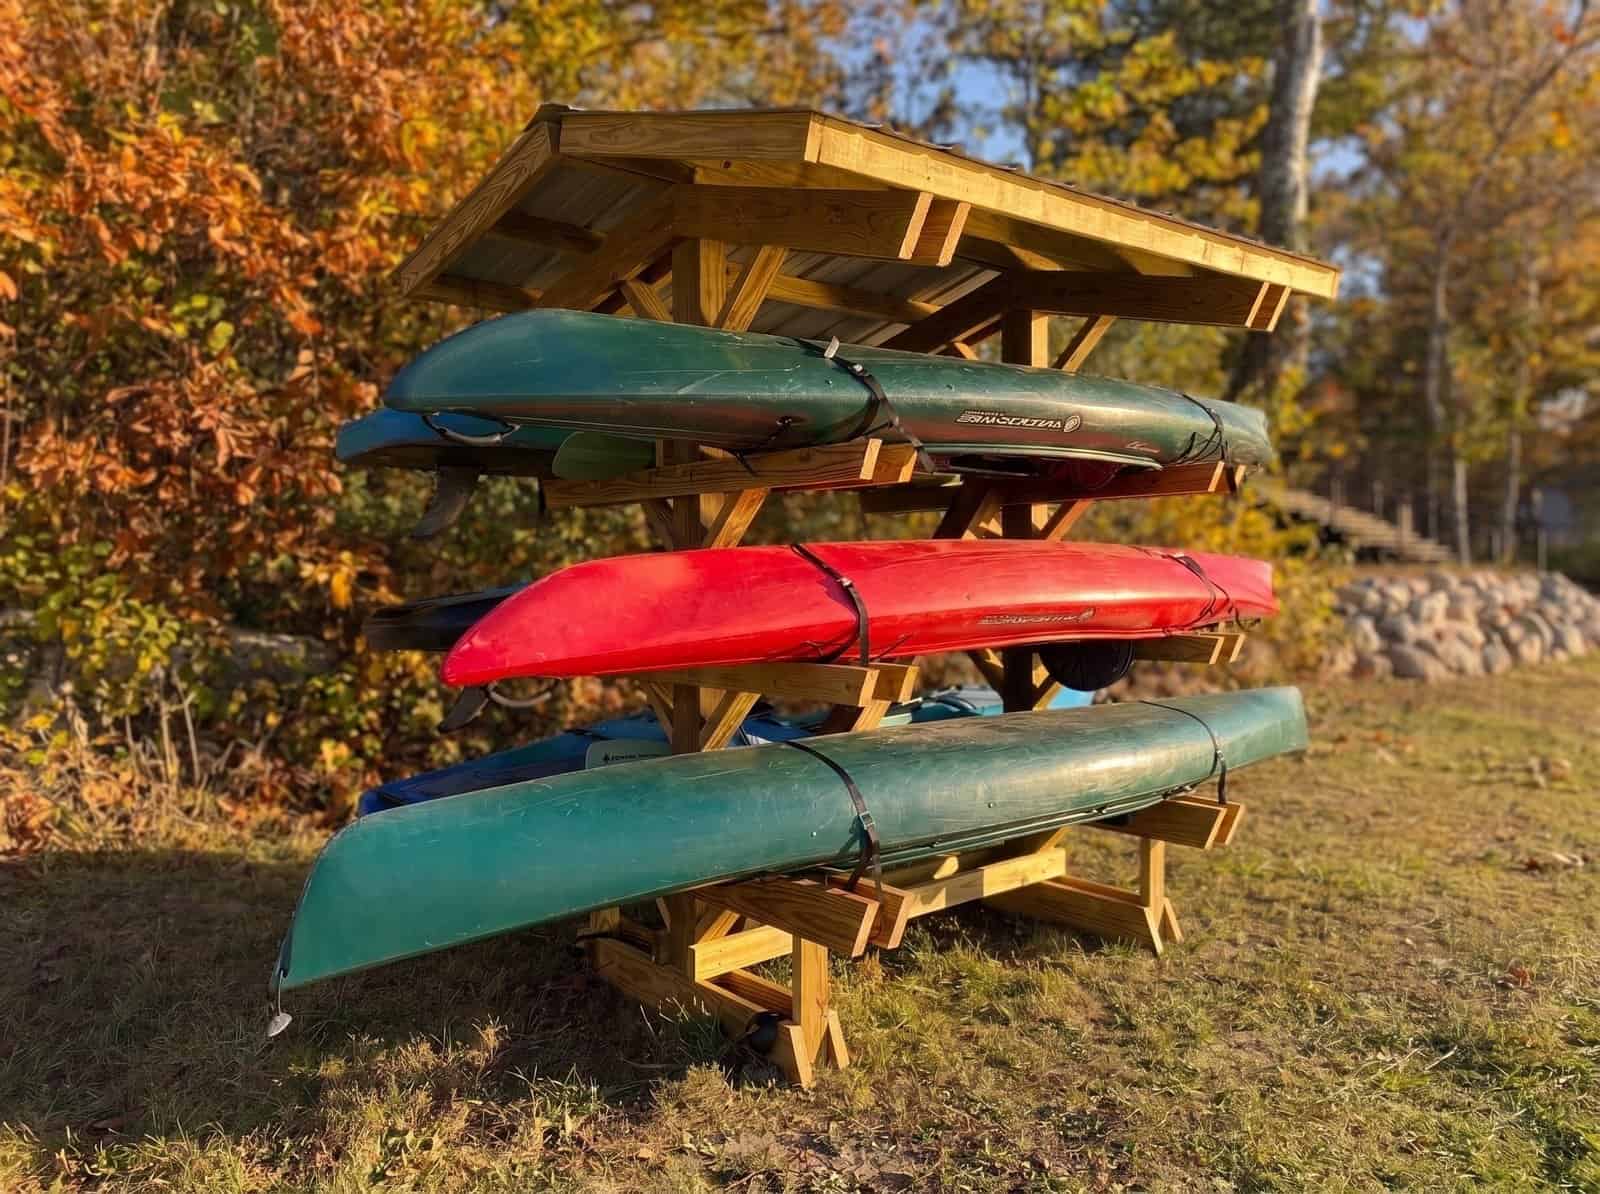
So I built an outdoor kayak rack that holds all six, three high on each side, with a metal roof to keep the sun and snow off them. It lives outside by the lake all year, so it’s built heavier than most kayak racks you see: 4×6 posts, a 4×6 diagonal, beefier screws at the braces, and ground anchors.
I’m an engineer, so I couldn’t leave the wind to a guess. Every joint in the plans was checked for 130 mph gusts and 50 psf of ground snow, and every screw listed is the one that check called for.
Why This Kayak Rack Design
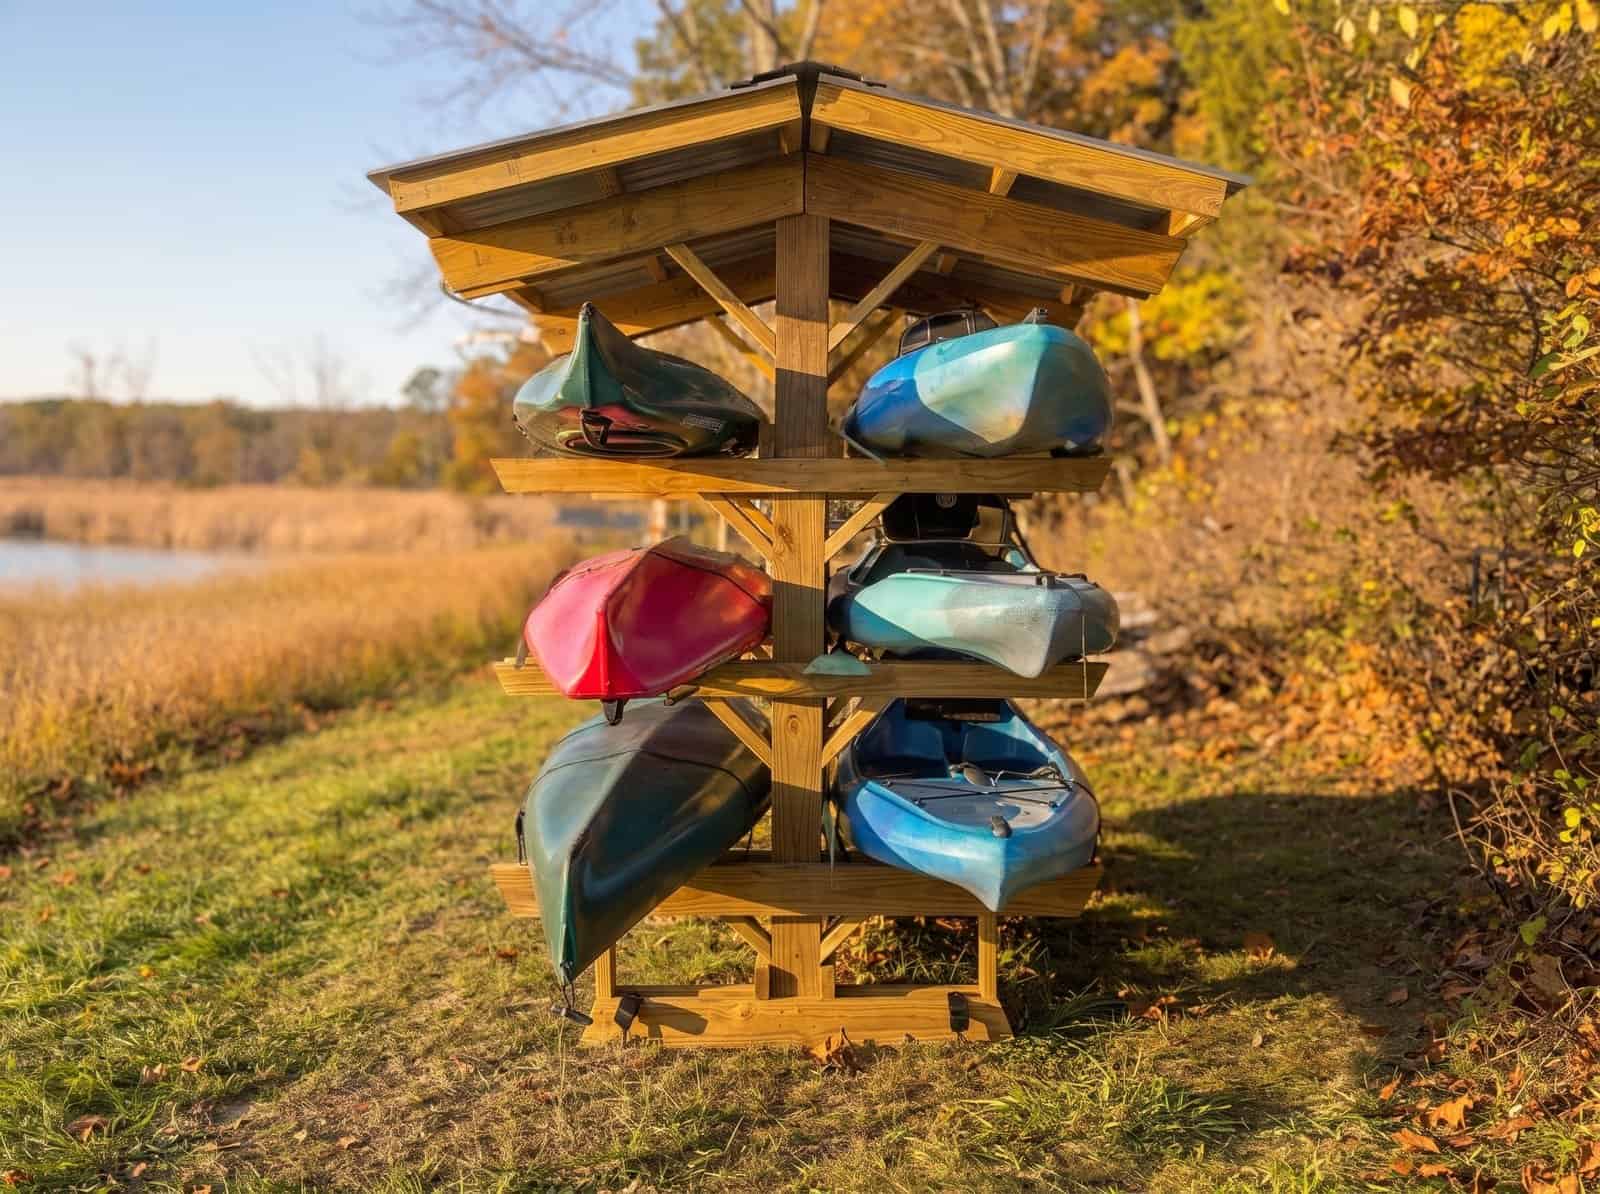
This is a post and arm rack. Each end frame is one post with a pair of arms at every tier, and the boats lie across the arms on their hulls. It’s the most common DIY kayak rack for a reason: it’s simple to build, you load each boat from the side without lifting it over anything, and it stacks three high in a small footprint.
I went double-sided so it holds six boats in about 8-1/2 ft by 7 ft of yard. And I gave it a roof. A plastic kayak left in the sun fades, and over a few seasons it gets brittle. And a winter of snow piled in the cockpits isn’t great either. The roof takes care of both.
You can buy a steel six-kayak rack online for about $110 to $440 (November 2026). The ones I found are rated for 120 to 400 lb in all, and none of them has a roof. If your boats live in a garage, that’s fine. Out in the yard, I wanted something heavier that I’d never have to think about.
What You Need: A Wood Kayak Rack From 2x4s, 2x6s and 4x6s
Use pressure-treated lumber. Buy the posts, feet and legs rated for ground contact and at least above-ground treated for the rest, with screws made for treated lumber.
For the roof I went with barn metal from my local lumberyard. They’ll cut it to the inch, so I ordered it to length and only made the one cut on each end. If your yard can’t, the plans cut each 12 ft panel into three pieces.
How to Build a Kayak Rack
These are the steps for the 6 kayak rack with a roof, the one I built. The plans have the cut list, the shopping list and a drawing for every step with the screws counted at every joint, for all 8 designs.
Cut the Lumber
Sight down every board at the store and leave the bowed and twisted ones. A bowed arm tips the boat. Cut the long parts first and label each piece as it comes off the saw.
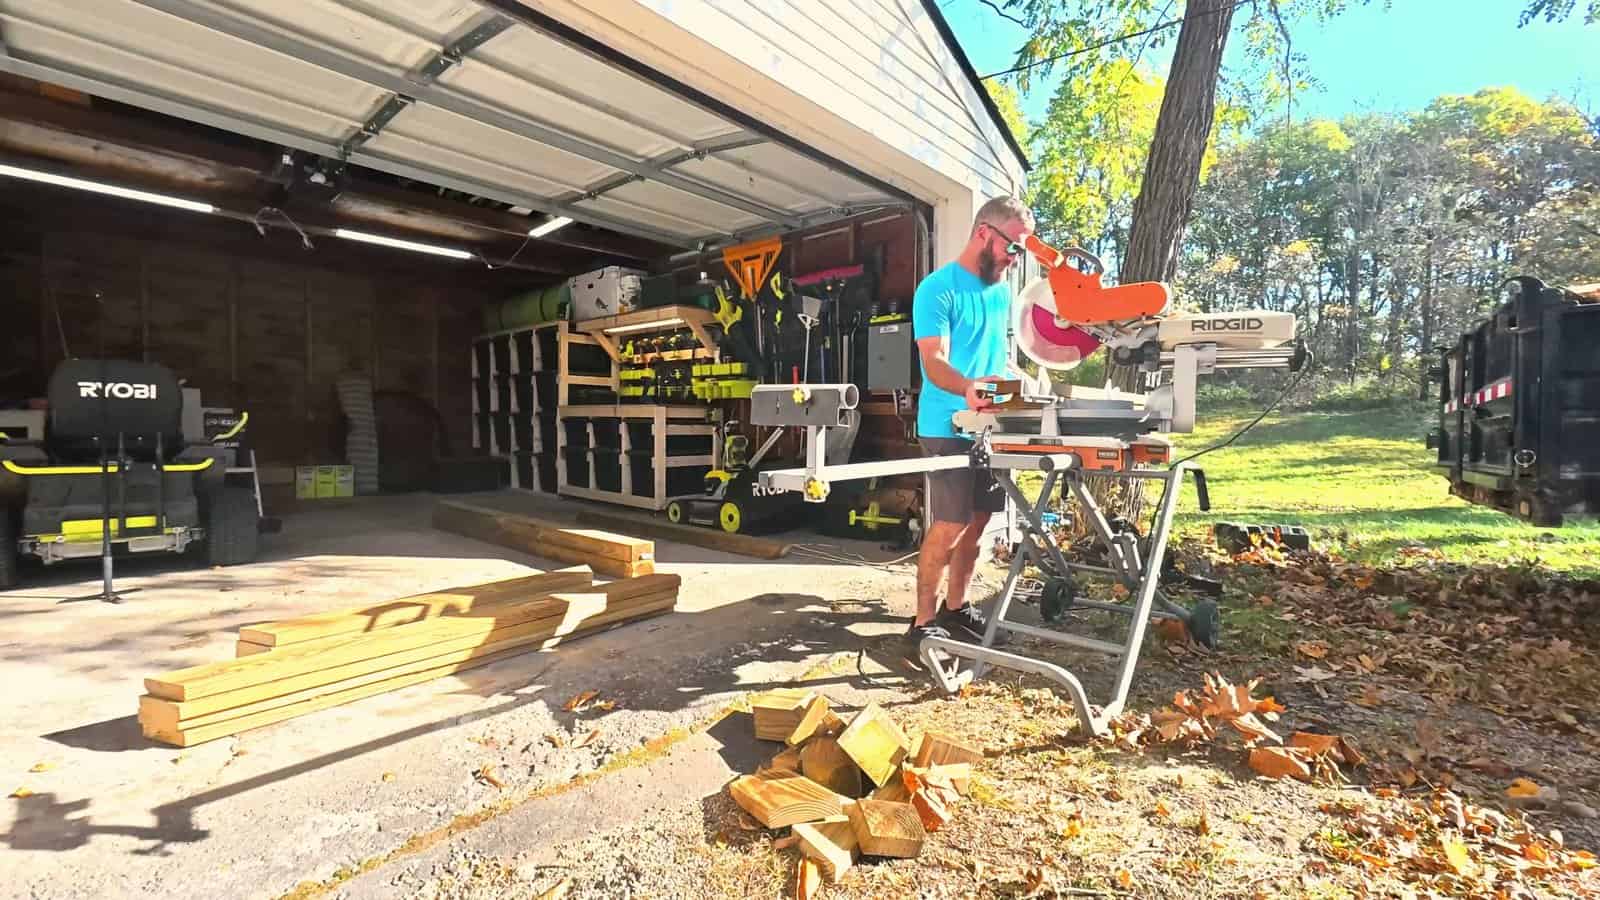
The 4×6 posts are too thick for most miter saws. Mark them all the way around and cut from both faces with a circular saw, so the ends come out square and the posts stand plumb.
I cut everything in the garage, loaded it back up in the truck and backed it right down to the spot where the rack was going.
Lay Out the Post and Both Sides
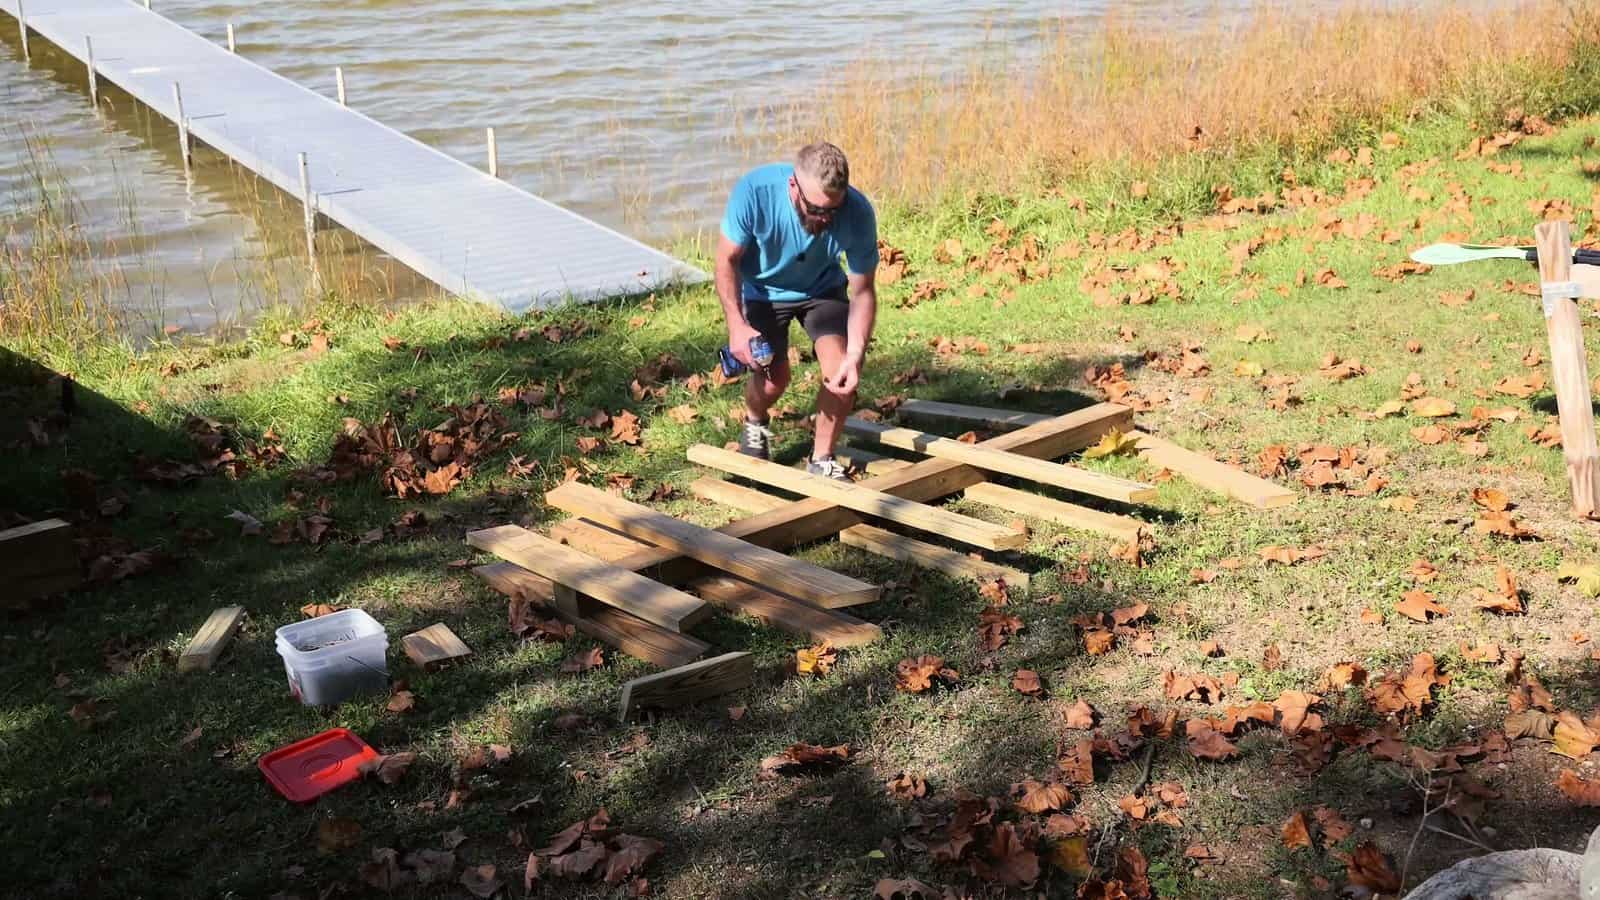
Each end frame is built flat on the ground. Lay the 4×6 post down with a wide face up and mark the arm tops on both wide faces, measured from the bottom: 20-1/2″, 42-1/2″ and 64-1/2″, and the rafter tops at 95-7/8″.
Set the first side’s foot, one arm per tier and the rafter across the post on those marks and screw each one on. The bottom arm gets structural screws, the rest get 3″ construction screws, and the plans count them board by board. A rafter only crosses half the post, so its tail drops. Prop it on a 2×4 offcut on edge and it sits level.
Then flip the frame with a helper and do the second side the same way, each board right over its twin.
One thing I realized down there: I didn’t have a speed square. So I got the bottom board as square as I could and pulled lines off both sides of it up to the other boards. Snapping a centerline down the post helps a lot, too.
And learn from me on the rafters. I cut one end of mine the wrong way. The plans have it right: that end is a straight cut, so it’s plumb once the rack stands up.
Fit the Braces and Legs
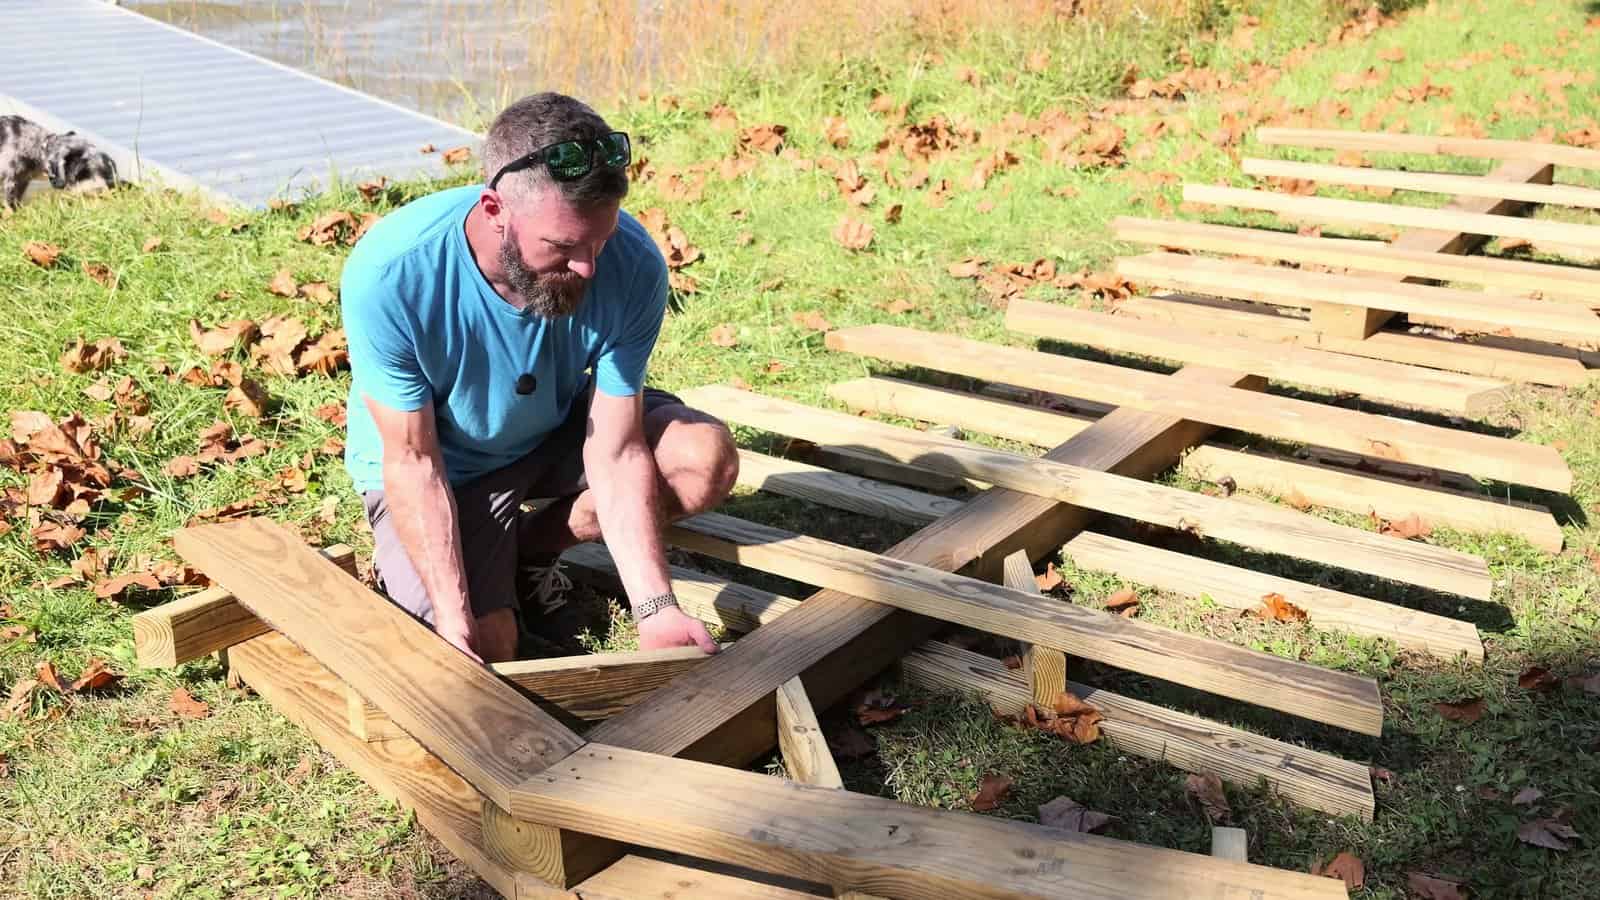
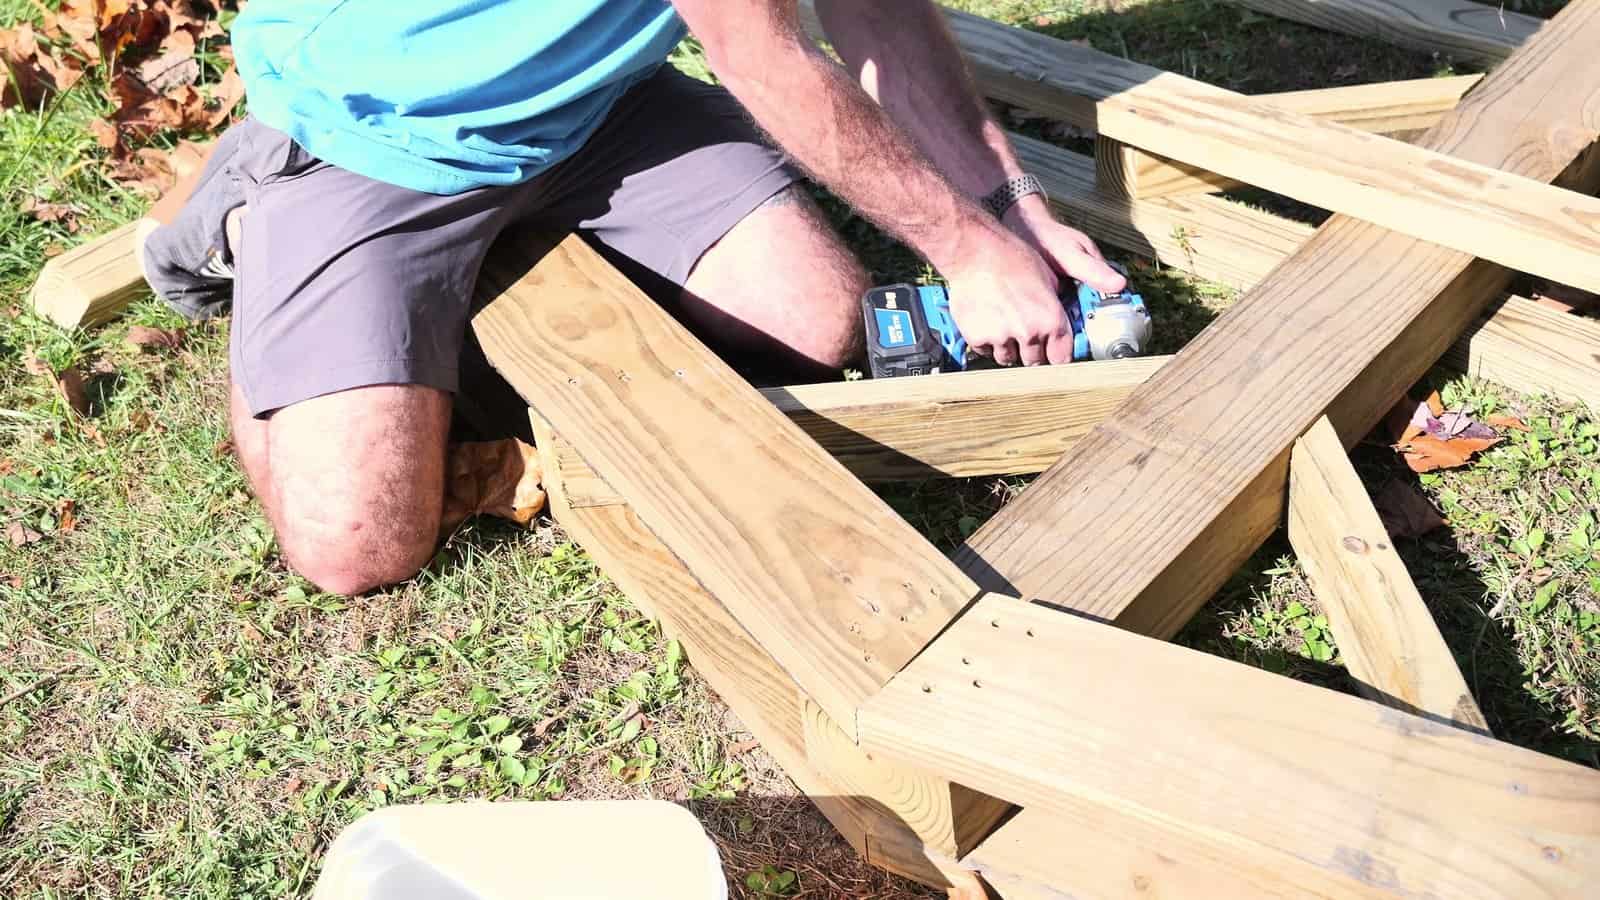
Now the knee braces slide into the slot between the two boards of every arm, the foot against the post and the top flush with the top of the arm. The roof braces go under the rafters the same way, and the two legs fit between the foot and the bottom arm.
Most of the rack goes together with plain 3″ construction screws. The braces under the bottom arms and the roof rafters get the beefier 5/16″ x 4-1/2″ structural screws, because they carry the snow and they’re what keeps the rack from swaying in the wind. Tie every brace foot to the post too, driving through the brace’s lower face level into the post.
Flip the frame again and fasten the braces through the other side’s boards, putting the structural screws between the first side’s so they never meet inside a brace. Then build the second frame. Lay its boards right on top of the first frame to mark them and both come out the same.
Stand the Frames, Then Add the Stretchers and Diagonal
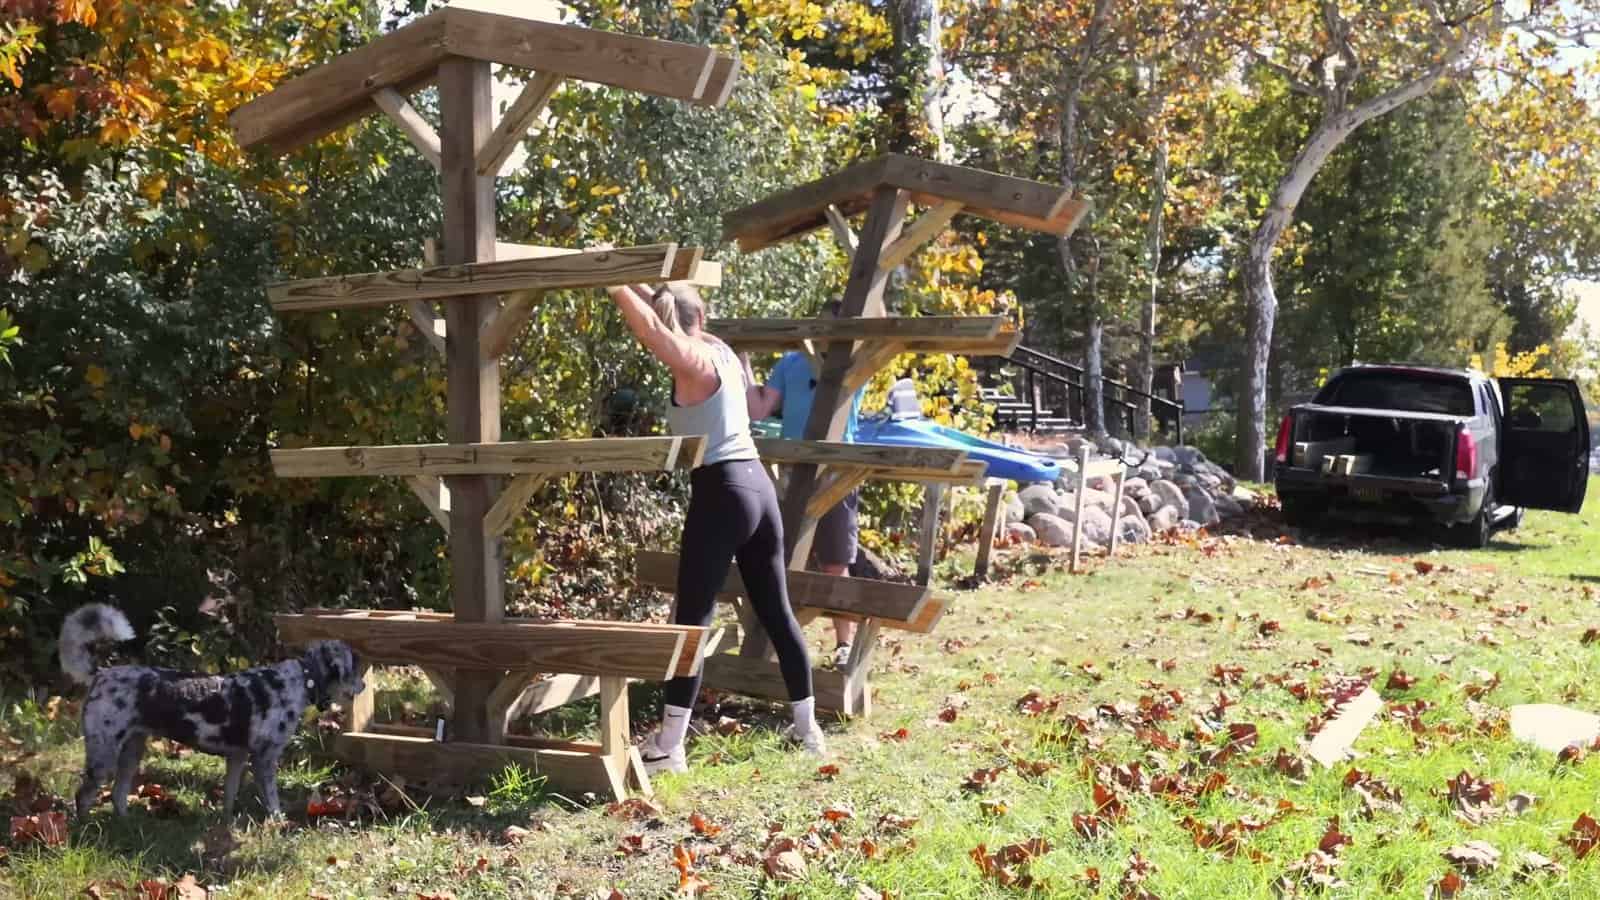
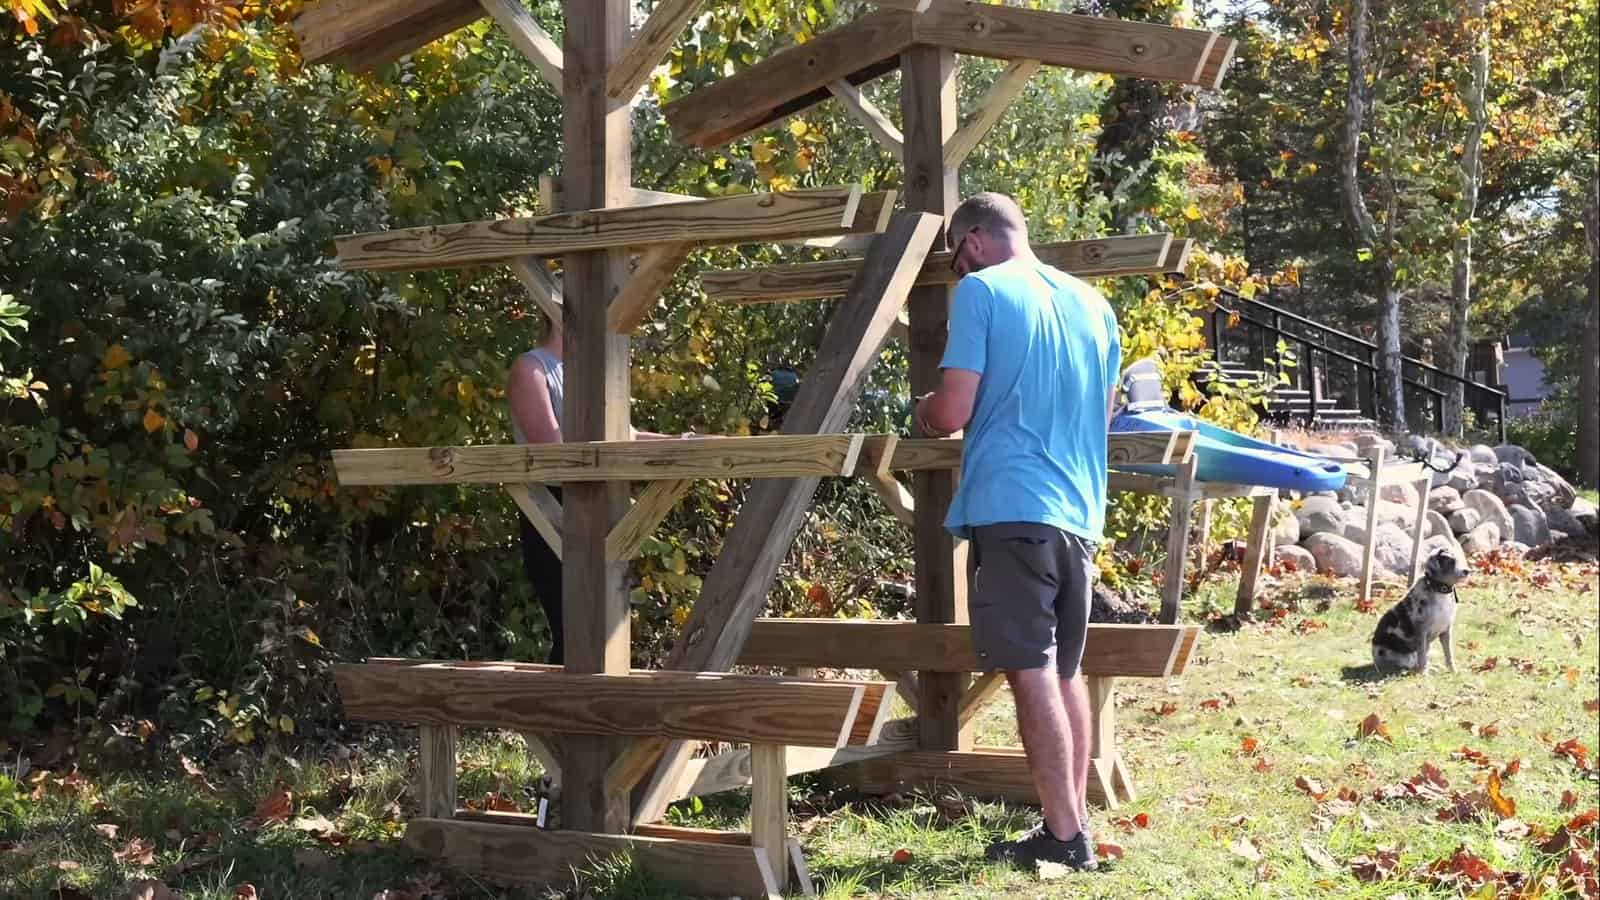
Pick level ground with room to walk all the way around and slide a boat off each side. Stand the frames up there with the posts 60″ apart, center to center. Jamie held them plumb while I got the first boards on.
Screw a 2×4 base stretcher across the feet and a top stretcher across the top arms on one face. Then set the 4×6 diagonal into the open slot: its bottom point on the inside foot of one frame, tight against that post, and its top point against the other post, flush with the top stretcher. Both ends are the same level cut. Add the other face’s two stretchers and fasten the diagonal through every stretcher with structural screws.
Before you fasten, measure both diagonals of the rectangle the feet make and nudge a frame until they match. Then it’s square.
Build and Install the Purlin Ladders
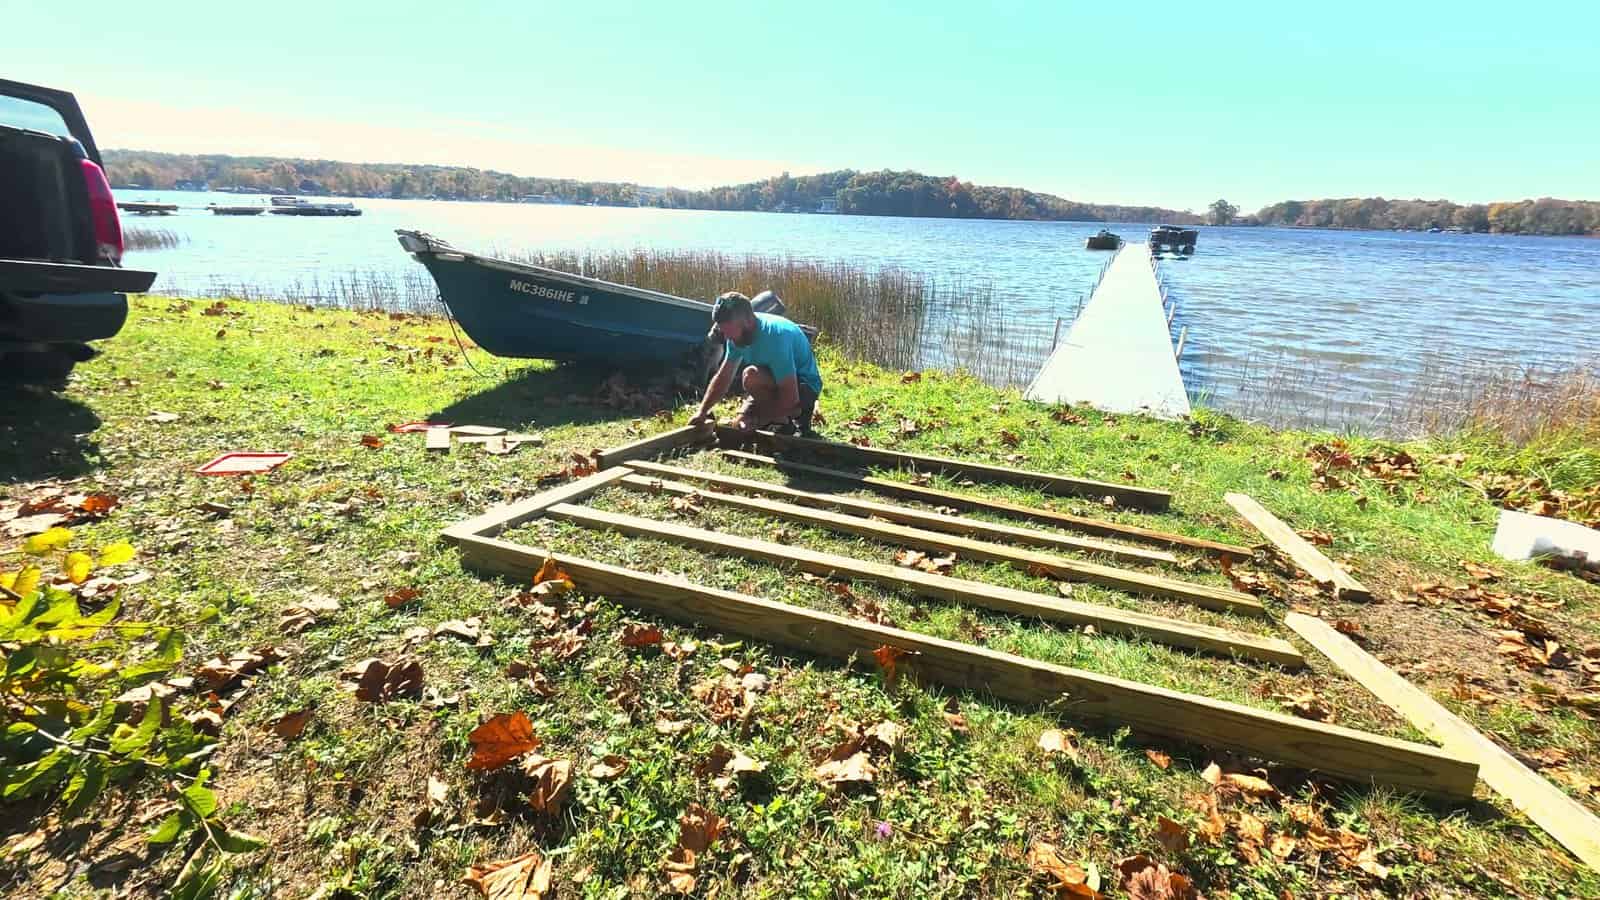
The roof sits on two purlin ladders, one for each side. Each one is three 2×4 purlins on edge, 19″ apart, with an end board across each end. Build them flat on the ground and rack each one until its diagonals match, so it sits flat on every rafter.
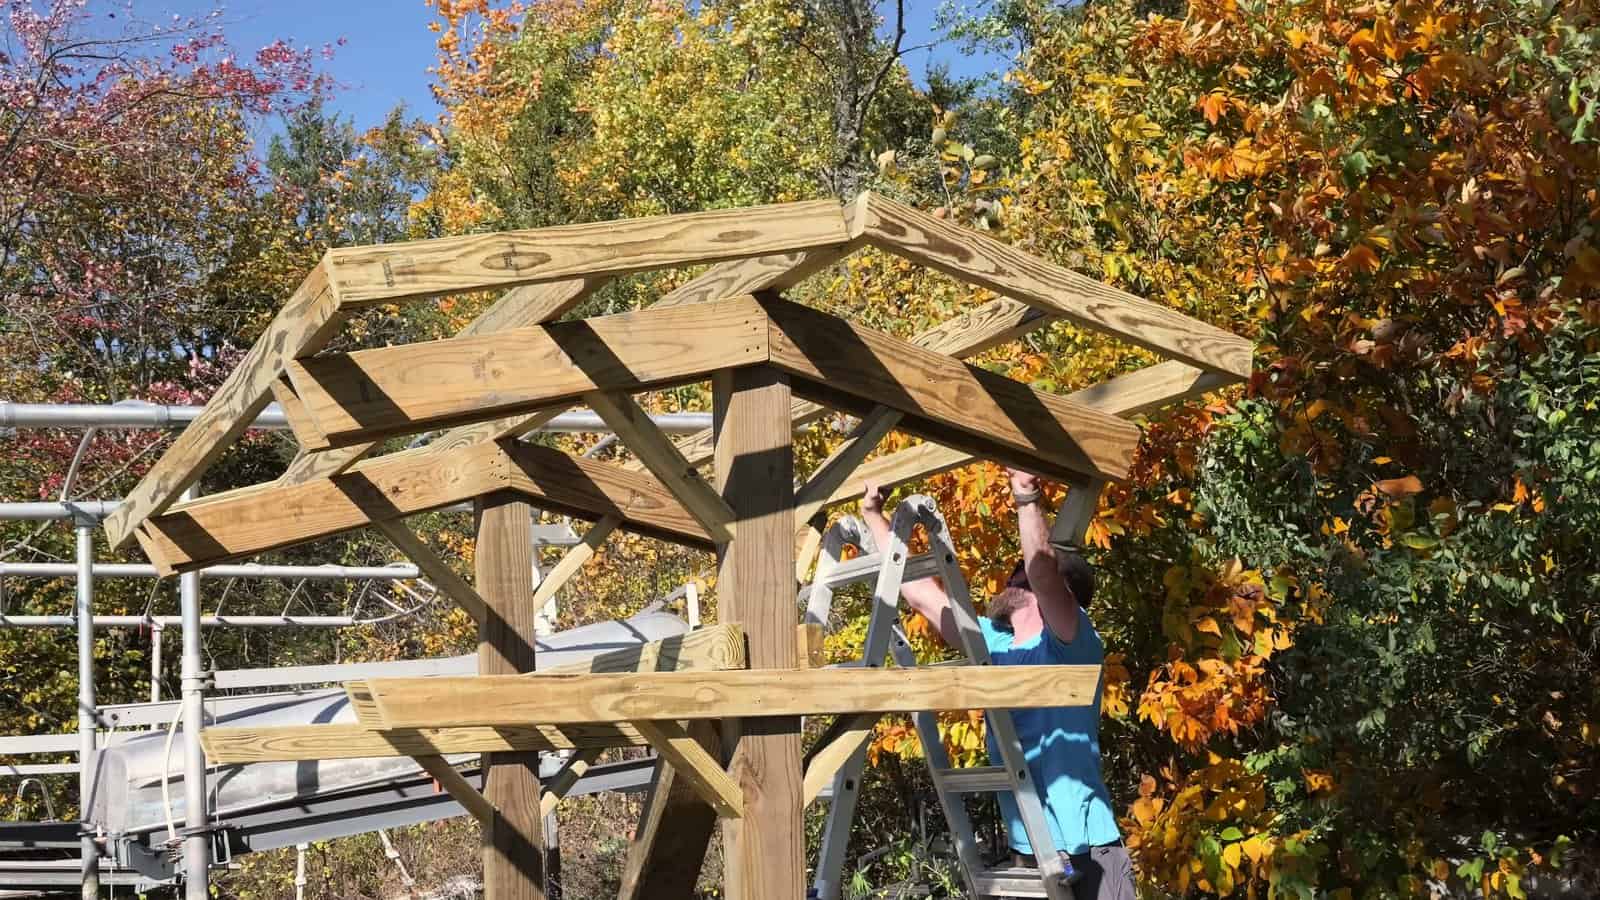
Then lift each ladder onto the rafters with a helper (you’ll want a ladder for this job), its ends 14-3/4″ past each end frame and its top purlin 1/2″ down from the peak. Toe-screw each purlin to every rafter it crosses. The bottom purlin hangs past the rafter ends, so drive its screws from its downhill face, angled uphill.
Do this on a calm day. Until the anchors go in, the rack is standing on its own weight.
Put On the Metal Roof
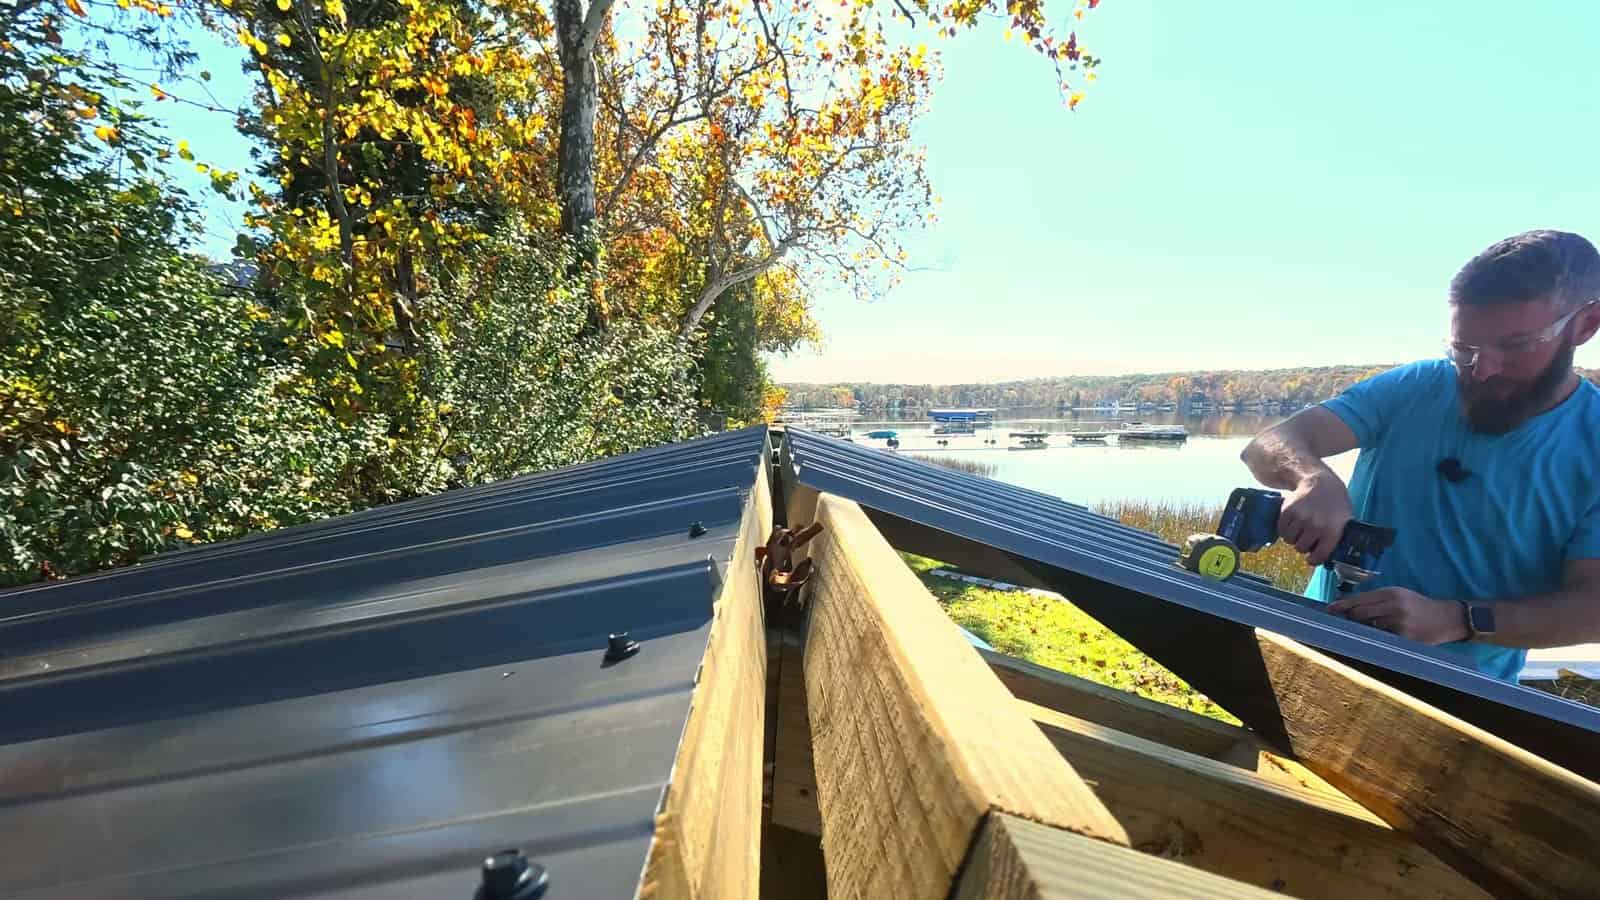
Lay three pieces of metal a side with the ribs running down the slope, 1-1/2″ past the eave, each piece lapped over the one before it. Fasten each piece to every purlin with four hex washer-head roofing screws, snug enough to seat the washer without crushing it.
Then the ridge cap goes on over the peak. All of it goes on with the same colored screws as the roof, and the rubber washers on those screws seal it up nicely.
Wear gloves. Cut metal edges are sharp. Use snips or a metal-cutting blade, never an abrasive wheel, which burns the coating.
Anchor It
This kayak rack isn’t tippy at all. But with the boats on it, the kayaks and the roof become a kite in a windstorm. The wind can’t get through, and it lifts the roof like a wing. Left loose, a big enough gust would lift the rack and tip it over, boats and all.
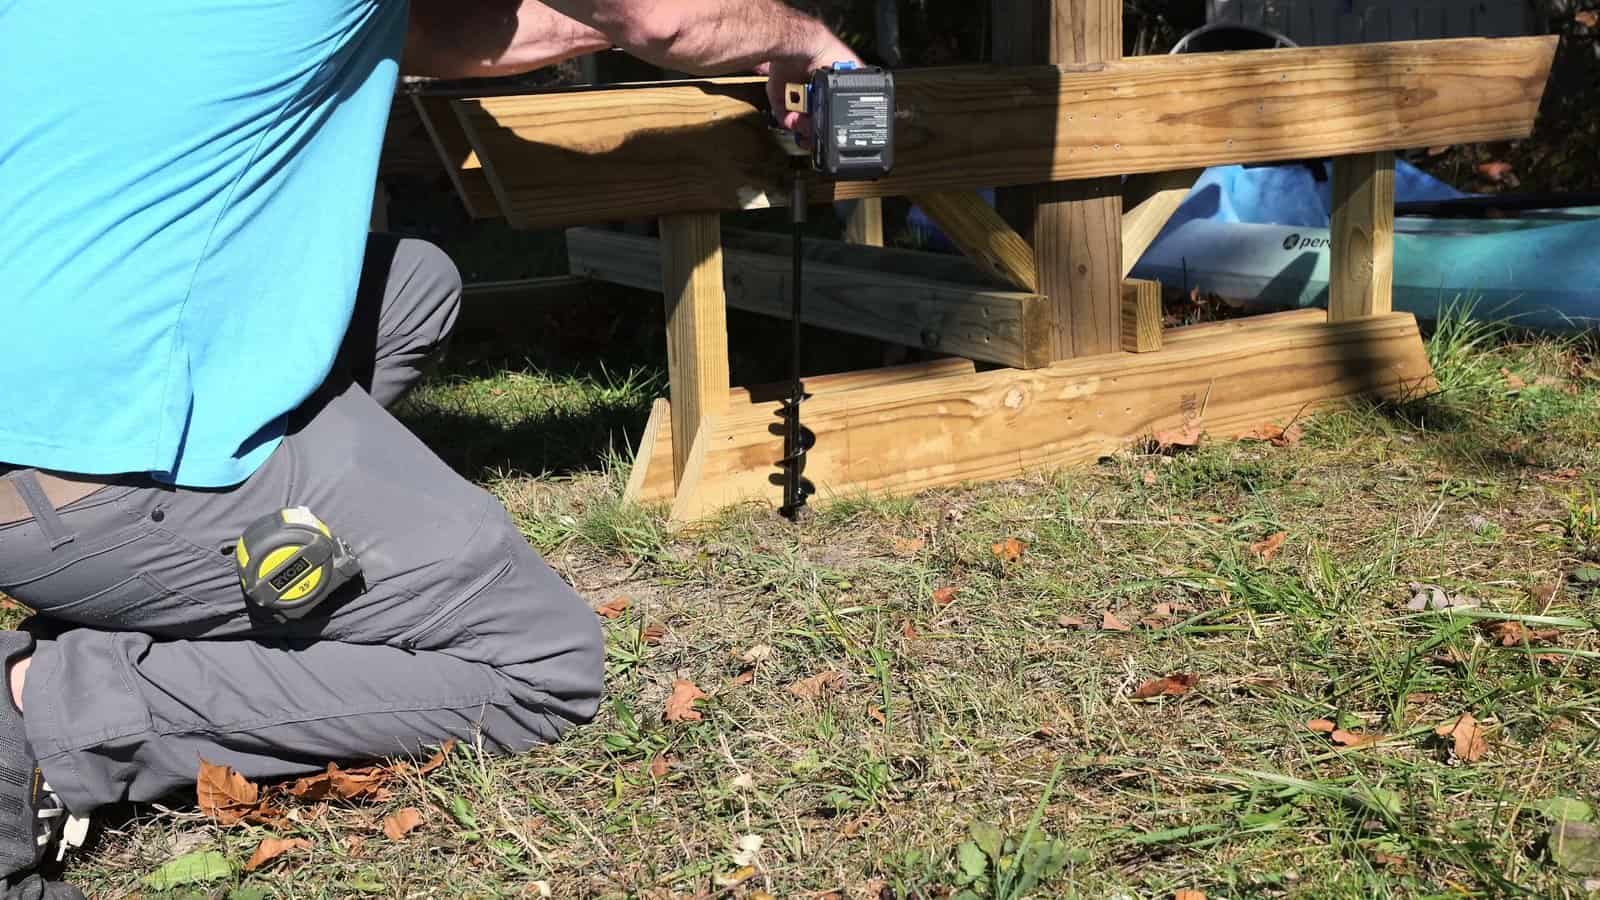
So anchor it before the first boat goes on. The plans use six ground anchors rated 1,200 lb or more: an auger anchor beside each leg, screwed in at least 30″ right against the wood, with a ratchet strap over both feet, and a strap anchor up the face of each post. On a slab, use wedge anchors through a galvanized angle instead.
Mine are these auger anchors, screwed in beside each foot with my drill. Whatever anchors you buy, check they’re rated for 1,200 lb or more.
Pad, Load and Strap
Wrap the top of every arm pair with foam pipe insulation or carpet scraps so the hulls never touch bare wood. Heavy boats go on the bottom tier and the lightest on top. Each spot takes a boat up to 120 lb, 29″ wide and 13″ deep.
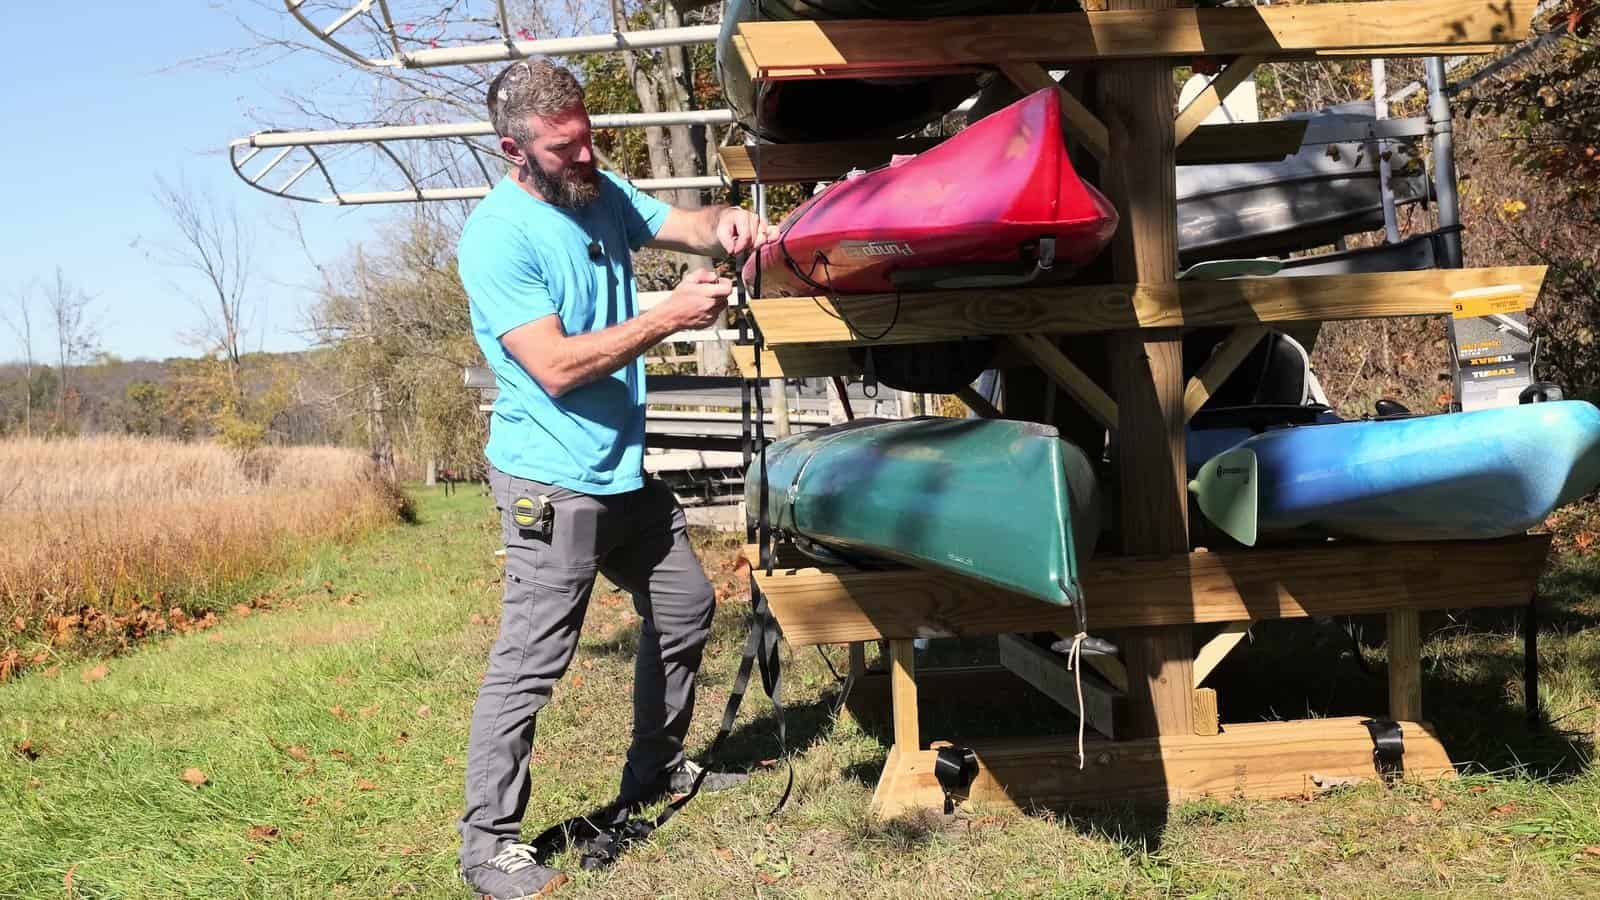
Center each boat so the frames sit about a third of the way in from each end, and strap it to both arm pairs with two cam straps. Snug, not tight enough to dent the hull. An unstrapped kayak is the first thing a storm takes.
The Finished Kayak Rack
We love kayaking, and now the boats have a real home instead of a pile on the shore. Three kayaks, three of the hybrid kayak and paddleboard boards, all off the ground and out of the weather.
Built for Wind and Snow: Anchoring an Outdoor Kayak Rack
Every member and joint in the plans was checked to the US load and wood standards (ASCE 7 and NDS) for 130 mph gusts on open ground, 50 psf of ground snow and 120 lb boats, in the weakest common framing lumber, wet. Built as drawn and anchored, the 6 kayak rack with a roof is rated to 132 mph gusts in the open, 162 mph in a suburban yard and 51 psf of ground snow.
All eight designs meet that basis except one: the 3 kayak rack with a roof comes in a little under, at 124 mph in the open.
That rating counts on the anchors. Without them, any rack with boats strapped to it is a sail. At the worst gust the 6 kayak rack is rated for, each anchor holds about 722 lb, which is why the plans call for anchors rated 1,200 lb or more.
It isn’t meant for hurricane coasts, places with more snow than that, or hilltops and cliff edges. There, store the boats inside for storms or have a local engineer look at it. This is a careful check, not a stamped design, so if your town needs a permit, take the plan to a local engineer.
Kayak Rack Plans: 8 Designs, 2 to 6 Kayaks
I built the 6 kayak rack with a roof, but not everybody has six boats. So the DIY kayak rack plans come in eight designs: 2, 3, 4 or 6 kayaks, open or with a roof. The 2 and 3 kayak racks are one-sided, so they can stand along a fence or the side of a garage, and their roof is a lean-to that drains to the front. The 4 and 6 kayak racks are two-sided with a gable roof, made to stand out in the open.
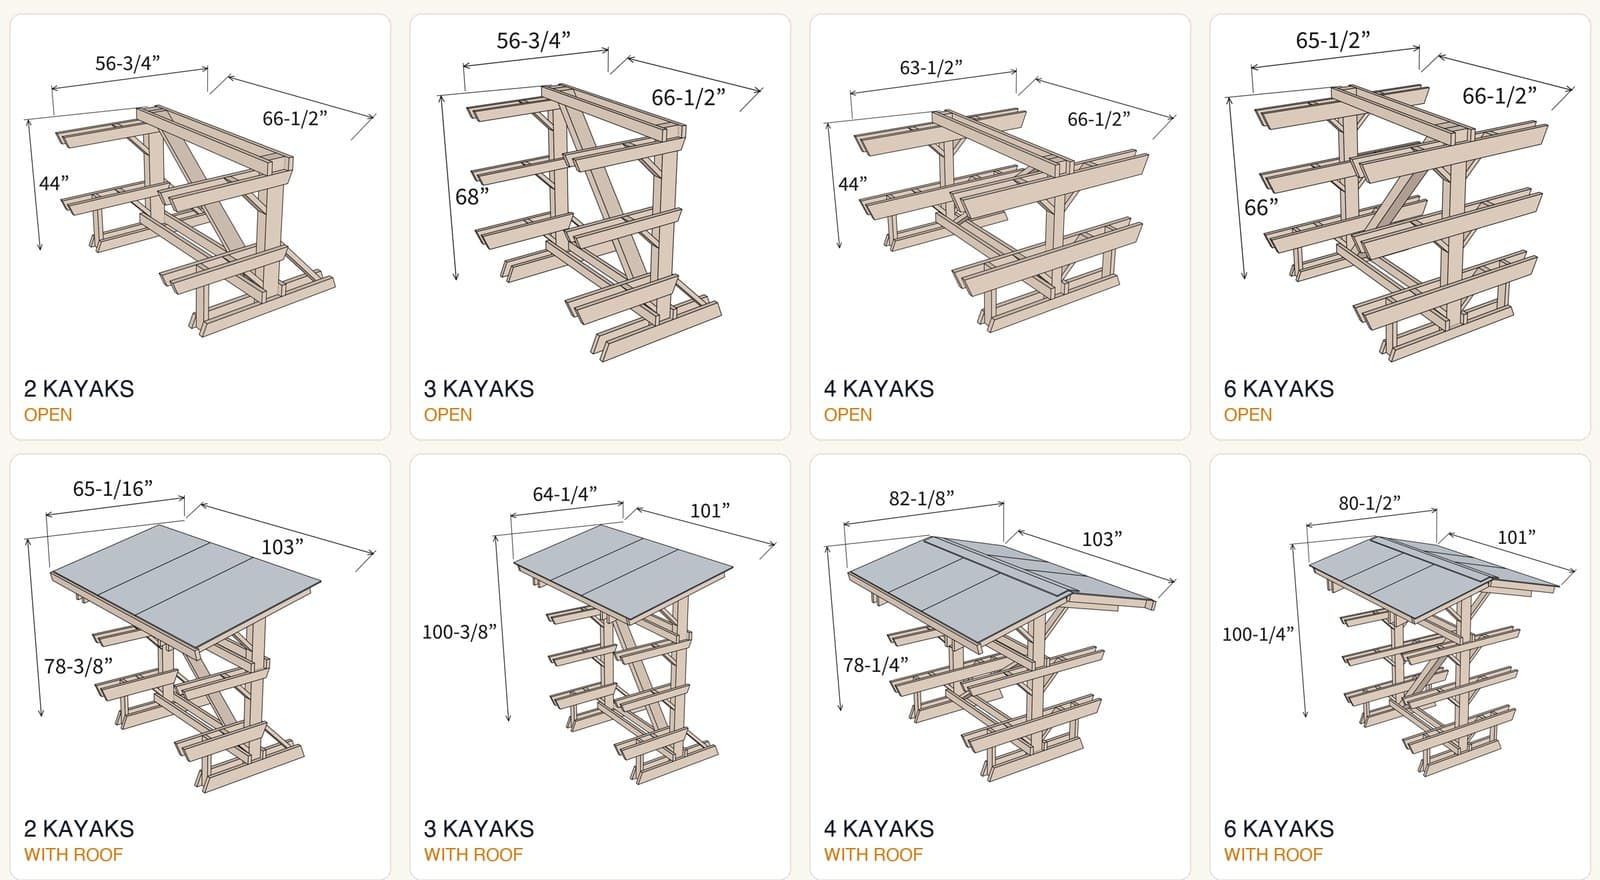
| Design | Layout | Size (L x D x H) | Est. cost |
|---|---|---|---|
| 2 kayaks, open | one side | 66-1/2″ x 56-3/4″ x 44″ | $214 |
| 3 kayaks, open | one side | 66-1/2″ x 56-3/4″ x 68″ | $298 |
| 4 kayaks, open | two sides | 66-1/2″ x 63-1/2″ x 44″ | $300 |
| 6 kayaks, open | two sides | 66-1/2″ x 65-1/2″ x 66″ | $455 |
| 2 kayaks, with roof | one side, lean-to roof | 103″ x 65-1/16″ x 78-3/8″ | $432 |
| 3 kayaks, with roof | one side, lean-to roof | 101″ x 64-1/4″ x 100-3/8″ | $456 |
| 4 kayaks, with roof | two sides, gable roof | 103″ x 82-1/8″ x 78-1/4″ | $586 |
| 6 kayaks, with roof | two sides, gable roof | 101″ x 80-1/2″ x 100-1/4″ | $665 |
Each one is a printable PDF with the shopping list priced line by line, a cut list with every board drawn, and a drawing for every step with the screws counted at every joint. Pick imperial or metric.
More Outdoor Storage Builds
- DIY firewood shed: the other roofed storage build in the yard.
- DIY garage storage ideas: three builds that fit any garage.
- Ski and hockey stick rack: a wall rack for the rest of the gear.
- Outdoor furniture plans: every outdoor build compared.
DIY Kayak Rack FAQ
Is it better to store a kayak vertically or horizontally?
Horizontally, for long-term storage. Lay it on its hull or its side (whatever the maker suggests) and support it at two points about a third of the way in from each end. That’s exactly how this rack holds them.
Can you build a kayak rack from 2x4s?
Mostly. Every design in the plans is mainly 2x4s and 2x6s, but the posts are a 4×4 or 4×6. An all-2×4 rack works in a garage. Outside, with the boats catching the wind, the posts need to be heavier.
How far apart should the arms on a kayak rack be?
The tiers on this rack are 22″ apart, arm top to arm top, and each spot takes a boat up to 29″ wide and 13″ deep. A wider or taller fishing kayak needs longer arms or more room between the tiers.
How much does it cost to build a kayak rack?
From about $214 for the 2 kayak open rack to about $665 for the 6 kayak rack with a roof, the one I built. That’s lumber, screws, roofing, anchors and straps, priced line by line in the plans in November 2026. The one I built came to about $630: about $275 in lumber, $135 for the metal roof and ridge cap, $65 for the anchors and straps, and about $157 of screws at the plan’s price (I already had them).
Do you need to anchor an outdoor kayak rack?
Yes. With boats on it and a roof over them, the wind lifts the roof like a wing, and a big enough gust would tip the rack over. The plans use six ground anchors rated 1,200 lb or more, and the wind rating counts on them.
Is it OK to store kayaks outside?
Yes, if they’re off the ground, out of the sun and strapped down. Sun is the hard part on a plastic hull, and that’s what the roof is for.
Are there kayak rack plans in PDF?
Yes. The kayak rack plans are printable PDFs in eight designs, 2 to 6 kayaks, open or with a roof, each with its own cut list, shopping list and step drawings.
Will it hold a canoe or paddleboards?
Paddleboards, yes. Lay them flat on the arms, deck up, one or two to a spot, and strap them the same way. Half of ours are hybrid kayak and paddleboard boards. Most canoes are wider than the 29″ a spot takes, so a canoe would need longer arms, which the plans don’t cover.
Your Move
Go count your boats (and the ones you’re planning to buy), then find a level spot with room to walk all the way around the rack. That tells you which design to build.
The kayak rack plans have the cut list, the shopping list and a drawing for every step in all eight designs. And if you build one, send me a picture. I want to see what’s on yours.
Be safe and happy building,
Jamison
Kayak Rack Plans: $20
Get the printable plans for your rack: 2, 3, 4 or 6 kayaks, open or with a roof.
Get the Plans →