
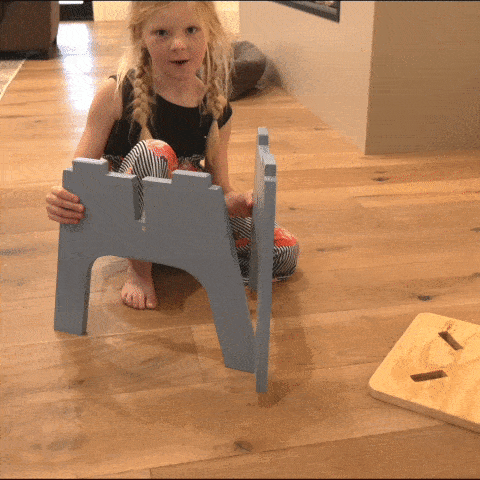
Kids Knockdown Stool
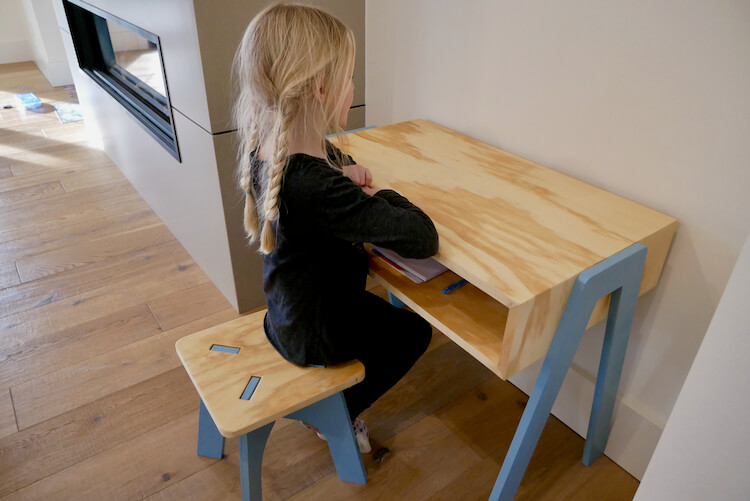
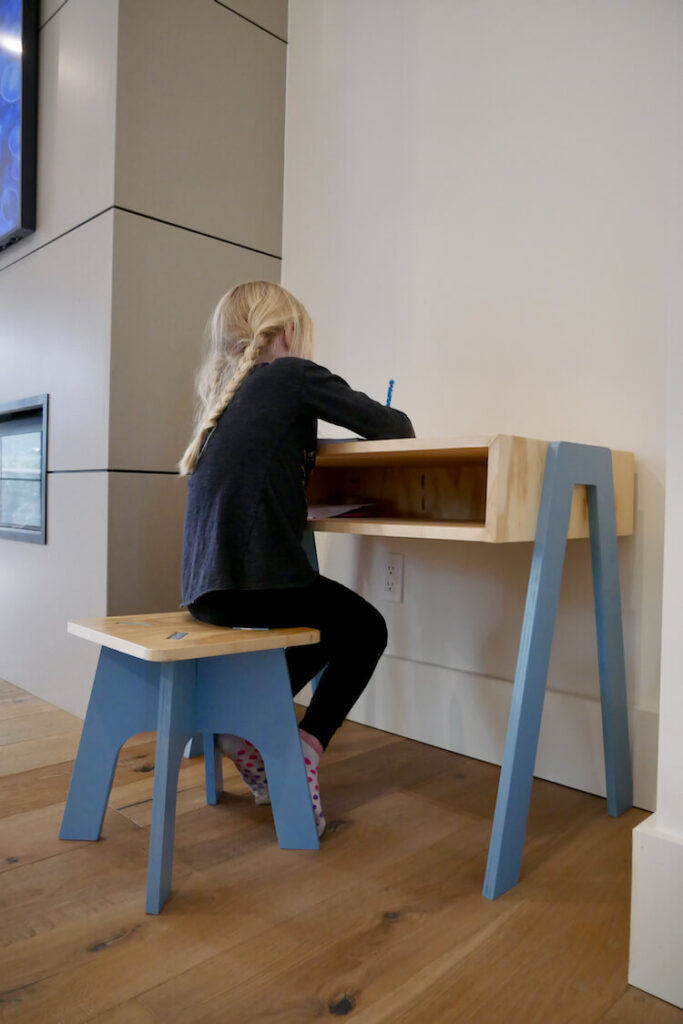
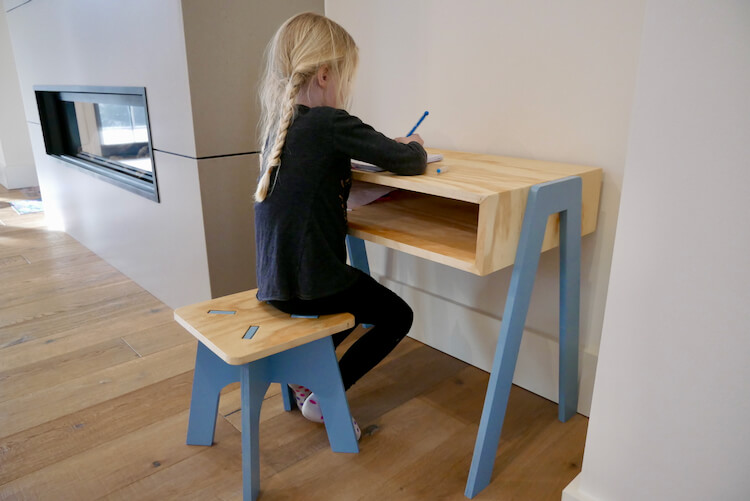
During this extended spring break (aka COVID quarantine) we decided that in order to keep our sanity we need to have the kids on a school schedule. This was the perfect opportunity to build Madison a small desk (plans coming soon) and stool that she could comfortably do school work and crafting at. For the stool I wanted it to be simple and when searching for ideas I came across a knockdown stool that I knew I could make out of some scrap plywood. However, this wasn’t something I could wing so I laid it out and CAD and made templates that made the layout a breeze! Check out below how the 3-piece knockdown stool assembles easily with no tools or hardware.
If you love this stuff as much as we do, you might want to consider following us on Instagram where we post sneak peeks and behind the scenes stuff in our stories. Also, did you know you can get tons of projects plans from all around the web when you follow us on Facebook and Pinterest!
Time to Complete
1 Day
Estimated Cost
$30
Skill Level
Intermediate
Tools
- Drill and Drill bit
- Table Saw and/or Circular Saw
- Scroll Saw and/or Jigsaw
- Band Saw (Optional)
- Sandpaper and/or File
- Tape Measure
- Pencil
- Safety Glasses
- Hearing Protection
Materials
- 3/4” x 2’ x 4’ Plywood Panel
- Spray Adhesive
- Printer and Paper
- Sand Paper
- Edge Banding (optional)
- Primer and Paint
- Polyurethane
Disclosure: The links provided in the “materials” and “required tools” sections are affiliate links. If you would like to support our site and help keep our content free come find out more about how we can make money with no extra cost to you.
Dimensions
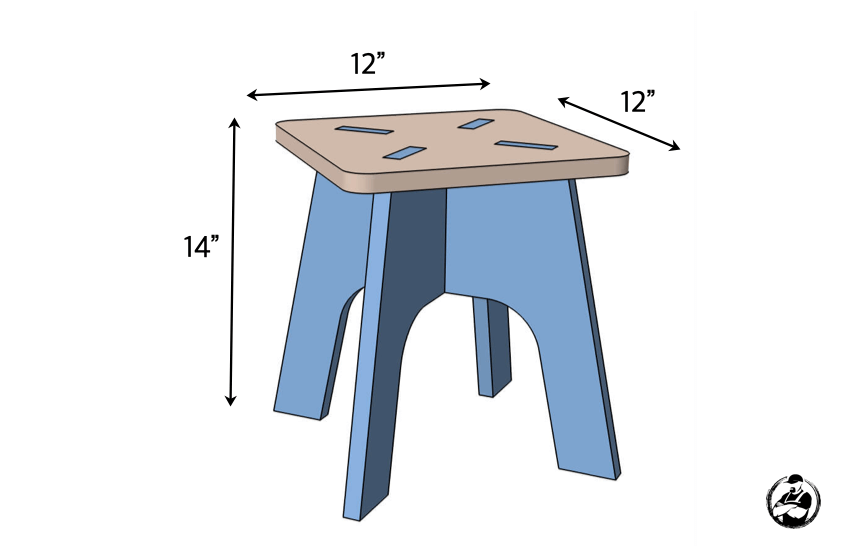
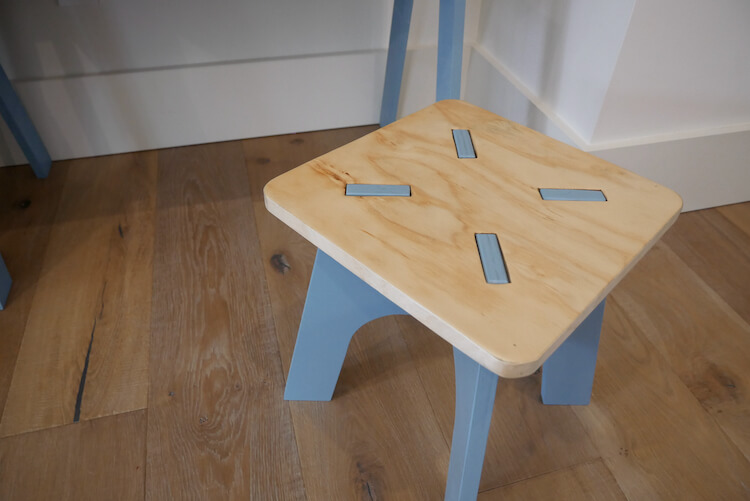
This tutorial will show you how to make a plywood knockdown stool that is the perfect height for a 5-8 year old child. This knockdown stool consists of three parts that lock together, without hardware, to form a secure stool.
Total Time: 2 days
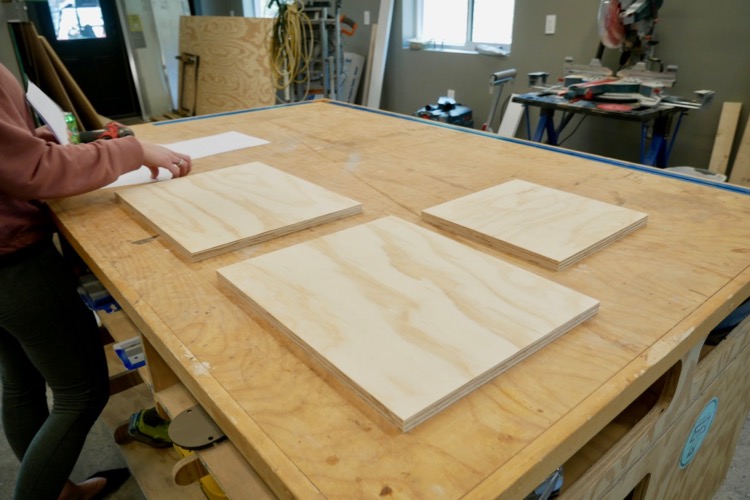
Rough Cut the Pieces

Start by cutting the plywood into three rectangles as shown above.
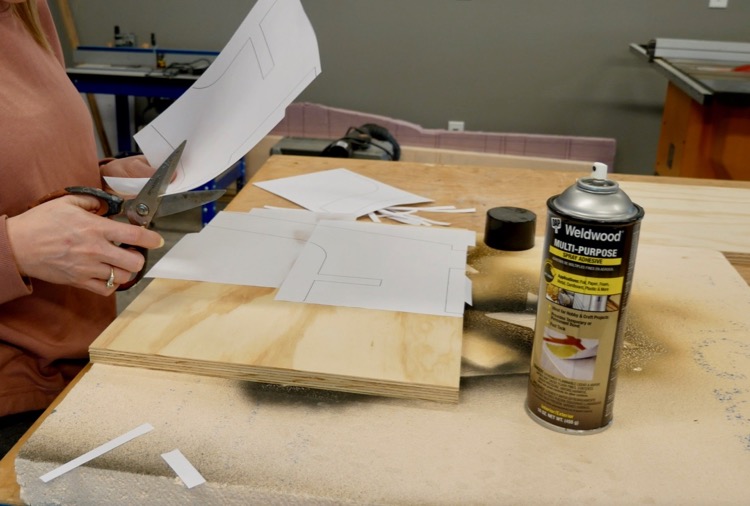
Adhere Templates and Cut Out
Start by printing out the templates which can be found here.
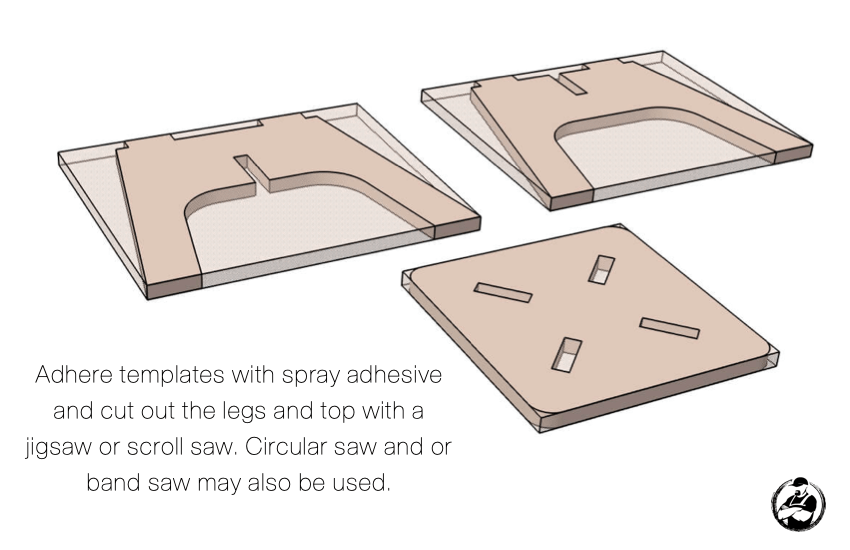
Using a spray adhesive line the templates up so that the exterior lines are flush with the edges of the boards, not the paper itself. You may need to trim the template to make this easier.
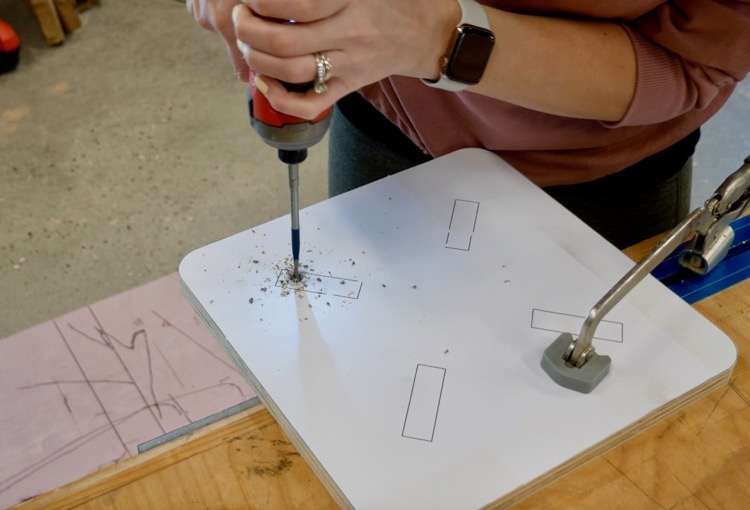
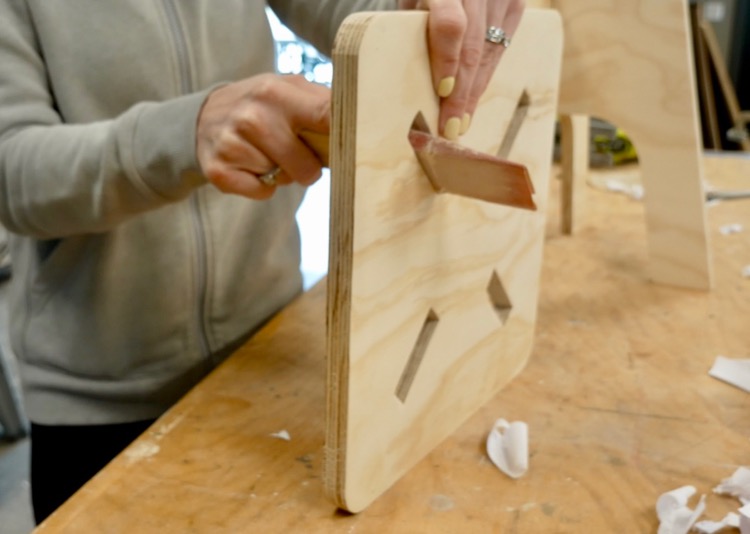
Then cut along the lines with whatever saw you have that works best. A scroll saw will give you the straightest cut (up and down) on the openings in the seat, allowing for a better fit. However, you will need to drill a hole first to get started. A circular saw will give you the straightest/cleanest cut for the straights. A band saw would be great for the curves, however, this could all be cut out with just a jigsaw and some extra cleanup with sandpaper or a file.
Once you get the pieces cut out, try to fit them together. If the legs don’t fit in the top, or are too tight, use a file (or a piece of sandpaper glued to a piece of wood) to remove some wood in the conflicting spots. Do this until it fits together easily.
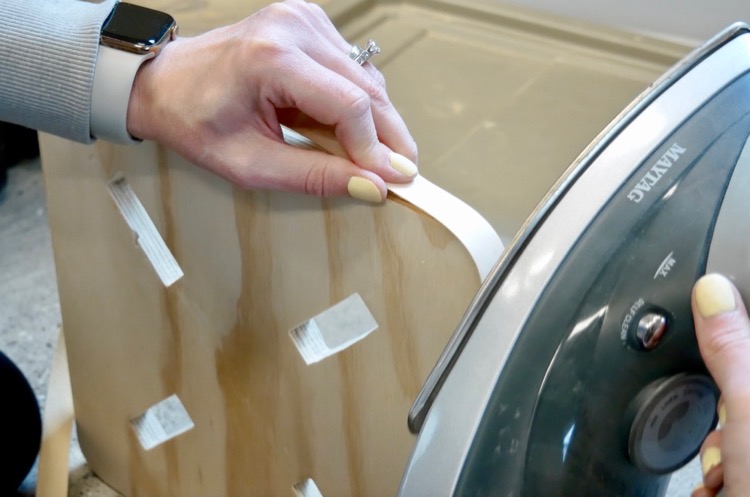
Edge Banding (Optional)
We opted to cover the exposed plywood edge of the seat with iron on edge banding.
Applying a Finish
Since the legs are getting painted we didn’t have to do those, however I wish I would have at least filled the edges with wood filler. The paint color we went with on the legs is French Blue. Also, make sure to prime the bare wood first if you can.

Hi I just downloaded the printable PDF but I think the templates haven’t come through properly, they seem to be split over multiple pages. Please can you check?
Love the designs!
Yes the templates are split over multiple pages since each piece is bigger than a piece of paper. The templates overlap so just align them with each other.
Cool, quick design! When are you going to get an CNC to make this process simpler?
Soon I hope! I would love that, however, I am a little torn because I feel like I would be doing a disservice to those that don’t have one.