

Lindsay Desk
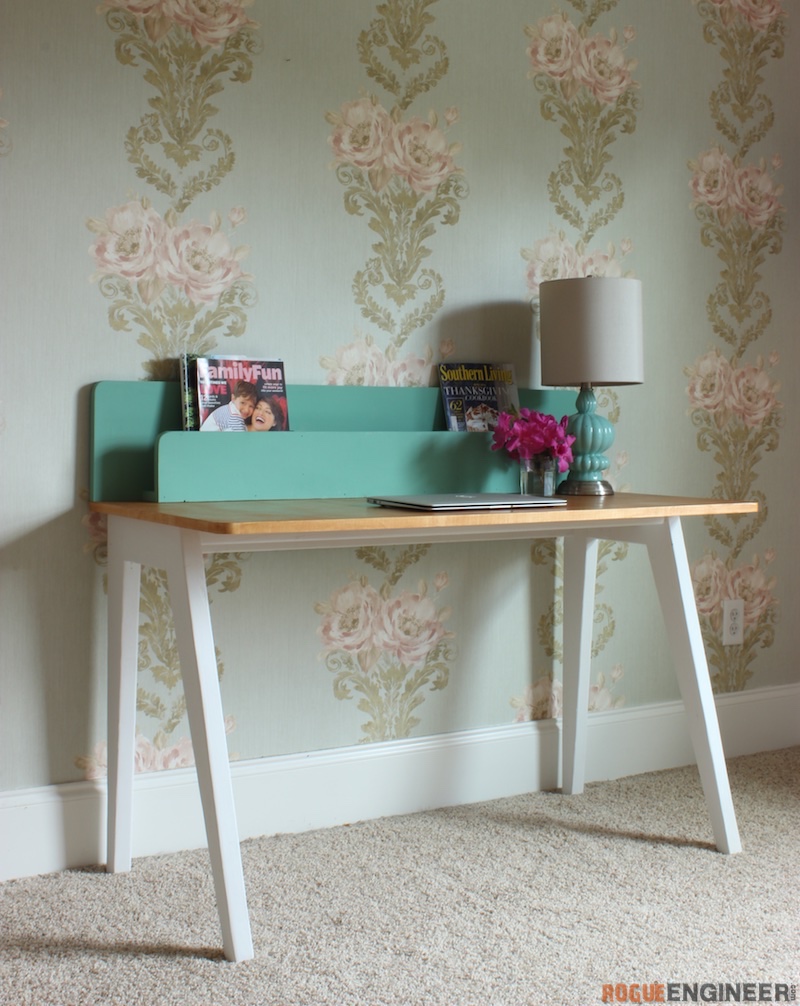
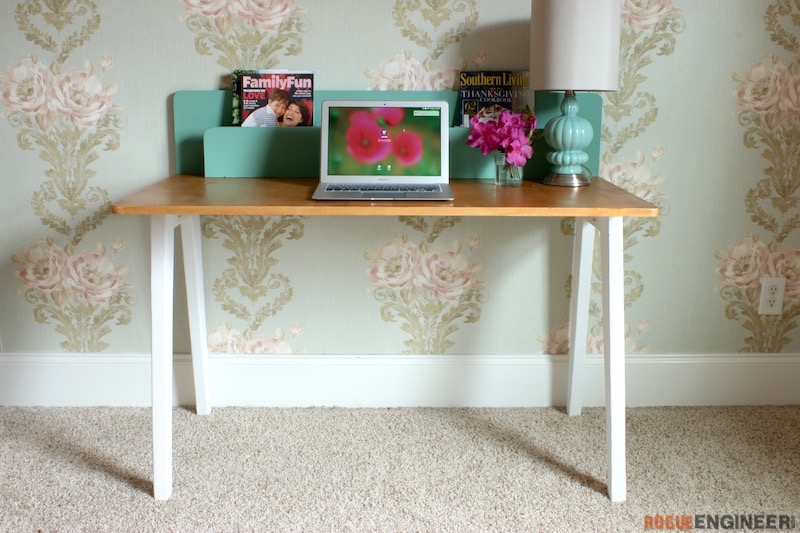
We were struggling to come up with a project for the weekend so we reached out to our audience on Facebook. Among the project ideas was this desk submitted by Lindsay.
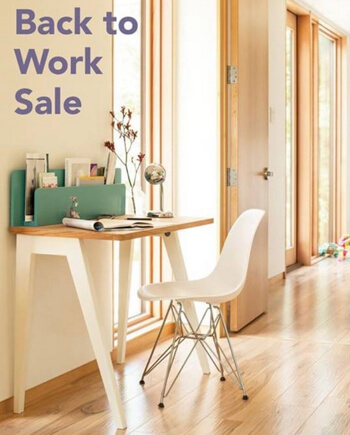
When we saw it we knew we had to build it. I knew I could make something just like it for next to nothing. So I got started. Below, you’ll find the plans showing exactly how I built my Lindsay desk. But make sure to go check out the build photos at my post over on Remodelaholic. Enjoy!
For sneak peeks of our upcoming projects be sure to follow me on Facebook and Instagram. Also, follow me on Pinterest to get tons of projects plans from all around the web!
Time to Complete
2 Days
Estimated Cost
$50-100
Skill Level
Intermediate
Required Tools
Materials
- Qty 1 – 3/4″ x 24″ x 48″
- Qty 3 – 2 x 4 x 8‘
- Qty 1 – 1 x 10 x 4′
- Qty 1 – 1 x 8 x 6′
- Qty 1 – 1 x 6 x 6′
- Qty 1 – 1 x 3 x 6′
- 2-1/2″ Kreg Pocket Hole Screws (Coarse)
- 1-1/4″ Pocket Hole Screws
- 1-1/4″ Brad Nails
- 2″ Wood Screw
- 3/4″ Iron-on Birch Edge Banding
Disclosure: The links provided in the “materials” and “required tools” sections are affiliate links. If you would like to support our site and help keep our content free come find out more about how we can make money with no extra cost to you.
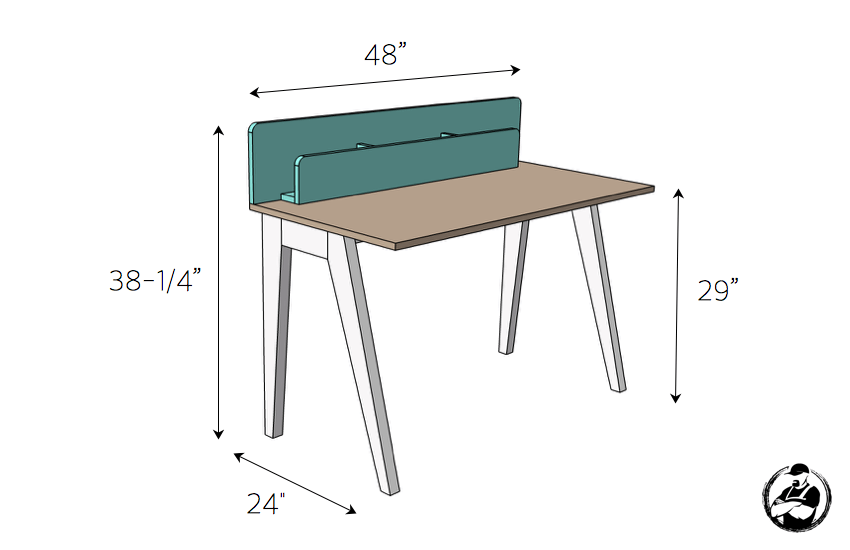
Dimensions
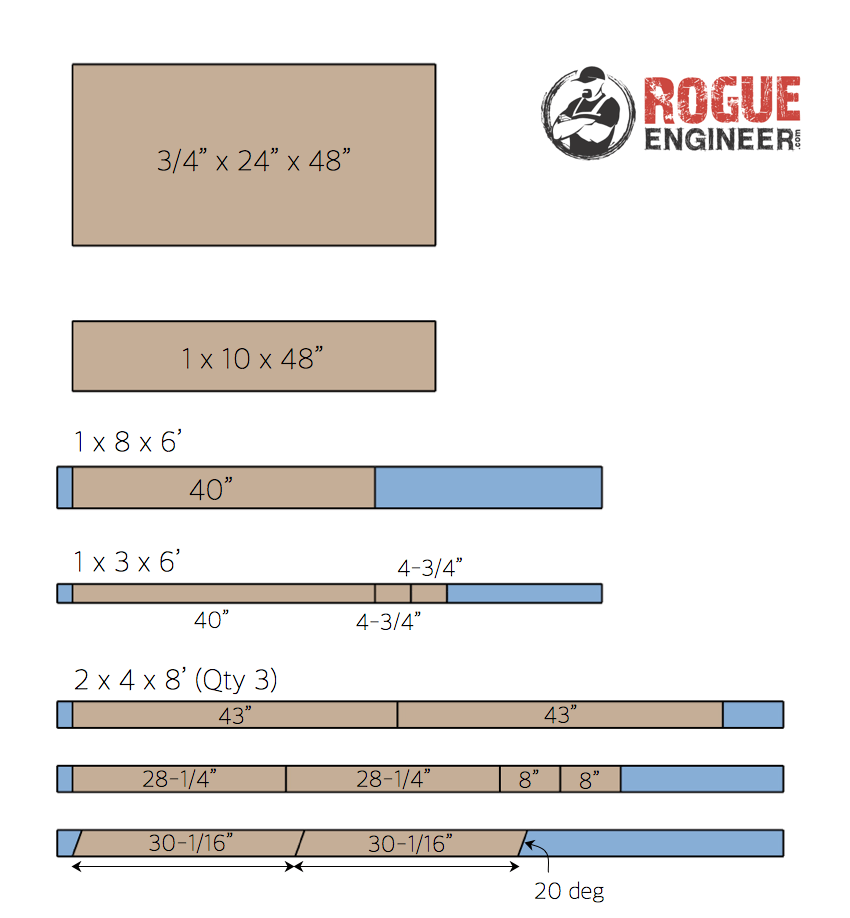
Cut List
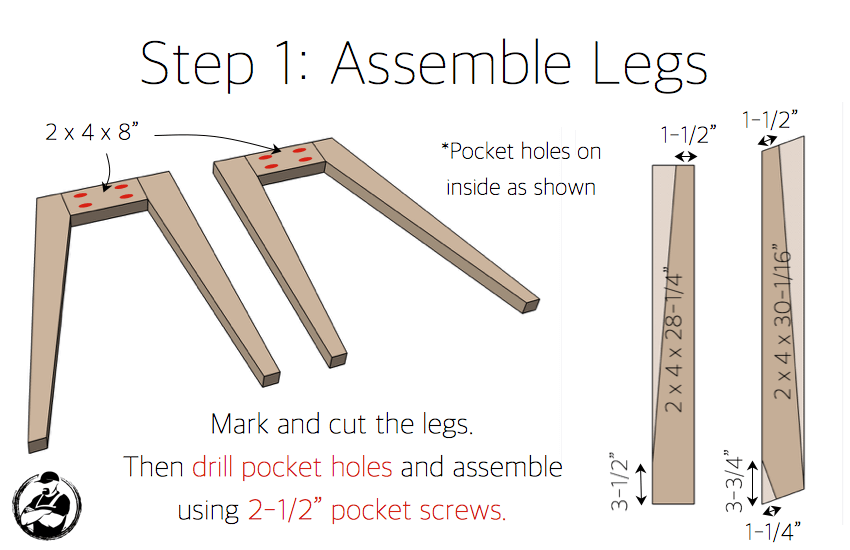
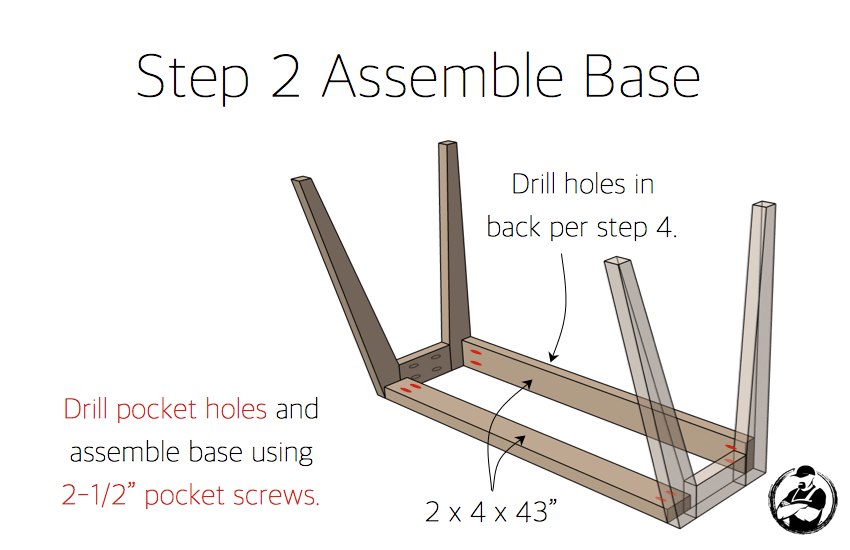
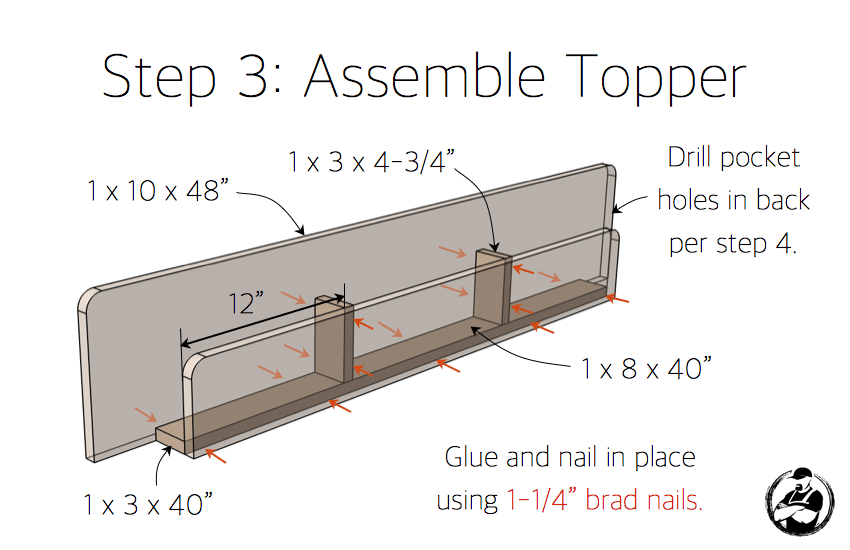
I decided to round the top corners of the front and back boards of the organizer as well as the front corners of the desktop. This can be done with a jigsaw and/or belt sander.
Finishing
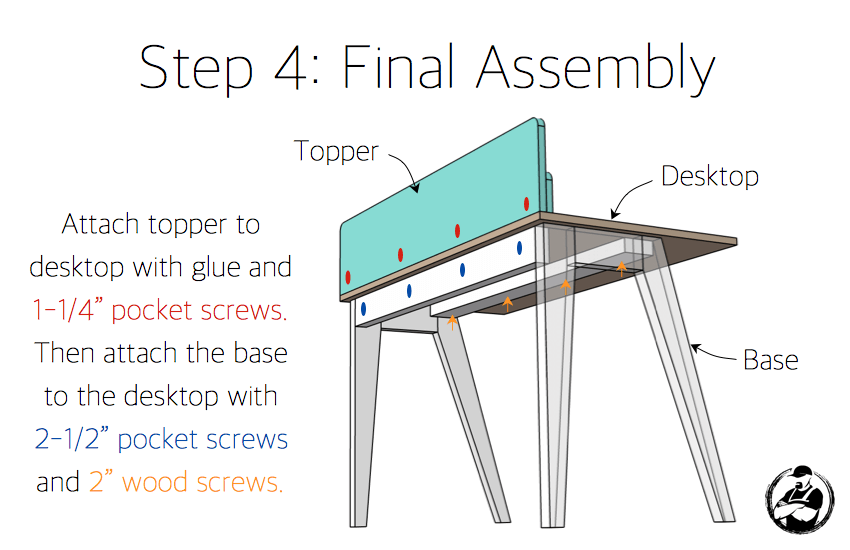
Since the base, desktop and organizer are all different finishes I had to finish each piece separately before final assembly. The desktop got summer oak wood stain and a satin poly, the legs got linen white chalked paint, and the organizer got a custom mix of serenity blue chalked paint and some other darker turquoise paint we had laying around (all products mentioned are by Rustoleum).
Questions? Comments?
As always, if you have any questions don’t hesitate to comment below and especially don’t forget to post pictures of your finished products in the comments! ENJOY!
What a sweet little desk! You could even make the topper by itself to attach to an existing desk.
Thanks! That’s a good idea!
Nice design of a desk. I recently made my daughter a desk but might have to add something like your topper to it.
Thanks,
Dave
Thanks Dave! That’s a great idea. I didn’t think of it until way later but a small compartment would be nice for pens and pencils. Just a thought.
Just this weekend my wife was wanting a desk and I was led to these forums I signed up for so long ago! Thank you for putting this out there for me to build. I will get back with you and let you know how it turned out.
Can’t wait to see how it turns out! Happy Building!
I love it!!!!!!!!
Can’t wait to Application on my room