
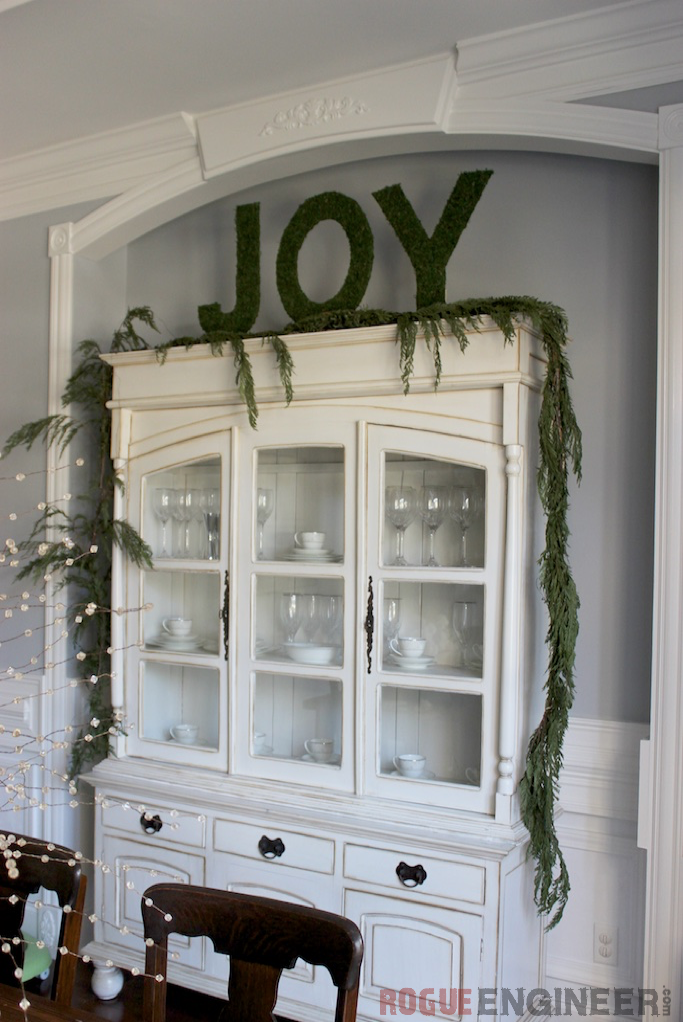
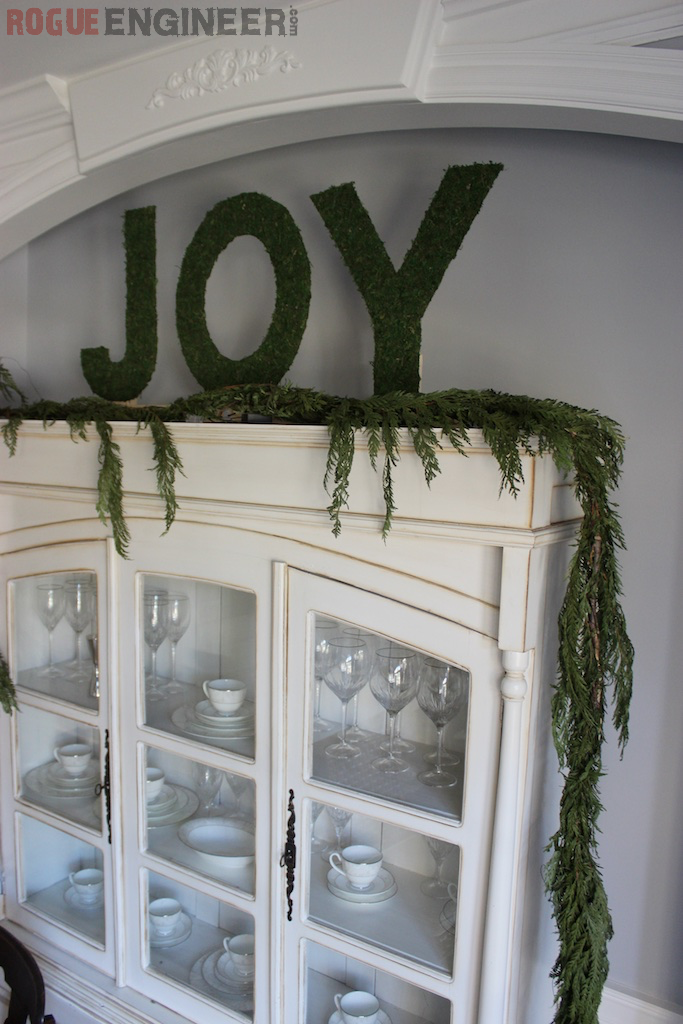
Moss Letters
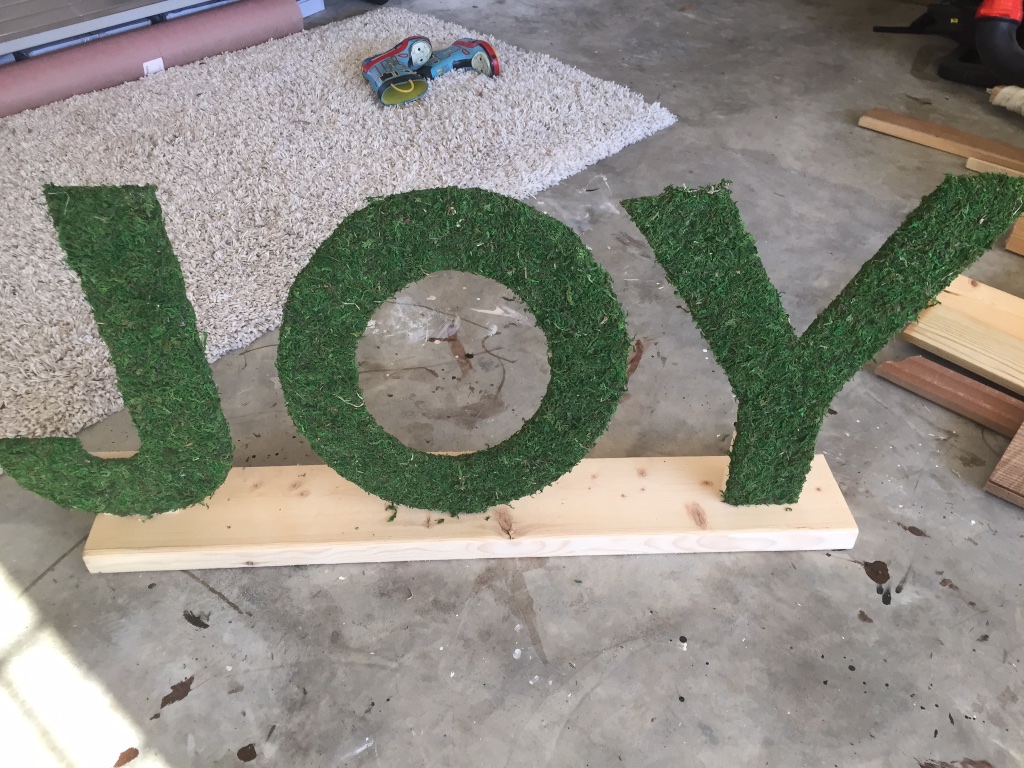
While live moss letters from Pottery Barn look pretty amazing, $79 a piece is just too far out of my budget! Simple enough solution to this problem, let’s DIY them! With the holidays right around the corner, I thought “JOY” would be the perfect place to start. But what time of year isn’t great for moss letters that you can make for less than $5 a piece? Using the Owl & Mouse printable letters, I was able to simply print, cut, and glue these awesome moss letters. Yes, they may not be “live moss”, but they are still just as cute!


Disclosure: The links provided in the “materials” and “required tools” sections are affiliate links. If you would like to support our site and help keep our content free come find out more about how we can make money with no extra cost to you.
Tools Required
Cutting Out Letters
- Jig Saw
- Hot Glue Gun
- Drill
- Pencil
- sand paper
- Safety Glasses
- Scissors
Mounting to Stand (Optional)
Materials
Plans
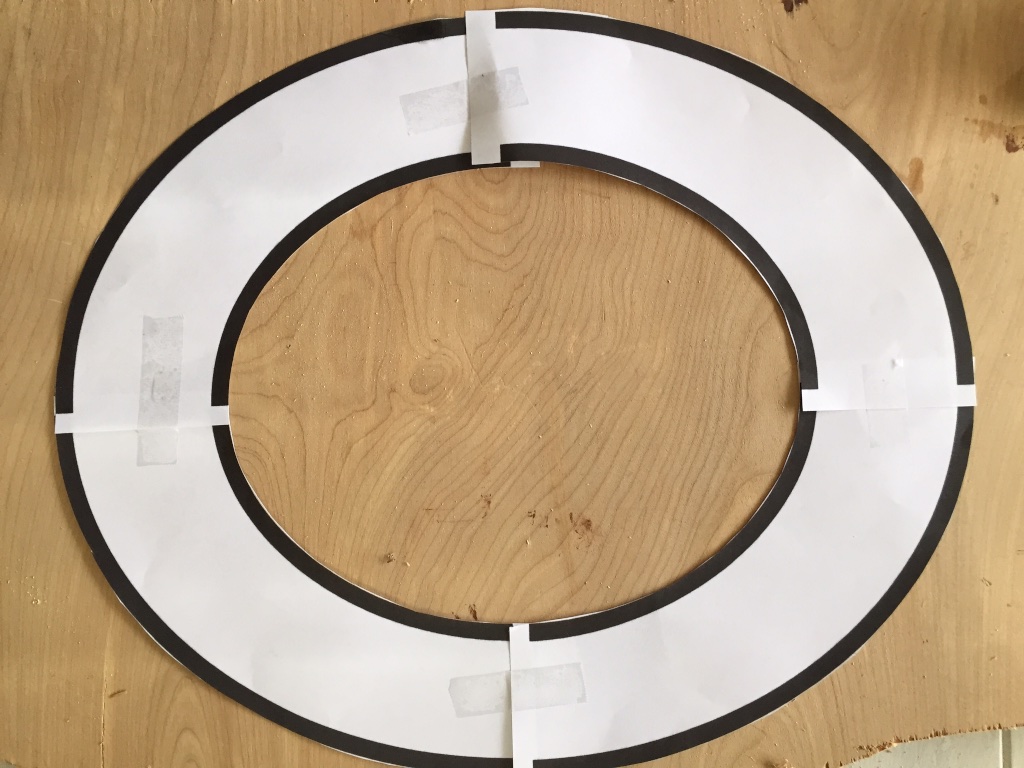
Print and Cut Out Letters
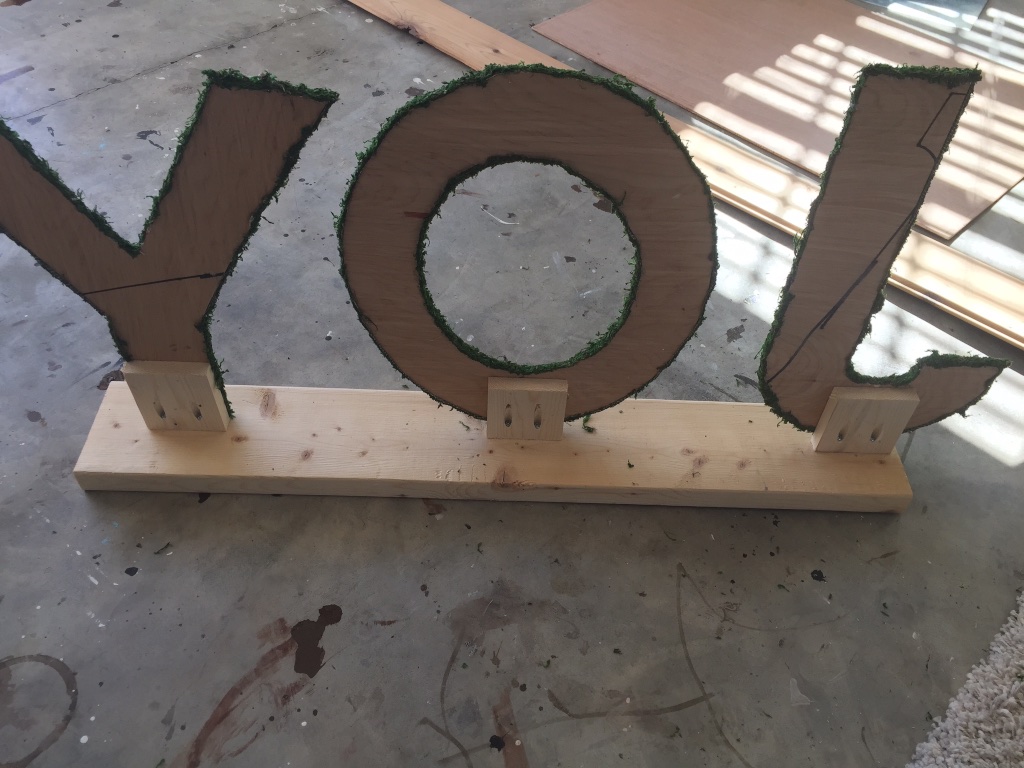
Using the Owl & Mouse website, select and print the letters and size you want to use. For “JOY” I selected the 2 x 2 4 page option, which made the letters about 18″ tall.
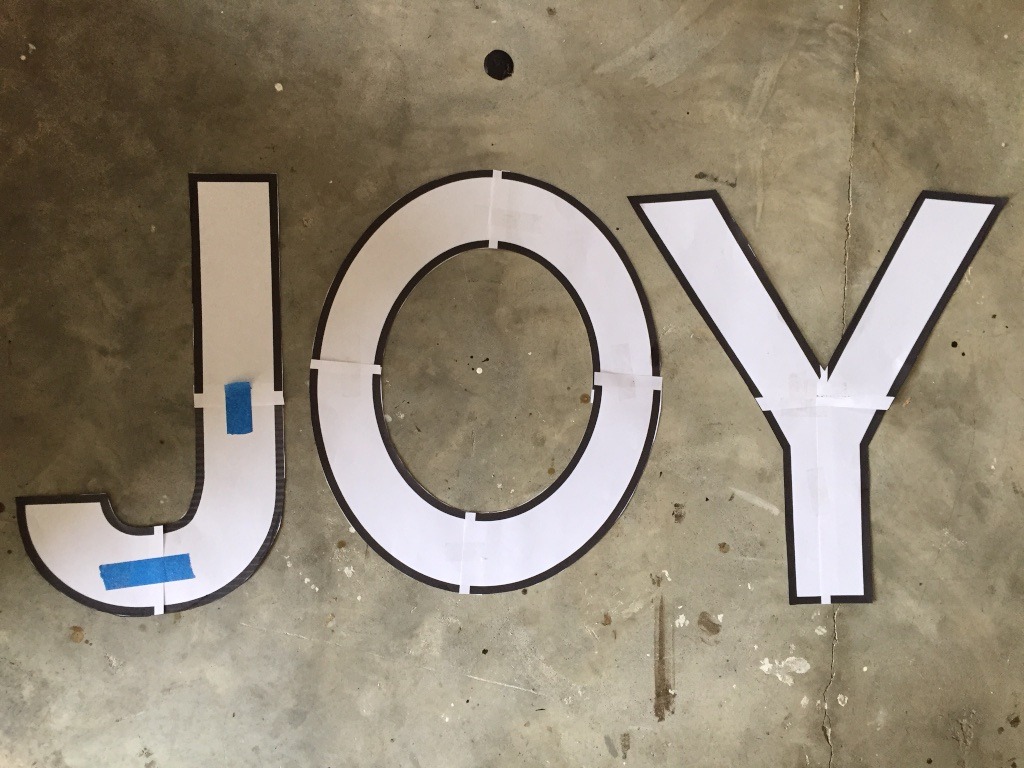
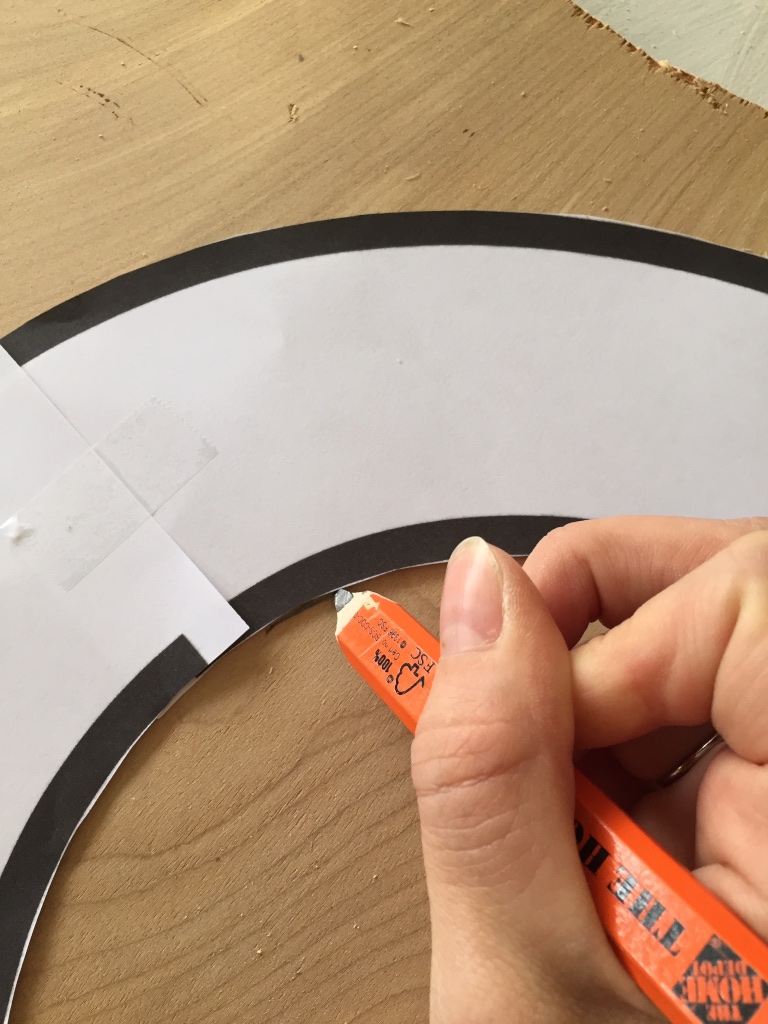
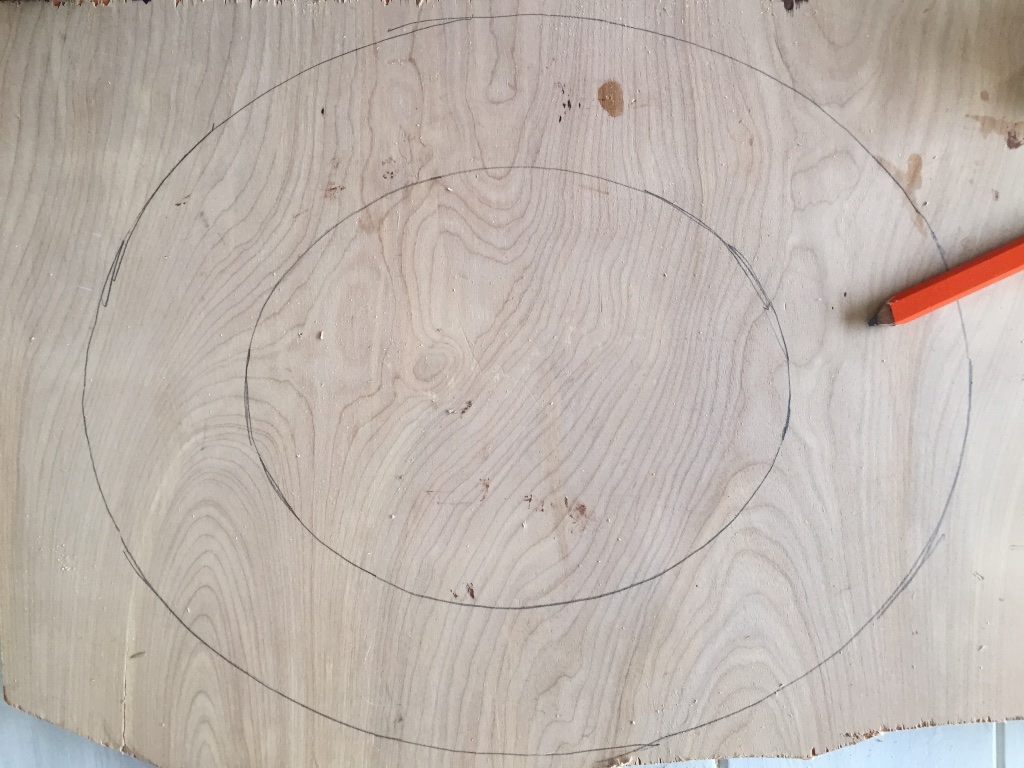
Trace Letters
Trace the letters onto the project panel.
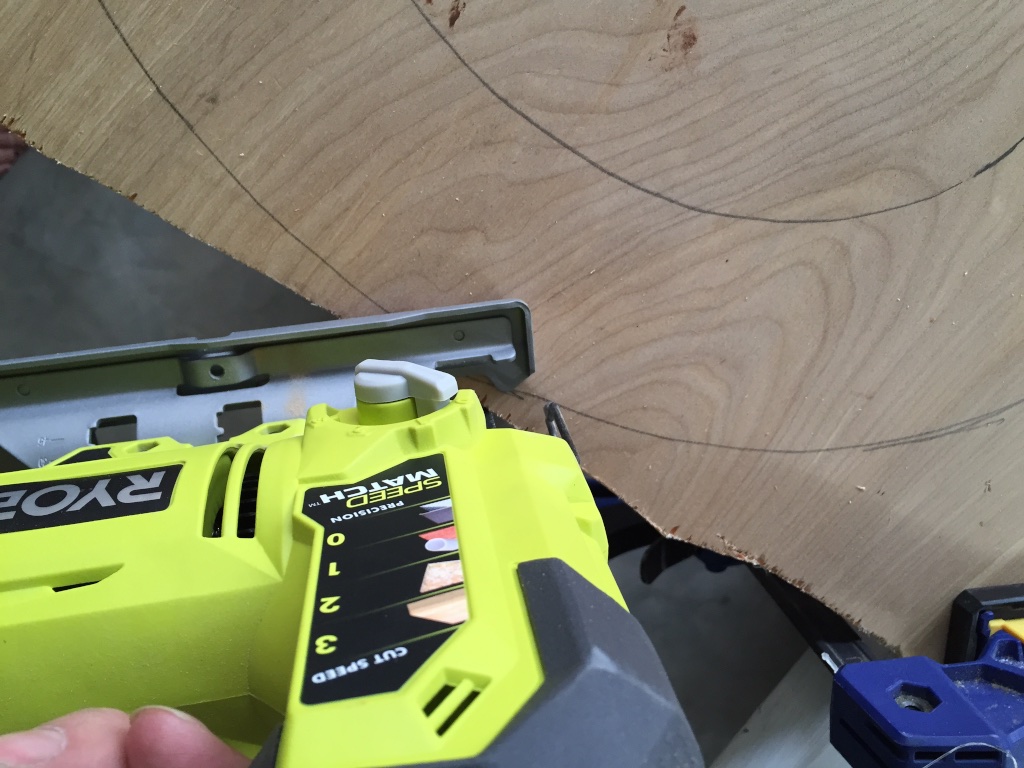
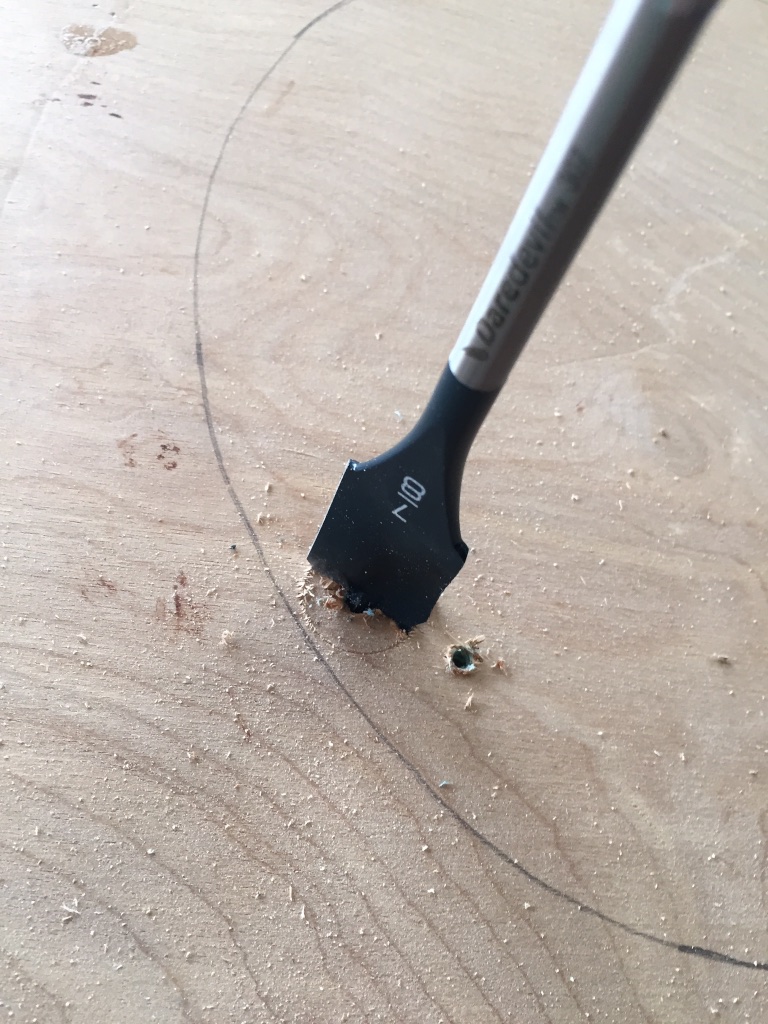
Cut Out Letters
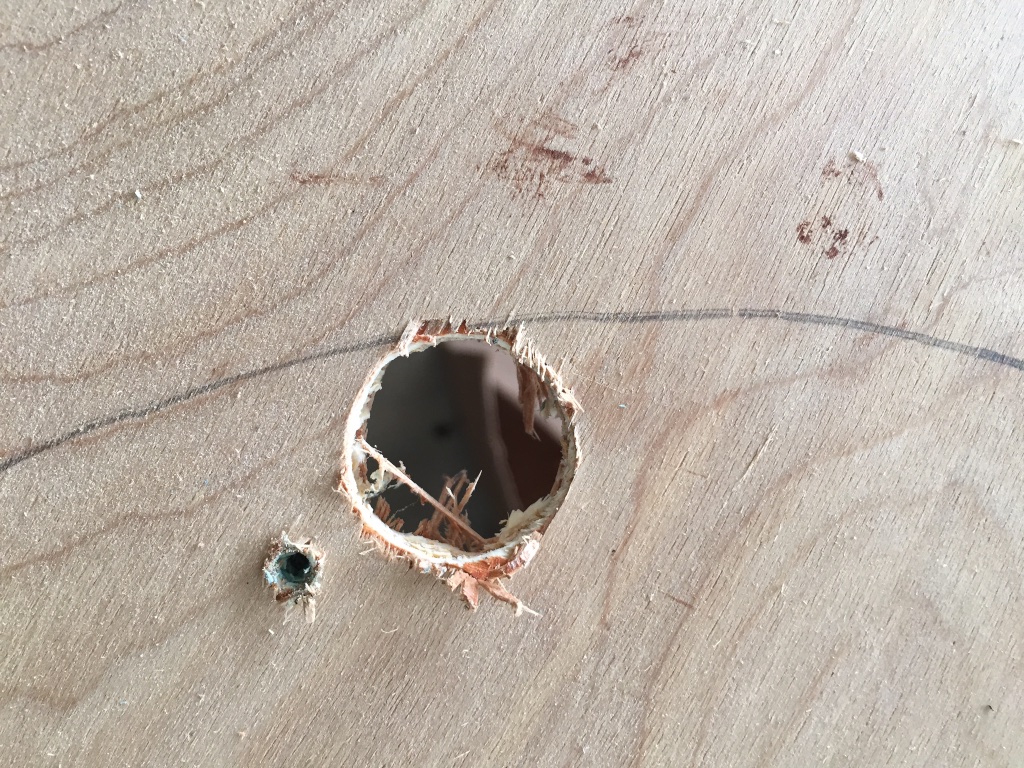
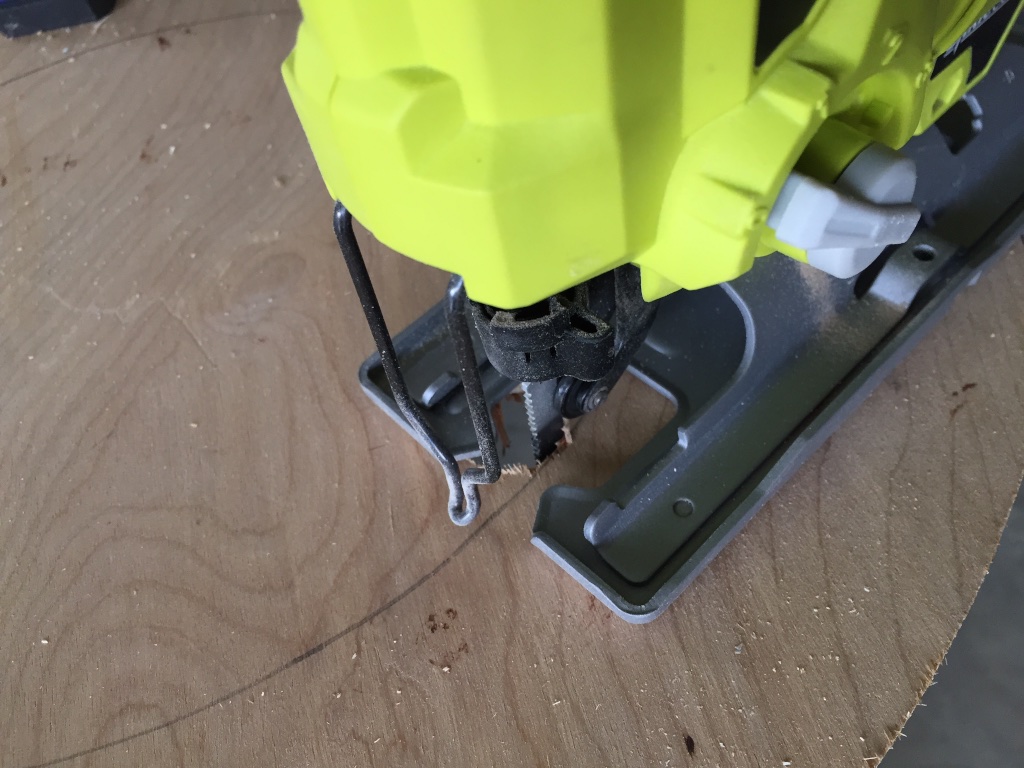
Using the Jig Saw, begin to cut the letters you traced out of the project panel. Keep in mind that some letters will require a pilot hole, for this simply use a drill to drill a hole in the discarded to allow the jigsaw blade to be interested in to make your cut.
Applying the Moss
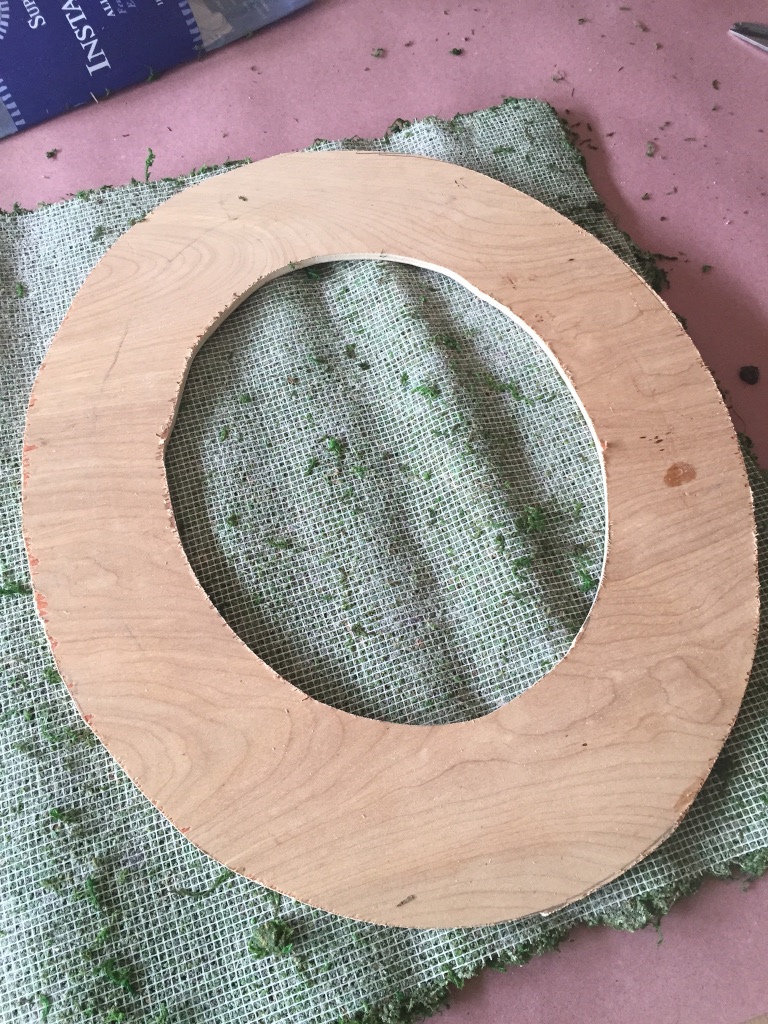
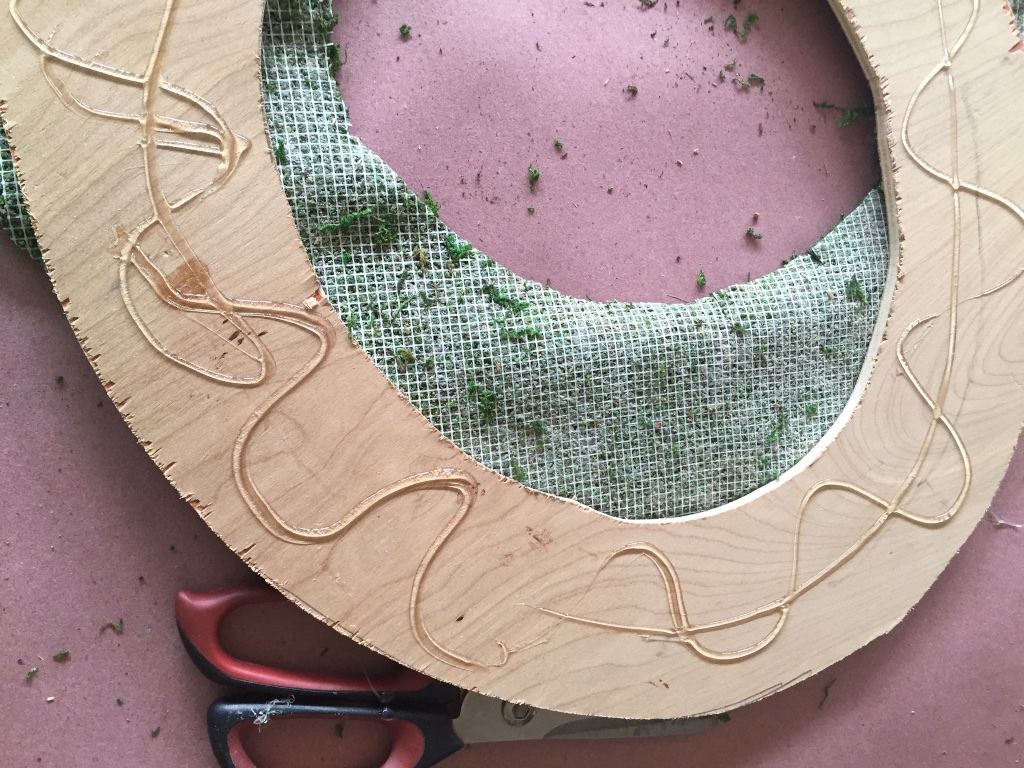
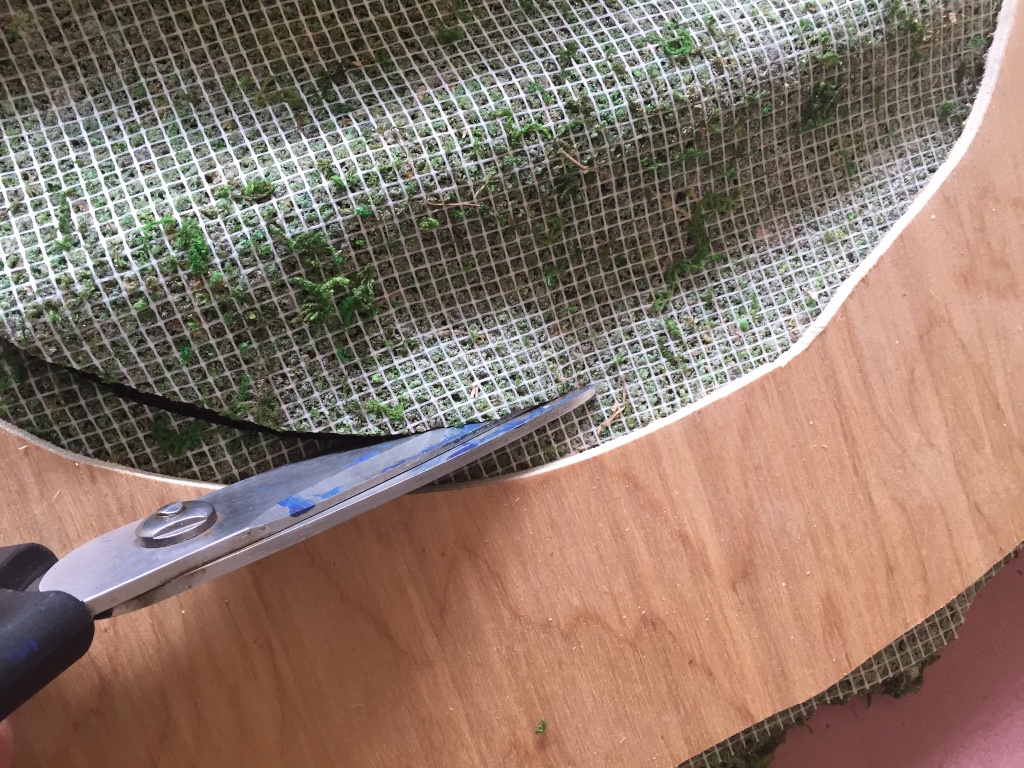
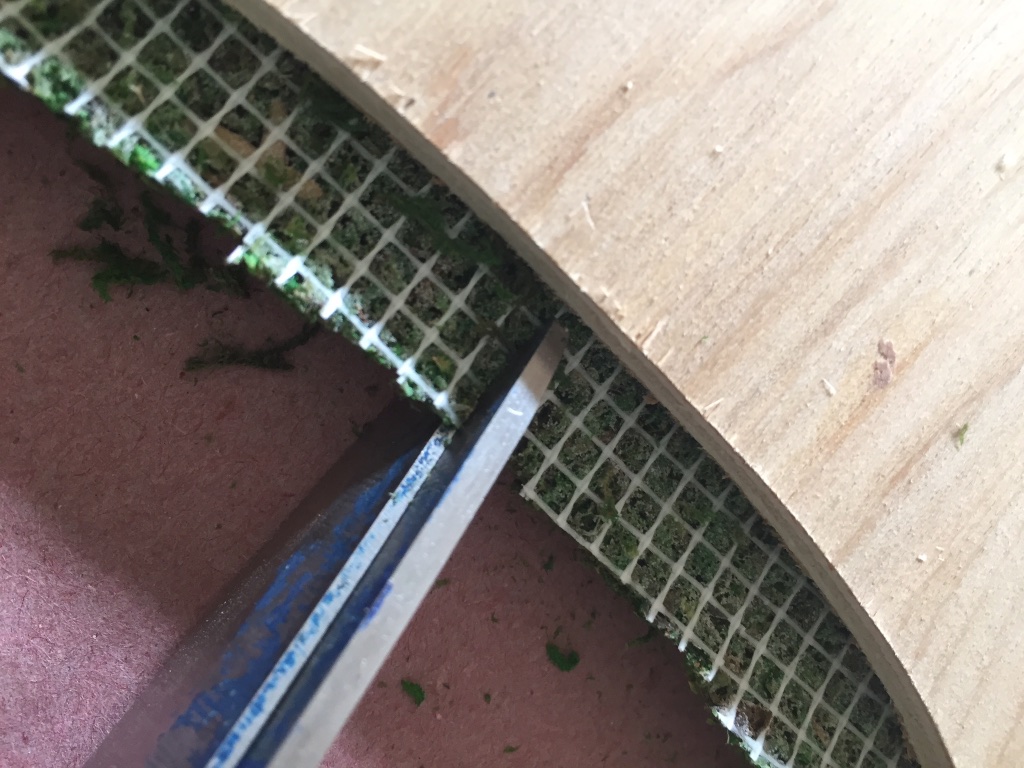
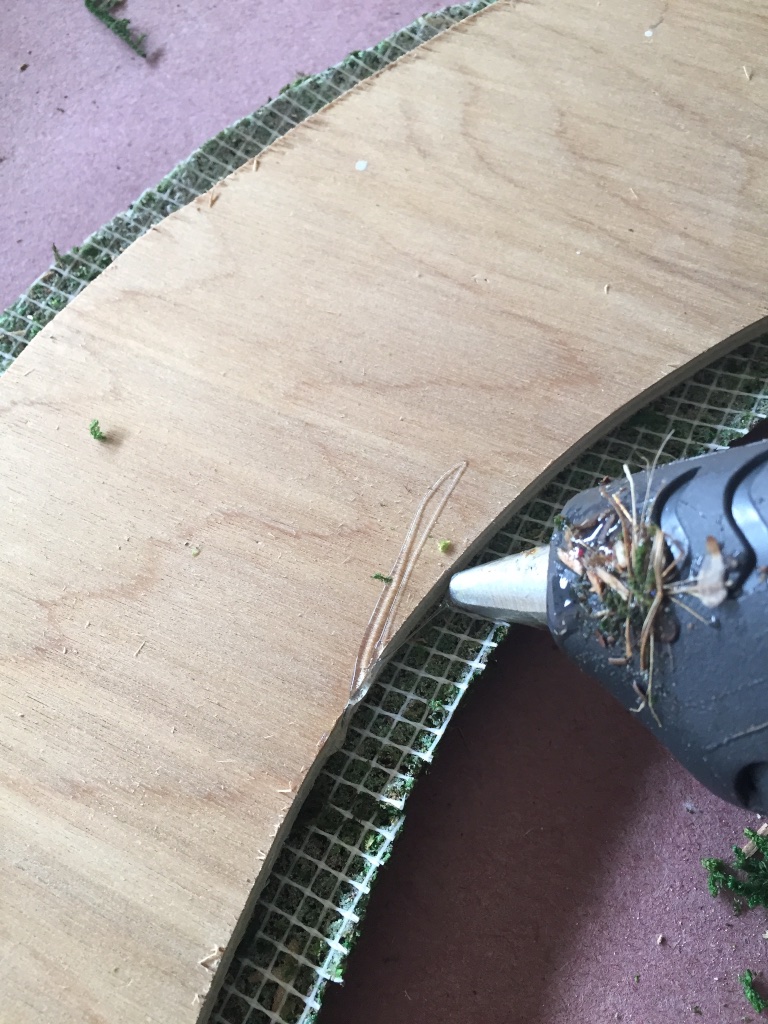
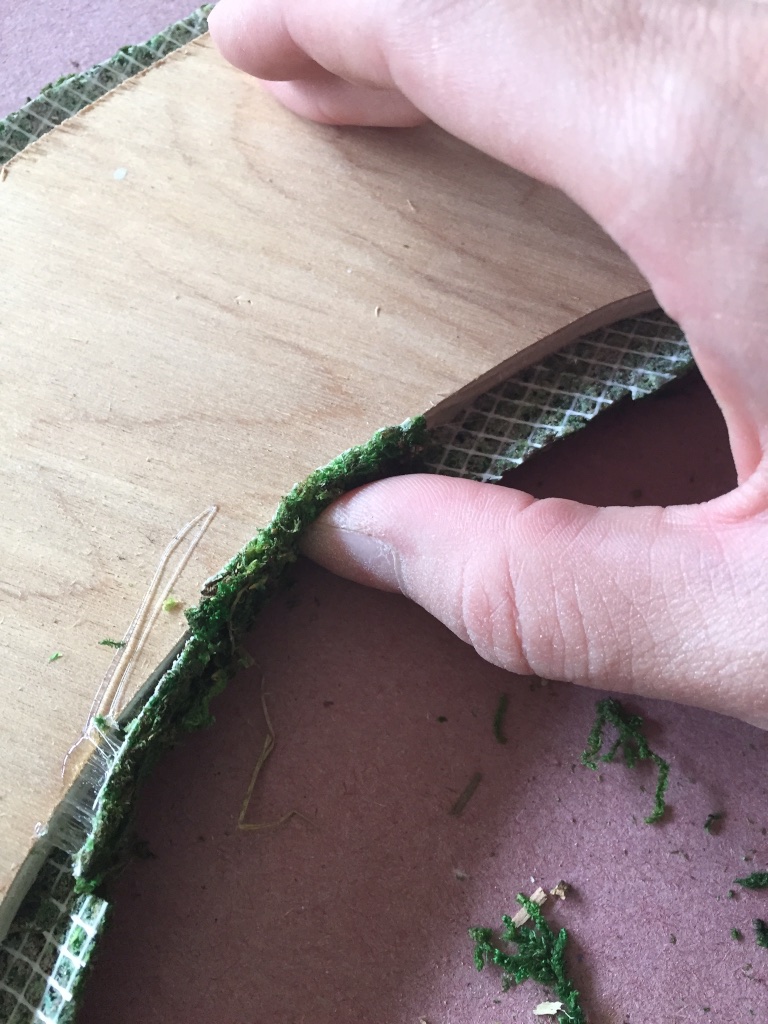
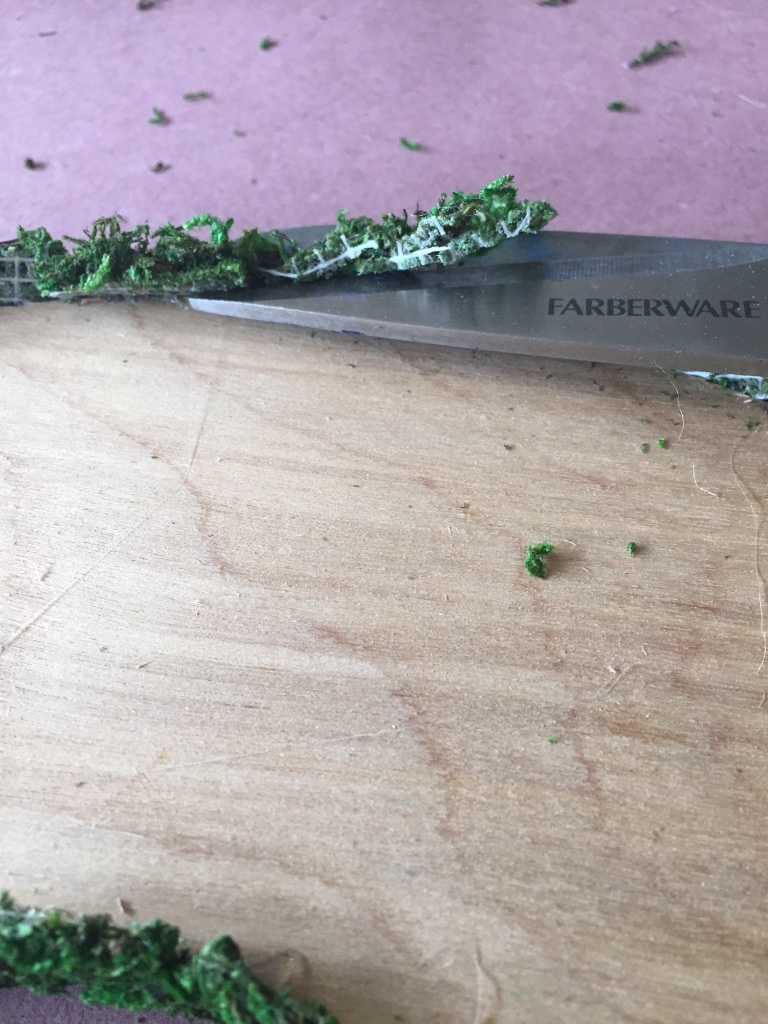
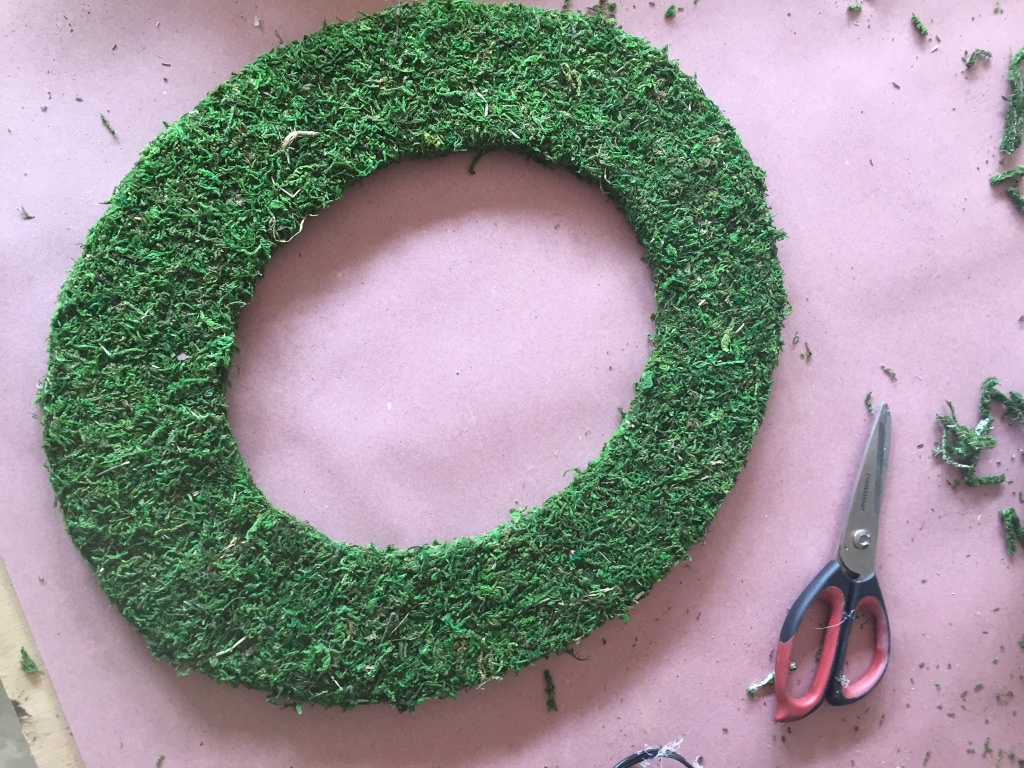
Lay the moss mat down on a flat surface, with the moss side facing down. Using the hot glue gun apply hot glue to the back of the cut out look letters then place the letter glue side down onto the moss mat. Trim about the letters leaving about 1/2″ excess. The next step to applying the moss is to wrap the moss around the edges. For letters with curves, cut a slit in moss about every inch to make wrapping easier, do the same to corners of letters as well. Place a bead of glue around the edges of the letter and wrap the moss around, hold for a minute to allow the glue to dry. Work in small sections. The last step is to turn the letter over and trim off any excess moss.

Mounting Options
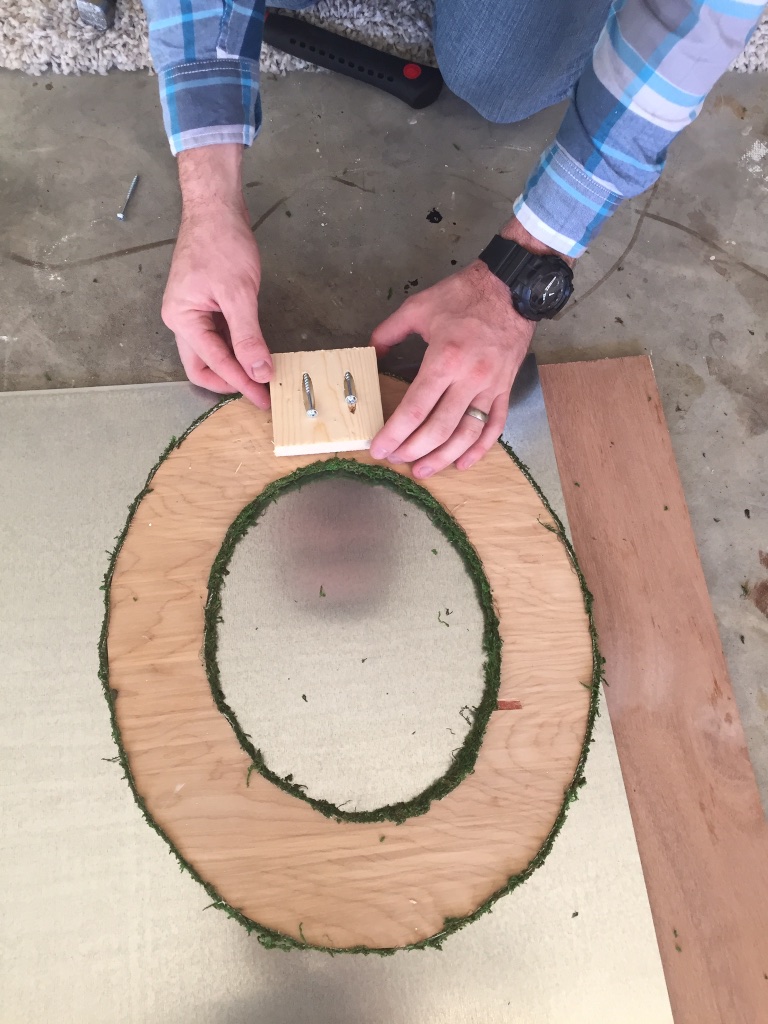
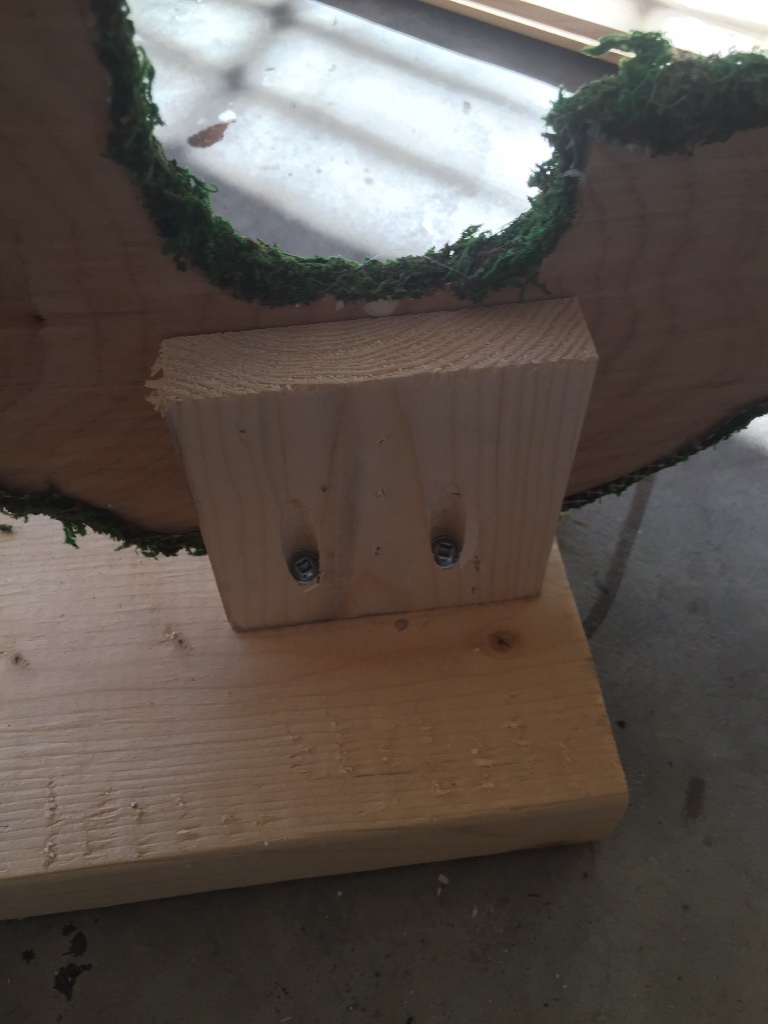
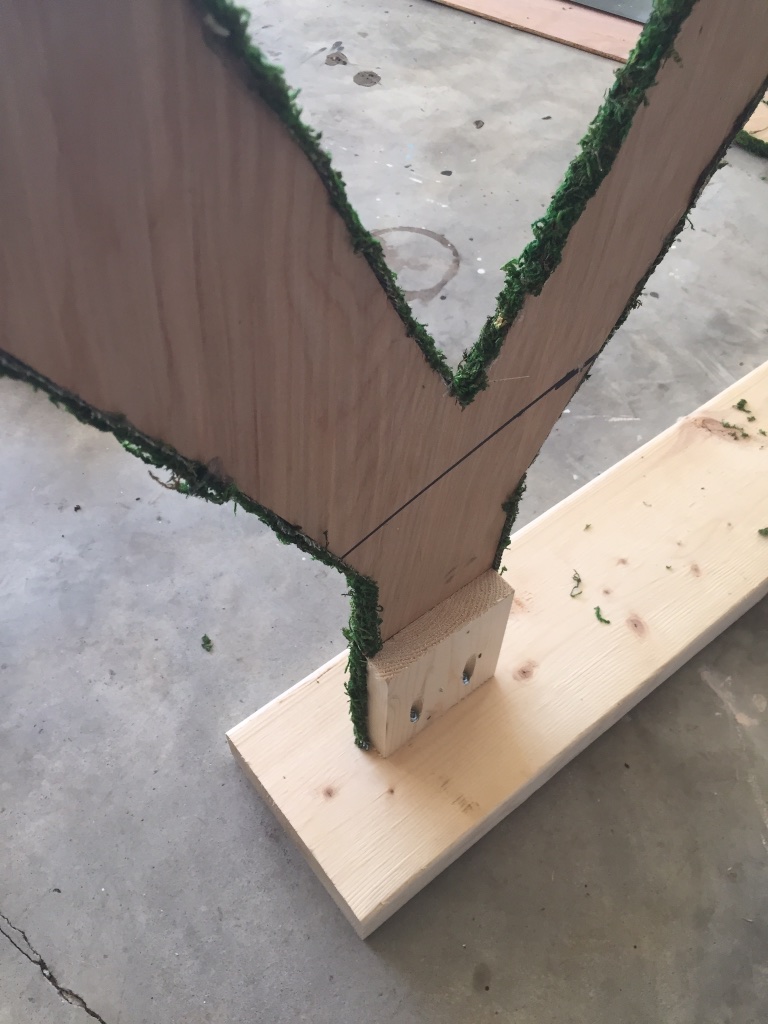
I decided to mount my letters onto a wood stand so they would stand alone nicely on top of my china cabinet. However, they would be just a cute mounted to the wall using Tooth Picture Hangers. For the stand option, we used a 1 x 4″ wood blocks with pocket holes, using a Brad Nailer we nailed the letters onto the blocks, and screwed them into a 2 x 6”. You can use what you have for this, if you don’t own a Pocket Hole Jig, you can simply screw them block into the board.
Questions? Comments?
As always, if you have any questions don’t hesitate to comment below and especially don’t forget to post pictures of your finished products in the comments! ENJOY!