
Parson’s Bar / Console Table
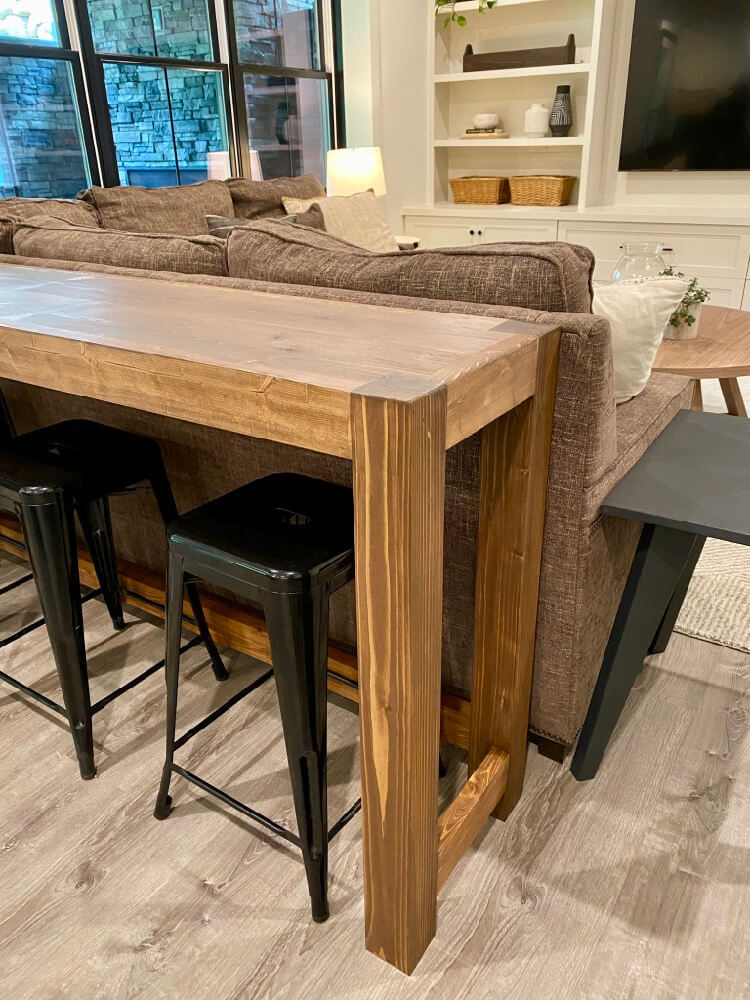
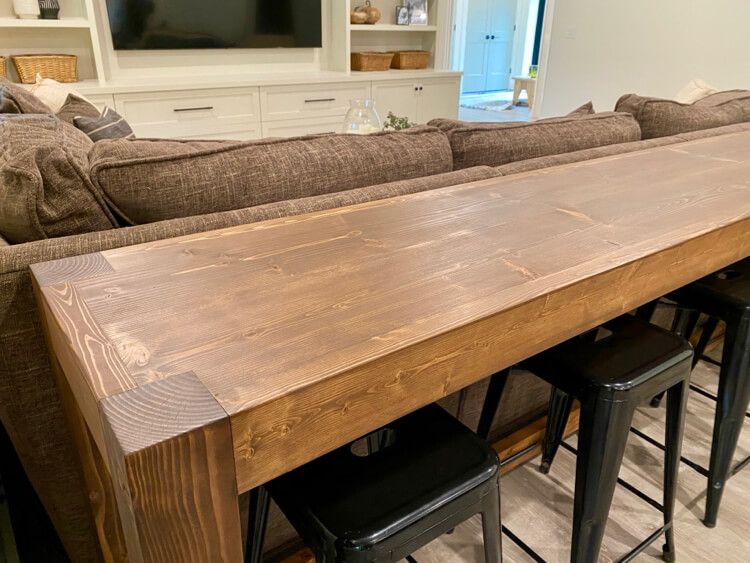
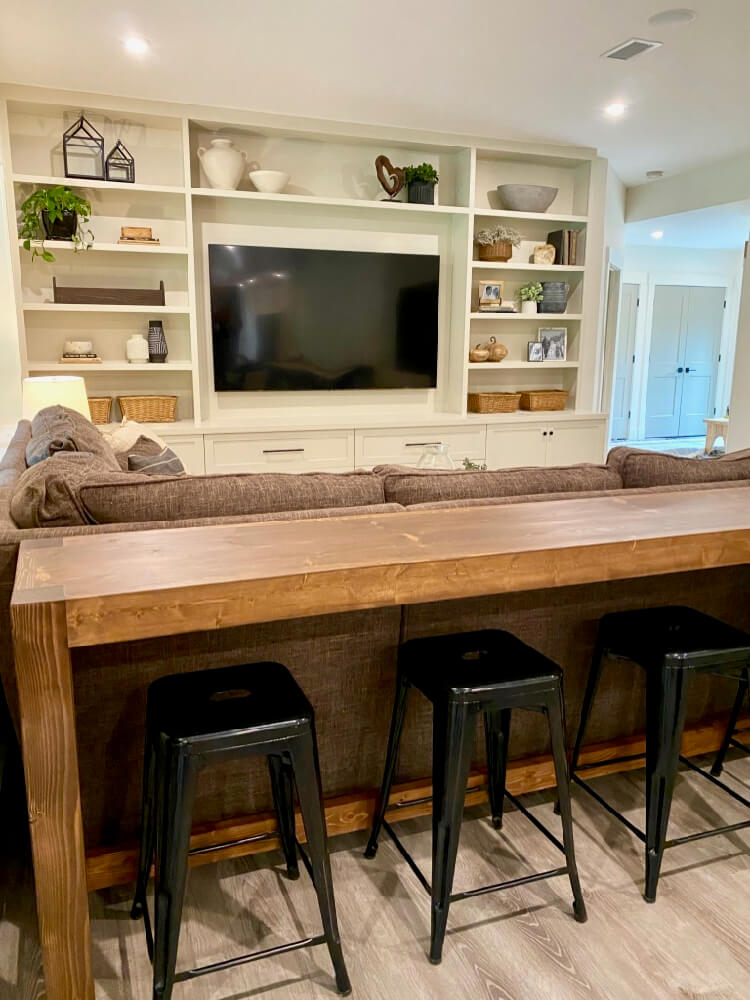
A while back we built a different bar/console table for some friends and it has been a huge hit whenever they entertain. Essentially, it is console table that goes behind a sofa that can house four counter height stools and is the perfect way to view a game or just hang out with friends. With our new entertainment center in the basement, we knew that this would be the perfect place for just that. After looking at a few different styles I settled on the Parson’s style, which is typically the look where the cross-section of the legs are shown in the table top. To keep it inexpensive, I opted to make it from construction grade lumber and I was able to keep the price around $50!
If you love this stuff as much as we do, you might want to consider following us on Instagram where we post sneak peeks and behind the scenes stuff in our stories. Also, did you know you can get tons of projects plans from all around the web when you follow us on Facebook and Pinterest!
Disclosure: This project was sponsored by Ryobi Tools & Kreg Tool Company however the design opinions are 100% my own.
Full Project Video
Wanna see how it all came together? Check out the full project video below and don’t forget to subscribe on YouTube so you won’t miss future videos!
In this video I take the table a step further by planing and jointing the boards to minimize any gaps. This caused me to have to do this project in a little bit of a different order and measure as I went along. Note that following the plans below will give you a slightly more rustic look with eased edges and grooves at the joints.
Time to Complete
1 Day
Estimated Cost
~$50
Skill Level
Beginner
Tools
Materials
- Qty 2 – 4 x 4 x 8′ Kiln Dried Posts
- Qty 2 – 2 x 8 x 8′ Kiln Dried Lumber
- Qty 4 – 2 x 4 x 8′ Kiln Dried Lumber
- Wood Glue (Apply to all joints)
- 2-1/2” Pocket Screws
Disclosure: The links provided in the “materials” and “required tools” sections are affiliate links. If you would like to support our site and help keep our content free come find out more about how we can make money with no extra cost to you.
Dimensions
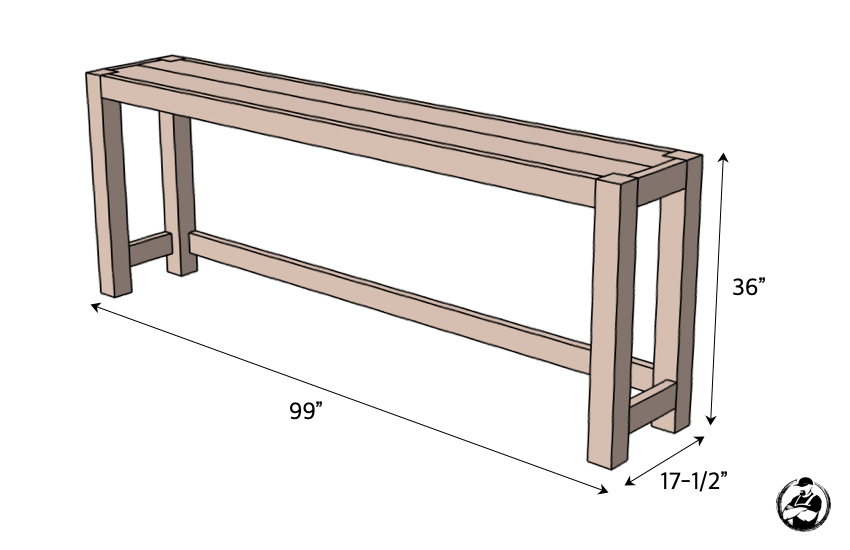
Cut List

How to build a Bar / Console Table
These step by step plans will walk you through how to build a DIY Bar / Console Table.
Total Time: 1 day
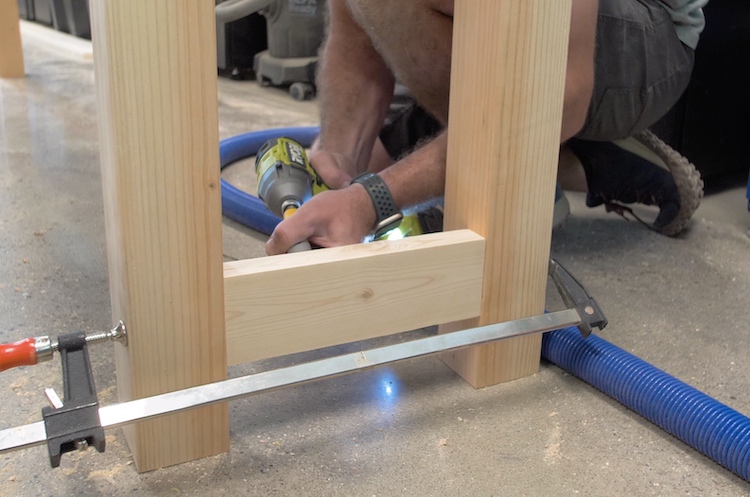
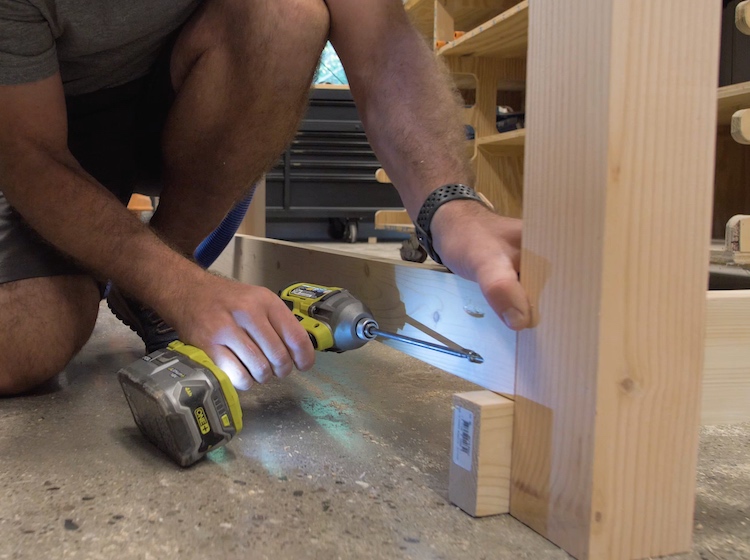
Assemble Sides

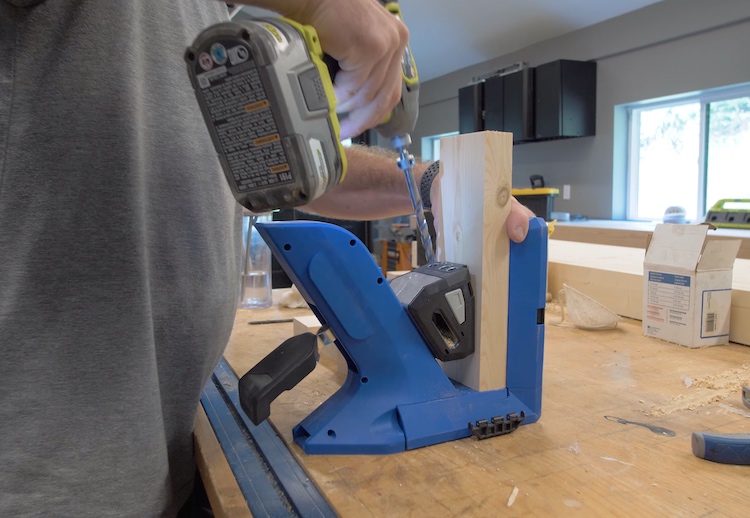
I have a right angle bit adapter which made this assembly a little easier. It could also probably be done with the shorter kreg square bit.
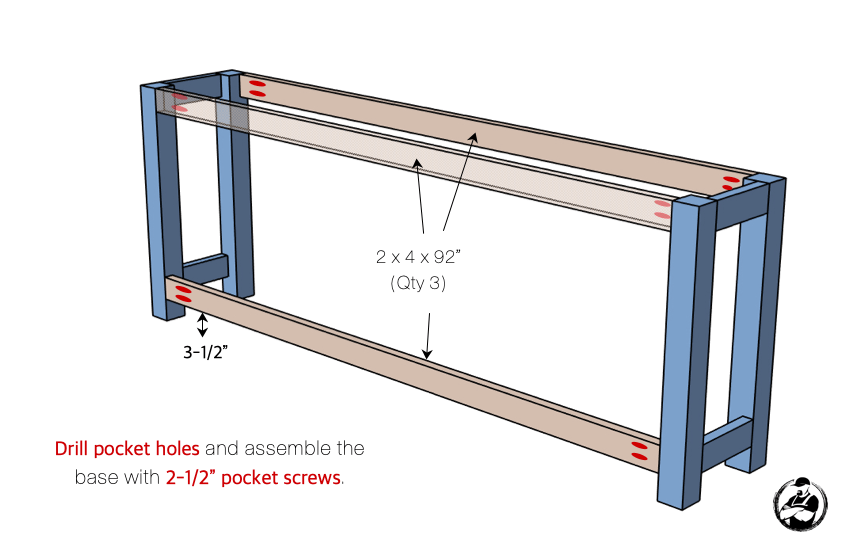
Assemble Base
Assemble Top

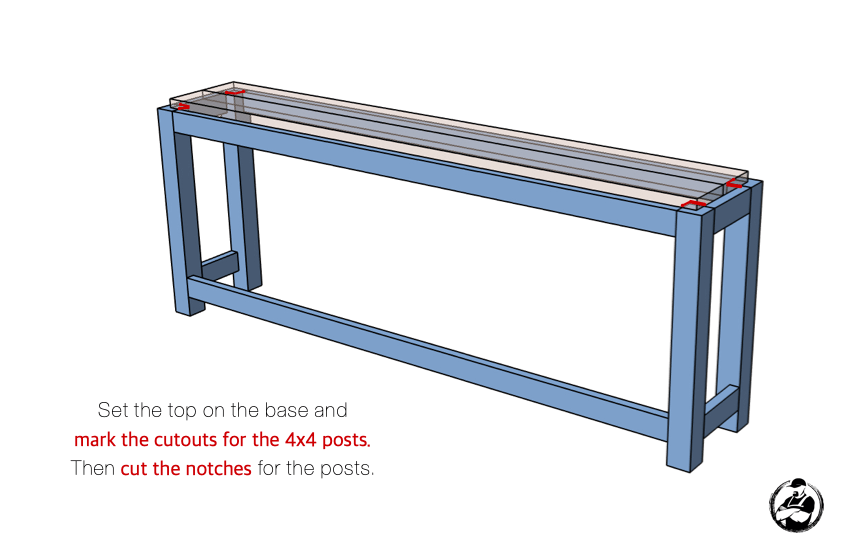
Notch Top to Fit
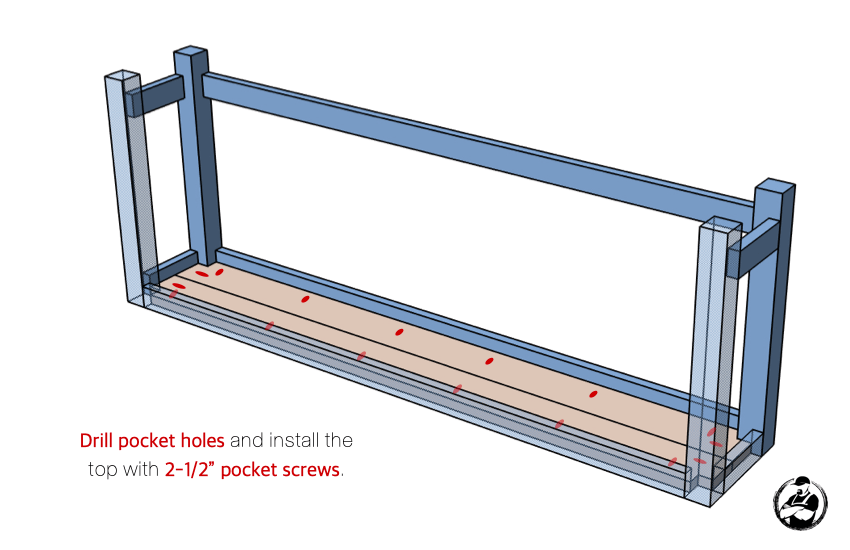
Attaching the Top
Sand and Apply Finish
After sanding from 80 grit to 220 grit, we decided to apply Rustoleum’s Weathered Wood Accelerator to take out some of the pink hues in the douglas fir posts before applying the Dark Walnut wood stain.
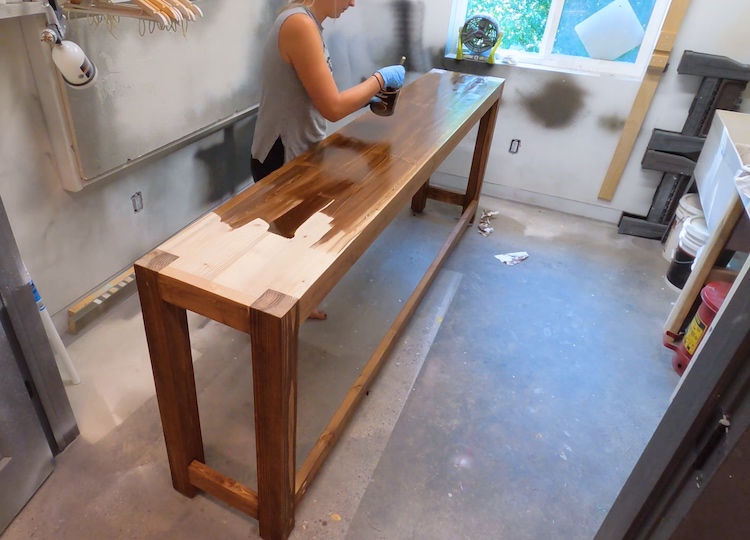
After the stain dried, we then applied a matte polyurethane to protect the surface
Questions? Comments?
As always, if you have any questions don’t hesitate to comment below and especially don’t forget to post pictures of your finished products in the comments! ENJOY!