

DIY Playhouse Plans: A Backyard Playhouse with a Covered Porch
Quick build These DIY playhouse plans build a 72″ x 61″ kids playhouse on a 79″ x 96″ deck (about 6-1/2 x 8 feet), with a covered porch and railing, three windows, a door and a steep 48 degree shingled roof, about 106-1/2″ tall. It sits on two 4×4 skids, so there are no footings to dig. It’s an advanced build: plan on two weekends and a helper. Documented by Jamison Rantz, October 2026.
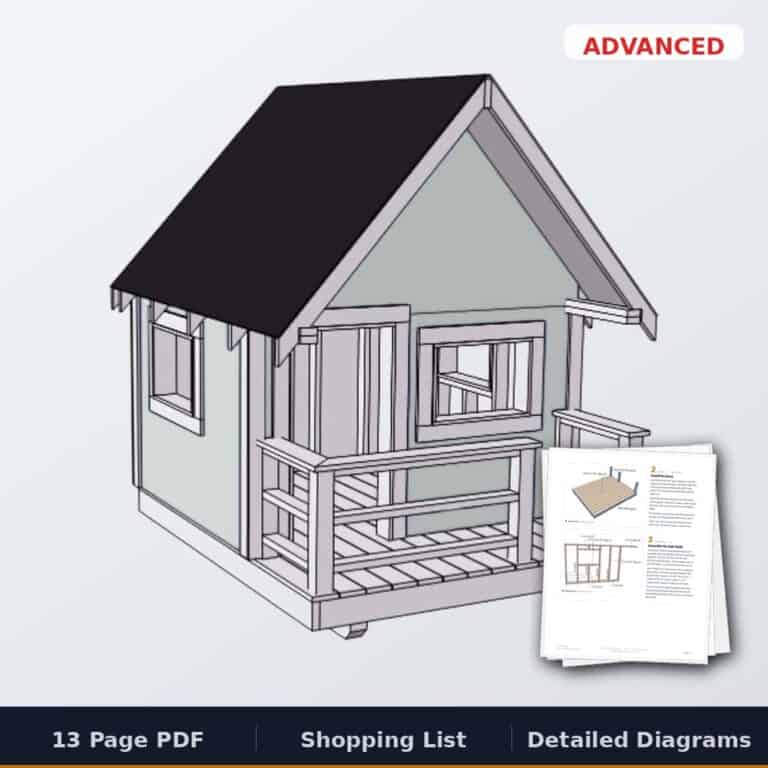
Backyard Playhouse Plans, $20
Everything below in one print-ready PDF, redrawn for 2026: 13 pages, a drawing for every one of the 15 steps, cut list diagrams and a shopping list. QR codes jump straight to the build video.
Every little girl needs a playhouse. My wife Jamie has always talked about her childhood playhouse, and I wanted our daughter Maddie to have those same memories. So we built her one, and our son Brayden was right there with us. We made it his project too: we were building Maddie’s playhouse, and he loved every minute of it. It was so cool to see those two working with their hands instead of sitting in front of the TV or the iPad.
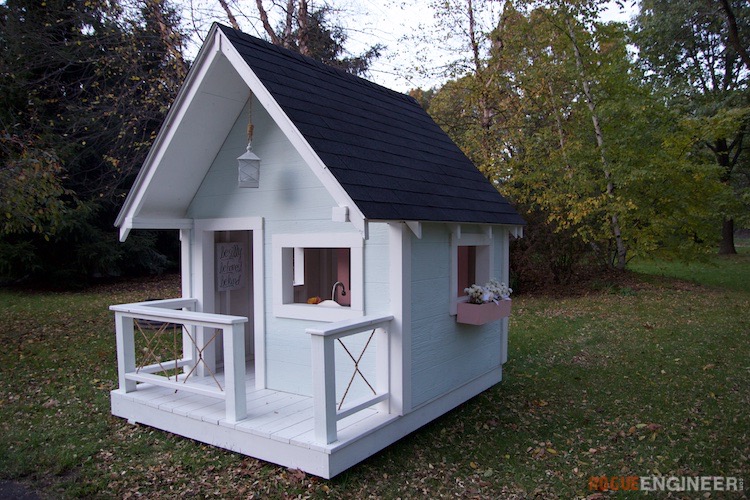
I wanted it durable, cute for our little girl without being so girly that Brayden wouldn’t play in it, and able to move if it had to. That’s why it sits on two 4×4 skids. I built the deck and walls in my garage and pulled it out to the yard with my truck and a tow strap before the roof went on. If you can, skip that part and build it right where it will stand.
Below you’ll find my DIY playhouse plans: the dimensions, the tools and materials, and how to build a playhouse step by step, plus the build video. If you’d rather have it all in one place, I redrew the printable playhouse plans from scratch for 2026: 13 pages, a drawing for every step, cut list diagrams and a shopping list.
Build It or Buy It?
I priced the whole shopping list at Home Depot in October 2026 (Ann Arbor, Michigan, before tax): about $1,260 in materials, plus about $200 more for primer and paint. Here’s how that stacks up against buying a playhouse this size.
The kit is a fair comparison: same 6×8 class, similar walls. But it’s framed with 2x3s, the deck is open instead of covered, and you still buy the shingles, drip edge and paint and put it together yourself. Lumber prices swing by region and month, so plug your store’s prices into the shopping list in the plan before you buy anything.
Playhouse Dimensions
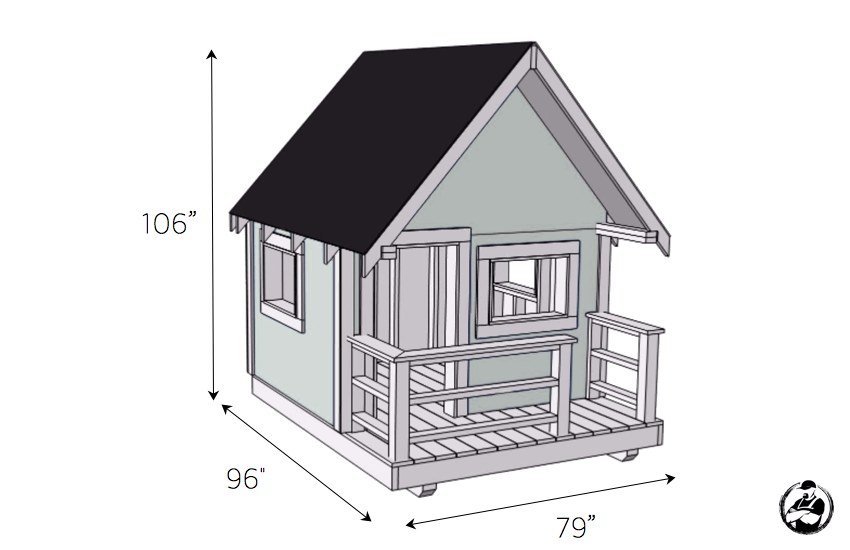
| Spec | Playhouse |
|---|---|
| Deck | 79″ x 96″ |
| Footprint | 6-1/2 x 8 ft |
| Skids | Two 4×4 x 96″ |
| Inside | 72″ x 61″ |
| Walls | 46-1/2″ tall |
| Headroom | 90-5/8″ at ridge |
| Porch | 27-5/8″ deep |
| Door | 24″ wide |
| Roof | 48 degree gable |
| Height | About 106-1/2″ |
That’s a good size for a kids playhouse: room inside for two or three kids and a little table, a porch for the lemonade stand, and small enough to sit on skids instead of a foundation. It’s close to the common 6×8 size. The steep roof is what makes it feel bigger than it is. There’s about 90-5/8″ of headroom under the ridge, so even I can stand up in the middle. I just have to duck to get through the door.
What’s in the Printable DIY Playhouse Plans
The original plan was an 8-page PDF I put together in 2016. For this update I rebuilt the whole playhouse as a 3D model and redrew the plan from it. Here’s what’s in the printable playhouse plans:
- 13 pages, every measurement in inches
- 15 steps, each with a perspective drawing: deck, walls, siding, roof, trim and the porch railing
- Cut list diagrams for every board and sheet, so you know exactly how to cut each one
- A shopping list with every board, sheet and box of screws
- QR codes to the build video, including one that jumps straight to the rafter birdsmouth layout
- A finishing guide, FAQ and troubleshooting
How to Build
Build the Deck Frame
The deck is the foundation of the whole playhouse, so take your time here. Seven 2×6 joists go 16″ on center between two 96″ rim joists, all pressure-treated, with two 3″ exterior screws at every joint. The three 30″ 4×4 porch posts stand flush with the bottom of the joists, screwed in from two sides, with a 2×6 block beside the middle post. Two 96″ 4×4 skids go underneath, their bottom corners cut off at 45 degrees. Before any decking goes on, measure corner to corner both ways. When the two diagonals match, the frame is square, and every wall that follows will be too.

Install the Decking
The deck boards are 5/4 x 6 x 96″ pressure-treated decking, fourteen of them, spaced with a nail and fastened with 2-1/2″ exterior screws at every joist. Three boards need a notch to fit around the posts: hold each one in place, trace around the post and cut it out with a jigsaw.
And pre-drill near the ends. Here’s where I thought I was better than pre-drilling. I wasn’t: the board cracked, and it took a little wood glue to save it. Learn from me.

Frame the Side Walls
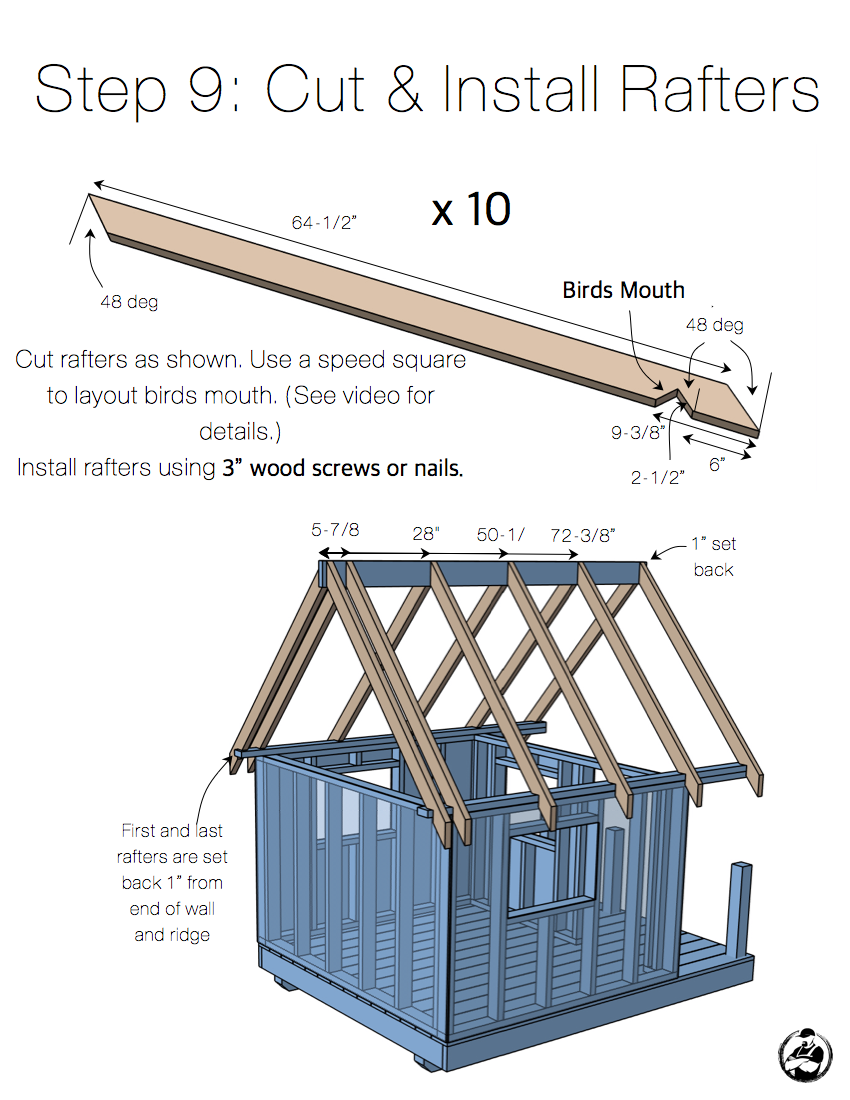
The walls are ordinary 2×4 studs. Frame each one flat on the deck: screw a straight board down along one edge and build tight against it, and the plates stay straight. Each side wall is a 68″ bottom plate, a 90-1/8″ top plate and 45″ studs. The top plate runs long, past the front of the house, so it can carry the porch roof without a post in the way. The window is framed between two studs with a 25-1/8″ sill and header and short cripples above and below. Build two: the second is the mirror of the first.

Frame the Back Wall
The back wall is the simple one: two 72″ plates and six 45″ studs, no openings. Mark both plates together so the studs line up, then drive two 3″ screws through the plates into every stud end.

Frame the Front Wall
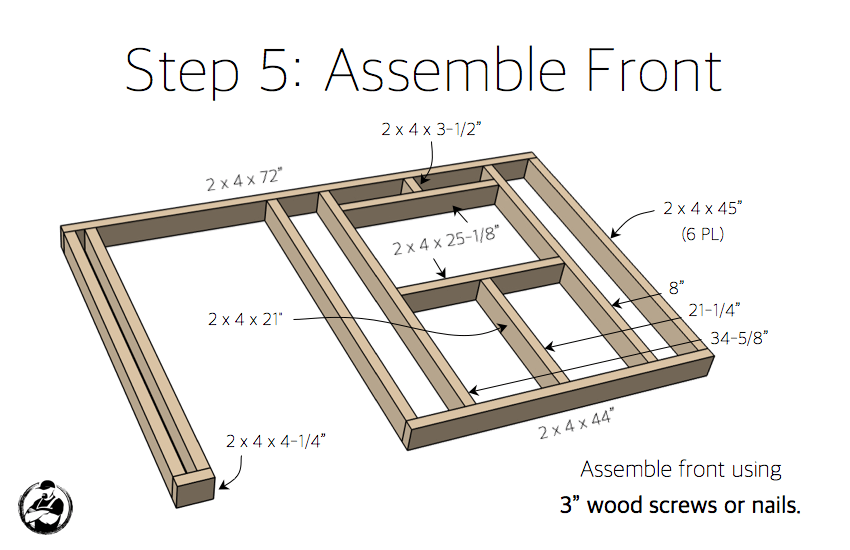
The front wall has the door and the third window. The bottom plate is two pieces with the 24″ door opening between them, and there’s no door header: the 72″ top plate does that job. The window is framed just like the ones in the side walls.
Stand the Walls
Stand the walls with a helper and tack a scrap diagonally across each one to hold it plumb until its neighbor is on. Screw the bottom plates down into the deck. Then join the corners from inside the house: a 3″ screw driven from outside can’t reach through a stud lying on its side. To check that the walls are square, use a 3-4-5 triangle. Mark 3 feet along one wall and 4 feet along the other, and the diagonal between the marks should be exactly 5 feet.
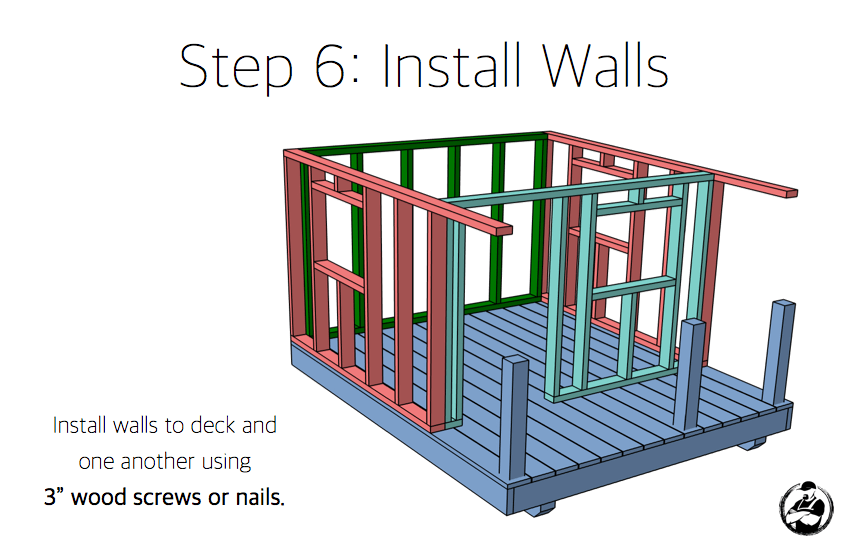
Side the Walls and Cut the Openings
The walls might seem a little flimsy at this stage, but the siding locks everything into place. It’s 3/8″ exterior paneling, one sheet per wall laid on its side, screwed on with 1-1/4″ exterior screws. Then cut out the windows and the door: drill a hole in each corner from inside, mark the lines on the outside, and cut along the framing. I used a reciprocating saw; a jigsaw works too.
One honest note on the paneling. What I used in 2016 was an inexpensive pressed fiberboard panel with a nice wood grain look, and it soaked up a ton of paint. That one isn’t sold anymore. Today the closest match is a 3/8″ LP SmartSide panel, or 11/32″ Ply-Bead plywood if you want to save a little. Either way, prime it.
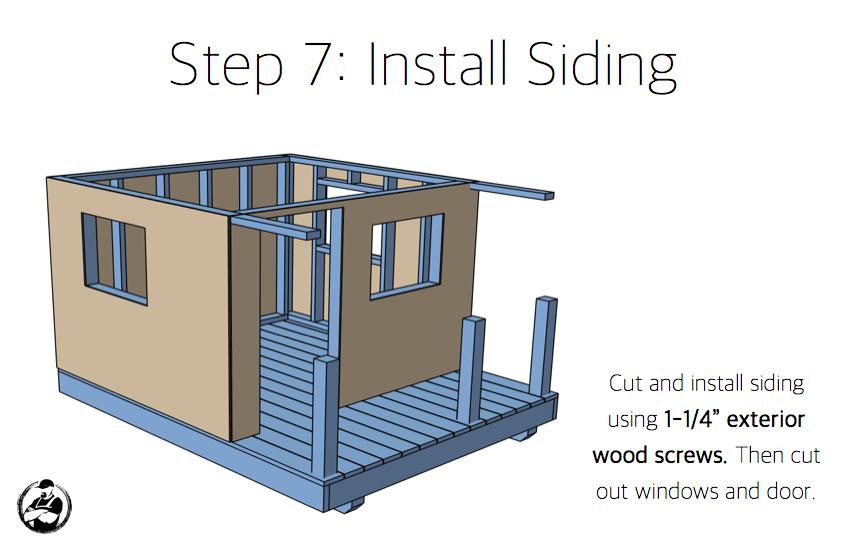
Set the Ridge and Wall Plates
Now the roof. Screw a full 8′ 2×4 wall plate onto each side wall’s top plate, flush at the porch end and 5-7/8″ past the back wall for an eave. The ridge is a full 8′ 2×6. Screw two temporary 2×4 supports to it 9-3/8″ in from each end, flush with its top, then stand it on the deck centered between the side walls.
One good tip: mark where your rafters go on the ridge and the wall plates before the ridge goes up. It’s a lot easier on the ground than in the air.
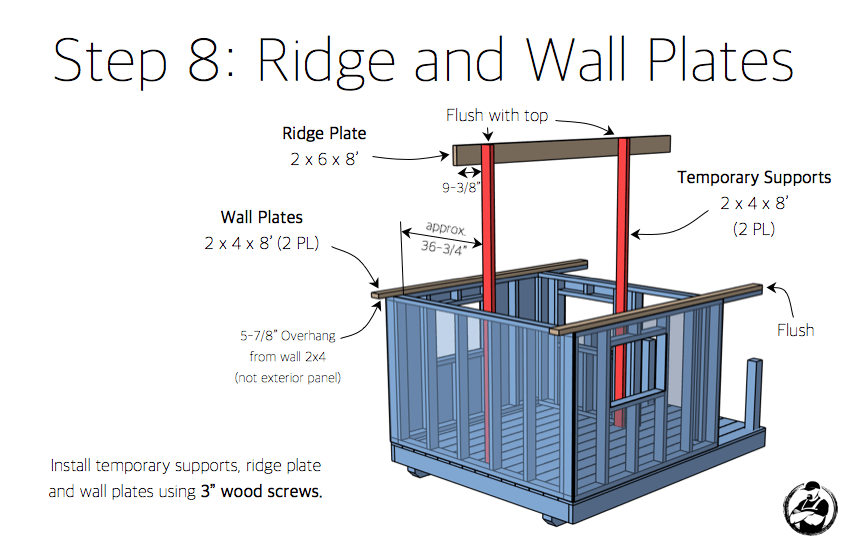
Cut and Install the Rafters
The rafters are 2x4s cut at 48 degrees, the pitch of the roof, with a birdsmouth notch where they sit on the wall plate. Mark the two points, pivot a speed square on the first one and draw the line out, then cut the birdsmouth with a circular saw and finish it with a jigsaw. Test that first rafter on the ridge and the wall plate, then use it to trace the rest. Here’s the birdsmouth layout in the video.
There are twelve rafters, six a side. (The 2016 drawing says “x 10″; it draws six a side, and twelve is right.) Set the end pairs first, toe-screw each one into the ridge and the wall plate with 3” screws, then take the temporary supports down.
Install the Gable Studs
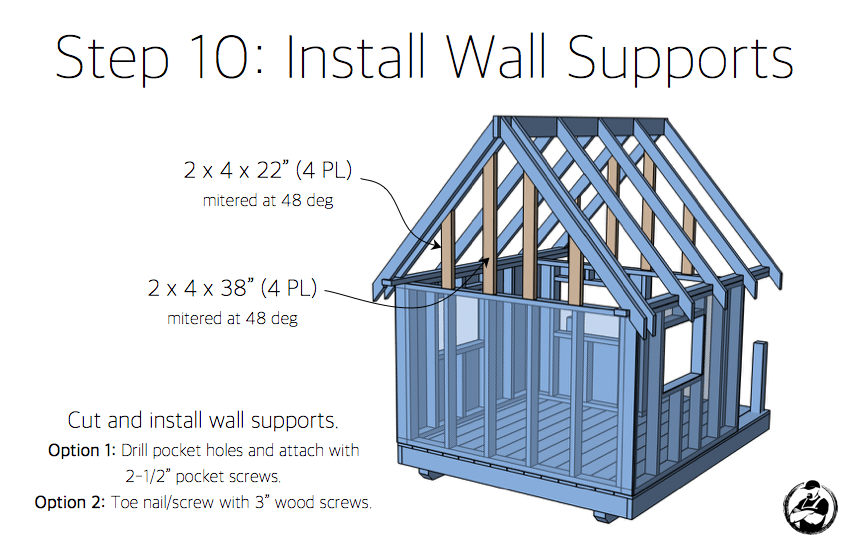
The gable studs fill in under the end rafters and give the gable siding something to grab: two 22″ and two 38″ 2x4s on each end, mitered at 48 degrees across the top. I installed mine with pocket hole screws on the outside face, so the siding hides them. No jig? Toe-screw them with 3″ screws.
Side the Gables
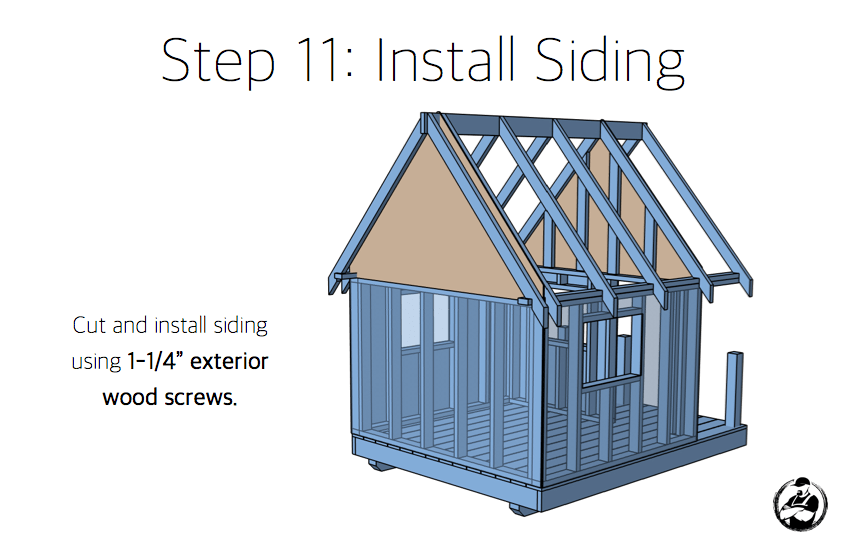
Now comes the fun part. Fitting the gable siding takes a few trips: hold the sheet up, mark it, bring it down, cut it, try again. My shortcut is to hold the sheet against the end rafters from inside and trace along their tops. It beats measuring angles in the air. Notch it around the wall plates and the ridge, then screw it on with 1-1/4″ screws.
Sheath the Roof
The roof deck is 19/32″ OSB, full 4×8 sheets running 1″ past the end rafters, so the shingles have something to nail into. (I used plywood in 2016; OSB does the same job for about half the price.) If the sheets won’t line up at the ends, your rafters are a little out of square: screw one side down first, then pull the other side into place before you fasten it. Rip the last sheet into strips to finish both sides at the ridge.

Roofing, Trim and the Porch Railing
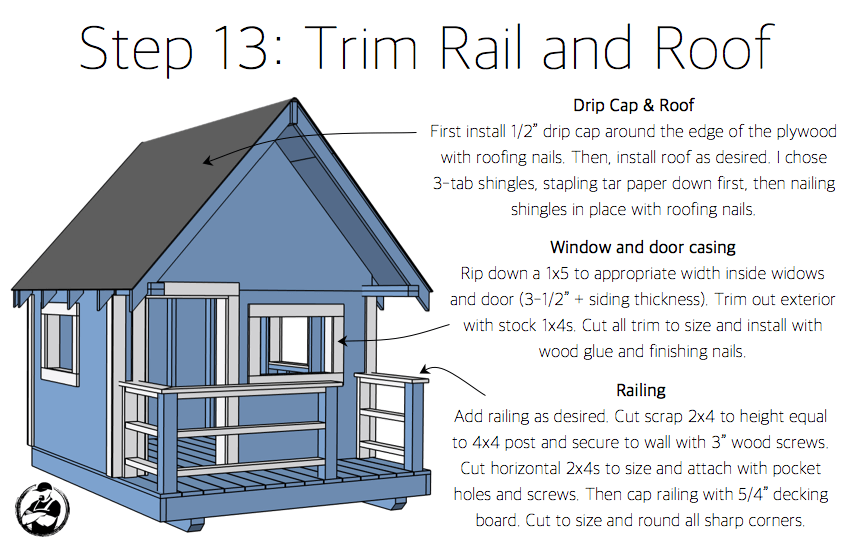
Drip cap goes around the edges, then the felt, then the shingles from the eaves up. I chose 3-tab shingles instead of architectural shingles so I didn’t have to buy a whole package of ridge caps for a few feet of ridge. Then case the windows and door with 1x4s over 1×5 jamb liners and add the corner boards.
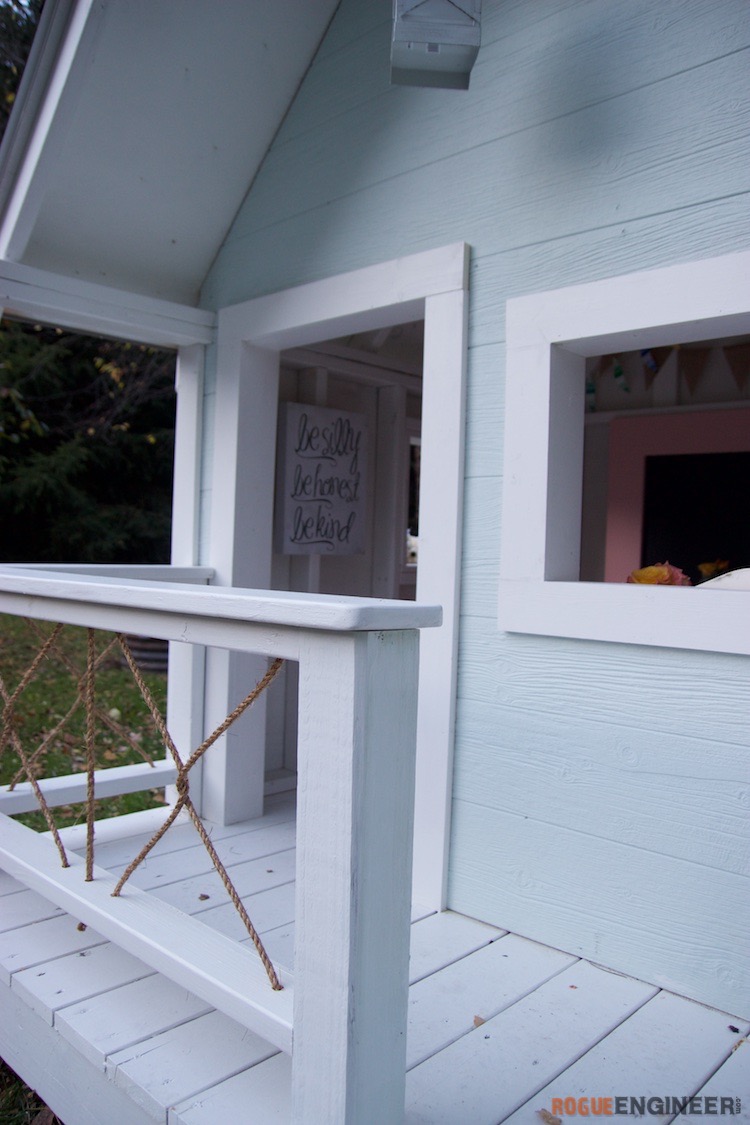
Last is the porch railing. The plan uses 2×4 rails pocket-screwed between the posts and capped with 5/4 decking. On ours, I drilled through the top and bottom rails, ran 3/8″ rope through and crossed it in the middle to make an X, then capped it with another 5/4 x 6 deck board. Either way, round over every corner little hands can reach.
Final Result
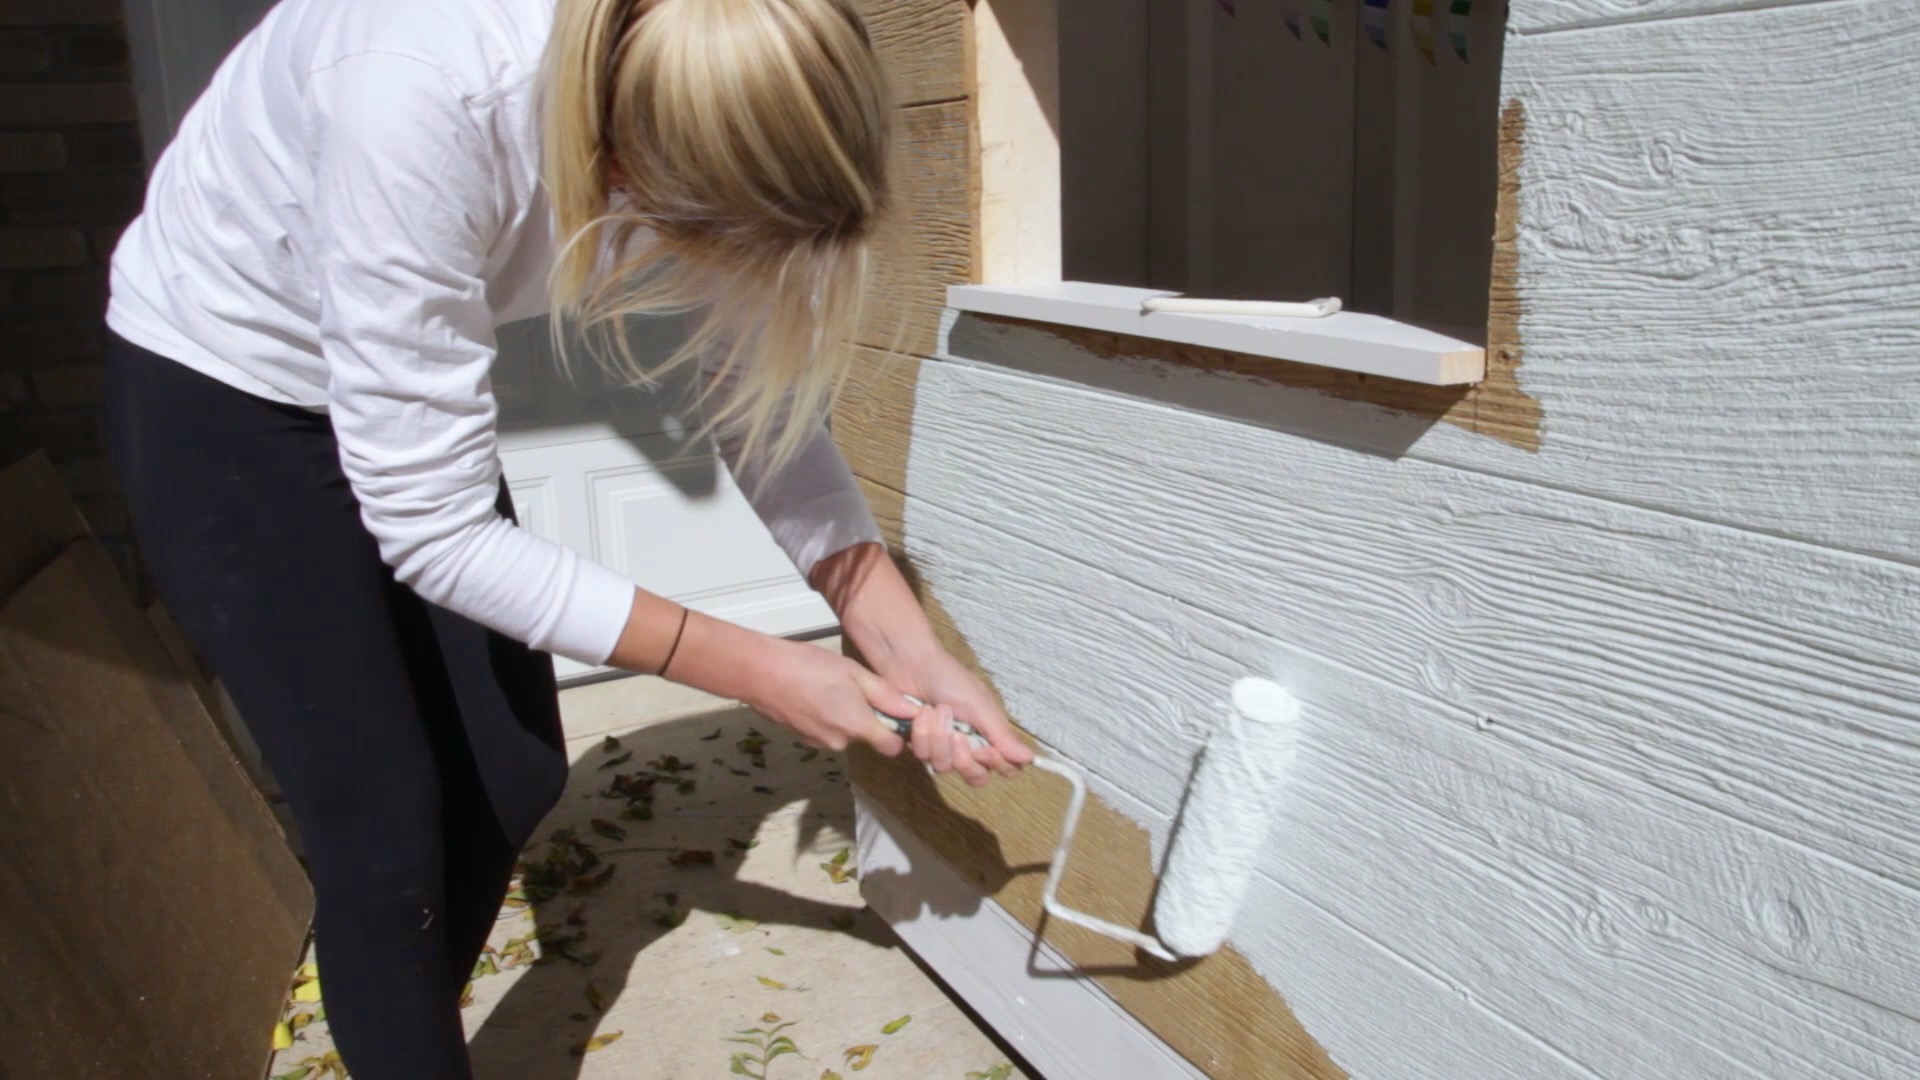
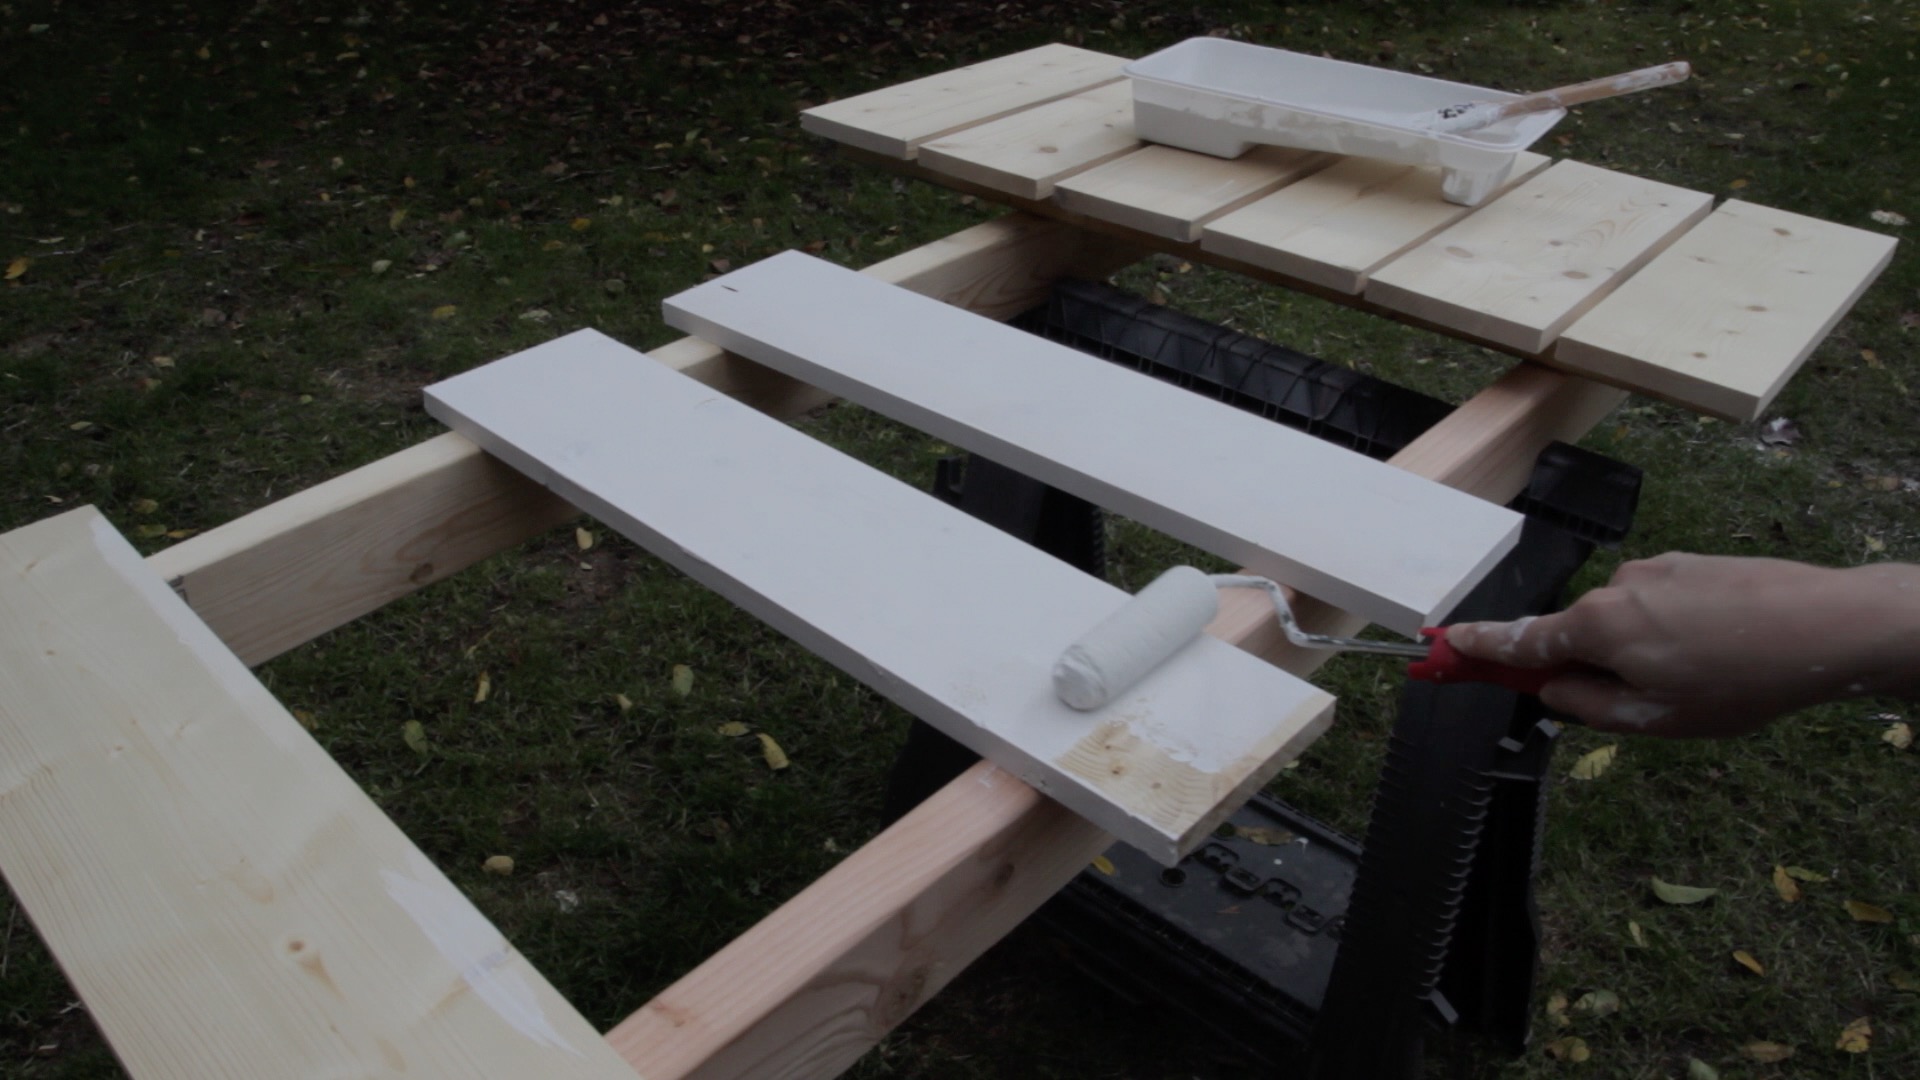
Paint is what turns this from a little shed into a little house, and it protects the siding and framing for years, so don’t skip it. Prime everything first (that paneling drinks paint), then two coats, and paint the cut edges of the siding: that’s where water gets in. Jamie was eager to get paint on it, and we didn’t want paint on the roofing, so we painted before the shingles went on.
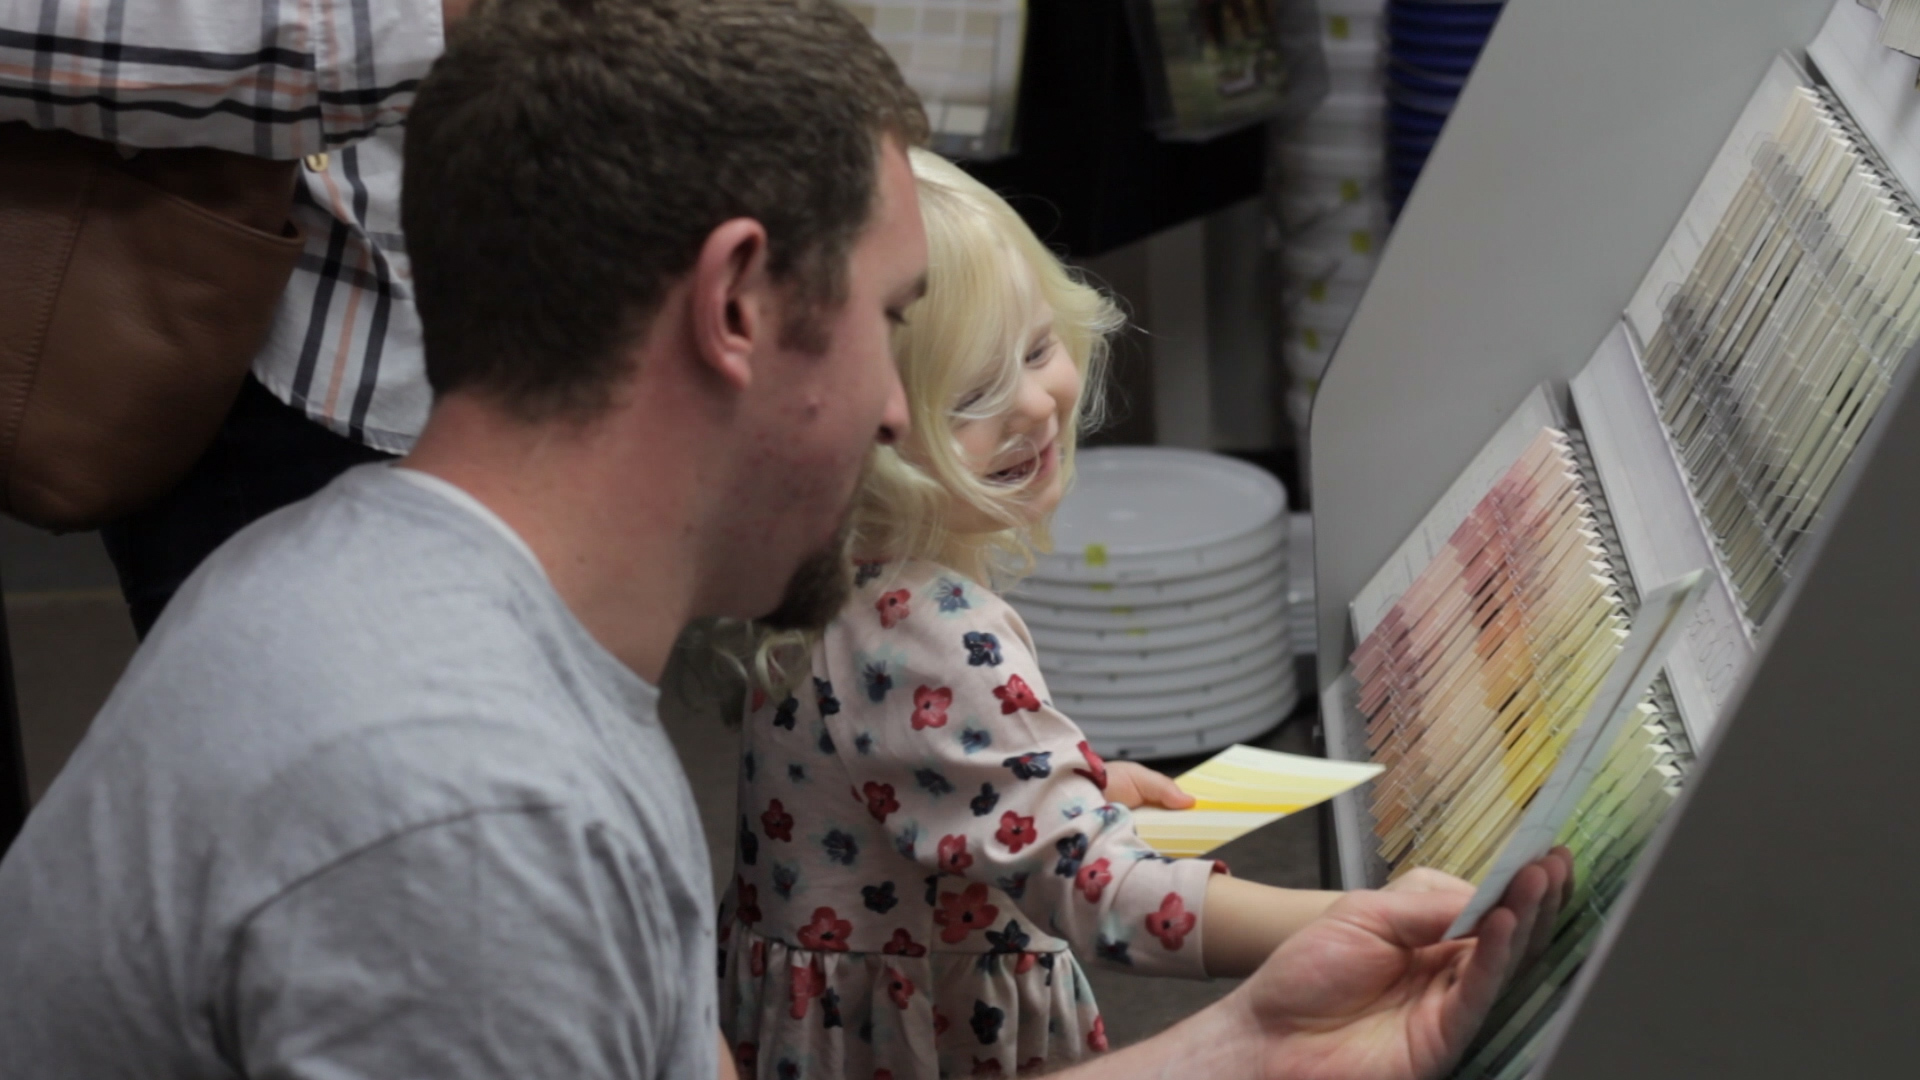
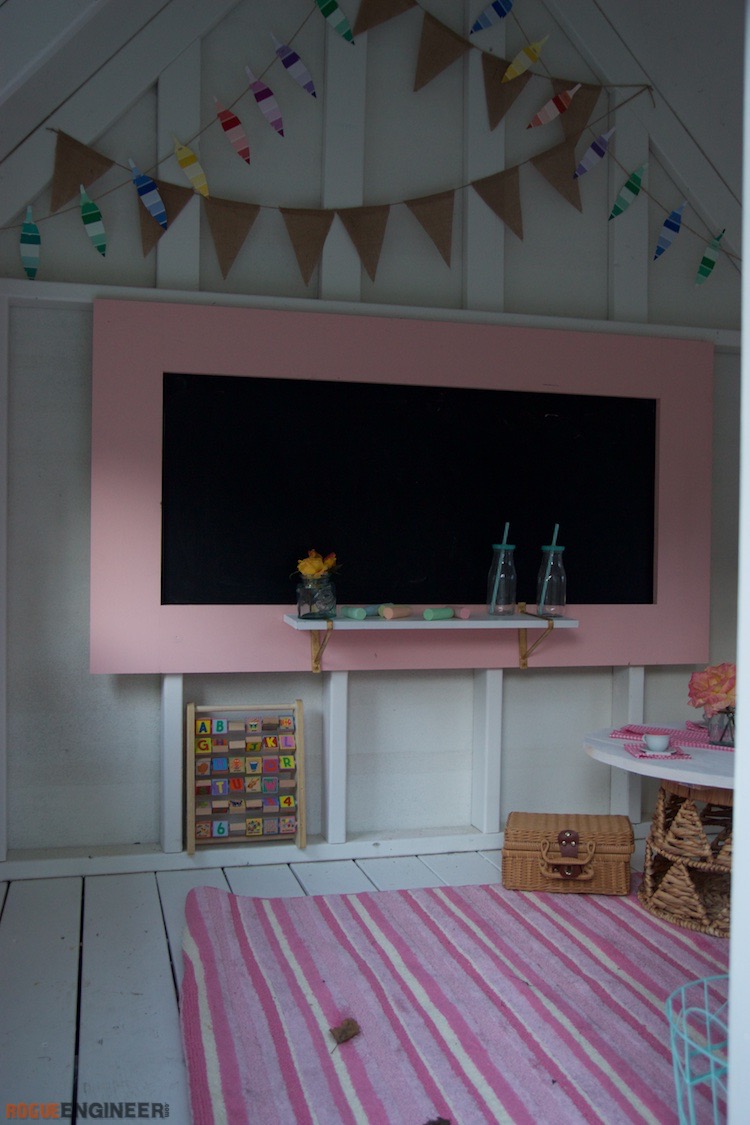
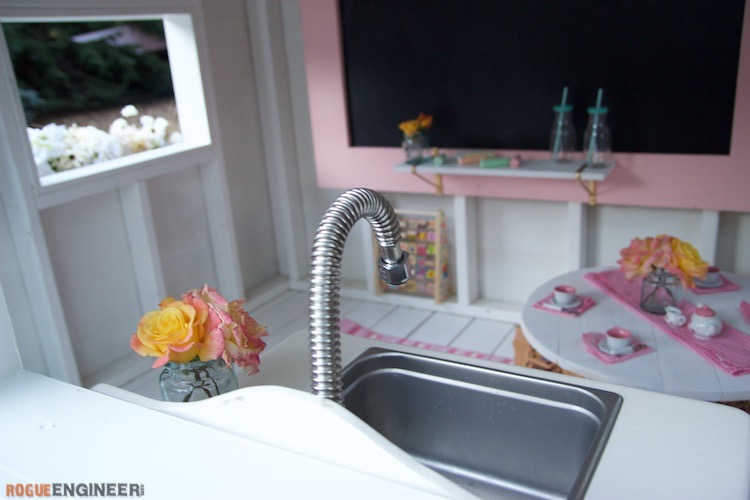
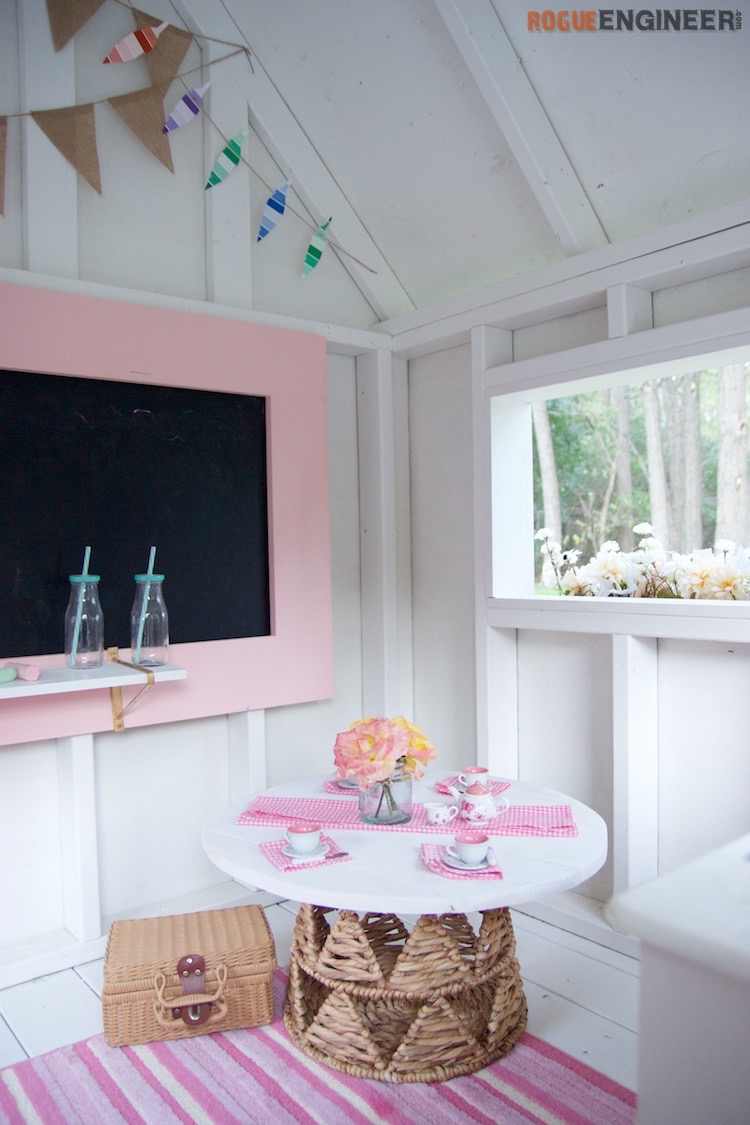
Our followers on social media helped pick the theme, and we went coastal, since Maddie was born in Savannah. Then we took her to our local hardware store to pick the colors: a light aqua outside, white trim and a white inside, with pink on the chalkboard frame and the flower box.
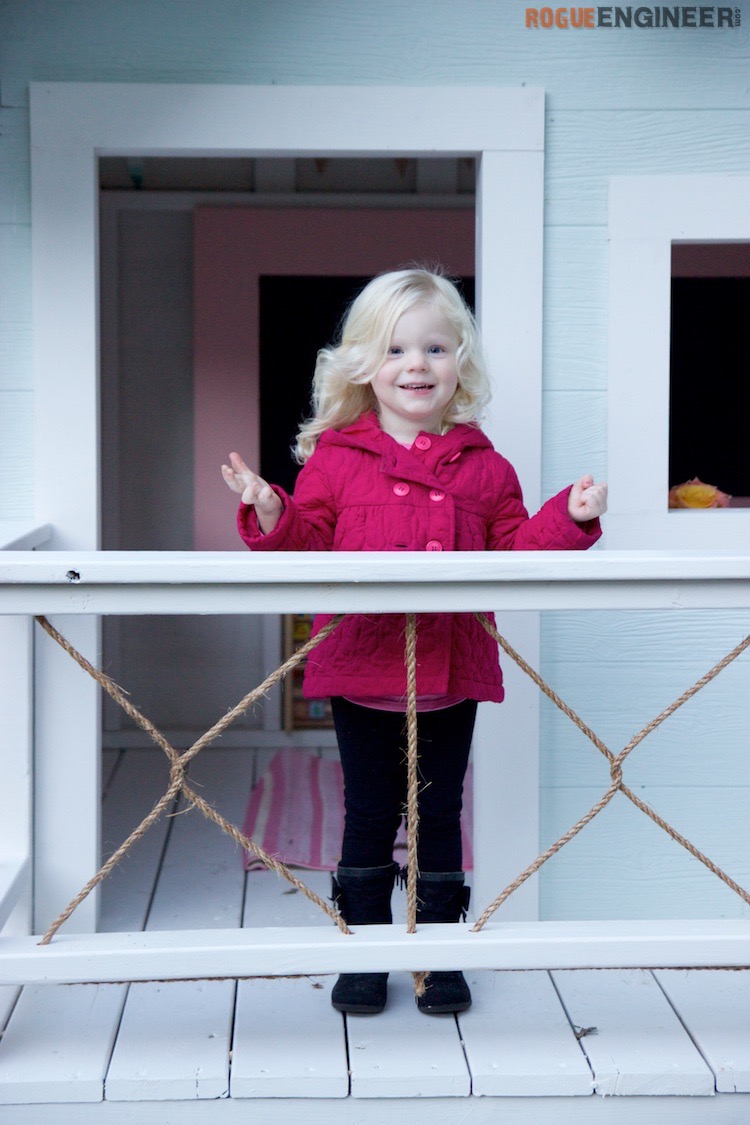
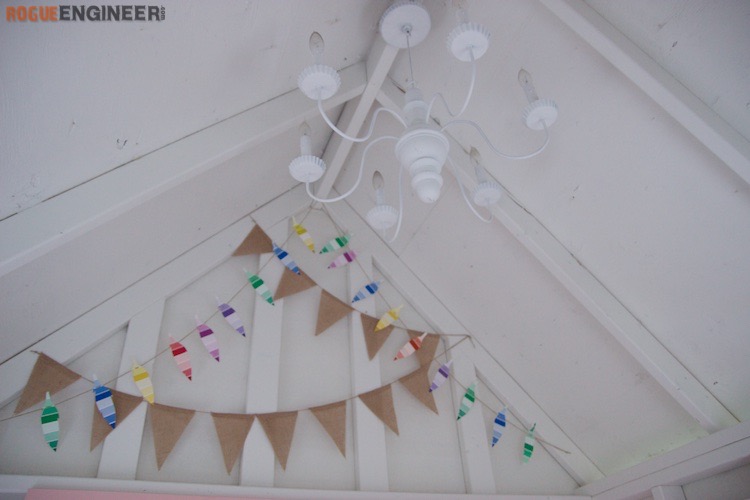
Jamie loves to accessorize, and she’s a lot better at it than I am, so I let her do that part. A sink, a chalkboard, a tea table and bunting. I think we nailed it.

FAQ
How big should a playhouse be?
Big enough for two or three kids and a little table, small enough to move. This one has a 79″ x 96″ deck (about 6-1/2 x 8 feet) and is 72″ x 61″ inside, with a 27-5/8″ porch. The walls are 46-1/2″ to the top plates, and the steep roof gives about 90-5/8″ at the ridge.
How much does it cost to build a playhouse?
About $1,260 in materials at Home Depot in October 2026 (Ann Arbor, Michigan, before tax), and about $200 more for primer and paint. That’s 80 boards, 9 sheets of siding and roof sheathing, four bundles of shingles and the screws. Lumber prices swing by region and month, so the printable plan’s shopping list lists every board, sheet and box of screws for you to price at your store. A comparable 6×8 kit with a deck runs about $3,700.
What is the best wood for a playhouse?
Pressure-treated lumber for anything near the ground: the skids, the deck frame and the decking. The walls can be ordinary 2×4 studs because the siding and exterior paint keep the weather off them. For siding, I used 3/8″ exterior paneling. It’s affordable and looks like wood, but prime it well.
Does a playhouse need a foundation?
Not this one. The two 4×4 skids keep the deck off the ground and spread the weight. Set them on level, compacted gravel or patio pavers so water drains away.
Do you need a permit to build a playhouse?
Check with your town before you build. Many don’t require one for a small structure like this, but size, height and setback rules vary, and this one is about 106-1/2″ tall.
How long does it take to build a playhouse?
About two weekends with a helper. The deck and walls go fast; the roof takes the most time.
Can you move a playhouse after it’s built?
It can move on its skids, but build it in place if you can. I built the deck and walls in my garage, and it took my truck and a tow strap to pull it out before the roof went on. With the roof on it’s about 106-1/2″ tall and heavier, so any move has to happen before then.
Where can I find free playhouse plans?
Right here. These DIY playhouse plans are free: the dimensions, the materials list and the step diagrams on this page. If you’d rather have everything in one place, the [printable playhouse plans](https://rogueengineer.com/product/playhouse/) are $20: 13 pages, a drawing for every step, the cut list diagrams and a shopping list.
Your Move
Watch the video, then grab the printable playhouse plans and get the deck framed this weekend. If your kids need more to do out back, my airplane play structure is the other big backyard build ours love, and the backyard slingshot and backyard golf game are weekend projects.
As always, if you have any questions don’t hesitate to comment below, and especially don’t forget to post pictures of your finished playhouse in the comments! Be safe and happy building.
How much did this cost? Awesome job on this Jamison! We are SO doing this!!!
Thanks James! I estimate the cost to be around $800.
Great video, cool project. Would this work well as a tree house plan? It seems a little heavy. How would you lighten the load?
I think it would depend on the tree. It is fairly heavy, but I’m not sure where you could really cut out any material.
This turned out adorable! And she looks so happy to be in her new playhouse. Nicely done!
Thanks Brittany!
Awesome Build Guy’s!! Great Job.
Thanks!
Yup i love it too but when i saw the cost of materials …i wigged out…I did not imagine it would cost that much but hey what do i know…i love it none the less…it will make a lot of little girls happy out there…
Thanks Eva. Yea the price of playhouses are pretty staggering. For a small plastic one you may be able to get away with a few hundred for a wooden one that’s built to last and this size, you could be anywhere from a grand and up.
Great job! I love your plans, not too many steps and very straightfarward. What software do you use?
Love the playhouse! On my list to build once the spring comes 🙂 Any chance you’re going to detail out the inside build too?
I used the left over lumber from a construction site near my house. Took me 5 days and 40 hours do this job solo. My girls love it. I modified the roof right to 6′ due to HOA.
Thanks for your plan!
Hello hopefully you can help me out here. I’ve been wanting 5o build my daughter’s a play house for a while now and I came across this one you guys have and love the look of it. So I’m somewhat new to DIY and not to sure about products to buy and the cheapest route. I’ve got most things at decent price except the decking board which for some reason I can only find that measurement at home depot for the 16 for about 450 and is kind of pricy wanting to know if there might be a cheaper route on that, hell I might even be looking wrong but I’d greatly appreciate it if you can help me out
So I’m building this for my daughter for Christmas hopefully it get done by then but here’s my progress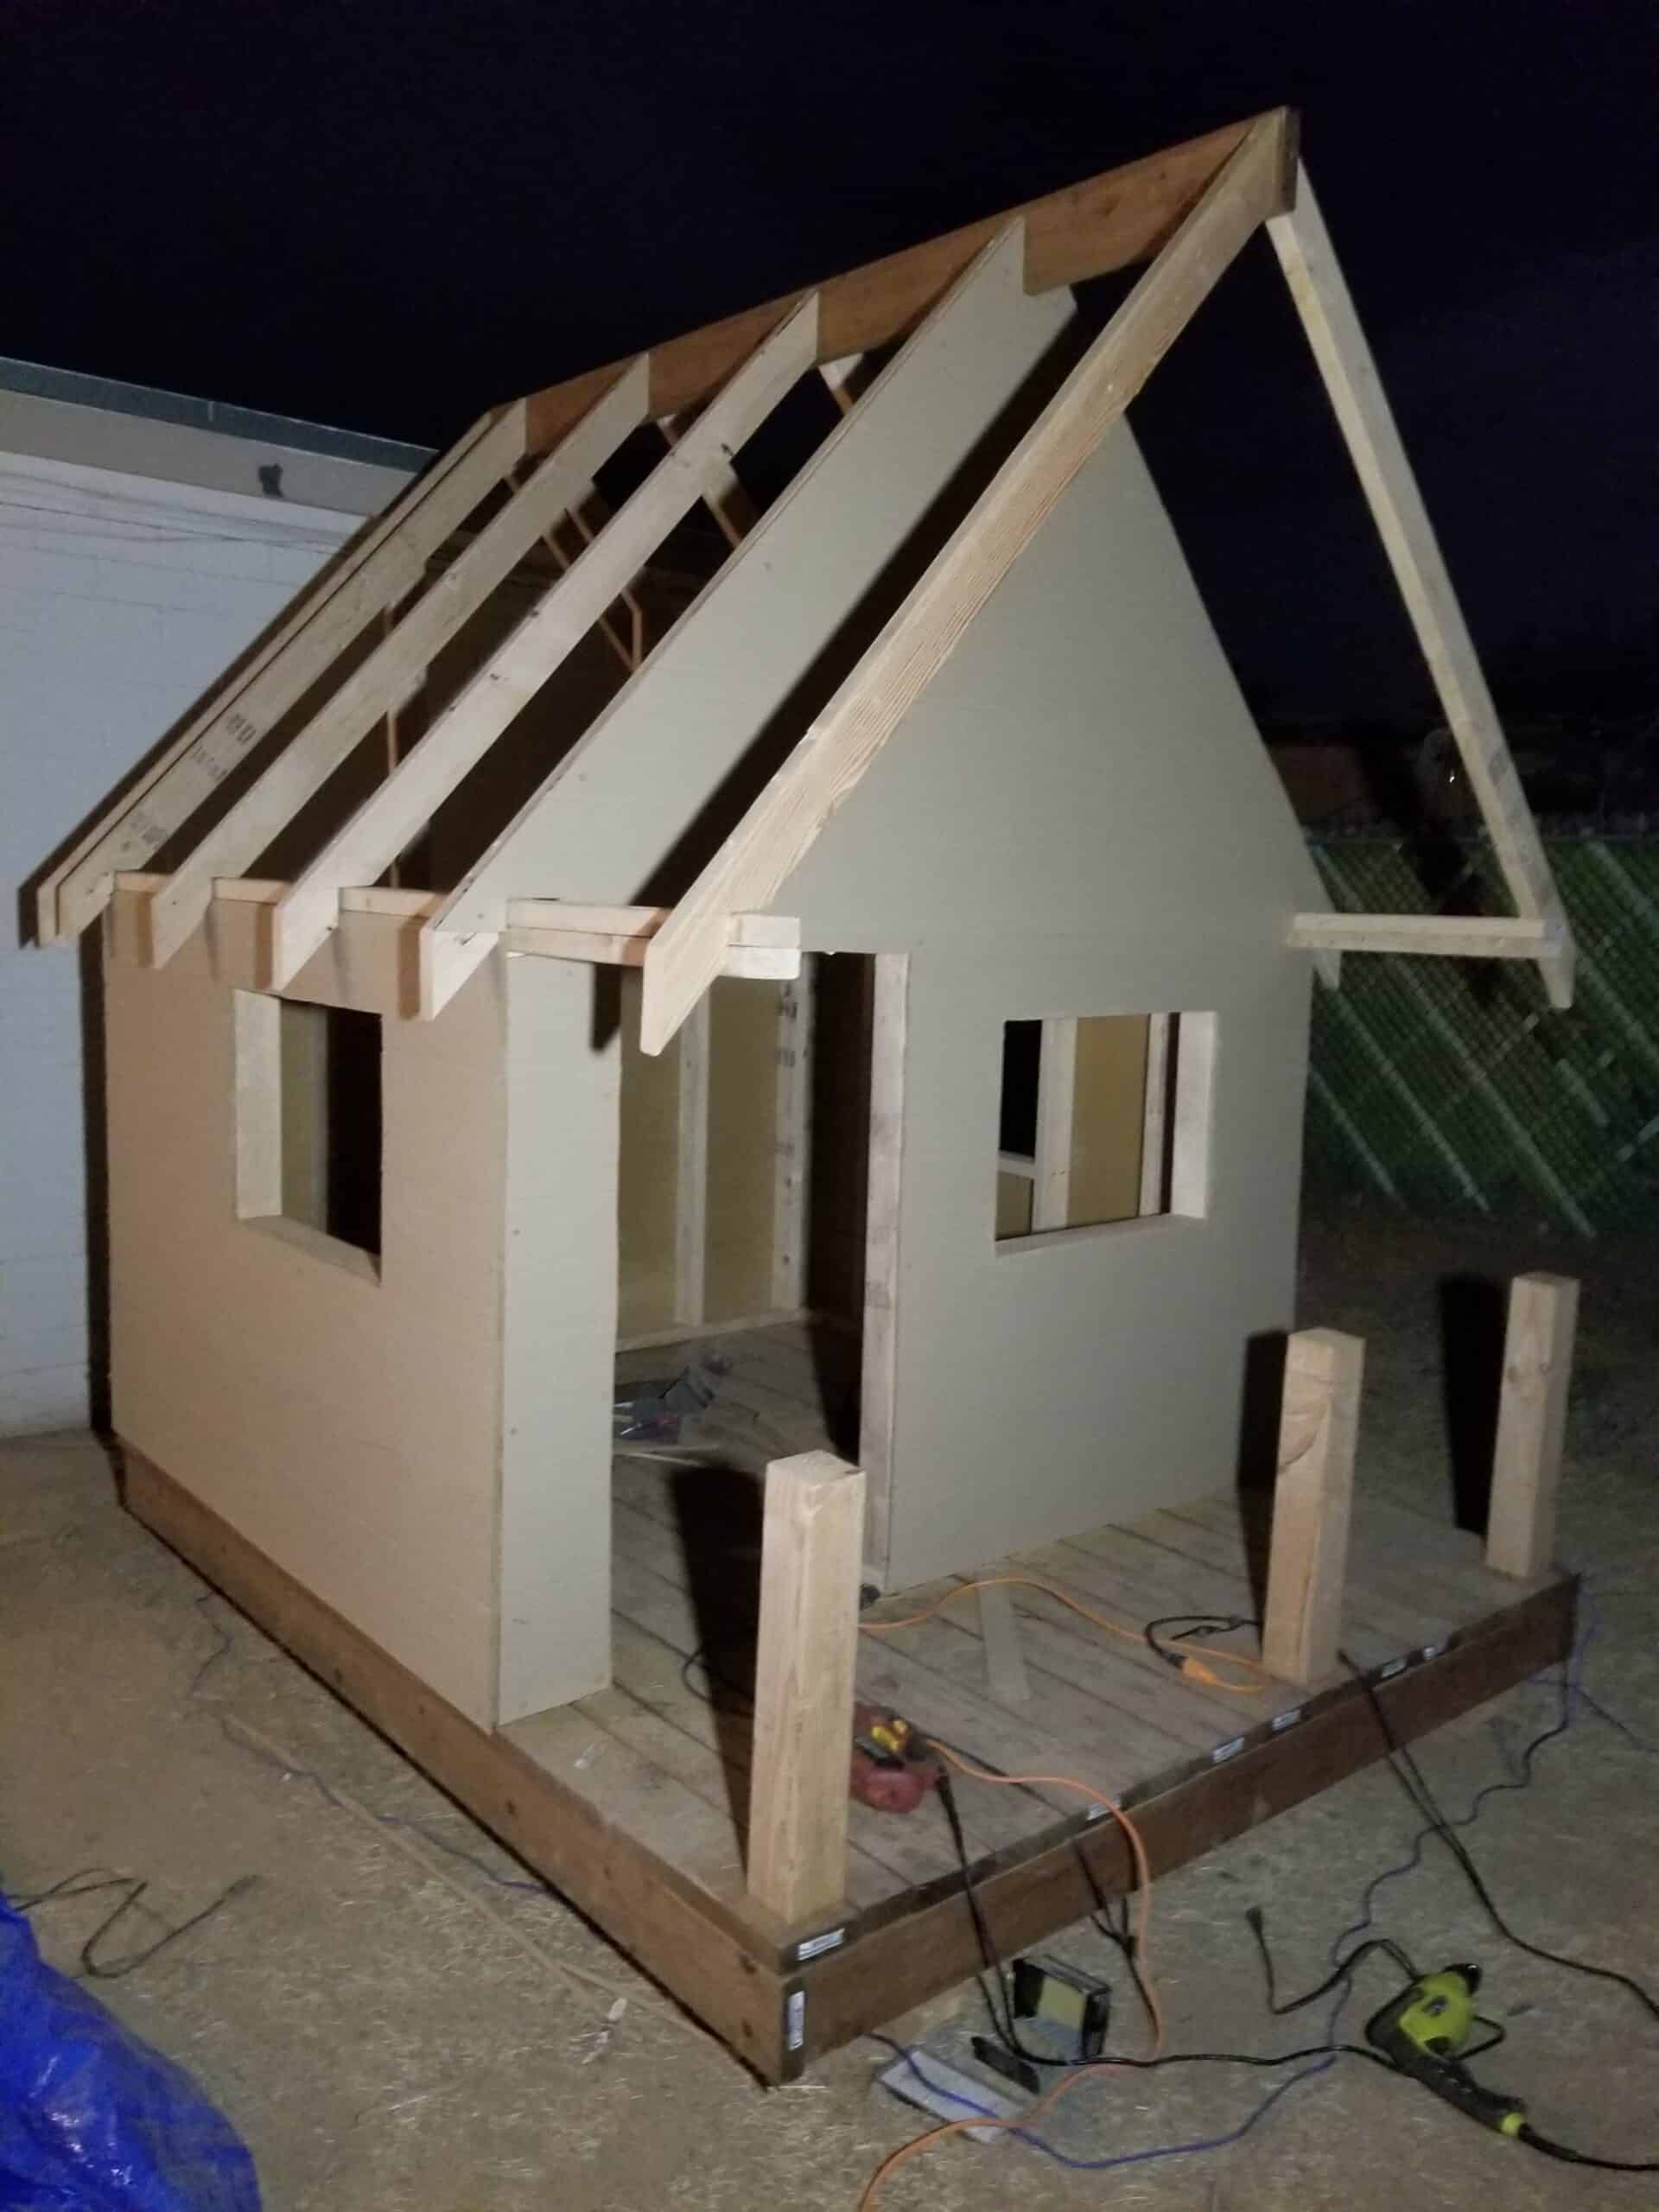
That is so cool! I’m sure she’ll be one happy girl! I’d love to see it finished so make to to post a pic when you do
Here it is just finished in time for christmas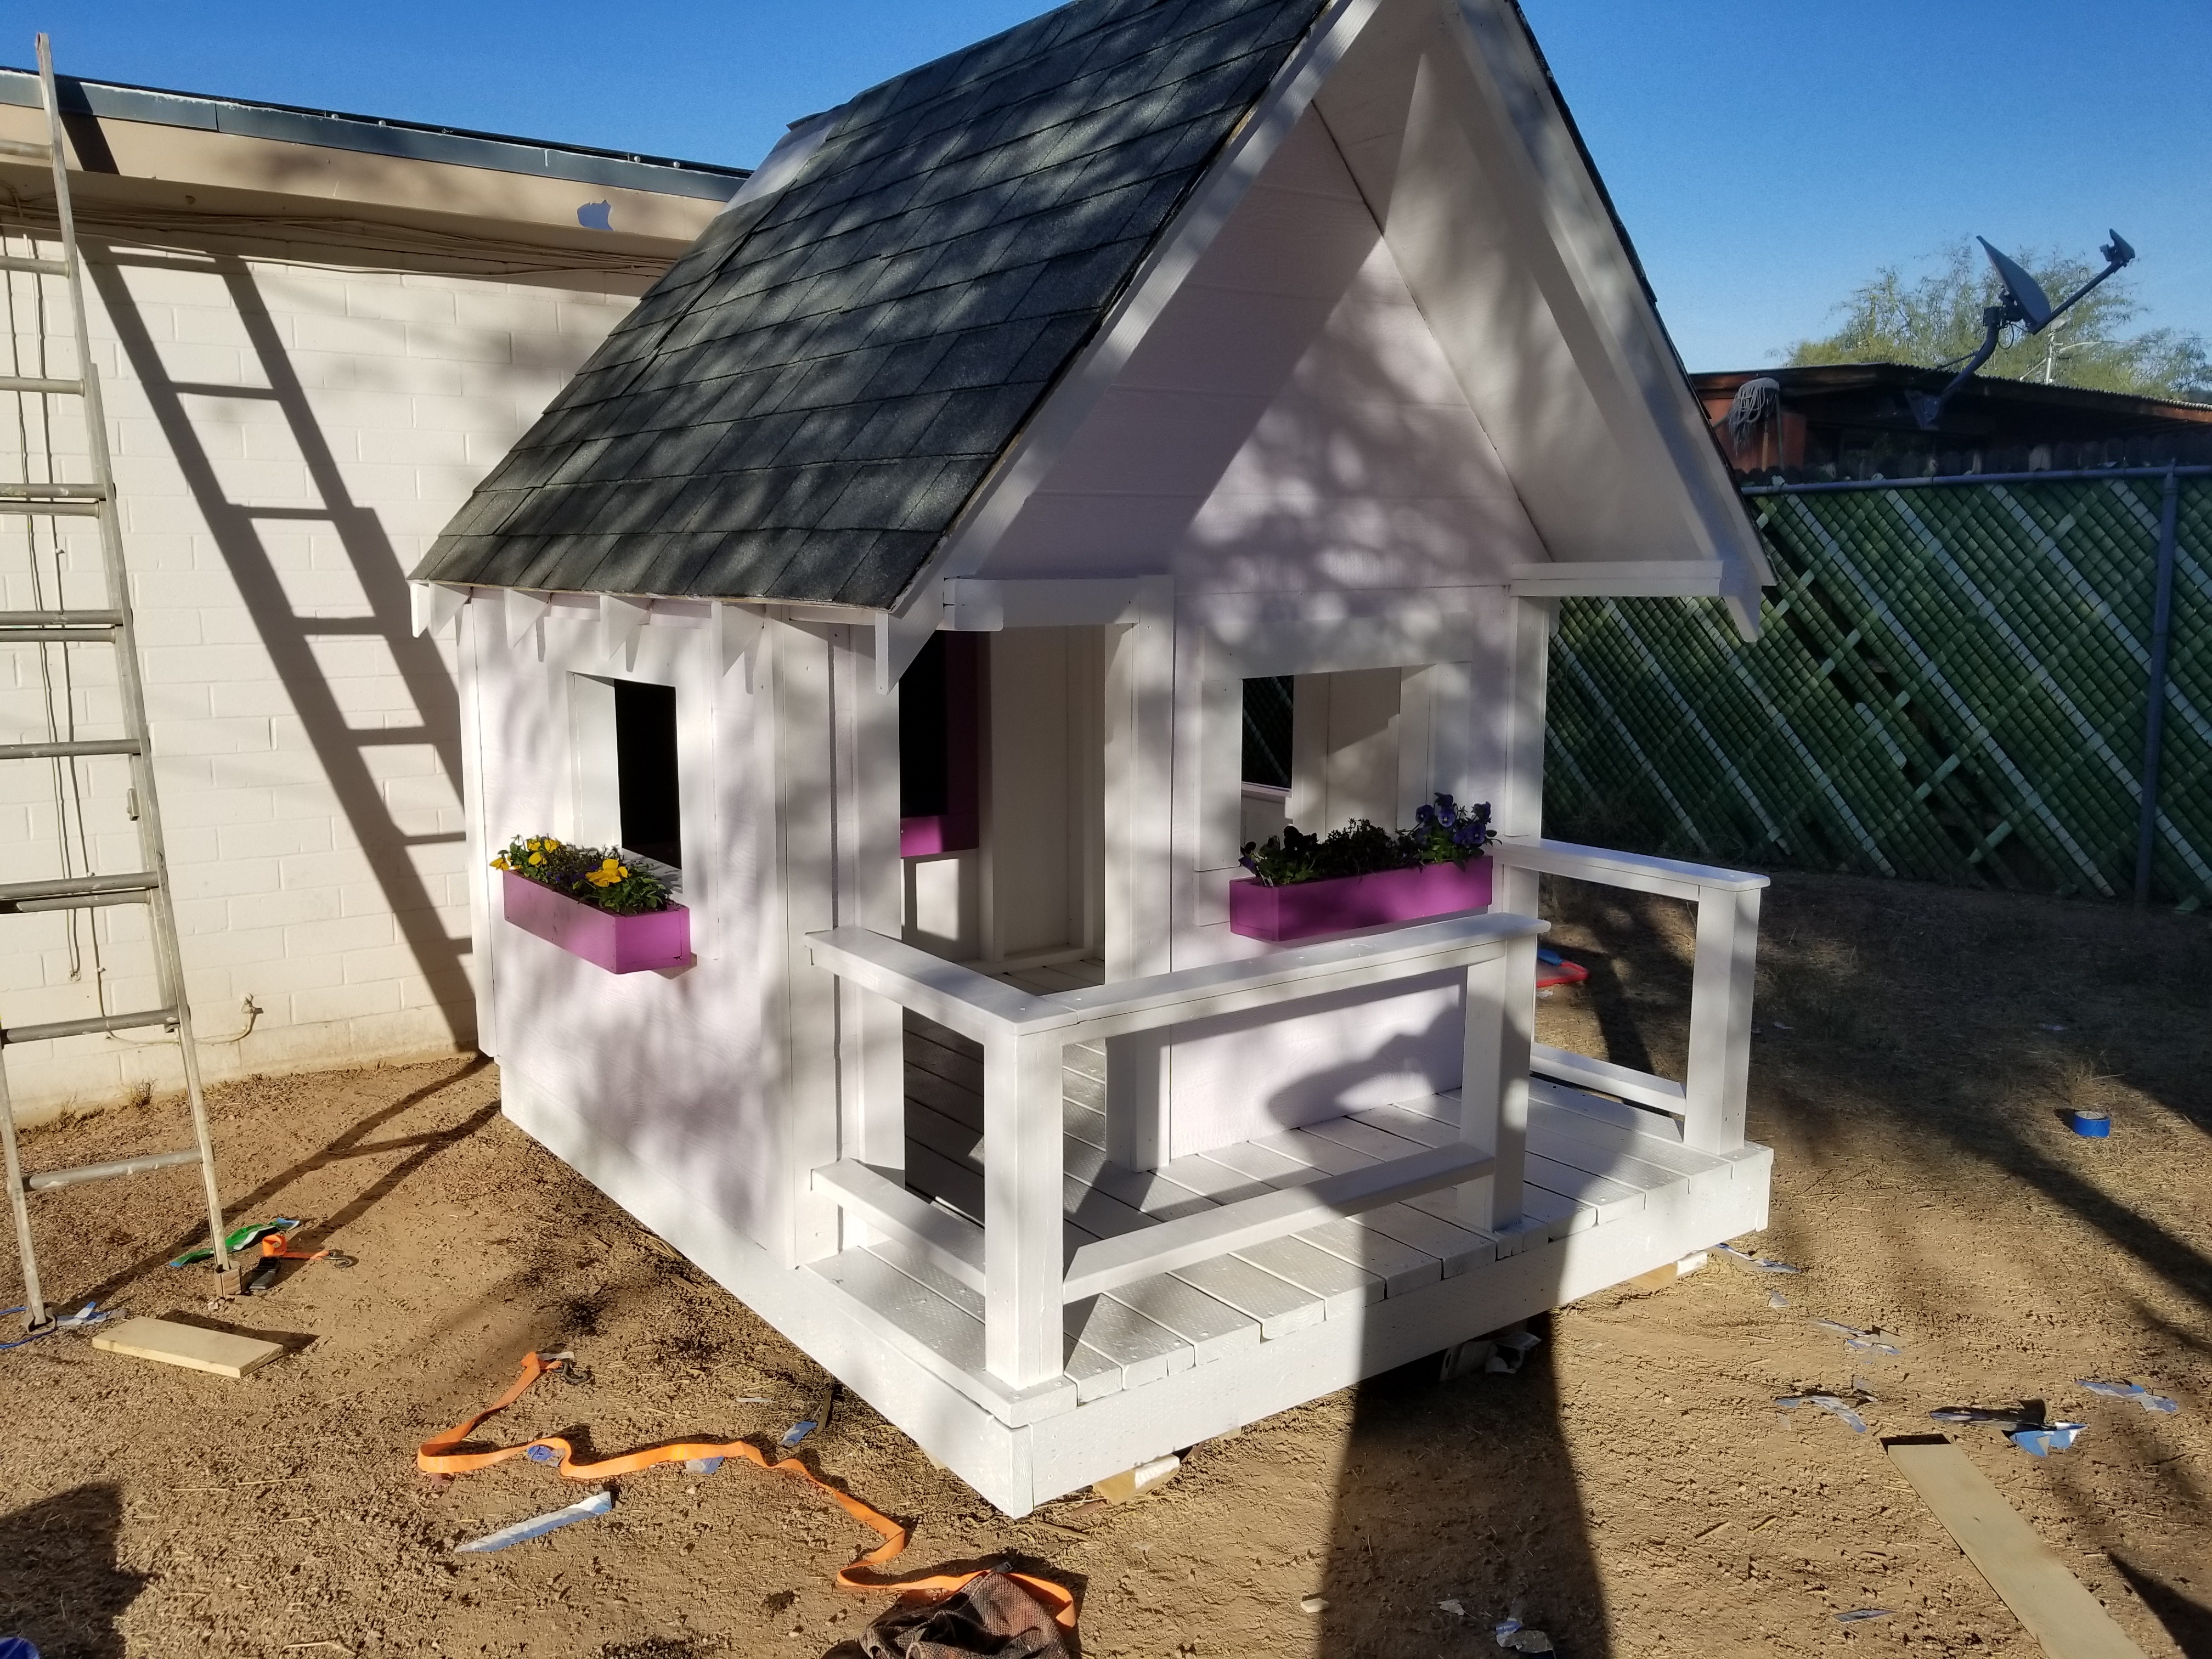
It looks so good!! I bet she was excited <3
So I am putting this on 4×4 posts 6 feet in the air, above a sandbox. Posts are in the ground with 18″ in concrete.
Any thoughts on issues with weight on top? So far I built it pretty well to to the design but a few inches narrower.
Looks like it works so far!
Great job…
Apparently you don’t have concerns from high winds… Is this just sitting on the ground or is it anchored (if anchored please describe)… Thanks… Again job well done…
Adding a slide to one end as well. Will post the final pic.
I am thinking the concrete, sandbox, and assist with the wind. But I don’t think I would want my kids in it during a severe thunderstorm.
Great job…Apparently you don’t have concerns from high winds… Is this just sitting on the ground or is it anchored (if anchored please describe)… Thanks… Again job well done… Just read further down… You anchored it… Thanks…
Question…what would be the weight of the playhouse completed?
What would be the weight of the Playhouse when completed
Hi and greetings from UK.
Would CLS TIMBER (T)38MM (W)63MM work instead of 2 in. x 4 in you have used. Mega thanks
Julian
Thank you so much for the plans, video and step by step instructions! We have just completed our playhouse and it looks great! The girls love it and it is just perfect for them to play in. Love from Holland, Sarah and Erwin Schuiling https://uploads.disquscdn.c…
I am building this for my girls. I have made the rafters as directed and it doesn’t fit. Anyone else have this issue. The angle at the ridge plate is off.
Did you have nails coming through the roof sheathing on the inside? I don’t want any nails coming through that my daughters could hit their heads or cut their hands on. Should I double up on the plywood?
Hi Jamison. Just want to thank you for all plans. After some mistakes and adaptation… it’s done! Including electric installation for lights and fan. My both daughter love it! Thank you from Brazil! https://uploads.disquscdn.c…
https://uploads.disquscdn.c… https://uploads.disquscdn.c…
Olá William. Também sou do Brasil e estou iniciando a construção dessa casinha. Estou com dificuldades em obter alguns materiais. O fechamento das paredes você fez com divisória de pinus? Qual a largura? O telhado você encontrou para vender onde? Qual o material? Obrigado.
Oi Lucas! Boa tarde. A lateral fiz com forro de Pinus. Se não me engano a largura padrão é de 9cm. Não é lá ideal mas é barato. Outra opção seria um produto da LP Brasil, o lP siding, mas um absorto o valor. Telhado o mesmo revendedor de LP Brasil vende, mas eu comprei na Leroy Merlin. Procure por telhado shingle. Tem varias modelos e cores. Qq coisa me mande um e-mail. williansgoncalves @hotmail.com
Lucas/Williams, tudo bem? Eu vou fazer para minha filha aqui no Brasil tb. Alguma outra dica importante de adaptação de material que vcs teriam para me passar? Obrigado.
Hi Jamison, Is it possible to make this wider or taller without worrying too much about major changes in the design?
I stuck with the general plans of the house, but I made some modifications to the dimensions to accommodate my needs. I decided not to make the porch, opting for more interior space. I also added a dutch door and a storage bench for the inside. We just needs some cushions for the seats and for her to decorate the inside the way she wants. My daughter loves it! Thanks for the plans Jamison!https://uploads.disquscdn.c… https://uploads.disquscdn.c… https://uploads.disquscdn.c… https://uploads.disquscdn.c…
That looks awesome! Thanks for sharing!
https://uploads.disquscdn.c…
https://uploads.disquscdn.c…
Excelente Álvaro. Parabens! Vc é brasileiro? Posso tirar uma dúvida? Com que material vc forrou as paredes? Abraço!
https://uploads.disquscdn.c… Hola yo soy de Chile yo use Osb Smart Panel https://www.sodimac.cl/sodimac-cl/product/238376/osb-smart-side-panel-ranurado-111-mm-122-x-244-cm
A situation has arisen since you completed this lovely playhouse. The issue of mosquito born illness.
Perhaps you could design, after compatible Screened windows and a screened door. She could spend many hours in her safe playhouse, without repeatedly dousing herself in chemical bug repellents or even forgetting to do so. The old fashioned screened windows hung on hooks above the windows should be sufficient. A sturdy screened door she can use while playing alone, would protect her from wildlife and unknown animals, as well.
Does anyone possibly have roundabout price of what this would cost me? Mommas building on a budget 🤣🤦♀️🤷♀️
What was the cost to build this?
Your plans were so easy to follow! We were able to use a lot of recycled decking boards and decided to switch the layout of the deck and added a steel roof. My daughter loves it. Thank you!!https://uploads.disquscdn.c…
Hello friend, I am writing to you from Argentina. I am building the playhouse for my son and the project is really excellent. It is not clear to me the length of the temporary supports and the wall plates, could you tell me? because I don’t think they are 8 “. Thank you very much
Hi another one from Brazil, want to thank Jaminson for the plans, make some adptations as well, (my daughter want more windows) and had a good time with my family during the quarantine.
https://www.youtube.com/wat…
https://uploads.disquscdn.c…Almost done mine…. 2000.00 later, but it’s worth it, i’ve learnt a lot from it… thx Rogue.
https://uploads.disquscdn.c…
Used your plans to make this. Modified the dimensions a bit. Thank you for the starthttps://uploads.disquscdn.c…
Thank you so much for this video & the plans. I used this video as a guide to build a playhouse for my kids last Summer and they love it. I made a few alterations to mine. What an enjoyable project this was! https://uploads.disquscdn.c…
Hi!
Attempting this build, and struggling with the rafters. Blueprints show the rafters being 64 1/2″ but is that measuring from long point to long point, (i.e. total length) or from long point to short point, as measuring along the top of the rafter from the ridge board to the top side of the tail cut?