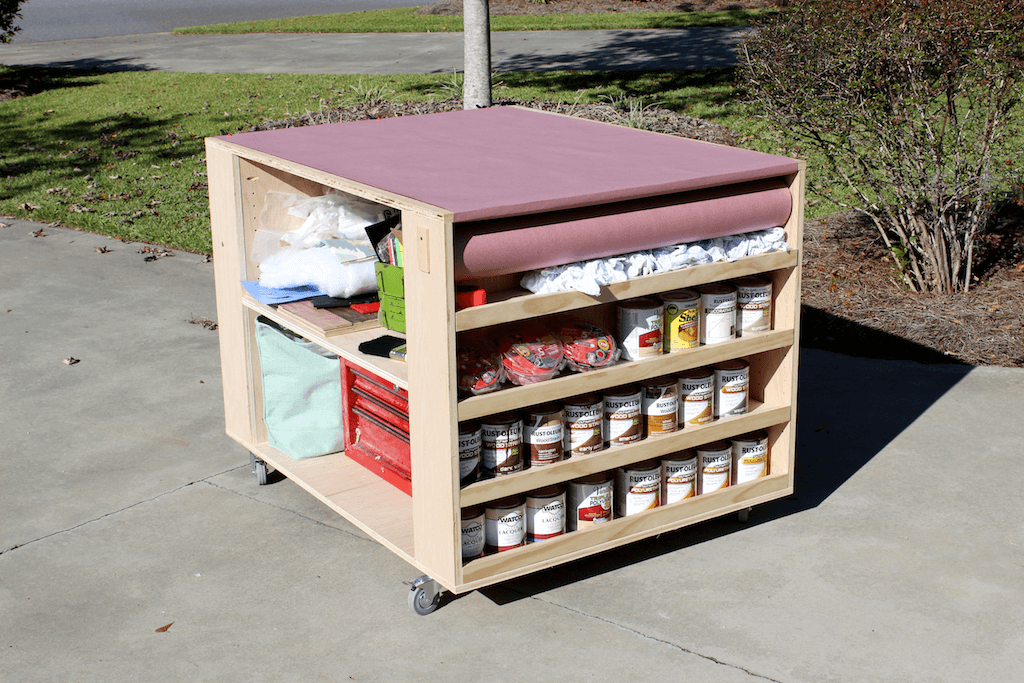
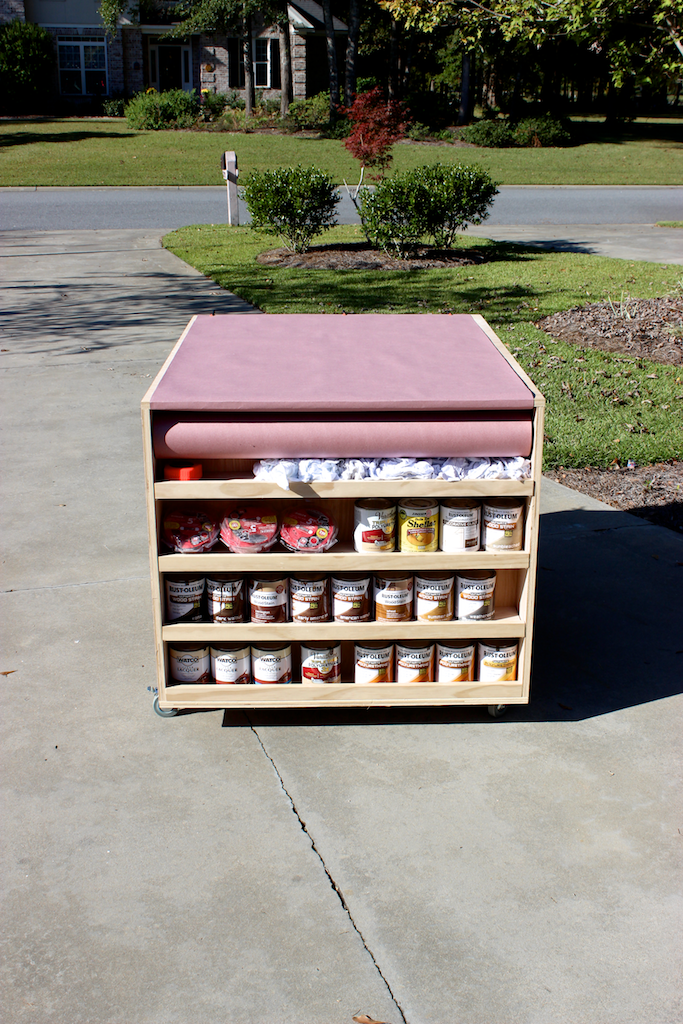
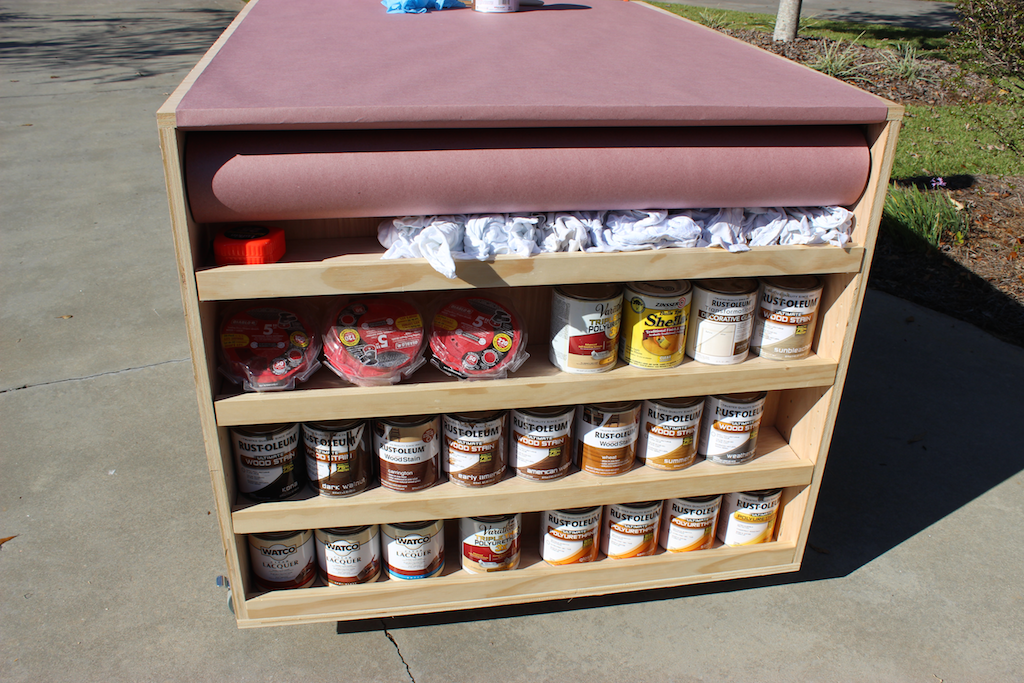
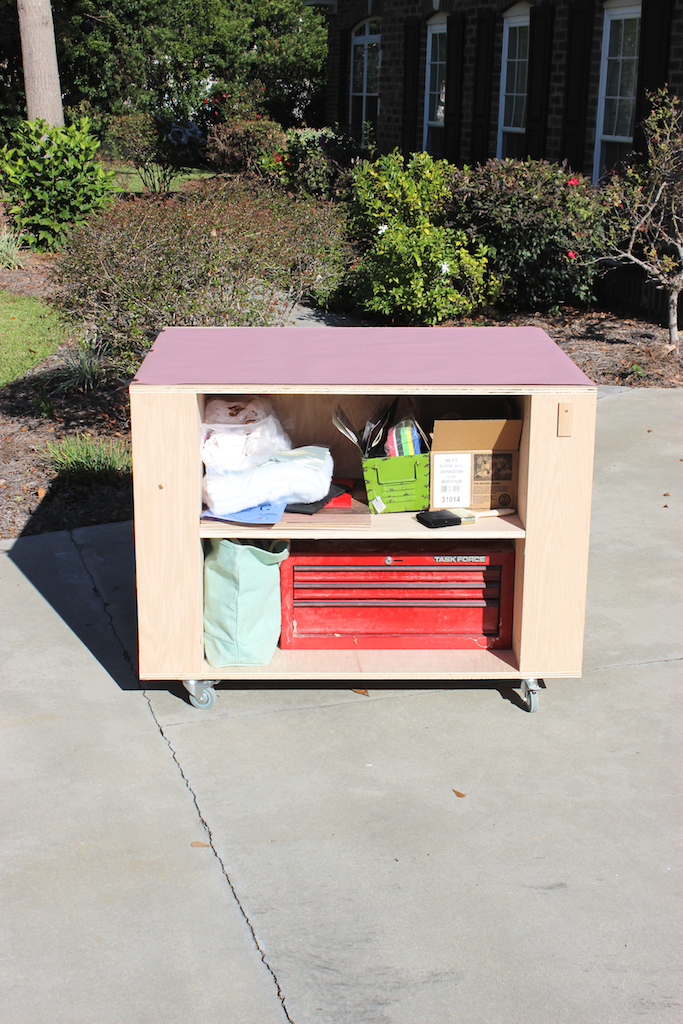
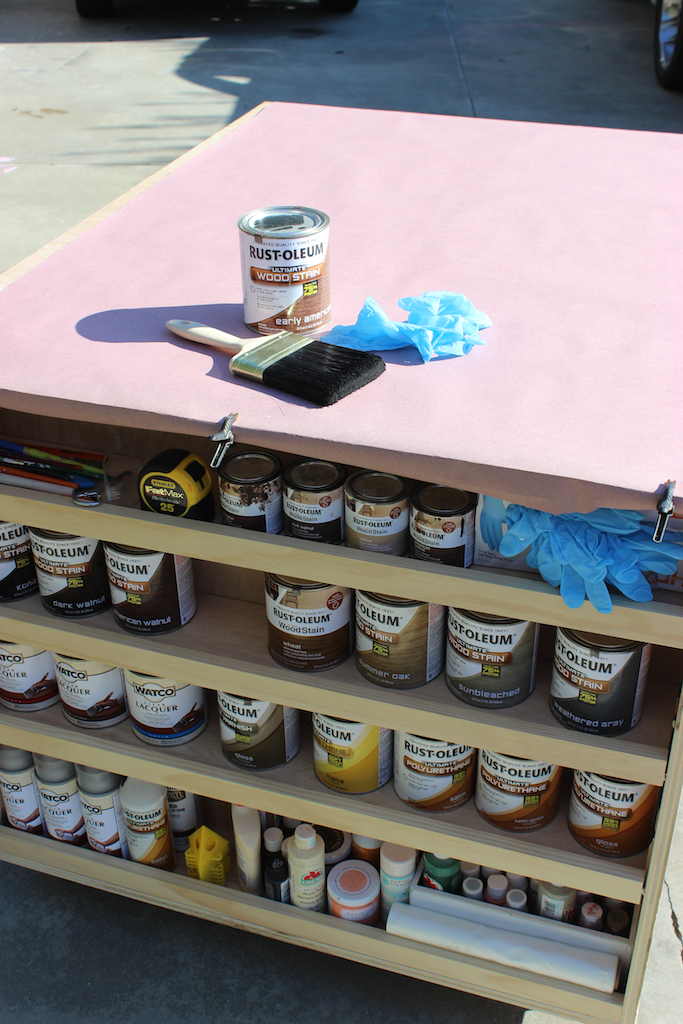
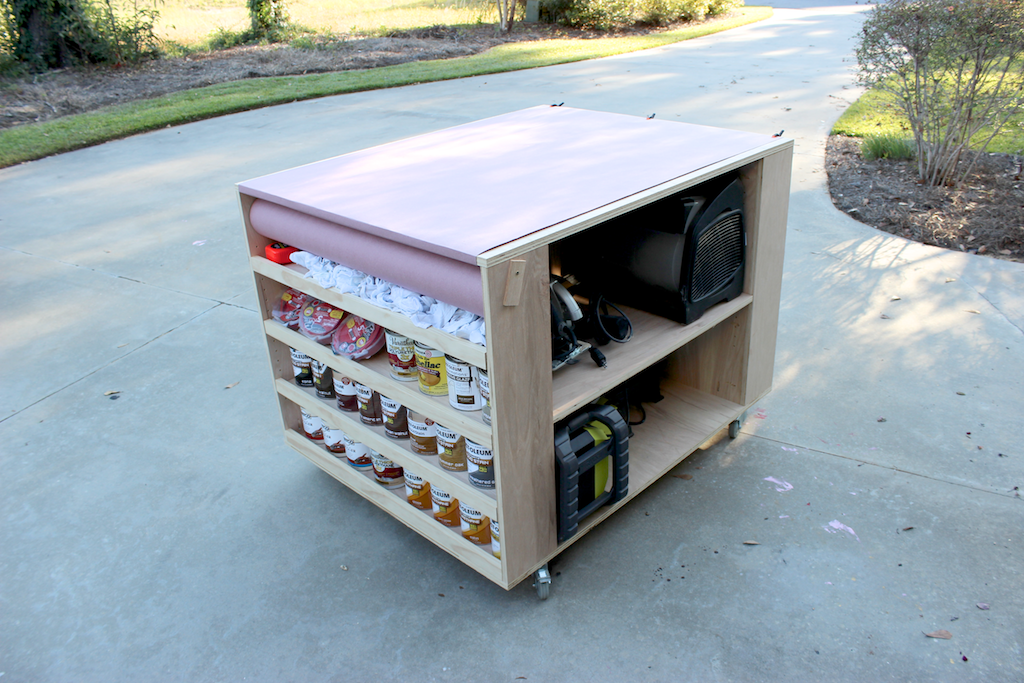
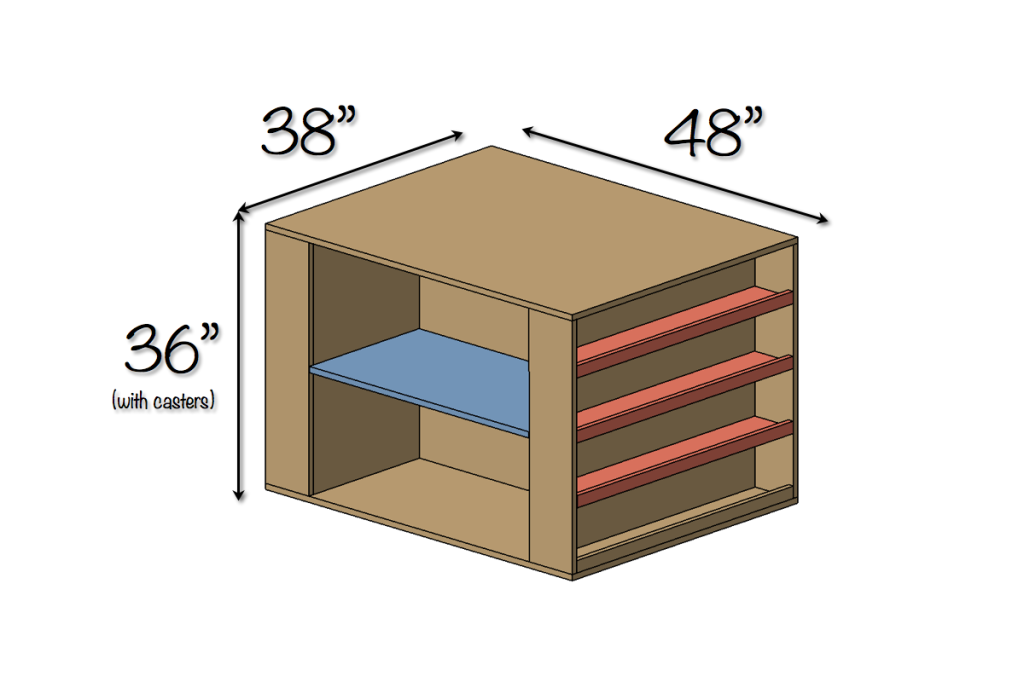
So my garage has been a complete disaster lately and with projects going on, what seems like, every weekend I really needed a portable workbench with storage for the excessive amount of stains and tools that I have been accumulating. I came up with this design for a portable plywood workbench with storage out of necessity for something that was not only a solid work surface but something that would be the best use of space.

Disclosure: The links provided in the “materials” and “required tools” sections are affiliate links. If you would like to support our site and help keep our content free come find out more about how we can make money with no extra cost to you.
Tools Required
Materials

- Qty 3 Sheets 3/4″ x 48″ x 96″ Purebond Plywood
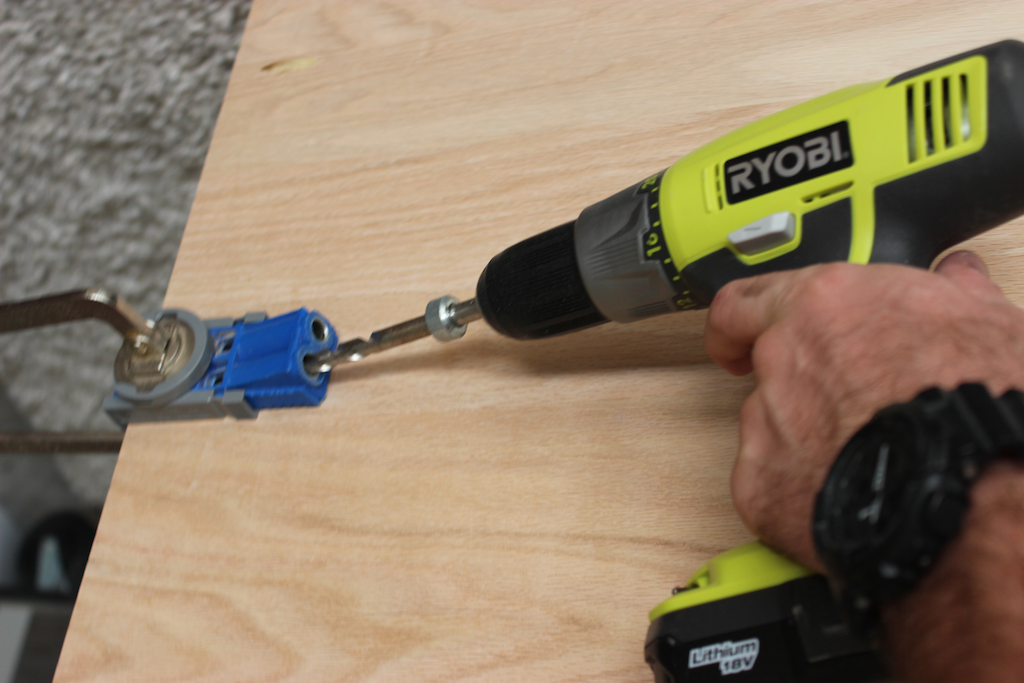
- 1-1/4″ Coarse Washer-Head Pocket Screws
- Qty 4 Swivel Casters
- Rosin Paper, 36″ Width, 200′ Length (1 Roll)
- 3/4″ x 5′ Electrical Metallic Tubing (EMT) Conduit
- 1/4″ x 2″ x 8″ (used as “keepers” in step 6; I used scrap)
- 3/4″ Wood Screws
- 5mm Shelf Pins
Cut List
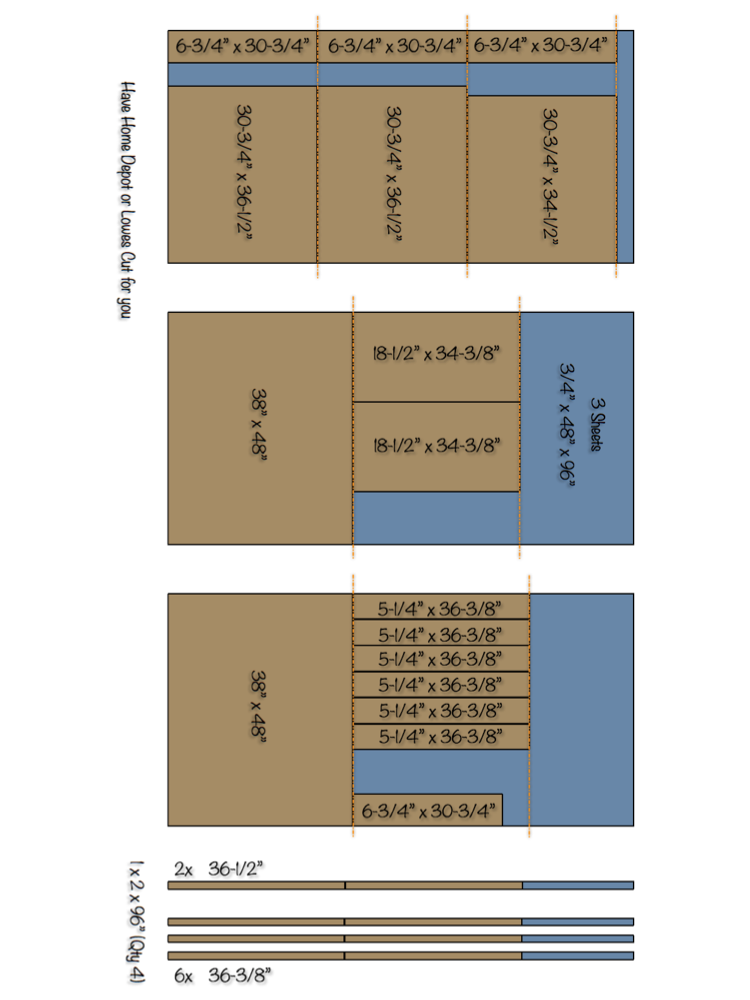
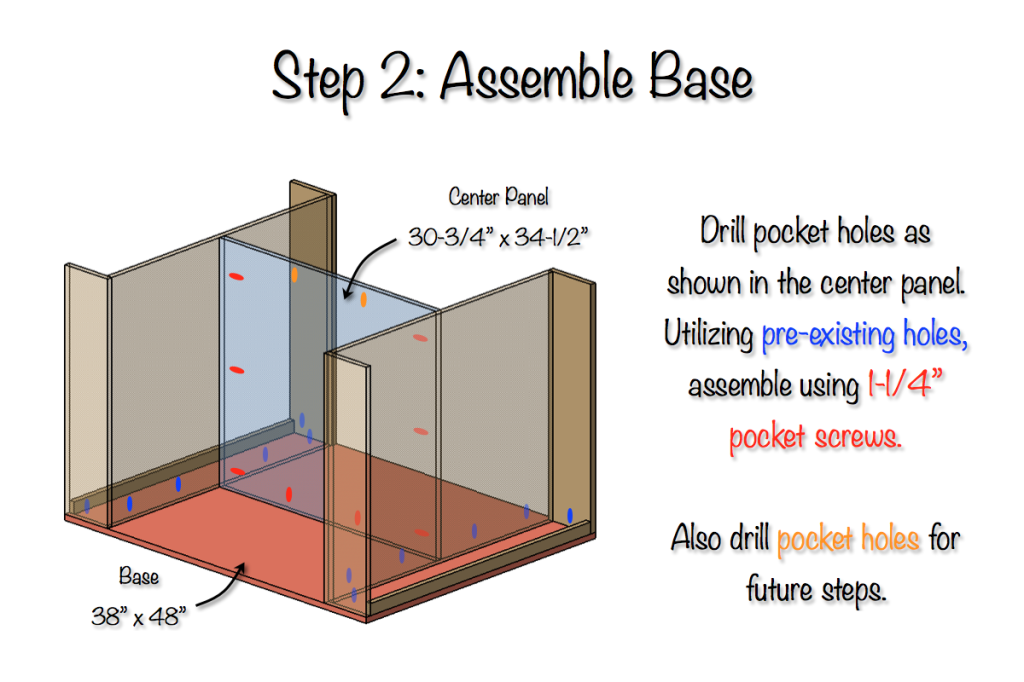
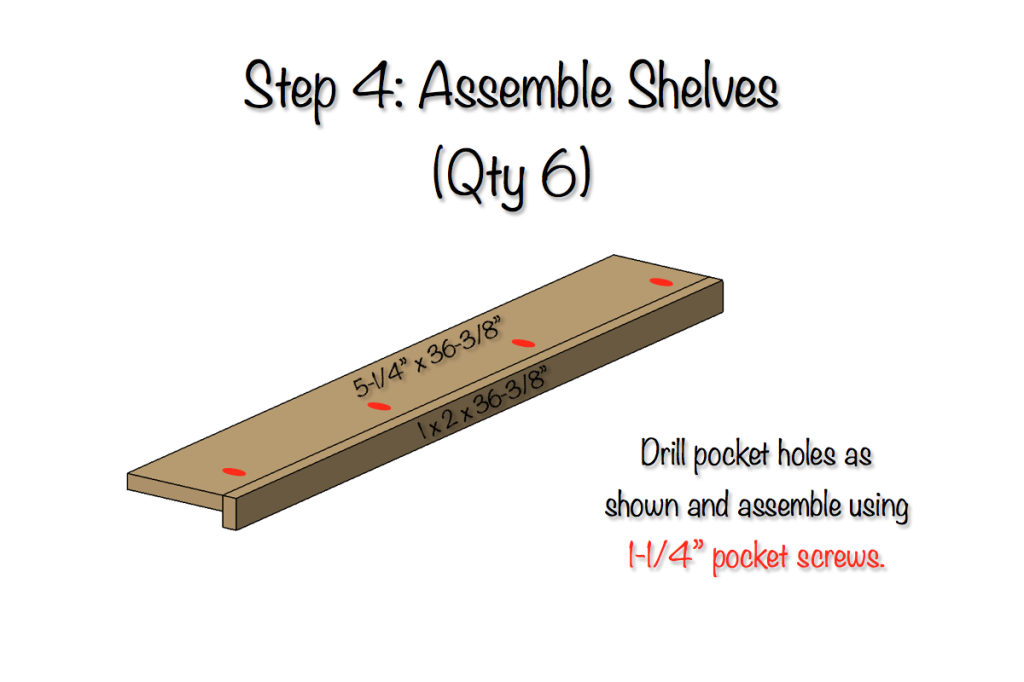
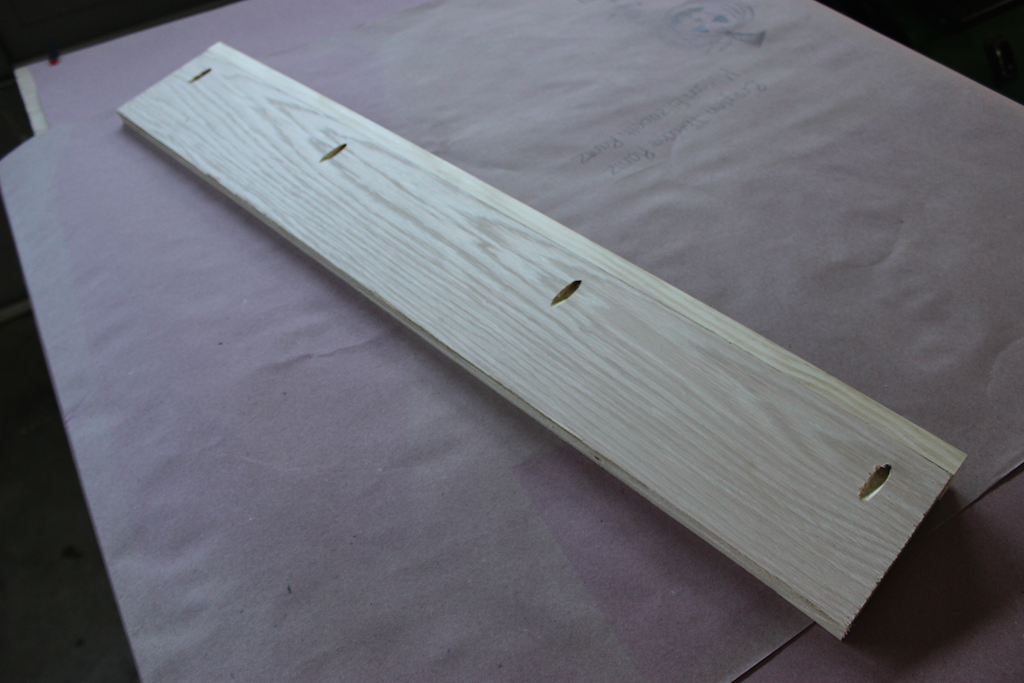
Dimensions
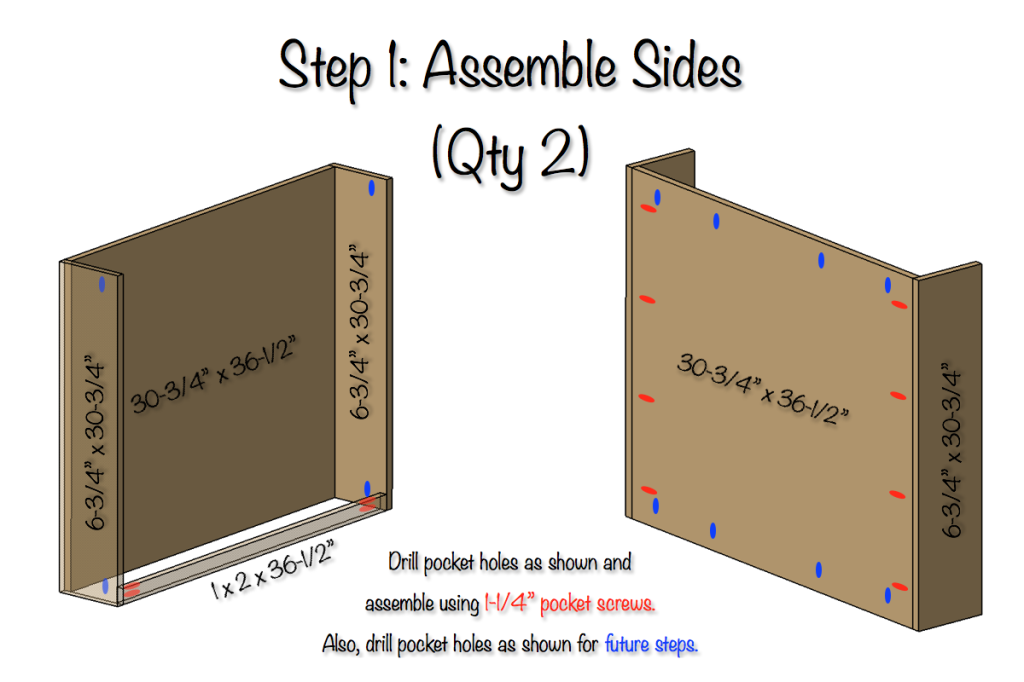
Plans


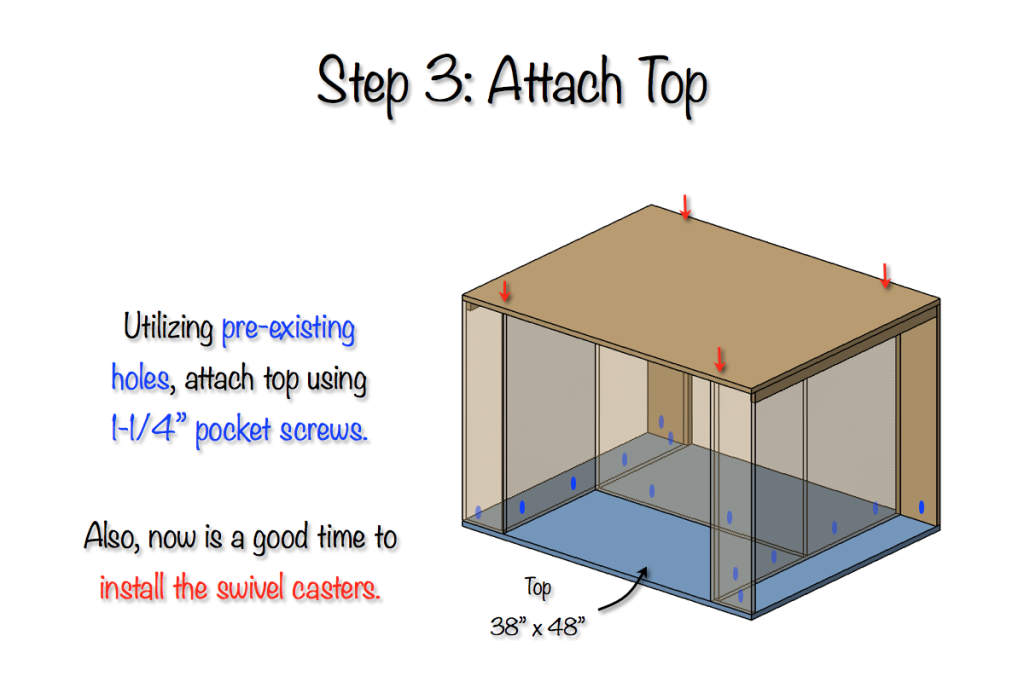
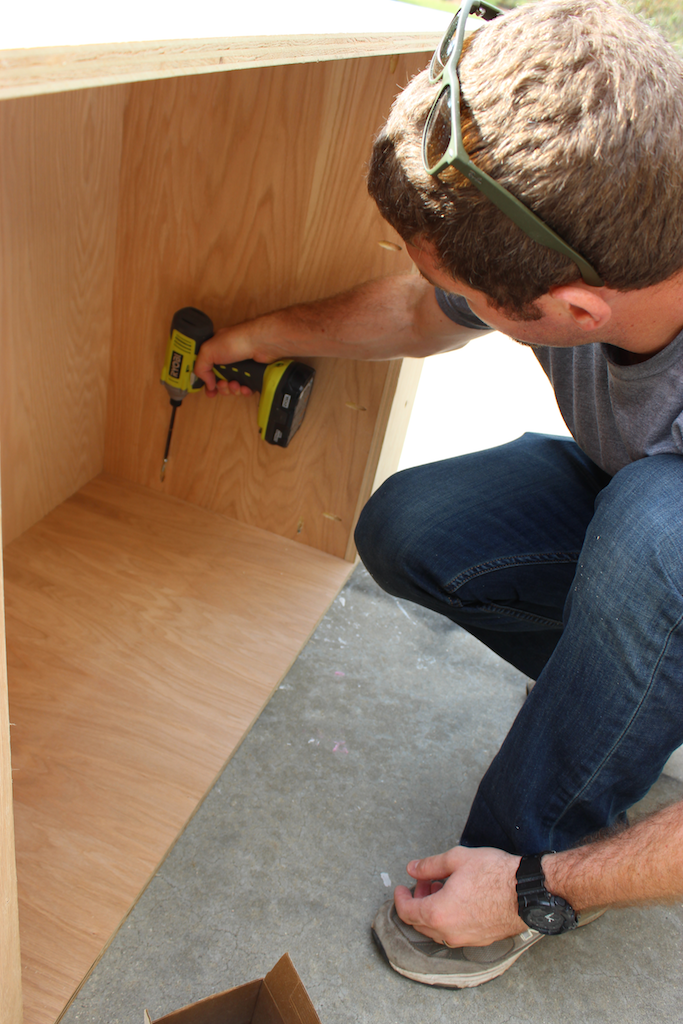
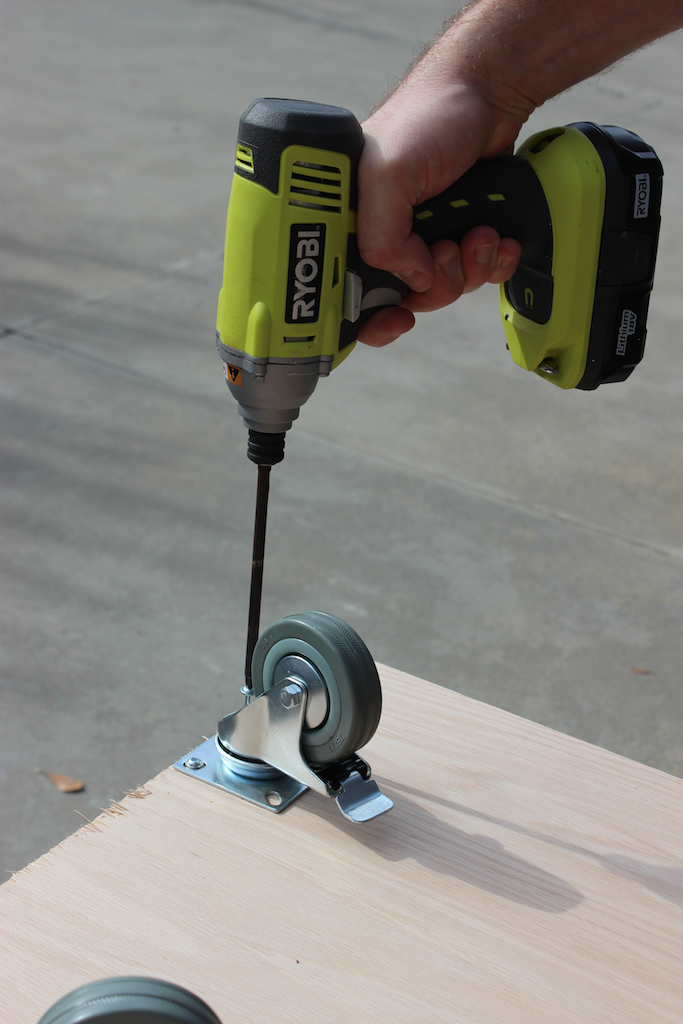
I installed my casters using three 1-1/4″ pocket screws in each caster so that they went into the vertical plywood used for the sides. You could also use 3/4″ screws without having to worry about the screws sticking out the other side of the base panel.
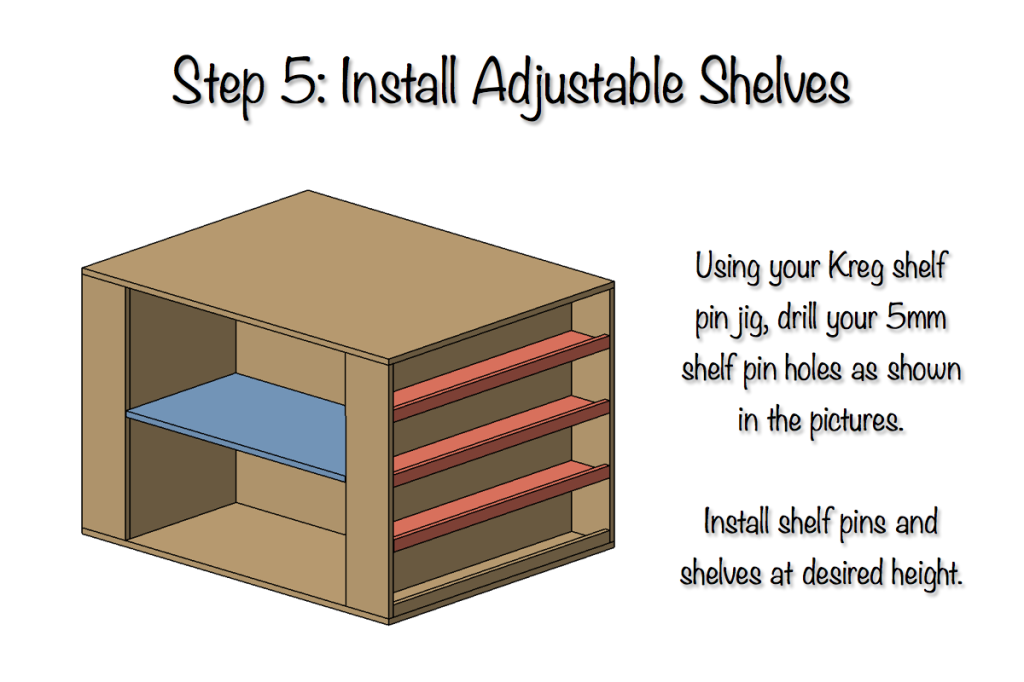
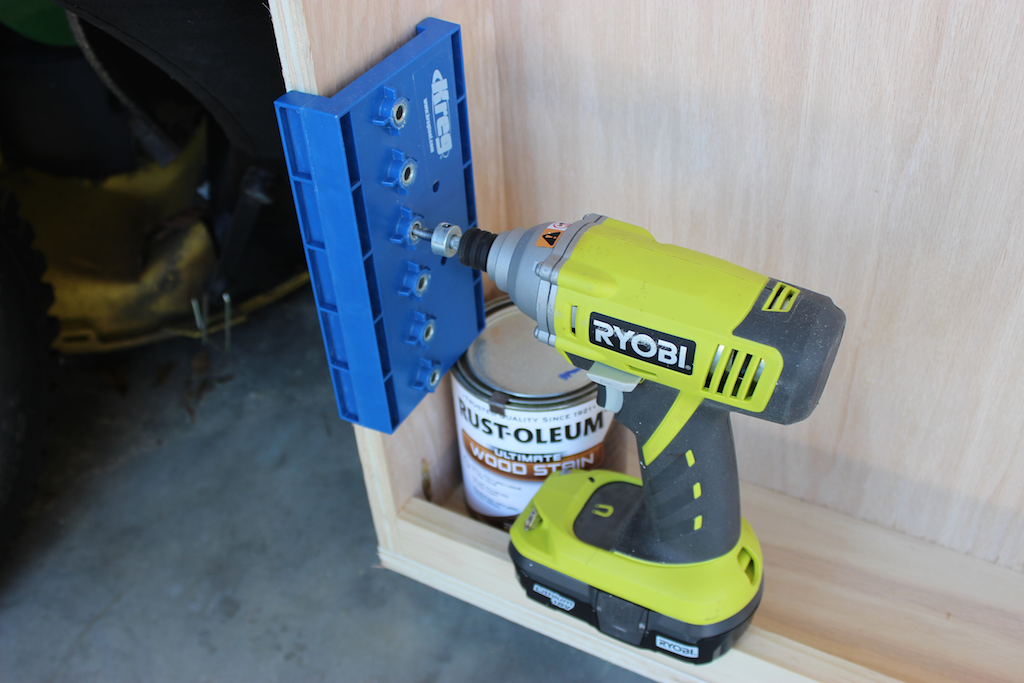
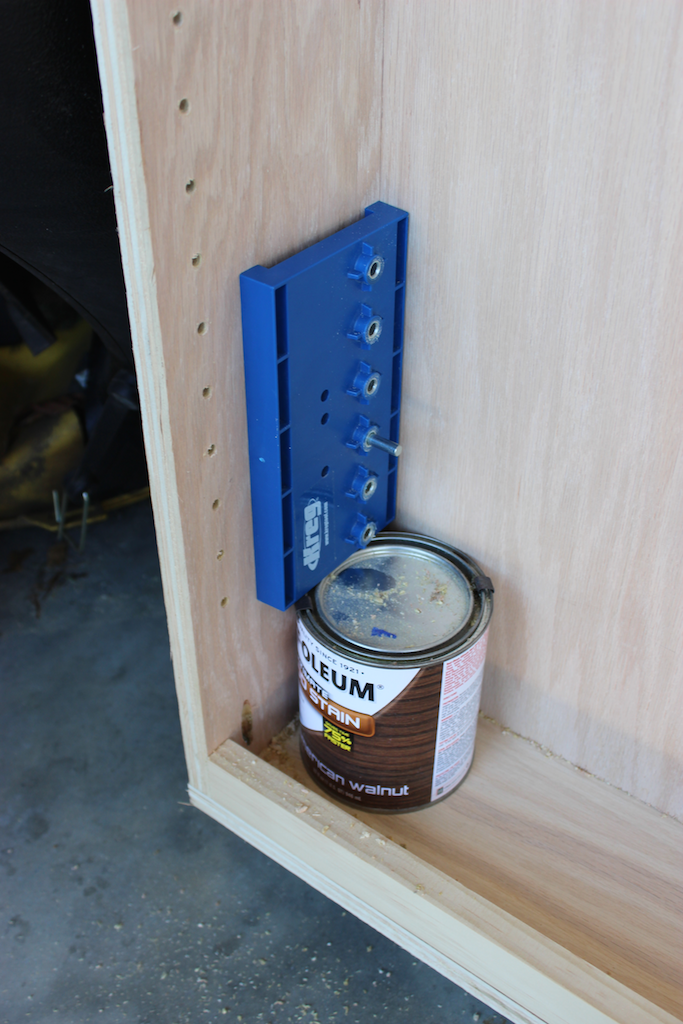
I used a can of stain for my shelf pin jig starting point. First drilling a single hole.
Remove the can and pin the hole before drilling the rest.
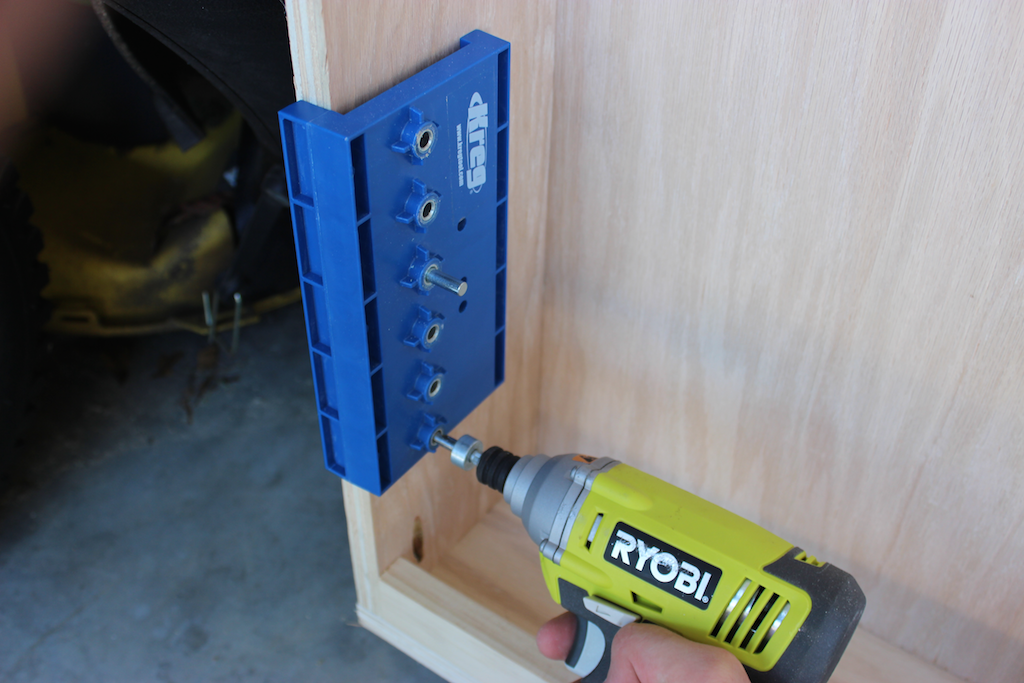
Repeat for the inside row.
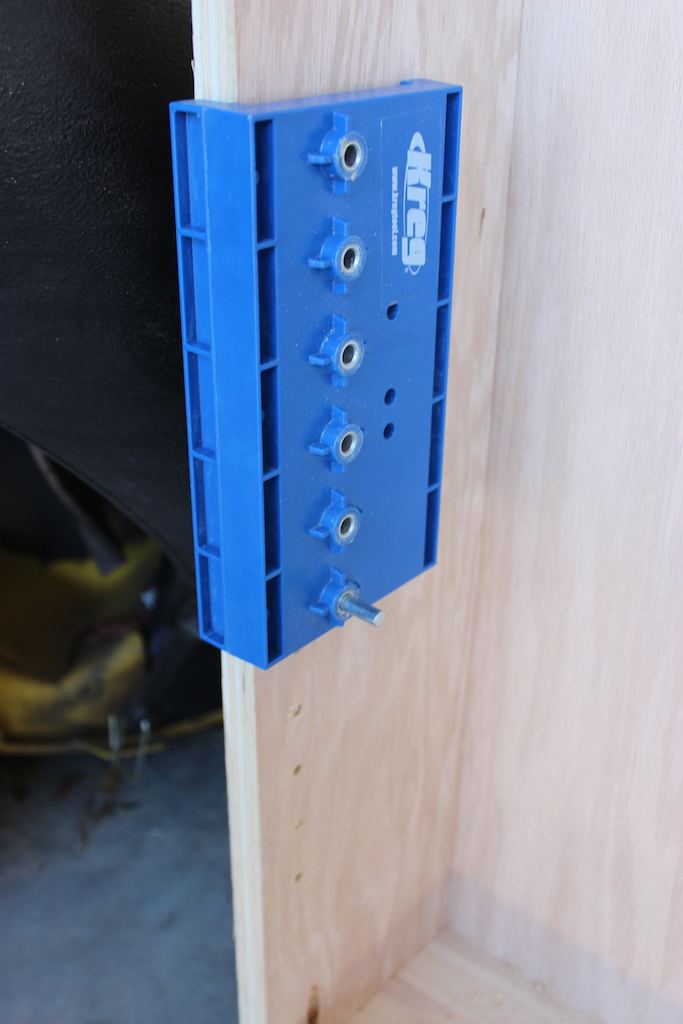
Pin the bottom of your jig to the highest hole and continue drilling.
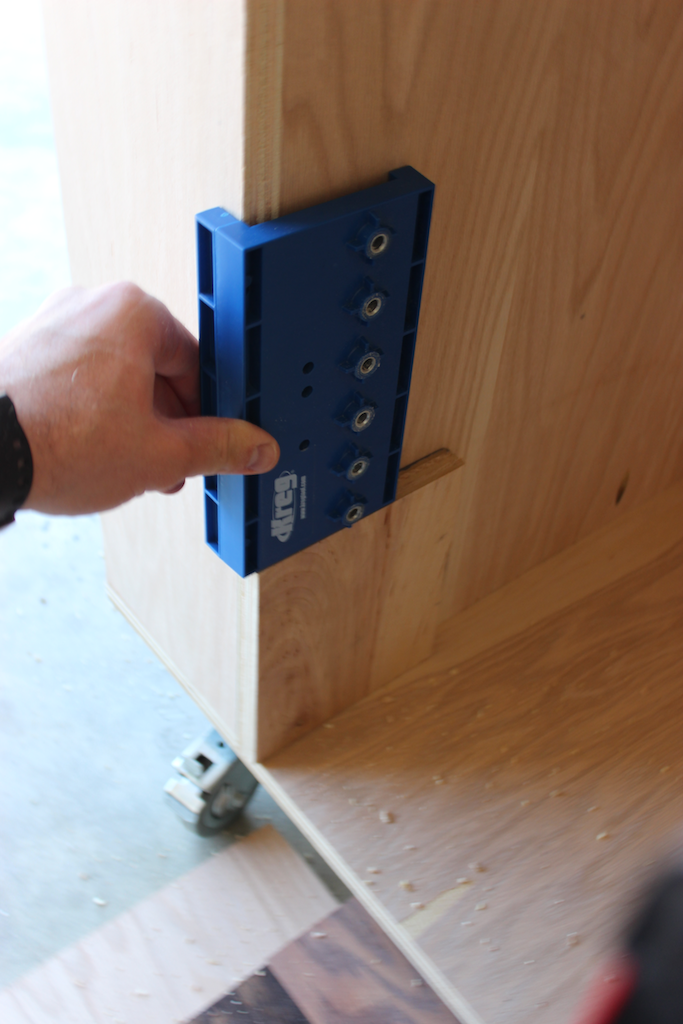
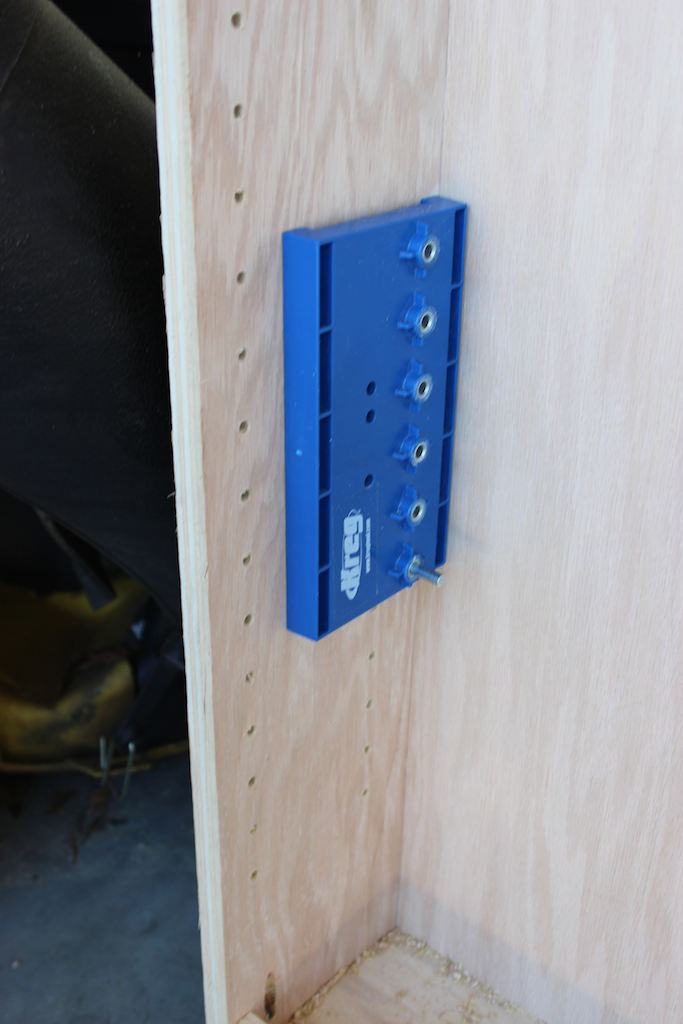
I used a 7″ piece of scrap as a starting point for the larger shelves
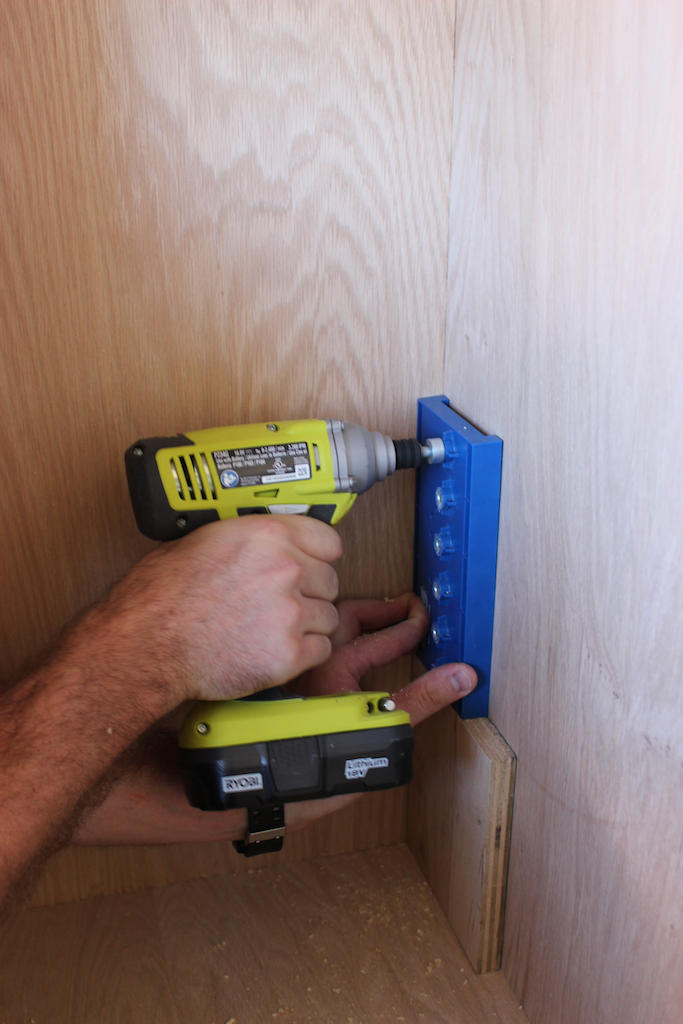
And repeated the same process.
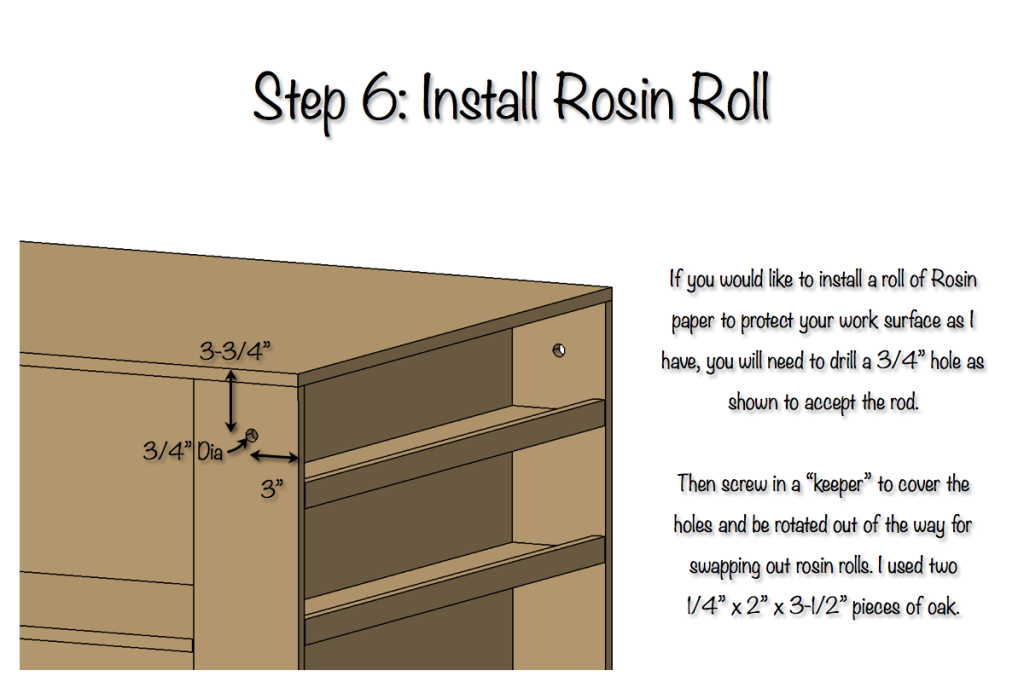
Step 6: Install Rosin Roll
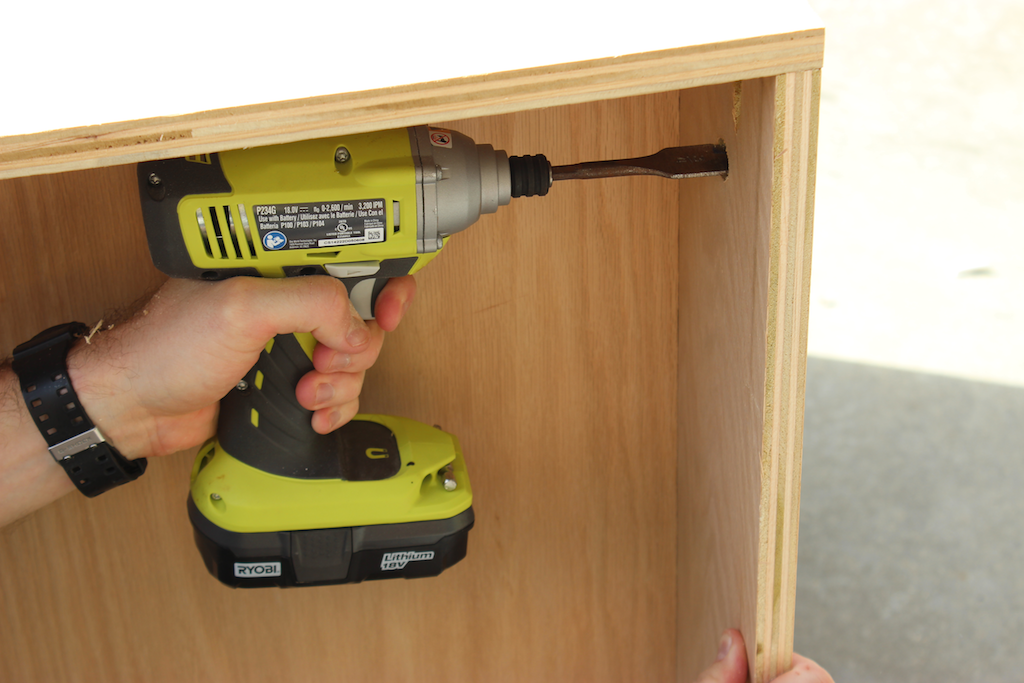
Start drilling your 3/4″ hole on one side.
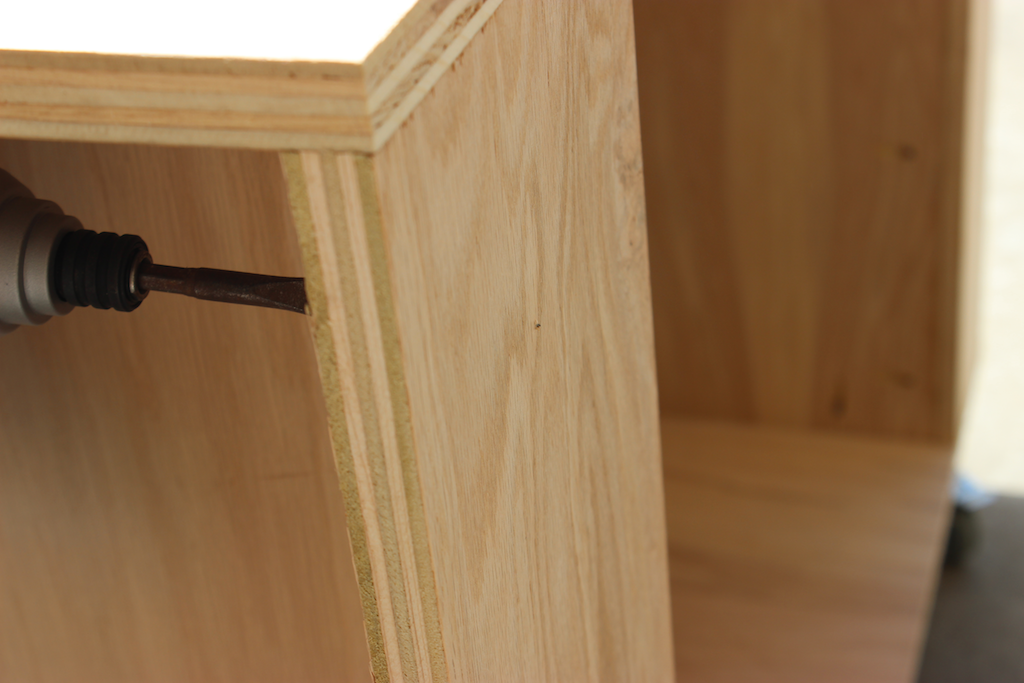
As soon as your wood bit starts to pop out the other side…
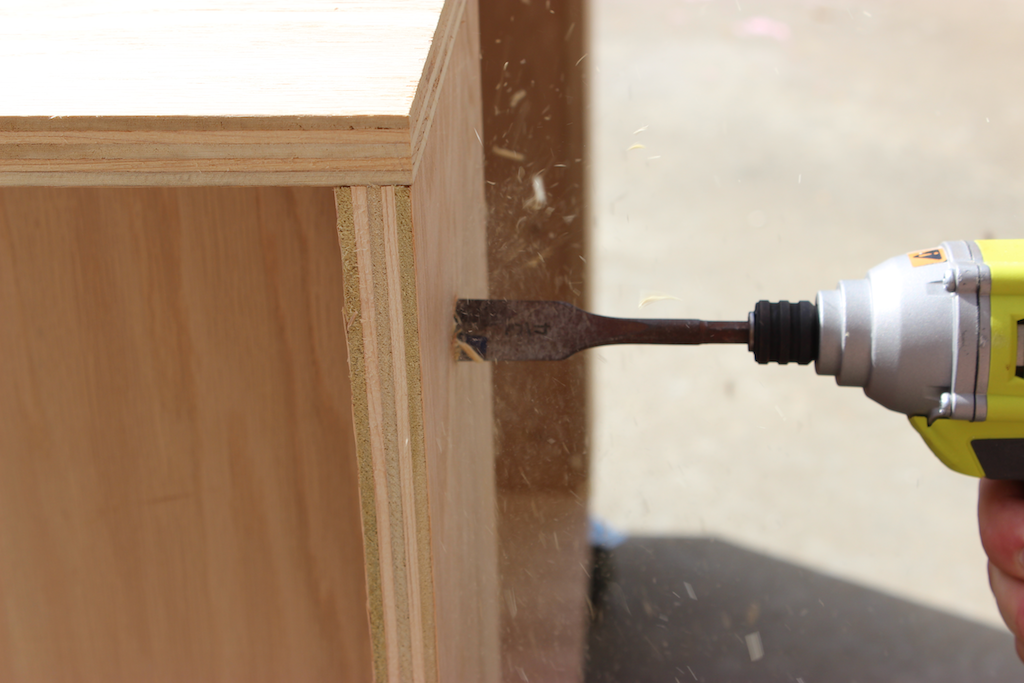
…finish hole from that side to prevent blowout.
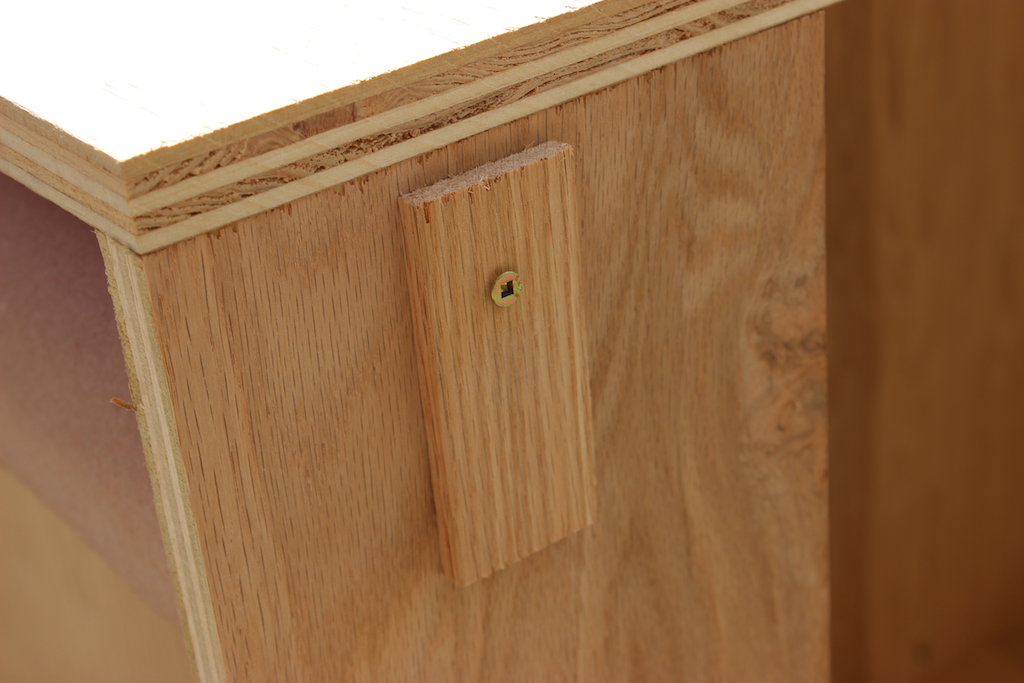
PRE-DRILL and loosely install keeper strap.
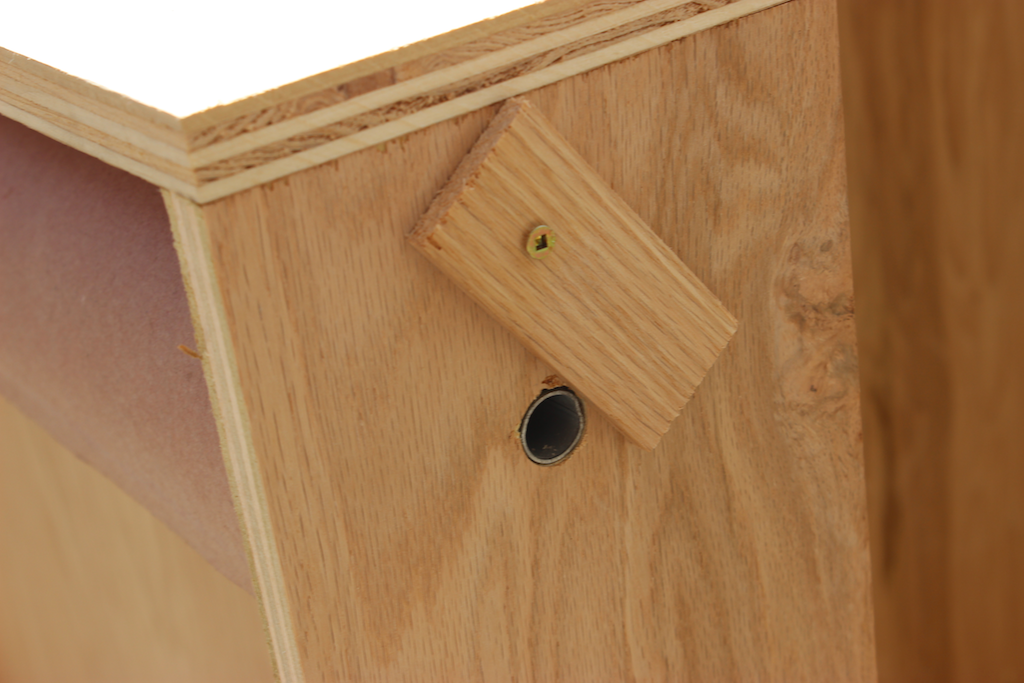
Tight enough that it can be rotated and stay out of the way.
Questions? Comments?
As always, if you have any questions don’t hesitate to comment below and especially don’t forget to post pictures of your finished products in the comments! ENJOY!