
RockSolid Garage Floor Coating
Ever since I saw the Rock Solid metallic garage floor coating I’ve been dying to apply it to my garage floor. However I have been dreading actually clearing out the garage. Well the time came that we sold our house and I still hadn’t put it down. Lucky for the new owner we decided to put it down after we moved our stuff out. I figured if it was a good chance for me to see if I liked it or not and I have to say it turned out great!
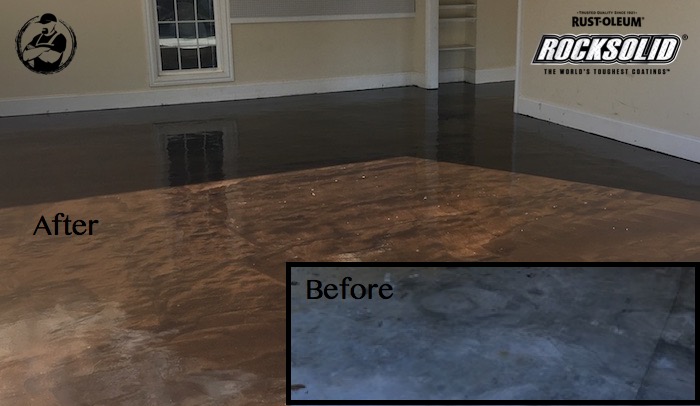
Judging by the finish and the metallic look you would never expect this to be a DIY friendly product but it sure is. I’ve detailed out below what you’ll need and just how easy it was to apply.
For sneak peeks of our upcoming projects be sure to follow me on Facebook and Instagram. Also, follow me on Pinterest to get tons of projects plans from all around the web!

Required Tools
- Roller Frame
- Extension Pole
- Stiff Bristle Broom
- 3″ Paint Brush
- Drill
- Mixing Wheel
- Hose & Water Supply
Materials
- Rock Solid Oil Destroyer or Rust-Oleum Cleaner & Degreaser
- 1 Gallon covers 200 sq ft
- Rock Solid Metallic Garage Floor Coating Kit – Earth Brown
- Each kit covers up to 100-125 sq ft
- Application Instructions
- FAQ’s
- Technical Data
- Product Label
- RockSolid Clear Top Coat with Anti-Skid Additive (Optional)
- Each Kit and Additive Packet covers up to 250 sq ft
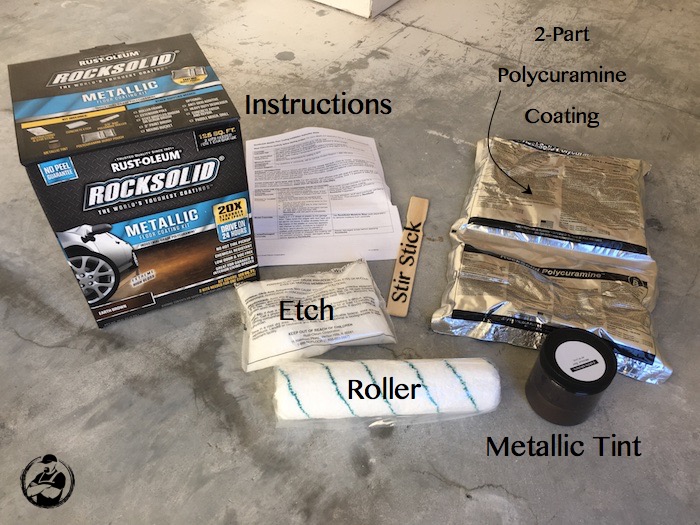
Here’s what comes in the box:
Disclosure: The links provided in the “materials” and “required tools” sections are affiliate links. If you would like to support our site and help keep our content free come find out more about how we can make money with no extra cost to you.
Preparing concrete for the Rock Solid Garage Floor Coating
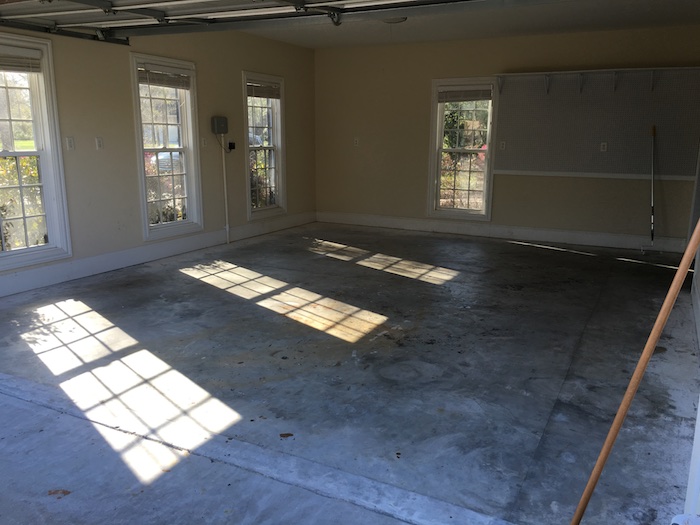
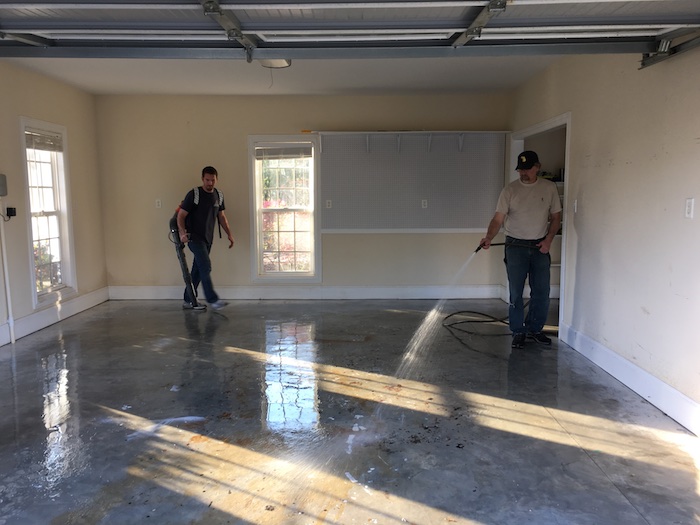
Step 1: Move everything out and sweep or blow out the garage with a blower. This was pretty easy for me since I was moving anyways. Then measure the garage. I had a two car on one side and a single car on the other side. My garage floor came out around 850 square feet so I went with 7 kits. With 125 sq ft of coverage per kit that would be just enough.
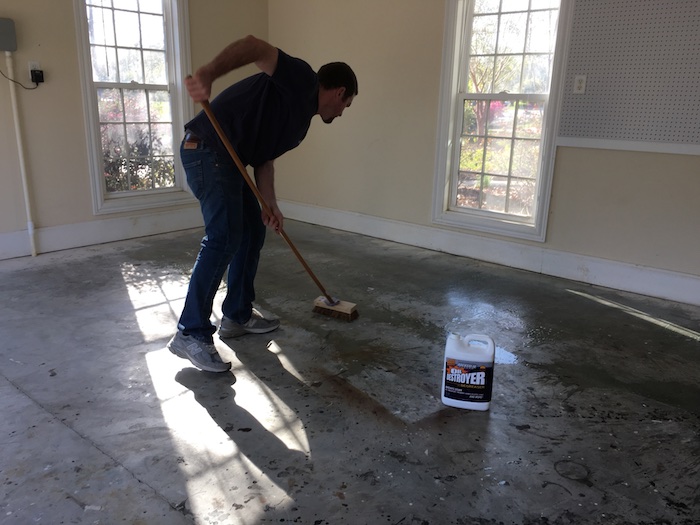
Step 2: Using the Rock Solid Oil Destroyer scrubbed the concrete down with a stiff scrub brush to remove any oil and allow for proper adhesion.
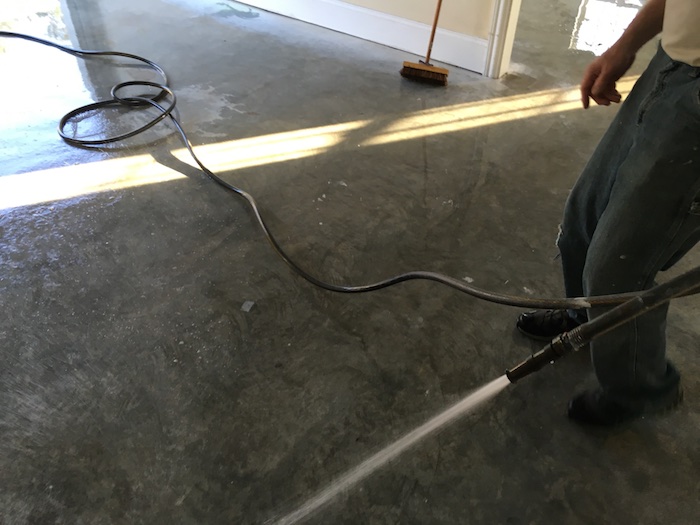
Step 3: Rinse the degreaser off the concrete with a hose. I didn’t have a squeegee so I used a blower to blow out as much water as possible. It worked pretty good but a squeegee would have definitely worked better.
Step 4: Dissolve each bag of etch in 2 gallons of water and cover the garage floor in the etch solution. I used a five gallon bucket and dissolved 2 bags of etch in 4 gallons of water at a time. With my floor still wet (pre-wet entire floor if not) I used a plastic watering can to evenly distribute the etch solution over a 10’ x 10’ section of floor. Then I scrubbed vigorously with a stiff scrub brush to loosen dust and dirt. Keep the entire section wet until it has been etched and rinsed, and then move on to the next section.
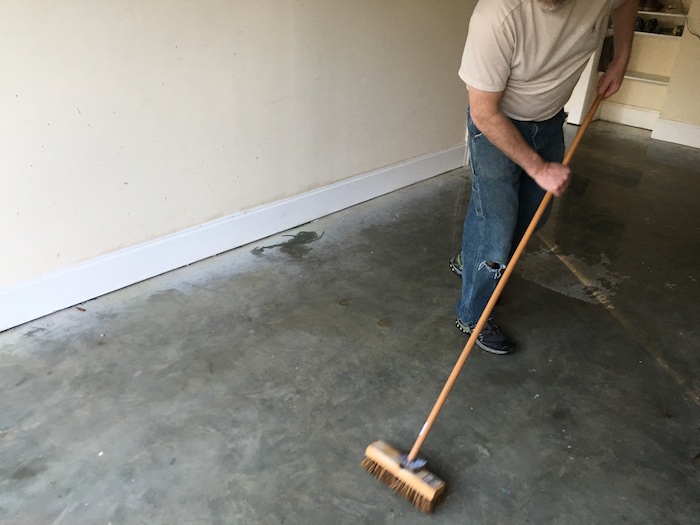
Step 5: Once complete, rinse and squeegee the entire floor to remove all etch and making sure not to leave any pooled water. Let the floor dry completely, I suggest at least 24 hours. Once completely dry, rub your fingers over the floor. If any dust or powder comes off then rinse, scrub and let dry until any signs of dust or powder is gone.
Applying the Rock Solid Garage Floor Coating
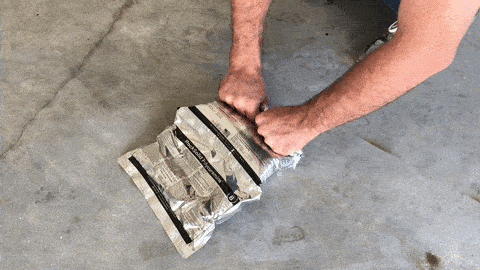
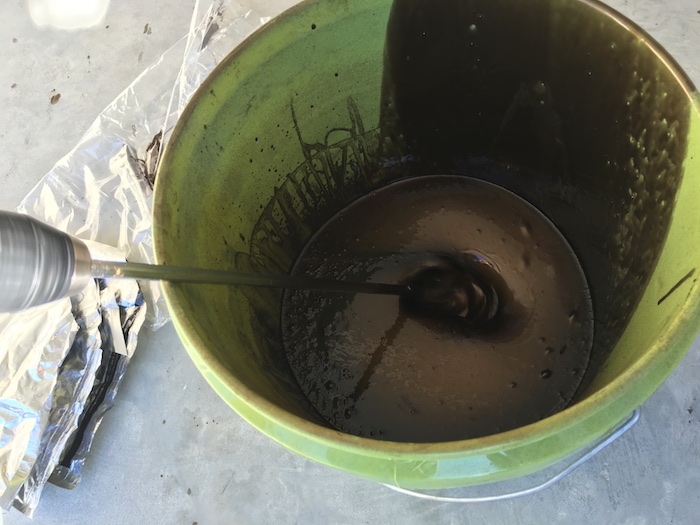
Step 1: Mixing only one pouch at a time, start by combining part A and B by placing the pouch on the ground and rolling it up like a tube of toothpaste. The seam in the middle is weaker and with enough pressure the seam will give way and allow parts A and B to combine. Once they do mix, begin to thoroughly mix the pouch by shaking it back and forth and squeezing the edges and corners for 2-3 minutes.
Step 2: Cut the corner of the pouch and pour into a clean mixing bucket. Then add the metallic tint and use a mixing paddle to mix for 3-5 minutes.
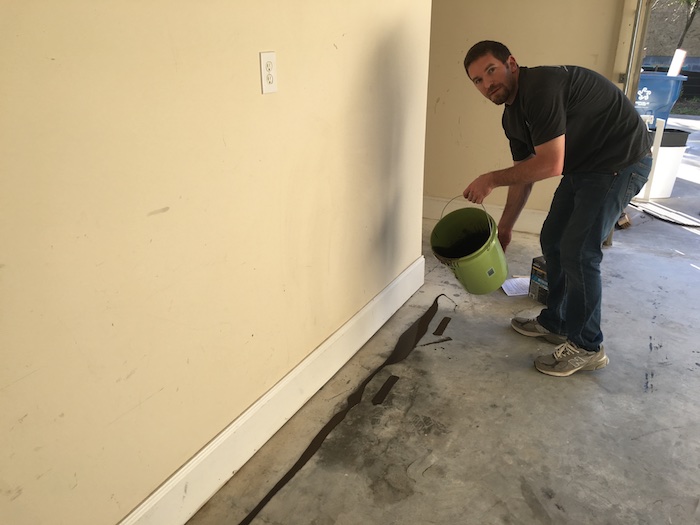
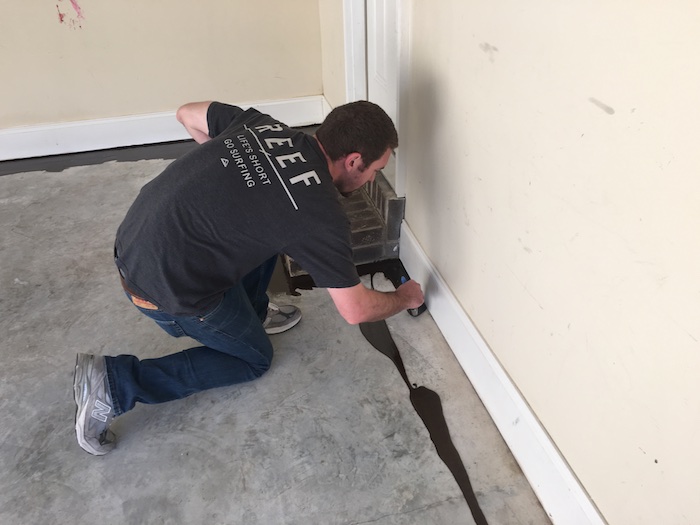
Step 3: Now pour a thin ribbon of the mixture about 6″ away from the wall. Then, using a 3″ brush, cut in around the edge of the floor.
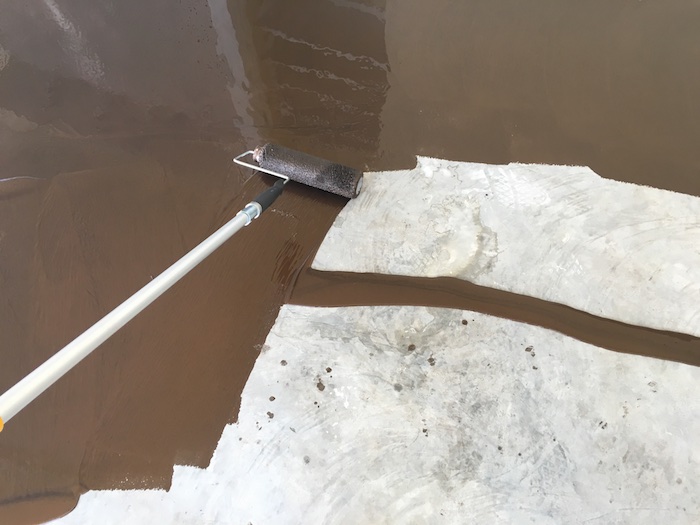
Step 4: After cutting in with a brush, use a paint roller, extension pole and the supplied 3/8” roller cover to spread the coating over a 5′ x 5′ square. Spread the coating using the standard M and W pattern as you would when painting. Pour each ribbon 2′ back from the painted section and start by pulling the mixture back with the roller and then pushing forward to cover the unpainted areas and blend with previously coated areas. Once the section you are working on is covered, then swirl the roller in a circular motion (like waxing a car). This may not look like much at the time but it will give the metallic coating a really cool look once it settles out. Repeat this step until the entire garage floor is covered.
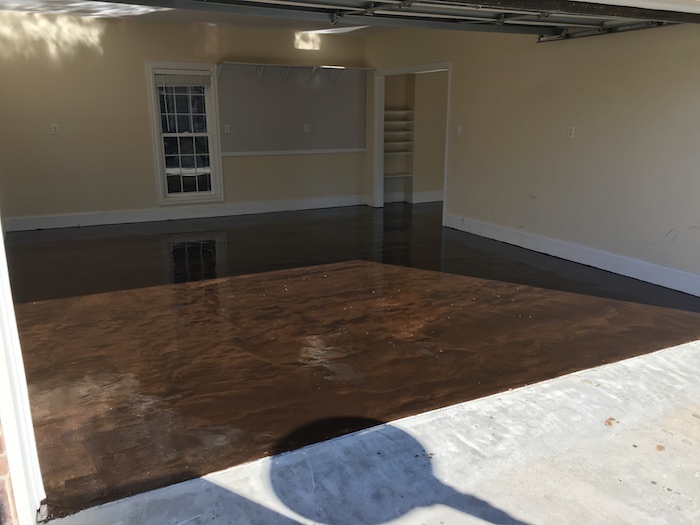
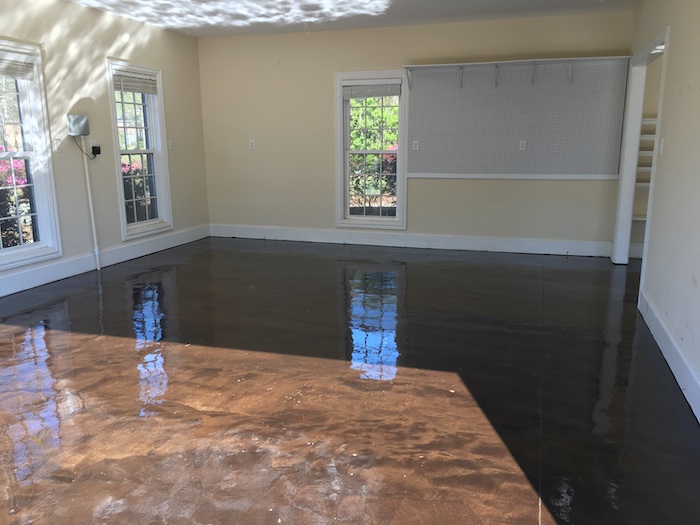
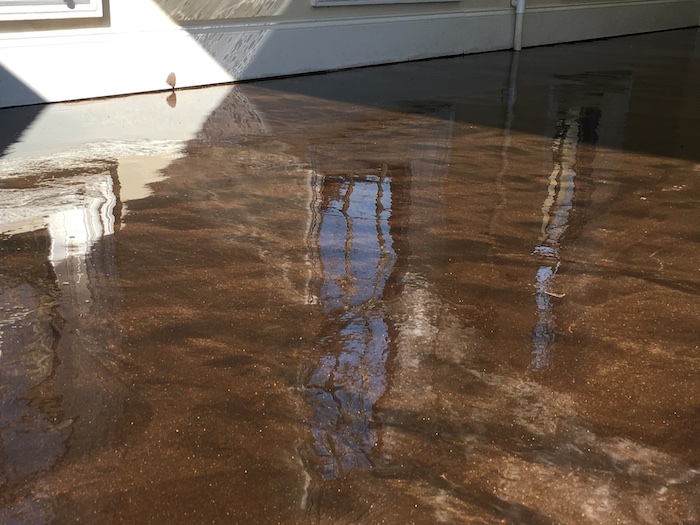
Sorry about the lack of finished photos, with everything already packed, we basically put the coating down and hit the road. Nevertheless, I really love the way this floor turned out. It has that high gloss, polished look that I was going for. It does get a little slick when wet but if you want to fix that just add the RockSolid Clear Top Coat and the Anti-Skid Additive. I will definitely be putting this coating down in my new workshop and garage!
Questions? Comments?
As always, if you have any questions don’t hesitate to comment below and especially don’t forget to post pictures of your finished products in the comments! ENJOY!
Is this a new product don’t guess I have heard or it before? What makes this better or more durable than epoxy? Why use that specific kit there seem to be others in the rocksolid line with a lot more coverage for just a little extra money.
Love the post would love more info i guess and what the durability is like hope you do a followup on when you get it in your new home.
It is newer and I don’t know the specifics but I have put down epoxy coatings before and it always just felt like I was painting the floor. This is a much thicker coating and to be honest that metallic finish is just so good looking I couldn’t resist.
I used their first gen product, Epoxy Shield in the garage of our first home and it took about 8 years of Indiana weather, before it started to wear away in some areas. Prep work is key.
Recently moved to a new house and used Rock Solid this time. I’m hoping the floor lasts longer, but even if I get the same life out of it, I’ll be pretty happy. These floors look wonderful and clean up so nice with a water hose and a broom.
Do you have to use anything specific to fill cracks before you put it down. I know that with the older epoxy stuff you did. Just wondering if anyone has experience with that.
Since it was new there wasn’t too many cracks, a few small cracks and I didn’t worry about them at all. If I had any large ones, I would fill it with something to prevent all the paint from running through the crack. At the previous house, I believe I used some sort of tube concrete crack repair.
Just saw this new product at the Charlotte Auto Fair. I am definitely going to coat my new garage floor with the metallic + anti-skid additive & clear.
I said the same thing when I saw it. It definitely is an eye catcher.
Did 7 kits give you all the coverage that you needed or did you have to buy more? Also did you ever get around to applying the topcoat and anti-skid?