

Golf Locker
Quick answer: This DIY golf bag storage locker organizes the clubs, shoes, and gear that otherwise live in a garage corner — built from a single sheet of 3/4″ plywood with pocket screws. It stands 62¾″ tall × 15½″ square: bag bay below, adjustable shoe shelf, and a tray up top for balls and gloves. A one-day beginner-friendly build (and a great gift for any golfer). Free tutorial below; the printable plans put it all in one PDF. Documented by Jamison Rantz.
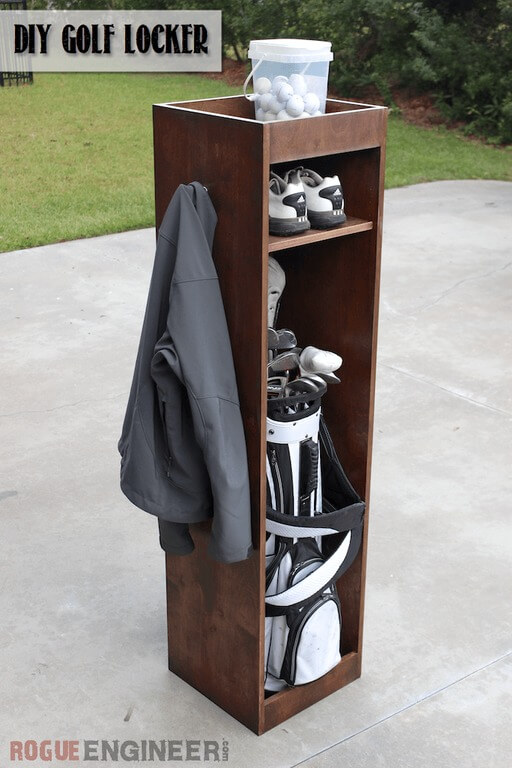
It seems like forever that I’ve wanted a golf locker — or as some call it, a golf caddy. My clubs have always been stuck in a corner somewhere, shoes set on top, with golf paraphernalia scattered around. So I made up my mind this was an issue that needed solving: a golf locker made from a single sheet of plywood. Don’t play golf? This makes a great Christmas present for any golf lover.
Need storage for two bags? The upgraded double golf locker is this build’s big sibling — his-and-hers bays with shared shelving.
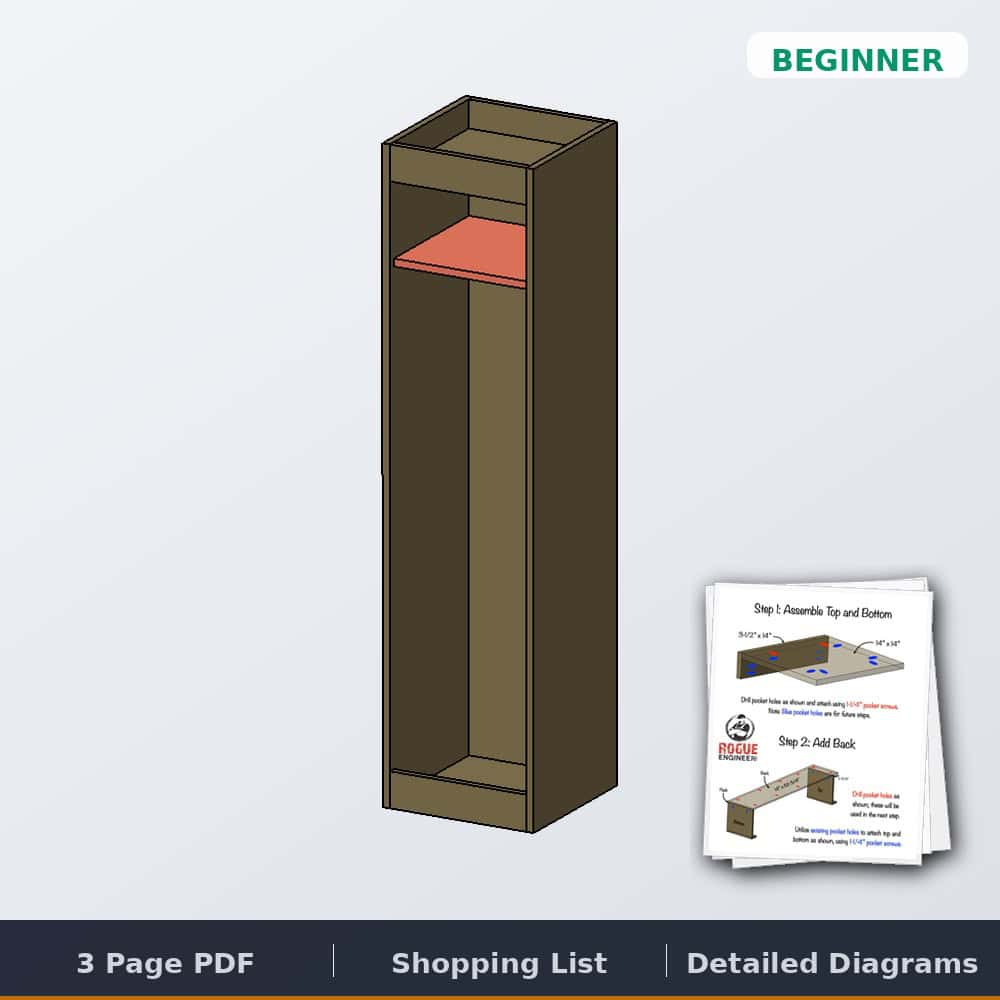
Tools & materials
Cut list

Dimensions

How to build the golf bag locker
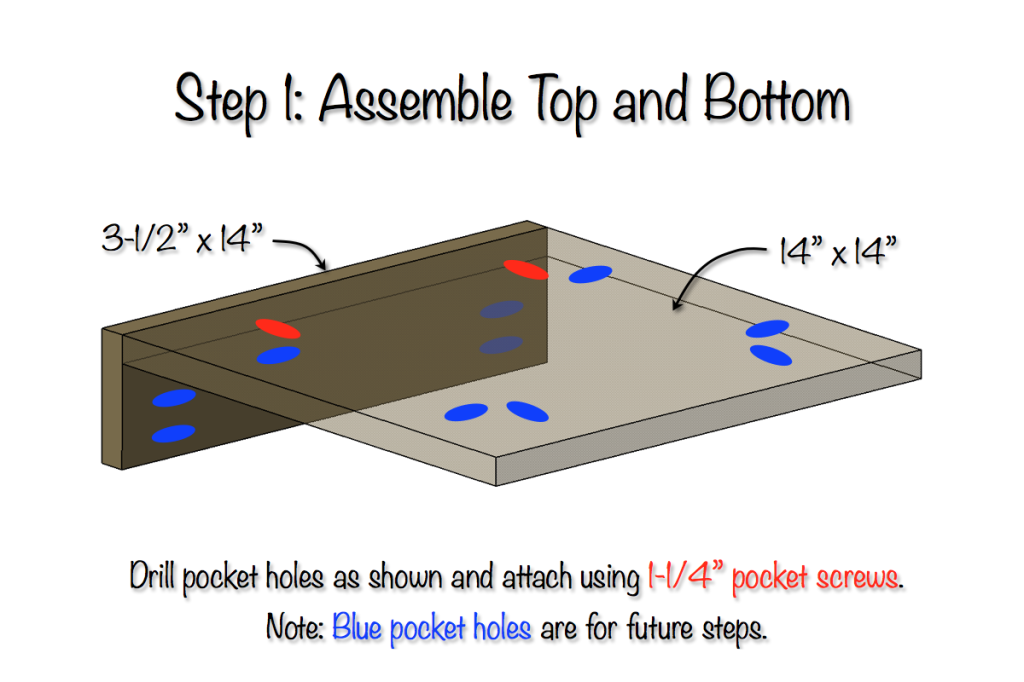
Step 1: Assemble the top and bottom
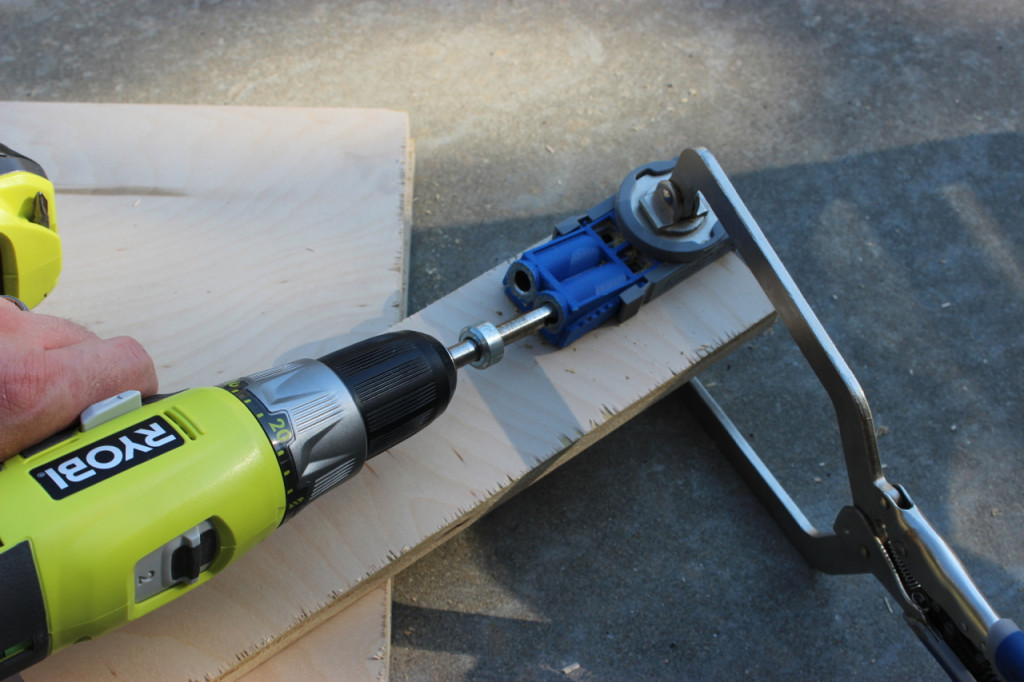
The top and bottom are each a 14″ × 14″ panel with a 3½″ × 14″ face strip. Drill pocket holes as shown and join each pair with 1¼″ pocket screws — and drill the extra (blue) pocket holes now; they’re used in the later steps.
Step 2: Add the back
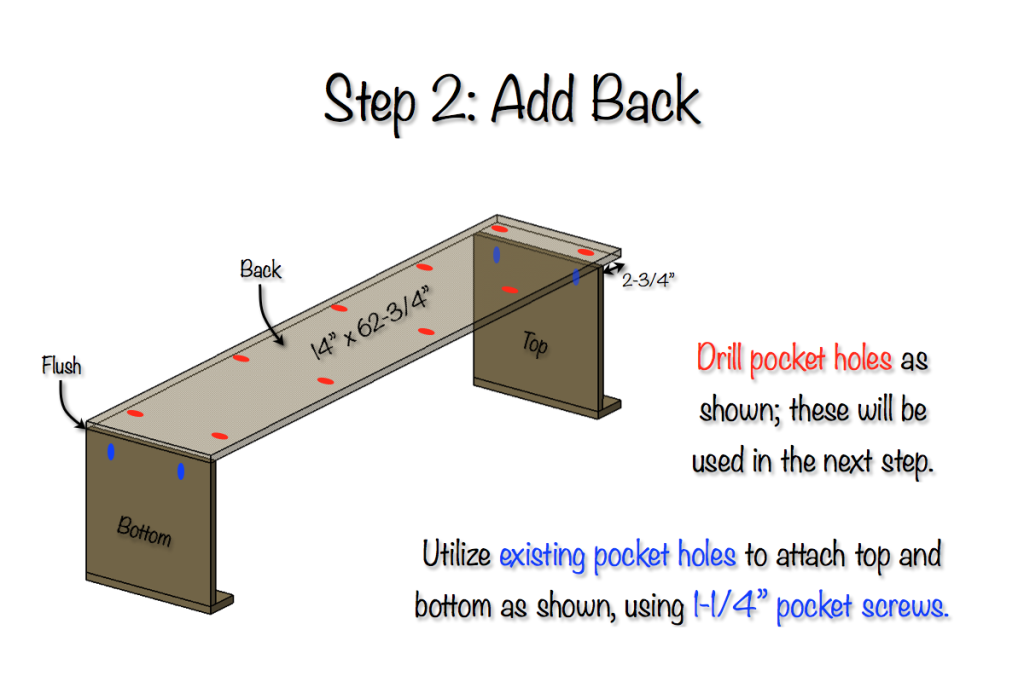
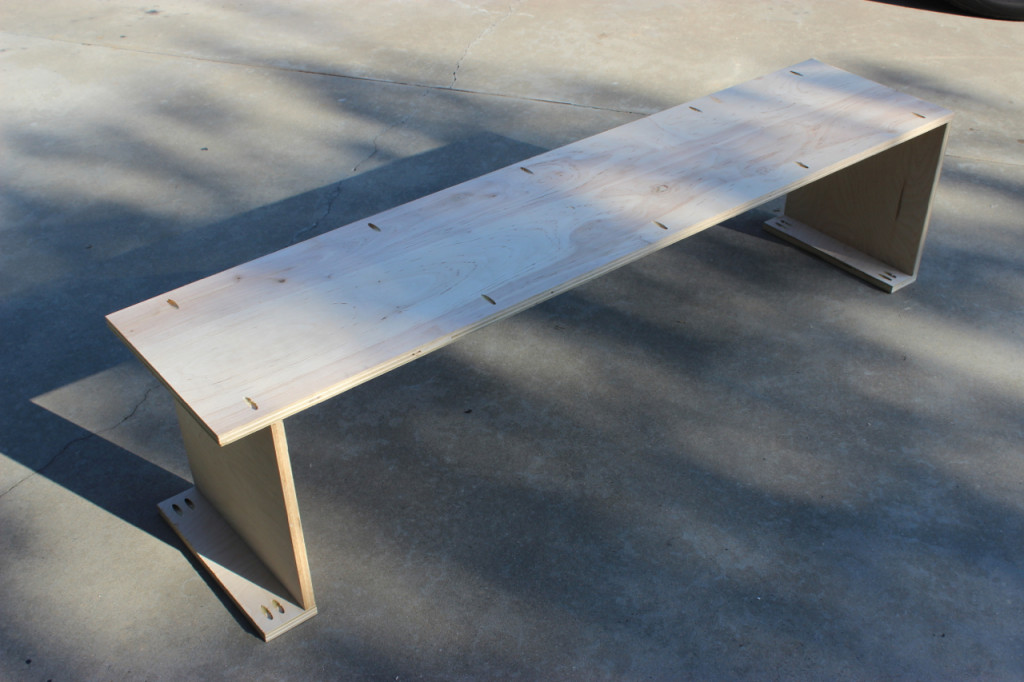
The back is a 14″ × 62¾″ panel. Drill its pocket holes, then attach the top and bottom assemblies using the existing pocket holes and 1¼″ screws — bottom flush with the panel end, top set 2¾″ down to create the tray lip.
Step 3: Add the sides
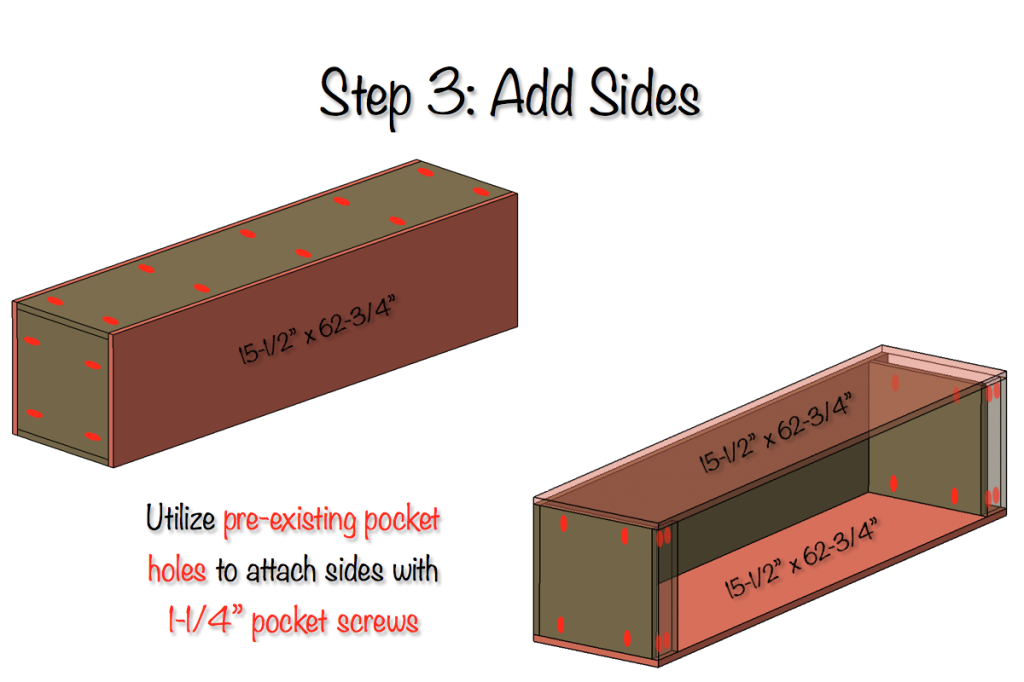
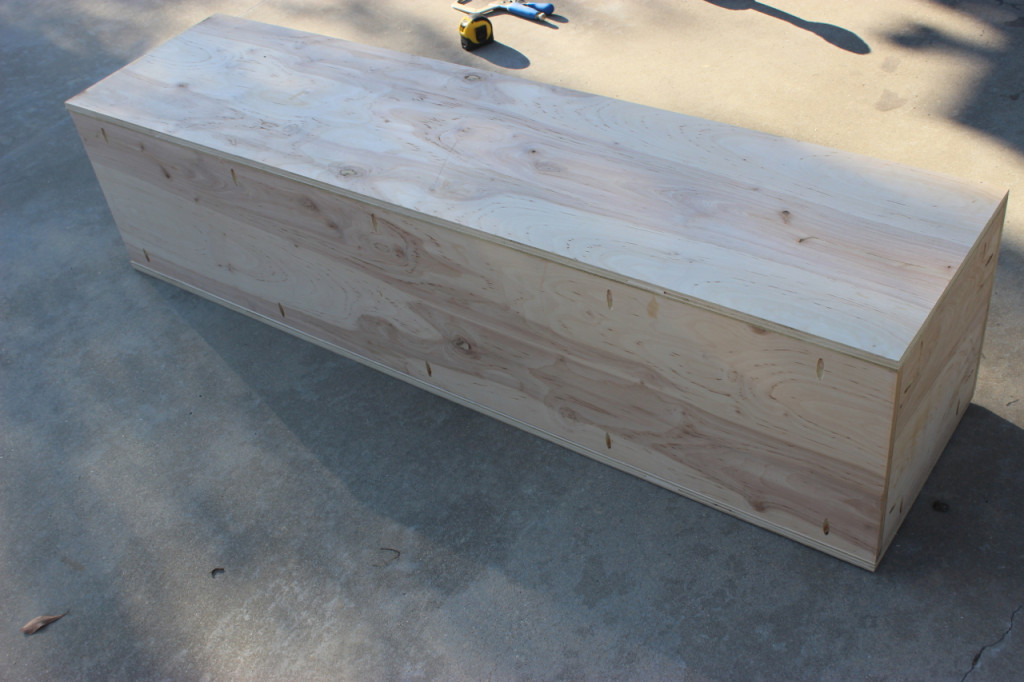
The two 15½″ × 62¾″ sides wrap the carcass, attached through the pre-drilled pocket holes with 1¼″ screws. The pocket holes all face inside the bag bay where they’ll never be seen.
Step 4: Add the adjustable shelf
Using a shelf pin jig with a scrap 3½″ board as a spacer, drill shelf-pin holes in both sides, then drop in the shelf — adjustable height for shoes, a rangefinder box, or whatever the golf habit accumulates next.

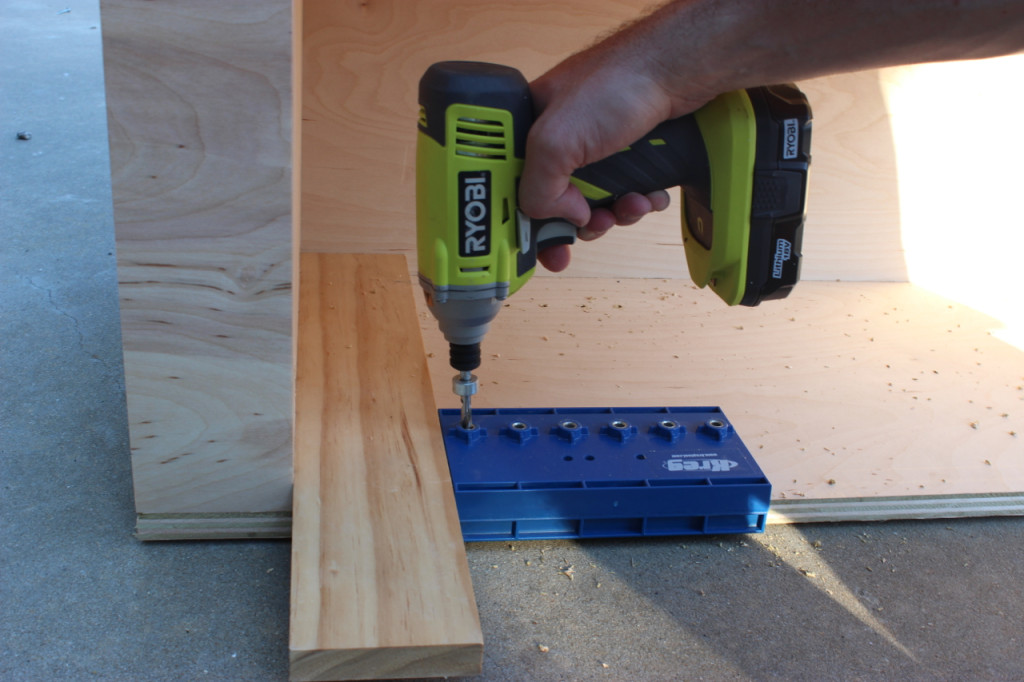
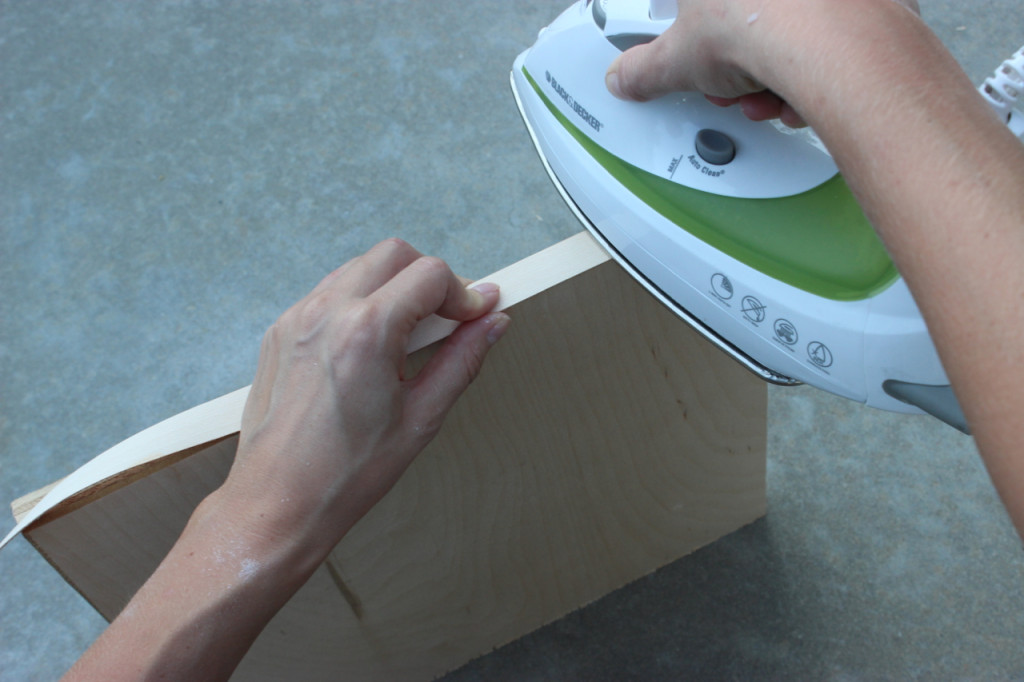
Step 5: Add edge banding
Apply iron-on plywood edge banding everywhere an edge of plywood shows. (We skipped the back edges since they’re unseen.)
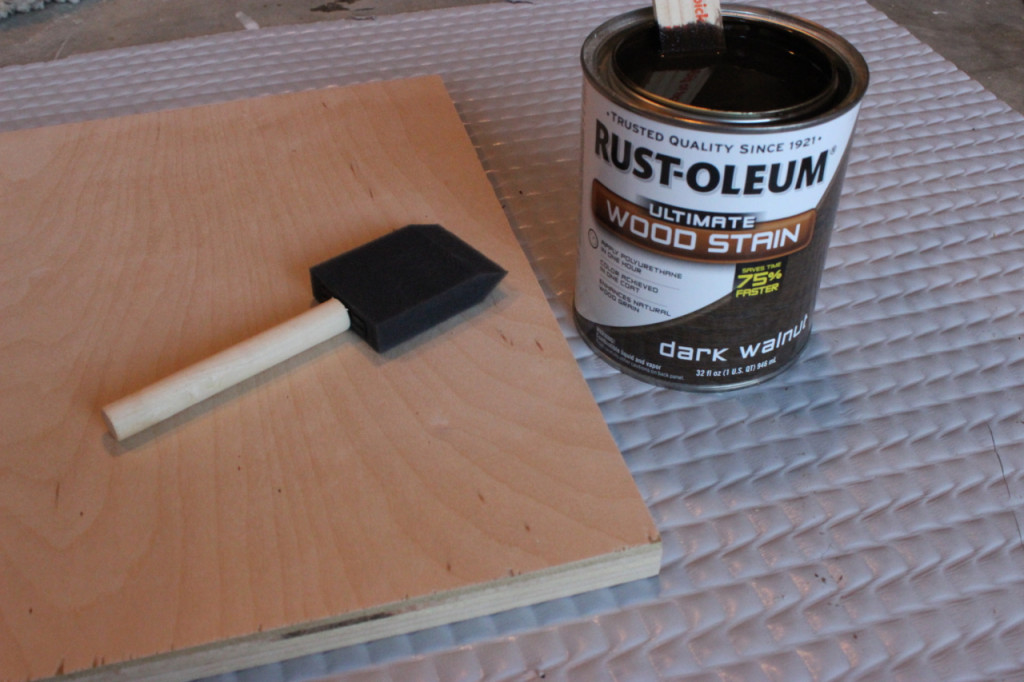
Step 6: Finishing
We finished the locker with dark walnut stain and three coats of satin polyurethane — garage-proof and handsome enough for a mudroom.
Golf bag storage questions, answered
How much space does golf bag storage need?
A standard cart bag is roughly 10–14 inches across and most bags stand under 50 inches with drivers in — this locker’s 15½-inch-square footprint and open bay swallow one comfortably, with the tray and shelf handling shoes, balls, and gloves.
Can I really build this from one sheet of plywood?
Yes — the cut list above pulls every panel (top, bottom, back, sides, shelf, and face strips) from a single 4×8 sheet of 3/4″ plywood. That’s what keeps the build at $50–100.
What if I have two golf bags?
Build the double golf locker instead — same idea, two bays, shared shelves. This single version is the right pick for one bag in a tight garage corner.
What finish holds up in a garage?
Stain plus three coats of polyurethane, like the dark walnut + satin poly here. The poly is what shrugs off wet bag bottoms and muddy shoes; refresh it in a few years if the shelf sees heavy use.
Keep the gear organized
Questions? Comments?
If you have any questions, drop them in the comments below — and when your build is done, post a picture. That’s the good part.
I just love everything on your site. You make me think I can build anything! What a great partner you guys have in Kreg! That giveaway is awesome! My husband would be so excited!!
Thanks Cynthia and good luck!
Great giveaway! Hope to make this for my hubby!!!
Thanks Veronica! Best of luck with the giveaway. If you do make it, be sure to post your pictures! We love seeing finished projects.
[…] Jamison from Rogue Engineer whipped up some free plans for a DIY Golf Locker, […]
Hi!
I am planning on building this for a Christmas gift. I only have just the basic Kreg Jig. Can I build it just with that?
Thank you for posting plans.
Awesome Erin! You can definitely build this with the basic Kreg jig. As I detailed in the required tools list you’ll just need a circular saw and a drill as well. Plus the shelf pin jig if you want the adjustable shelf feature otherwise you can locate it as you wish and secure it permanently with pocket holes and screws. Best of luck! Post a pic when you’re done!
Great site Jamison! I am just about to stain the golf locker as a gift for my brother’s birthday. This was a great project, it was my first “cabinet” and my first from your website. It put many of my skills to the test and even added some new ones. The people at Kreg really have a knack for taking a task and translating it into a tool that anyone can use. One word of caution regarding the shelf pin jig though, do not attach the connecting bar to the base unless you plan on connecting two jigs right away. I thought it would get lost, so I screwed mine on when I took it out of the package. When you flip the jig over, you will get an offset you don’t want. Now I am hoping those four holes will stain up okay once filled. Thanks again for the great birthday idea.
Thanks Steven! And thanks for the tip, I’m sure I lost my connector but I figured if I ever got another it would come with one so I was covered.
Here is a picture of the completed golf locker. My brother loved it and should have his clubs in it just in time for his first trip to the links. Thanks for the great plans Jamison.
Wow @Steve Schwendtner that finished turned out really good. Looks very professional. Great work.
Check out this double golf locker that another reader just did. I thought the addition of the turf at the bottom was a good idea.
Reattaching photo that was removed
Reattaching photo that was removed:
Reattaching photo that was removed
Thanks so much for the idea and plans! I tweaked them slightly to allow for my husband’s new larger (fatter) golf bag. I also added a spot for additional clubs that he uses inside the house to practice swings and putts. This was the perfect 50th birthday gift for my husband. He loves it. He asked me to add his name to the front piece, so I plan to do that soon! I finished the locker with Behr French Roast Eggshell paint to match our laundry cabinet. Thanks again!
I love it! You did an awesome job, and he’s a lucky man. Thanks for sharing.
Reattaching photo that was removed
I used my dad’s Forstner bits to make the holes for the additional clubs.
This is a really great feature. Thanks for the closeup, I almost missed it in the first picture.
Reattaching photo that was removed:
Just turned my garage into a man cave. Saved a corner for the clubs!
Thats awesome! Love the double. Great work!
Reattaching photo that was removed
Thanks for the inspiration, Jamison. I’m not a golfer (yet), but wanted storage to house various hiking boots, winter boots, running gear, bike helmets, etc. I used two sheets of plywood to create two units. I made them about 3″ taller and used the remaining 12″ to create shoe shelves for the middle unit.
That is awesome! Extra storage is always a plus. Great job!
Reattaching photo that was removed
Hi Jamison, awesome looking locker. I’ve never really built anything before and intend to tackle this as my first project. Being as I’m new to woodworking, I don’t have many tools. I do have a drill and so I was planning on just putting this locker together with some wood screws through the exteriors, rather than using pocket screws. Is there any reason why that wouldn’t work?
What size bag does this fit?
Great idea and execution! Can 1/2in plywood be substituted for the 3/4in? Or does the box lose its structural integrity? Again great design. I’m going to be making about 4 or five of these for Christmas presents.
I am building one from long pallet boards