

DIY Simple Square Bedside Table
Quick answer: This rustic square bedside table is the perfect first furniture build — 2×4s and 2×2 furring strips, pocket holes, and under $25 in lumber. Designed with Remodelaholic, where the styled build tutorial lives. Free tutorial below and a free printable PDF.
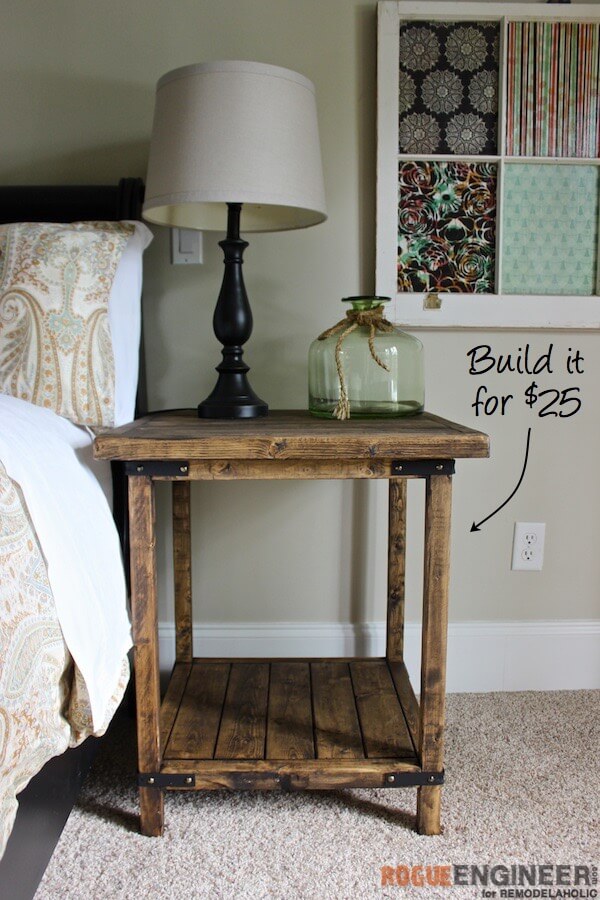
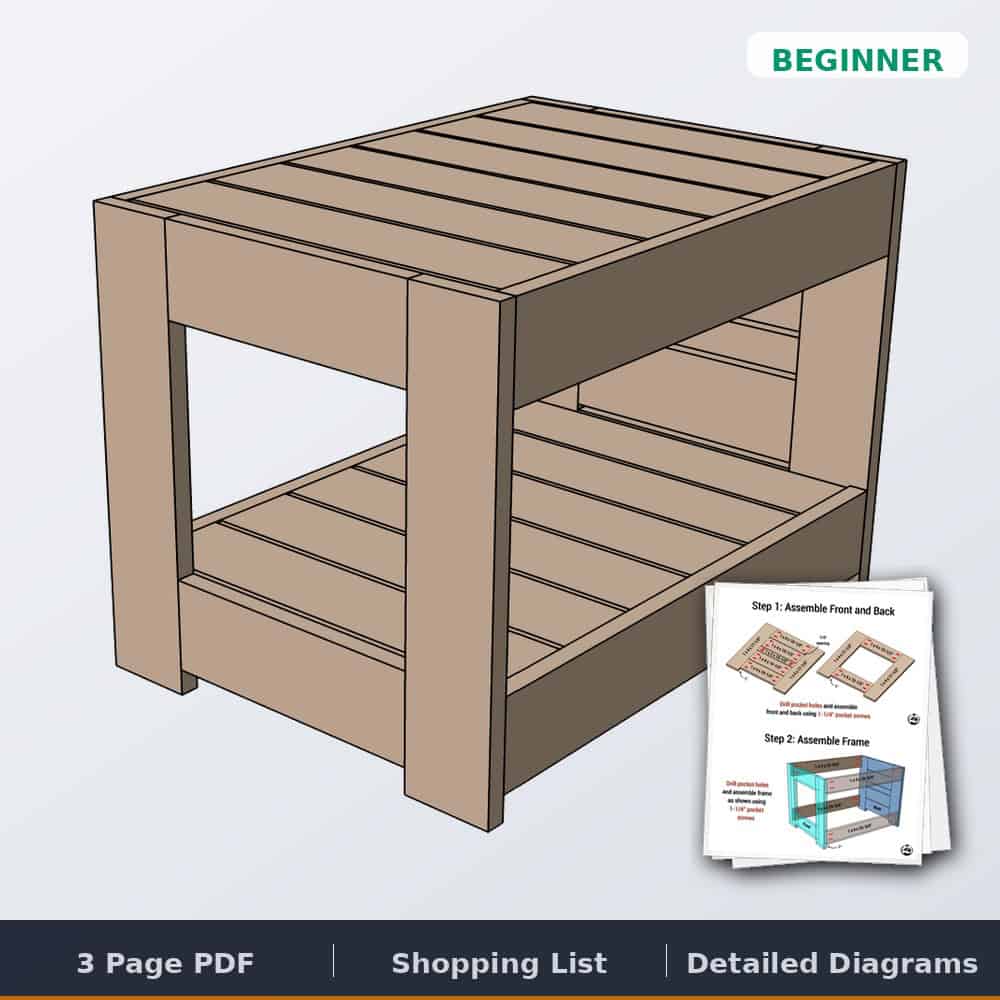
This is a great project for any DIY newbie — a simple rustic square bedside table for under $25 in lumber. If you haven’t jumped into the world of DIY furniture yet, this is the on-ramp: five steps, two board sizes, one pocket hole jig. See it styled and finished at the Remodelaholic build post.
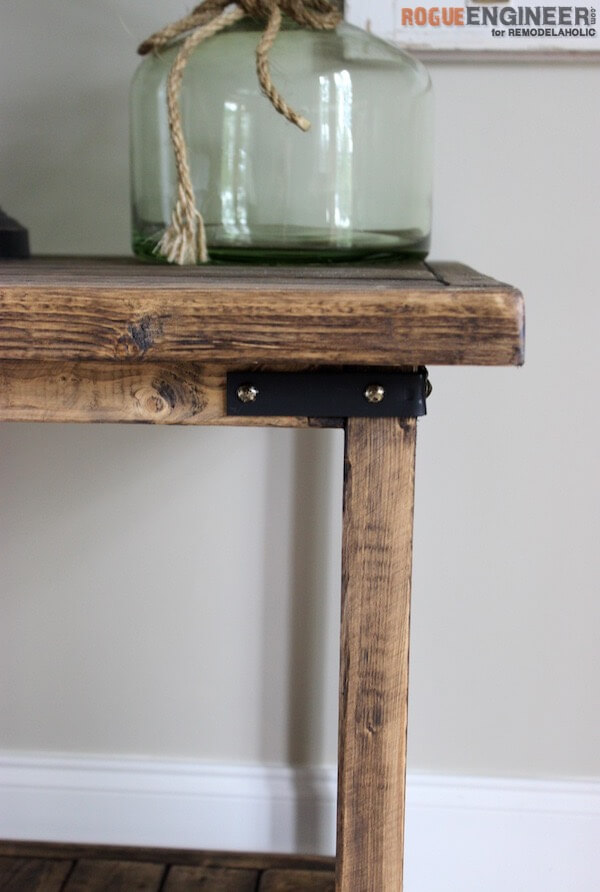
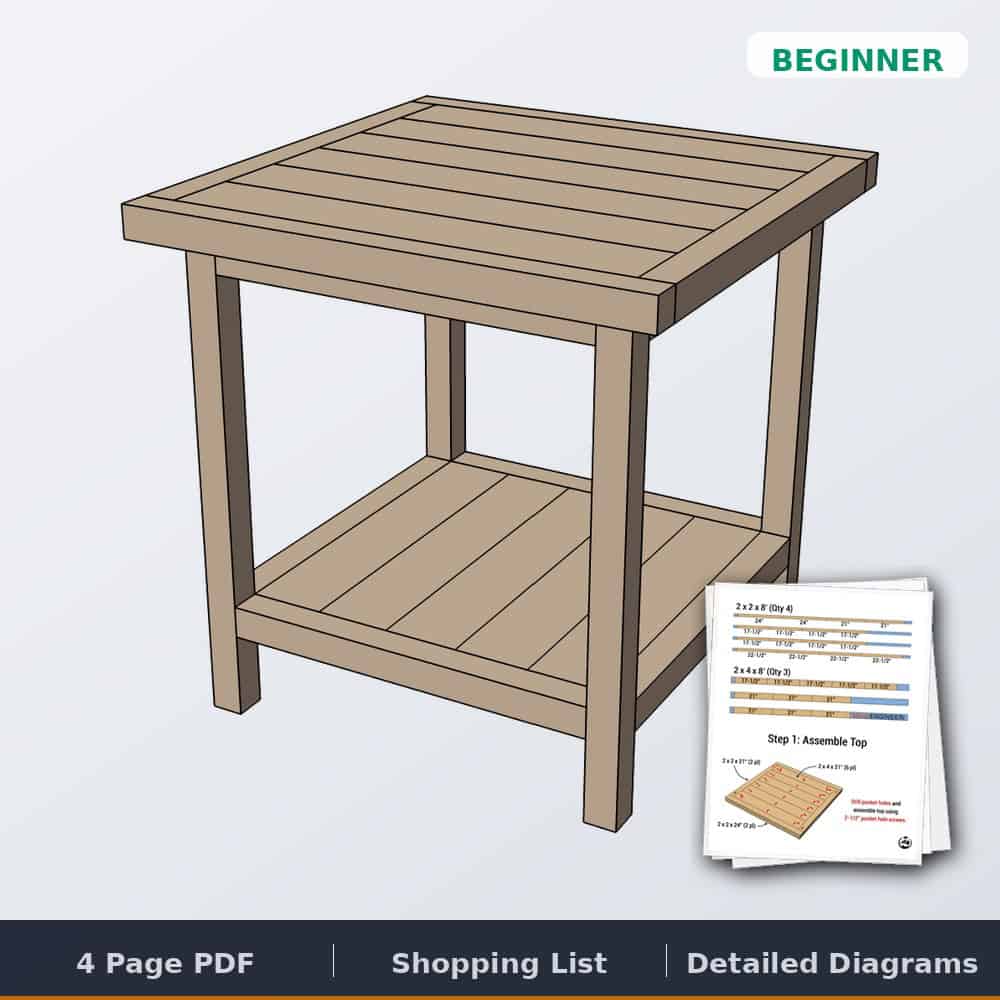
Simple Square Bedside Table Plans
The complete printable PDF — full cut list, dimensioned diagrams, and all five steps — free in the plans store.
Tools & materials
Dimensions
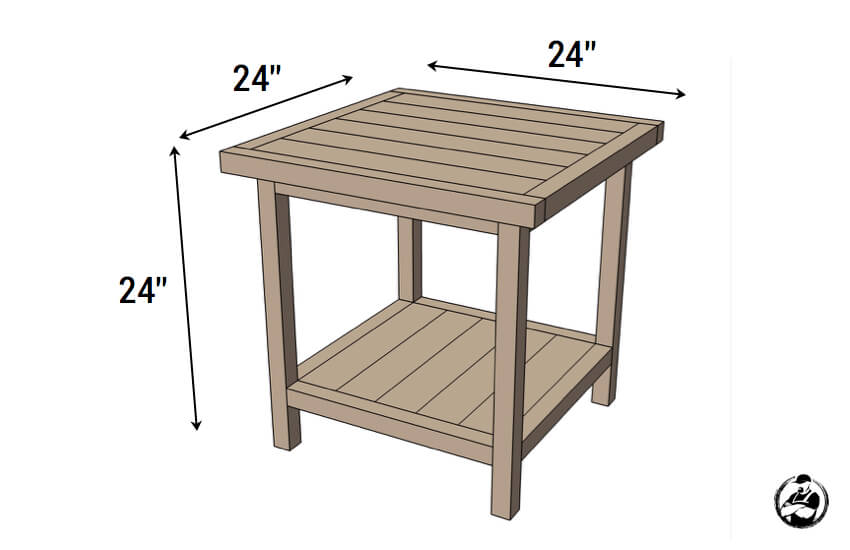
Cut list
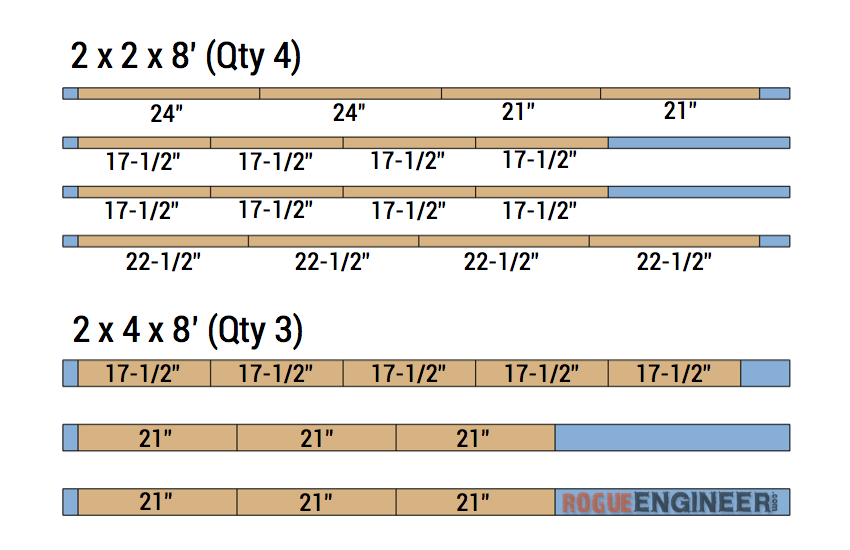
The build, step by step
Step 1
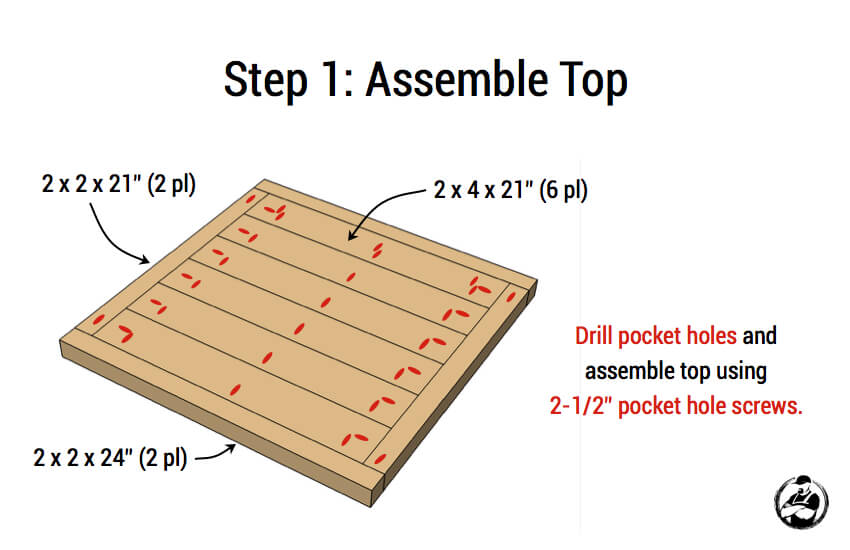
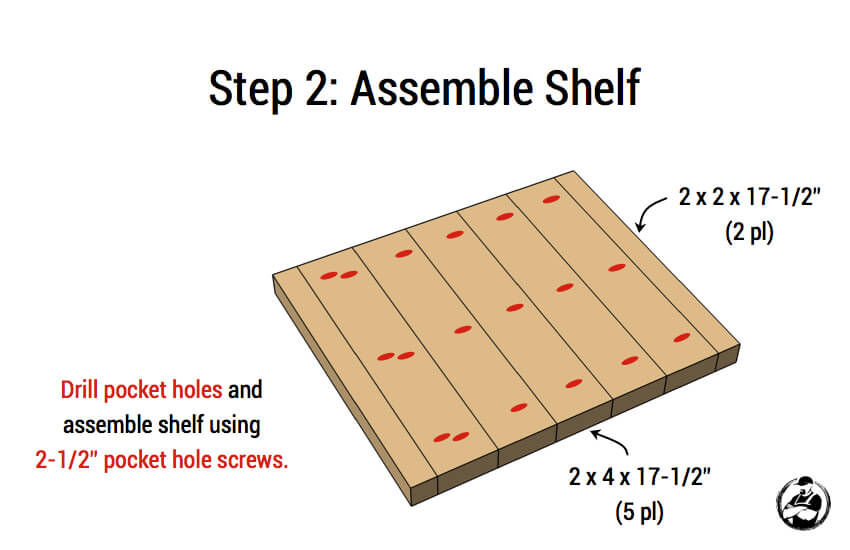
Step 2
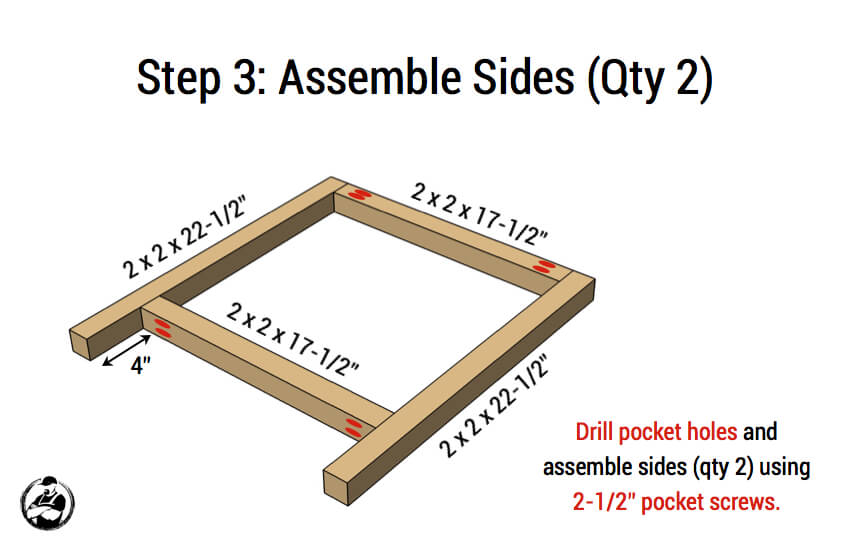
Step 3
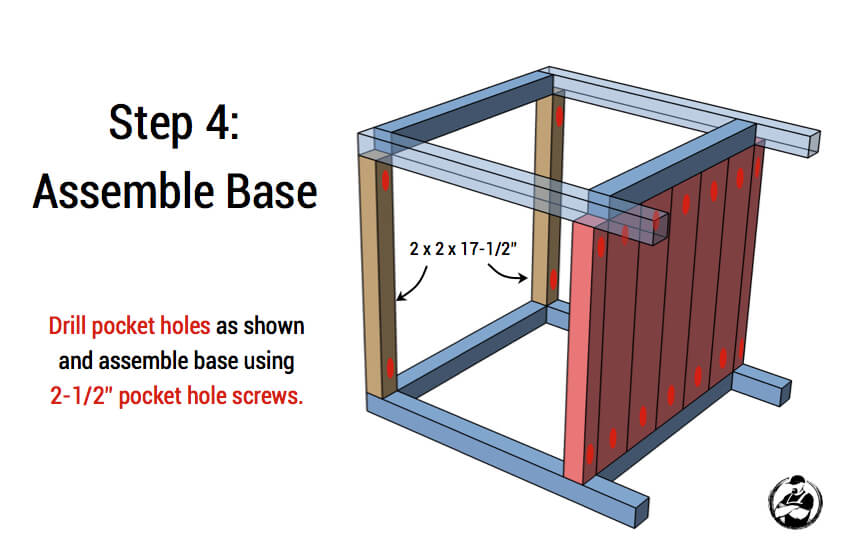
Step 4
Step 5
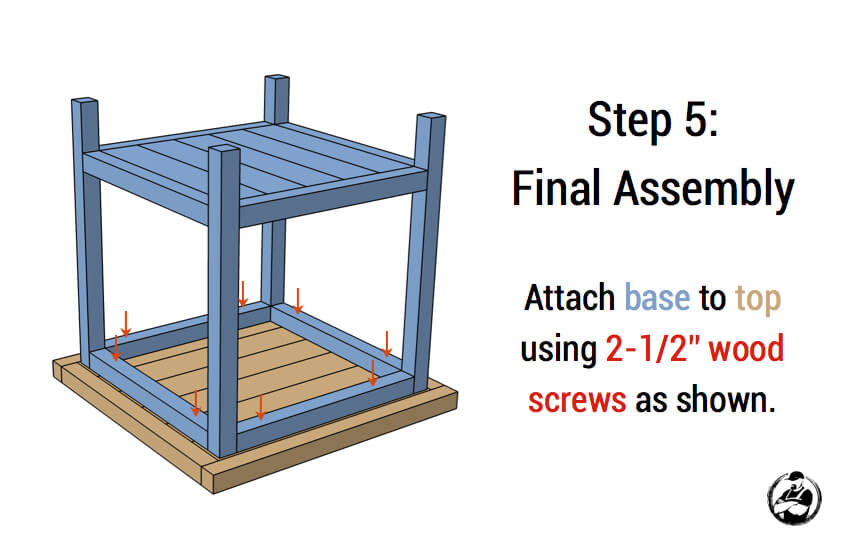
Every dimension, the full cut list, and the printable diagrams for each step are in the plans above.
Simple Square Bedside Table Plans
The complete printable PDF — full cut list, dimensioned diagrams, and all five steps — free in the plans store.
Questions? Comments?
As always, if you have any questions don’t hesitate to comment below — and don’t forget to post pictures of your finished tables in the comments! ENJOY!
Thanks for the plans. I finished my side table last night for my son’s rustic themed bedroom. I’m looking forward to making more projects from your plans. Thank you again!!!
That looks amazing! Great job and keep up the good work. Happy building!
Reattaching photo that was removed
I wanted to let you know that as I was doing the pocket holes for my project after I had cut all the pieces I noticed that the table tops call for 2 2×2 pieces at 21″ long but that your cut list only calls for 24″, 22.5″ and 17.5″. I think that 2 of the 17.5″ cuts should read 21″ cuts. An oversight on my part. Luckily I bought extra. Can’t wait to finish the project.
Veronica, I noticed the same thing when reviewing the plans. I’m preparing to do the same project. So is the cut list here right, or should 2 of the 17.5″ cuts actually be 21″? TIA
Crap. Sorry about that but thanks for the heads up. Actually, two of the 2x2x24″ boards should be 21″. I’ll fix that.
never mind i figured it out. 🙂
As a super new DIY-er, especially with wood-related projects, as well as living in an apartment building and having no tools.. What are the chances this would work with some sort of wood glue/adhesive? Or any ideas of substitutes that I could use? Thanks!
P.S. It looks so good!
Ava, welcome to the world of DIY. Trust me once you get started you will want to build all of your furniture! Wood glue alone won’t provide enough strength for this table. Kreg has a very affordable and small pocket hole jig, similar to what I used for this post, which would allow you to put together this table and most of the DIY furniture plans I have on this site. My suggestion would be to purchase and drill and a R3 pocket hole jig, and get the wood pre-cut at Home Depot. This is a small tool so it will allow you to get your DIY on while not taking up too much space.
Where did you buy those black corner braces? I looked at Lowe’s and they only had unfinished “silver” ones, and the black and bronze braces at Home Depot were all too small.
I got them from Home Depot and they are the silver ones, I just spray painted them with Chalkboard spray paint. Check out my post on Remodelaholic for more details on that. http://www.remodelaholic.com/rustic-square-bedside-table-building-tutorial/
Also, do you put a cap or anything on the bottom of the legs?
No I didn’t put anything on the bottoms of the legs.
How do you keep the top and the shelf from bowing or cupping when you put them together?
I didn’t have any problems with that. If you purchase straight wood and its dry enough then you should have any issues
The stain looks great! Did you use any distressing technique when putting it on or did you just brush it on?
Thanks Blake! No distressing, just applied the stain and wiped off.
What stain did you use?
Ash by Varathane
I put a black finish on mine…
That looks great Dan. I like the black!
Jamison, what size corner braces did you use? I really like the look but am having difficulty finding larger black braces at my hardware store.
Here’s mine! I added an extra removable slat shelf for electronics and the like, I’ve been wanting an easy place to put things to charge but not take up all the table space. Thanks for the plans Jamison!
Are my pictures visible? Here they are again just in case.
That’s odd. They still aren’t showing up.
Do you do any work for hire? I would love to have this kind of nightstand…maybe with a drawer, made for me.
We don’t, however you can give these plans to a local builder and they should be able to make it for you!
Here is my finished product. Thanks for the design plans, turned out awesome!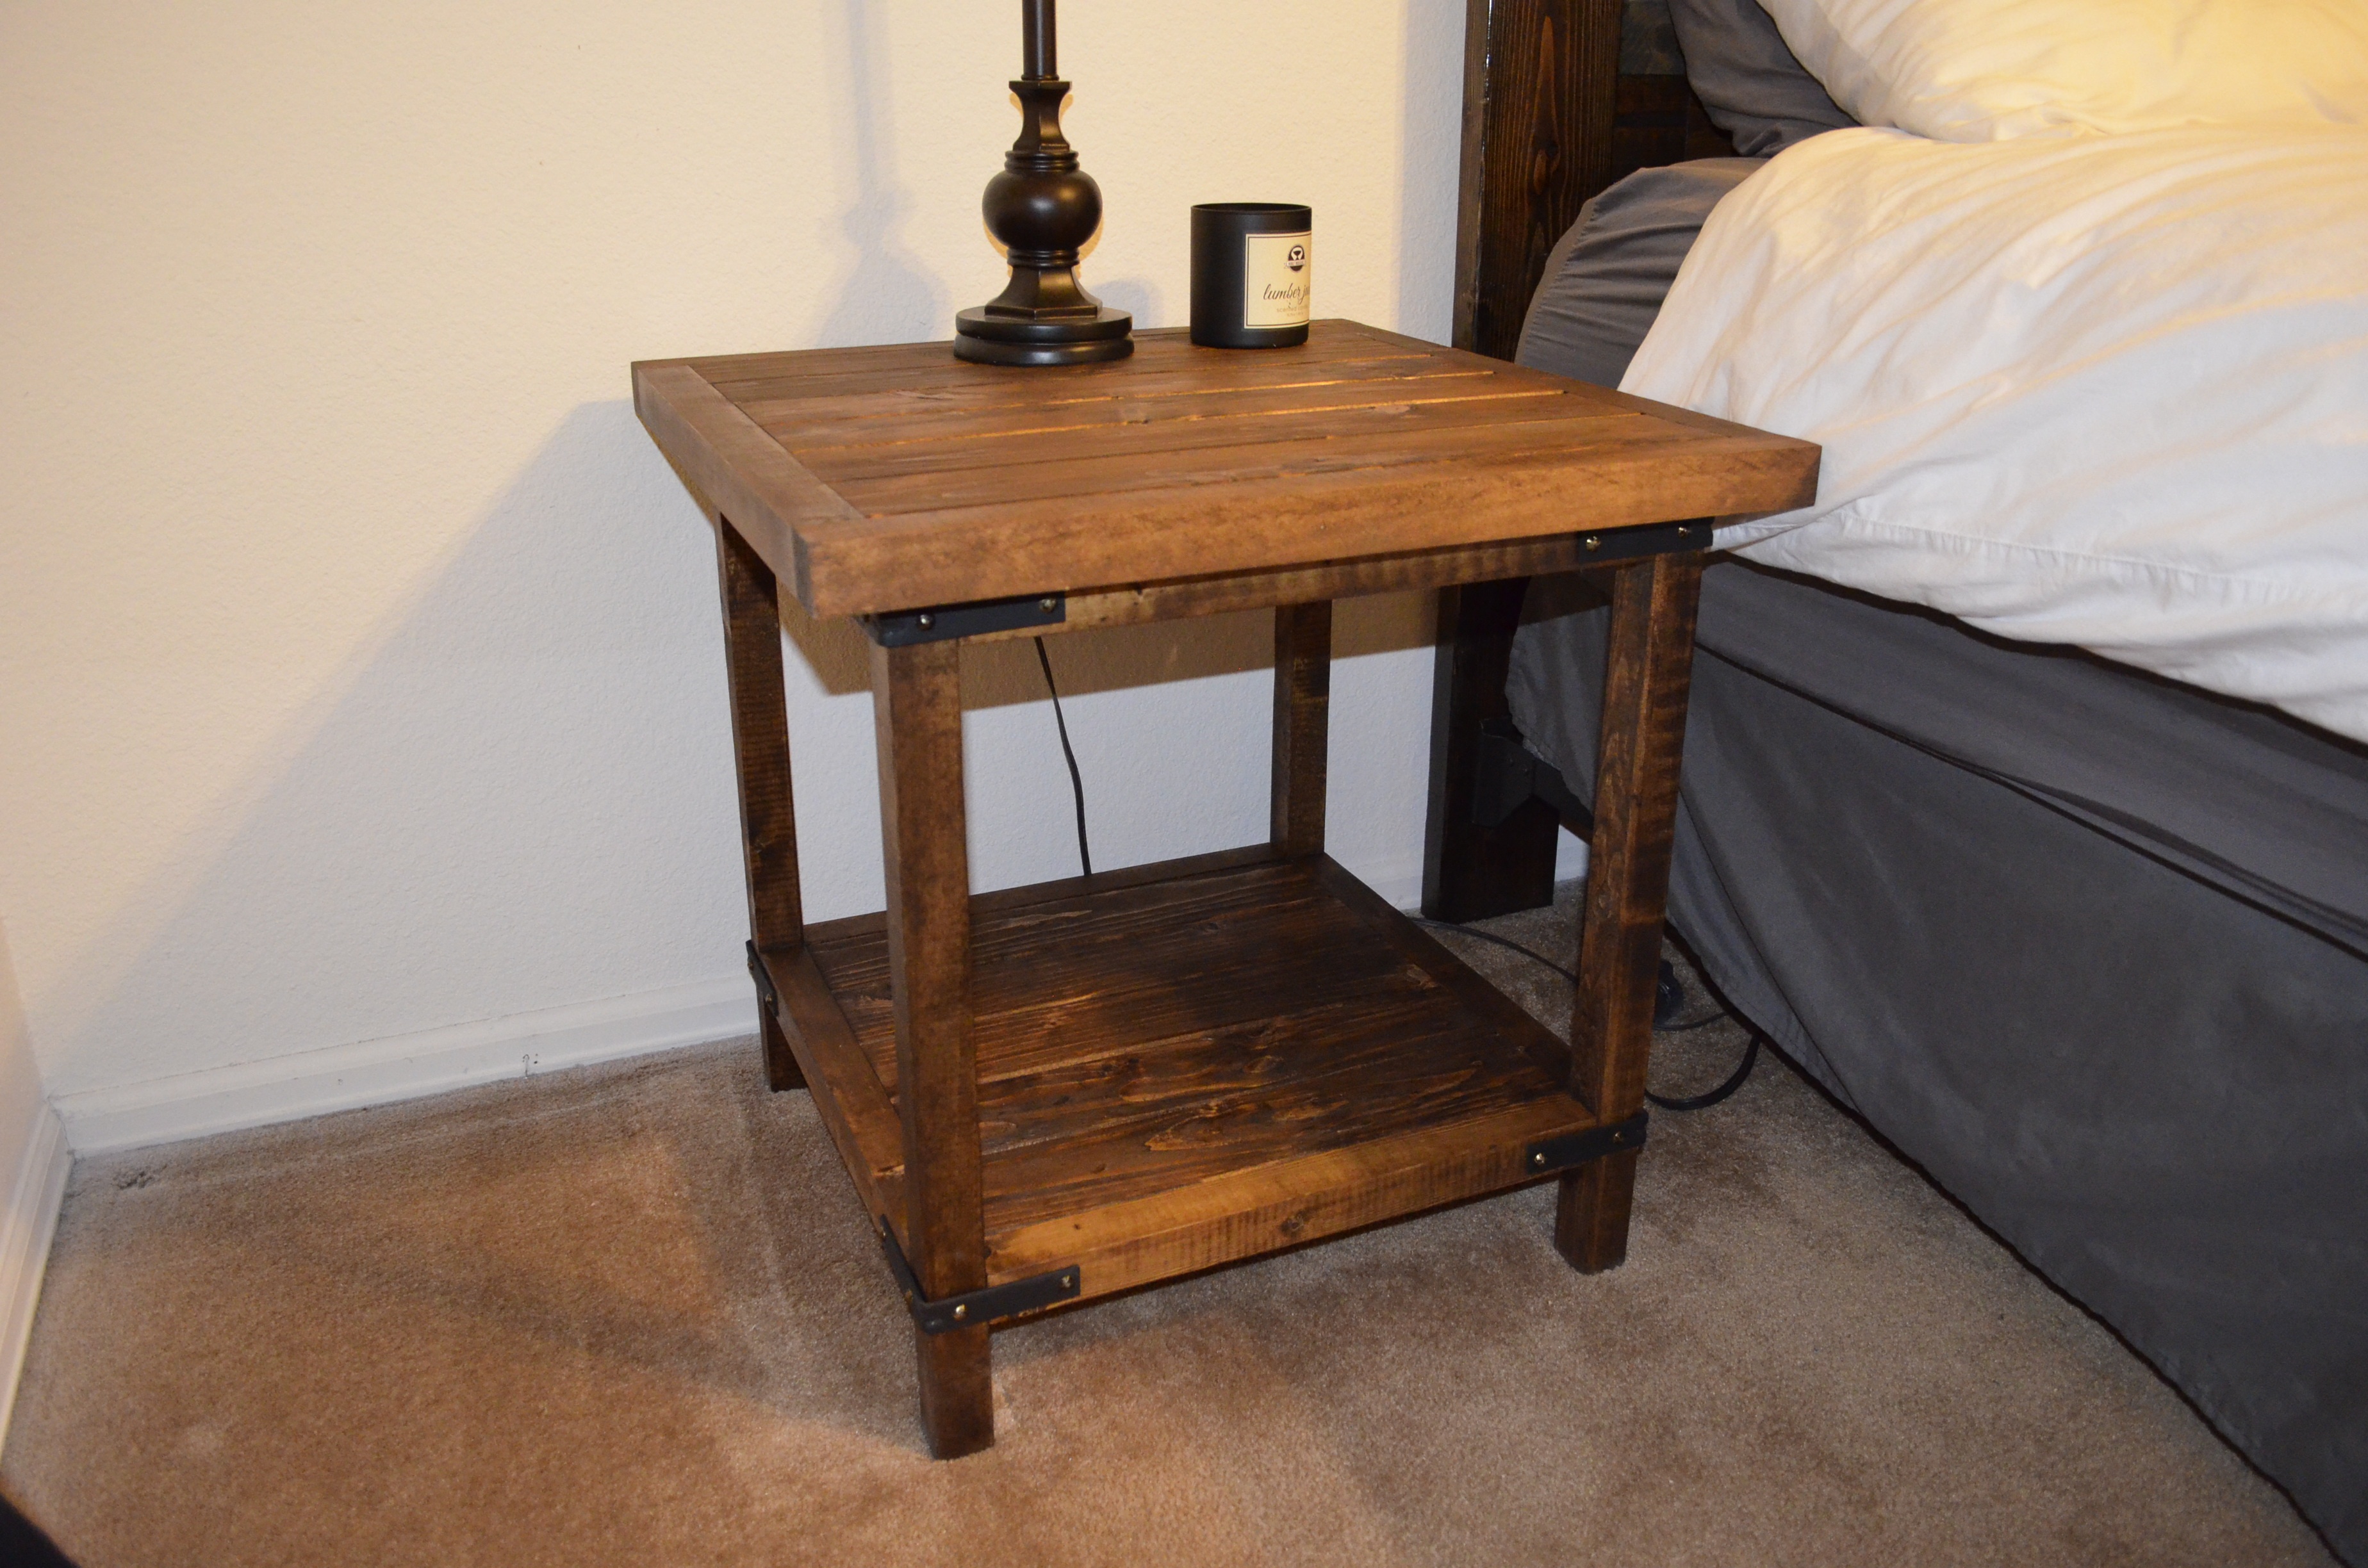
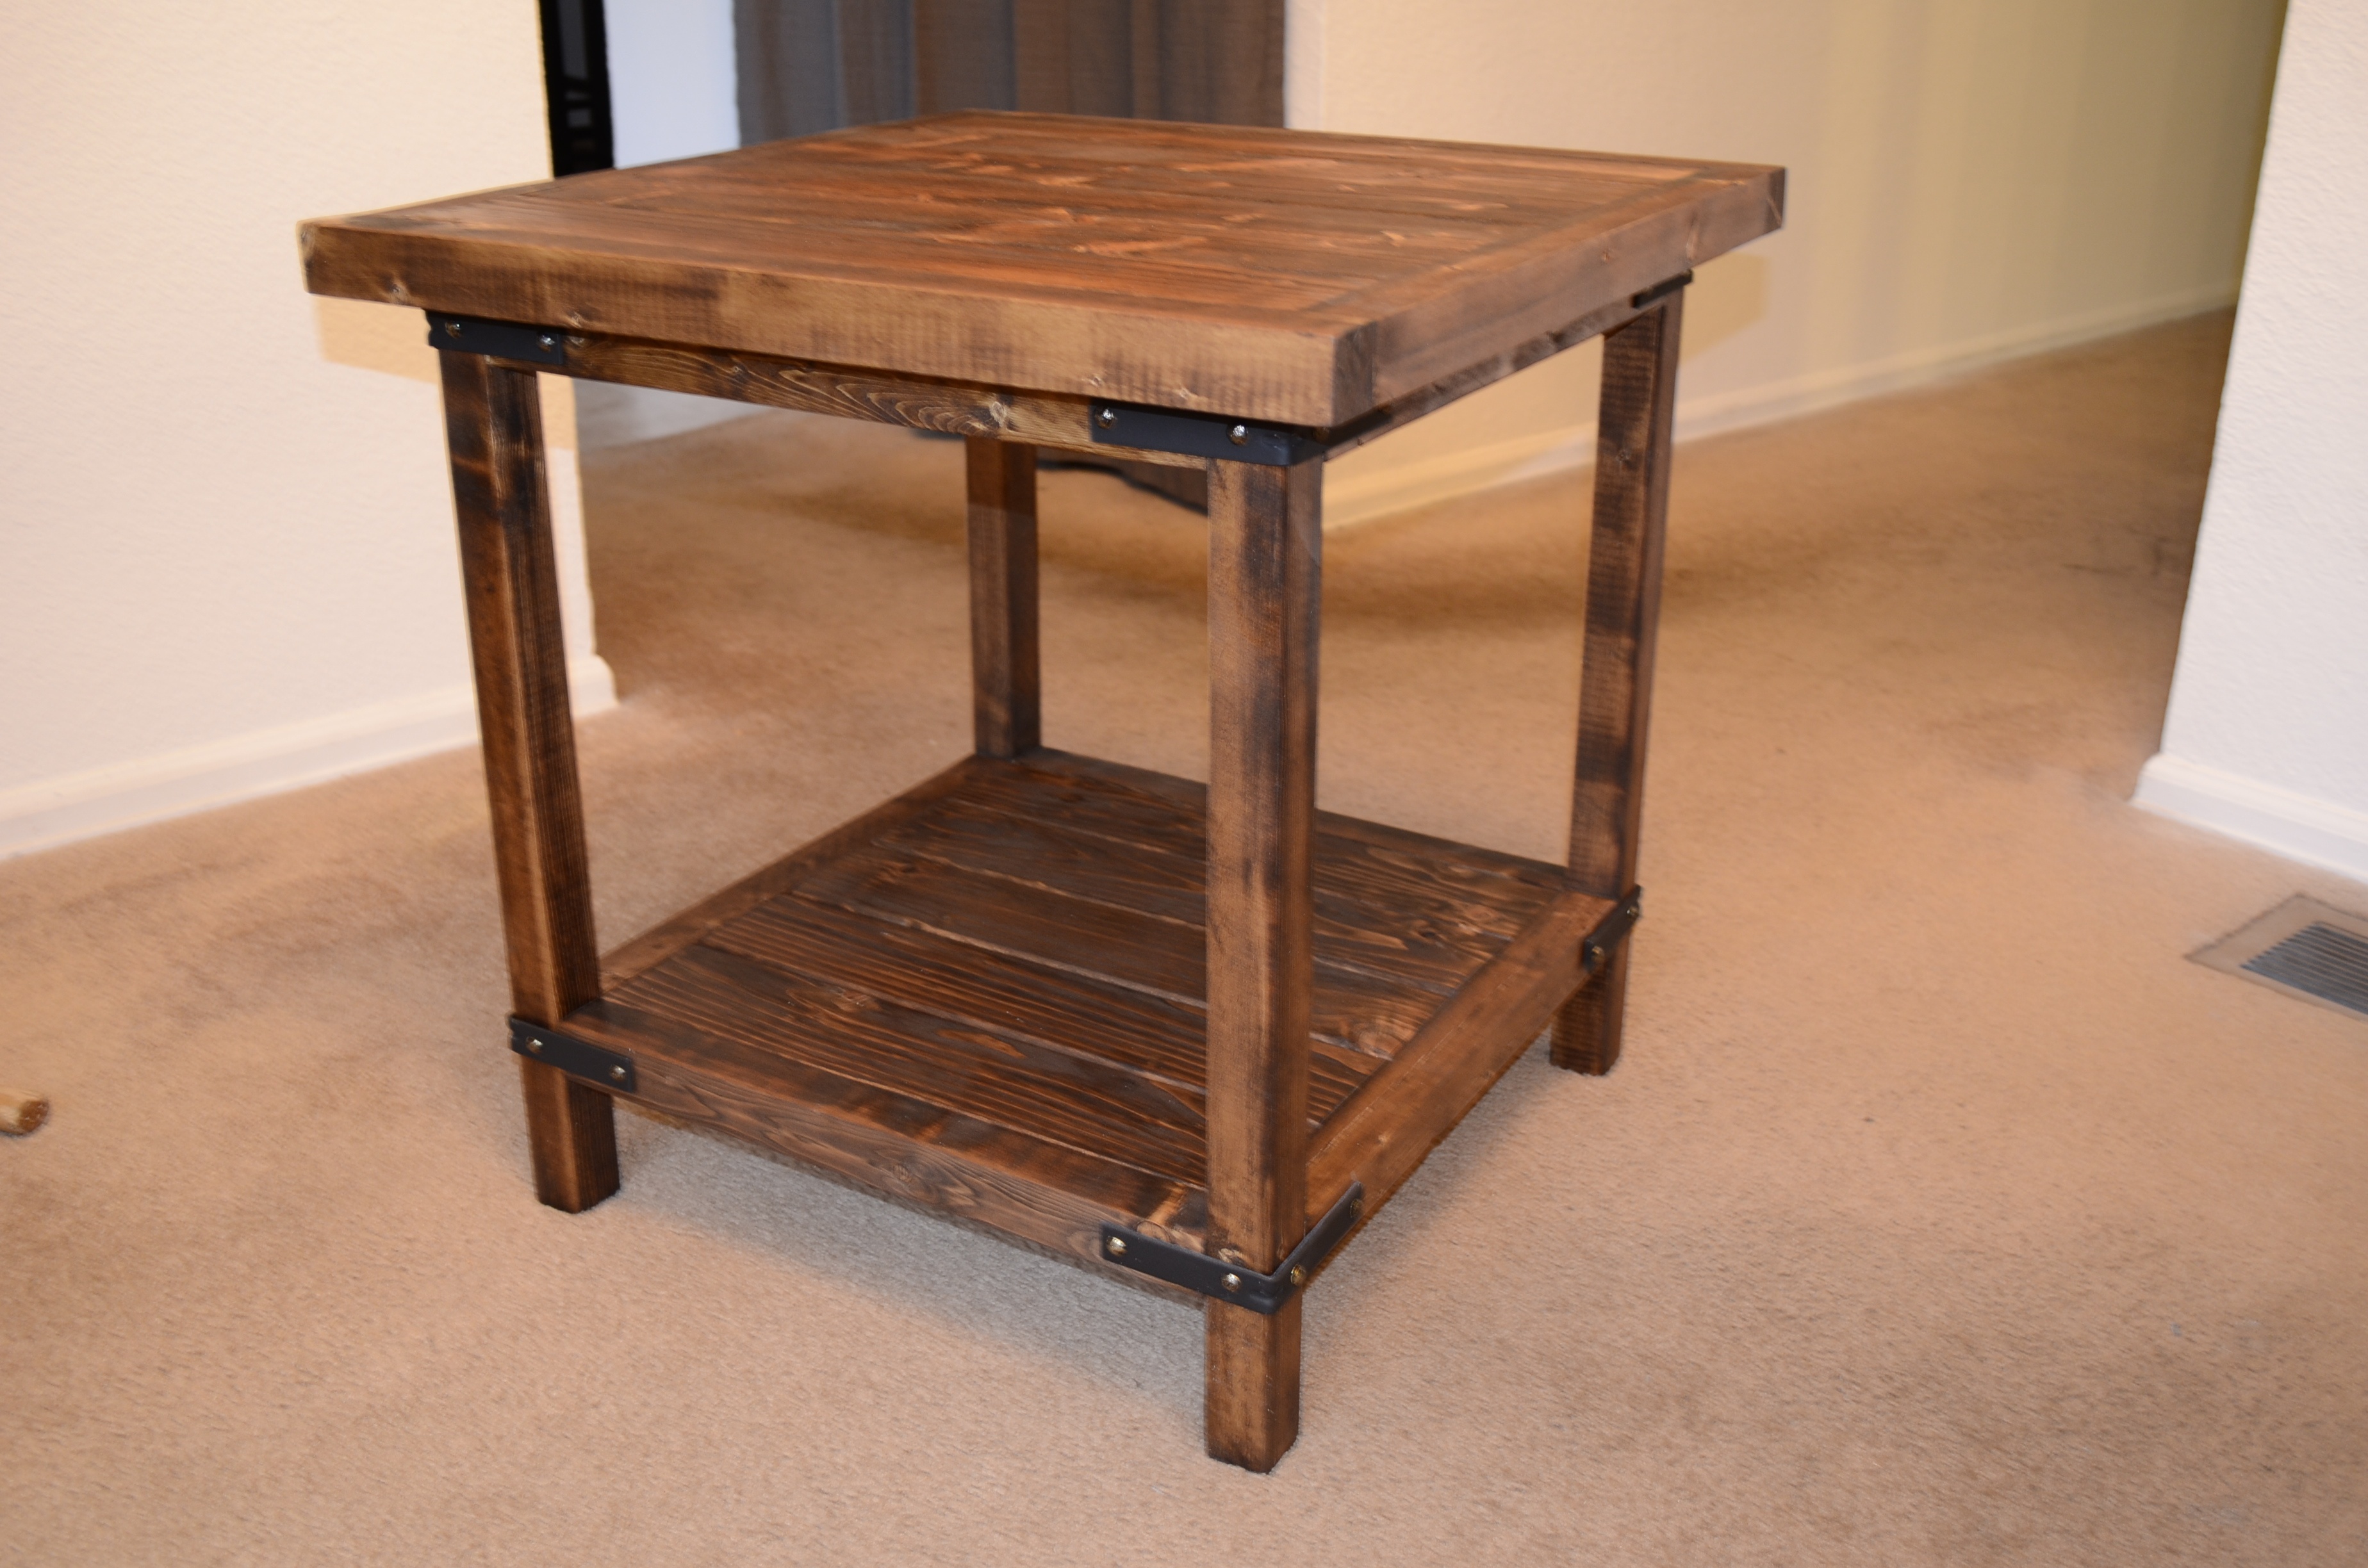
Stain- Minwax Provincial
Here are mine. I’m working to do a bench for the front of the bed as well. I stained them in “classic grey”.
Would it be fairly easy to use pipes and flanges for the legs instead of wood?
I really love the look of these pieces you make, and they’re so functional! The style of the bedside table is exactly what I’ve been looking for, and is definitely a reasonable cost. My problem is, for the space I have to work with, it would be too wide. I do understand I would need to make some adjustments in the amount of materials it would take, and some of the cuts, but is there any reason I can’t just cut the width measurements in half and make 2-12″x24″ tables? This may be a silly question, because it seems obvious it should be ok, but thought l’d check since I’ve never built anything out of wood before. And any tips/suggestions to make those adjustments go more smoothly would be very appreciated! Thank you!
Is the materials list just for 1 table, I am planning to make two so should I double?
My first diy project ever! Love it!
This is exactly the look I’m interested in, but I need a drawer to hide stuff like cables, medical devices, etc. Any suggestions for how to incorporate a drawer and maybe a mid-level pull out shelf?
I had thought of building the drawer and just using additional rails to cover it on sides and back — it doesn’t look that hard, but then again, I’m not a rogue engineer (or any other kind of engineer 🙂 )
Beautiful table! Do you have any plans for a matching coffee table?
Just want to thank you for your free plans which has given me the opportunity to learn something new and creative. Made a few mistakes but I know what they were and will try to improve on the next project.
All the best.
Thank you for this tutorial, forgot a 2 by 4 on the lower shelf as you can see but still worked out and looks decent, ill probably add crosses on each sides to make it extra sturdy, now i only have to stain it id says difficulty wise its 5/10 my first build https://uploads.disquscdn.c…