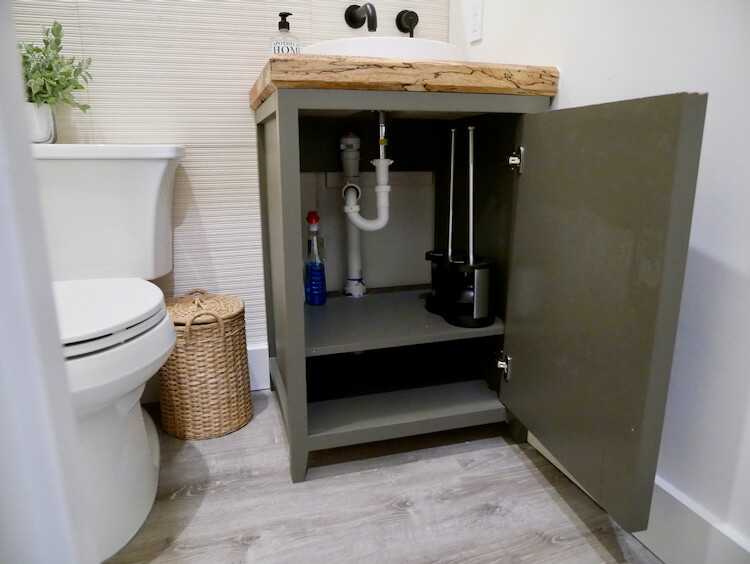
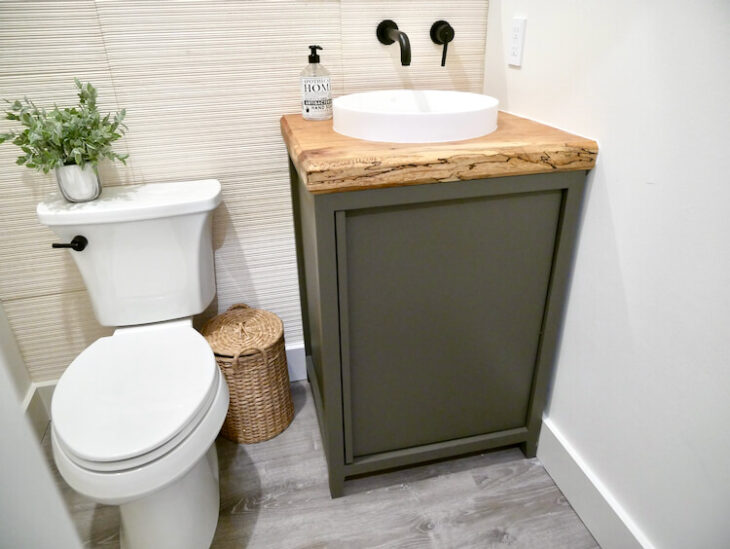
When we decided to finish our “roughed-in” 1/2 bathroom in the basement, we knew we needed a vanity. At first we looked to purchase one but come to find out, they are pretty expensive and the wall mounted faucet made finding a vanity with no faucet holes pretty difficult. After deciding on a simple design we opted to build it ourselves for a fraction of the cost. With the simple, single-door design, we wanted to add a cool, routed handle to the door. While these plans are just for the base, you can make it your own, like we did, with a custom top (we used leftover 2″ thick cypress slabs), cool vessel sink and faucet.
If you love this stuff as much as we do, you might want to consider following us on Instagram where we post sneak peeks and behind the scenes stuff in our stories. Also, did you know you can get tons of projects plans from all around the web when you follow us on Facebook and Pinterest!
Tools
Materials
- 3/4” x 4’ x 8’ Plywood Sheet
- (4) 2 x 2 x 3’ Select Pine Boards
- OR (2) 2 x 2 x 6’ Boards
- (2) 1 x 2 x 8’ Select Pine Boards
- Iron-on edge banding
- Frameless Inset Concealed Hinges (Pair)
- 1-1/4” Wood Screws
- 1-1/4″ Kreg Pocket Screws (Coarse)
- Wood Glue
Disclosure: The links provided in the “materials” and “required tools” sections are affiliate links. If you would like to support our site and help keep our content free come find out more about how we can make money with no extra cost to you.
Dimensions
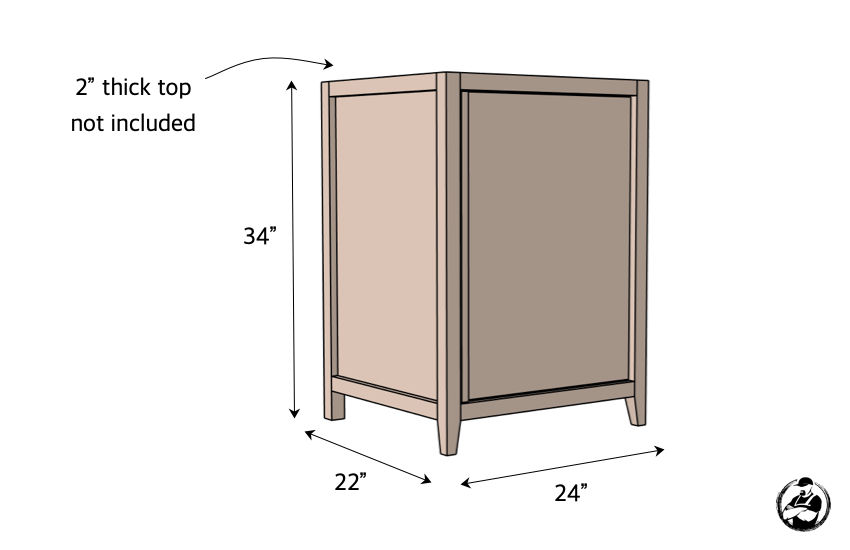
Time needed: 2 days.
This step by step tutorial will show you how to cut and assemble a 24″ wide bathroom vanity base.
- Cutting the Wood
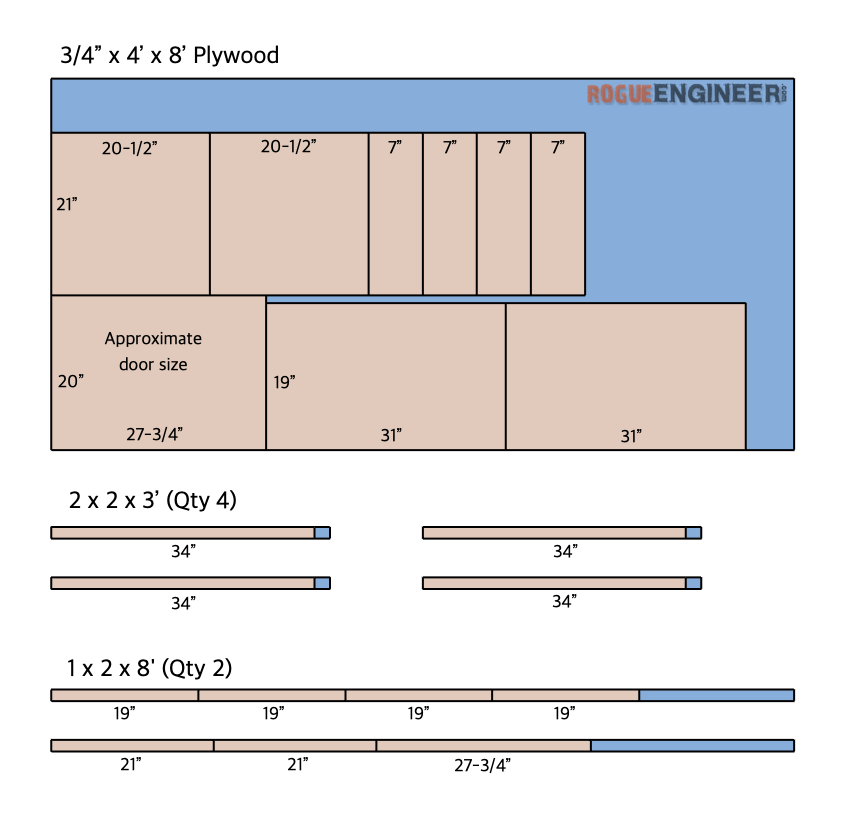
Using the diagram below cut the lumber to size with a table saw, track saw, and miter saw. - Taper the Front Legs
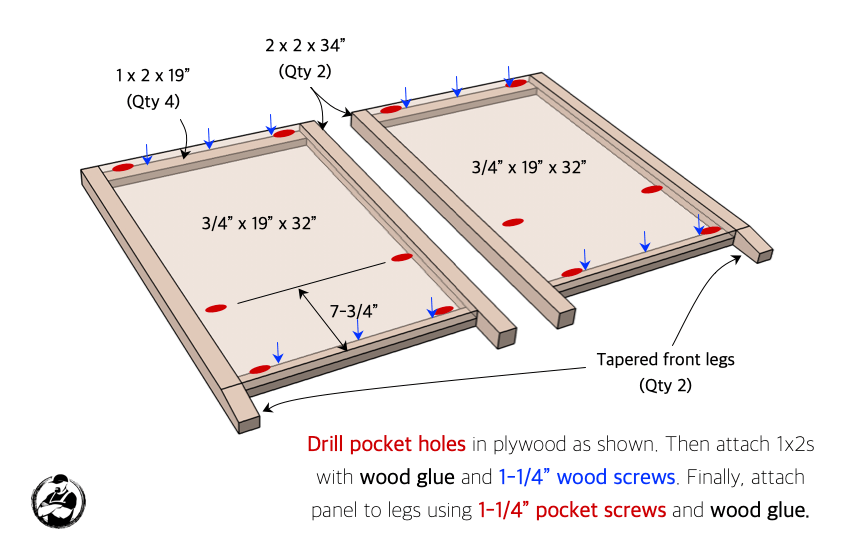
- Assemble the Sides
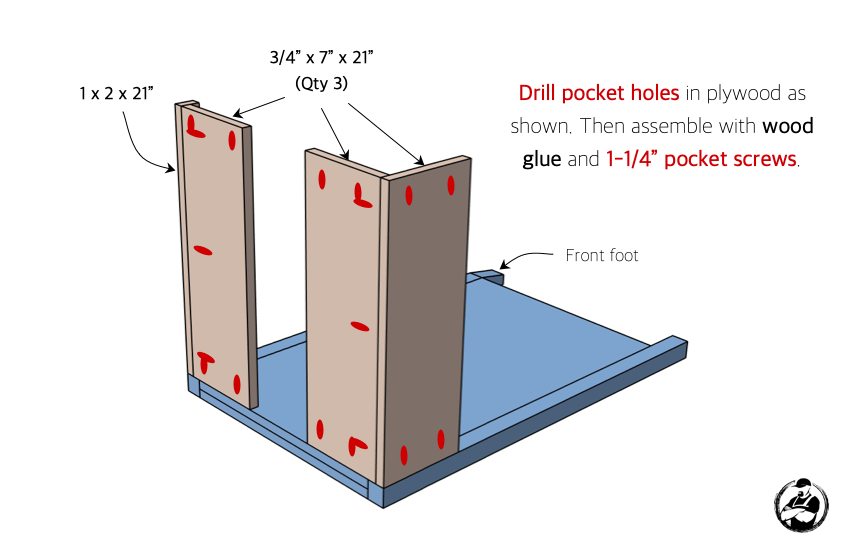
- Assemble the Base
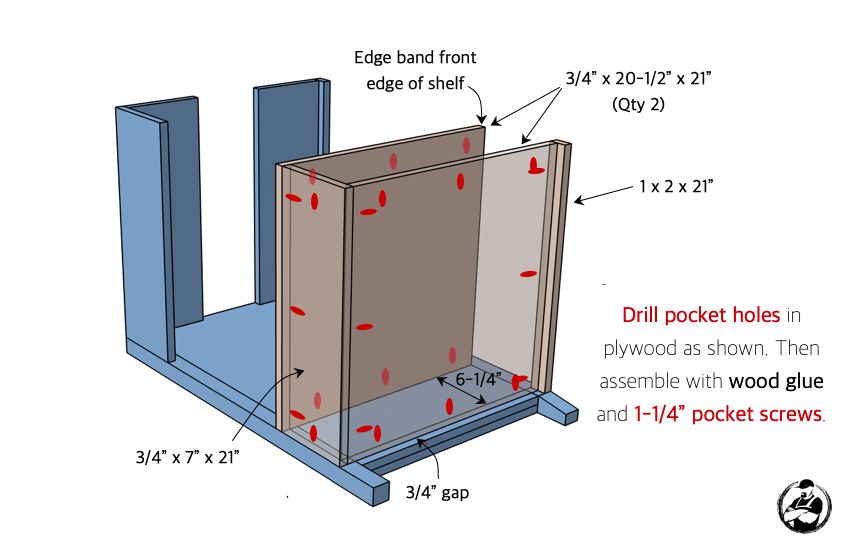
- Assemble the Base (cont.)
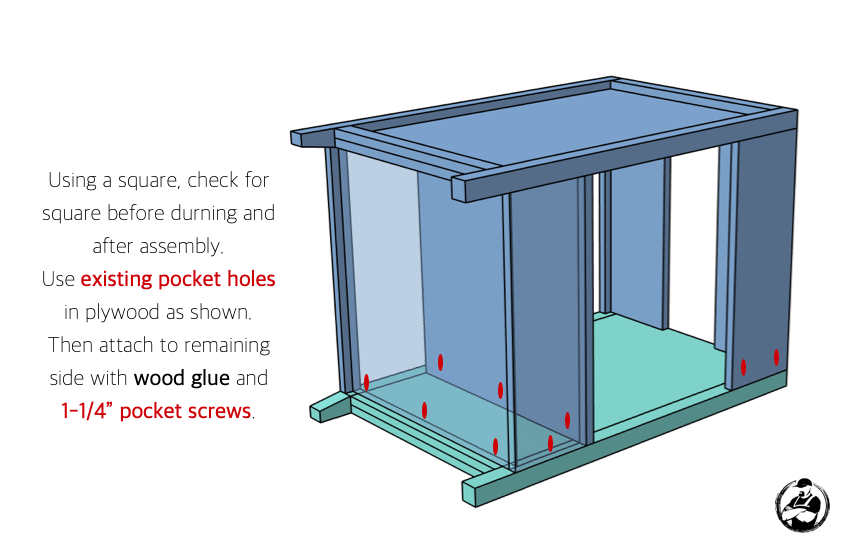
- Assemble the Base (cont.)
- Assemble the Door
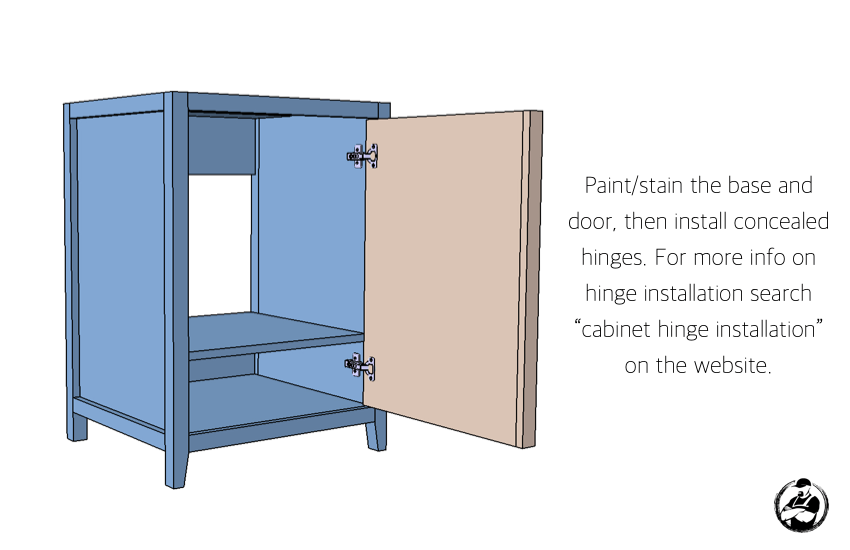
- Finish and Install the Door
