

DIY Portable Lumber Rack
Quick answer: This portable lumber rack is four 2×4s and four casters — a rolling home for the scrap pile with vertical bays for boards and sheet goods. It’s the 30-minute shop project that pays rent every single day after. Free tutorial below and a free printable PDF.
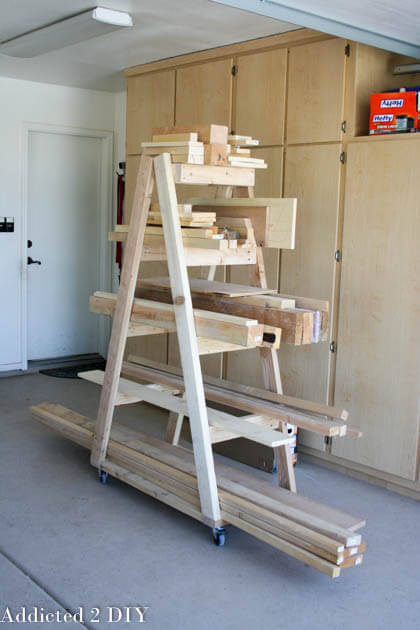
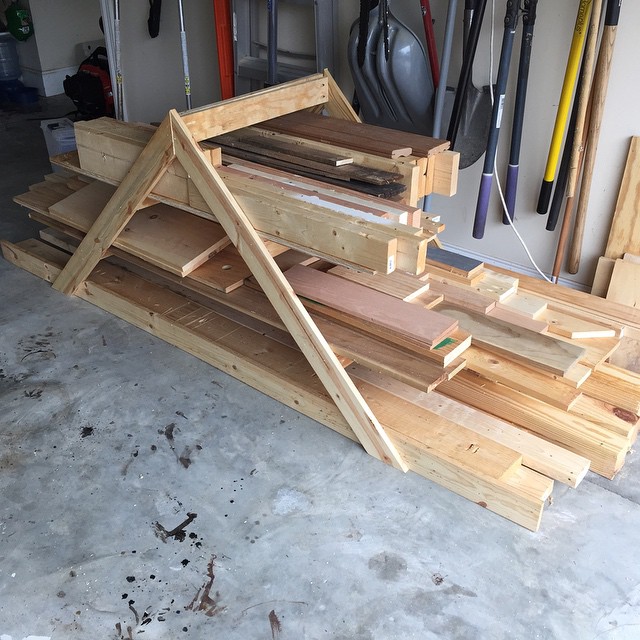
A few weeks ago I opened the garage door and hit my boiling point with the scrap wood pile. Out of impulse I pulled it all into the driveway and threw together something quick to organize it — then posted it on Facebook and Instagram with a promise: if enough folks wanted plans, I’d write them up with my “wish I’d done it this way” mods. You did, so here they are.
Simple Portable Lumber Rack Plans
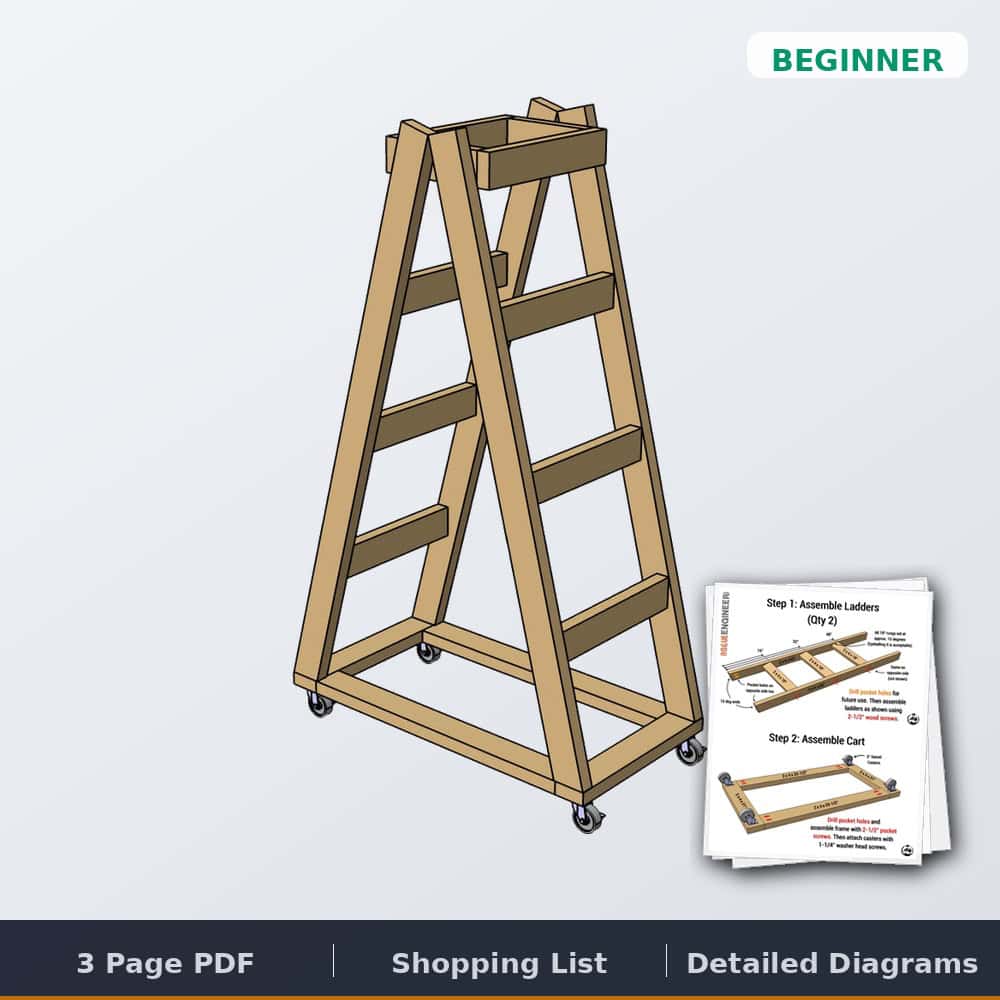
The complete printable PDF — full cut list, dimensioned diagrams, and all four steps — free in the plans store.
Tools & materials
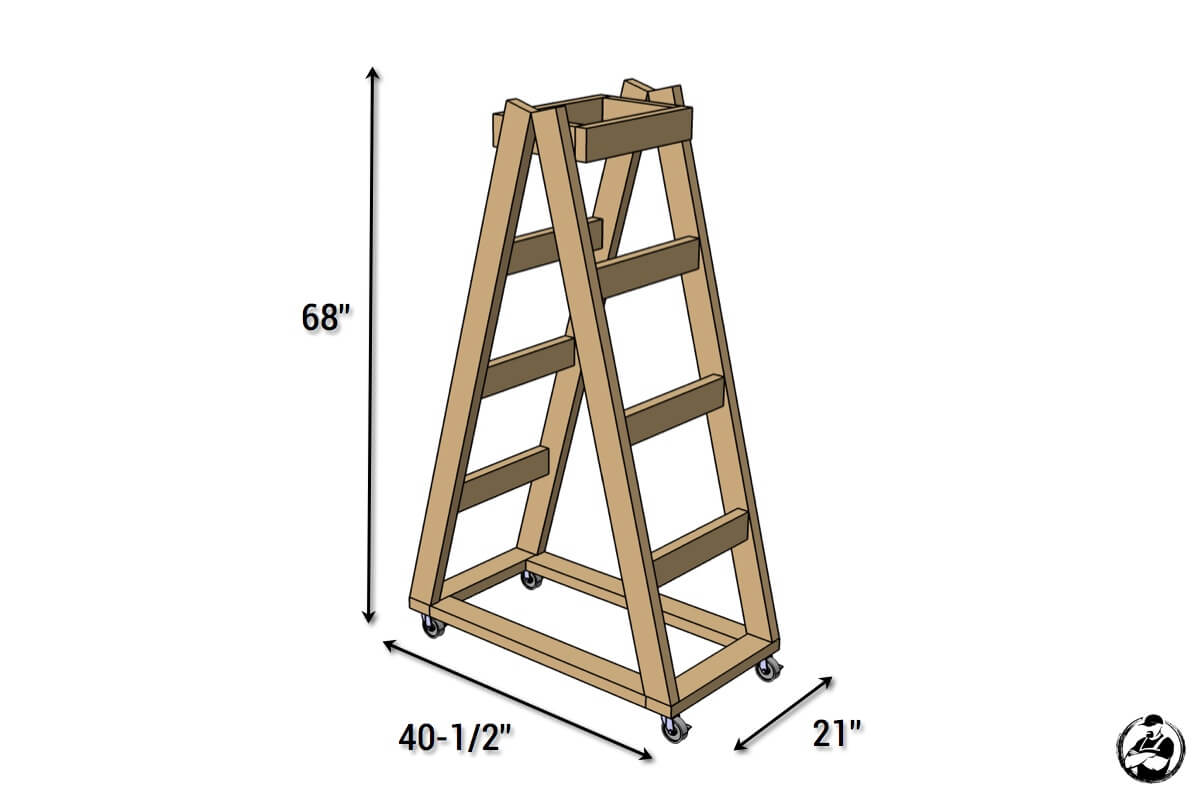
Dimensions
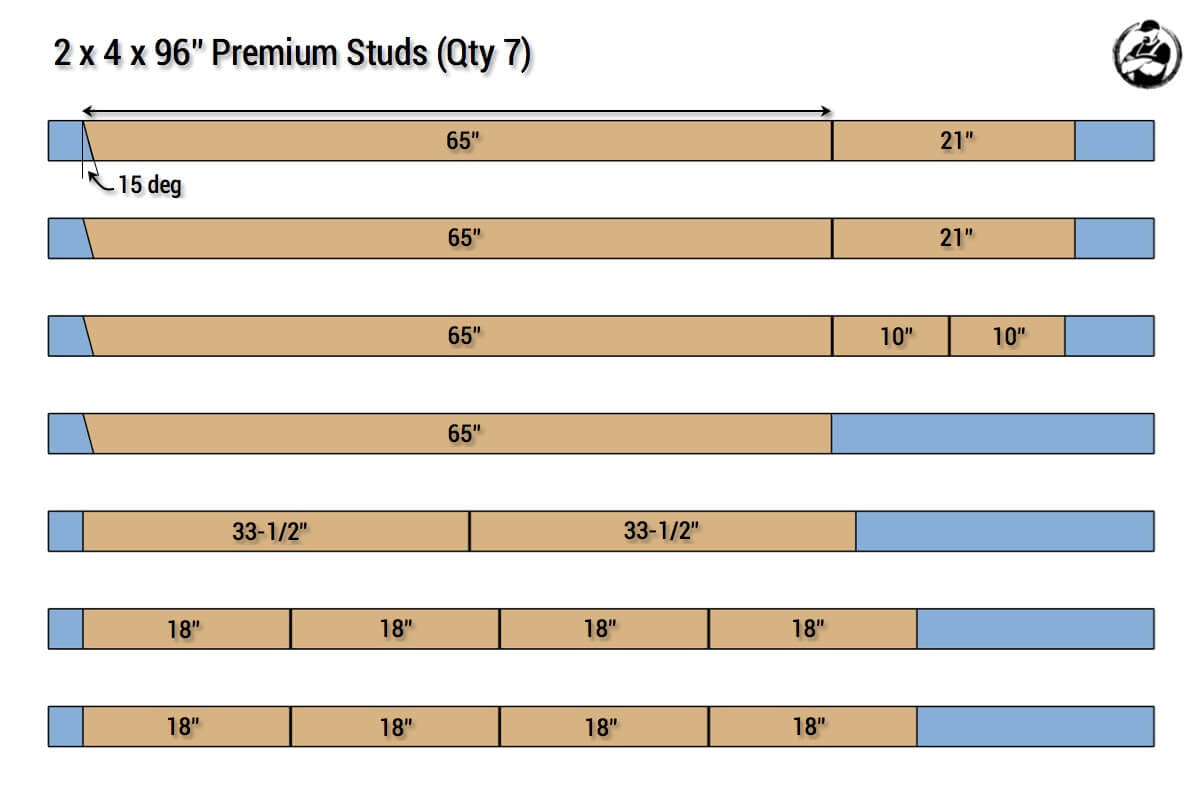
Cut list
The build, step by step
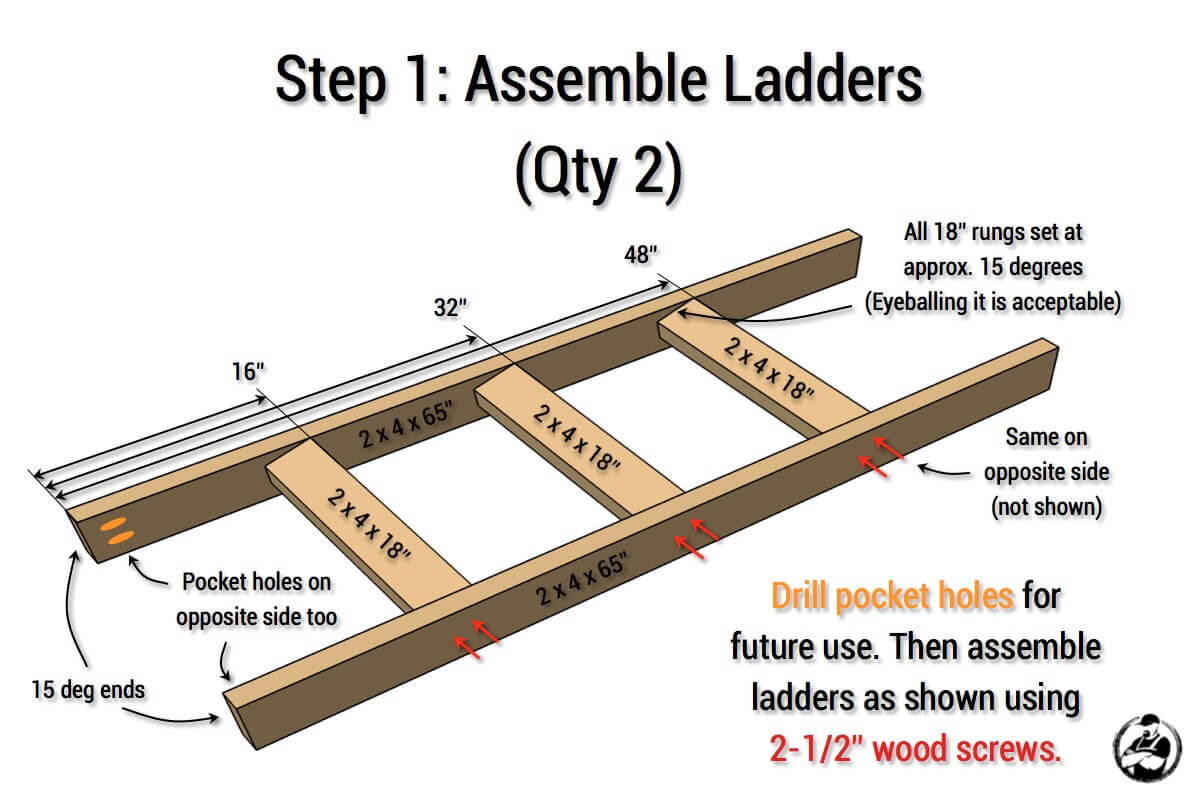
Step 1
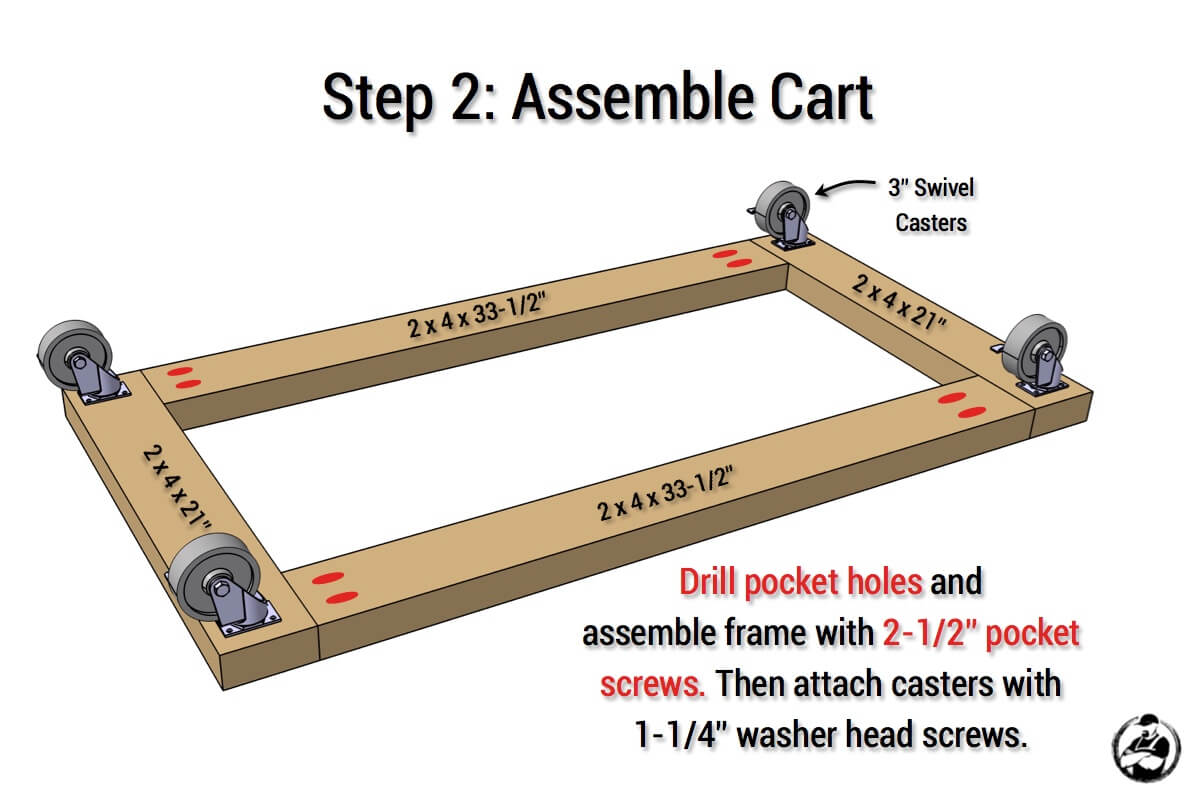
Step 2
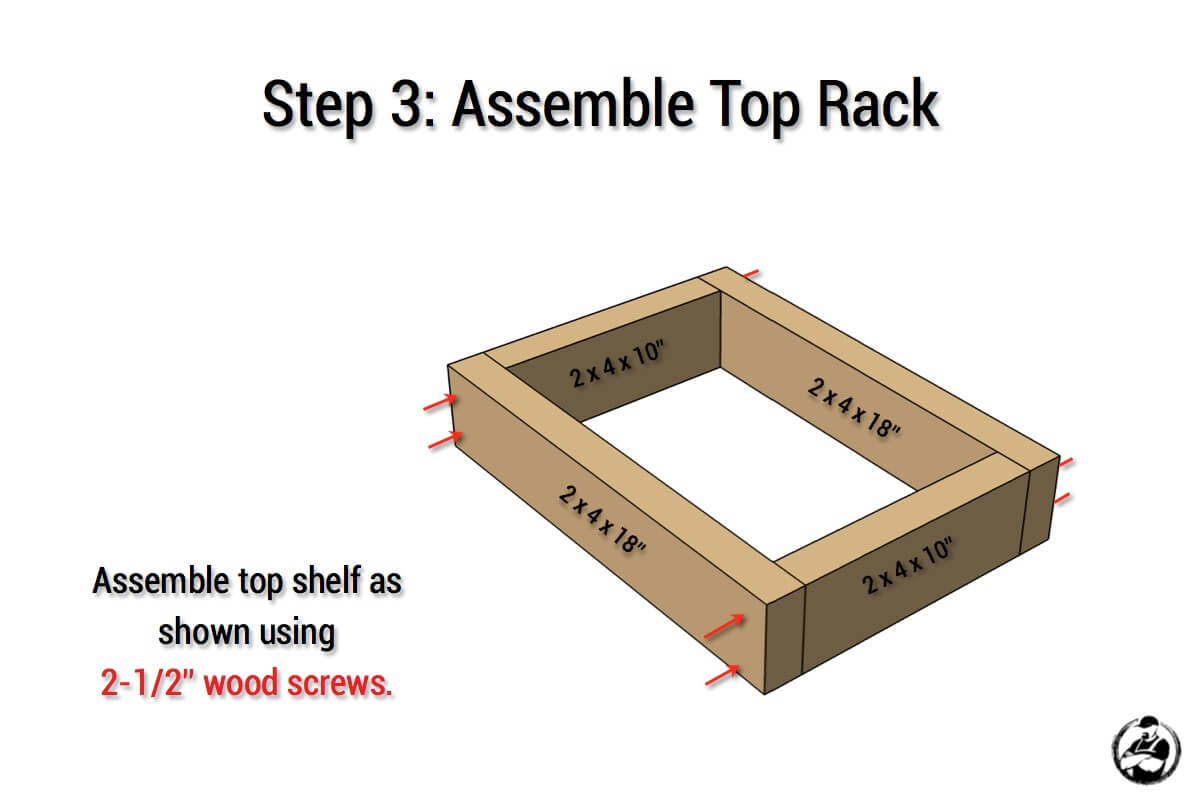
Step 3
Step 4
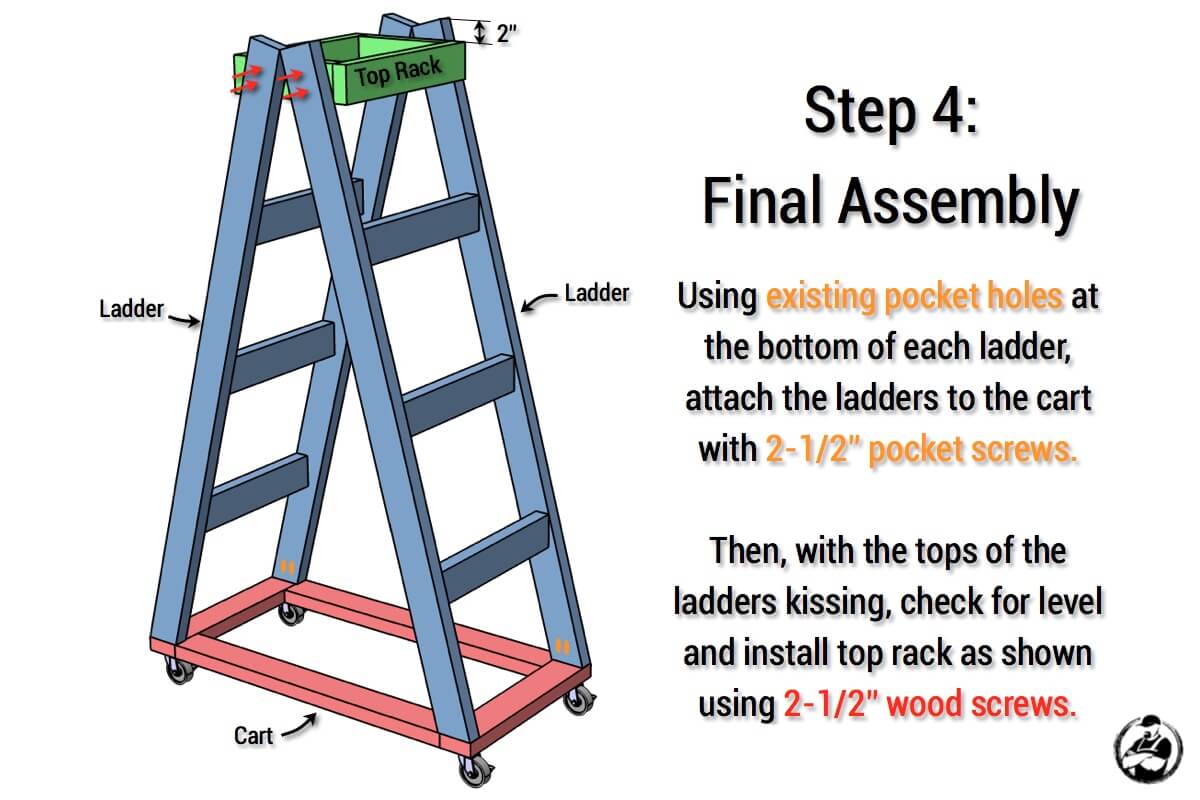
Every dimension, the full cut list, and the printable diagrams for each step are in the plans above.
Simple Portable Lumber Rack Plans
The complete printable PDF — full cut list, dimensioned diagrams, and all four steps — free in the plans store.

Questions? Comments?
As always, if you have any questions don’t hesitate to comment below — and don’t forget to post pictures of your finished racks in the comments! ENJOY!
Ok, my question may be silly, but do you store the wood vertically, or horizontally (like ur pic). Cuz if its vertically, dont I need a bottom shelf?
The wood should be stored horizontally on this rack Max.
Smh
Thank you so much for these plans! My excess lumber was totally getting out of control. I was able to put this cart together really quick. Total cost, including casters was $30. It is the perfect size and very easy to maneuver around.
No problem Amy! That’s great to hear. Thanks for the feedback.
Made the portable rack and added a place to put small plywood pieces on the side. Cleaned up my workshop nice- no pile of scrap lumber.
What a great idea Mark! I’d love to see a photo of it if your willing to share.
I just finished building this rack! Thanks so much for the plans. It has cleared up a great deal of space in my garage and it’s easier to see what I have in stock. 🙂
http://www.ashleygrenon.com/2015/06/diy-mobile-lumber-rack-plans-by-rogue-engineer/
That looks awesome Ashley! And it looks like its getting put to good use. Great post and thanks for sharing!
Reattaching photo that was removed:
You only need 6 studs to do this:
2 cut into 65″, 18″ and 10″ pieces
2 cut into 65″ and 21″ pieces
2 cut into 33 1/2, 18″, 18″, and 18″ pieces
It might be just a couple of bucks for a stud, but why make all that useless scrap? This cut makes for less waste.
Thank you?
revised cutting diagram
Reattaching photo that was removed
Many thanks for this plan. I have a lot of reclaimed pallet wood and have just finished a new garage and this rack is absolutely what I have been looking for. Starting build tomorrow.
Not all engineers work in aerospace… ; )
Love the design, I made a couple minor changes, just wanted to share:
The red area is 3/4″ ply to give a ‘bin’ to drop small cutoffs in, & to create a solid bottom to attach the three (yellow) 2×4’s. I came in 3″ from the edge and drilled a hole in the bottom & mounted a Tee nut. Used the router to cut a slot in the 2×4’s & used a star knob to fit the tee nuts. the blue strip is a 1×2.
Loosen the 3 star knobs, slide the 2×4’s out to desired length & re-tighten. Stack flat material on edge using the 1×2 as a ‘toe’ to keep the plywood bottom in place. (I wouldn’t go more than 8-10″ for the slot to avoid causing tippage due to weight of ply)
The last thing I did was put 2 lag eyes a few inches from the top (1 on each side) & attach a couple feet of small chain to each with a hook on 1 side, this secures the top of the ply.
The whole purpose of the extra work was so i could move the ply holder in flush when not in use, to avoid knee knocking & tripping.
Rod
Portable Lumber Rack
I just built this today and it solves all my problems for dimensional lumber.. I know the plans stated 7 (2×4) were need I did mine with less than 6.
Thank you for the great design
I too just finished this project and it looks awesome, thanks for the detailed instructions. Below you can see before and after pics. Oh and I concur I only needed 5 1/2 boards at 8′ length
Wow looks great! Saved you a ton of room too!
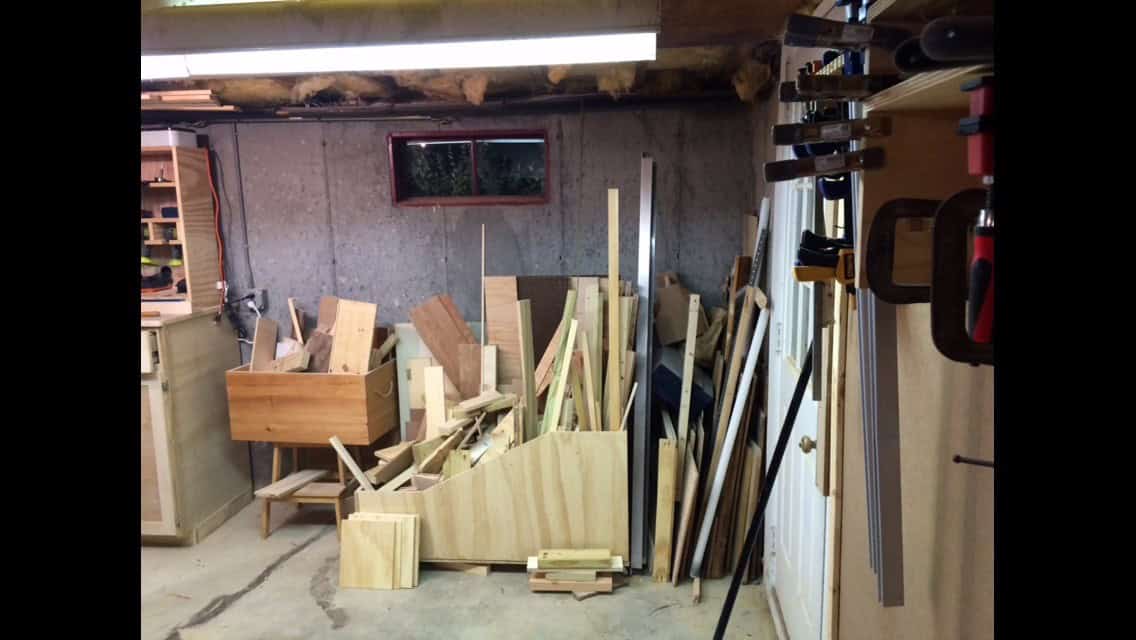
Looking to build storage cabinets for my garage– Do you have plans for the cabinets pictured in the background of the first portable lumber rack image?
THANK YOU!!
Thanks for the plans! This works great! https://uploads.disquscdn.c…
Thank you for a very cool design. I adopted it and did a few modification to it so that it can handle plywood too. Here are my diagram and sketchup file too just in case anyone wanted to play with it. https://bit.ly/3kTqTD7
Have you had any problems with the longer pieces of wood only being supported in the center, hanging under their own weight at the ends? Normally, it seems ideal to support wood along the entire length to prevent it from warping over time. Any issues with this so far?
Thanks for the plans!! Made a couple modifications to store sheet materials.https://uploads.disquscdn.c…