Covered Patio Makeover
Living in Michigan, the winter months can get cold and depressing. I learned early on that in order to endure this season we really needed to get outside and embrace the ice and snow. A few of our winter hobbies include sledding, skiing, and ice skating on our backyard ice rink. So we decided to tackle the project of finishing our walkout basement patio. It has been one of those projects that we’ve wanted to finish every year since we started building the backyard rink. This space is under a deck and mainly used to take a breather and warm up while ice skating. Having a space like this to enjoy the outdoors in the winter is so cool and we wanted it to be awesome. Check out the video and the blog post below for all the details on how we finished it off.
Full Project Video
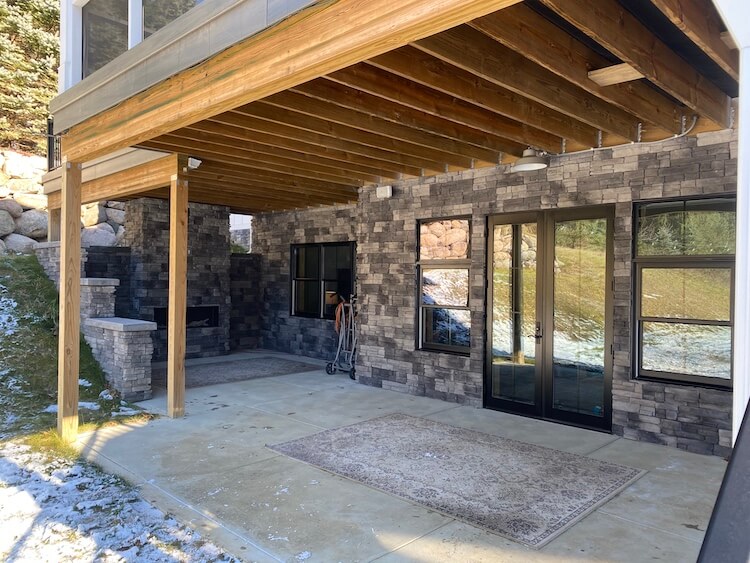
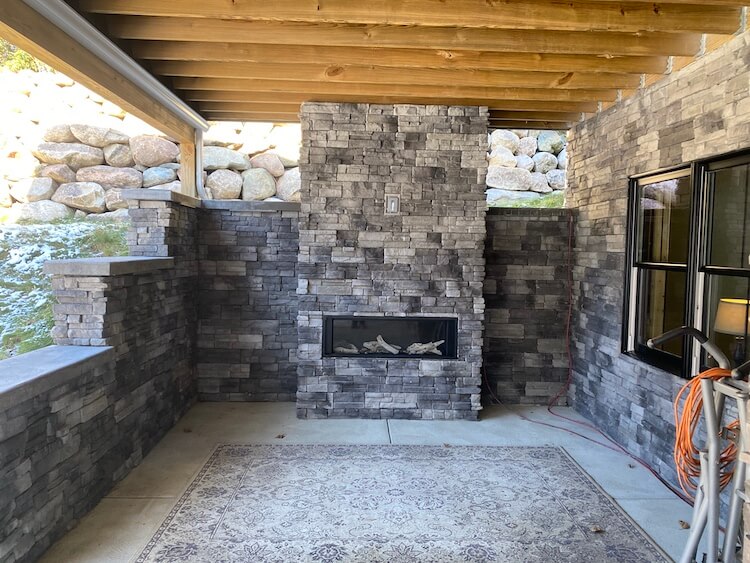
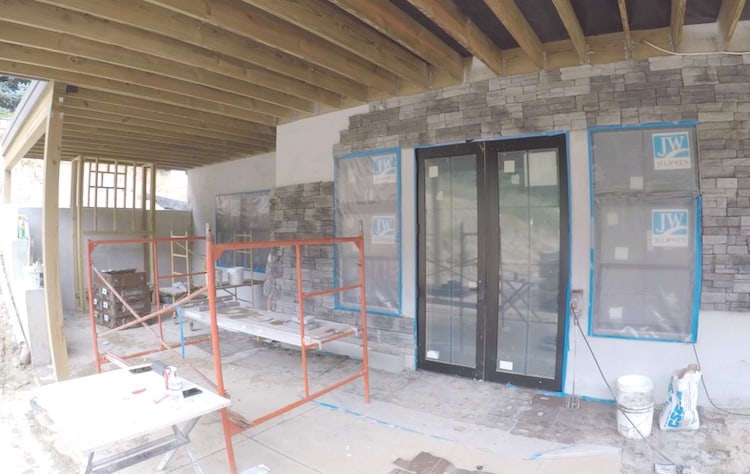
Before
Preparations During Construction
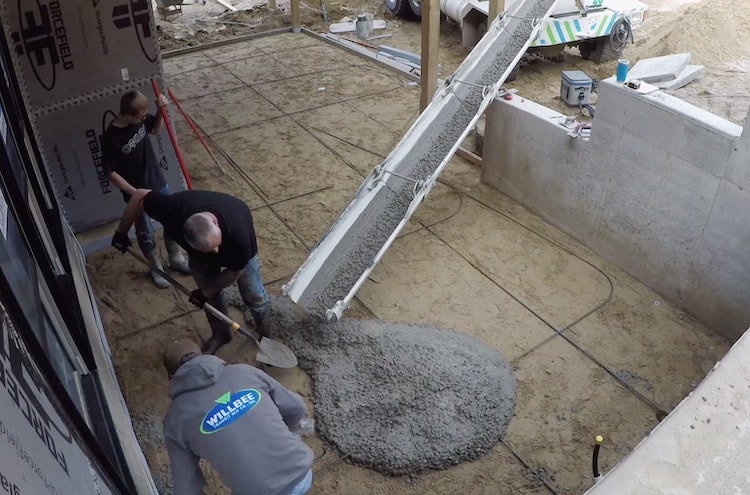
If you didn’t know, we built our dream home a couple years ago and there were a few things that we did to make sure this space was protected from the elements and comfortable. One of which was pouring the retaining walls, concrete pad and installing the stone veneer on the walls. All of which was contracted out.
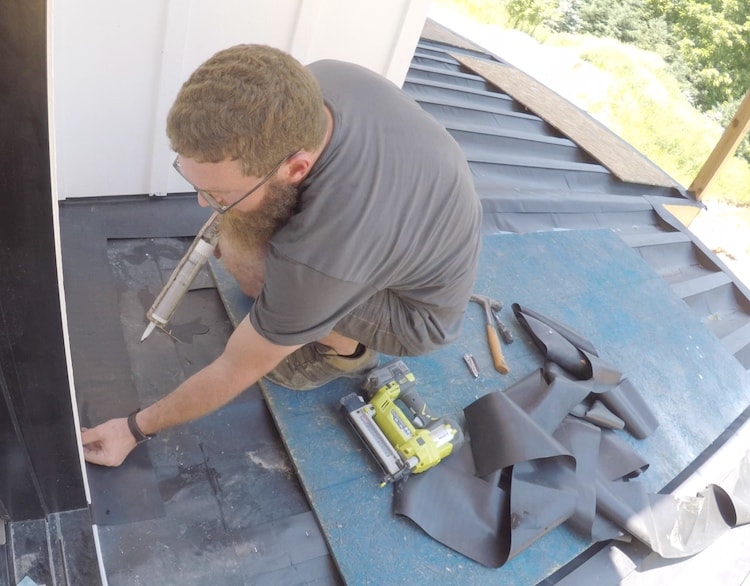
The other things Jamie and I did during construction was to waterproof the deck using the topside system from Dek Drain which is a rubber membrane that funnels the water into a gutter and takes it away, keeping the deck joist and the space below nice and dry.
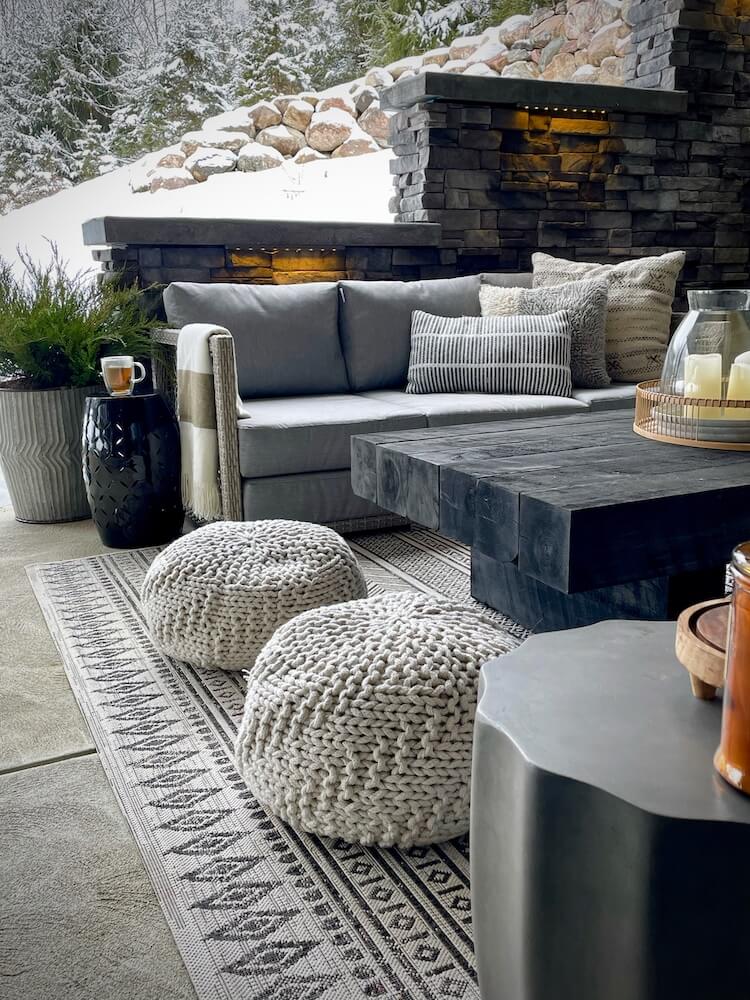
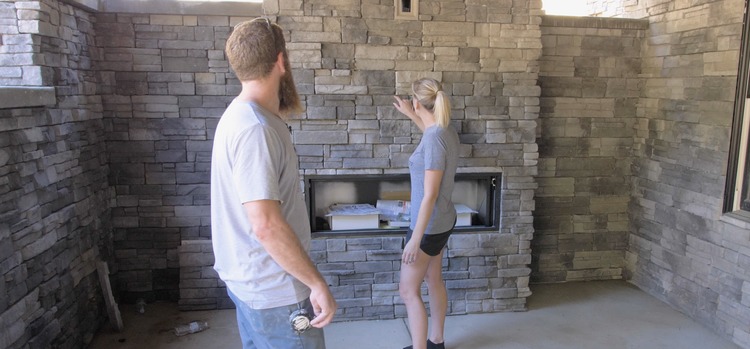
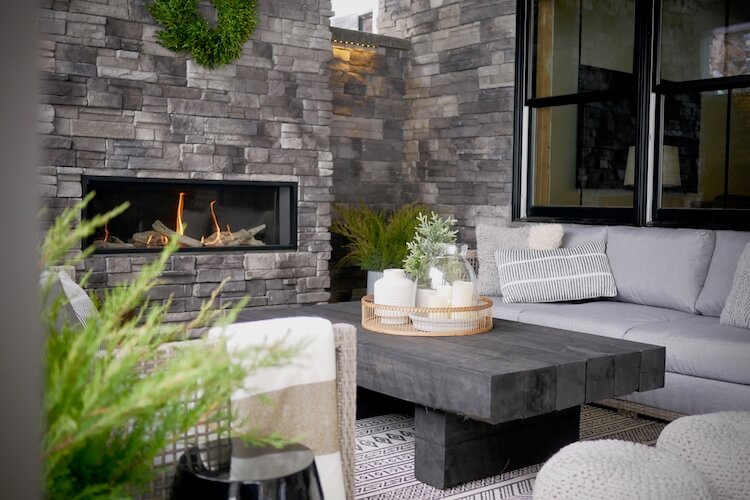
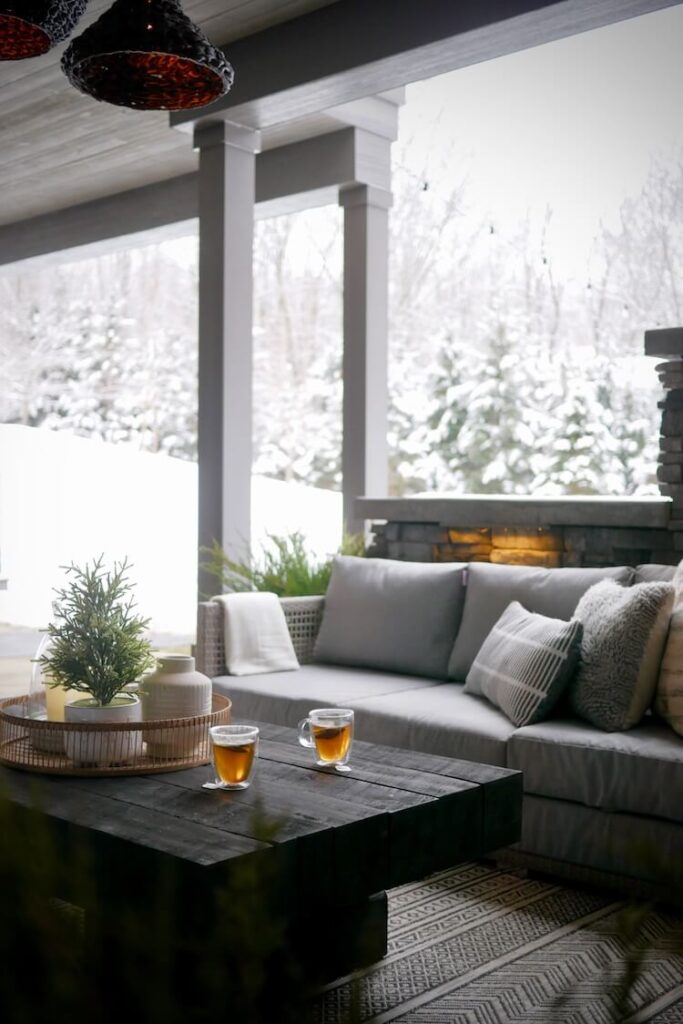
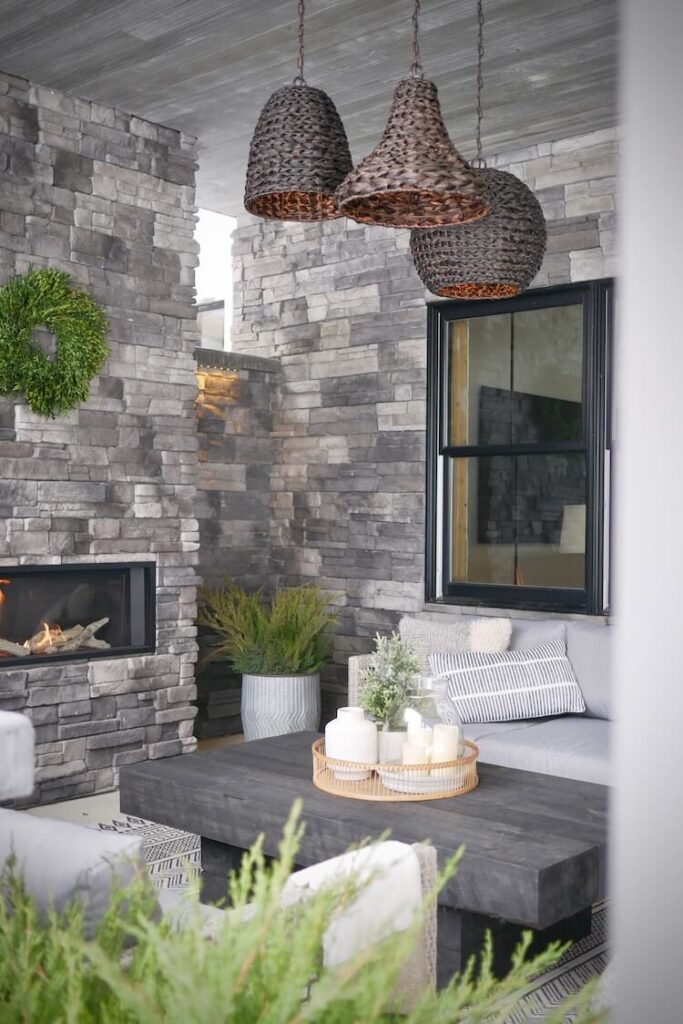
Finally we framed out and installed the L2 linear gas fireplace from Valor which is absolutely beautiful and convenient to flip on, on a cold day.

Running Electrical
We knew we wanting a few defendants over the sitting area and two can lights in front of the door. So I removed the existing light and extended the wiring to those locations with the appropriate boxes.
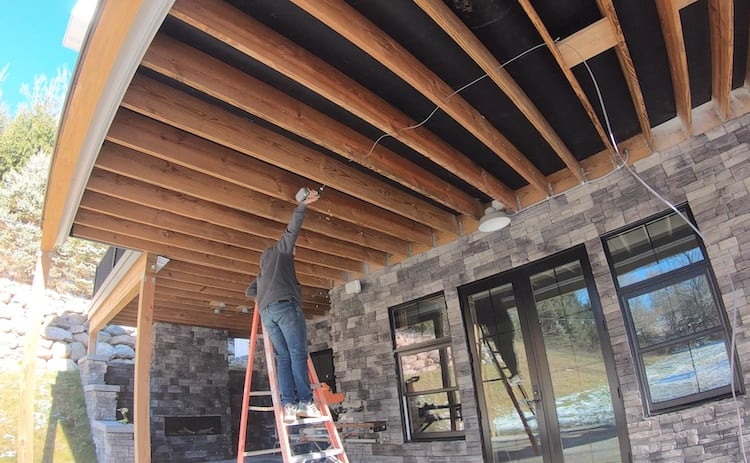
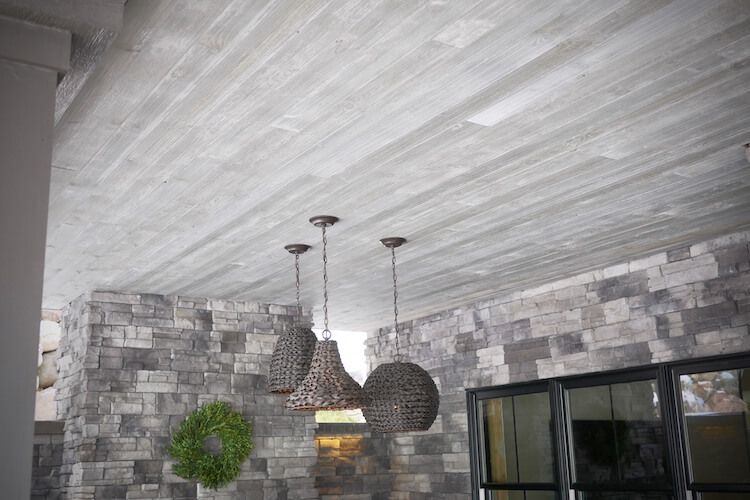
Installing the Ceiling
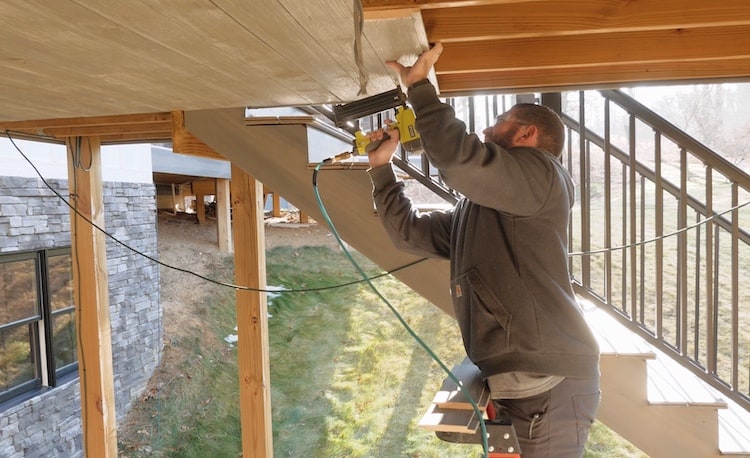
With the wiring ran we moved on to installing the ceiling. Since we were limited on time and temperature controlled space to finish the boards we opted for a prefinished grey barnwood shiplap board.
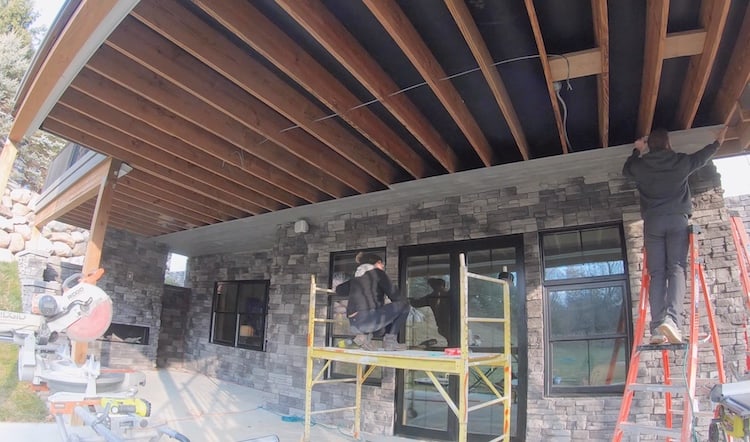
Those boards took some time to get up but the process was fairly simple just nailing in place with 2″ 18 gauge brad nails.
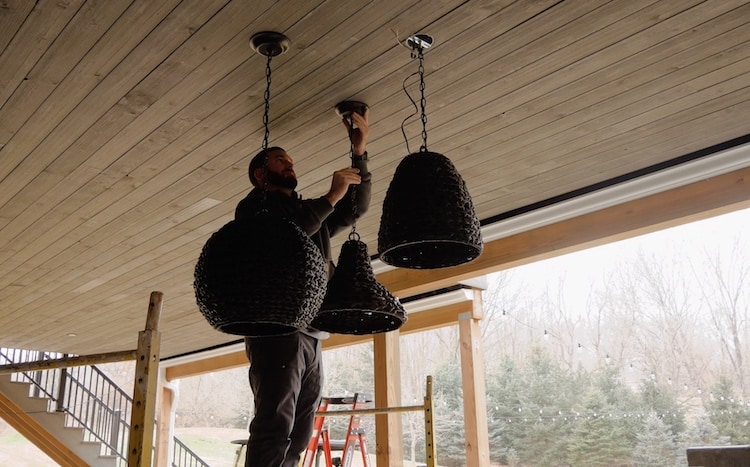
Installing the Light Fixtures
Over the sitting area we installed 3 outdoor hanging lights from Kichler and they look amazing. Unfortunately they are now discontinued so I can;t provide the exact link.
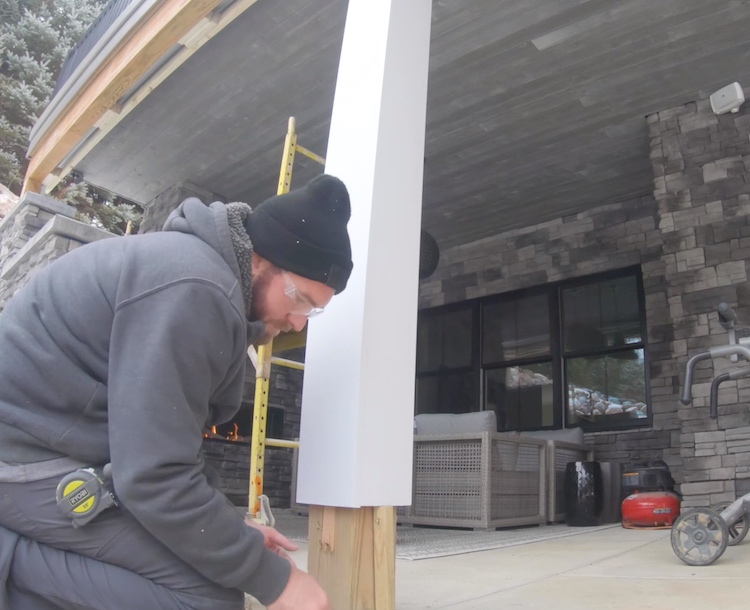
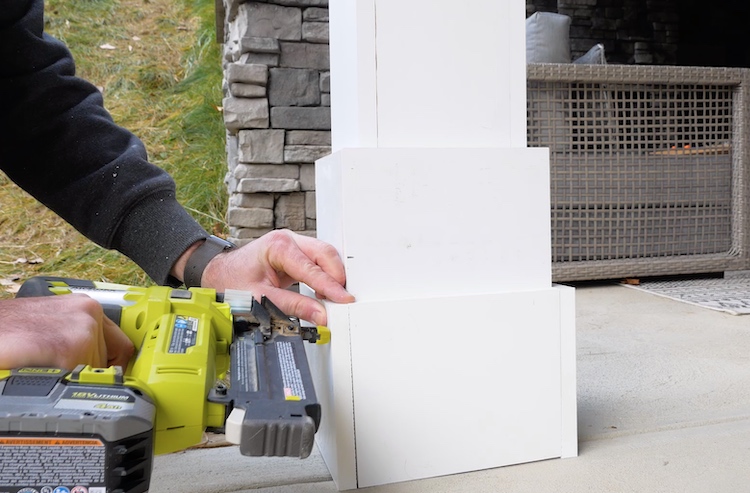
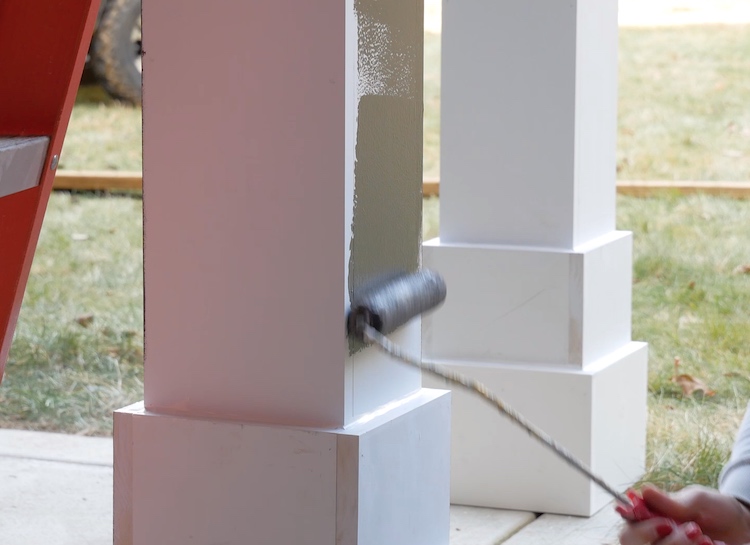
Wrapping the Posts
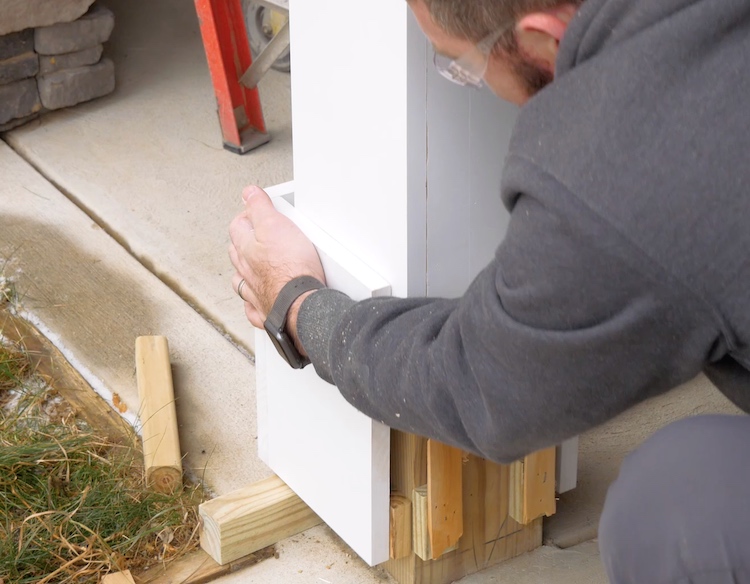
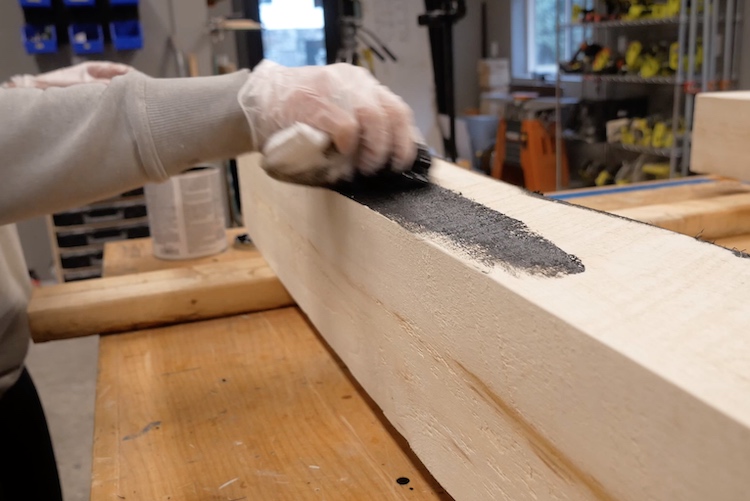
The exposed 6×6 posts now get wrapped with pre-primed exterior grade 1×8 trim boards. Two of the sides get ripped down to 5-3/4″ and the cut edge gets primed. Then they get nailed to another 1×8 to form a “U”.
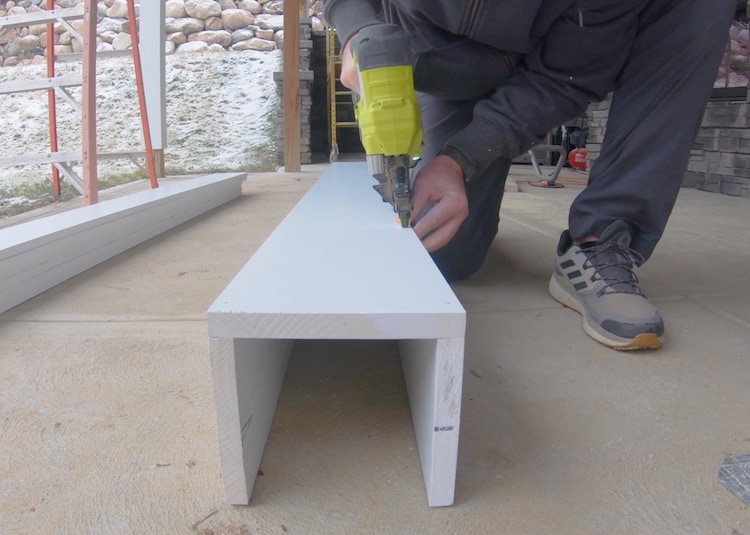
Now the “U” is slipped over the post and nailed to the remaining 1×8. These post wrap boards should not be nailed to the post itself. The 1x8s should allow for a 1/8″ gap all around the posts. Cedar shims can be used on each side to maintain this gap before nailing in place.
Then the 1×12 base trim gets cut down and installed 2″ above the ground using the same process. Natural would should never be installed within 2″ of the patio and in some cases more. This will prevent the would from wicking moisture into it and excellerating decay.
The final 1×8 trim at the base is composite and installed in the same fashion.
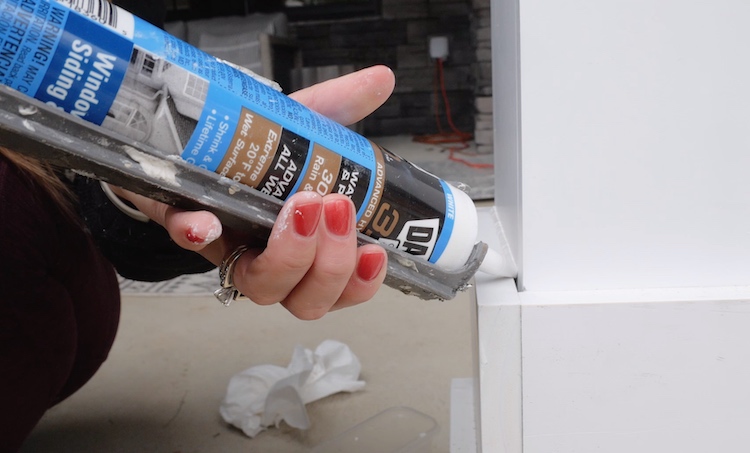
At the top of the post we installed 1×4 trim and drip edge to prevent water from getting in.
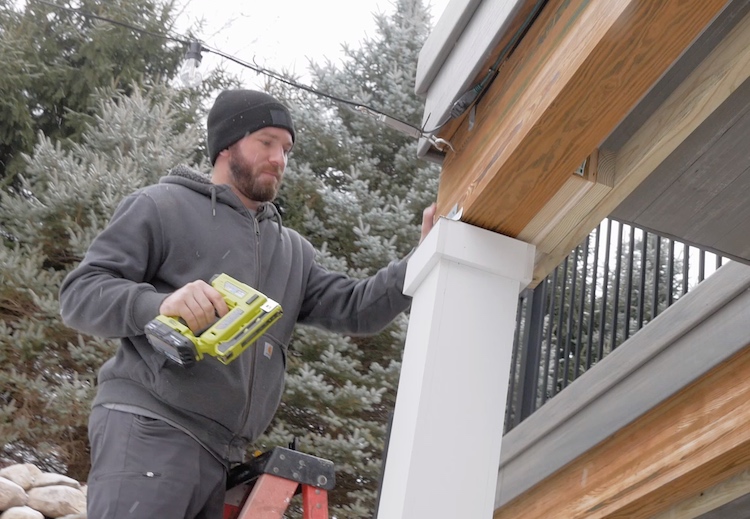
Then we waterproofed all the joints using DAP 3.0 which is a hybrid sealant that can be applied in temps as low as 20 degrees. Something interesting that I figured out dealing with the cold weather is that most standard latex caulk needs to be applied in temps above 40 degrees F and not freeze within 24hrs. However, silicone can be applied in temps as low as -35 degrees F!
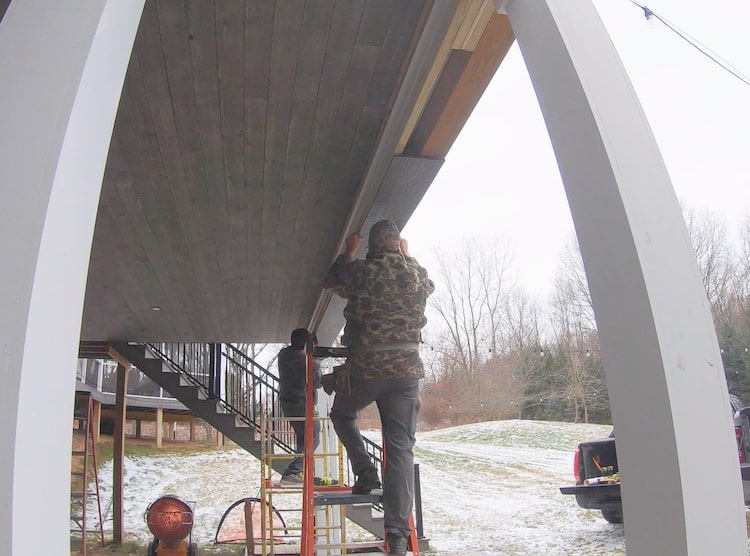
Wrapping the Beams and Gutters
With the ceiling looking real nice we now needed to wrap the beams and unsightly gutters. I did so by adding 2×4 structure to the beam that will now encase the gutters. Then I installed paneling over the entire structure. The paneling was actually solid soffit material that we ripped down and painted to match.
Painting
While we were working in the cold most days, we had one day in the forecast that was over 50 and we needed that for painting the posts and beams. For the color we went with an earthy color from Behr called Peppery.
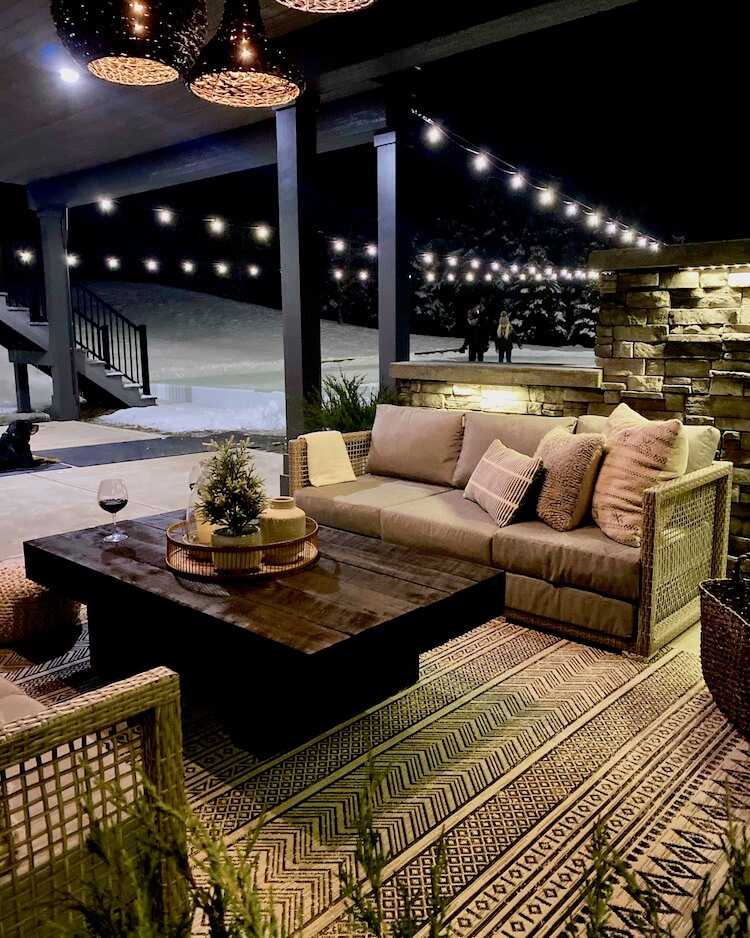
Decorating the Sitting Area
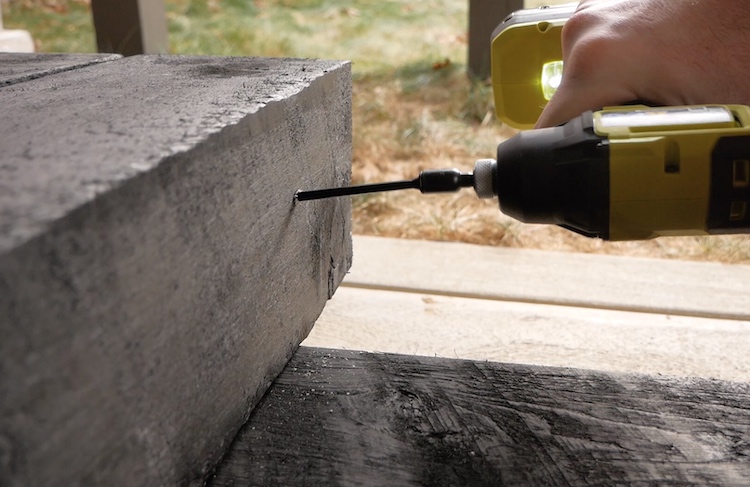
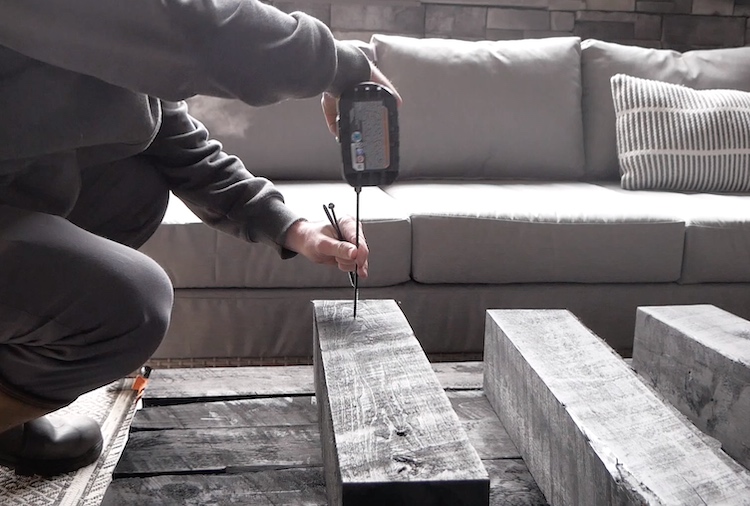
When walking through Home Depot one day I found these awesome 6×6 landscape timbers for about $15 a piece and I knew they would be perfect for a coffee table. A heavy one… They got cut down with a chainsaw, stain with ebony wood stain and screwed together with 8″ timber screws. While this is pretty straightforward I will be doing plans for this next and will add a link here when I do.

We purchased two wicker sofas from Home Depot for this area as well as some outdoor poofs, stone side table and metal side table. All of it really came together nicely and is the perfect space to relax and warm up in the winter.

Honestly, this space being completed really makes our backyard the winter wonderland I’ve always want.
And at night with the string lights over the ice it is really magical. Let me know what you think in the comments!