
48in Bathroom Vanity
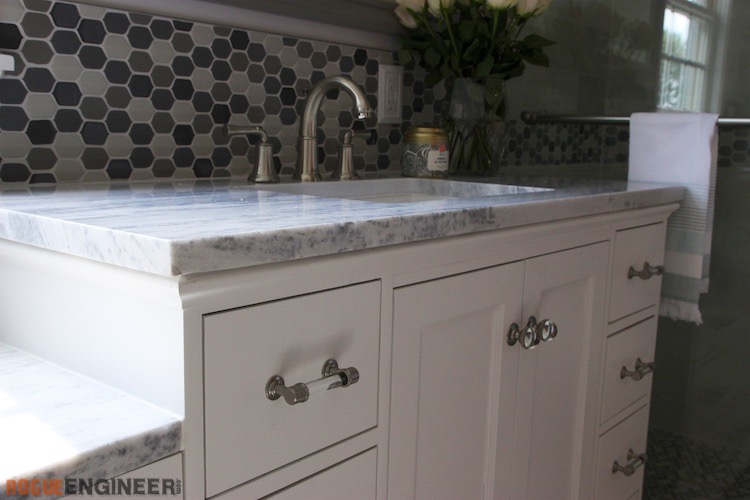
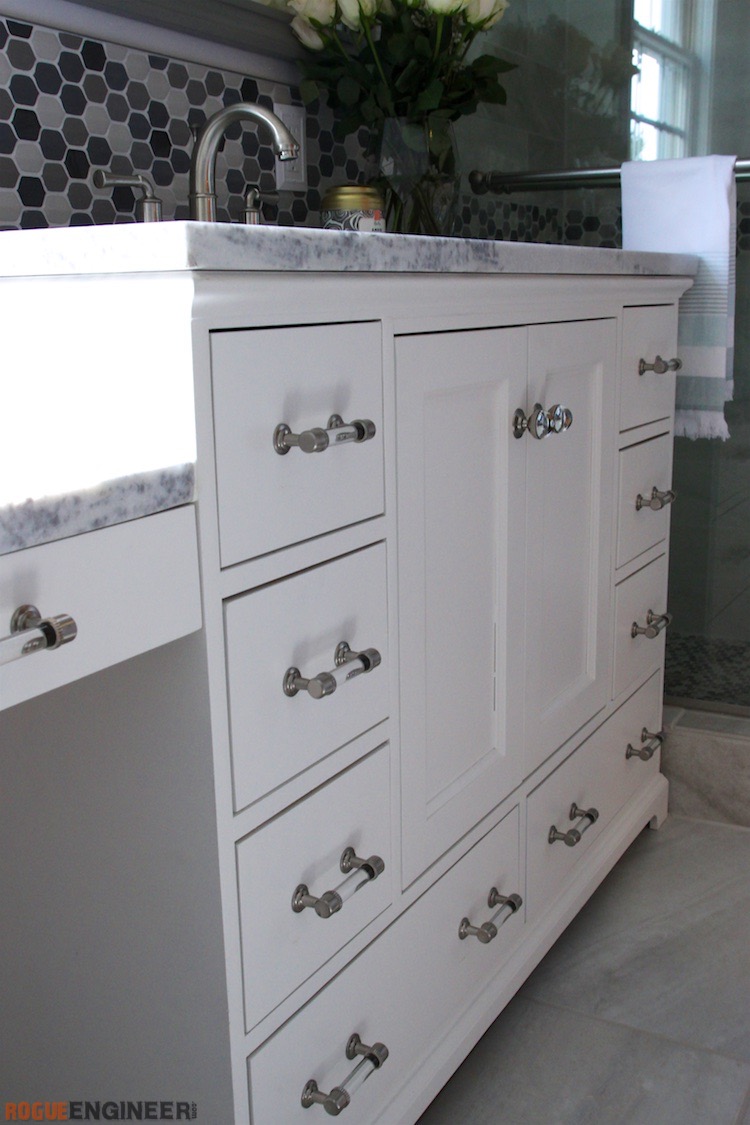
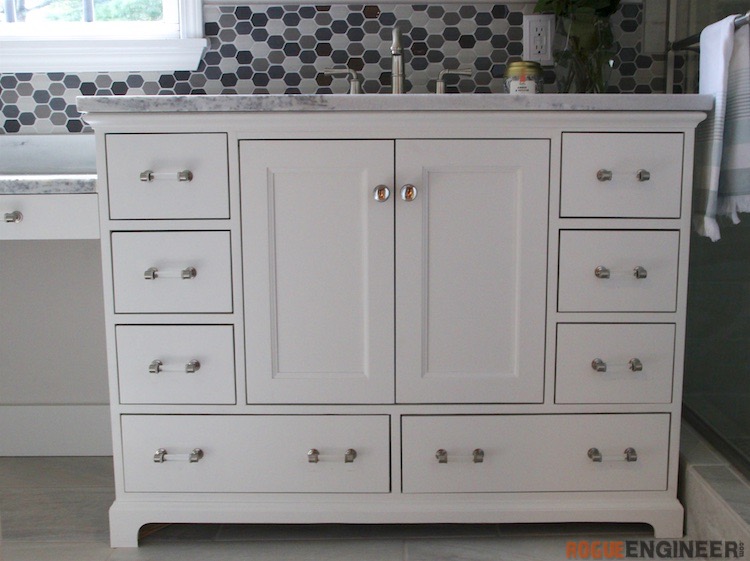
This 48 inch wide vanity was built for the master bathroom in the house we are flipping. The cabinet is made from pre-primed Purebond plywood and the drawer boxes from pre-finished Purebond plywood for that beautiful factory finish. I love working with this stuff because it not only looks great but it makes me feel better knowing that it’s formaldehyde-free and all sourced and manufactured in North America. I wouldn’t consider this project to be a cost saving project as it was still about $600 (not including the top, sink and faucet). However, I used better materials then an “off the shelf” version and it’s built to the exact dimensions that I wanted so I am happy with the investment that I made.
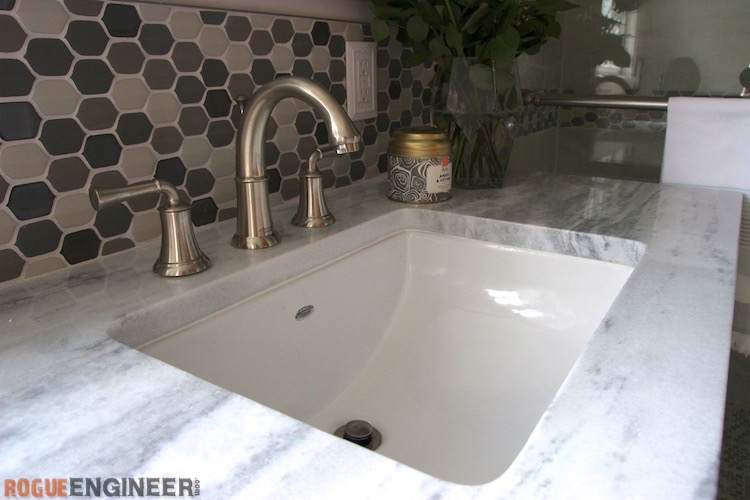
The granite was sourced from a local granite yard where they had some remnants laying around. They were able to cut and polish the edges and sink hole. They also installed the Studio Sink from American Standard which has a nice deep rectangular bowl. Then they came and installed the countertop after the vanity was secured. Finally, we had our plumber run all the plumbing and connect the sink and faucet. This is something we could have done but he was already doing all the plumbing for the entire house so we let him finish it off.
If you are not familiar with the house we are flipping then make sure you check out the Our First Flip section of the site for all the projects we’ve been working on related to it. This vanity is one of the many that will be coming out in the coming weeks.
Don’t forget to subscribe on YouTube and for sneak peeks of our upcoming projects be sure to check out Our DIY Life on YouTube, follow us on Facebook and Instagram. Also, follow me on Pinterest to get tons of projects plans from all around the web!


Required Tools
Materials
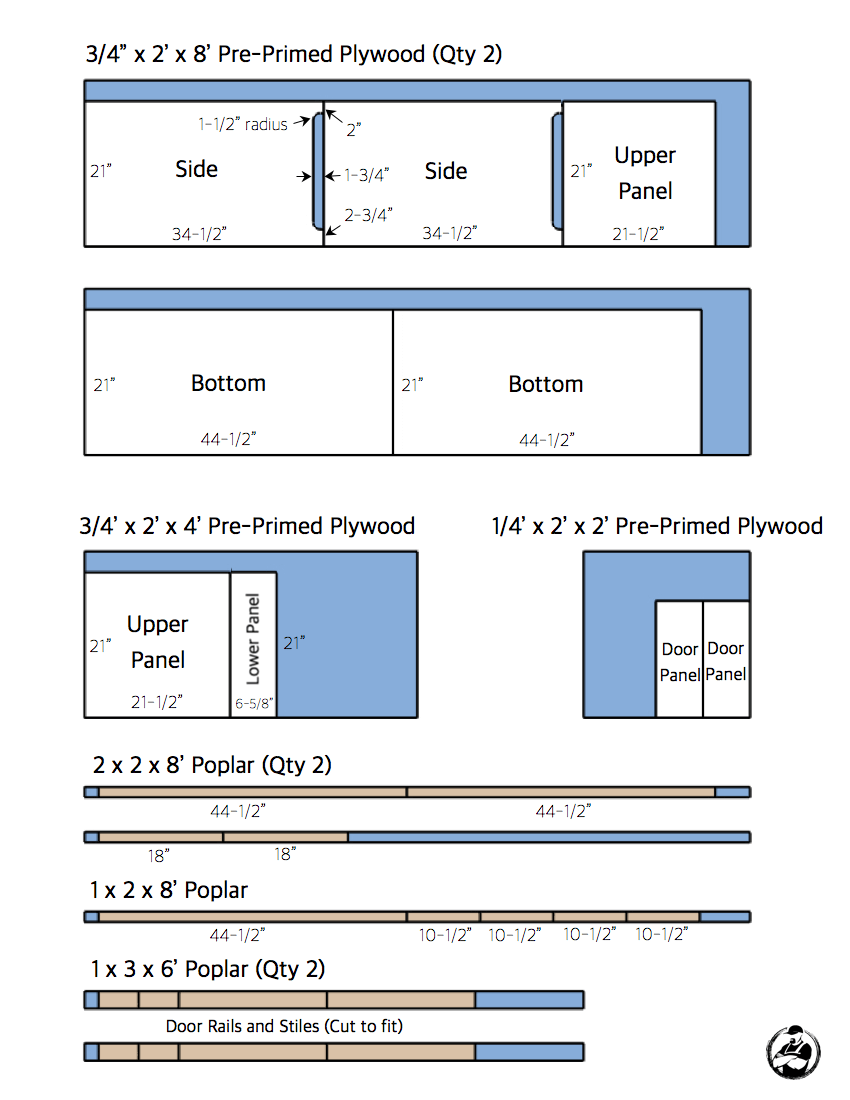
- Pre-Primed PureBond Plywood
- Qty 2 – 3/4” x 2’ x 8’
- Qty 1 – 3/4” x 2’ x 4’
- Qty 1 – 1/4” x 2’ x 2’
- Pre-Finished PureBond Plywood
- Qty 1 – 1/2” x 2’ x 8’
- Qty 1 – 3/4” x 2’ x 8’
- Qty 1 – 3/4” x 2’ x 4’
- Qty 2 – 2 x 2 x 8’ Poplar
- Qty 1 – 1 x 2 x 8’ Poplar
- Qty 2 – 1 x 3 x 6’ Poplar
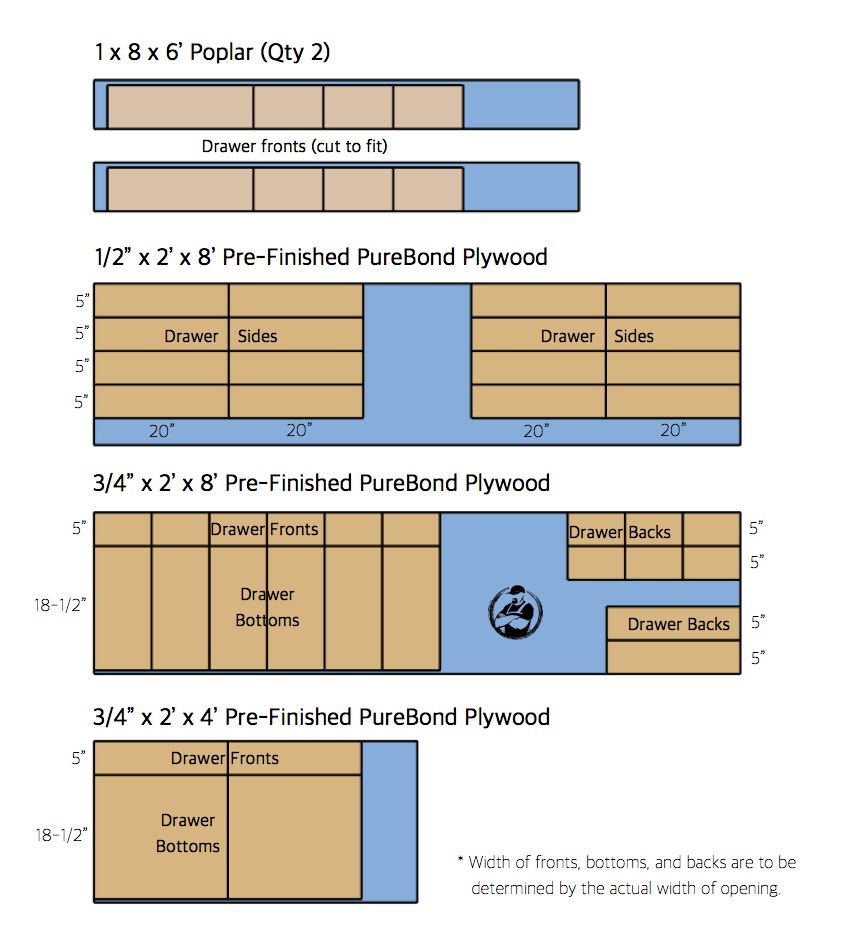
- Qty 2 – 1 x 8 x 6’ Poplar
- 8’ – 3-1/4” Baseboard Trim
- 8’ – 1” Base Cap Molding
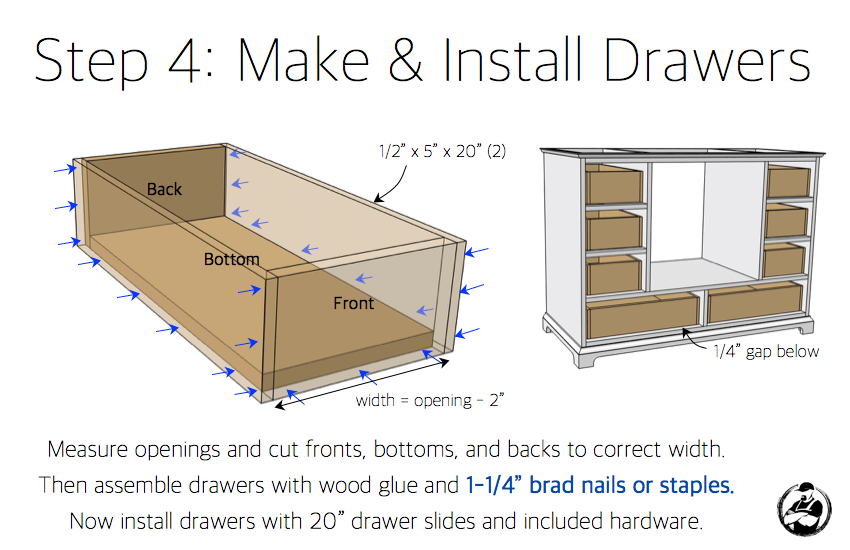
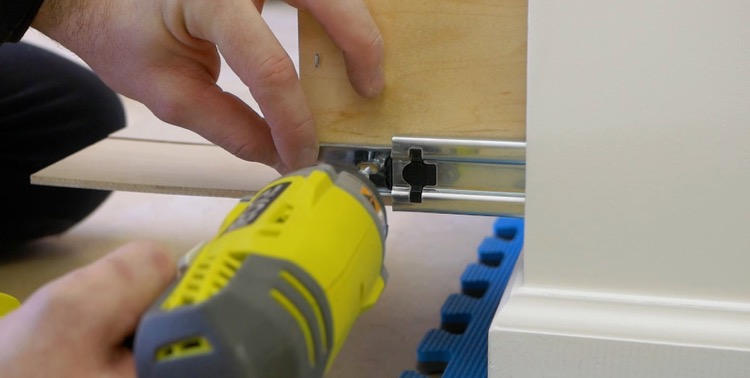
- Qty 8 – Liberty 20 in. Soft Close Full Extension Drawer Slide (1-Pair)
- Qty 2 – Liberty 90-Degree Surface Mount Hidden Spring Hinge (1-Pair)
- Qty 10 – Liberty 3” Glass Pulls
- Qty 2 – Liberty Glass Knob
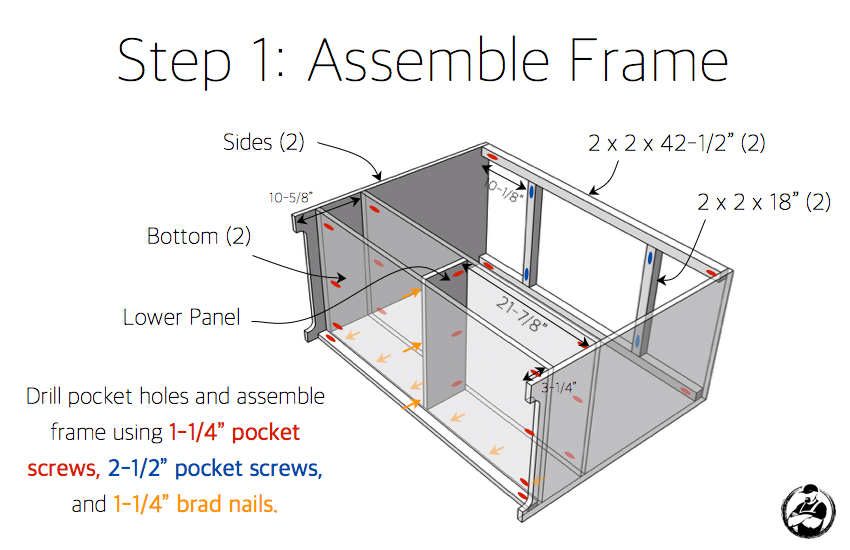
- 2-1/2″ Kreg Pocket Screws (Coarse)
- 1-1/4″ Kreg Pocket Screws (Coarse)
- 1-1/4″ Brad Nails
- 1-1/4″ Wood Screws
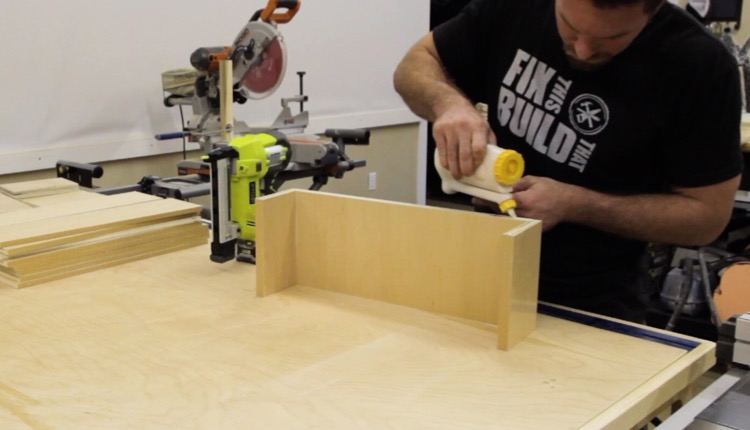
- Wood Glue
..beyond the Vanity
- Granite Remnant fabricated and installed by local granite yard
- American Standard Studio Undercounter Sink, White
- American Standard Portsmouth Widespread Bathroom Sink Faucet with High-Arc Spout, Satin Nickel
- American Standard Traditional Toilet Paper Holder
- American Standard ActiClean Right Height Elongated Complete Toilet, White
Disclosure: The links provided in the “materials” and “required tools” sections are affiliate links. If you would like to support our site and help keep our content free come find out more about how we can make money with no extra cost to you. We have also received some of the products mentioned at no cost.
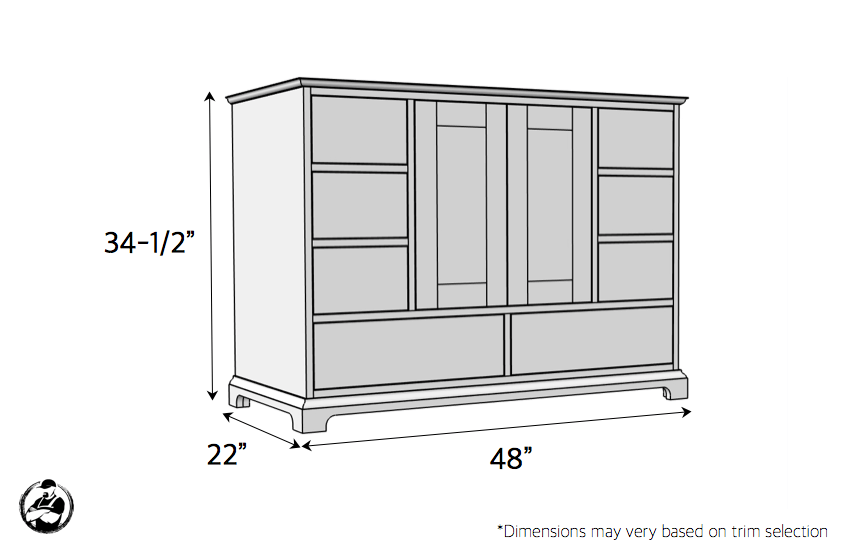
Dimensions
Cut List
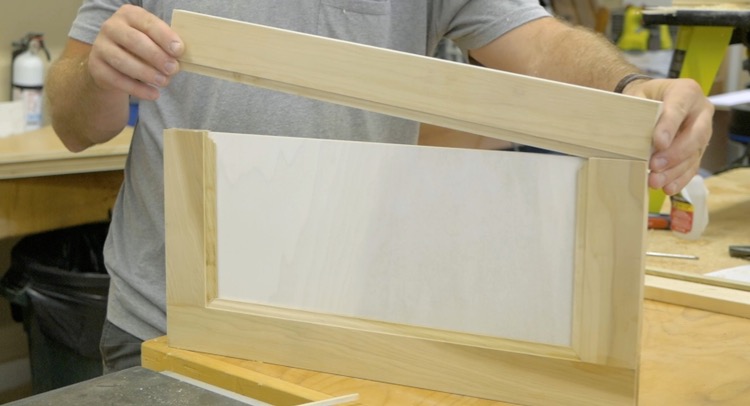
How to build a 48in Bathroom Vanity
Make sure to note where your plumbing is located. If it coms out of the floor like mine did you will have to modify the depth of you bottom drawers so the plumbing can be run behind one or both.
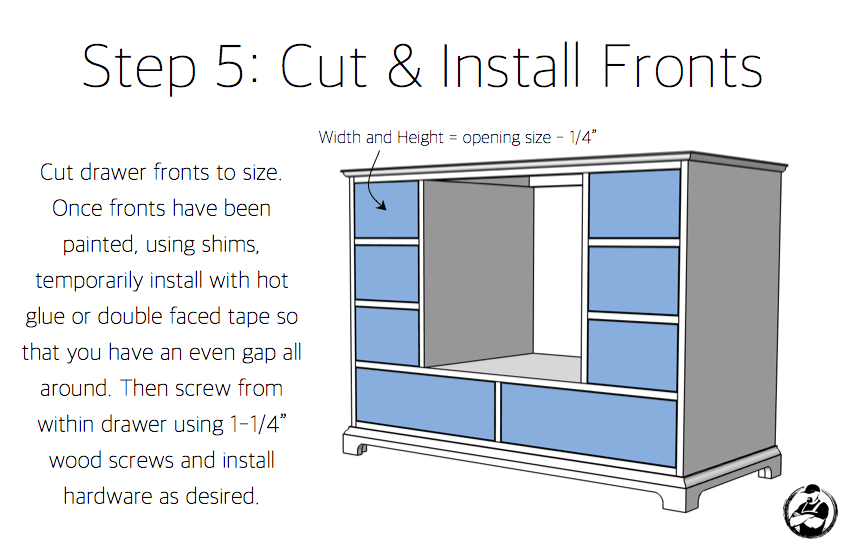
When it comes to installing your vanity every situation will be different but the vanity should be leveled from front to back and side to side. Shim as required and then secure the back of the vanity into the wall studs with appropriately sized screws. Once that is done the top and sink can be installed. Then the plumbing and faucet can be finished.
Questions? Comments?
As always, if you have any questions don’t hesitate to comment below and especially don’t forget to post pictures of your finished products in the comments! ENJOY!
great project