Our drawer…
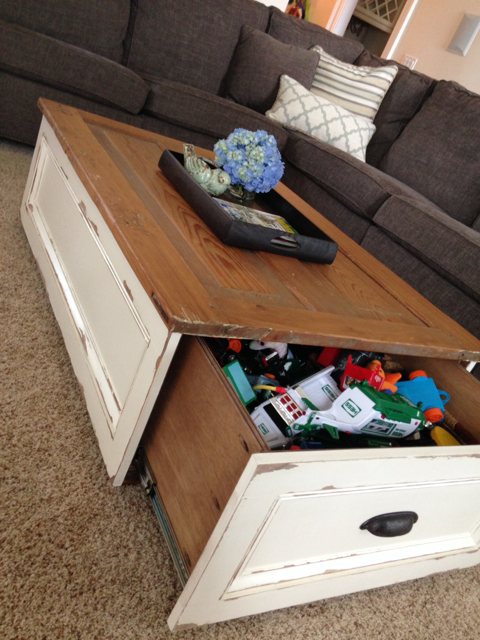
Kiddo’s drawer
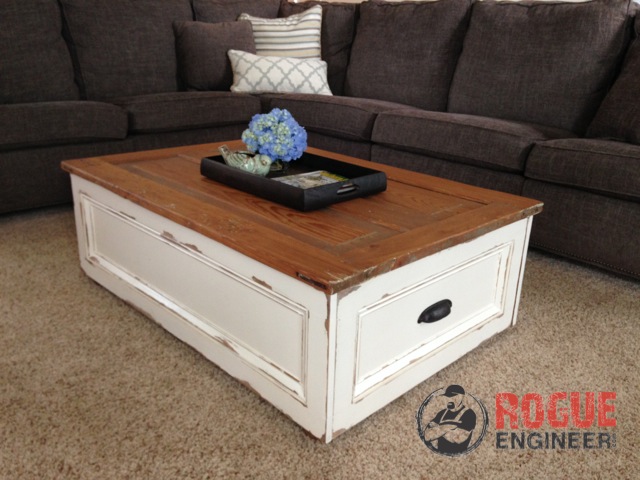
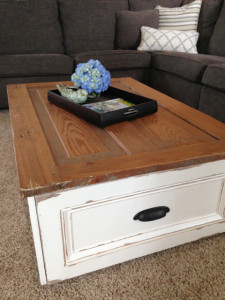
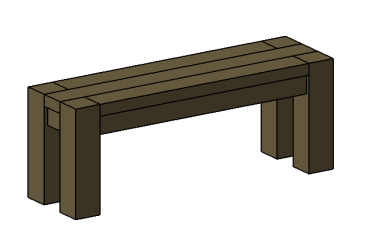
So a while back we cut down and refinished an old wooden door we found so we could swap out our current coffee table top for something with a little more character. Well, as our family grew so did our toy collection, and being the neat freaks that Jamie and I are, we had to come up with a better solution. So below you have the DIY coffee table storage solution that worked best for what we needed. It has a draw on one side for all Brayden’s toys and a drawer on the other side for our blankets and such. The best part is…. it’s all HIDDEN! Now since we wanted to reuse our door as the tabletop I included a standard tabletop that could be built by anyone. I hope you enjoy! I know we have!
Required Tools
- Miter Saw
- Kreg Pocket-Hole Jig
- Brad Nailer
- Cordless Drill
- Level
- Square
- Tape Measure
- Safety Glasses
- Ear Protection
Materials
- 4x 2 x 6 x 8′
- 6x 1 x 3 x 6′
- 1x 3/4″ Plywood Full Sheet (4’x8′)
- 1x 3/4″ Plywood Half Sheet (4’x4′)
- 4x 8′ Base Cap Moulding
- 2x 22″ Drawer Slides (Pair)
- 2x Drawer Pulls
- 4x Unfinished Bun Furniture Feet
- 1-1/4″ Coarse Washer-Head Pocket Screws
- 2-1/2″ Coarse Washer-Head Pocket Screws
- 18 Gauge 1-1/4” brad nails
- 1-1/4″ Wood Screws
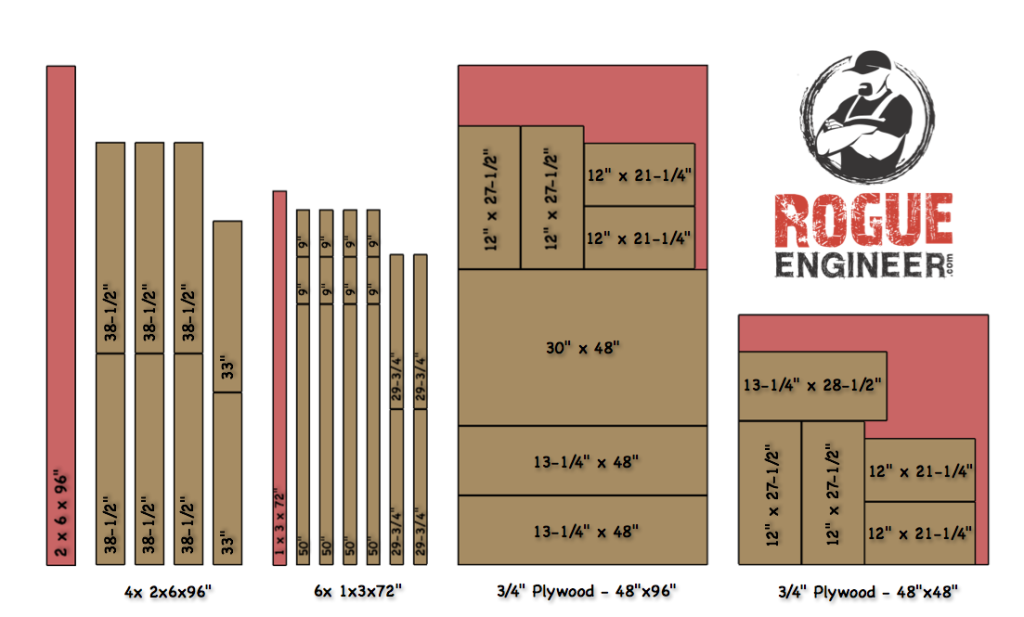
Cut List
DIY Coffee Table Plans
As always if you have any questions don’t hesitate to comment below and especially don’t forget to post pictures of your finished products in the comments! ENJOY!
Step 1: Assemble Table Top
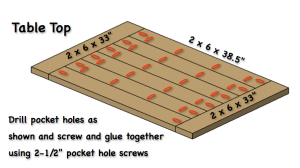
Assemble table top first drilling pocket holes in each of the six 2x6x38.5″ boards as shown. Then, using 2-1/2″ pocket hole screws, screw the six boards together making sure they are flush at both ends. (You can sand smooth if necessary)
To finish off the table top, add the 2x4x33″ bread boards at both ends, again using 2-1/2″ pocket hole screws.
Make sure to clamp each joint as you screw together to assure an even surface.
Step 2: Assemble Faces for Side Panels (Qty 2)
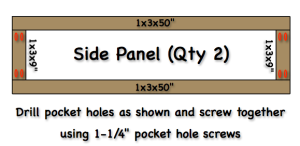
Assemble the faces by first drilling two pocket holes in each end of the 1x3x9″ boards.
Assemble the faces as shown in the picture using 1-1/4″ pocket hole screws.
Step 3: Assemble Side Panels (Qty 2)
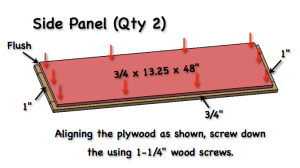
Lay the 3/4 x 13-1/4 x 48″ plywood back on top of the face of the side panel, as to cover the pocket holes.
Align it so that the top is flush with the top of the face and the sides are set in 1″ from the edges of the face.
Screw in place using 1-1/4″ wood screws.
Step 4: Assemble Base
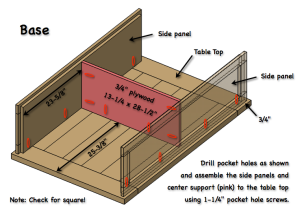
As shown, drill four pocket holes in the top of each side panel. Also drill pocket holes in the 3/4 x 13-1/4 x 28-1/2″ plywood center support, as shown.
First, screw each side of the center support to the inside-center of the side panels using 1-1/4″ pocket hole screws.
Secondly, make sure the inside of the side panels are square and evenly spaced 28-1/2″ apart and there is 3/4″ spacing maintained from the edge on all four sides.
Now, screw down the side panels and center support to the table top using 1-1/4″ pocket hole screws.
Step 5: Assemble Base
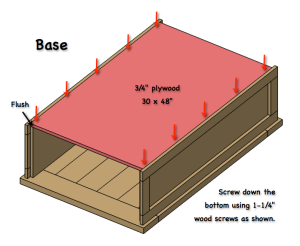
Set the 3/4 x 30 x 48″ bottom in place and align with the edge of the side panel backs.
Screw in place using 1-1/4″ wood screws.
Step 6: Install Feet
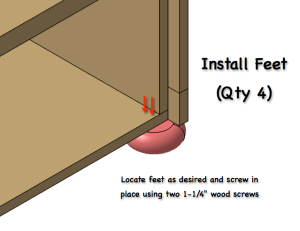
You can locate the feet so that the edges are shown or hidden, whichever is your preference. Make sure that they are evenly spaced from the corners and screw in place using two 1-1/4″ wood screws.
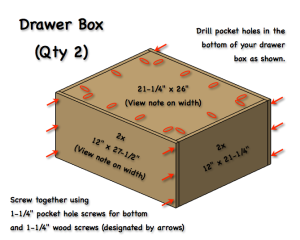
Step 7: Assemble Drawer Boxes (Qty 2)
Check to make sure the inside of your side panels are spaced 28-1/2″ apart (Top and bottom). Also, check that your drawer slides are 1/2″ thick. If they are not you will need to adjust the width of your drawer box accordingly. Use the equation below to help calculate the box width.
Width of drawer box = (width of opening) – 2(thickness of slide)
Drill pocket holes in the 21-1/4″ x 26″ bottom as shown.
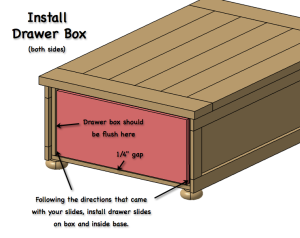
Step 8: Install Drawer Boxes and Slides
Install drawer slides per manufacturer instructions.
For an easy tutorial on how to install drawer slides check out this YouTube video.
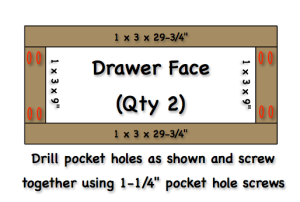
Step 9: Assemble Drawer Faces (Qty 2)
Assemble Drawer faces by first drilling two pocket holes in each end of the 1x3x9″ boards.
Screw together as shown, using 1-1/4″ pocket hole screws.
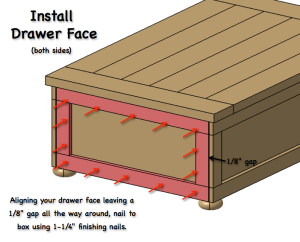
Step 10: Install Drawer Faces (Qty 2)
With the drawer fully closed, align drawer face so that there is a 1/8″ gap all the way around.
Making sure to nail into the drawer box, attach the drawer faces using 1-1/4″ finishing nails.
Step 11: Add Trim
Now, to complete your DIY coffee table, cut your base cap moulding to size, mitering the corners, for each of the side panels and drawer fronts as pictured.
Finish
We will be posting a separate page detailing how the finish was achieved very shortly!
As always if you have any questions don’t hesitate to comment below and especially don’t forget to post pictures of your finished products in the comments! ENJOY!

