
How to Install a Toilet
In my new workshop/office area, the Rogue HQ, I knew I wanted running water, which meant I needed a drain and since I was doing that, I probably should just put in a bathroom as well. I had my plumber rough in all the underground plumbing before we poured the concrete slab. I planned on having him come out and install all the fixtures as well but he is currently on the run from the FBI (🙄 long story), so rather than call another plumber I decided it was time for me to learn a new skill. After a good amount of research I realized this was a fairly straightforward job and I was quite capable.
For this tutorial I go over all the steps, in detail, for how I installed my skirted toilet on a concrete slab. If you have a concrete slab and roughed in plumbing, this is going to align with your install very well. If you are installing over a plywood subfloor or finished floor this might differ a bit but I try to touch on that throughout.
If you love this stuff as much as we do, you might want to consider following us on Instagram where we post sneak peeks and behind the scenes stuff in our stories. Also, did you know you can get tons of projects plans from all around the web when you follow us on Facebook and Pinterest!
Disclosure: This project was sponsored by DAP Products however the information and opinions are 100% my own.

Tools
Materials
- DAP 3.0 Kitchen, Bath & Plumbing Sealant
- Toilet (My toilet)
- Toilet Flange
- Concrete Anchors or Wood Screws (for plywood subfloor)
- 1-Piece Toilet Supply Line
- Escutcheon Plate
Disclosure: The links provided in the “materials” and “required tools” sections are affiliate links. If you would like to support our site and help keep our content free come find out more about how we can make money with no extra cost to you.
This tutorial is meant to serve as a guide for installing a toilet. While I try to cover some of the variations in different installation conditions, I did not cover them all. Nevertheless, always refer to the manufacturer specifications and your local plumbing codes, and if you don’t feel comfortable, hire a plumber.
Total Time: 1 day
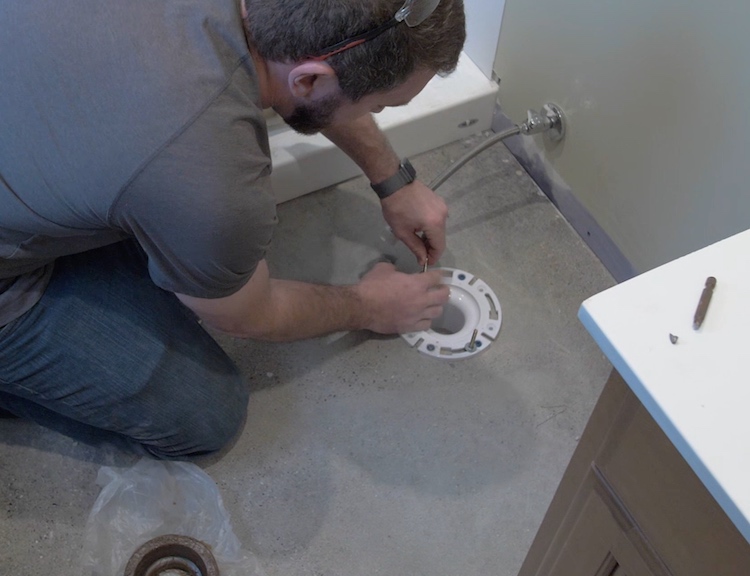
Installing the Toilet Flange
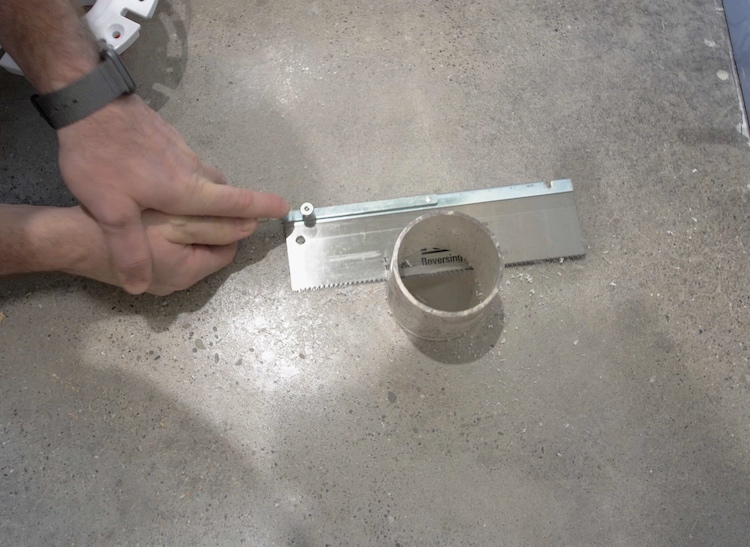
Start by cutting the rough plumbing flush with the subfloor. For this, I used a reversible back saw. A pull saw would work great as well.
Now dry fit the flange and check the height. I can see this flange is about 1/2″ higher than the subfloor so some of the floor must be removed and the PVC cut down a bit further.
To cut the PVC I recommend a Dremel rotary tool with a cutting wheel. This will allow you to cut from inside the PVC. Plug the drain with a rag or something to catch any debris.
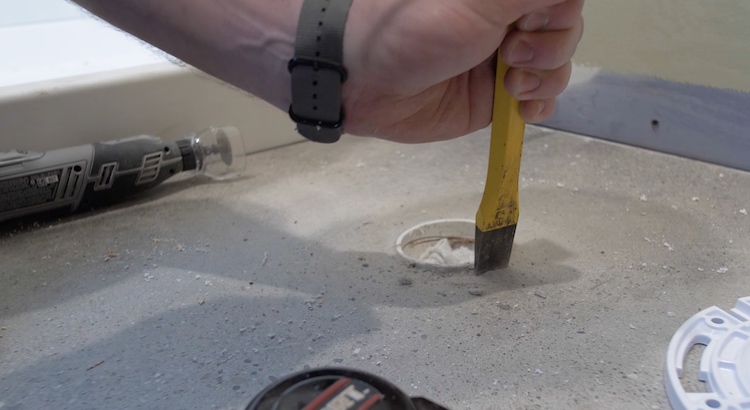
If you have a concrete slab like I do, then you will need a hammer and masonry chisel to remove some of the concrete. If you are deal with wood subfloor then a wood chisel or oscillating multitool will work well. You’ll need to remove enough of the floor so that the top of the flange will be level with the finished floor.
In this case, the concrete is my finished floor so ideally I would have recessed the entire flange into the concrete. Since I didn’t do that, I have to shim the toilet in a later step.
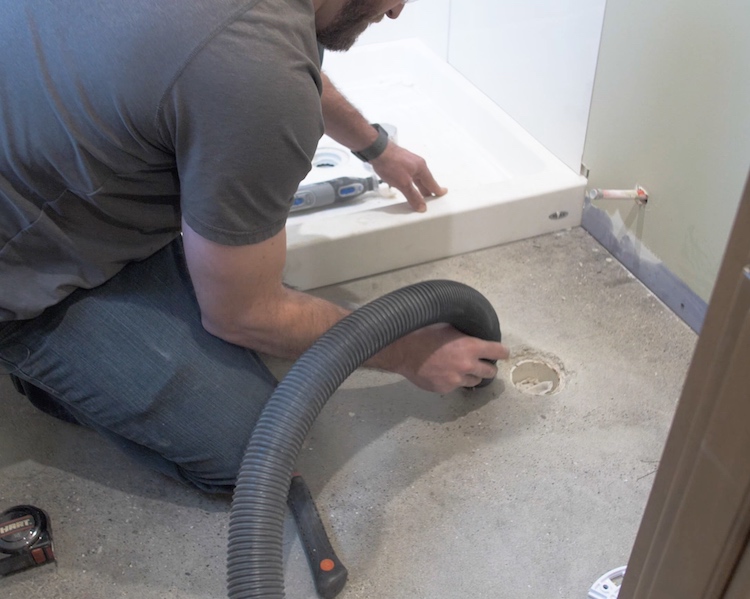
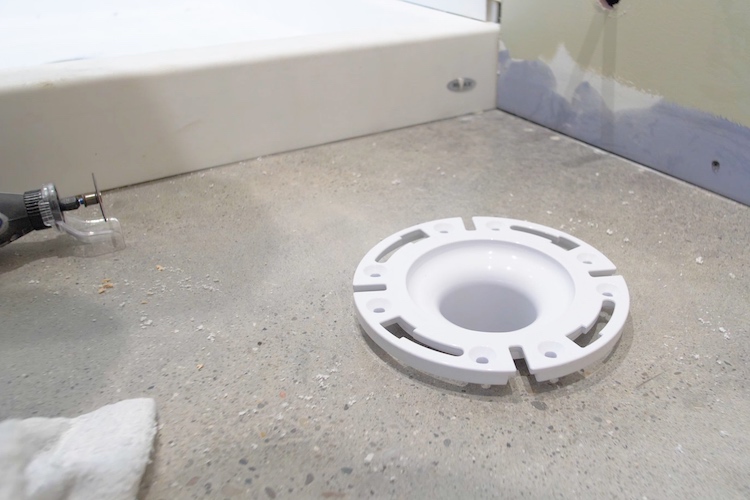
Vacuum up all the debris and fit the flange to the PVC. I used a press-fit style flange that has a rubber ring that compresses as it slides into the pipe to seal it off. These are way easier then having to cement a flange in place.
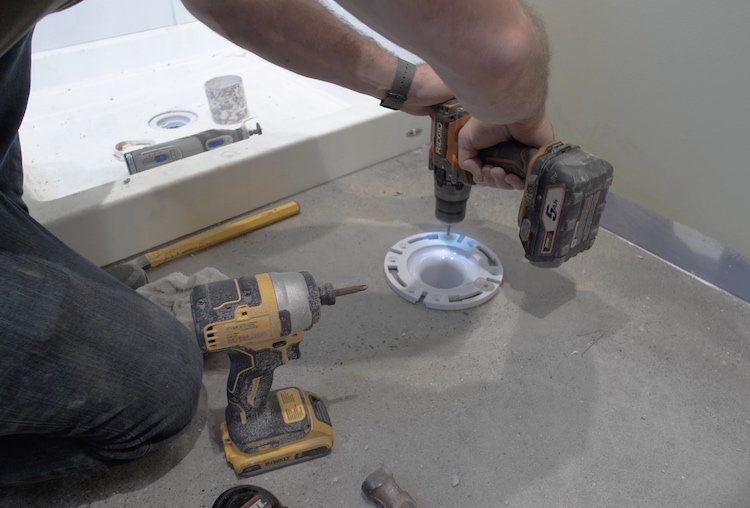
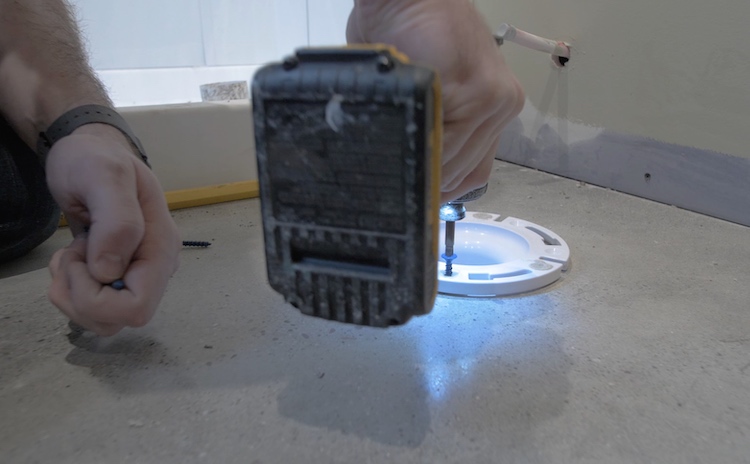
Before anchoring the flange to the floor, make sure that it is oriented such that the T-bolts (included with the toilet) will be the same distance from the back wall when installed. This will make sure that the toilet is straight when mounted to the flange.

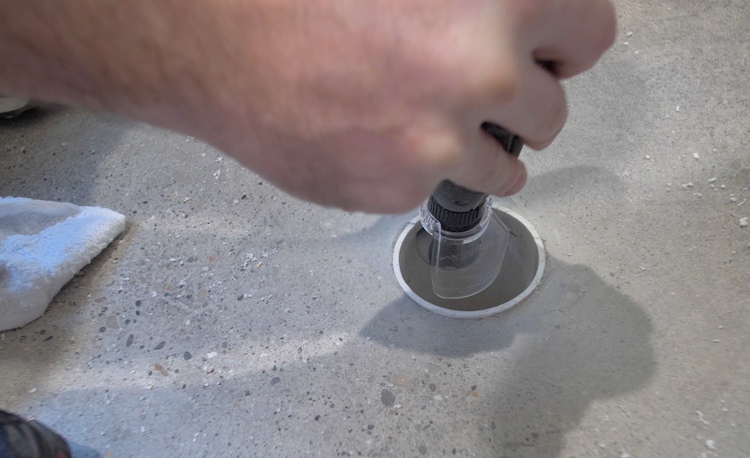
Anchor the flange with the appropriate fasteners. I used four 1/4″ x 1-1/4″ Tapcon screws, pre-drilling with the correct masonry bit first.
Connecting the Supply Line
This is probably the easiest part but can get messy if you don’t prep it right.
First, you’ll need to locate and turn the main water line off. Then go to the nearest tub or faucet and turn the water on. This will release the pressure in the water lines and drain most of the water out, reducing the mess.
Now it’s time to cut the roughed in water line. This can be done with a small handsaw but if you think you’ll ever do any plumbing projects again, I recommend picking up a flexible tube cutter. Also note that if you are connecting to copper you’ll need to cut it with a standard tube cutter.
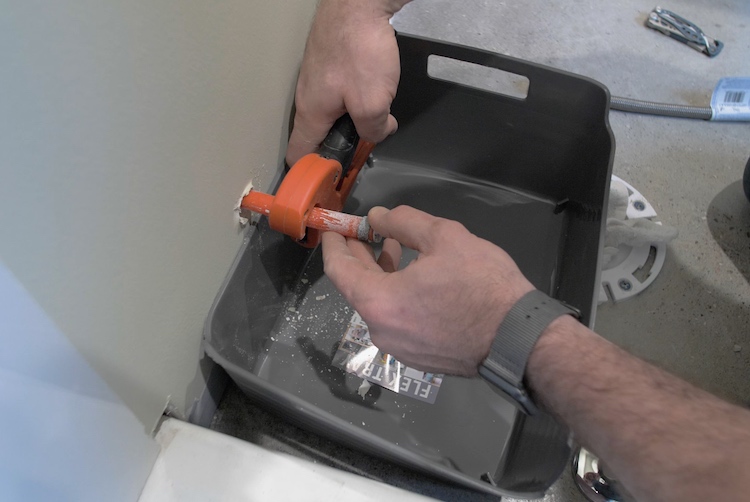
When cutting the supply line make sure you leave enough to connect the toilet supply line and the escutcheon plate that will cover the hole in the wall.
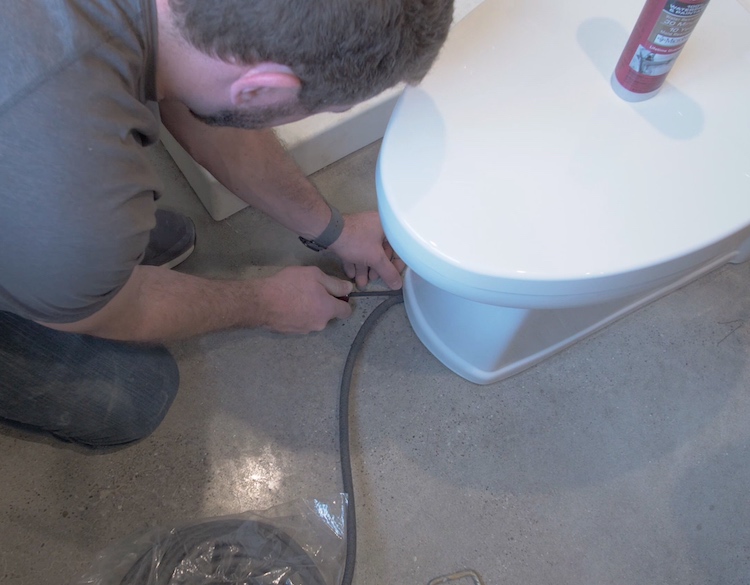
It’s a little more money but I highly recommend the 1-piece toilet supply line. This line has a 1/4 turn valve built-in and press-fit fitting that works with PEX, copper, or CPVC. So you just press one end onto the water line and screw the other end onto the toilet tank (not yet installed).
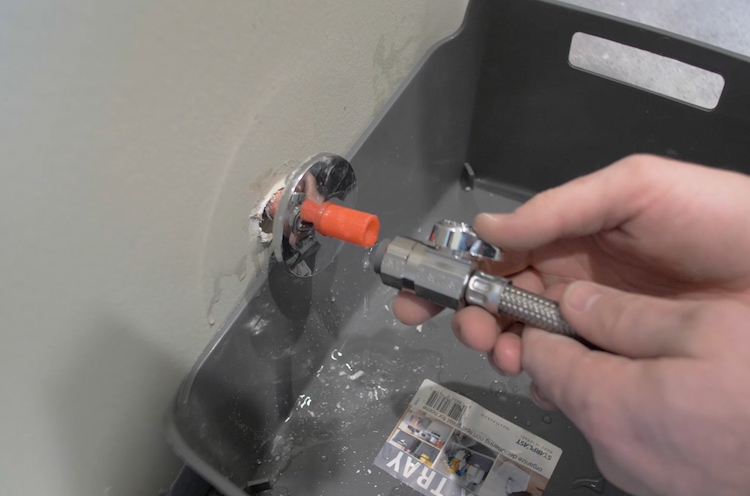
When pushing the fitting onto the PEX water line you may need to use a set of pliers or vise-grips to hold the water line in place.

Installing the Bowl
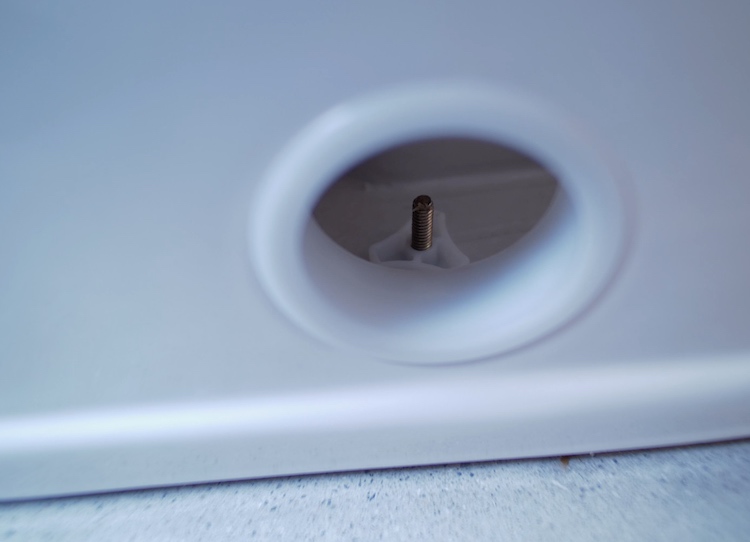
Once the finished floor is in the toilet can now be installed. I am installing a skirted toilet which means the trap and mounting nuts will be hidden. The toilet I have came with some nuts that will tighten the t-bolts down on the flange and help them to stand up straight, making the next step a bit easier.
But before we can set the toilet we need to get the wax ring in place. The wax ring is exactly that, a thick ring of wax that gets pressed onto the bottom of the toilet around the hole.
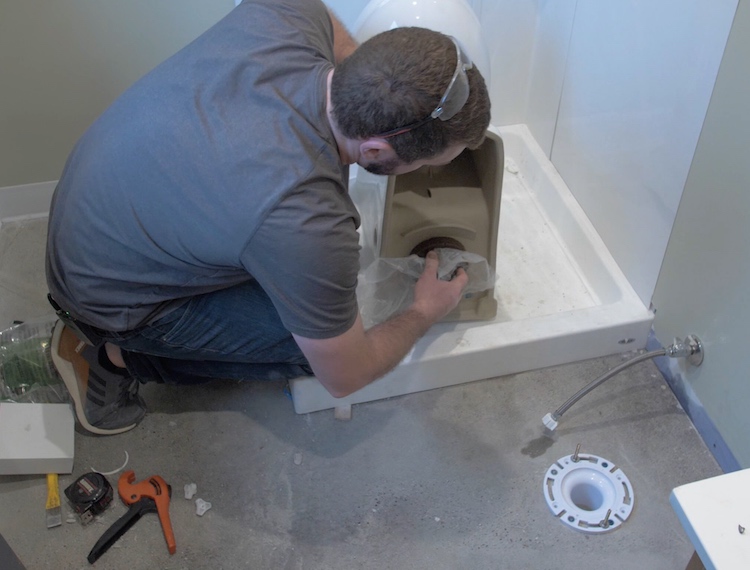
Once the toilet is set in place the wax ring will compress (or spread out) and seal off that connection making sure no sewage gases leak out.
If the toilet has a little wobble in it that can be taken out with shims. Since my shims are in contact with concrete I used treated wood to resist rot.
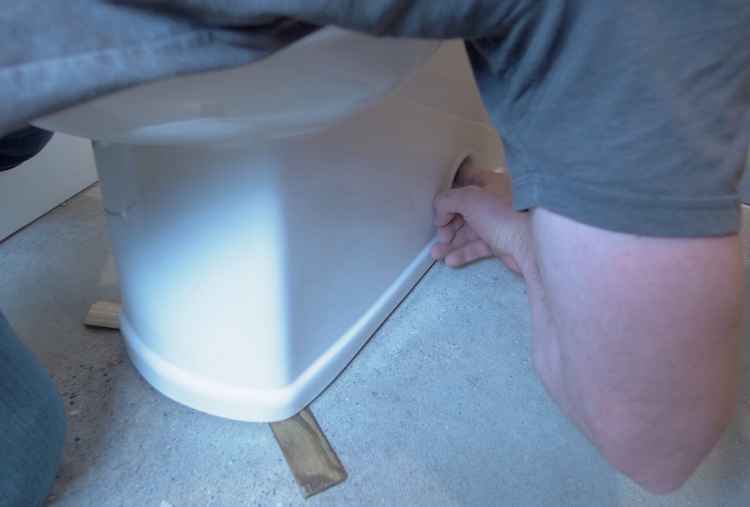
The nuts then get tightened down to secure the toilet in place.
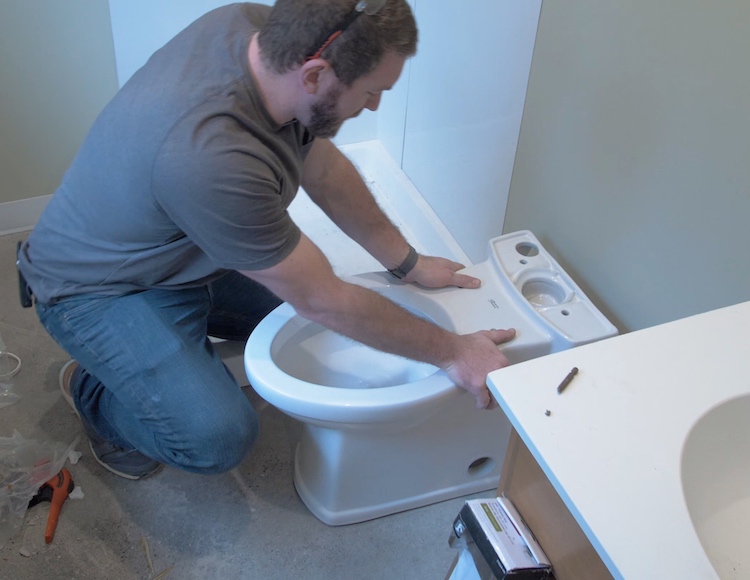
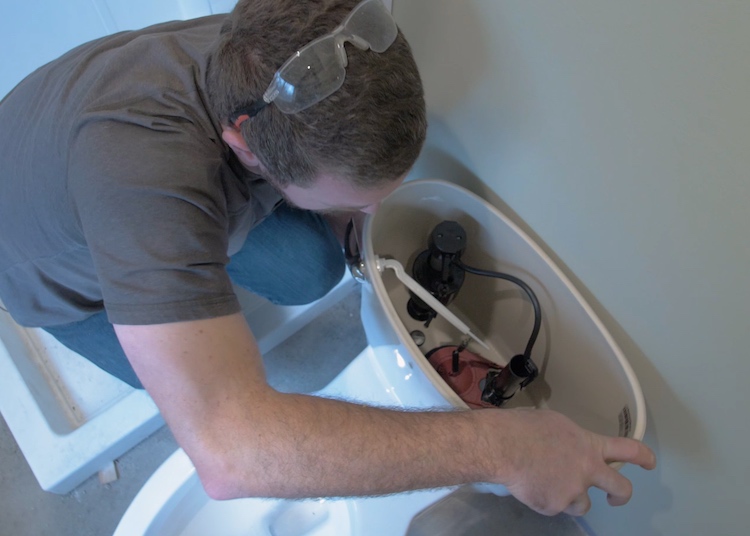
Mounting the Tank
The tank can now be installed the back of the bowl. First place the rubber seal between the openings.
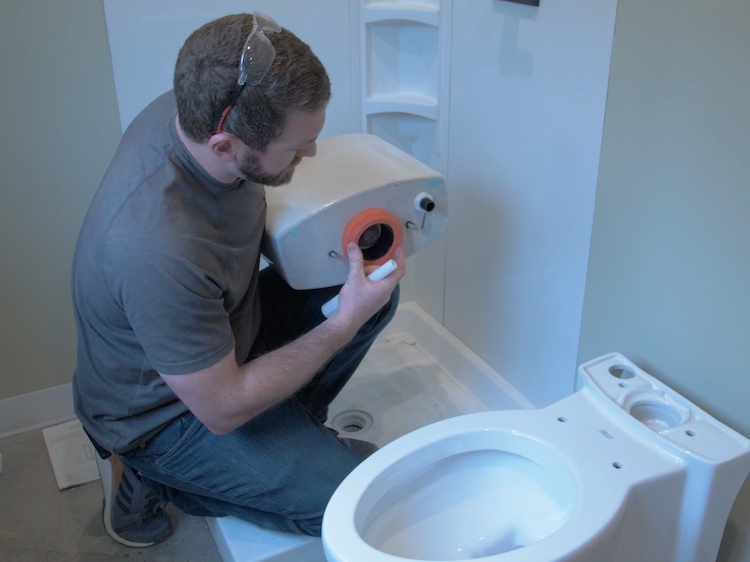
Then fit the tank in place and secure with the included hardware.
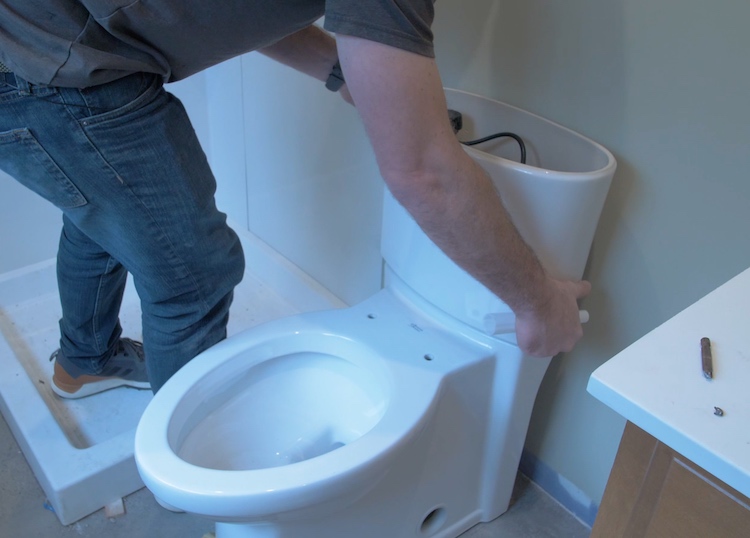
Most toilets will come with a tool to help hold the nut while tightening the tank. Tightened both bolts at the same time (alternating sides) so that they are even tightened and the tank will be level.
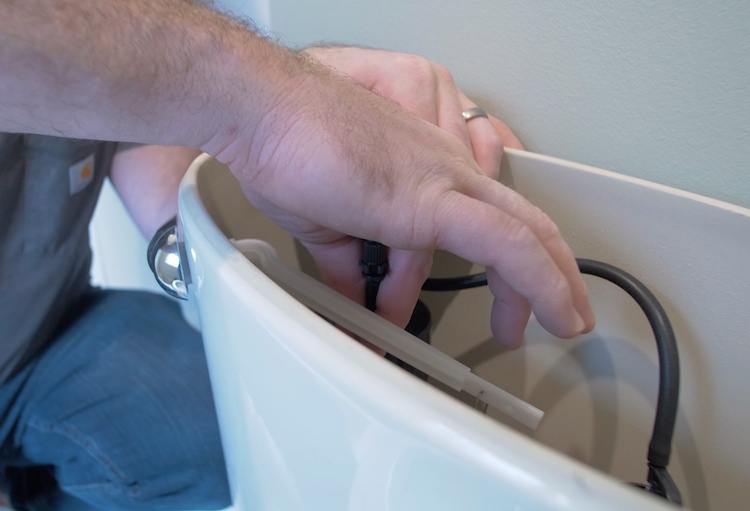
Connecting the Water Supply Line
Now it’s time to attach the supply line to the tank. This connection screws on and can be hand tightened.

Turn the water valve on and check for leaks. If all is well, adjust the float in the tank so that the water shuts off approximately 3/8″ below the top of the overflow pipe.
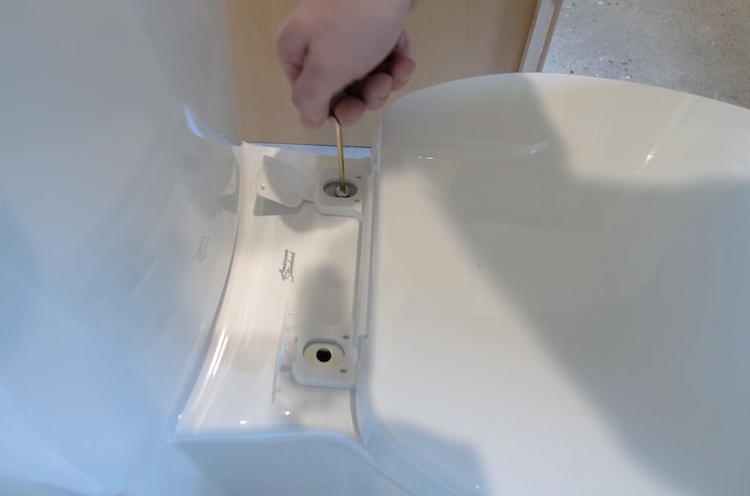
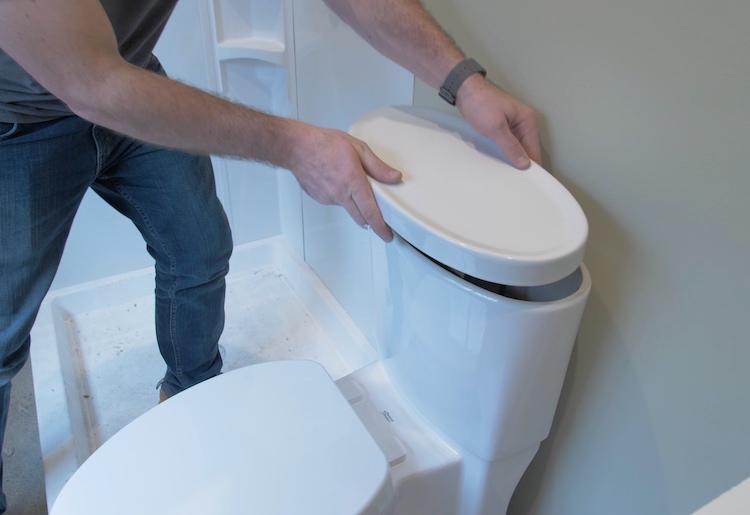
Installing the Toilet Seat and Tank Lid
The instructions for how to do this will probably vary between toilets. Mine came with two rubber plugs that fit into the holes and and expanded to secure themselves when the bolt was tightened up.
The lid simply sits on top of the tank.
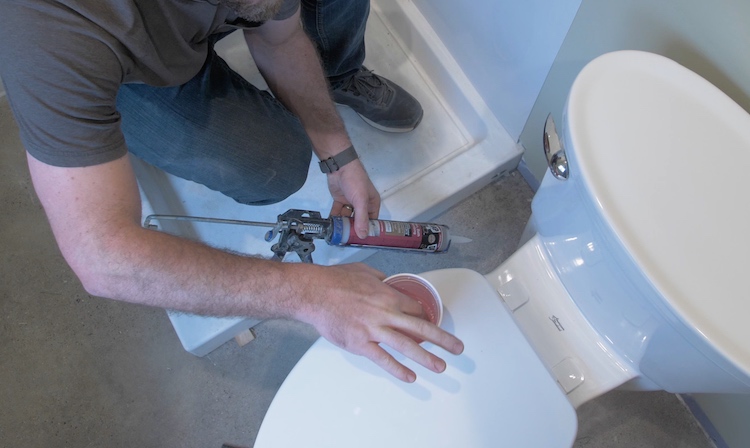
Sealing the Base
It is a code requirement to add a watertight seal around the base of the toilet. To do so I used DAP 3.0 Kitchen, Bath & Plumbing High Performance Sealant. The key features of this sealant and why I recommend it is that, not only does it have 10-year mold resistance but it also is specially formulated with Microban Antimicrobial protection to resist stains and odors.

Since I had to shim the toilet, I needed to install some foam backer cord to give the sealant something to flow against.
Then I laid down a thick bead of sealant, all the way around the toilet base.

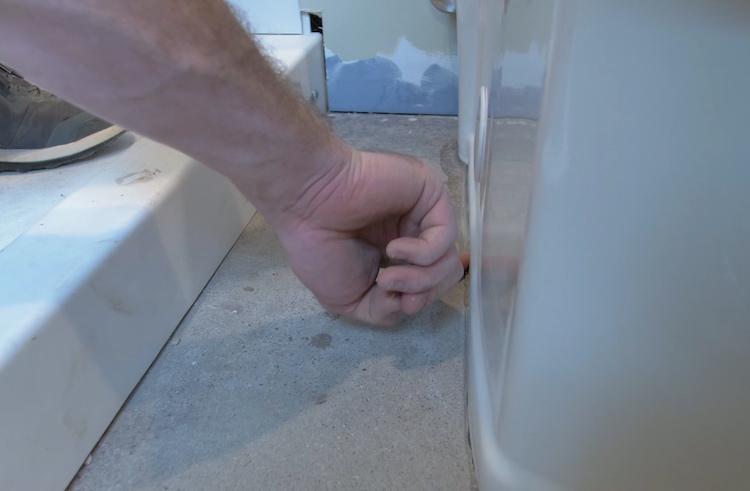
One tip, when doing any kind of caulking like this, I recommend having a little cup of alcohol (for silicone caulk) or water (for latex caulk).
Wet your finger before using it to round-over the caulk or sealant. This will lubricate your finger to create a smooth joint as well as help prevent excess sealant from sticking to your finger.
That’s it! I hope you now feel comfortable installing a toilet. I know this was a longer article with a lot of photos, but I wanted to cover every step in detail to show that this really is an easy job when you have the right parts and tools. Let me know if you have any questions in the comments.