
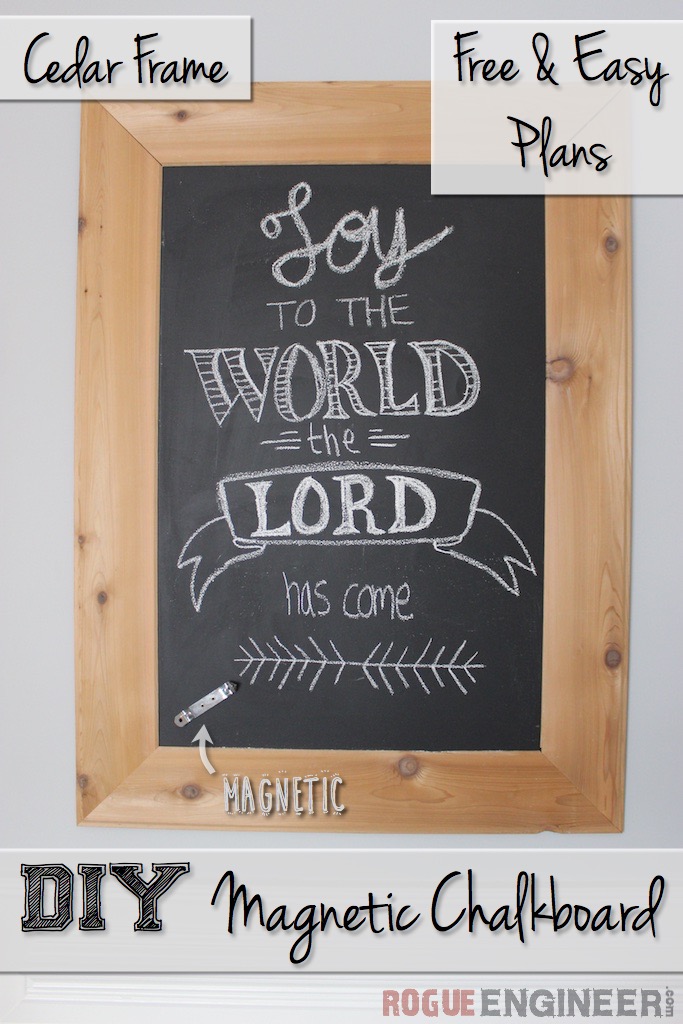
Cedar-Framed Magnetic Chalkboard
Forever now, we’ve had a large piece of wood, painted with chalkboard paint, that we would use during the holidays. I’ve been promising Jamie a nice framed chalkboard for a long time now that could stay on the wall year round. One feature that I really wanted to add was a magnetic surface. When I found this inexpensive sheet of galvanized steel at Home Depot I knew I could do it very easily. Plus the tongue and groove cedar boards, make this simple to build, decorative, and smell amazing! Enjoy these DIY plans and be sure to share with your friends!

Disclosure: The links provided in the “materials” and “required tools” sections are affiliate links. If you would like to support our site and help keep our content free come find out more about how we can make money with no extra cost to you.
Tools Required
Materials
- Qty 1 1″ x 6″ x 12′ Tongue & Groove, Cedar Board
- Tip: Cut in half at store to make transporting easier
- Qty 1 24″ x 36″ Galvanized Steel Flat Sheet
- Located by the roofing supplies
- Qty 1 5mm x 24″ x 48″ Underlayment
- Qty 1 1/4″ x 2″ x 36″ Oak Hobby Board
- Liquid Nails
- 1-1/4″ Pocket Screws (Coarse)
- 1″ Wood Screws (Only 5 required)
- Sawtooth Hanger
- Chalkboard Paint
- Foam Mini-Roller
- Chalk or Chalk Marker
Framed Magnetic Chalkboard Plans
Step 1: Cut Frame and Underlayment
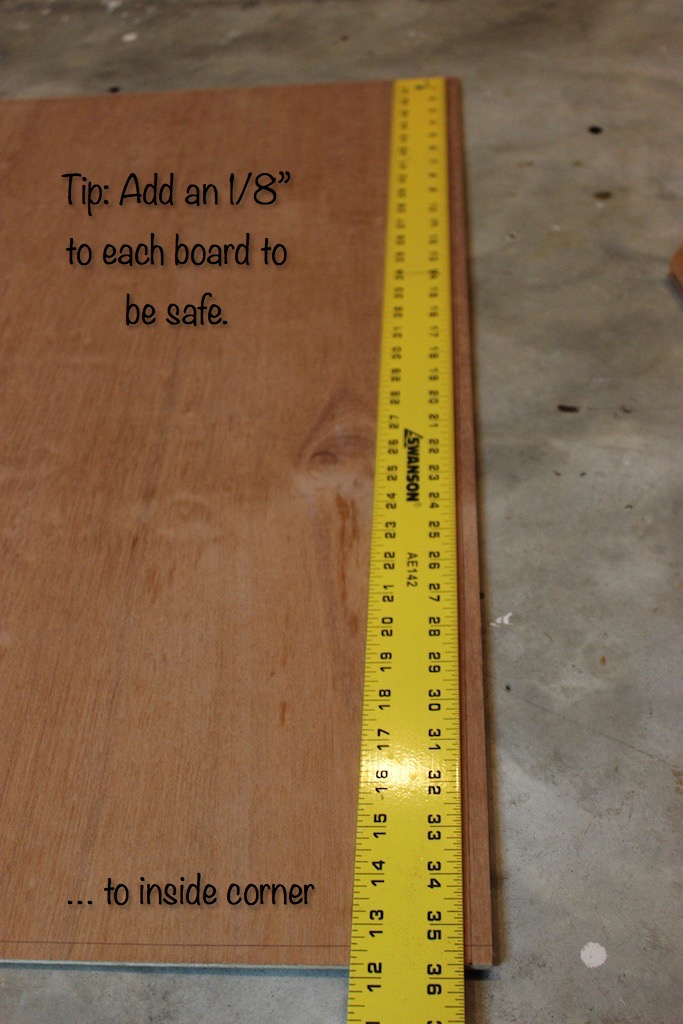
First, cut your underlayment down to 36″ in length so that it is the same size as your sheet metal.
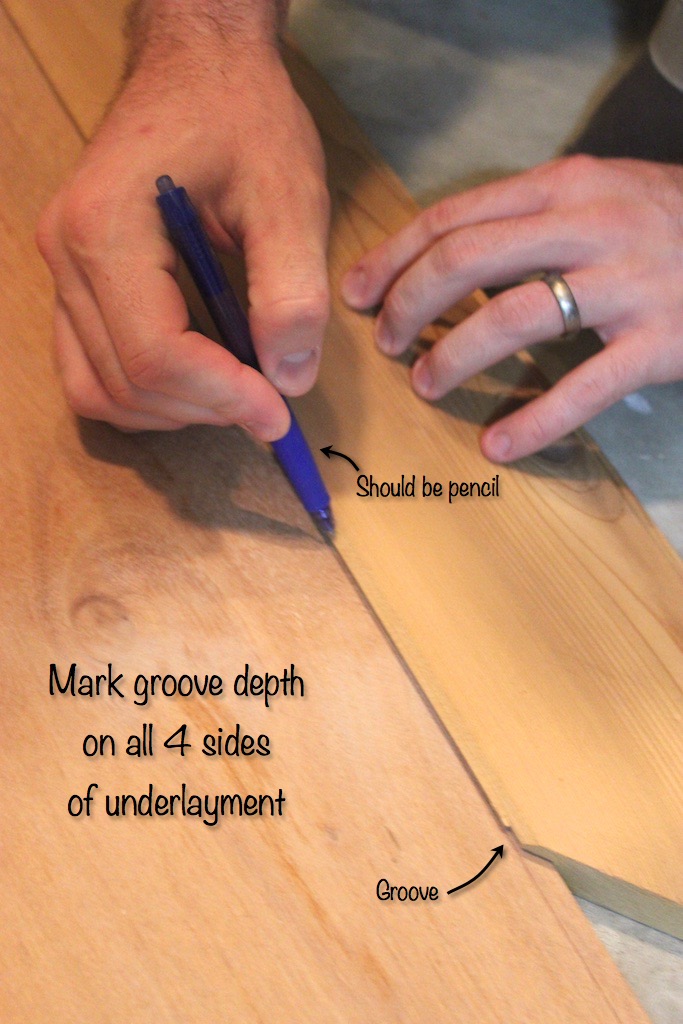
Next, mark the depth of your groove on all four sides of the underlayment as shown in the picture below.
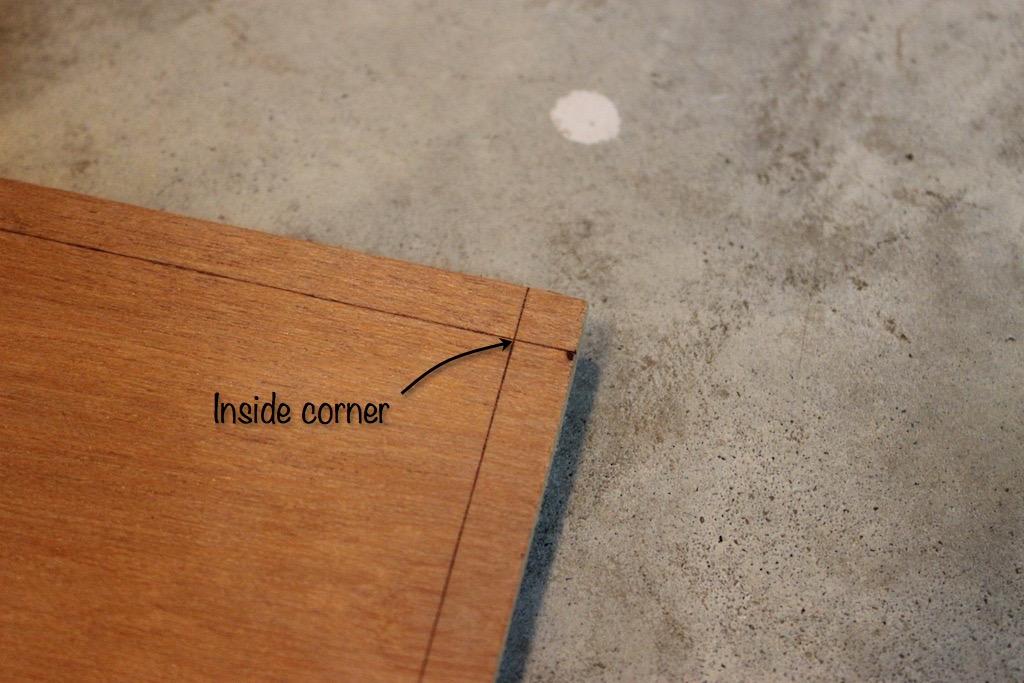
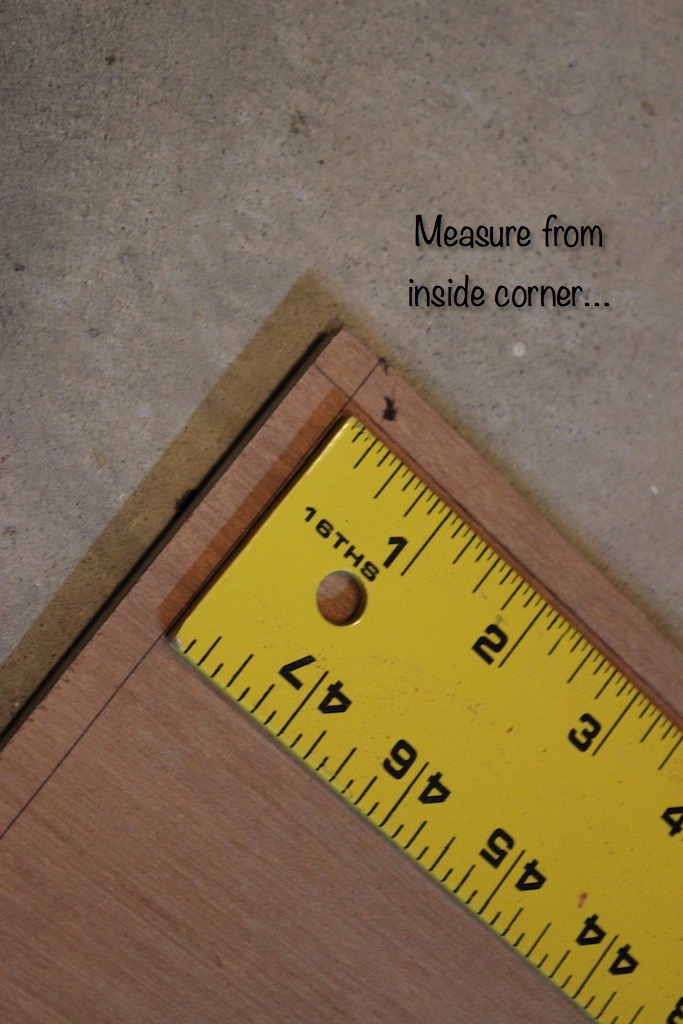
Then, measure from inside corner to inside corner for both short and long sides. Take that measurement and add 1/8″-1/4″ to give your underlayment a little breathing room. Write these down! These lengths will be the inside lengths of your cedar boards.
Step 2: Cut Frame and Underlayment
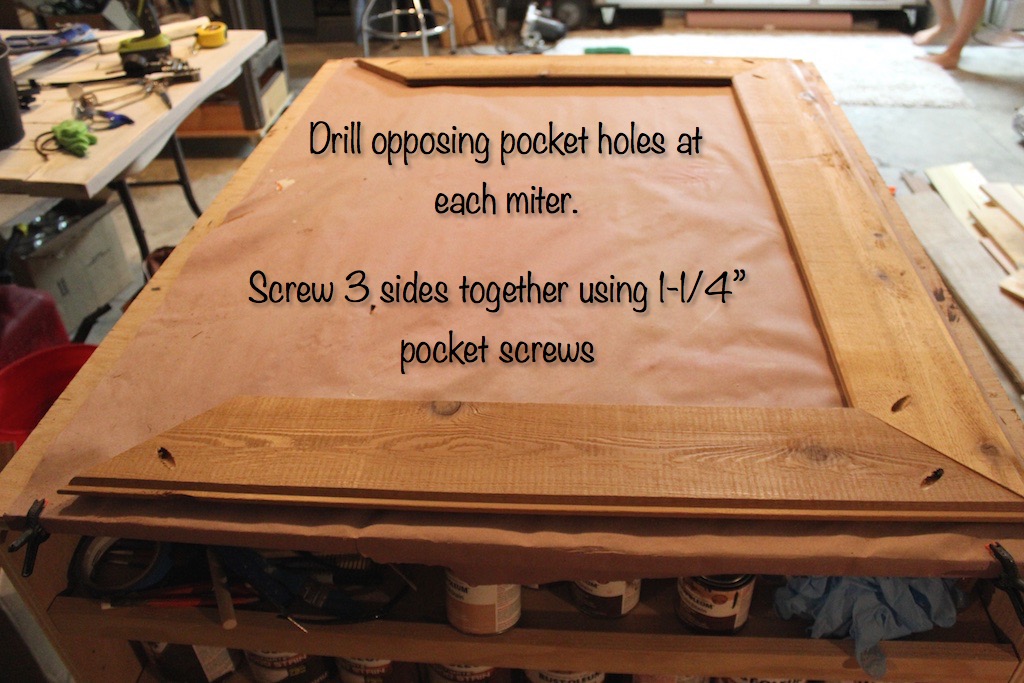
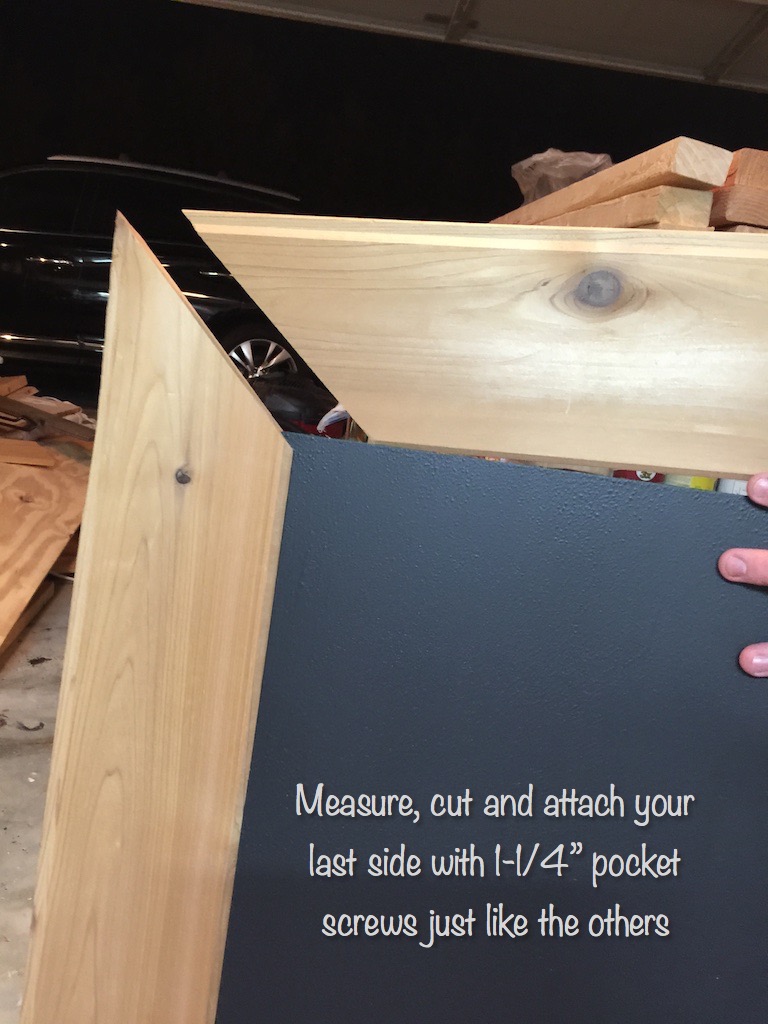
First, using the measurements from the last step, cut both of the short sides and only ONE of the long sides, mitering both cuts at 45 degrees.
Then, drill opposing pocket holes at each miter and screw the three boards together as shown using 1-1/4″ course pocket screws.
Step 3: Apply Chalkboard Paint
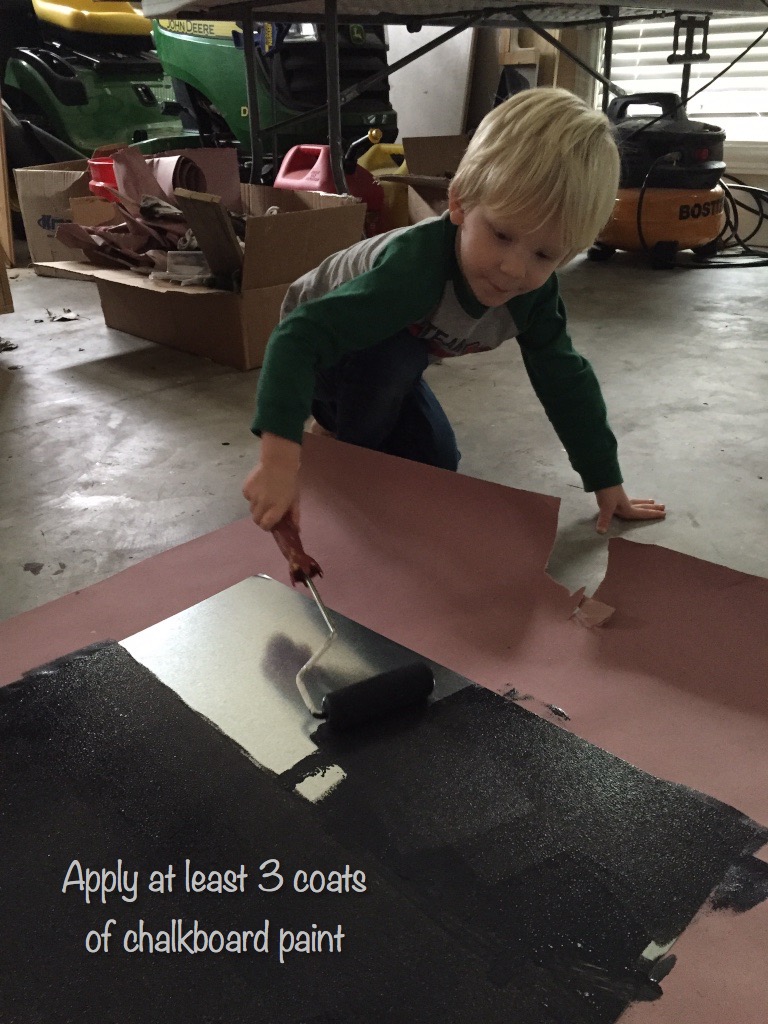
Using a foam mini-roller, apply at least 3 coats of chalkboard paint to the 24″ x 36″ sheet metal, allowing ample dry time in between coats.

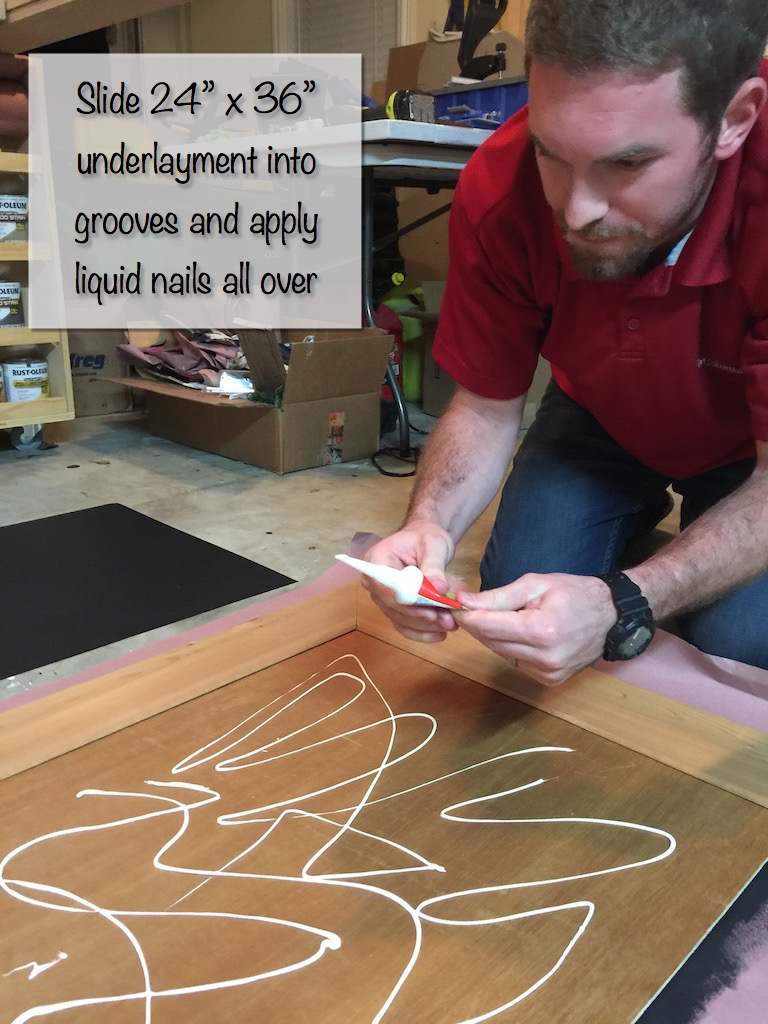
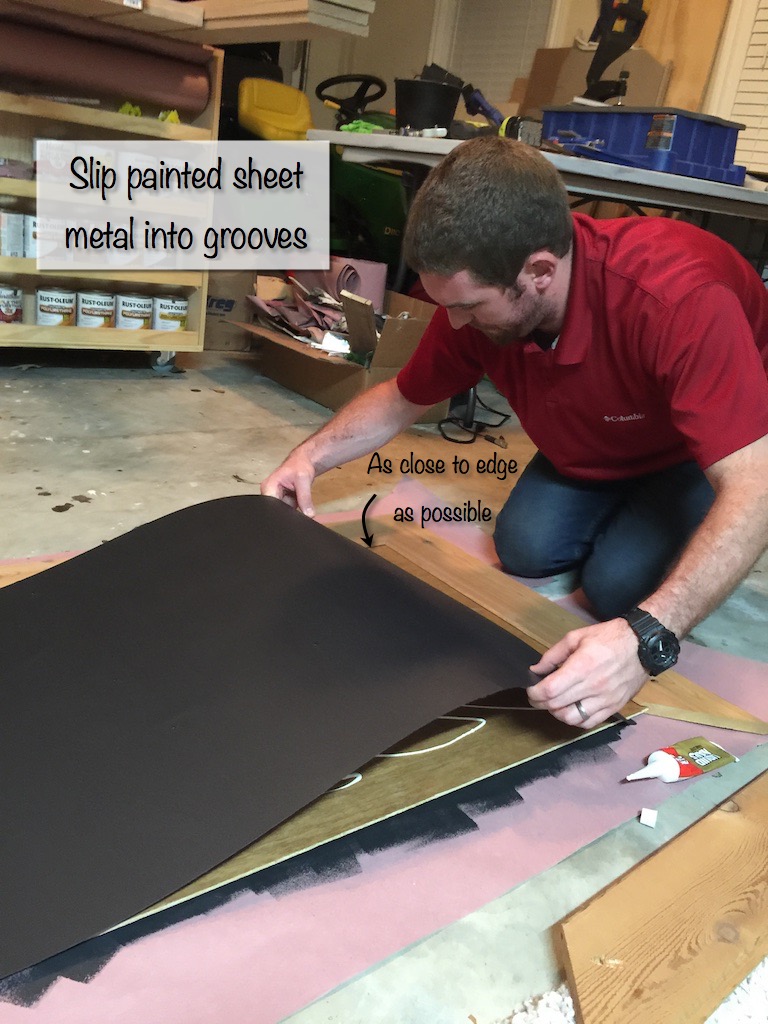
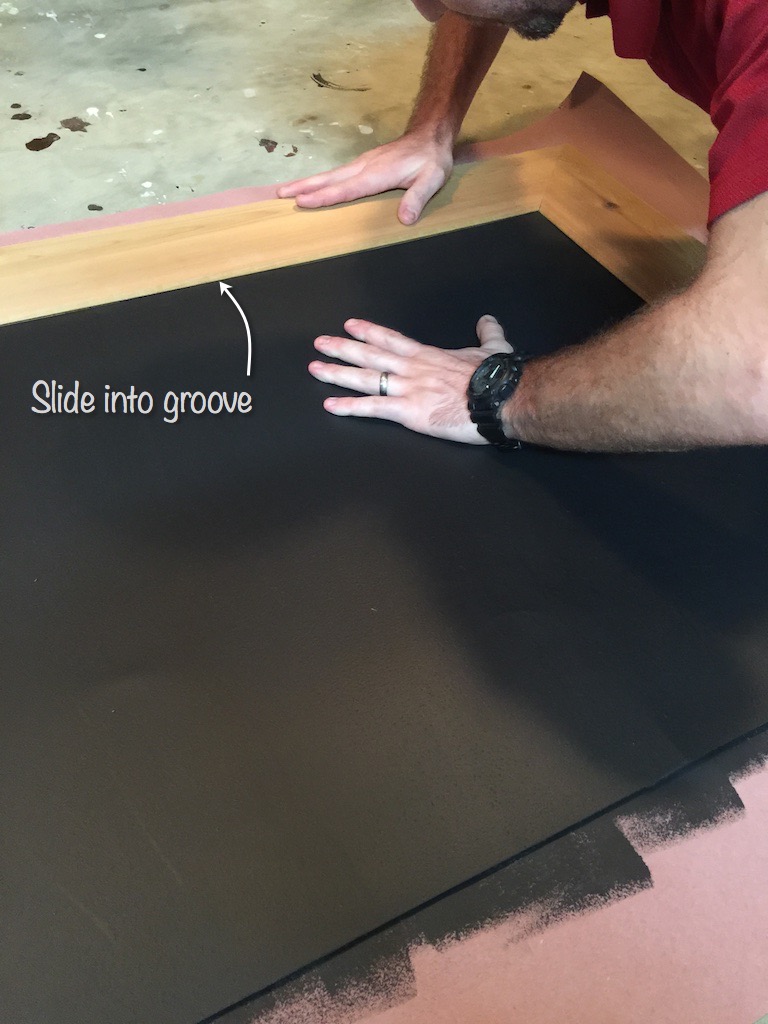
Step 4: Install Underlayment and Sheet Metal
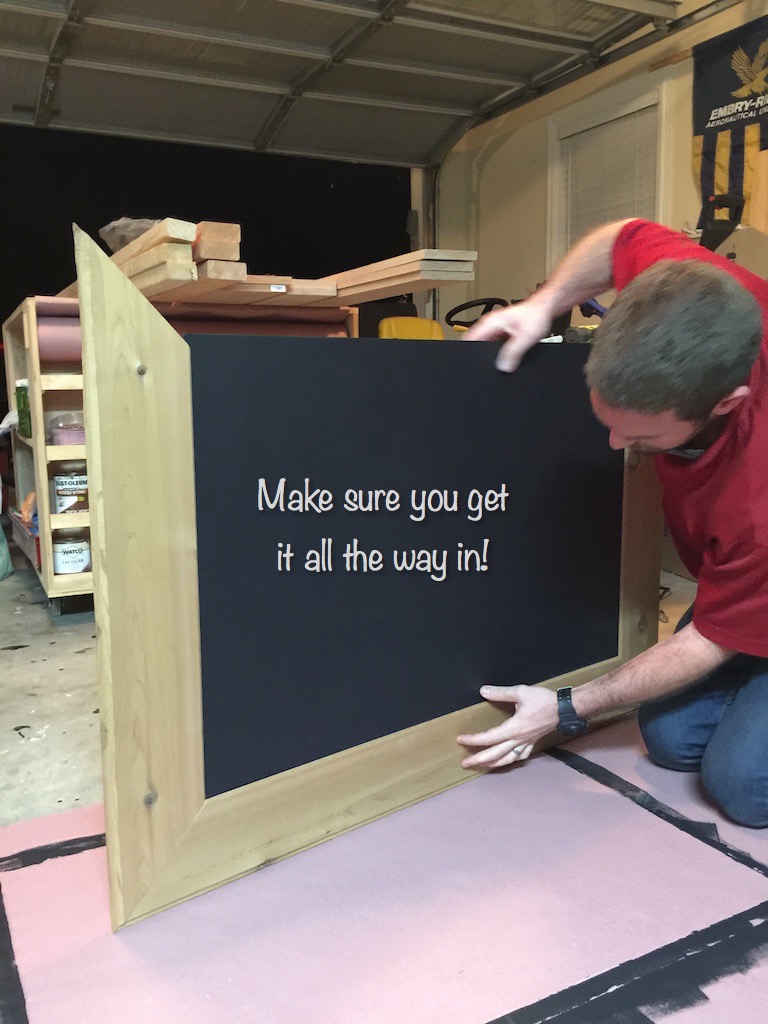
Step 5: Cut and Install Final Cedar Board
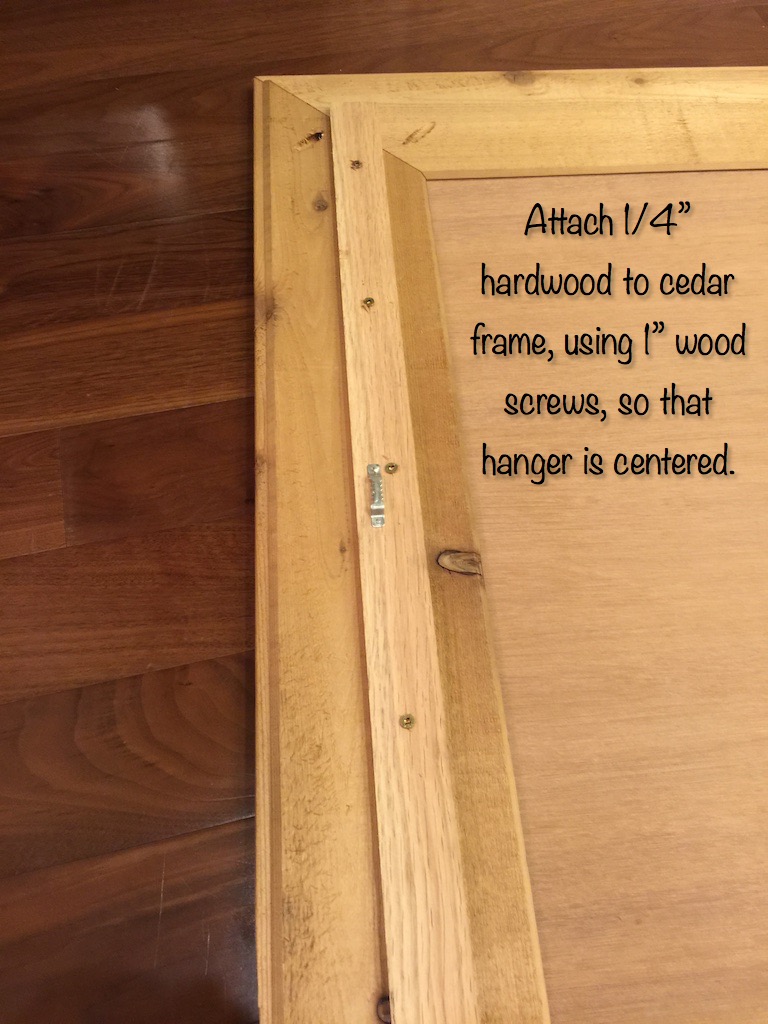
Step 6: Add Hanger Support
The cedar is far to soft to hold a sawtooth hanger with only two small nails. Oak however, is a hardwood, and plenty hard enough to work. Using a long oak board you can distribute the load across five 1″ wood screws that attach the oak board to the soft cedar frame.

Questions? Comments?
As always, if you have any questions don’t hesitate to comment below and especially don’t forget to post pictures of your finished products in the comments! ENJOY!
Your magnetic chalkboard looks like a great project to build. One question – what makes it magnetic?
Thanks Jerry! The galvanized steel flat sheet is what makes it magnetic.
Sir,
I don’t mean to keep asking a million questions but I find your work outstanding for someone that didnt use to do it as a full time deal (at least until now), and as a beginner I have questions. How did you measure the mitered corners accurately? Meaning what formula or calculation did you use to cut the 45 degrees corners accuratelly when accounting for the groove inside to where the material wouldn’t be sliding all over the place once the frame is set? How do you know how long to cut the wood where the wood joins perfectly?
No worries Gustavo. In step 1 I detailed exactly how I did that. Once you have the underlayment cut down, mark the depth of your groove on all four sides of the underlayment as shown in the picture in step 1. Then, measure from inside corner to inside corner for both short and long sides. Take that measurement and add 1/8″-1/4″ to give your underlayment a little breathing room. Write these down! These lengths will be the inside lengths of your cedar boards.