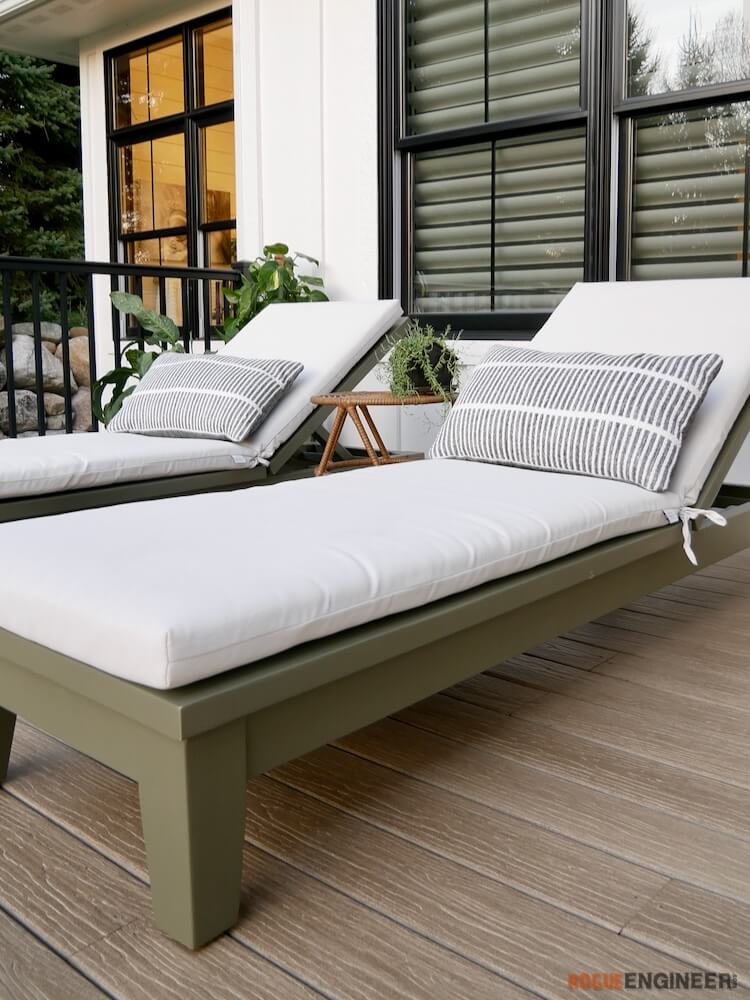
Outdoor Chaise Lounger
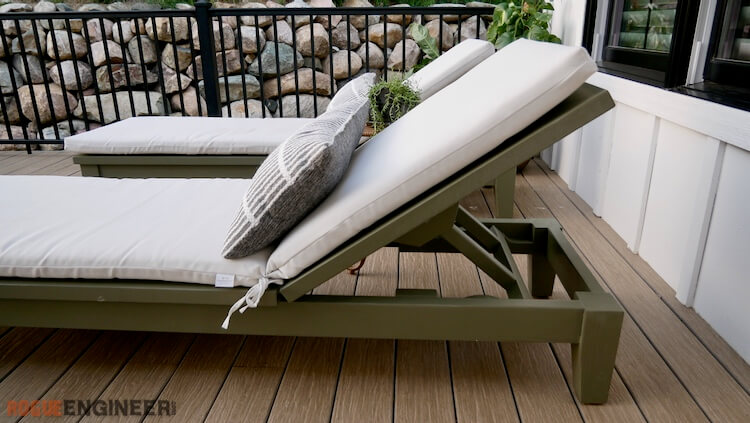
With summer upon us, one thing that Jamie has wanted is a set of outdoor chaise lounge chairs for the back deck. One day when I saw her laying on the deck trying to catch some rays, I decided it was time. After settling on these cushions from Target it was time to start designing a chaise lounge to suit them. I knew we wanted the loungers to recline and have three stops (flat, 45 degrees and closer to upright) which made it a bit more difficult but was worth the effort.
Disclosure: This project is sponsored by DAP products, however, the design and opinions are 100% mine. Help support brands that support the maker community and enable us to give great free content like this.
Time to Complete
1 Wknd
Estimated Cost
$50-100
Skill Level
Intermediate
If you love this stuff as much as we do, you might want to consider following us on Instagram where we post sneak peeks and behind the scenes stuff in our stories. Also, did you know you can get tons of projects plans from all around the web when you follow us on Facebook and Pinterest!
Tools
Materials
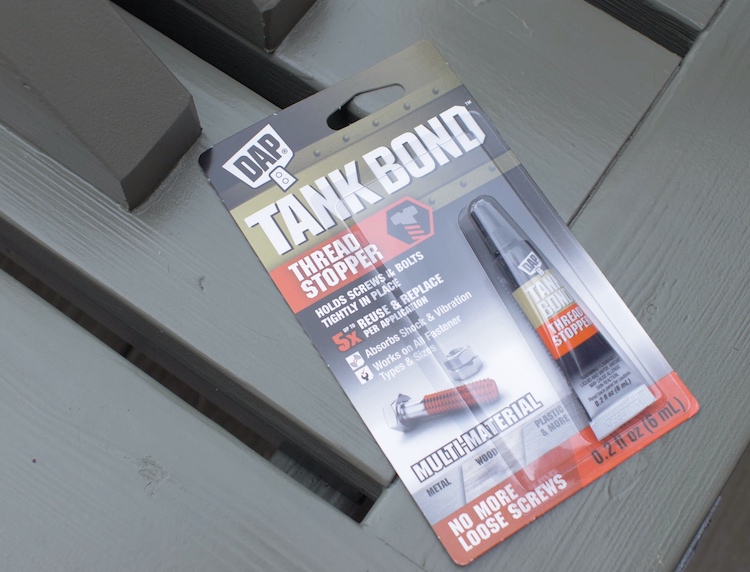
- DAP Tank Bond Thread Stopper
- DAP Platinum Patch (if painting)
- DAP Premium Wood Filler (if staining)
- DAP Spray Adhesive
- 4 x 4 x 8’ Douglas Fir or Cedar
- (9) 2 x 4 x 8’ Douglas Fir or Cedar
- 2-1/2” Exterior Pocket Screws
- 1-1/4” Exterior Wood Screws
- Exterior Wood Glue
- (2) 1/4” x 5” Galvanized Carriage Bolts, Washers and Nuts
- (2) 2-1/2” Exterior Hinges
- Plastic Furniture Feet Pads
- Primer
- Paint
- Cushion
Disclosure: The links provided in the “materials” and “required tools” sections are affiliate links. If you would like to support our site and help keep our content free come find out more about how we can make money with no extra cost to you.
Dimensions
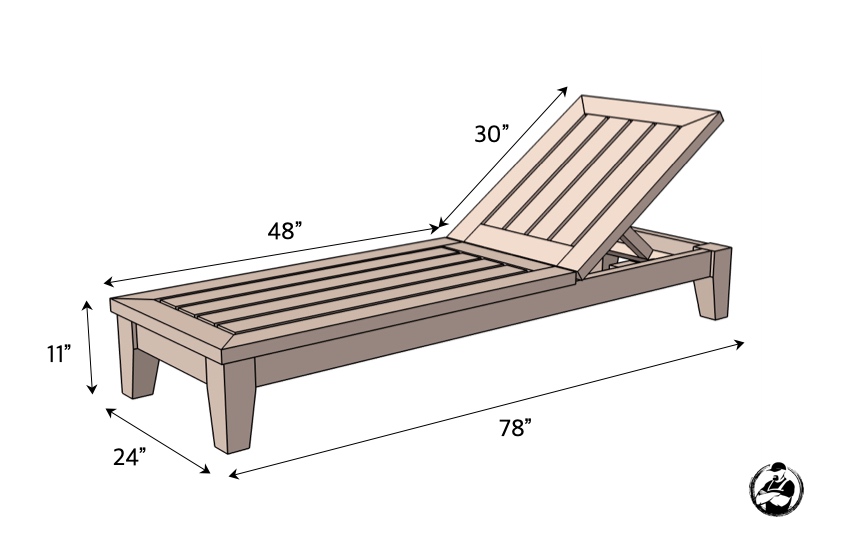
This tutorial will show you how to build an outdoor chaise lounger that is sized for a Target replacement cushion. In this example the lounger is painted with exterior paint.
Total Time: 2 days
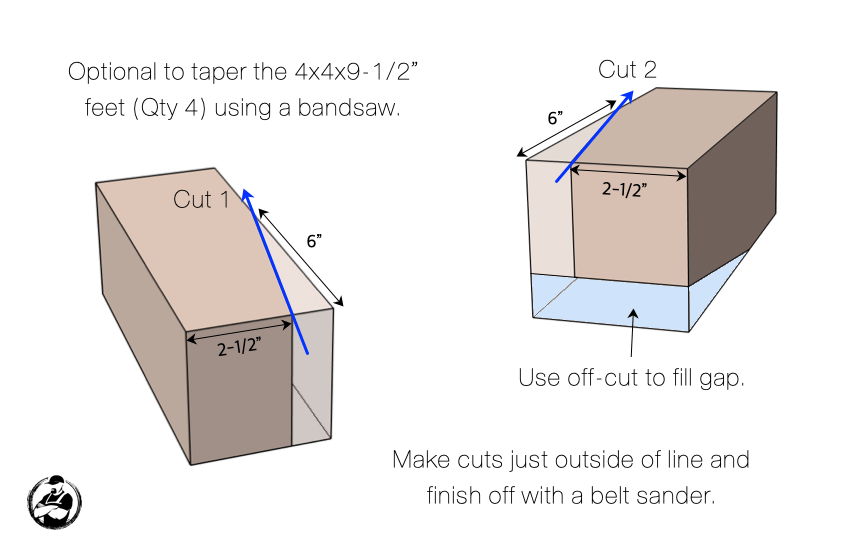
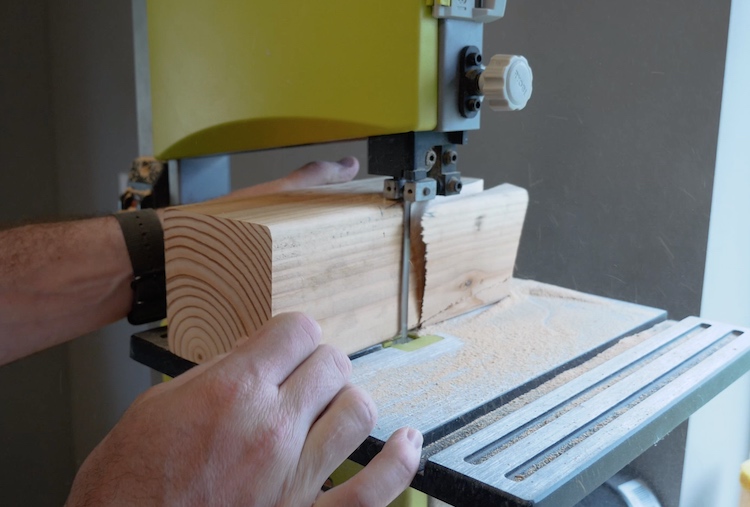
Tapering the Feet (Optional)
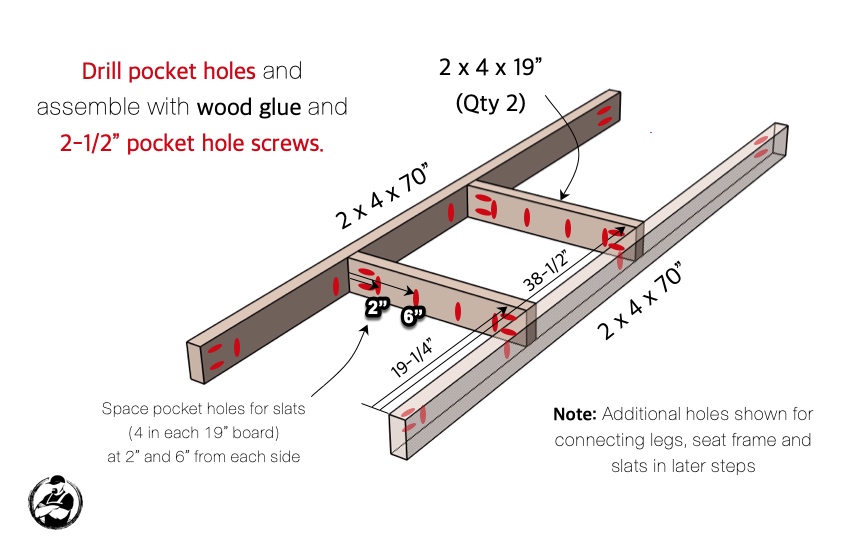
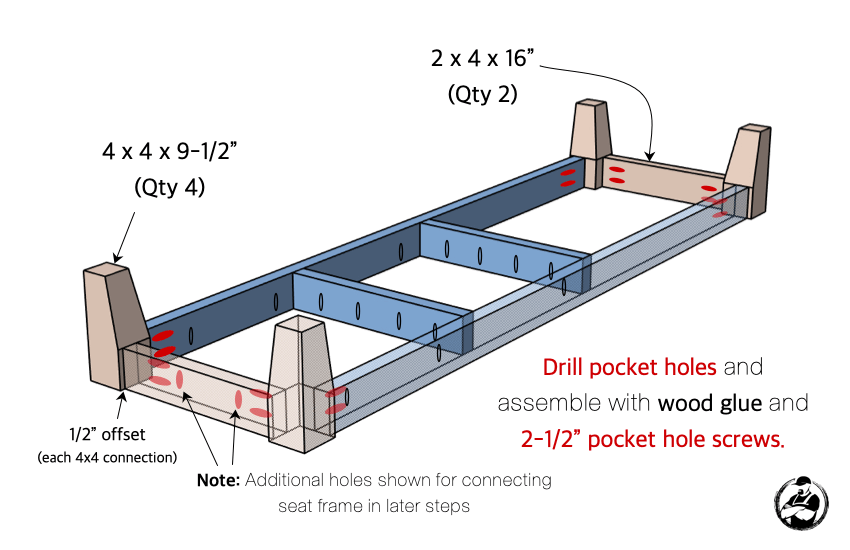
Assembling the Base
Assembling the Base (cont.)
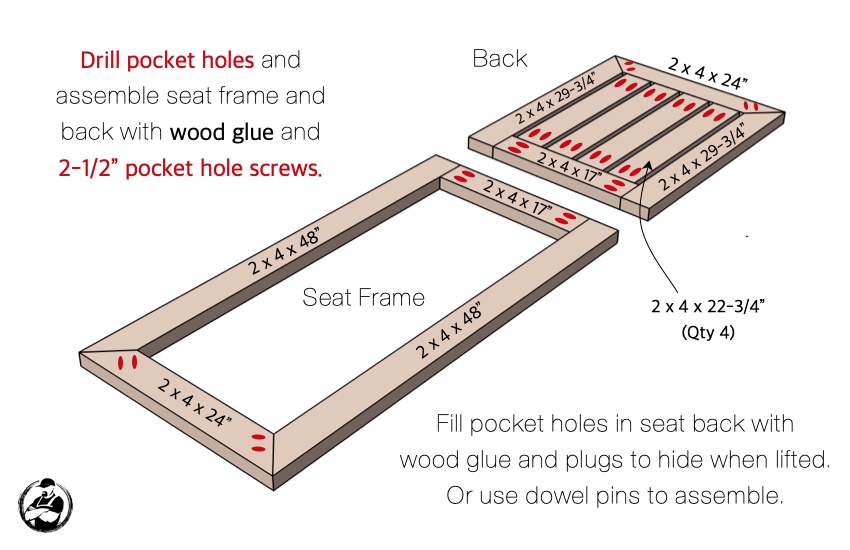
Assembling the Seat Frame and Back

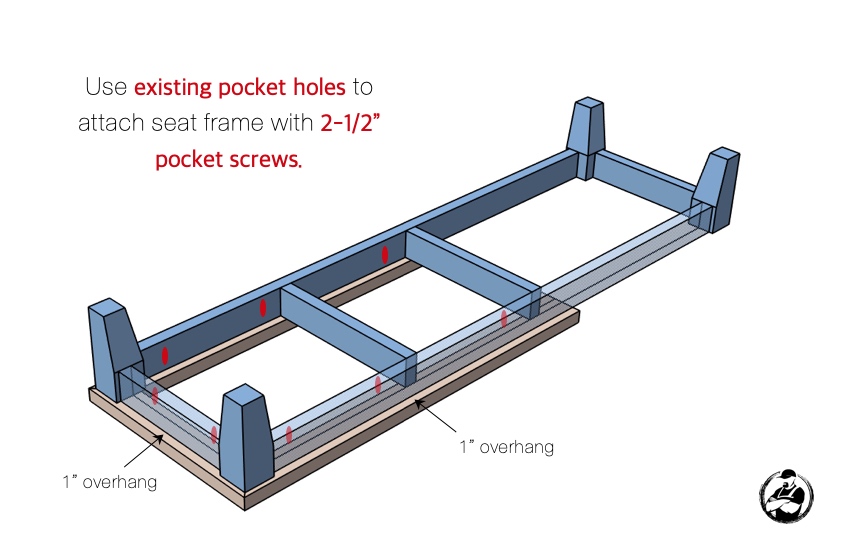
Attaching the Seat Frame
Note that the seat slats are left off until after paint. This makes the painting process easier.
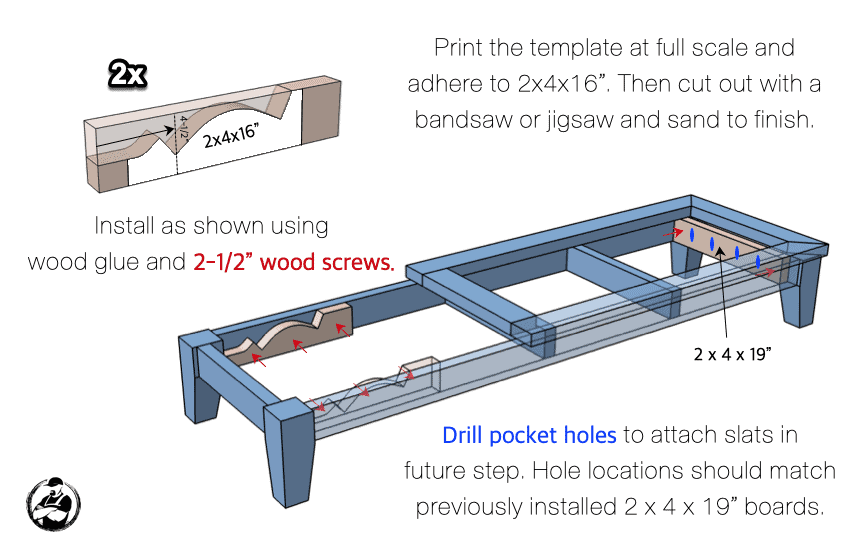
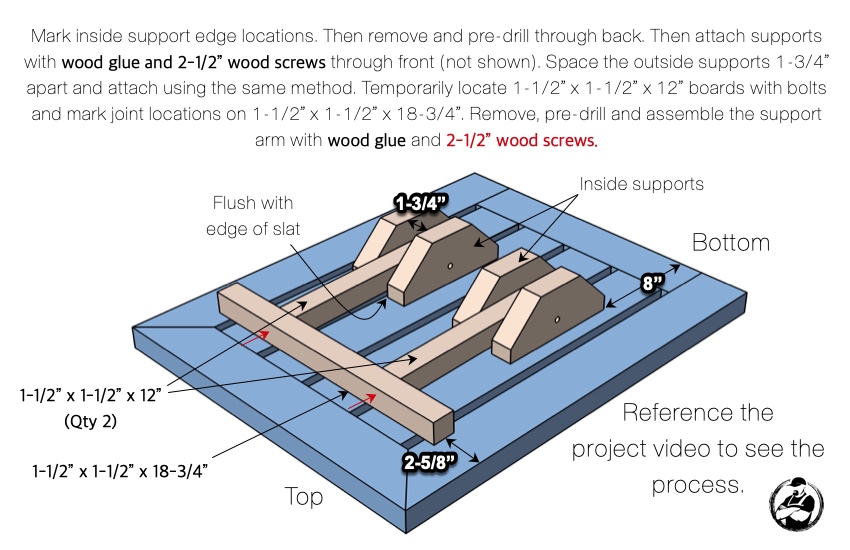
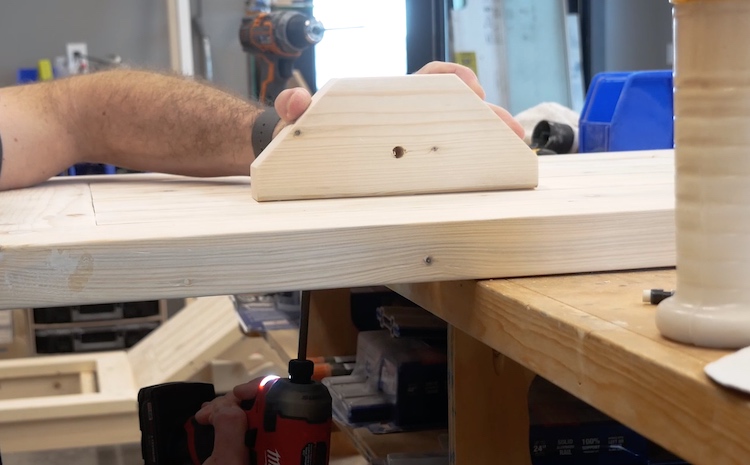
Cutting and Installing Supports
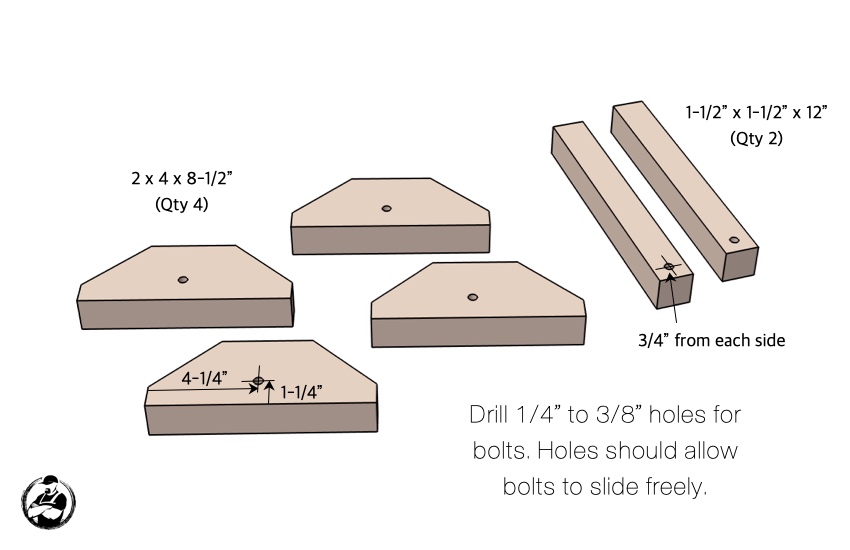
Drilling Holes for Support Arms
Attaching Supports to Back

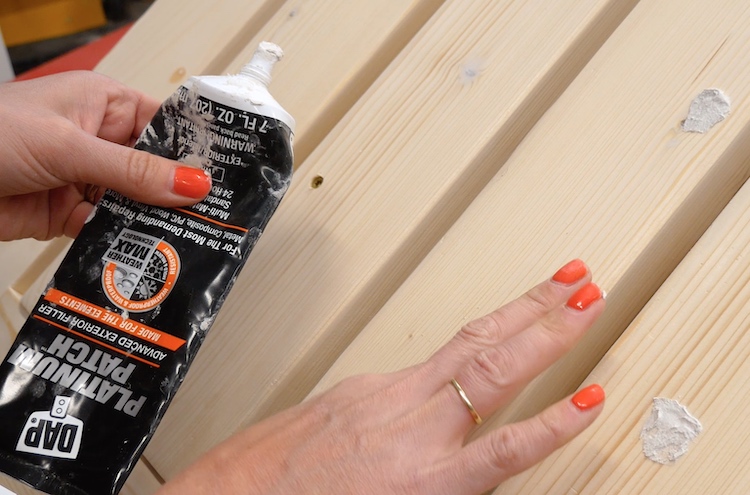
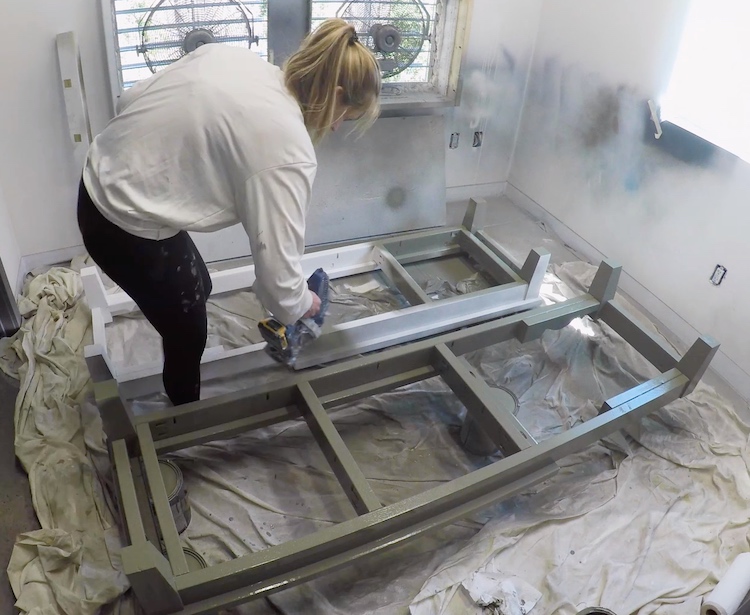
Prepping and and Painting
Before you prime and paint you’ll want to get the surface as clean looking and smooth as possible. To fill any imperfections I recommend using DAP Platinum Patch (if painting) or DAP Premium Wood Filler (if staining). DAP Platinum Patch is designed for exterior applications and will adhere to a variety of surfaces.
As always, when painting bare wood, make sure to prime it first. For paint, we used Behr’s exterior grade paint in the color Gladiator Gray with a satin sheen.
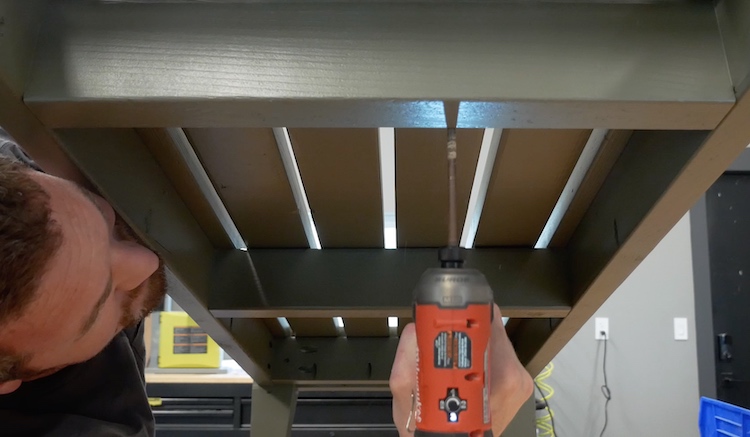
Installing the Seat Slats
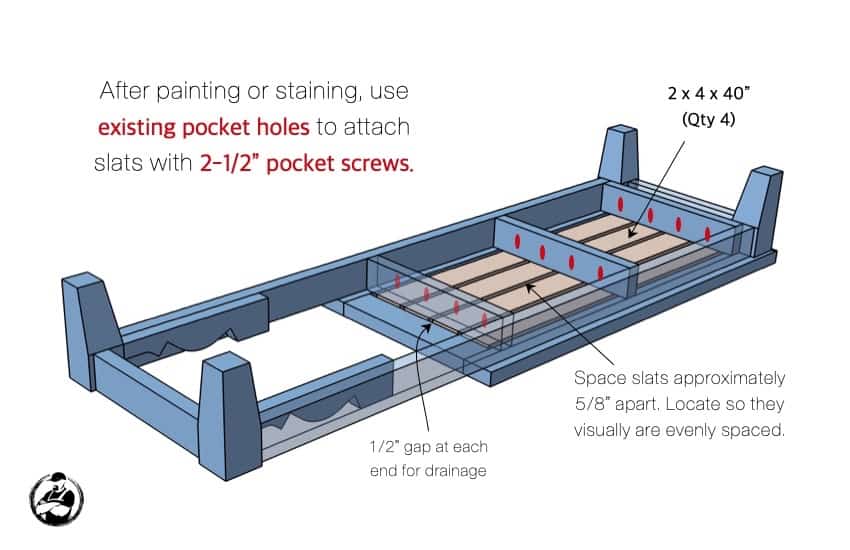
Installing the Back
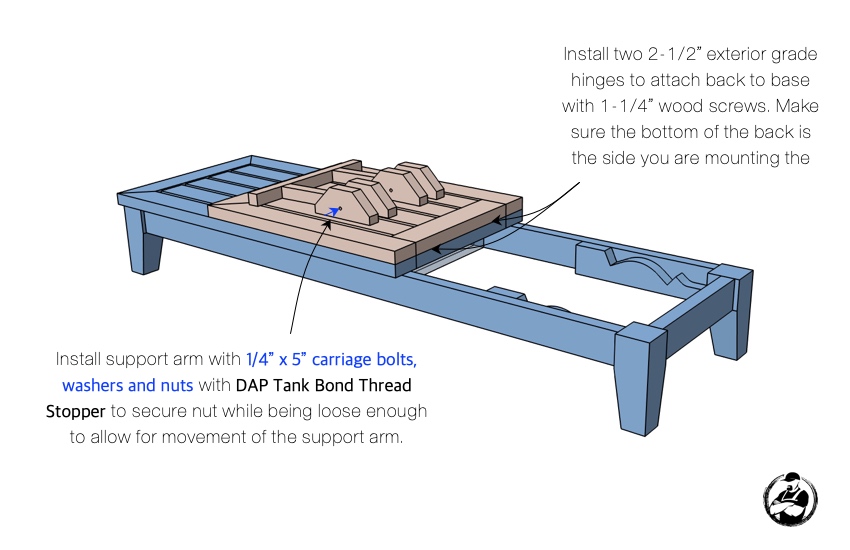
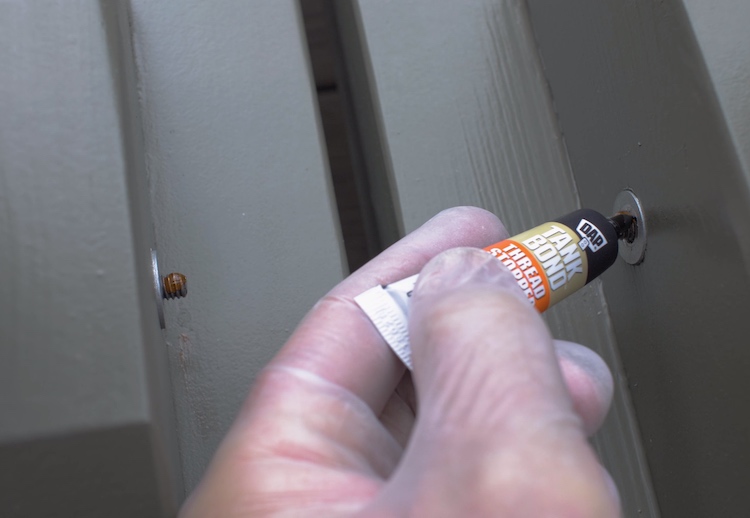
When attaching the support arm with the carriage bolt you want to make sure the nut is not too tight. If the nut is overtightened it will create too much friction and the support arm won’t swing freely. Apply DAP Tank Bond Thread Stopper to the treads and hand tighten the nut. The tread stopper will keep the nut in place and can even be loosened if need be over time.