

Wood Plank Loveseat
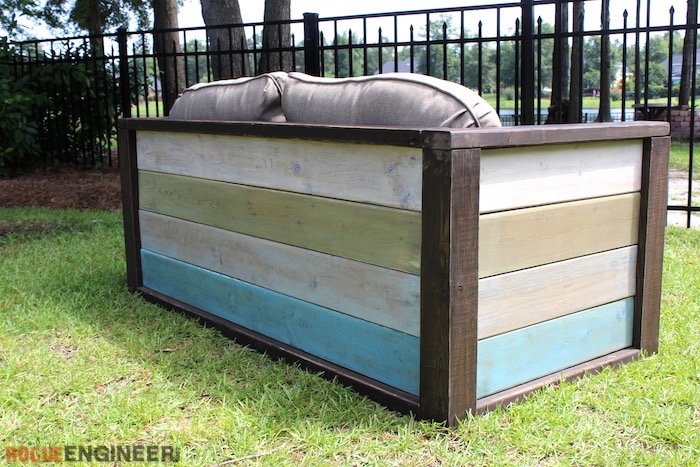
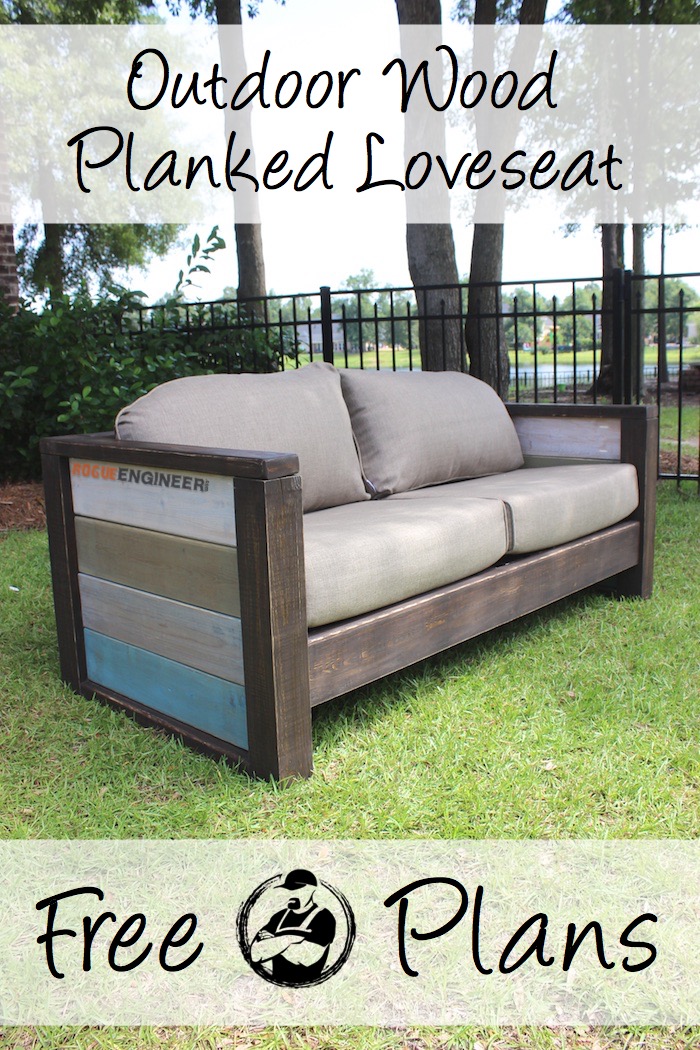
The new Varathane reclaimed stain colors inspired me to create this awesome planked outdoor loveseat. Who doesn’t need more outdoor seating. This planked loveseat would be a great addition to any outdoor space. Enjoy!
For sneak peeks of our upcoming projects be sure to follow me on Facebook and Instagram. Also, follow me on Pinterest to get tons of projects plans from all around the web!
Required Tools
Materials
- Qty 1 – 4 x 4 x 8′ Untreated Kiln Dried Lumber
- Qty 7 – 2 x 6 x 96″ Untreated Kiln Dried Lumber
- Qty 4 – 2 x 4 x 96″ Premium Studs
- Qty 5 – 1 x 4 x 8′ Common Boards; Pine
- (Link is to 6′; 8′ not listed online)
- Loveseat Cushions
- 2-1/2″ Kreg Pocket Hole Screws (Coarse)
- 1-1/4″ Pocket Hole Screws
- 1-1/4″ Brad Nails
- 2-1/2″ Wood Screws
Disclosure: The links provided in the “materials” and “required tools” sections are affiliate links. If you would like to support our site and help keep our content free come find out more about how we can make money with no extra cost to you.
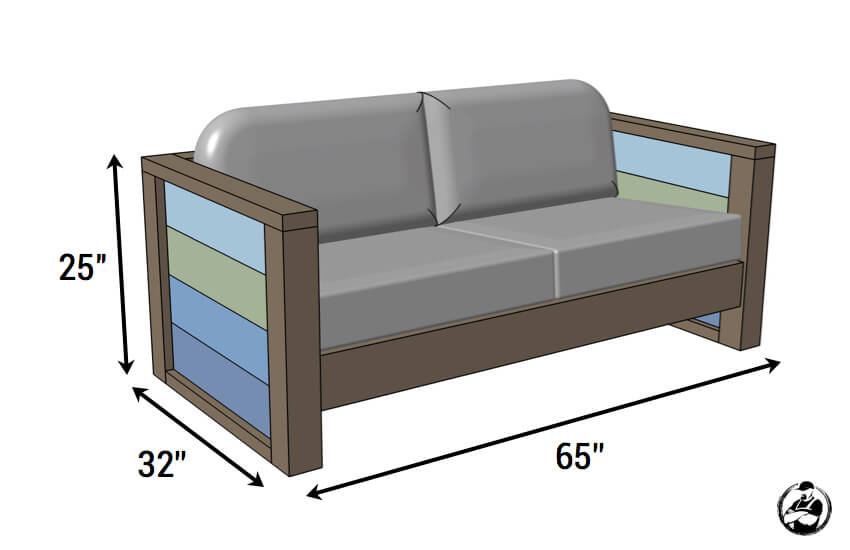
Dimensions
Cut List
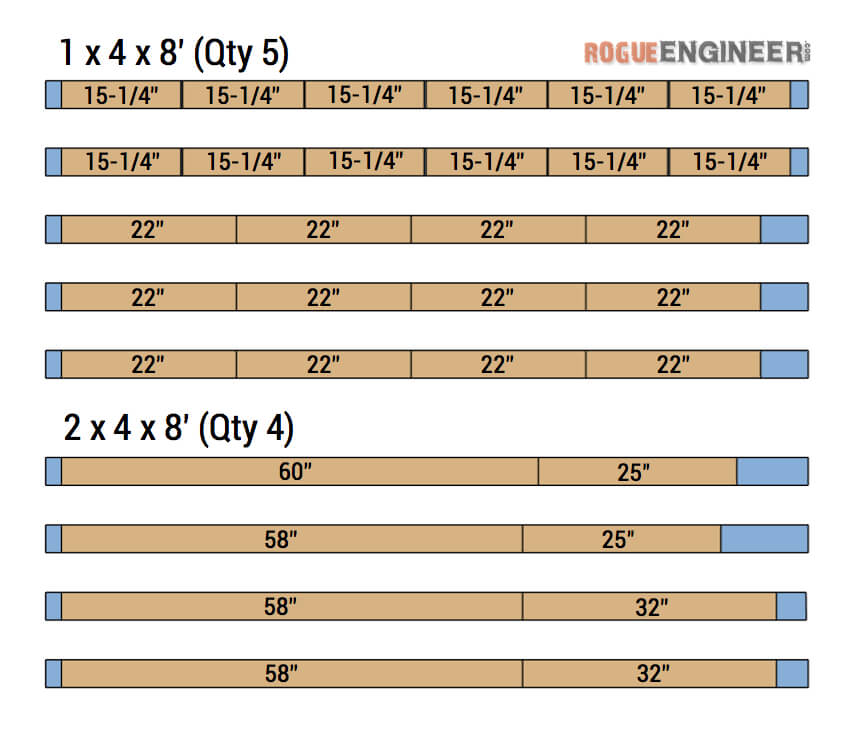
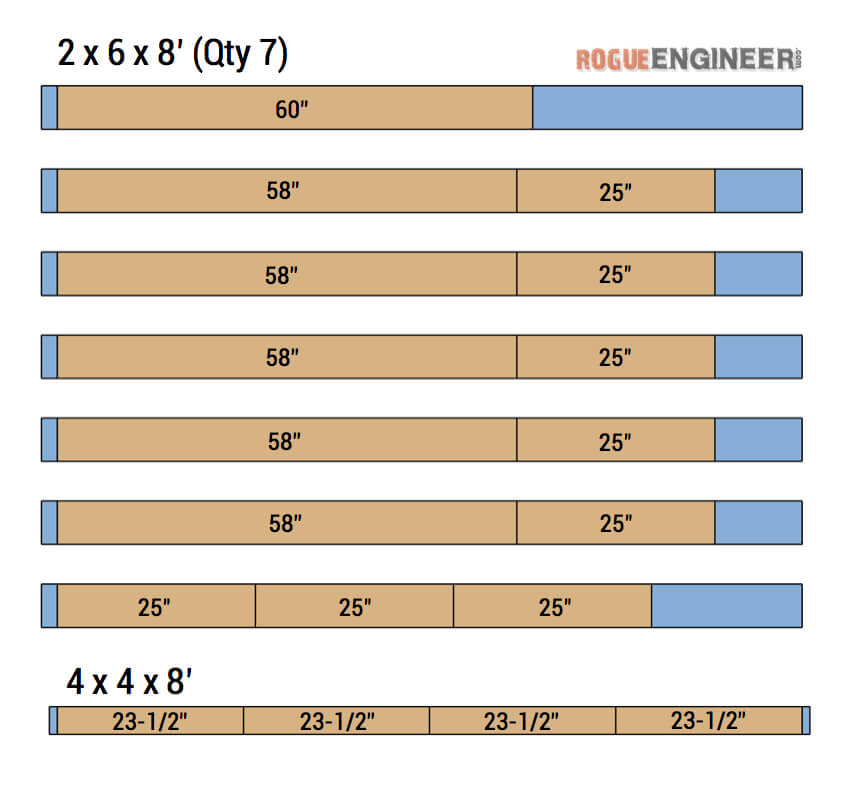
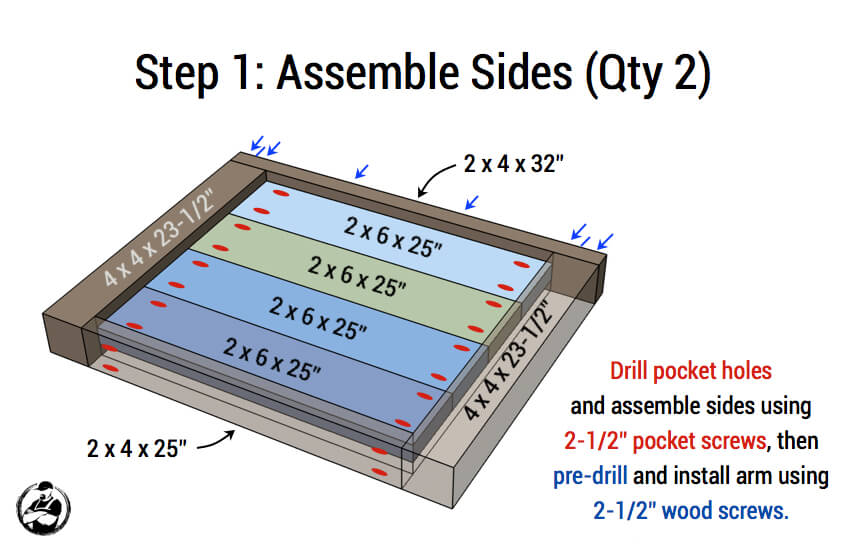
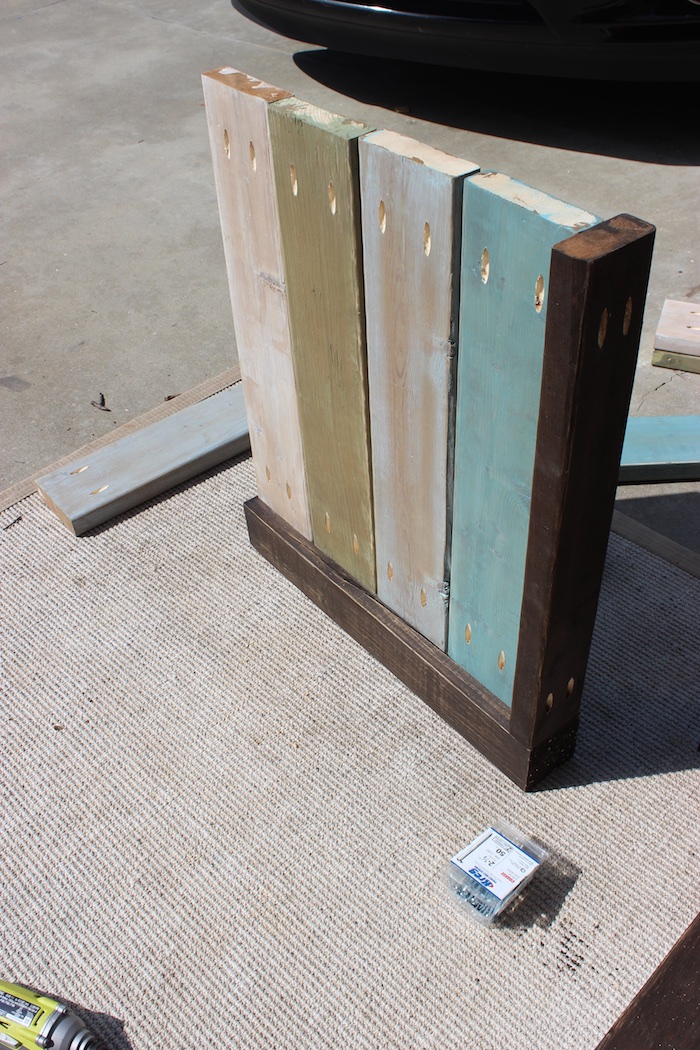
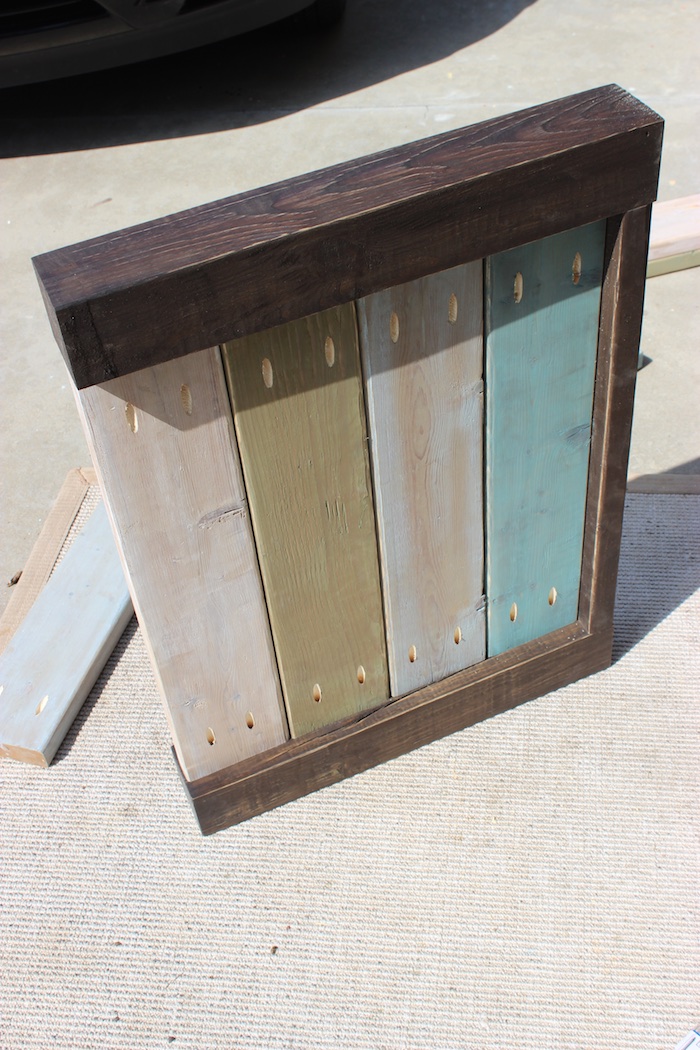
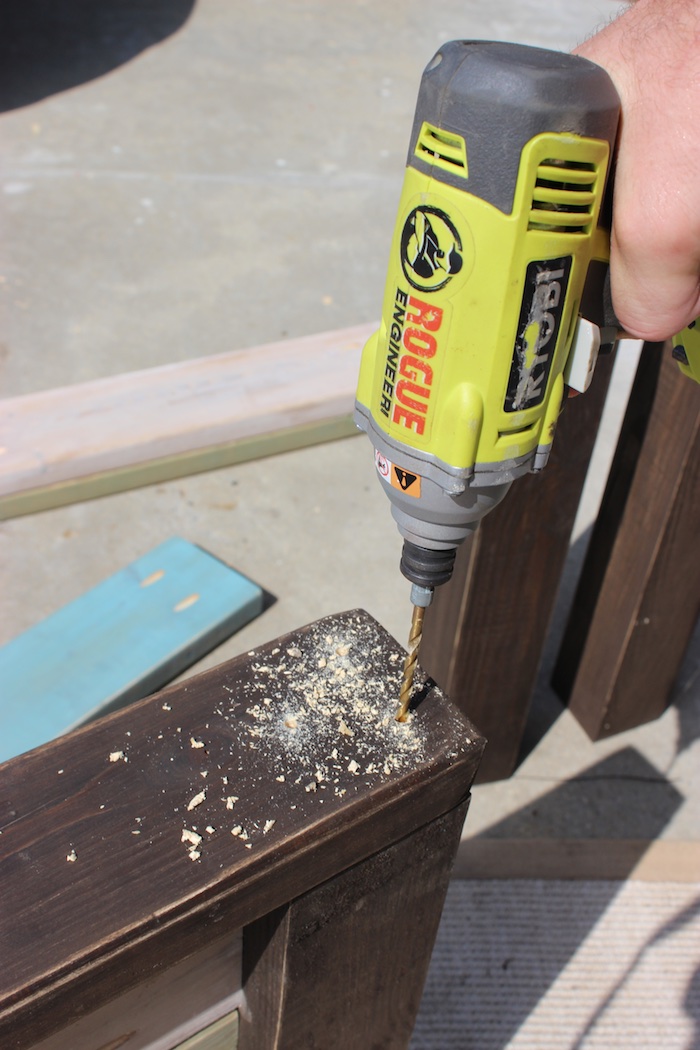
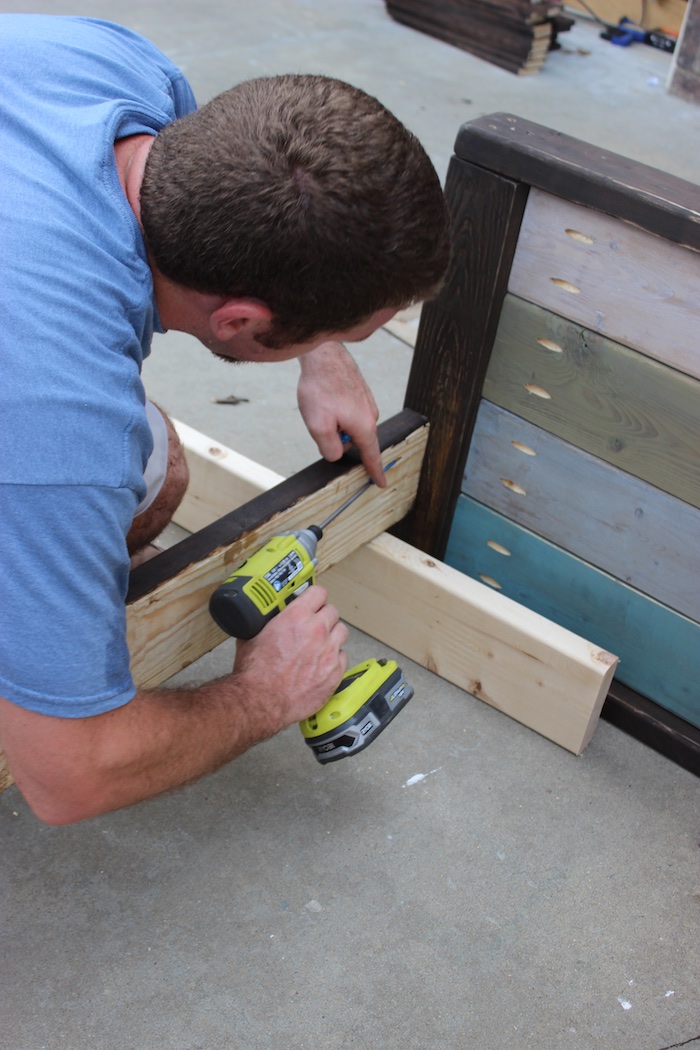
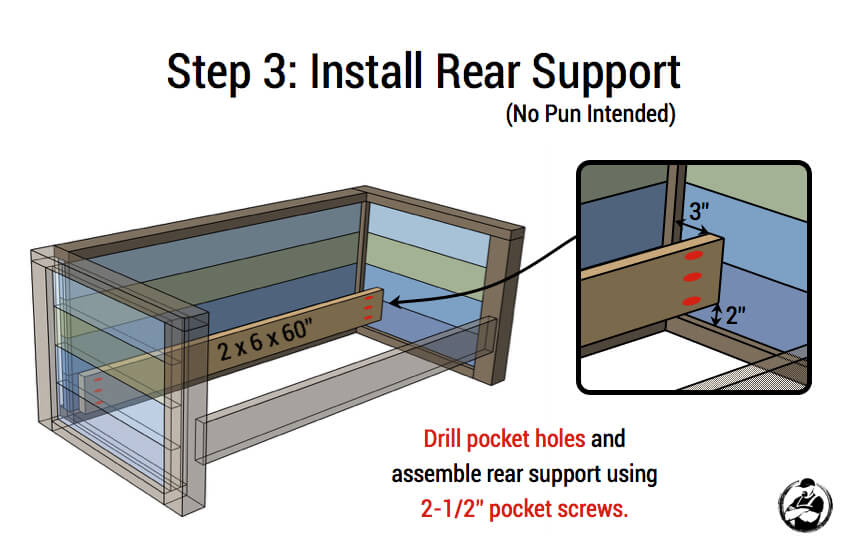
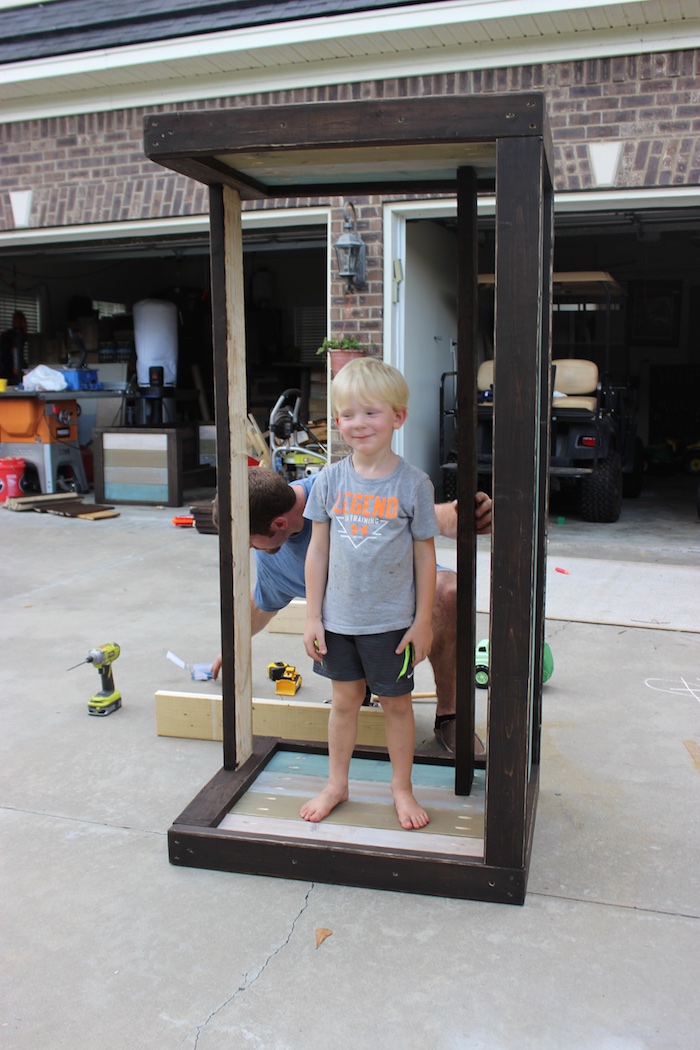
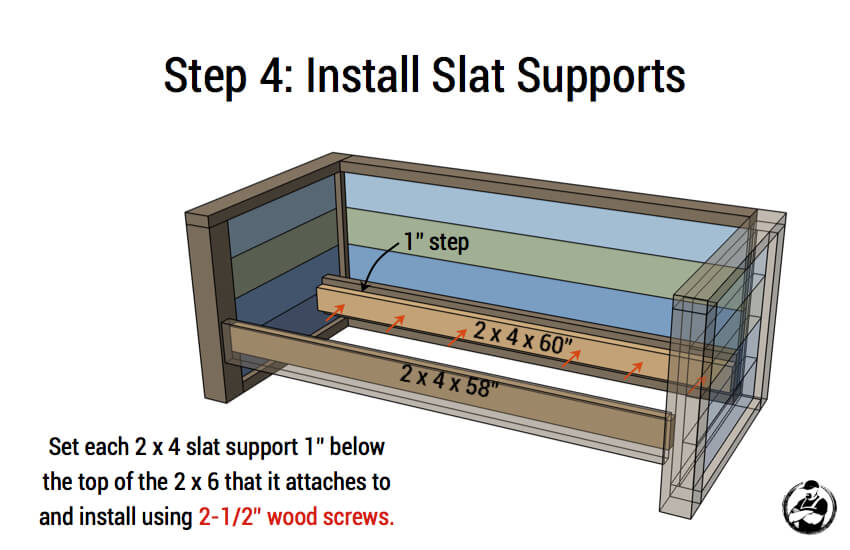
How to build an Outdoor Wood Plank Loveseat
Finishing
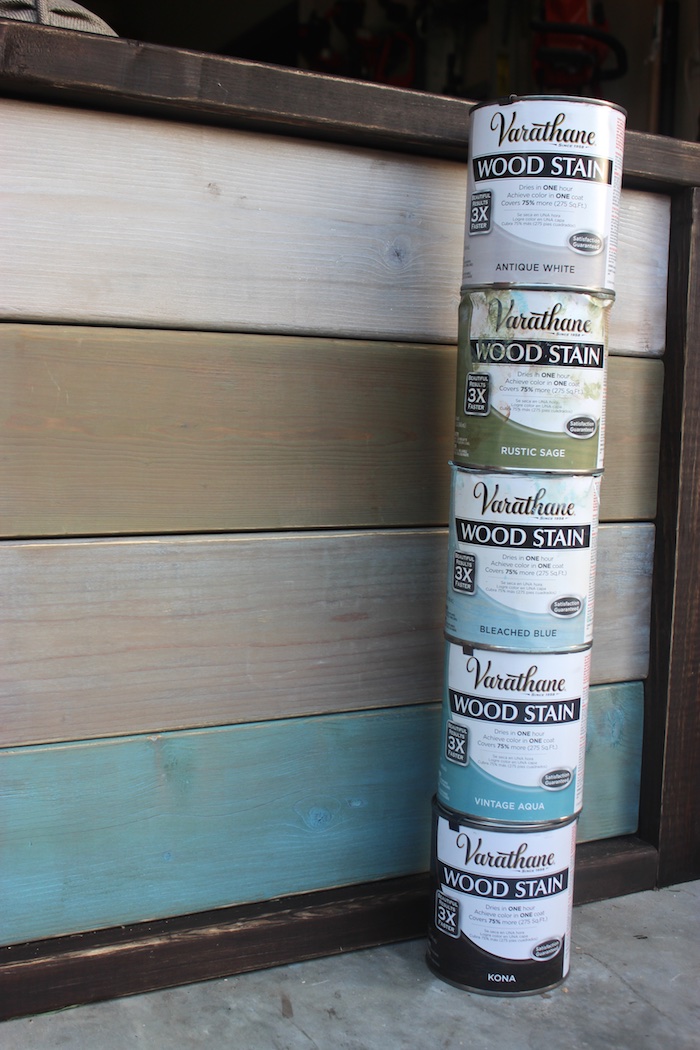
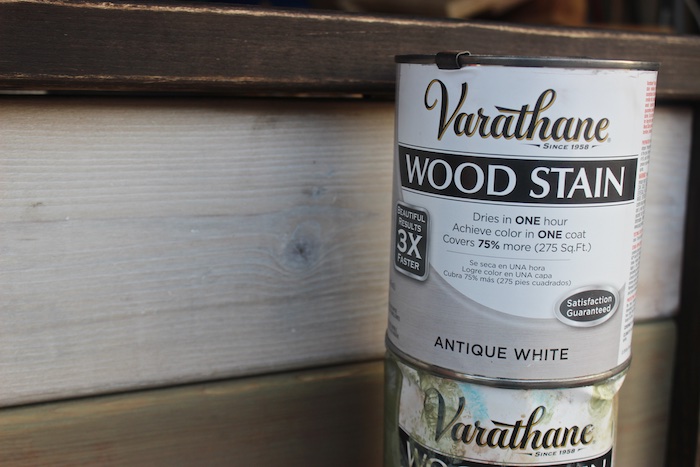
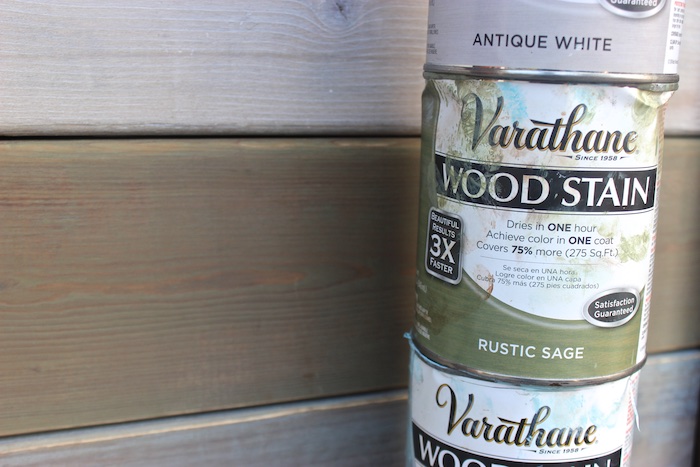
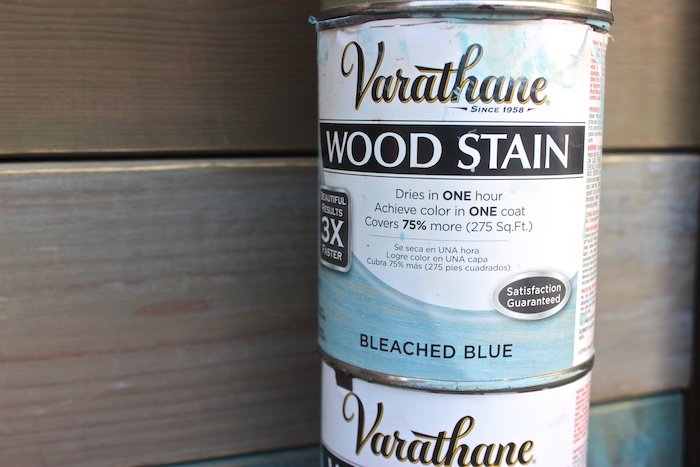
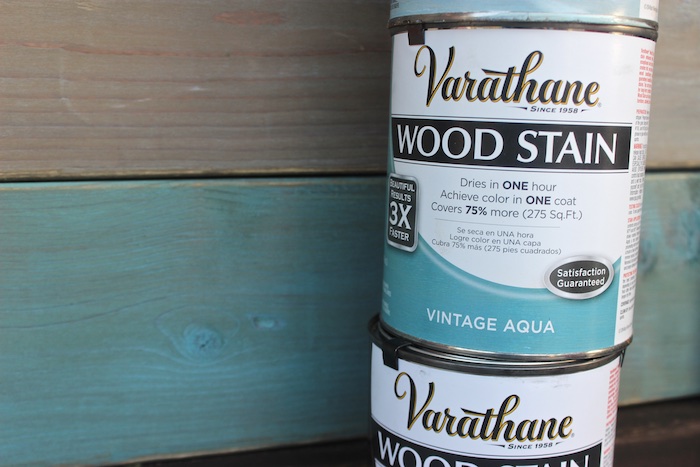
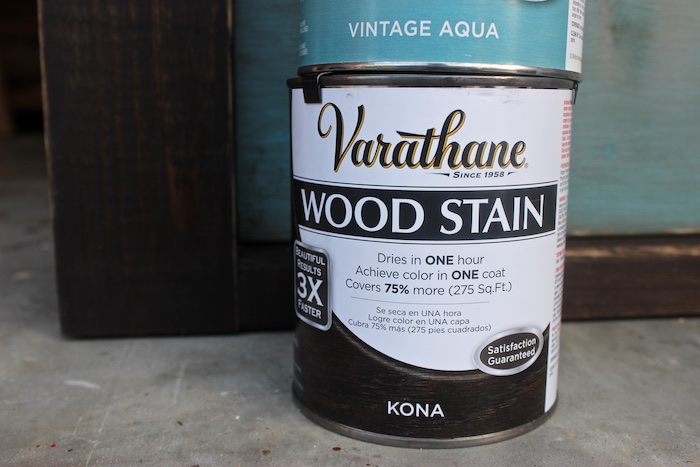
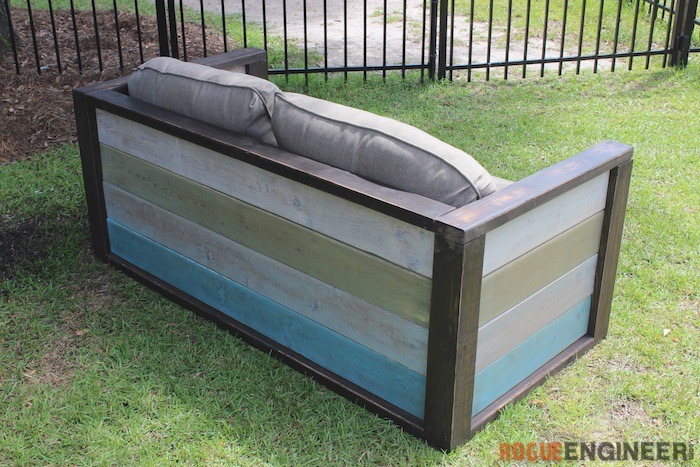
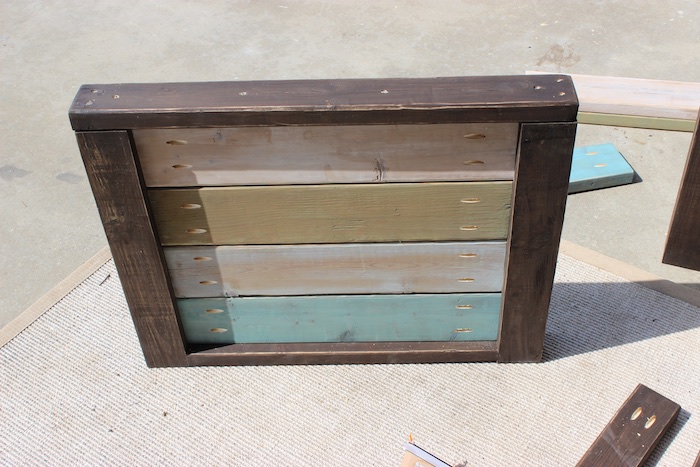
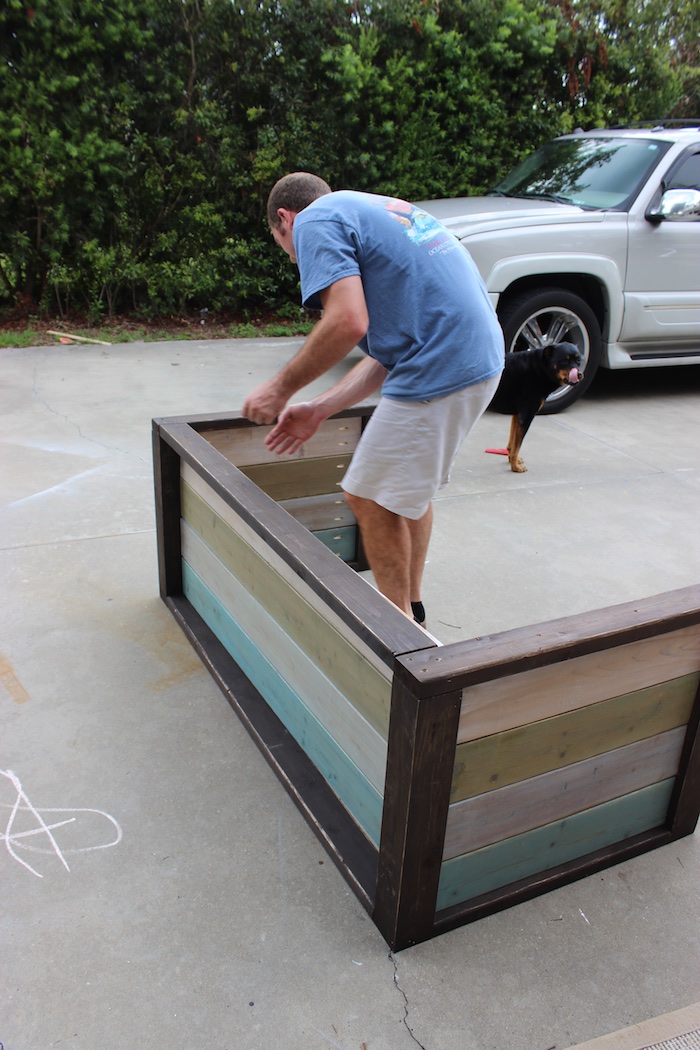
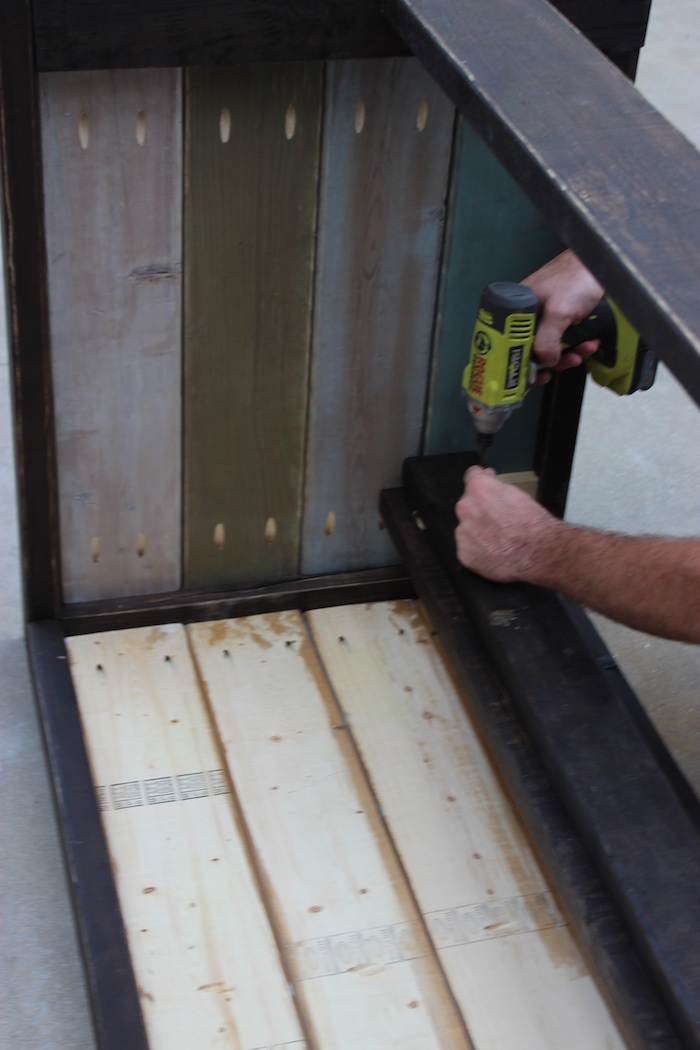
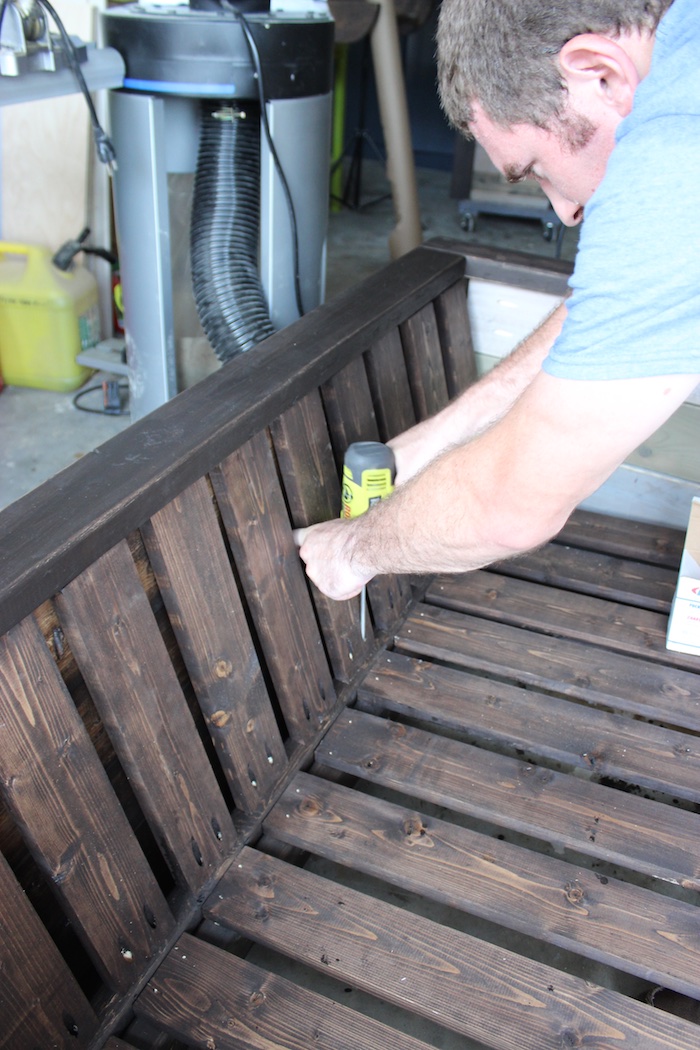
Unlike most projects, since these boards are all different colors the staining must be done up front. For this project the frame is stained with Varathane’s Kona and the planks are stained with Vintage Aqua, Bleached Blue, Rustic Sage, and Antique White (bottom to top). After the stain dried we distressed the edges with 220 grit sand paper.
Disclosure: This post was sponsored by Rustoleum. While I received compensation for including their products I was going to anyway (but don’t tell them that ;)) and all the opinions are mine.
Questions? Comments?
As always, if you have any questions don’t hesitate to comment below and especially don’t forget to post pictures of your finished products in the comments! ENJOY!
This looks awesome! Great job! Even down to the stain choices. Maybe I missed it in the article but where did you get the cushions? Is the bench dimensioned so that it uses common pillow sizes or something?
Thanks Jason. They are from HomeDepot, the Martha Stewart Collection. There is a link for the cushions in the materials list of the post. I built the loveseat off the cushion dimensions , however it should work with any standard outdoor cushion.
I really like what you post- your plans are so easy to follow. Every thing I have seen that you posted is great!. Keep up the good work.
Thanks Denny! I appreciate your feedback. I’ll keep the plans coming as long as I have readers like you. Thanks again.
Really nice, and great job.I do like the simplicity and creativity of your plans.
although the standard sizes of the materials are different here in Australia but I’ll build one for my new house.
Many Thanks to you Jamison.
Thanks Mohammed, I did not know that, I was however able to find this thread that could help you.
http://ana-white.com/2010/09/timber-lumber-sizes-metric-compared-against-dimensional
Cheers!
Thanks Mohammed, I did not know that, I was however able to find this thread that could help you.http://ana-white.com/2010/0…Cheers!
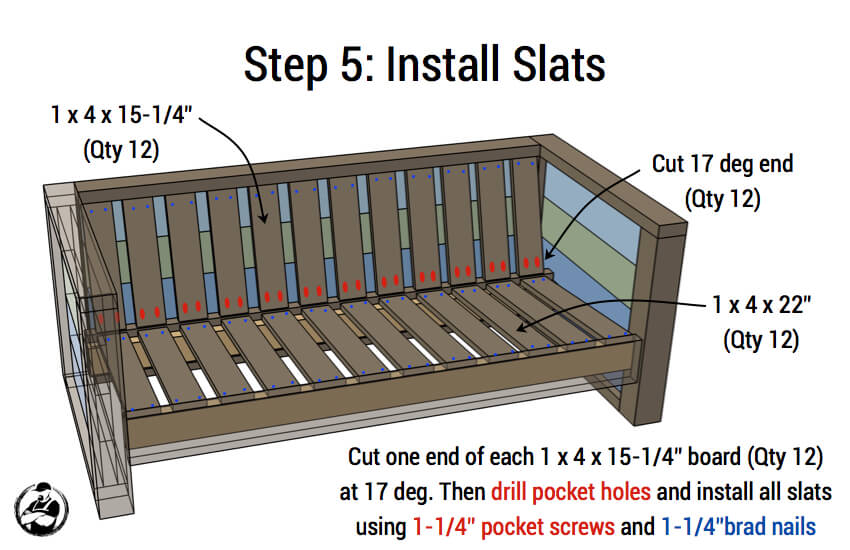
May be first project I attempt. Only question, how was 17deg cut made? Miter saw?
Awesome Johnny! Those can be made with a miter saw. I suggest you hold the wood vertically and rotate the miter saw that way (don’t lean it over), if that make sense. Good luck and happy building!
Jamison, I’ve been looking at your handy work, plans and instructions, and I have to say It looks like you are working up some quality creations and making them simple to understand and follow. Thank you! I’ve resigned myself to giving this love seat a try, and maybe down sizing it to make a couple of similar chairs. I can’t wait to see what comes of it! I’m thinking of doubling the ends and halving the width to make chairs, and use the same cushions for both the chairs and loveseat we’ll see. Thanks so much for taking the time to get your ideas out there!
Thanks so much Jamie! Great name by the way. (my wife’s name and my childhood name) That sounds like a great idea though. The only issue I see is that the back cushions are tapered on the outside corners. Best of luck and happy building!
I just finished this project yesterday. I’ve been following your site for a while now for inspiration on projects, but this is the first project I built using your (almost exact) design. Only difference in mine is that I am buying outdoor cushions from a fabric store that are each 22″x22″, so mine is narrower than yours (51″ rather than 65″).
One thing I would point out for others that are going to try this build is that this is definitely a low couch. With my 4″ thick cushions, the height to the top of the cushion is 15″. Of course I should have realized this before I got started because it is pretty clear on the plans. I had some spare heavy duty casters with brakes lying around, so I threw those on the legs to add 3″ inches, and now my couch is about 18″ to the top of the cushion (a little lower than average, but still comfortable). The casters give it the extra height it needs, and allows you to easily rearrange (because it is heavy!). My couch staying in my shop so the industrial look of the casters works, plus I don’t care if they mark up my floor. If you are building this, you might want to consider adding wheels/legs like I did, or maybe add a 2×6 to all three sides, and raise everything up by 5-6 inches.
Other than that, this was a super easy build and I love the look of it. The slight slope in the seat and the angles on the back support are perfect, and the idea of the four different stained boards looks awesome. Thanks Jamison for this amazing site and the easy to follow plans!
Hey Colin! Thanks so much for sharing and thanks for pointing out that it is a low couch. I guess it’s technically considered deep seating which is more of a lowrider type seating. Thanks again!
Can you just cut the 4×4 uprights on the side panels 3″ longer?
Getting ready to build this but want to extend it too a couch size. But seems like this thing will be a monster. Do you think it will need center supports to keep from sagging? I have seen some couch designs over on Ann whites site but none of this seem as beefy as this one. All the 2x6s seem to even be a little overkill but I like it 🙂
Haha. They are very much overkill. This thing is a beast and those 2x6s will be more than enough to span the width of a couch. I think you’ll be more than fine without center supports.
Off the top of your head, what would be the length increase to make couch size. I kind of want to do both.
I would base it on the cushion dimensions.
Curious if this should be made out of cedar or pressure treated wood to prevent weather damage?
I’m in New England and weather is a concern.
With a good protective coating it should be okay if only subject to mild outdoor conditions. However, cedar or pressure treated would be even better in your case.
This project is now my couch. Thanks for the plans, it turned out great! As you can tell it met my inspectors standards.
HAHA that is awesome! Thanks for sharing and glad the inspectors approved on the design.
I would love to know how the Varathane stain has held up. I LOVE the look, but I am concerned about it being an interior product. Did you poly over it? Has it aged well? –Julie
I always recommend using a poly over top for indoor or outdoor use. I’ve used Varathane stains on many of my outdoor pieces and it holds up great.
Did you use a wood conditioner before staining, I noticed on the can I had it said no wood conditioner required but my pine still came out a little blotchy.
Just finished this project. Super easy and fun, and the whole family loves it. Thanks! I am wondering if you have done plans for a similar single person chair to match the lover seat using the same cushions as a lounge chair? I will be doing this soon, but I’d rather follow your plans if you have the plans to match… Thanks again!
Maybe cut the board length in half?
I’m so happy I came across this website. You and your wife have created some incredible pieces. I had no idea something that appeared so complicated would actually be feasible for a beginner. God bless you and your entire family for being so generous as to offer this information for free. Respectfully, in Christ, Gia … Oceanside New York 👼
Awesome. How could you turn this into a sectional?
yeah, was wondering the same thing.
I’m guessing build one arm normal and on the other only put 2 -2×6 stacked high with no 2×4 underneath. And cut the front 4×4 to match Im guessing 11 inches tall
I did it. see my post above.
Is the rear seat support supposed to be lower than the front?
Where find cushions
The ones linked via the project are for Home Depot but last I checked they were sold out (as well as a bit spendy). I went ahead and made my own. It isn’t too overwhelming or costly if you know someone that has sewing skills.
Jamison, I viewed this plan several times over the past couple years while trying to decide on some outdoor furniture. This year I pulled the trigger on attempting them, and I’m pretty happy with how it turned out. The cushions from Home Depot were more than I wanted to spend and out of stock anyways, so I decided to make my own using some duck fabric and my mother-in-law’s sewing skills. I also added some 2 inch plastic furniture feet to it to help keep it off the deck and allow it to try more underneath in the event of rain/moisture. My wife’s only complain is that we need more seating for guests now!https://uploads.disquscdn.c… https://uploads.disquscdn.c…
Hi, I love this design and I plan on making it this spring. What is the spacing for the slats? I can’t seem to find it on the plans. I’m hoping to make the love seat into a couch 🙂 I would also like to know if i can use a spar urethane on top of the stain (since the stain is for interior surfaces) and will likely fade quickly in the elements.
I also couldn’t find spacing so all I did was moved a cut off of 2×4 between each one and it worked for me.
I finished the assembly today. I just need to stain it. The instructions were very clear. Any issues I had came from my lack of experience with woodwork. But I’m the type of guy who will learn from experience and the next time I make this (say for someone else) or when I make your other loveseat, it will go better. You have a couple other outdoor/patio/deck furniture that I plan to make. Thank you
I just did this project and I couldn’t be happier! I modified it a bit to suit my needs. I really wanted a sectional but didn’t want to pay over $1500 for something that looks nice and would last. Even the $400 cheap box store stuff is just that, CHEAP. Looks cheap and does not last! In my search I came across your loveseat. I absolutely loved the design and the look so I just double the required wood, deleted one armrest, spun it 90 degrees and screwed it together. I added support in the corner and voila! The short side I raised the rear support so it lined up and you sit straight.The long end (17 inches longer to fit the space) is still lower to be able to sit down into it. I have since taking these photos fixed some missed/uneven staining spots.The instructions easy to follow but the photos on the website made it easier to understand. All costs in, including the jig set and some wood glue was less than $400 (Canadian).With the left over wood I will build myself a coffee table outside. I will use the same boards and stain pattern to make it match the sectional (I’ll upload it when I complete it).Thank you so much! https://uploads.disquscdn.c… https://uploads.disquscdn.c…
How has this project held up to the elements, since it’s outdoors? Any fading or wear from sun and rain? Thanks!
This looks perfect for our backyard. I didn’t like any of the commercial ones we looked at and this seems as if it would last a lifetime at a good price point.
One question – what size cushions did you have? I want to build this and my cushions are on the way so I can’t double check the sizes. Can you tell me the cushion dimensions in case I need to modify my position/angle a bit so its comfortable to sit with our cushions?
After making up the sides, I mocked up the location of the cross pieces and my cushions fit fine. Mine were 26 x 25.5 for the seat, and 18.5 x 25.5 for the back.Note – for my sofa, placed all 3 cushions side by side and put the end panels on, measured the width, and took a half inch out. The cushions must have been a little smaller, since I made the cross boards supporting the seat slats 75.5 and 77.5 inches long. It worked though and all fits great! https://uploads.disquscdn.c… https://uploads.disquscdn.c…
What type of wood did you use here? Is this a cedar or a pine?
I used cedar from our local Menards while they have had the 11% rebate.
mind sharing a link to cushions. These are exactly what wife is wanting. Went to a few places and they all had smaller back cushions than these. Thanks in advance.
Here is a link to some cushions that should work: https://homedepot.sjv.io/rn…These have a total width of 56″ so I would consider shortening the horizontal boards from 58″ to 56″ or even 55″ if you want the cushions to have a snug fit. Might be worth getting the cushions in first and measuring them
This looks great, I’m going to try it! The link to the cushions is broken so I’m not sure what size we need, but as far as I can tell this is it (though in a different color):
https://www.homedepot.com/p…
Cushion Dimensions:
Thickness: 7″
Seat Width: 28″
Seat Depth: 23.5″
Back Width: 28.25″
Back Height: 10.25″
Since I’m STILL out of work, I’ve been doing home projects and re-doing my patio furniture is next on the list. I stumbled across your website, thankfully. I LOVE this couch, and your descriptions and pictures make it look really easy. However, being a single female, I don’t exactly have the ultimate set of carpentry tools (or skill) and can’t really go out & buy a bunch of new stuff, so I picked up a free couch from OfferUp, stripped the upholstery off and will use the basic wood frame as a starting point. It looks like the side and back panels are pretty flimsy so they can be removed/ replaced with new wood to resemble your couch. I can reupholster the couch pillows with duck cloth. Crossing my fingers that this’ll work….. Thanks so much for the inspiration!
Anyone know where to purchase cushions for this design? I can’t seem to find anything that spans the 58″ for the seating width.
Hey! The link to the pdf download for the plank loveseat does not seem to be working. Can you send that file or fix the link? Thanks!