

DIY Potting Bench Plans
Quick answer: This DIY potting bench is a pocket-screwed 2×4 and 1×6 build with a grated work top that drops excess soil straight into a removable crate below, a hardware-cloth back panel for hanging tools, and two full shelves. It measures 53¾″ wide × 25″ deep × 61½″ tall. Free tutorial with dimensions and cut list below; the printable plans put everything in one PDF. Documented by Jamison Rantz.
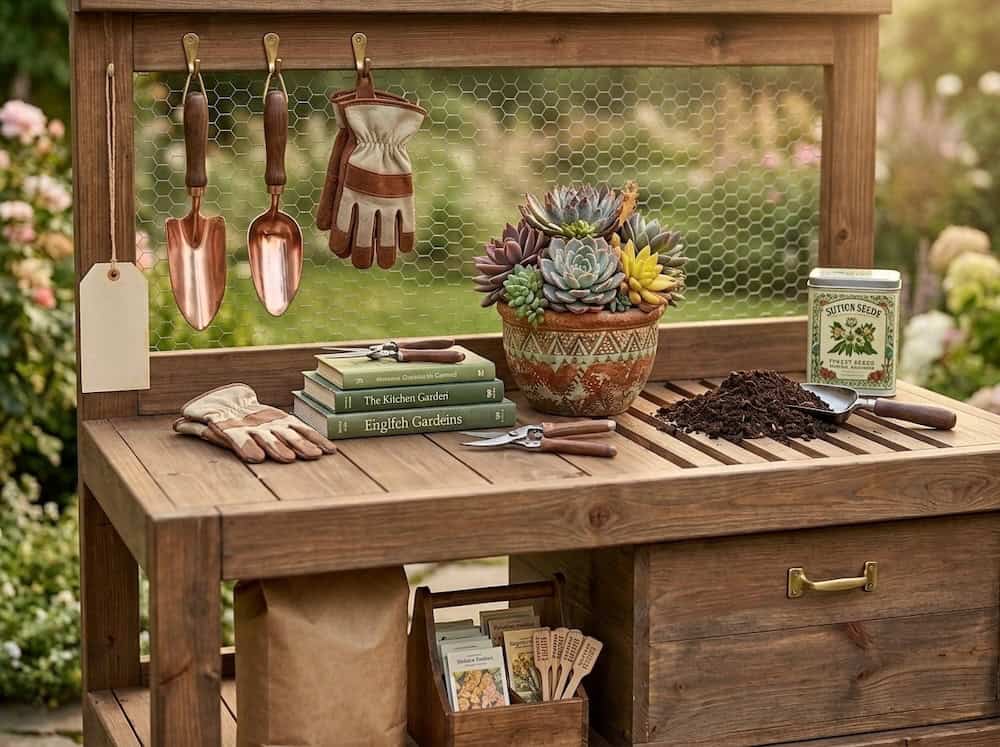
Krissy from Revival Wood + Oil reached out about plans for a potting bench she wanted to build for her mother, and I loved the design too much to say no — even in the middle of winter. The grated top is the genius part: excess soil falls straight through into the crate below instead of ending up all over the patio. To see how Krissy’s build turned out, check out her post. And if this bench is going to serve a set of raised beds, the soil calculator will tell you exactly how much mix you’ll be blending on it.
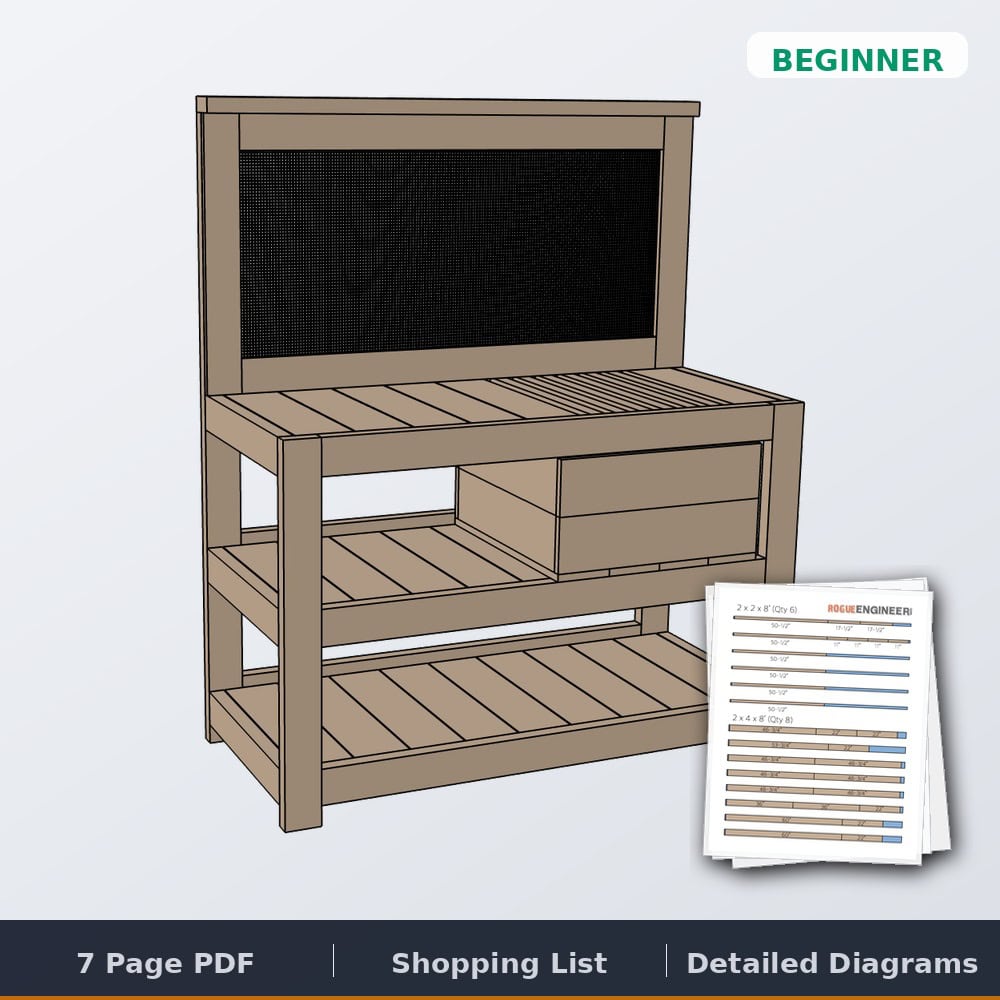
Potting Bench Plans
The complete printable PDF — full cut list, dimensioned diagrams, and all seven assembly steps in one clean document you can take to the shop.
Tools & materials
Dimensions
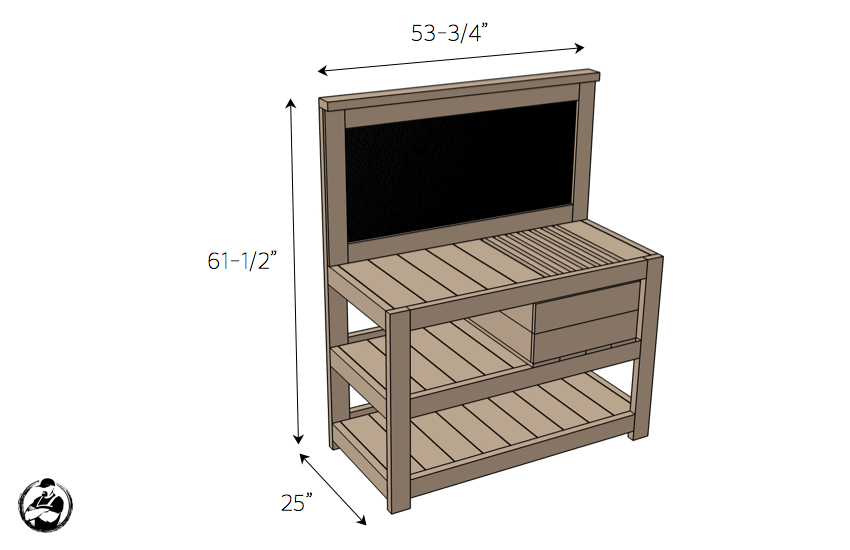
The bench is 53¾″ wide, 25″ deep, and 61½″ tall, with the work surface at a comfortable counter height. Every individual part dimension is in the cut list below and in the printable plans.
Cut list


How to build a potting bench
Step 1 — Assemble the back
The back is two 60″ 2×4 legs joined by four 46¾″ cross members. Drill your pocket holes and assemble with 2½″ pocket screws — the cross-member spacing sets the heights of both shelves and the work top, so measure twice here.

Step 2 — Assemble the front
Same story up front: two 36″ legs and three 46¾″ rails, assembled with 2½″ pocket screws.

Step 3 — Join the front and back
Six 22″ 2×4 cross members tie the front to the back with 2½″ pocket screws. Then add the six 50½″ 2×2 rails with 2½″ wood screws, setting each one ¾″ below the top of its cross member — that recess is what lets the slats sit flush.

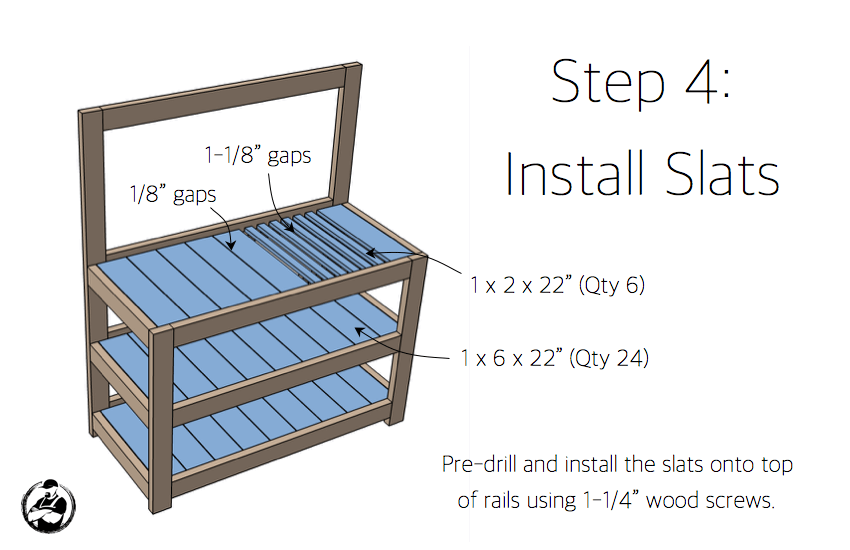
Step 4 — Install the slats
Pre-drill and fasten the slats to the rails with 1¼″ wood screws: 1×6 boards with ⅛″ gaps on the shelves, and 1×2 slats with 1⅛″ gaps over the crate opening — that’s the grate that lets the soil fall through.
Step 5 — Build the back frame
The frame that will hold the hardware cloth is 1×4s — two at 46¾″ and two at 27″ — assembled with 1¼″ pocket screws.

Step 6 — Install the frame and cap
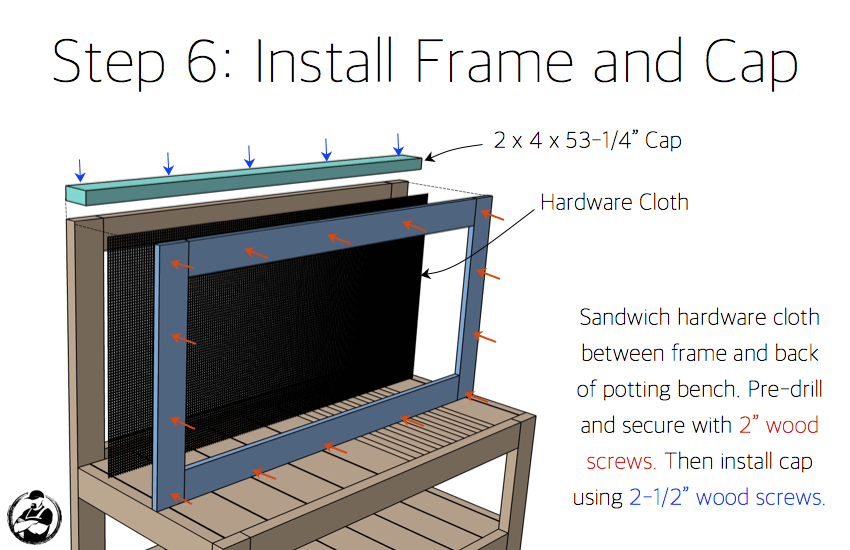
Sandwich the hardware cloth between the frame and the back of the bench, pre-drill, and secure with 2″ wood screws. Top it off with the 53¼″ 2×4 cap fastened with 2½″ wood screws. The mesh is perfect for S-hooks — trowels, snips, and twine all live here.
Step 7 — Assemble the soil crate
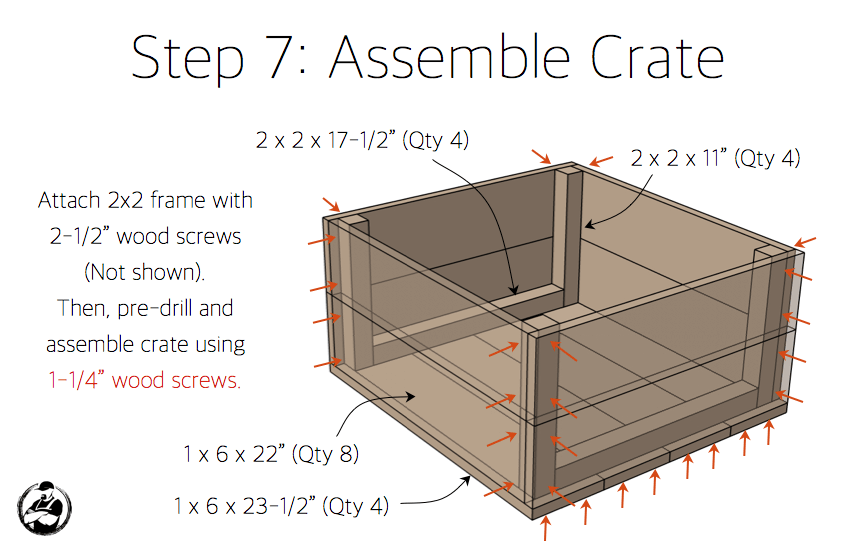
The crate is a 2×2 frame screwed together with 2½″ wood screws, wrapped with 1×6s — eight at 22″ for the sides and four at 23½″ for the bottom — using 1¼″ wood screws. It slides right under the grate to catch everything.
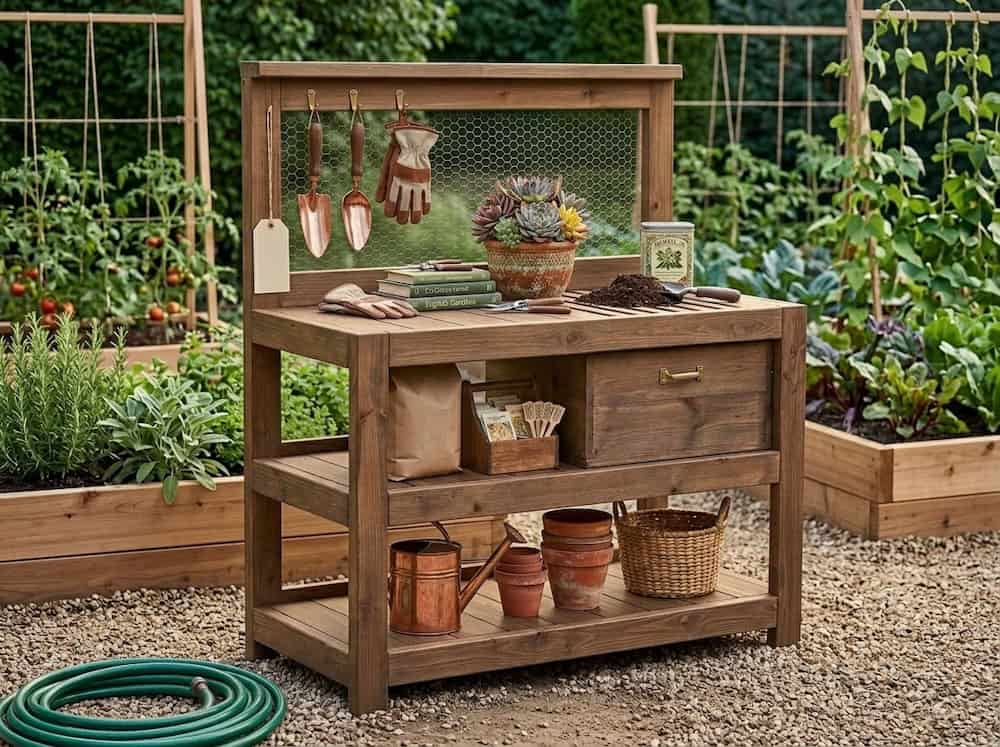
That’s it — find it a wall near the garden and it’ll earn its spot every single spring. Ours lives next to the raised garden beds, and it’s where every batch of soil mix gets blended before planting.
Potting Bench Plans
The complete printable PDF — full cut list, dimensioned diagrams, and all seven assembly steps in one clean document you can take to the shop.
Questions? Comments?
As always, if you have any questions don’t hesitate to comment below — and don’t forget to post pictures of your finished potting benches in the comments!
Be safe and happy building.
— Jamison
Awesome – thank you. I think I might add small rollers to the bottom the drawer so it wouldn’t scrape up the finish on the shelf. Looking forward to doing this project. This comes next after I make cubbies for 1,000 bottles of wine in my husband’s wine storage room.
Rollers are a good idea. I have a feeling I’ll be making a modification soon. 🙂
I think this is adorable and well-planned with the soil crate! I wish I knew someone who liked to do potting and planting so I could make this for them. Maybe my brown thumb will turn green someday and I can have this for myself 🙂 #plantkiller
Haha I’m right there with you.
Me me Linda LOL
LOL!!! That’s hilarious! I bet shipping would be a fortune!
I wonder if this could be built with “fake” lumber? I live it a VERY rainy area and mold and rot are a constant battle.
Sure, I don’t see why not. You might also try cedar as it is resistant to both.
@Jamison Rantz:disqus – can you tell us about the paint and finish? What did you use? Number of coats? Any thoughts on best resistance to rain/mold (cedar? protective finish?)
@Forum – Any ideas / thoughts about closing in the bottom shelf all around and putting swing doors?
Thanks, John
Hey John, the stain is Behr Semi-Transparent Weatherproofing All-In-One Wood Stain & Sealer in Wedgewood. I didn;t build this one but you can see more at https://kecreations.wordpress.com/2016/02/21/potting-bench/
Cedar would provide great resistance. You could also go with pressure treated lumber or a deck stain and sealer like Krissy did.
And I think that would be a great mod to the bottom shelf. I would just add 2x4s to the sides to close it in and build doors out of 1x4s and 1x2s with latches and a center post to rest against,
Thanks for the link! Krissy did a bang up job with this one (I’m going to get the 90 deg clamps – I could have used on past jobs for sure!)
– Bottom Shelf: You’d use 2×4 on the sides/back of the bottom shelf? Feels a little beefy…what do you think of running 1×2 along the inside of the frame and screwing 1×6 to close in the sides/back?
– Bottom Shelf: How would you suggest making it semi water-tight? Or is that wishful thinking? Maybe I could staple gun thick mil clear plastic along the top/sides? Or use some foam weather filler/sealant
– Any other Kreg clamps that are good essentials to have handy?
Yea maybe go with 1xs for the sides to close it in. Instead of trying to make it water tight you might think about using a water tight storage bin. I like the heavy duty ones they sell at HD.
http://www.homedepot.com/p/HDX-27-Gal-Storage-Tote-in-Black-HDX27GONLINE-5/205978361
As far as Kreg clamps, I use my 6″ automaxx all the time. The other is that right angle clamp (https://www.kregtool.com/store/c46/corner-clamps/p52/right-angle-clamp/) I don’t use it often but when I need it, I NEED IT. It’s like a third hand.
Yea maybe go with 1xs for the sides to close it in. Instead of trying to make it water tight you might think about using a water tight storage bin. I like the heavy duty ones they sell at HD.http://www.homedepot.com/p/…As far as Kreg clamps, I use my 6″ automaxx all the time. The other is that right angle clamp (https://www.kregtool.com/st… I don’t use it often but when I need it, I NEED IT. It’s like a third hand.
Hey John, the stain is Behr Semi-Transparent Weatherproofing All-In-One Wood Stain & Sealer in Wedgewood. I didn;t build this one but you can see more at https://kecreations.wordpre…Cedar would provide great resistance. You could also go with pressure treated lumber or a deck stain and sealer like Krissy did.And I think that would be a great mod to the bottom shelf. I would just add 2x4s to the sides to close it in and build doors out of 1x4s and 1x2s with latches and a center post to rest against,
Thanks for the plans. I built this all with pallet wood. The only thing I changed was the frame to cover the hardware cloth. It was 24 inches not 27 inches.
Looks great!!
Thanks!
Looks great! Love the color. Thanks for sharing.
Thank you.
yes, you are correct about 24″. This was a fun project, but as a first time wood working project, there were a few errors in the plans in PDF file.
There are dozens of potting bench plans out there – this is the first one I’ve seen with a slotted section and drawer to catch the overflow. Ingenious! Krissy thought that through!
The slotted section was a great touch!
Looks great! Hope she enjoys it. Great finish too!
I used redwood 2x4s and redwood 1×6 dog-eared fencing boards (cut off the tops) from a big box store and made this as a Christmas gift for my sister-in-law. I shrank the width to 36″ to fit her space and left out the top frame and wire mesh since I had none–instead I used 2×2 strips I ripped down from one of the 2x4s. Added a few brass hooks.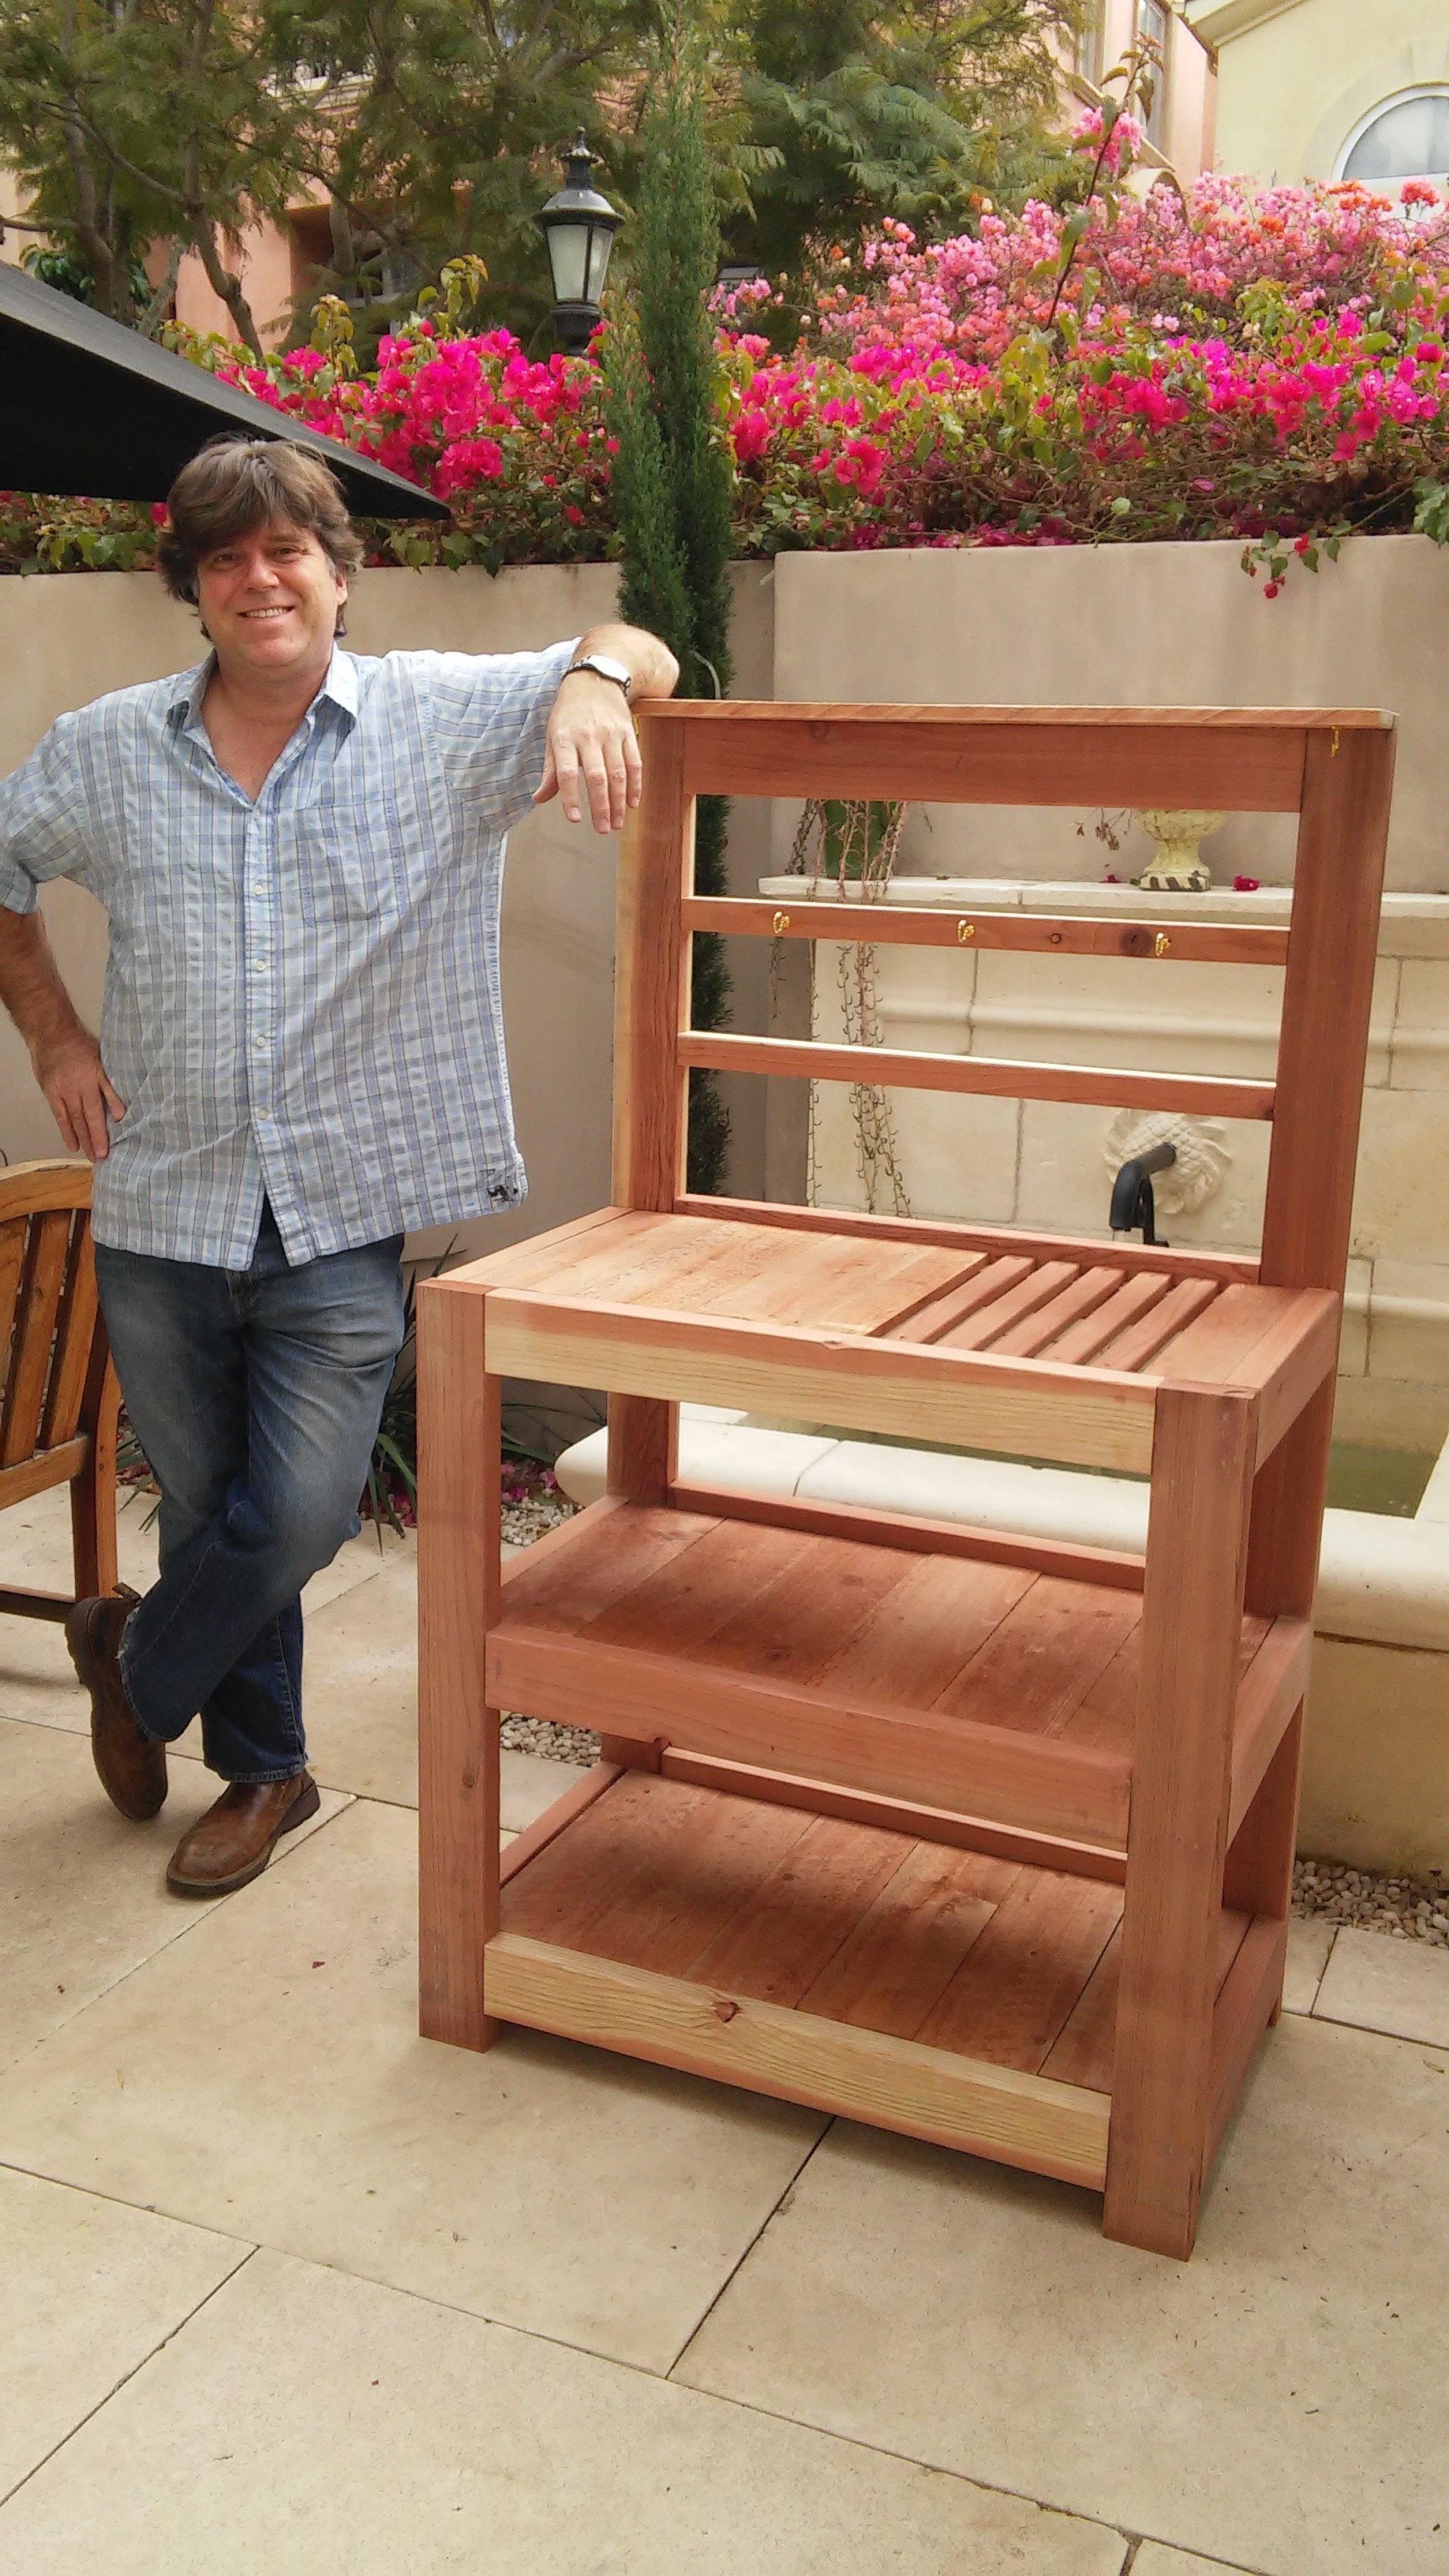
Andrew, that’s a fantastic set of mods: redwood, the ripped 2×2 slats instead of mesh, sized to her space, and brass hooks to finish it off. Your sister-in-law scored on that Christmas gift. Thanks for sharing the photo and the details, that helps the next builder too.
I followed the plans, but made a less deeper and wide version so it would fit in a particular spot in my garage. I also used pegboard instead of hardware cloth. My wife loves it! Thanks Rogue Engineer!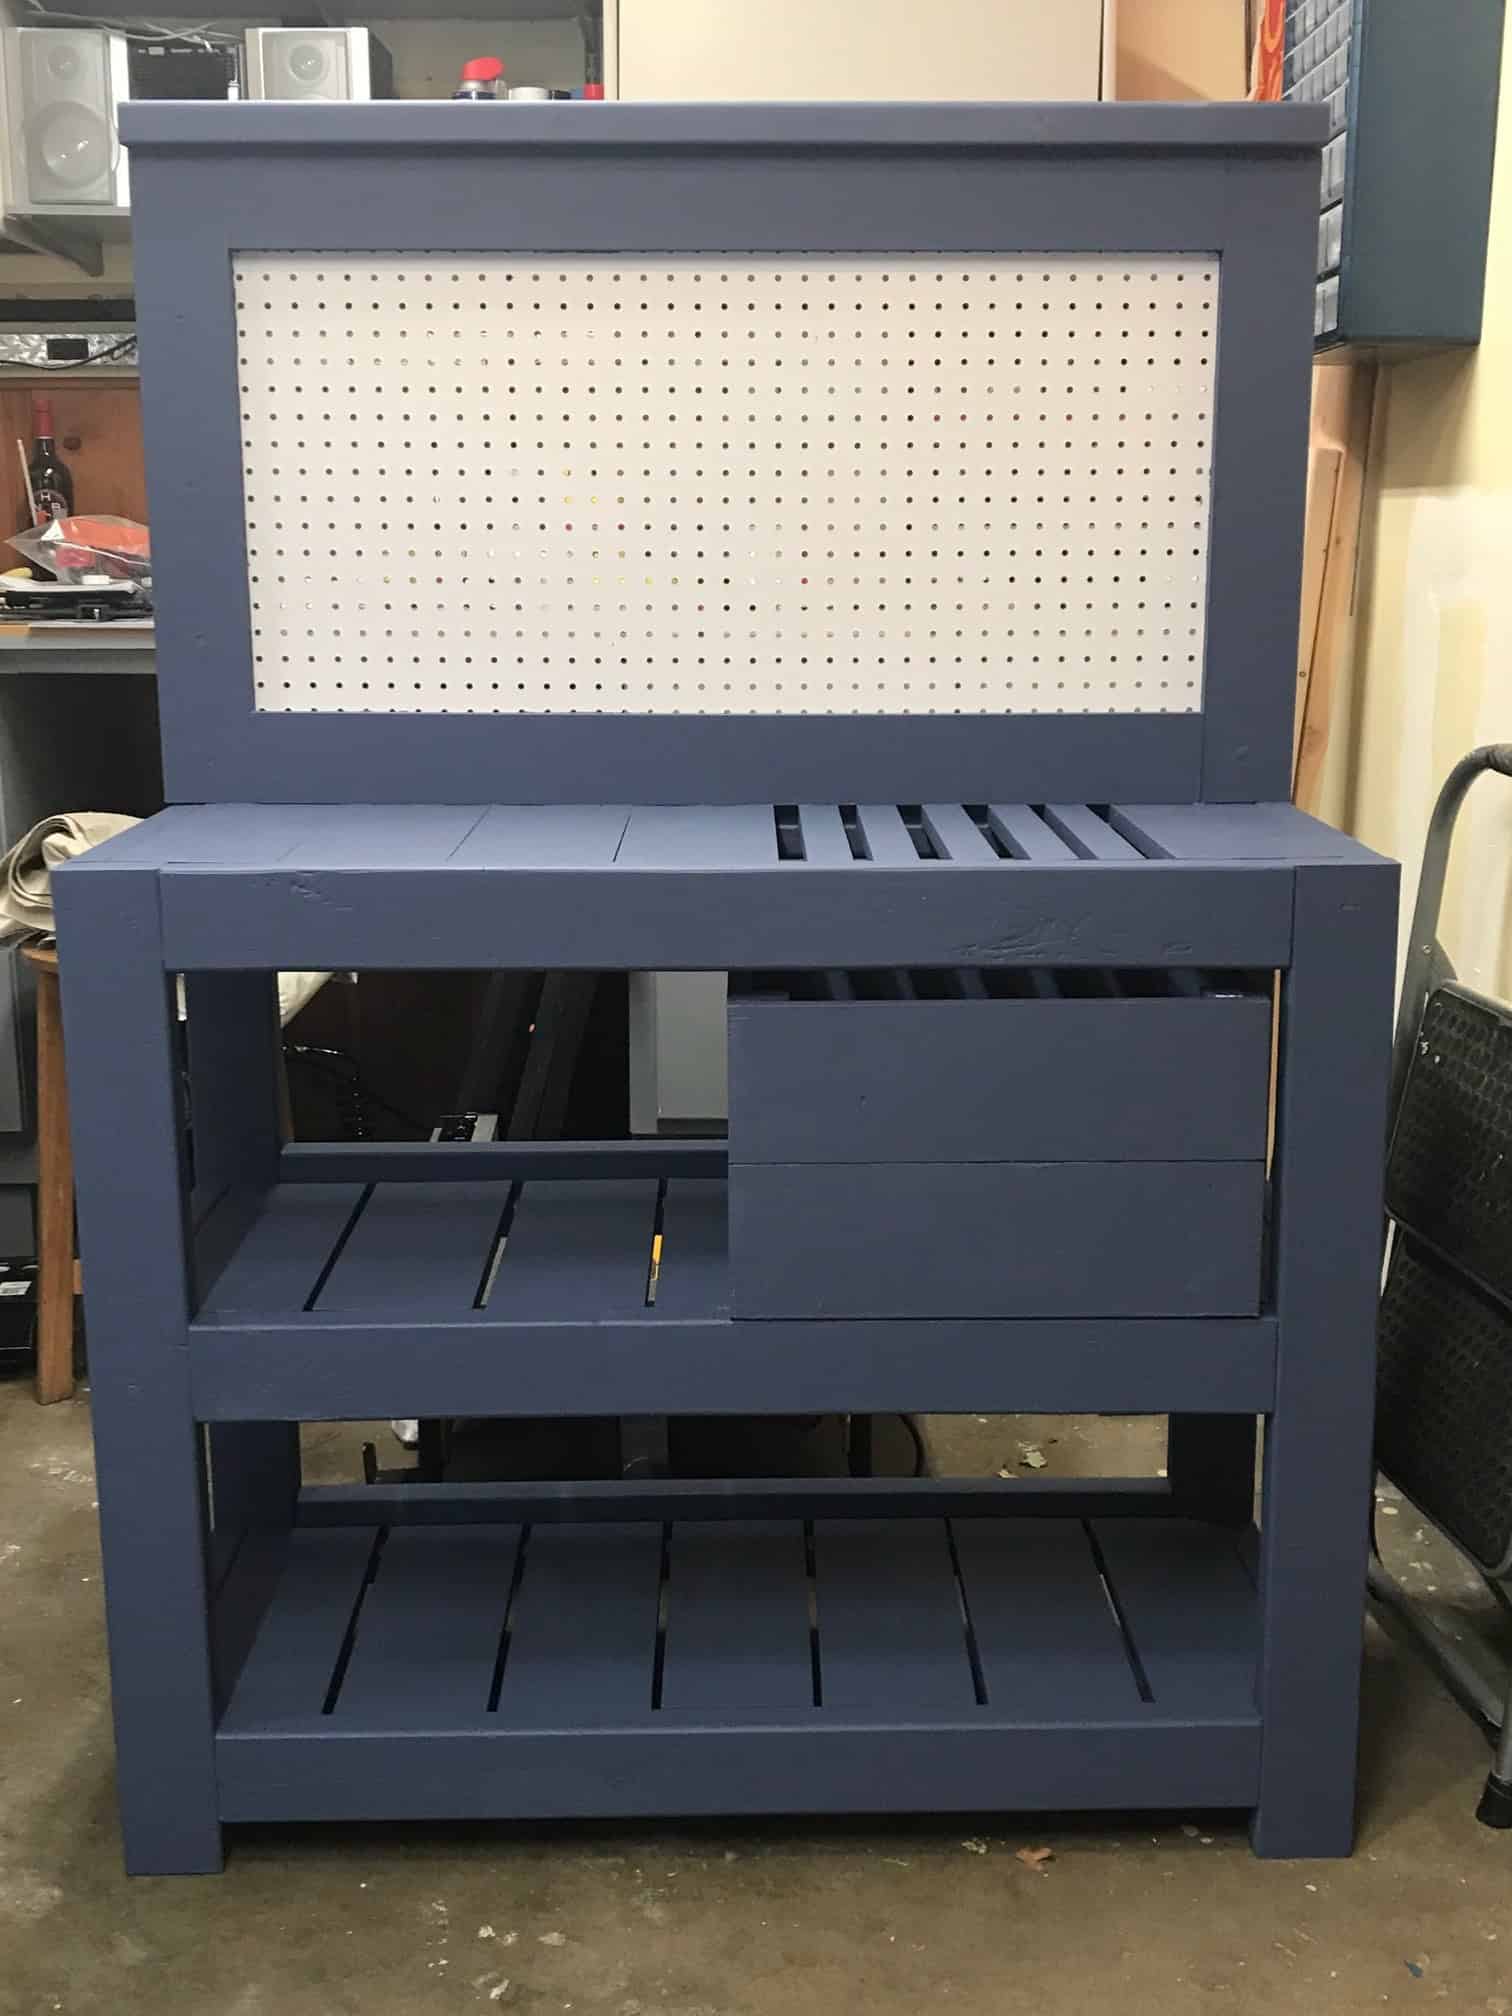
That looks awesome Tim! Thanks for sharing!
This plan was easy to follow. We used lots of wood left over from previous projects. I didn’t have time for a “clean” picture, as my wife dove in to using it as soon as the paint allowed. She did not want the drawer and opted for the metal tub instead. She thought the drawer would allow for too much moisture and muddiness from the open slats above.
https://photos.app.goo.gl/3RabiwutJanScusB8
Ha, that’s the best kind of review, when it gets put to work before the paint’s even fully cured. The metal tub swap is a smart call too, your wife’s thinking is right about the moisture from the slats. Thanks for sharing the photos, love seeing these out in the wild. Be safe and happy building.
Am I crazy? Is the front shorter than the back (2″ vs 3.25″)? Is it supposed to lean forward?
No, the work surface should be level and 36” off the ground I thinsteps 3 and 4 should help make sense of that. The boards across the back are a little higher to keep things from falling off the back of the shelves
Makes sense. Helps if I read the plans. Thank you for the quick reply! This is a cool project. Looking forward to making more from your site.
Just finished this one.Wife designed the artwork, and I used beeswax/oil varnish for the inside of the soil drawer, to avoid contaminating any soil we use.Substantially smaller though! Figured it needed a tool tray and a stool 🙂https://uploads.disquscdn.c…
I tried downloading the PDF, entered my email info into the lead catcher window, but the email never arrived. I tried 3 times to ensure there were no errors, but nothing ever came.
–disregard this message or delete it, It showed up after a few hours. Thank you!!
The printable PDF link doesnt work anymore – which is shame! can you fix this so i can download please?
Just finished ours. Loved this project! Did a little something different. Thank you! https://uploads.disquscdn.c…
This will make the perfect gift for my very green thumbed girlfriend
Hello, I know this plan of yours has been on the web for many years now, but I have just discovered it. I would like to build it for my mad gardening wife. Unfortunately the pdf download link no longer works. Could you please fix it for me?