

Twin Loft Bed Plans: How to Build One for About $200
Quick build: These free twin loft bed plans build a loft for about $200 in kiln-dried construction lumber in one weekend. The frame uses 2×10 and 2×12 stock, ripped to 1-1/2 in. square for the posts and left full thickness for the rails, on a platform of 39-3/4 in. 1×4 slats. Anchor it to two adjacent wall studs with 5 in. lag screws. Documented by Jamison Rantz, October 2026.
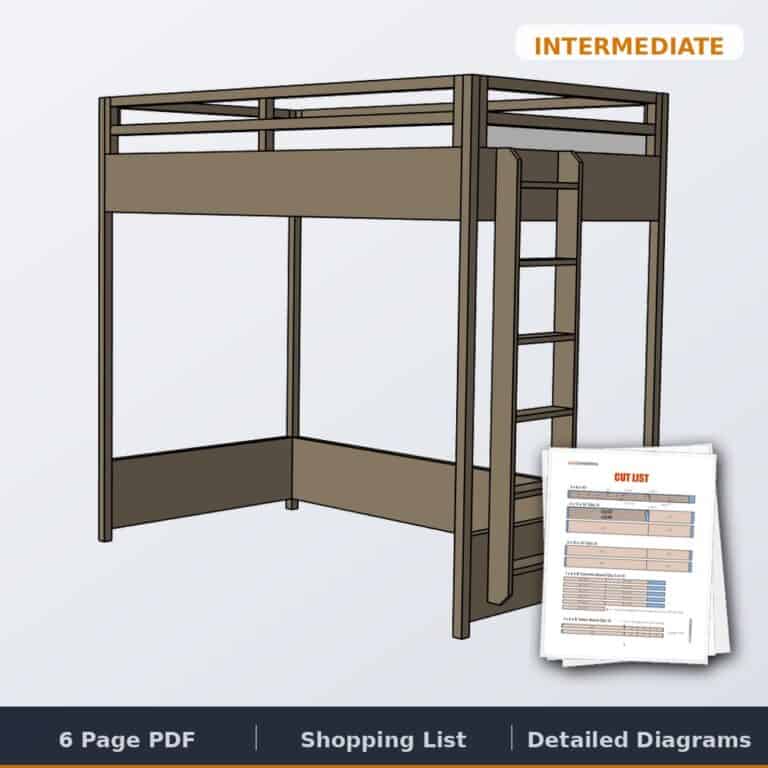
Want the ad-free, printable version?
Everything below in one organized, print-ready PDF: cut list, dimensions, step-by-step diagrams and shopping list. Perfect for the shop wall or your phone.
If you have a kid in a small bedroom, or two kids sharing one, a twin loft bed buys back more usable room than anything else you can put in that house. The mattress goes up, and about 20 square feet of floor opens up underneath, the 76 by 40 inch footprint of the bed itself. Desk, dresser, reading corner, a sibling’s bed, whatever that room is short on.
Retail runs $400 to $1,000 for a solid hardwood loft. This one is about $200 in construction-grade kiln-dried lumber, and it is genuinely intermediate work if you own a Kreg jig and a miter saw. No table saw? The lumberyard will rip your 2x2s for a few dollars.
Loft or bunk? A loft puts one mattress up and leaves the floor under it open. A bunk puts a second mattress under the first. Want the floor back, build this. Want two sleeping spots in the same footprint, build the twin bunk bed plans or the twin over full bunk bed plans. If the room fits both, this loft was drawn to clear a DIY queen platform bed underneath, which is how ours is set up.
Twin is what the cut list is drawn for. The table below has the numbers for twin XL and full if your mattress is a different size.
The thing most loft bed plans skip: this has to be lagged into wall studs. Step 7 covers it.
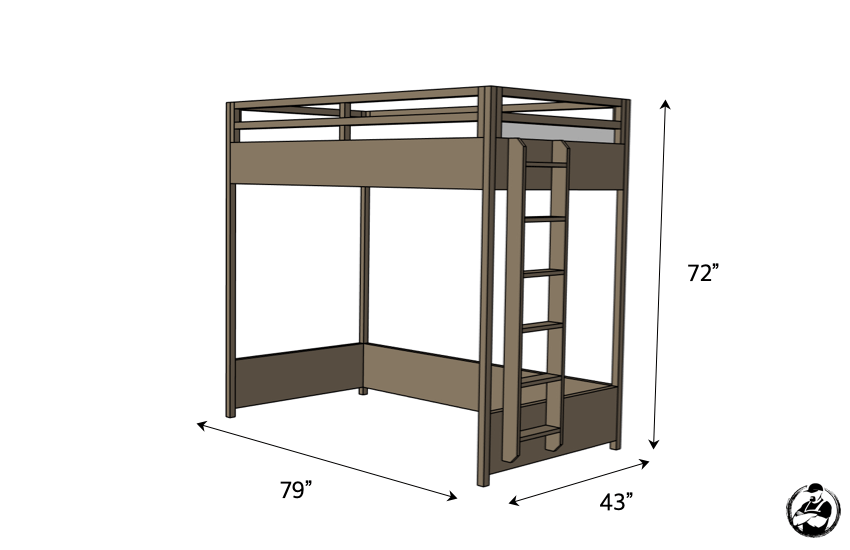
Twin Loft Bed Plans: Dimensions
Only the twin row above comes from the cut list. Twin XL and full are scaled from it, so measure your mattress before you cut. Full is the size that needs a center support, because the wider slat span will flex without it. Ladder and step sequence are identical for all three.
Cut List
Every cut is in the diagram. If you do not have a table saw, the lumberyard will rip 2x stock down to 1-1/2 in. square for a small fee. That is what the cut list assumes for the 2×2 framing pieces.

How to Build
Build the short bed rails
The short rails tie the two ends of the bed together at the head and foot. Each is a sandwich of ripped 2×8 pieces, glued and fastened with 3 in. wood screws driven through the longer outside pieces into the short blocks so the joint pulls tight while the glue sets. Two rails total.

Build the two end frames
Two tall vertical posts with the wider 2×10 and 2×12 cross-rails spanning between them. The short rails from Step 1 land inside each end on pre-drilled wood screws, and the 2×12 caps the top with pocket screws driven from the back so nothing shows. Glue every joint. These frames are heavy and awkward alone, so line up a helper or a couple of clamps now.

Build the long bed rails
The long rails carry the mattress load, so each is a sub-assembly: a 2×10 backbone with ripped 2×2 framing on the inside face to catch the slats. Those glued-and-clamped blocks are the actual bearing points. Drive the framing on from behind with 2-1/2 in. pocket screws and glue so no heads show on the finished face. Build two.

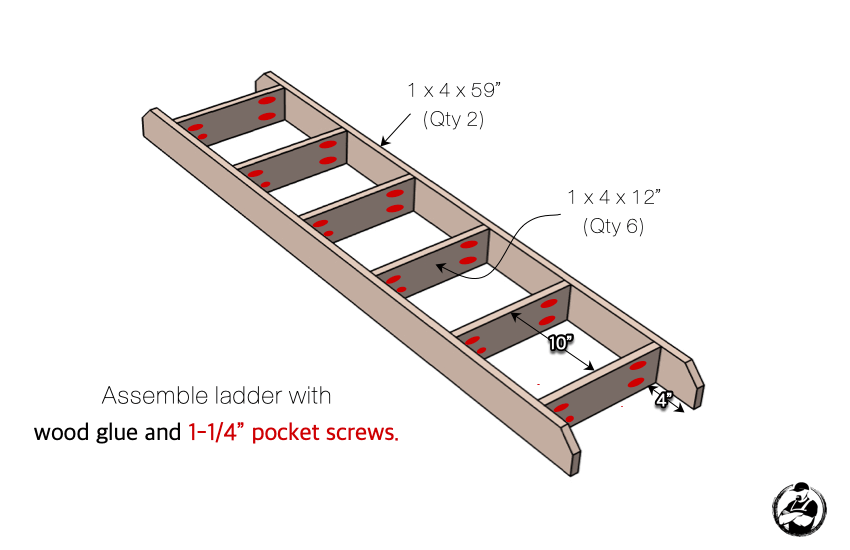
Build the ladder
Two long 1×4 sides, six 1×4 rungs, glued and pocket-screwed between them. The mitered ends let the ladder sit flush against the frame top and bottom instead of leaving a sharp corner at shin height. Cut one scrap block to your rung spacing and use it as a jig. Keeps the ladder square, saves measuring six times.
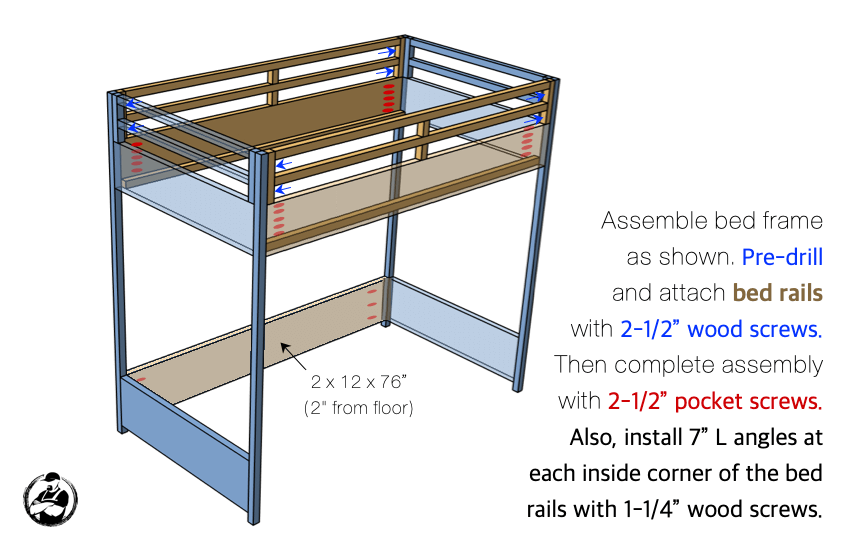
Assemble the full bed frame
Stand both end frames up, drop the long rails between them, drive pre-drilled 2-1/2 in. wood screws through the uprights into the rail ends, then back them up with pocket screws underneath. Add the 2×12 stability rail low across the front. That board keeps the frame from racking sideways when a kid swings onto the ladder. Then set a 7 in. L-angle at each inside corner. Do not skip them.
Mount the ladder
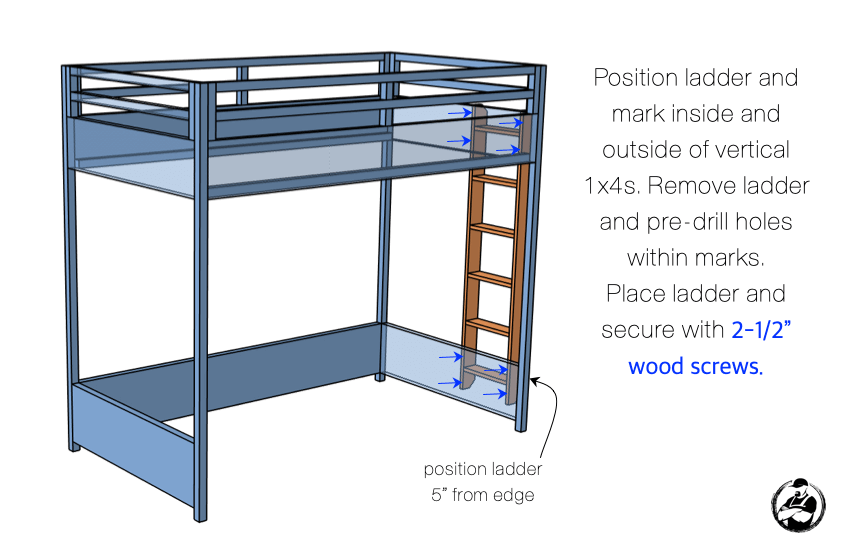
Hold the ladder against the frame where you want it. The plans show 5 in. in from the side, but shift it to suit the room. Mark where the ladder rails meet the frame’s vertical 1x4s, take it down, pre-drill so the 1×4 does not split, then drive 2-1/2 in. wood screws from inside the frame outward into the ladder rails. Screw heads end up inside the frame, not on the ladder face.
Install bed slats and anchor to wall studs (do not skip this)
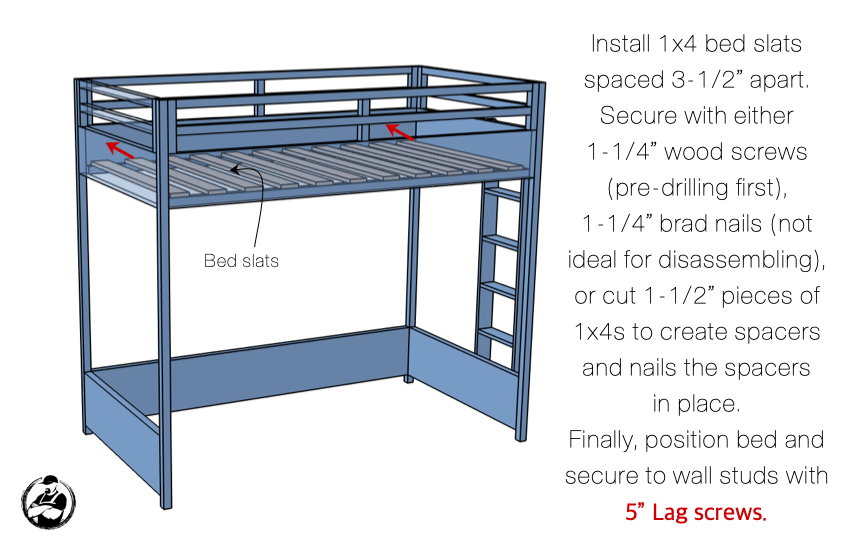
Lay the 1×4 slats across the long rails with even spacing. Three ways to secure them: pre-drill and drive 1-1/4 in. wood screws if you might take the bed apart later, 1-1/4 in. brad nails for speed, or glue 1-1/2 in. cutoffs between the slats as permanent spacers so the gaps stay perfect.
Then lag the bed to the wall. Find the studs behind the headboard side with a stud finder. Pre-drill through the headboard rail and drive 5 in. lag screws with washers, at minimum two, one into each of two adjacent studs. Drywall anchors are not an option here, not even good ones. A loft bed puts a moving load six feet in the air, and lag-into-stud is the only acceptable wall connection. This is the step most tutorials leave out and the single reason a loft bed is still solid ten years later.
Final Result
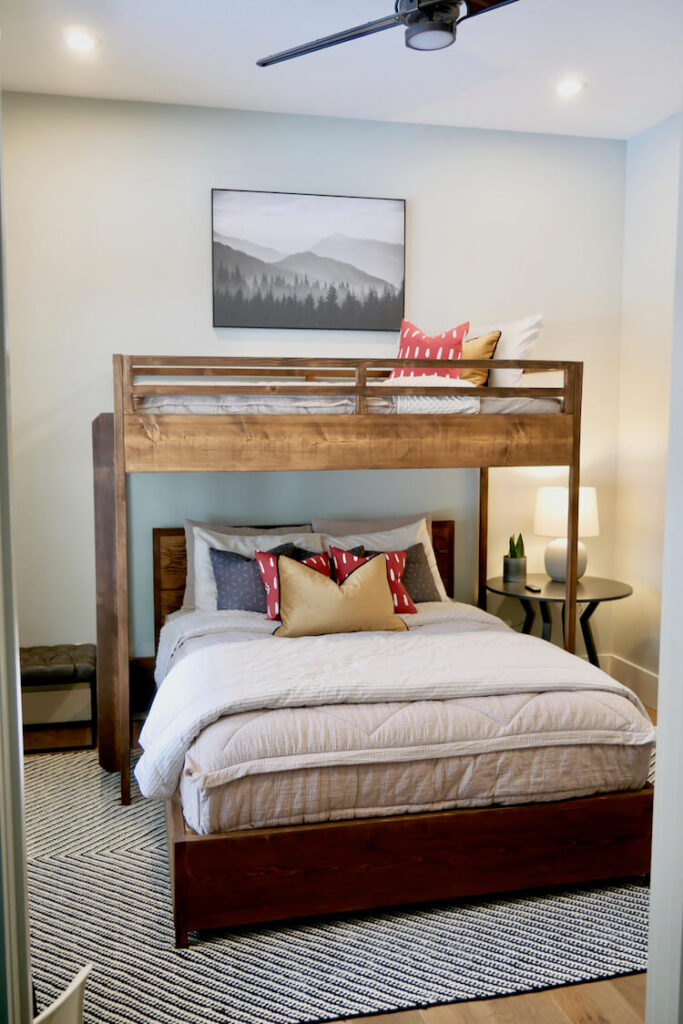
A twin loft bed solid enough for a 10-year-old to jump on, with enough clearance underneath for a desk, a dresser, or a sibling’s bed. Lagged to studs well enough that a parent can sleep at night. The lumber is over-spec for the load on purpose.

FAQ
What wood is best for a kid’s loft bed?
Construction-grade kiln-dried lumber. The 2×8, 2×10 and 2×12 stock carries the platform and the sleeper, and 1×4 common or select pine handles the slats and ladder. Kiln-dried matters: green lumber twists after assembly and takes your square frame with it. Do not use pressure-treated or cedar. Both are outdoor materials and neither belongs in a closed bedroom.
How do I anchor a loft bed to the wall safely?
Stud finder, headboard side, two studs minimum. Pre-drill through the headboard rail and drive 5 in. lag screws with washers, one into each of two adjacent studs. The 7 in. L-angles from Step 5 stiffen the frame’s own corners. The lag screws tie the whole thing to the house. Drywall anchors alone are never acceptable on a loft bed.
How long does the build take?
One focused weekend. Saturday is cuts and sub-assemblies, Steps 1 through 4, call it five hours with setup and ripping the 2x stock. Sunday is assembly and install, Steps 5 through 7, another four or five hours including studs and lags. It is rated intermediate for the table-saw rips and the volume of pocket-hole work, not because any single step is hard.
What weight can this loft bed hold?
It has not been formally load-tested, but the lumber is well over-spec for one twin sleeper. The 2×12 rails alone carry far more than a kid plus a mattress, and adults sleep on ours without flex worth mentioning. Want more margin? Add a third 7 in. L-angle at each rail intersection in Step 5. Cheap insurance.
Can I build this as a twin XL or a full?
Yes. Twin XL adds 5 in. to the long rails, so 76 in. becomes 81 in. Full adds 16 in. to the short rails, 40 in. becomes 56 in., plus one 2×2 center support down the long axis because the wider slat span flexes without it. The sizing table above has the breakdown. Ladder and step sequence do not change.
Your Move
Go measure the room this weekend. Sketch the floor plan with the loft against one wall and the desk space shows up on paper before you cut a board. Lumberyard Friday, cuts Saturday morning, lagged to the wall by Sunday afternoon.
Want to see every step before you start? Watch the full twin loft bed build on YouTube.
The first cut is the hardest. After that the build mostly does itself.
Be safe and happy building, Jamison