
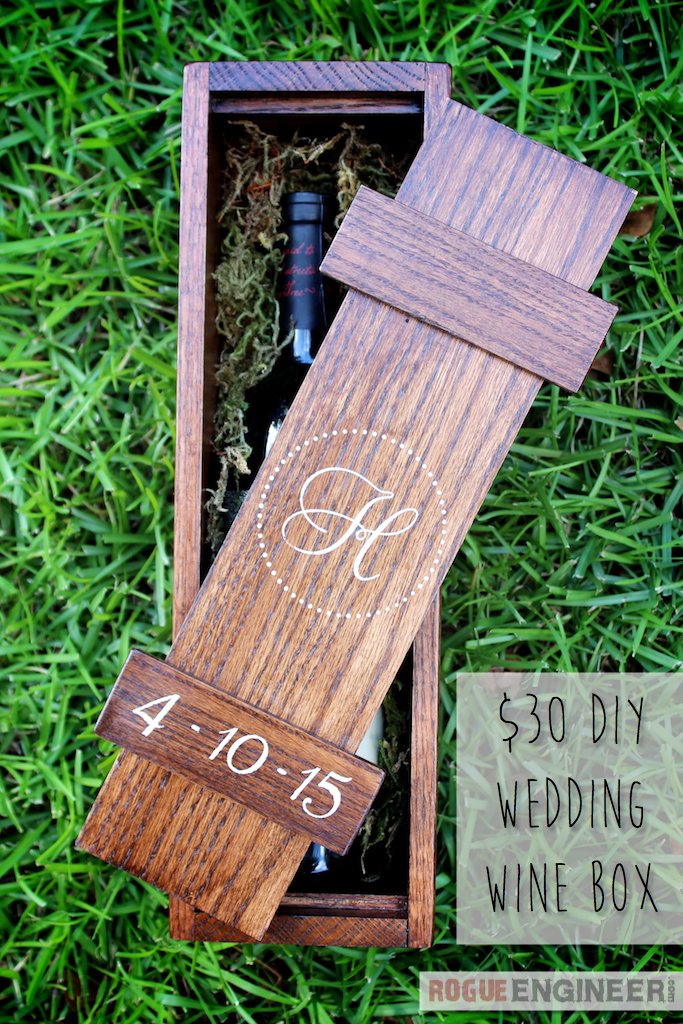
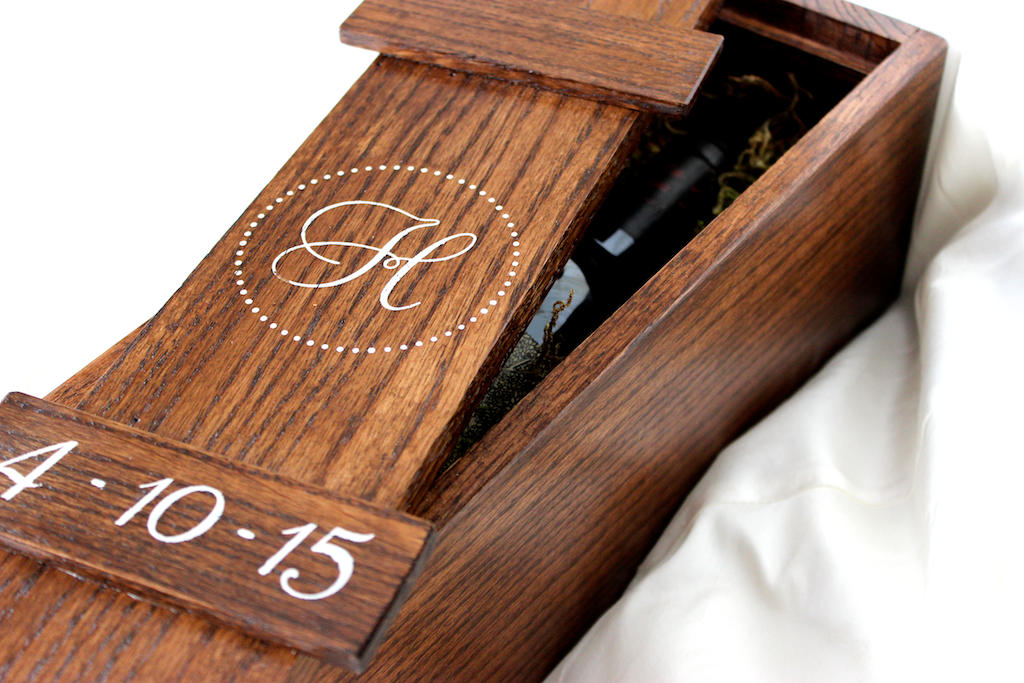
Wedding Wine Box
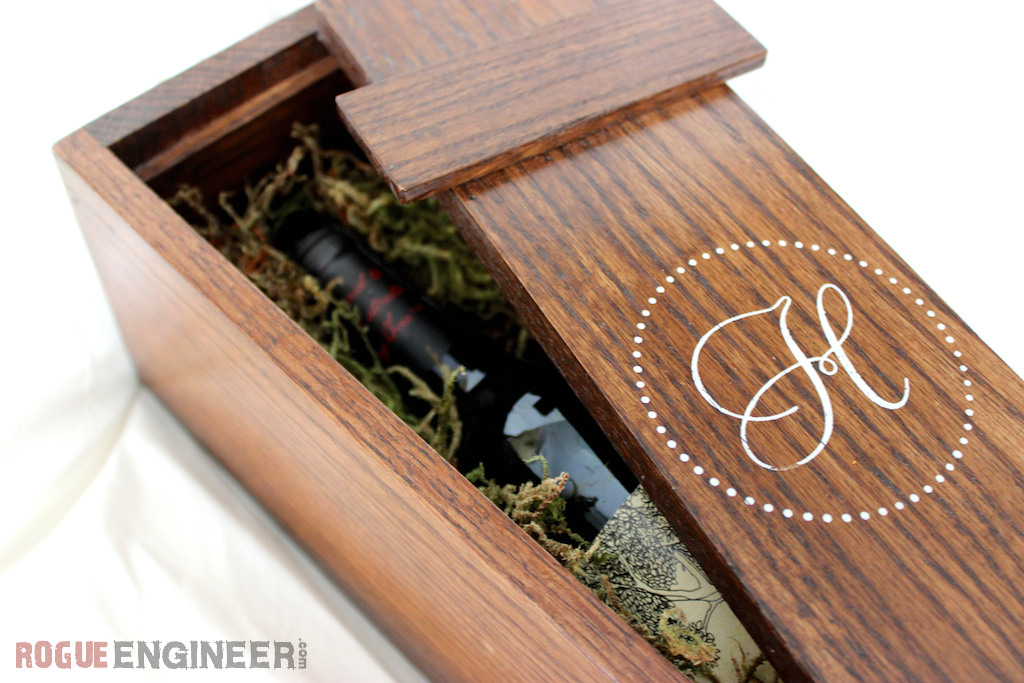
A wedding wine box is a growing trend lately, with some even incorporating them into the ceremony. I got the idea for this at my brother-in-law’s wedding last month. Towards the end of their ceremony they mixed a glass of red wine and white wine in a decanter to symbolize their different lives coming together as one. They then placed unread letters to one another in the wedding wine box with the wine and nailed it shut. The sealed wedding wine box is then to be opened on their anniversary, to reveal the letters and wine. Great idea, huh?
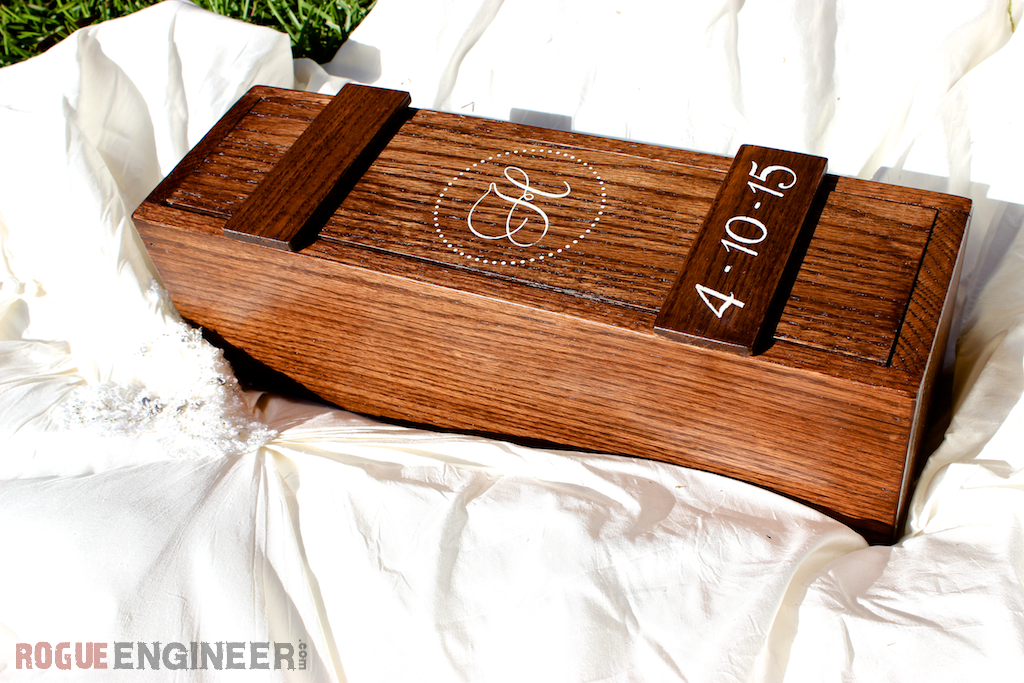
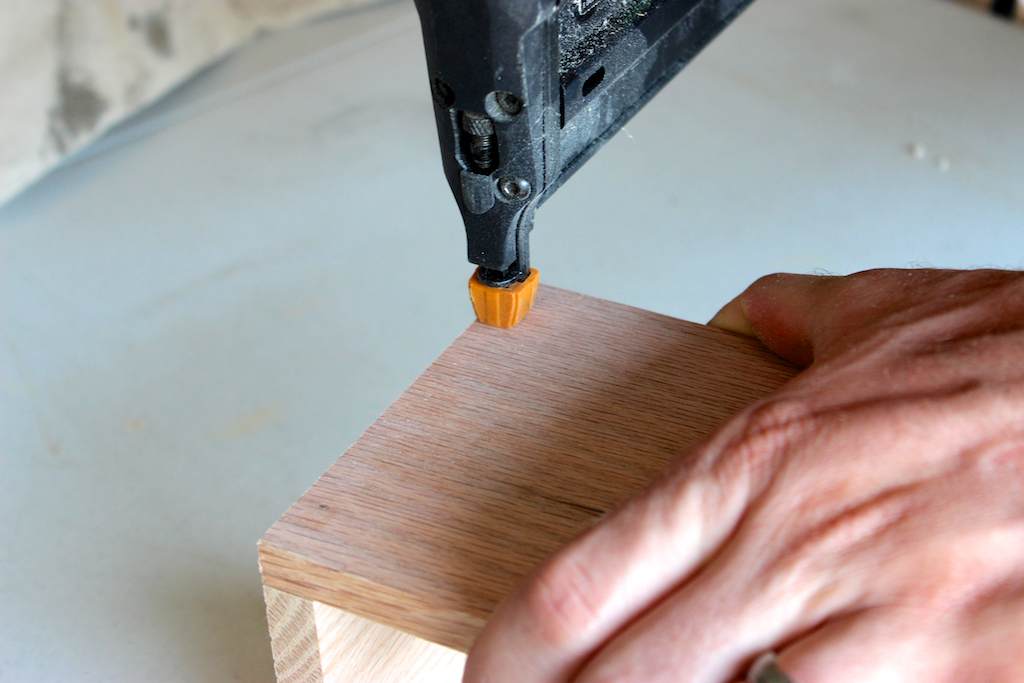
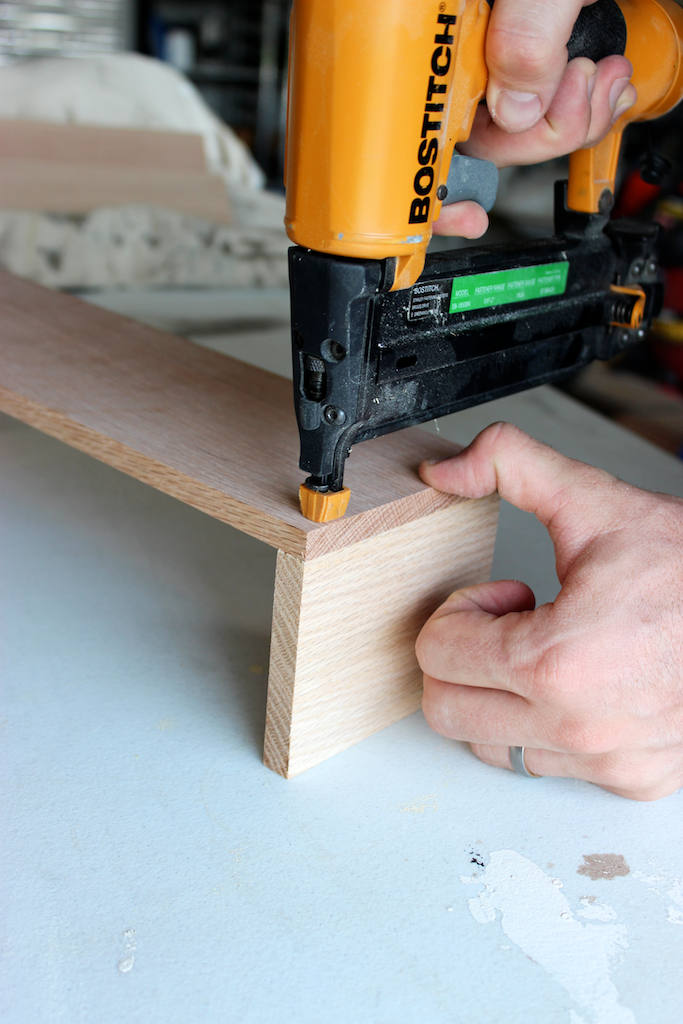
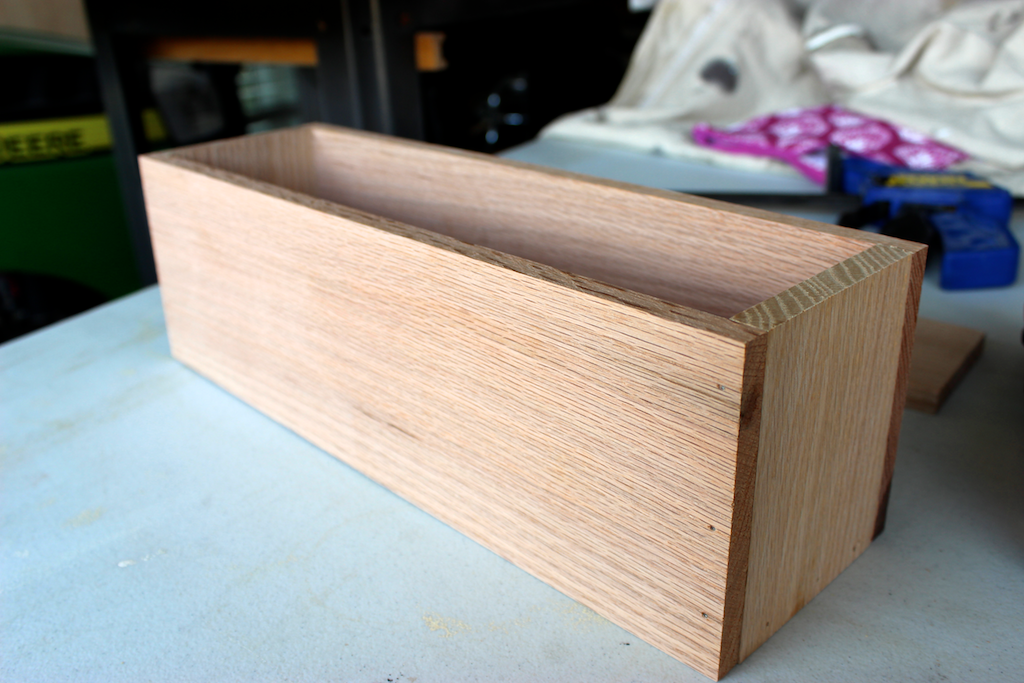
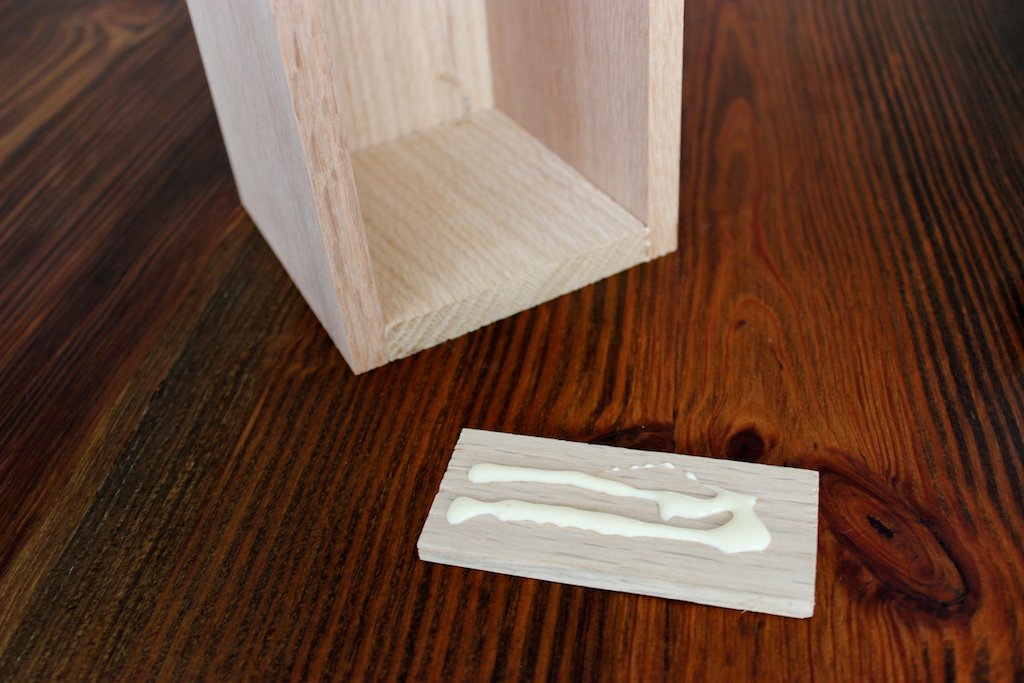
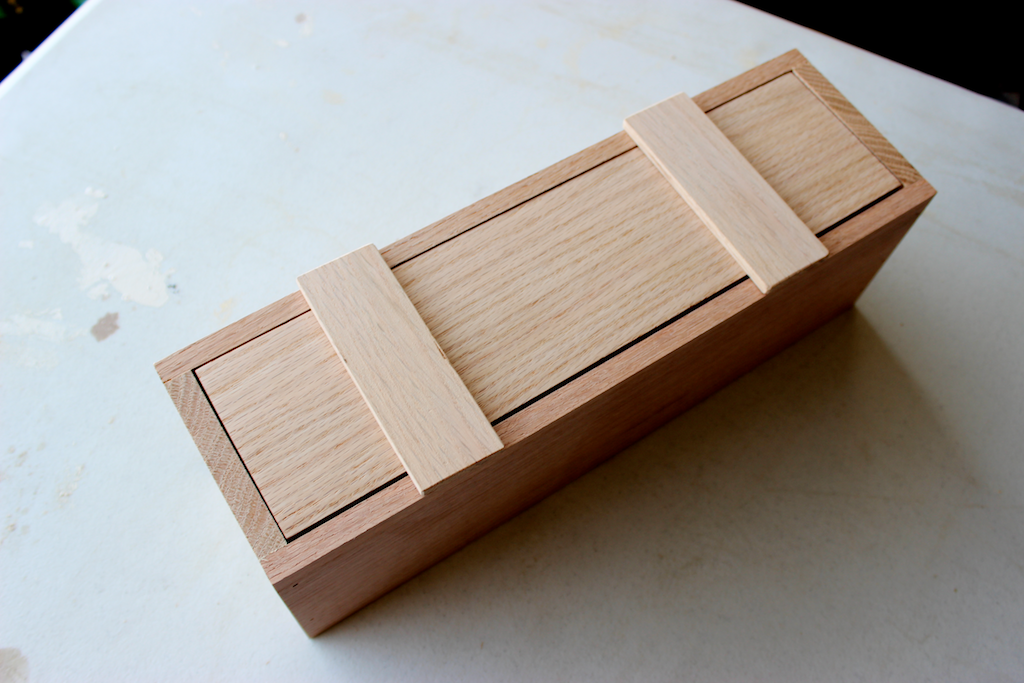
Naturally, building one seems like not only a great way to save some money but also a meaningful wedding gift. We built this solid red oak, personalized, wedding wine box, for about $30.
Disclosure: This post is sponsored by Rust-Oleum, but my opinions are my own and in no way influenced by Rust-Oleum. Also, the links provided in the “materials” and “required tools” sections are affiliate links. If you would like to support our site and help keep our content free come find out more about how we can make money with no extra cost to you.
Tools Required
Materials
- Qty 1 1/2″ x 6″ x 48″ Red Oak (hobby board)
- Qty 1 1/2″ x 4″ x 48″ Red Oak (hobby board)
- Qty 1 1/4″ x 2″ x 48″ Red Oak (hobby board)
Cut List
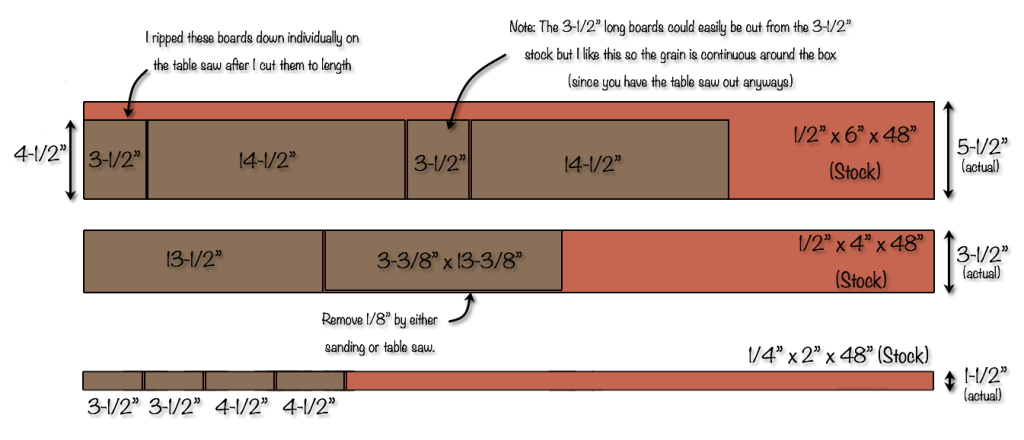
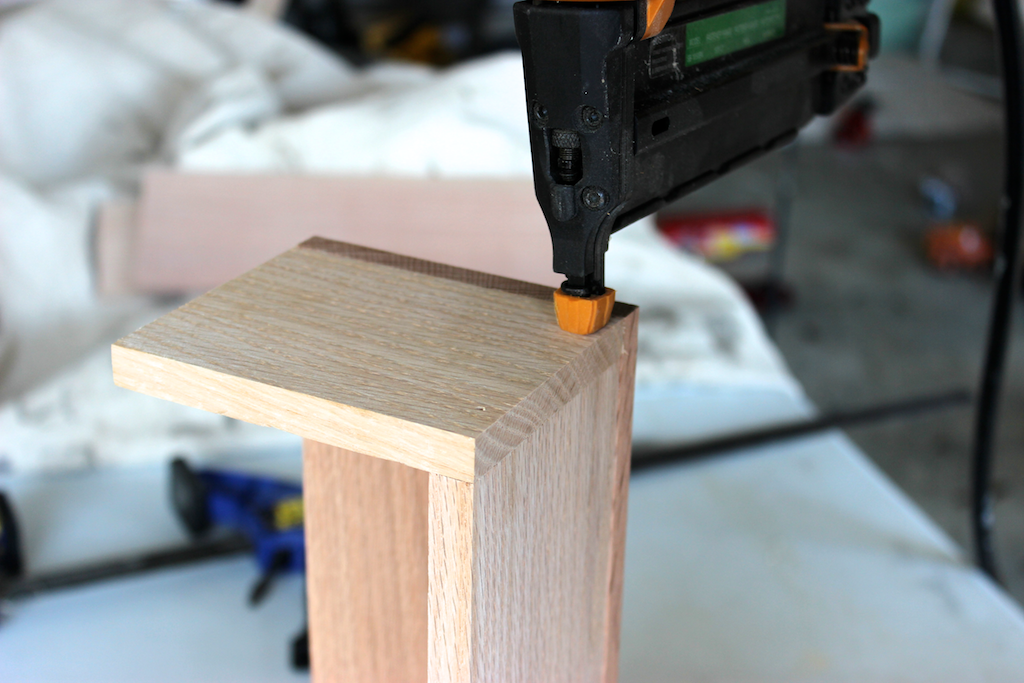
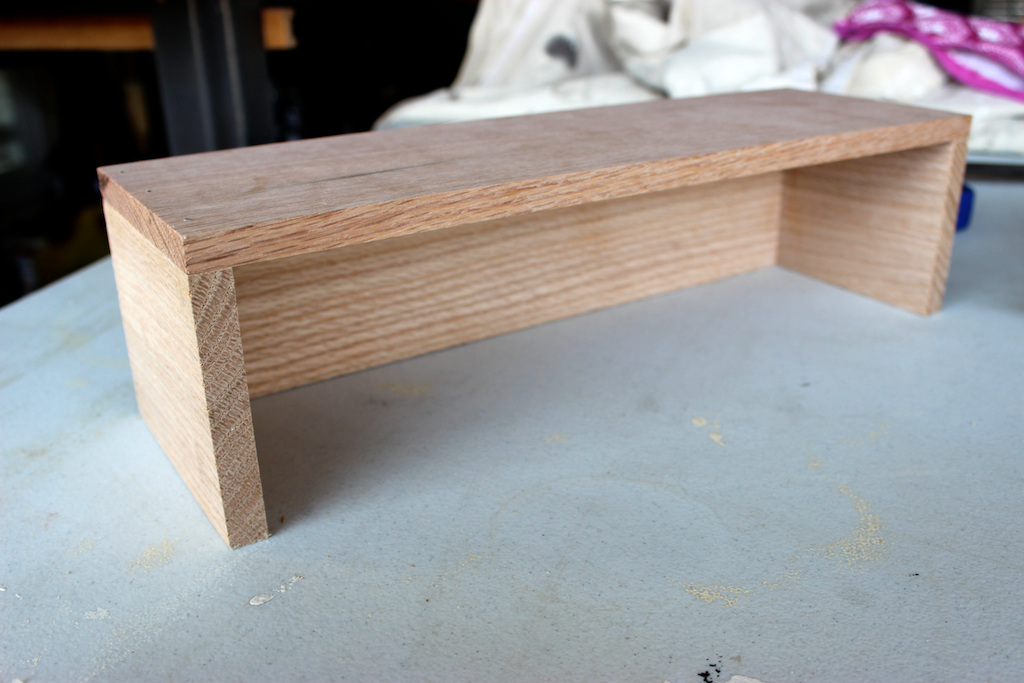
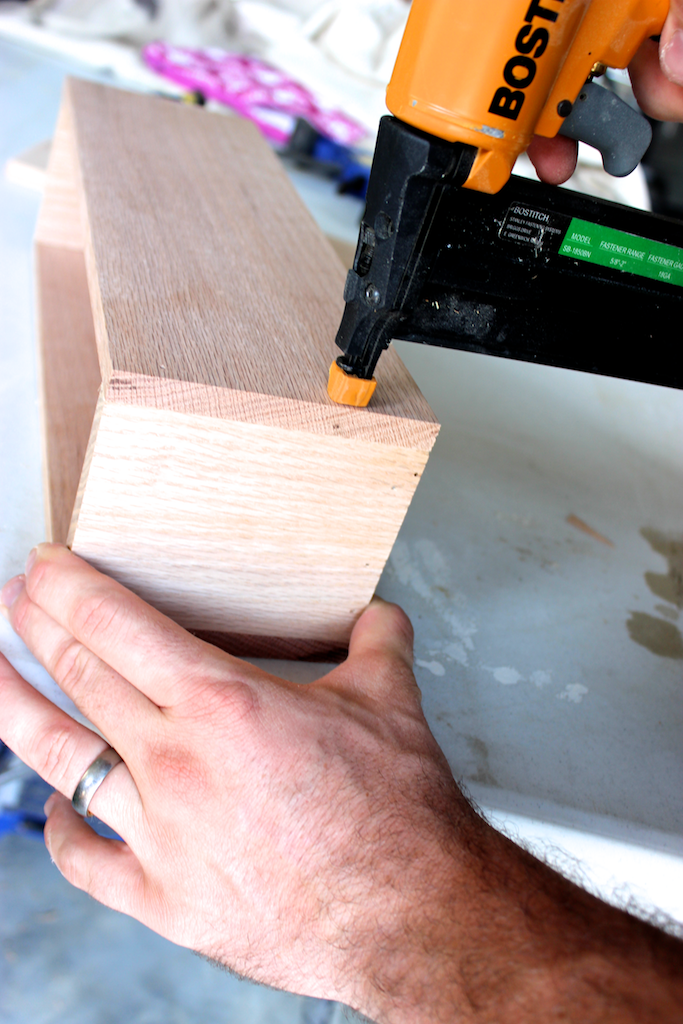
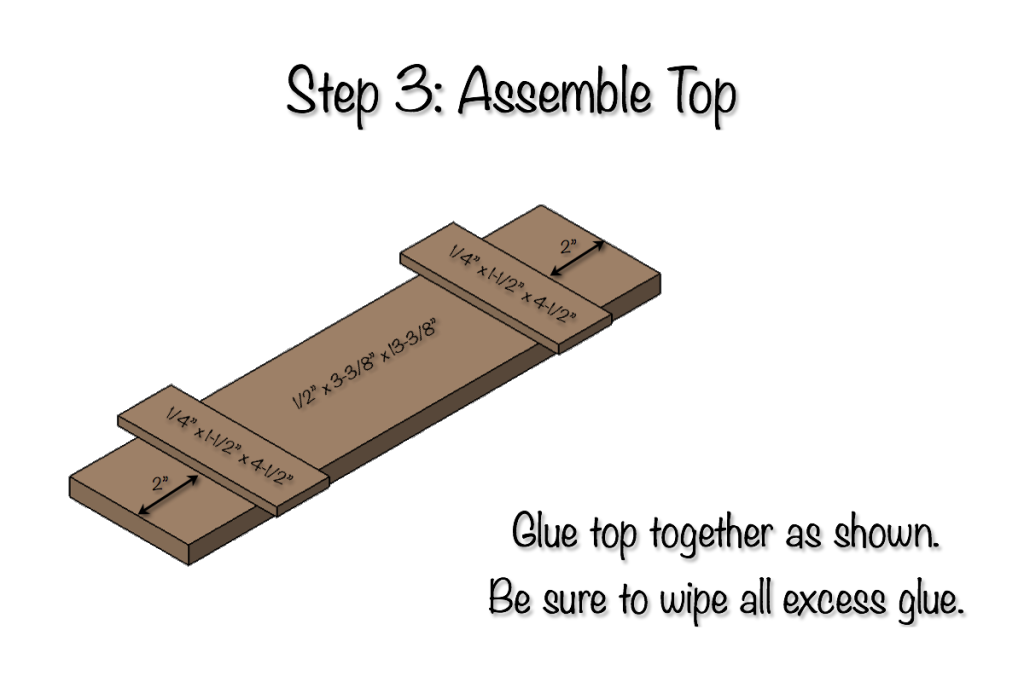
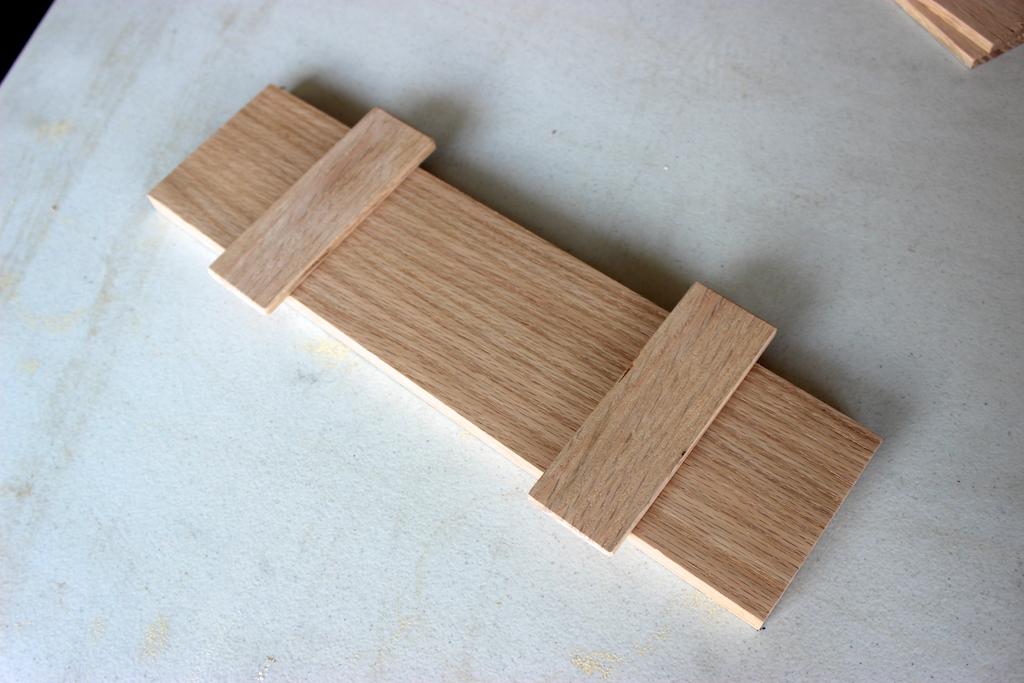
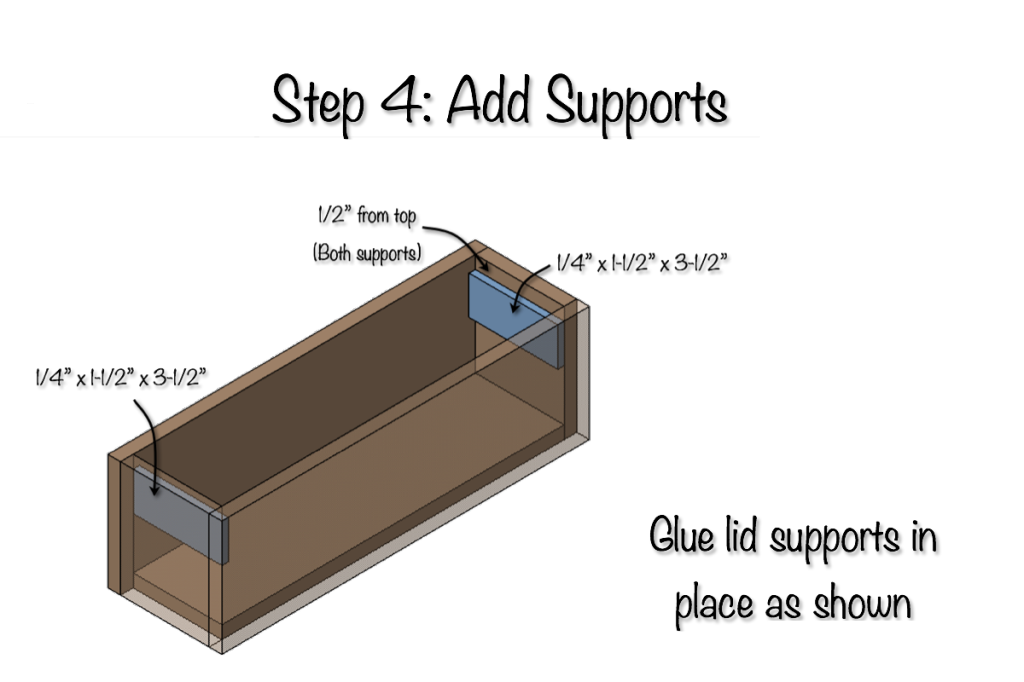
Wedding Wine Box Plans
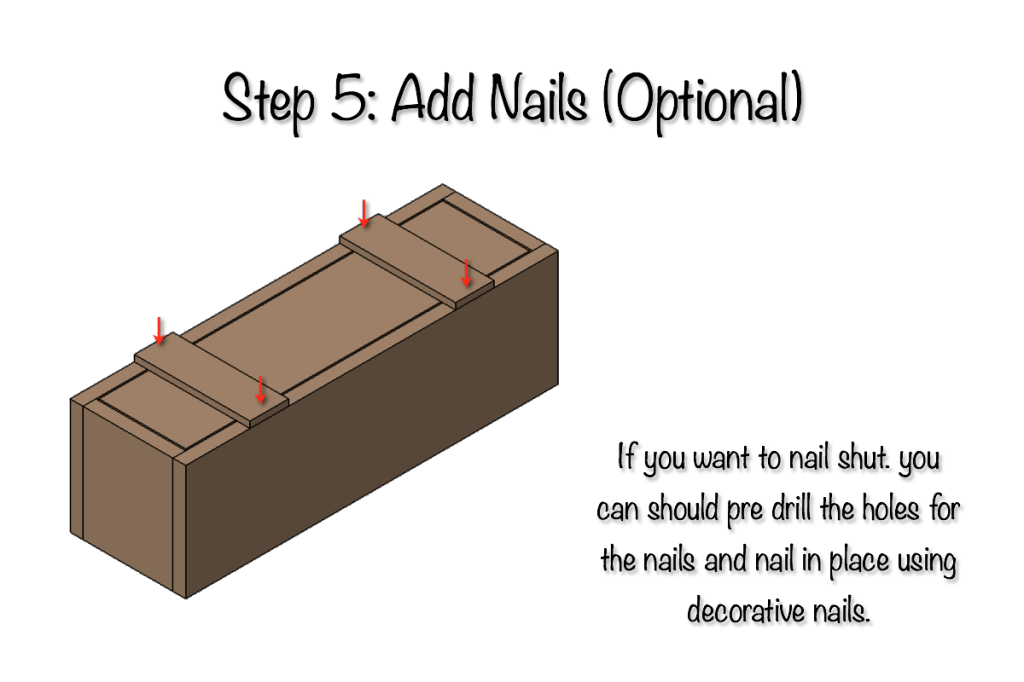
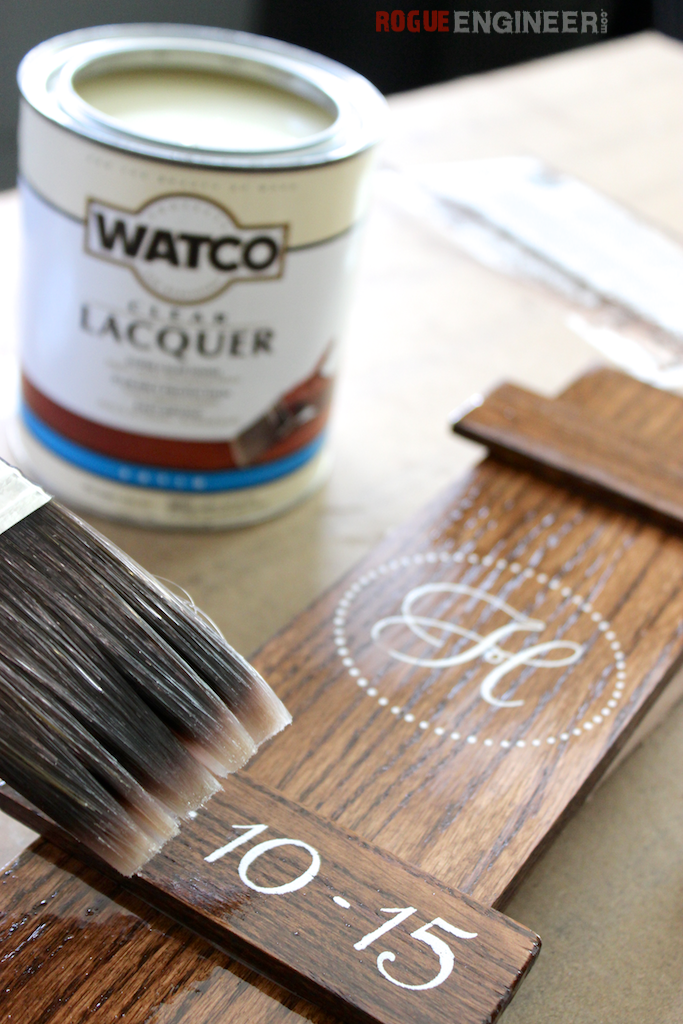
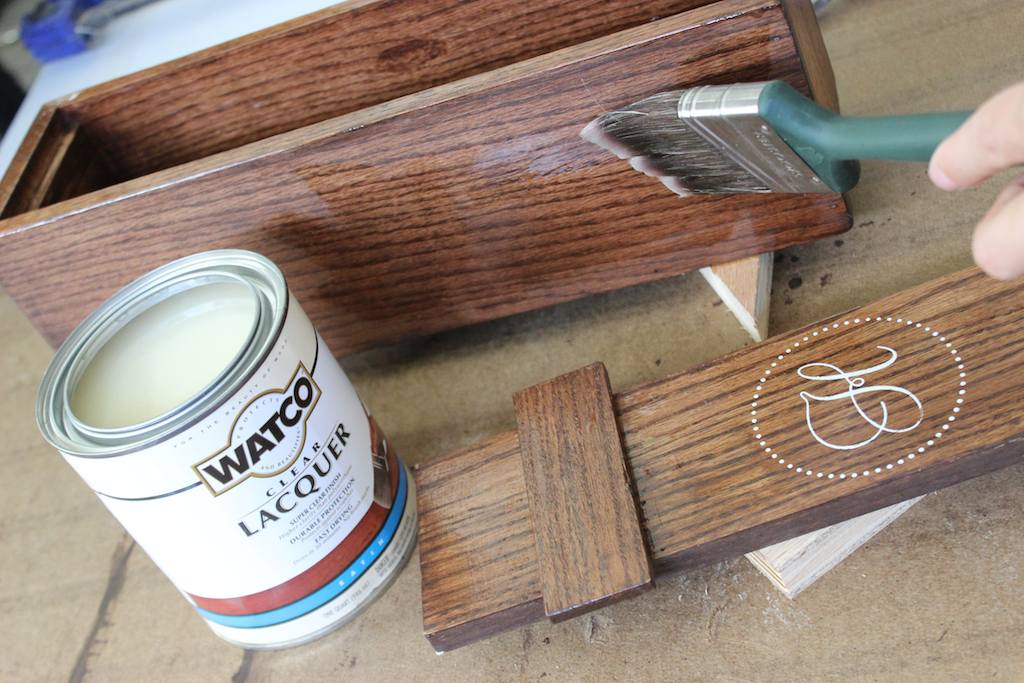
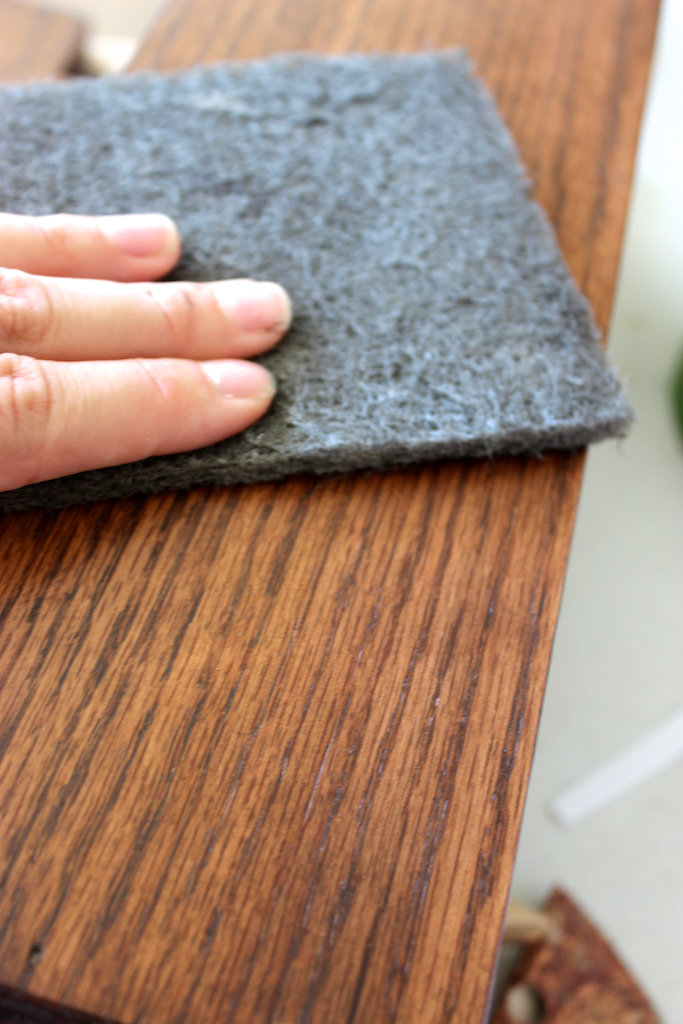
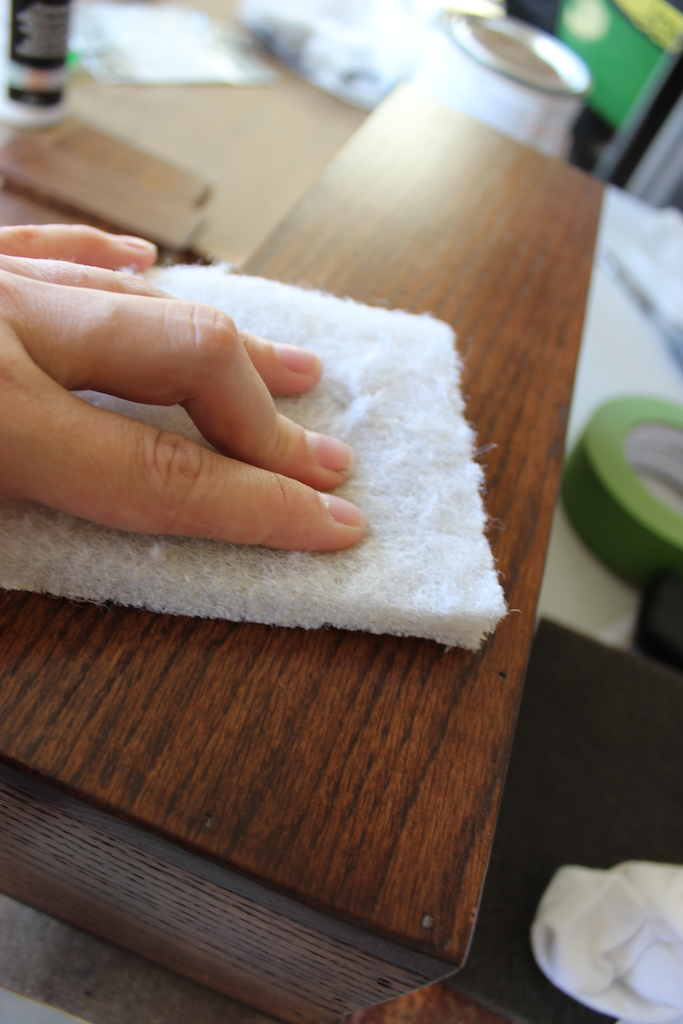
Finishing
Jamie finished this box using a Dark Walnut stain from Rust-Oleum followed by three coats of satin Watco Lacquer.
Questions? Comments?
As always, if you have any questions don’t hesitate to comment below and especially don’t forget to post pictures of your finished products in the comments! ENJOY!
How did you get the lettering and date onto it? Hand painted? Looks great!
Thanks Joe! I actually used Martha Stewart Adhesive Stencils They are adhesive so they wont move around when trying to sponge paint the letters on.
Great, thank you! Really great job with this site. Very happy I came across it!
Thanks again Joe! I’m happy you did too.
Super easy and turned out great! Thank you!!
Finishing up the toy chest this week too, will send in photos when finished
Thank you Joe. Did you build this one? And I can’t wait to see how your chest turns out!
This is a great piece; simple and full of class.
If you were to transport wine in this box, what is the best way to secure the top without nailing it down?
Thanks Josh! This design is meant more for long term storage and life on a shelf, not to be opened regularly. If you wanted to do something like this you could simply use small screws. Repeated use however, could result in the screws not holding well. Another option would be to incorporate a nice looking bungee of some sort to secure the top.
Sorry, I thought the photos uploaded last time! This is going to be a go to wedding gift from now on. Thank you!
No worries Joe, I figured that was the case. Your wine box looks amazing and I’m sure it will be well received!
Reattaching photos that were removed
Great job! Just wondering if staining all pieces before assembly would be easier?
Thanks Mike!
It could be if you don’t think you’ll need to sand once you get it together. Once I got mine together not everything was perfectly even and a quick sand was needed to soften the edges and blend the joints. On the other hand, a light sanding of all the wood before assembly is a good idea as sanding the inside corners could be a pain.
Hi Jamison, love your box design. We decided to build a triple sized box to hold two bottles of wine and two glasses set in the middle of the wine bottles. I thought it could be a great memory box and need to make it accessible on a regular basis.
What do you think of these straps at the link below and how would you attach it to the box?
The lid will sit down inside the box as does yours and I thought that one tab could be attached to the side of the box and one tab could be attached to the top of the box. The tab has a snap closure.
Thanks, Suzy
http://www.mjtrim.com/media/catalog/product/cache/1/image/9df78eab33525d08d6e5fb8d27136e95/5/6/56836-brown_1.jpg
Thanks Suzy! I think that’s a great idea and I’d love to see a picture of it when you’re done!
Thanks Jamison, I will give you a pic after the wedding since I don’t really want to give this away before then, lol. So what about the snap closure, any ideas on how to attach it to the box? The lid will sit inside so there isn’t a top to put hinges on. I was thinking two of them, one on each side.
These look to be riveted but if you didn’t want to do that you could use some decorative nail heads, just make sure they’re not to long. And yes I think two would be fine.
Thanks, you are fast!
I am giving them a call tomorrow to find out if those brass parts can be removed and if so then I will be ordering these. It’s going to be expensive but worth it if I can seal the box.
http://www.vandykes.com/burnished-brass-tacks/p/200545/s/02362511/
Hmm, I just saw these on the same site. Nothing to take out so we can just add furniture tacks to each side. It’s a bit plain though.
http://www.mjtrim.com/buckle-and-tab-closure#sthash.ekM98wLU.dpbs
I have a call into the company and waiting on a call back since they said someone in a store location would need to look at the tabs to tell if the parts can be removed or not.
That would work too.. Or just do two belts around the whole thing.
Great idea but I would probably have to drive 45 miles to get to the place that would have some decent belts to put on it. I would like real leather, maybe we could just order some leather and add some buckles to it.
I thought I would update my info here. I had left a message yesterday regarding the tabs I was looking into and had not received a call back, so I called them again just now. I was put through to the store and the guy on the phone told me he wasn’t going to take the time to help me. What a jerk!
I called the 800 number again and made my complaint. The store manager was put on the phone and I made my complaint to her. She apologized and took a look at the tabs. They are fake leather and the studs are not removable. So, I think we will have to figure something out. Customer service really is not taken seriously anymore.
That’s crazy! I say look for another source. Sorry about the troubles.
I’ve looked everywhere, I cannot find anything like those tabs in leather and I can’t find any type of D style ring that would be squared like the one on the tab. Bummer, I don’t know what we will do as of yet. Still looking.
Hi Jamison, we are about half way through our build with the 2nd coat of poly going on our boards and I have been thinking about the white paint you used. What brand and style was that? I have the stencils so I just need the paint. Thanks for all of your help.
Hey Suzy, my wife just used a white acrylic paint like you could find at Micheal’s or Hobby Lobby. I think the color may have been “Linen” if I’m remembering correctly.
First of all, I really like the work that you are doing on this website and I really like this plan. I am planning on making this box for my wedding next month.
What did you use to make the letters and numbers?
Thanks a lot.
Thanks Tyler, I used these adhesive stencils.
Jamison,
I really enjoy your site and have made two boxes to date with some slight variations. For Box #1 I did not use the lid supports inside the box since the lid has readymade supports attached. I also included a little text on the side of the box that says “Good love is like fine wine, it just gets better with time.”. Box #2 I made with a hinged lid and a little more trim. When we give them, we are including a bottle of wine, a note about the tradition and personalized note cards from the bride to the groom and vice versa so they can write their love notes. For the second and subsequent boxes, I found a bottle of wine with the words “Primo Amore” on the bottle, which translates to “First Love”. I think they turned out pretty good and it has started a new tradition of wedding gifts from me and my wife. I have also made a few magnetic bottle openers and am just finishing my first set of lawn dice. Thanks again for the great ideas.
Reattaching photos that were removed
Jamison,
Love your website! Do you paint on the lettering after the 3 coats of poly or 2 coats then paint lettering and cover with the final coat of poly?
Thank you.
Sandy, my wife painted the lettering prior to applying any coats of the poly.
Great! Thank you for the quick response. Going to start on it today!
Hey Jami,
Great design! I am making one this weekend for my wedding in sept.
Also, there is a typo. The third board is listed as 1/2″ but it should be 1/4″.
-George
Awesome! Congrats on the upcoming wedding. Thanks for letting me know about the typo, I’ll fix it today!
Hey Jamison, I just saw that in your materials list there is something mislabeled. Instead of 1/4″ thickness you have it at 1/2″. The piece for those cross bars on top.
Thanks man, I updated the materials list
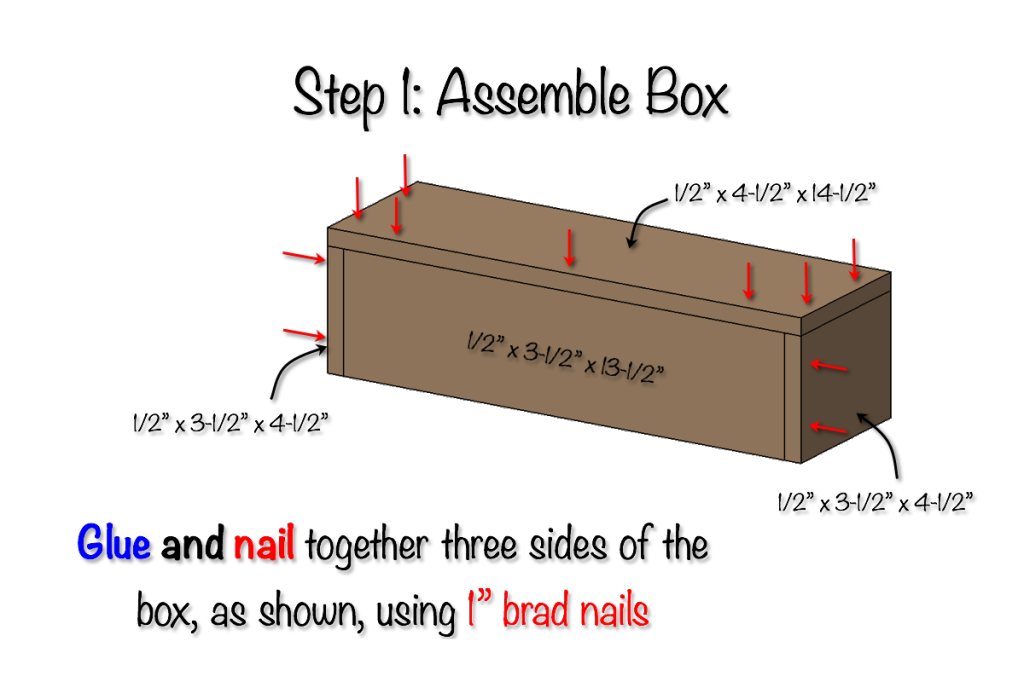
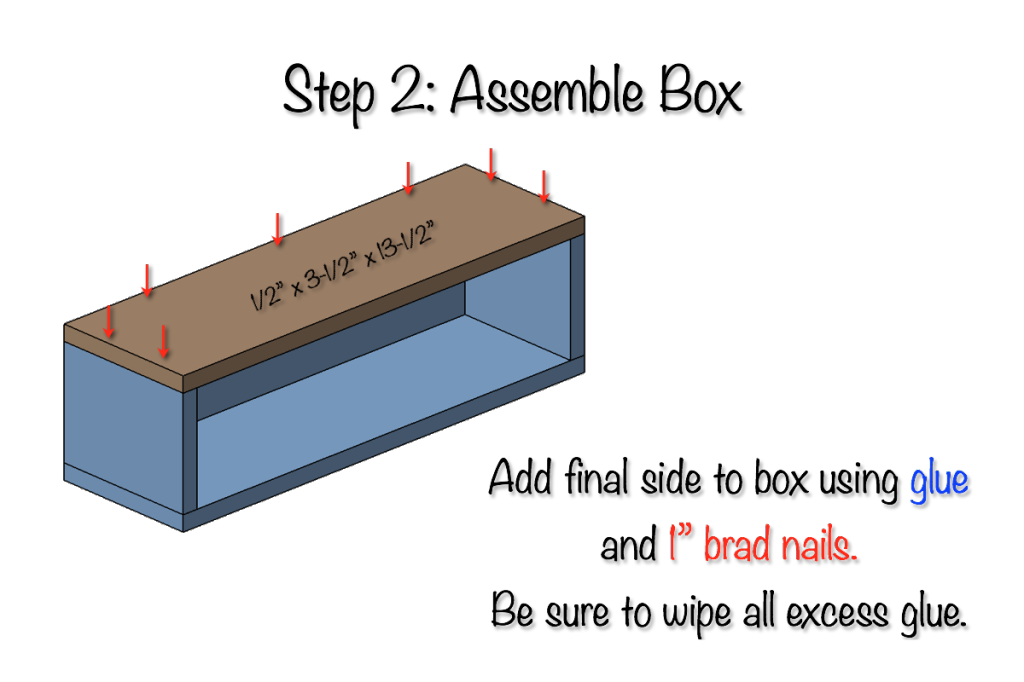
Great plans, I like the mixture of schematics and photos, really helps make it easy to follow. In step 2, your graphic for assemble box, I think it lists the wrong measurement. Shouldn’t it be the second 14 1/2″ piece?
Thanks and it absolutely should be. I’ll make a note to fix that!