Easy Modern Adirondack
Time to Complete
1 Hour
Estimated Cost
$30 – $40
Skill Level
Beginner
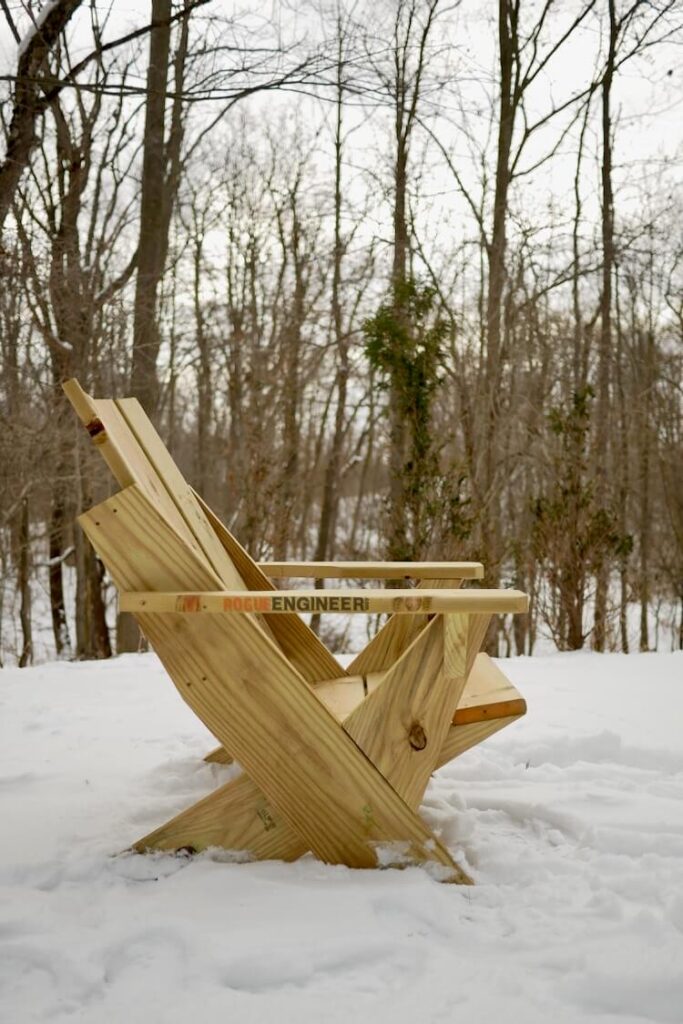
An Adirondack chair has been on my list of things to build for some time now. However, I wanted to add my twist to it. When I was building my outdoor bench not too long ago, I realized that the simple modern looking leg design could probably be translated to more of a lounge chair like an Adirondack. So I tweaked the design to give it the angles of an Adirondack and added a curved back and armrest and now we have the easy modern Adirondack chair! We were able to build this chair for about $30-$40 and in about an hour with only a few tools.
If you love this stuff as much as we do, you might want to consider following us on Instagram where we post sneak peeks and behind the scenes stuff in our stories. Also, did you know you can get tons of projects plans from all around the web when you follow us on Facebook and Pinterest!
Tools
Materials
Disclosure: The links provided in the “materials” and “required tools” sections are affiliate links. If you would like to support our site and help keep our content free come find out more about how we can make money with no extra cost to you.
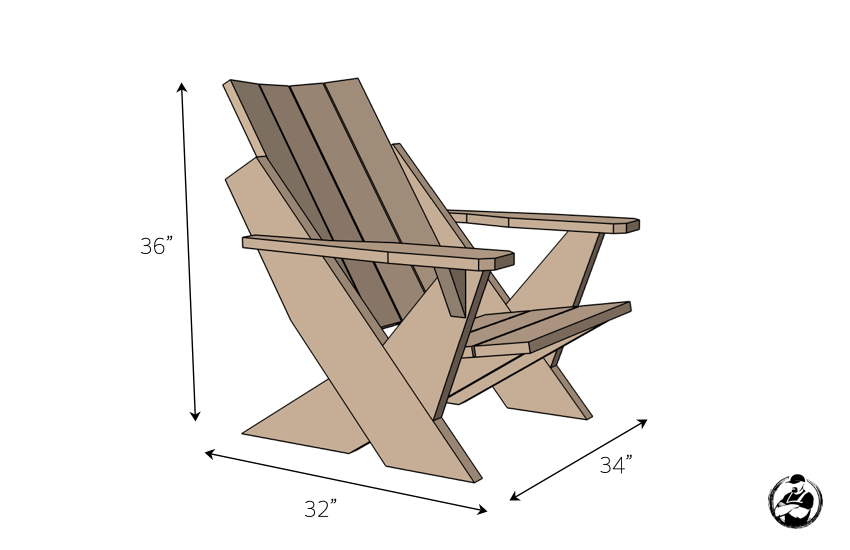
Dimensions
How to Build an Easy Adirondack Chair
The plans below detail how to cut and assemble the wood to build an easy Adirondack chair.
Some things to note are that it is always highly recommended to pre-drill screw locations to reduce the chances of wood splitting. Another is that any fasteners that are used in combination with treated wood should be ACQ rated so that they do not corrode.
Total Time: 1 hour
Cut List
Cut the lumber as specified below. For the legs and supports, the second of each can be templated using the first to make sure they are the same.

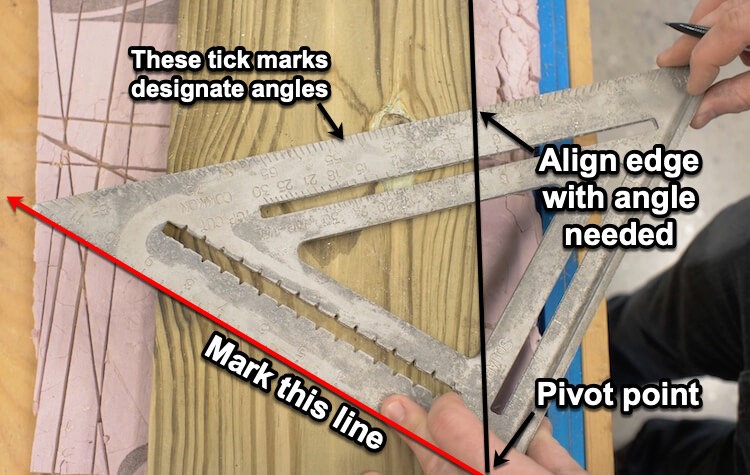
If you do not have access to a miter saw the angles for these cuts can be found using a speed square as shown below.
Taper the Long Leg
Using the diagram below, mark the cut with a straight edge and cut the
taper with a circular saw. 
Assemble the Legs
Use the measurements on this diagram to mark the intersection of the short leg on the long leg. Then, make a mark at 4″ from the bottom on the front side of the short leg and align the short leg as shown below. Scrap boards can be used to balance the shorter leg while fastening with 2-1/2″ wood screws. Before fastening check to make sure the bottom of the short and long leg are even so that they will sit flat on the ground.

One way to enhance this build and make it last longer to use exterior waterproof wood glue at this joint and/or assemble with 3 galvanized carriage bolts, washers and nuts. If you want to get really fancy you can cut a lap joint!
Cut out the Back Supports
The back supports should be curved for comfort. Using the dimensions below you will be able to 3 points on the board (one is mirrored to the other side). Connect those points with a straight edge and then cut it out with a jigsaw or bandsaw.

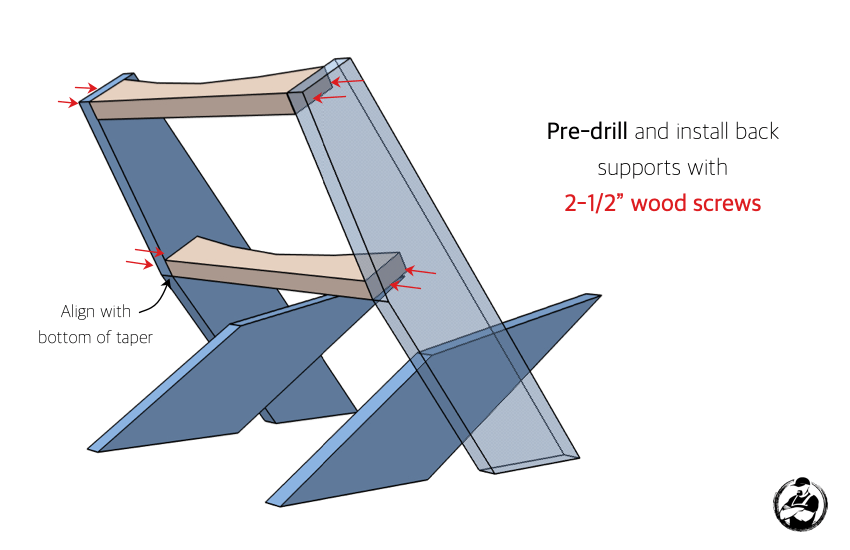
Install the Back Supports
Pre-drill and install the back supports with 2-1/2″ wood screws. Especially at the top of the leg because that is where boards are most likely to split. I know because I was lazy and mine split.
One way to beef this connection up is to opt for longer lag bolts or install a 90 degree galvanized bracket on each of the inside corners of these joints.
Taper the Arm Support
Using the diagram below, mark the cut with a straight edge and cut the
taper with a circular saw.

Installing the Arm Supports
Mark the height of the arm supports on the leg, pre-drill and install them with 2-1/2″ wood screws. Then align the triangular pieces such that the top is flat with the arm support, pre-drill the supports and install with 2-1/2″ wood screws.
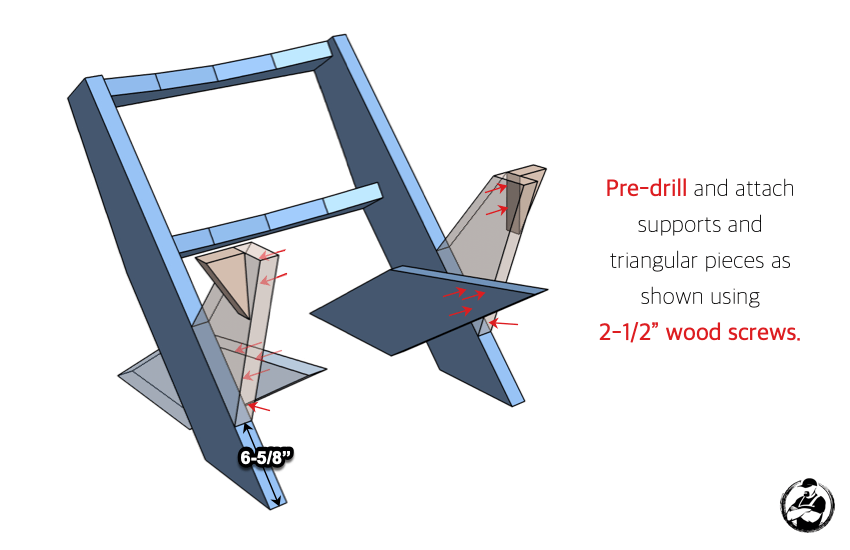
This is another area that could be beefed up with exterior waterproof wood glue at the joints and/or assemble the supports to the legs with 1 or 2 galvanized carriage bolts, washers and nuts.
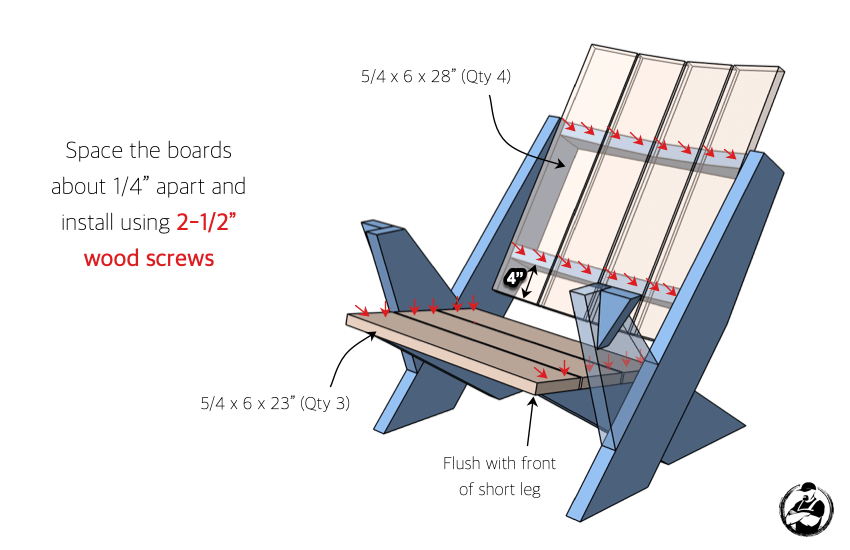
Installing the Seat and Back
The 5/4 boards are used for the back and seat. These will get installed per the diagram below using 2-1/2″ wood screws. Pre-drilling first of course.
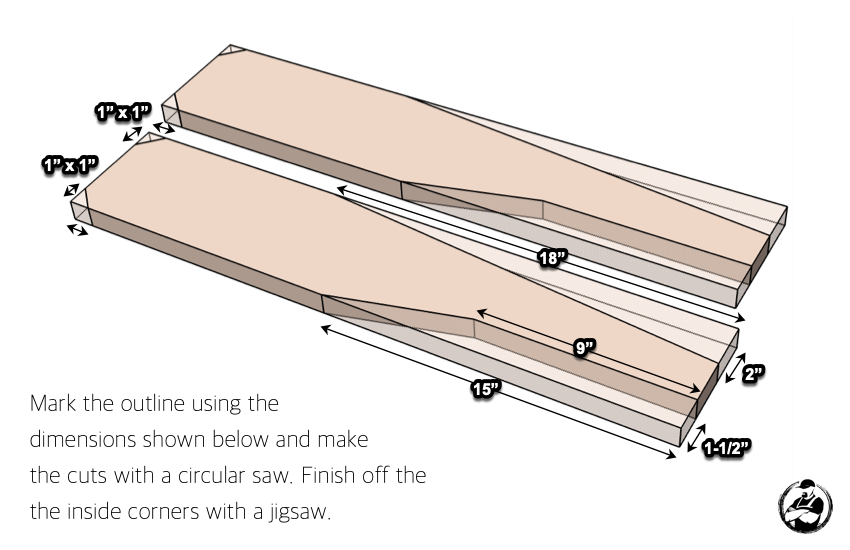
Cutting out the Arm Rests
Use the diagram below and a straight-edge to outline the armrests, then make the cuts with a circular saw and follow up the inside corners with a jigsaw.
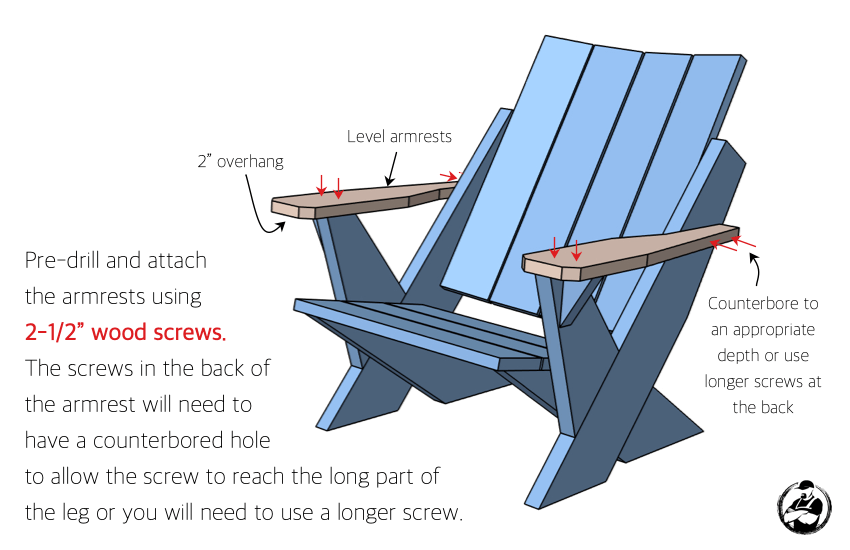
Installing the Armrests
Locate per the diagram, then pre-drill and attach the armrests with 2-1/2″ wood screws. The screws in the back of the armrest will need to be pre-drilled and counterbored to an appropriate depth so the screw will reach the leg or use longer screws.

You might also like…