
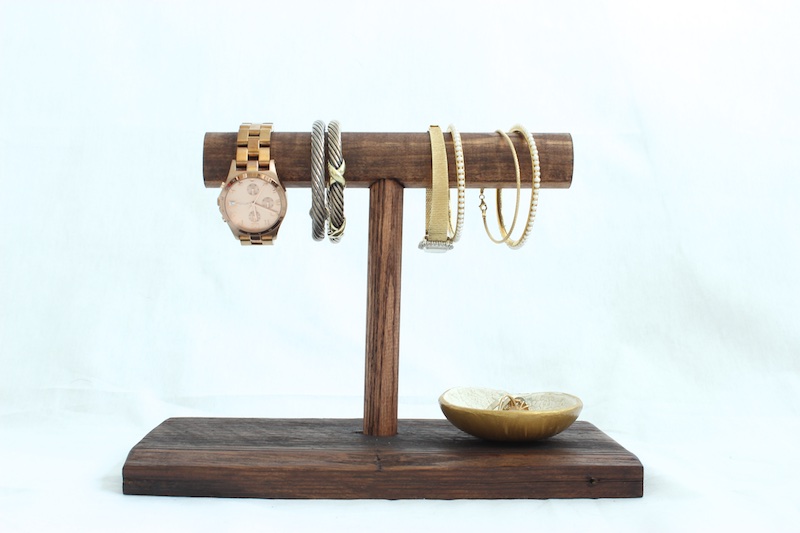
Jewelry Stand
The holidays are coming up quick and we are busy thinking of some awesome DIY gifts that anyone can do, because honestly what’s better handmade gift from the heart. We have some scrap wooden dowels laying around form a recent project, so I put them to good use. Here’s a quick tutorial on how to make a jewelry stand, or for the men a watch stand. Enjoy!
For sneak peeks of our upcoming projects be sure to follow me on Facebook and Instagram. Also, follow me on Pinterest to get tons of projects plans from all around the web!
Required Tools
Materials
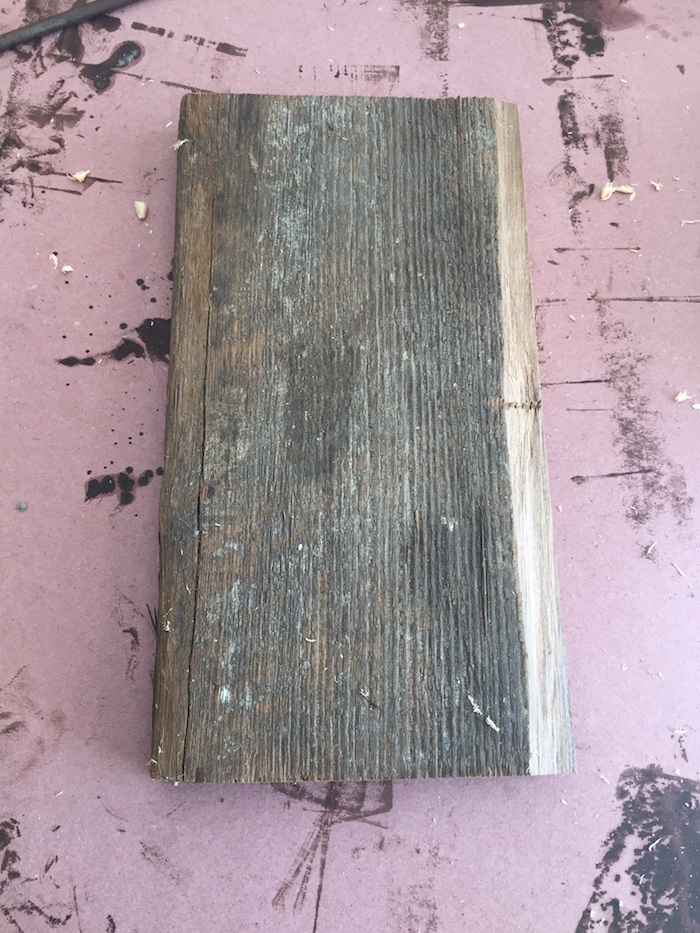
- Qty 1 – 2 x 6″ scrap wood
- 2″ wood dowel
- 3/4″ wood dowel
- Wood Glue
- 1-1/4″ Brad Nails
Disclosure: The links provided in the “materials” and “required tools” sections are affiliate links. If you would like to support our site and help keep our content free come find out more about how we can make money with no extra cost to you.
How to build a jewelry/watch stand
Step 1: Cut Wood
Using the miter saw, cut the 2″ wood dowel to 8″, and 3/4″ wood dowel to 6″, and the 2×6 to 10″. Since I has some awesome reclaimed lumber in the scrap pile I used this in place of the scrap 2×6. Use what you have!
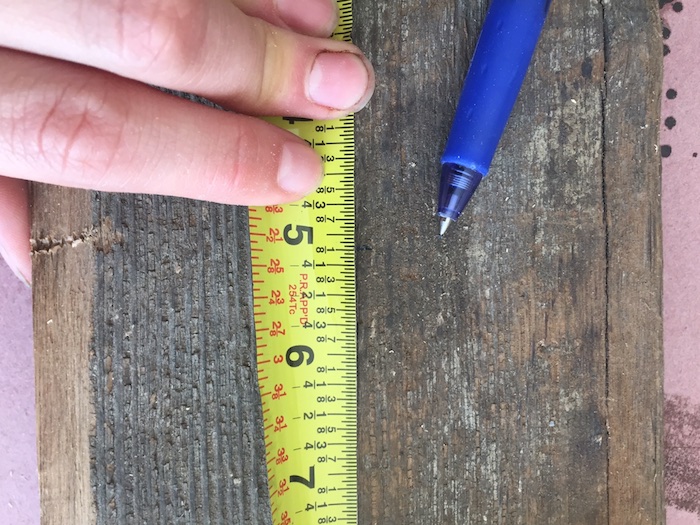
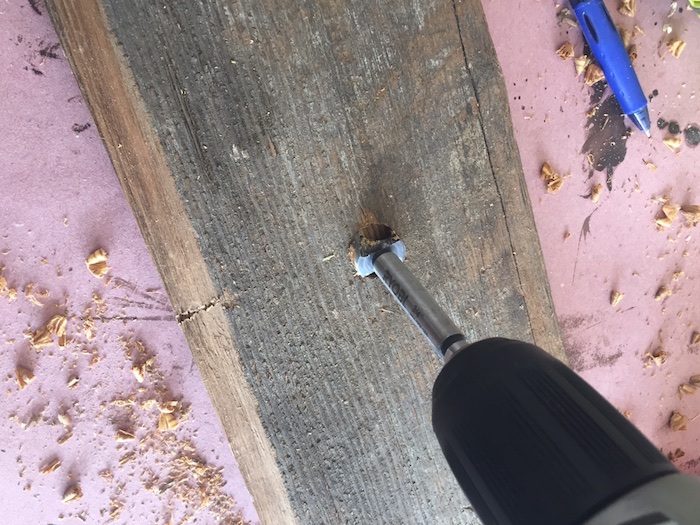
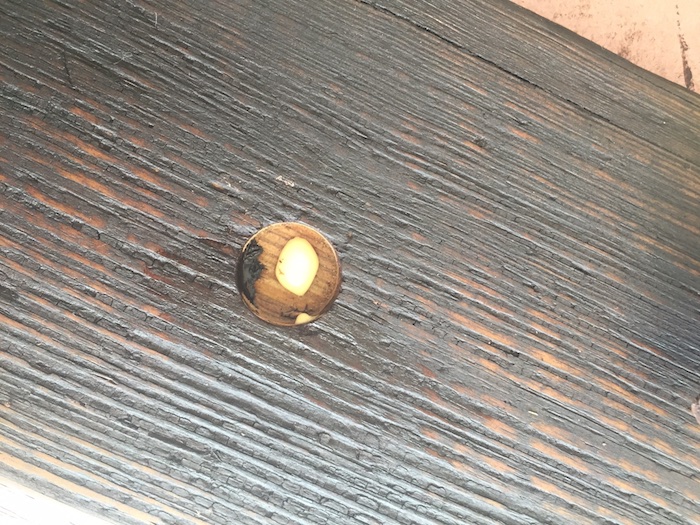
Step 2: Drill holes
Before drilling the hole mark the center of your 2″ wood dowel and 2X6. For the 2″ wood dowel mark 4″ and the 2×6 mark 5″, then using the drill with the 3/4″ forester bit, drill holes. Drill the holes about 1/4″ deep.

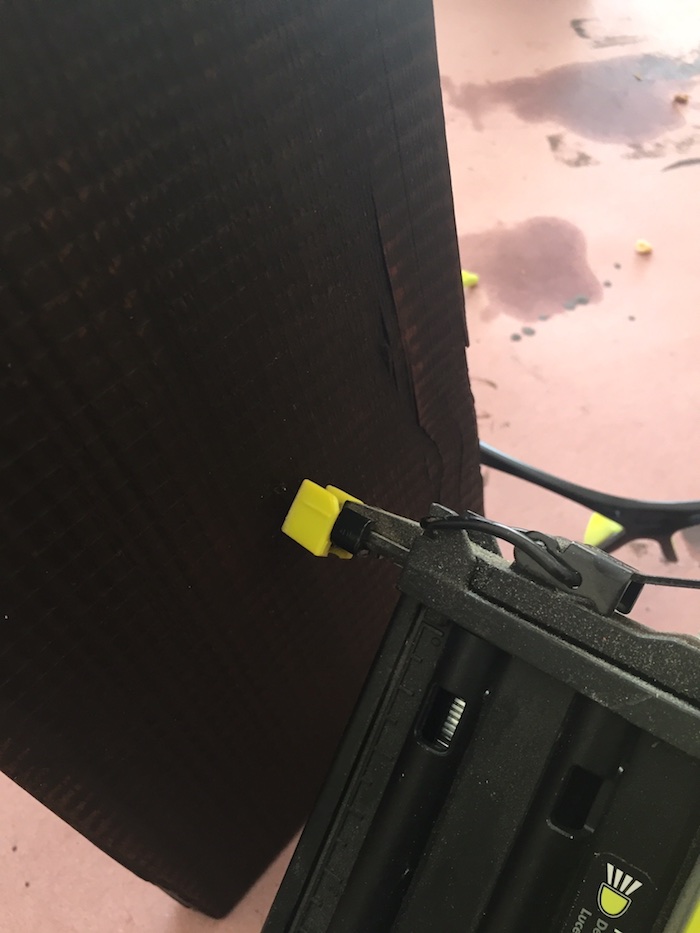
Step 3: Glue and Nail
Squeeze a dab of wood glue into the hole on the 2″ dowel and inset the 3/4″ wood dowel. Using the brad nailer, nail from the top of the wood dowel into the 3/4″ dowel.
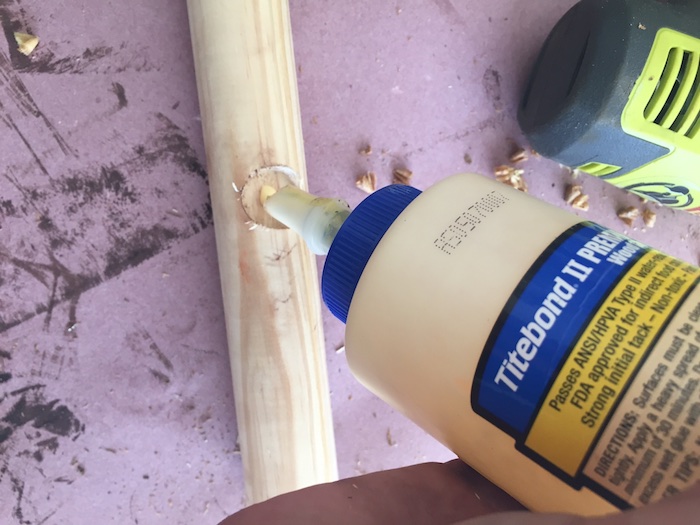
Add a dab of glue into the hole drilled into the 2×6″ and insert the 3/4″ wood dowel. Using the brad nailer nail the bottom of the 2×6 into the 3/4″ wood dowel.
Step 4: Finishing
For the finish on this jewelry stand I used Rust-Oleum’s Carrington wood stain. Using a stain rag, wipe on the stain, let sit for a couple mixtures, then wipe clean.

Questions? Comments?
As always, if you have any questions don’t hesitate to comment below and especially don’t forget to post pictures of your finished products in the comments! ENJOY!
I have sold more than one handmade wood jewelry box and I would say this jewelry can be made at reasonable price and they would sell like hot cakes
plus they make the perfect gift!