
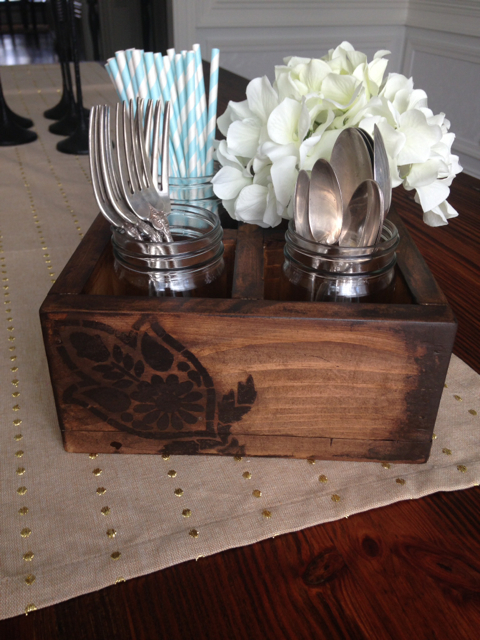
Old World Finish with Stencil Detail
I am not an artist in the least, nor do I have much experience in the “finishing” world (until recently). I am just not afraid to try new things. If I don’t like where a project is headed Ill just sand it down and try again!
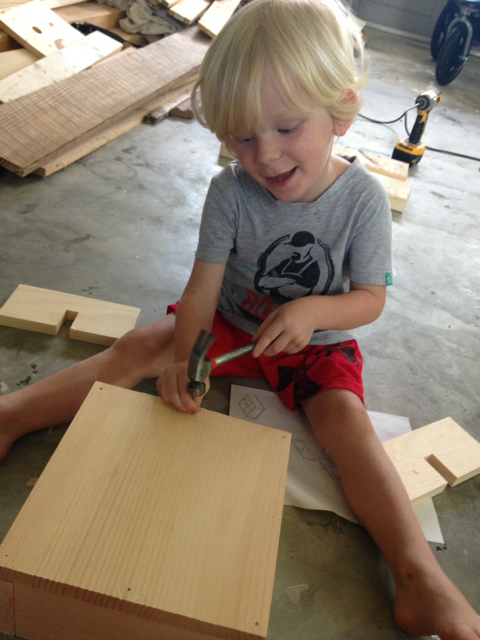
So, my husband recently attended the Haven Conference and brought back some really fun goodies! I am a sucker for anything free. Anyway, Home Depot had some really fun project giveaways. It was the perfect way to entertain my son this afternoon and it gave me a reason to experiment with a new finish.
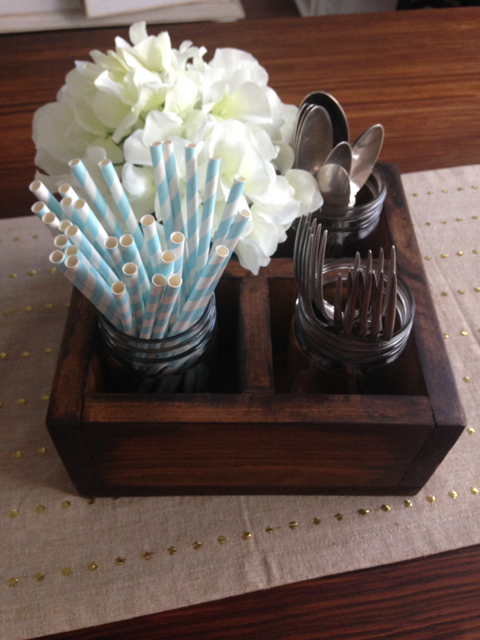
I really wanted a finish that looked worn, with kind of a oily look from years of handling and I couldn’t help but add a little flare with this stencil. I bring you, what I like to call, the old world finish!
Supplies
- Rust-Oleum Dark Walnut Stain
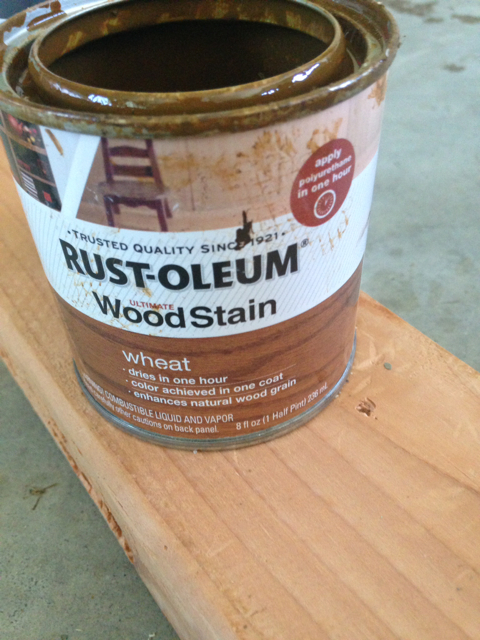
- Rust-Oleum Wheat Stain
- Lint-Free Rags
- Stencil (optional)
- Foam brush
- 220-grit Sandpaper
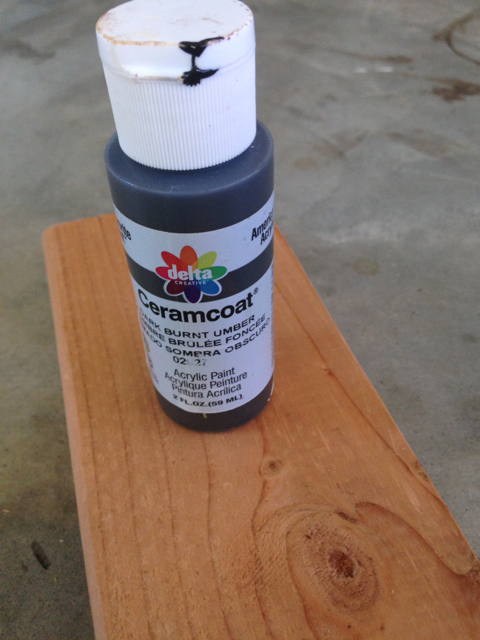
- Dark Burnt Umber Acrylic paint
Instructions
Step 1: Base Stain
First things first, make sure your project is sanded and ready for stain. For tips on how to prepare your wood for finishing take a look at our how to sand post.
For my base stain coat I used Rust-Oleum Wheat. I prefer using a lint-free cloth to apply the stain. Wipe on the base stain with lint-free cloth and wipe off any excess stain with a clean cloth.
The great thing about Rust-Oleum stain is that it dries in an hour!

Step 2: Sanding
Since I wanted to two tone the stand I sanded in-between coats to allow for this look. Using a sander, lightly go over the stain coat. I did a little more on the edges and corners.
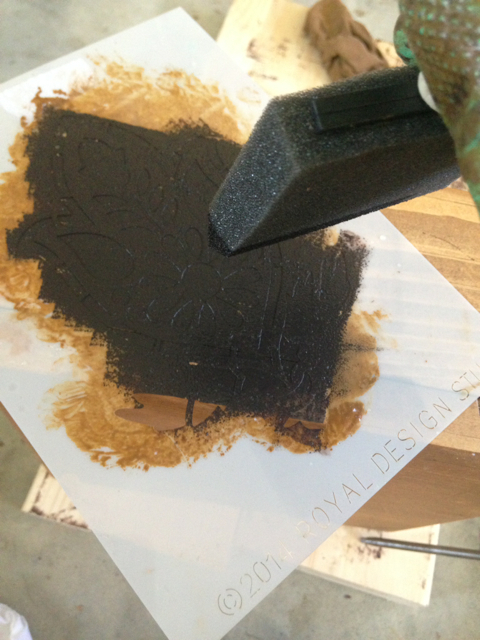
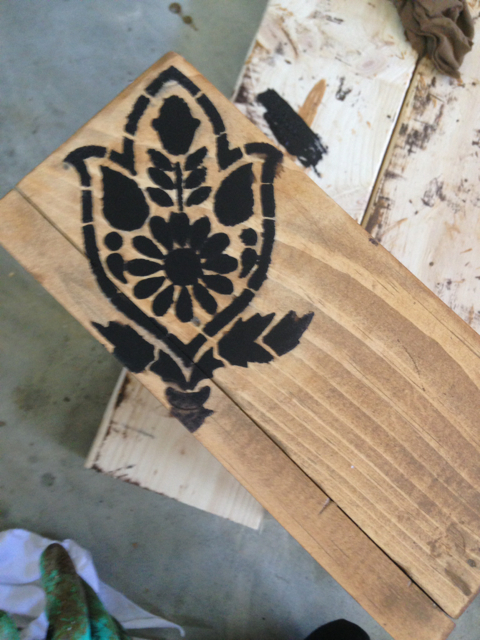
Step 3: Stencil and Acrylic Paint
After allowing your base coat to dry completely, using a foam brush apply the acyclic paint to corners and edges of your project. I found the best method of doing this was to get paint on each side of the foam brush and lightly wipe up from the edges. You can add as little or as much of the paint as desired. Don’t be afraid to make mistakes, we will be sanding after this step! If using a stencil, place wherever design is desired and simply tap the foam brush on top of the stencil.
Step 4: Sanding
Once you have allowed your acrylic paint to dry, it’s time for some light sanding. Lightly sand over the paint to blend it better. This is where you can fix any areas where you feel you went a little heavy on the paint.
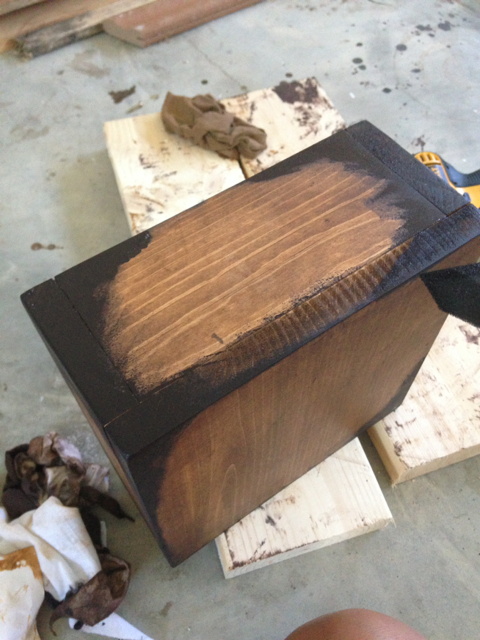

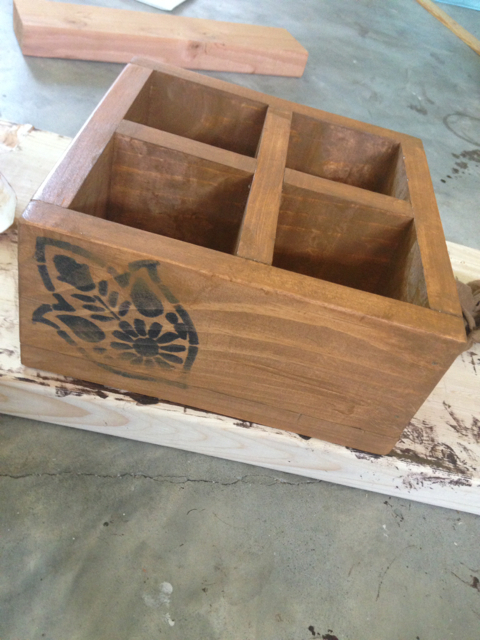
Step 5: Top Stain
For my top stain coat I used Rust-Oleum Dark Walnut. The purpose of the top coat is to make the piece seem like its from the old world. Therefore apply the darker stain to the corners and anywhere the piece would be handled and naturally wear. Wipe on the stain using a lint-free cloth and wipe off any excess stain with a clean cloth.
We always recommend you add a protective coating to all your projects. After spending so much time and effort it is wise to protect you investment. To learn more com check out our protective coating tutorials.
Comments:
As always if you have any questions don’t hesitate to comment below and especially don’t forget to post pictures of your finished products in the comments! ENJOY!
Love it!
Thanks @Alicia Rogers !
Do you have the measurements for the box? I would love to make some. These are very nice.
Thanks Gail! This was actually a “ready to assemble” project from Home Depot that I got at a conference, but it could easily be replicated. Here are some dimensions I put together.
Reattaching photo that was removed:
Thank you