Outdoor Bench – 4×4 Legs

(6 customer reviews)

$10.00

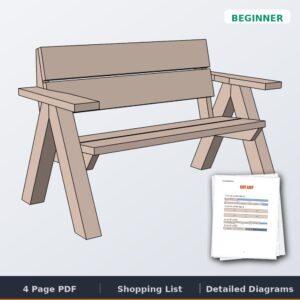
Printable outdoor bench plans with 4×4 legs: a chunky, full-size bench with a two-board back, angled legs on solid feet, and a finished size of 48″ wide x 24″ deep x 33″ tall. Four boards, about 30 minutes, beginner level. The instant-download PDF includes the cut list, shopping list and step-by-step diagrams.

Buy Now →

✓ Instant download · Personal use license · Secure checkout via Stripe

Build the whole setGet this plan plus 4 more outdoor favorites in the Backyard Bundle$34Save $21See the bundle →
SKU: RE-BENCH---4X4-LEGS Categories: ,

Description

Outdoor bench plans with 4×4 legs: a chunky bench with a back

This is the chunky one. Most of my outdoor benches stand on 2x lumber, but this one stands on 4×4 legs. On each end, the back leg rakes back to carry a two-board backrest, and an angled front leg meets it on a solid foot with chamfered ends. The seat is two boards with a small gap between them. It finishes 48″ wide, 24″ deep and 33″ tall, a full-size bench with a back for the patio, the fire pit or the end of a garden path.

What you get

  • Printable PDF plan, instant download
  • Full dimensions
  • Complete cut list
  • Step-by-step instructions
  • Shopping list

Specs

  • Overall size: 48″ wide x 24″ deep x 33″ tall
  • Style: outdoor bench with back, 4×4 legs on solid feet
  • Seats: 2
  • Build time: about 30 minutes
  • Skill level: Beginner
  • Estimated cost: $50 to $60

Lumber you’ll need

  • 2 boards, 2x8x8′ treated lumber (seat and back)
  • 2 posts, 4x4x8′ treated lumber (legs and feet)

Hardware

  • 8 structural wood screws, 3/8″ x 6″ (one per leg joint, no pre-drilling)
  • 16 deck screws, 3″

Tools you’ll need

  • Miter saw (every angle is a plain miter setting, nothing compound)
  • Impact driver
  • Tape measure and pencil
  • Safety glasses and hearing protection

Common questions

What wood should I build it from? Pressure-treated pine is the budget pick and what most of my benches use. Let it dry a few weeks before staining. Cedar costs more but is naturally rot resistant and stays cooler in the sun. Either way, keep the legs off wet ground and it will last for years.

Do I need to seal or stain it? Yes. An exterior stain and sealer every year or two is the difference between a bench that grays and checks and one that still looks new. Pressure-treated lumber should dry out before its first coat.

How is it different from my other benches? It’s the chunkier take on my outdoor benches: same idea, but with 4×4 legs instead of 2x boards. If you’d rather build from a short stack of 2x8s with almost no waste, the outdoor bench with back or the modern outdoor bench are the lighter takes.

Not sure it’s the right one for your spot? Compare all our outdoor bench plans. It also pairs with the outdoor table, Adirondack chair and chaise lounge in the outdoor furniture plans lineup.

6 reviews for Outdoor Bench – 4×4 Legs

    IMG 0038
    Andrew Bobola
    Nov 9, 2026
    Easy plans, perfect design and comfortable bench. Will build many more in the years to come as this worked out great and took very little time to make. I used rough cut cedar 2x6s and 4x4s and they worked perfectly.
    Reply from Jamison Rantz:
    Nice work Andrew! Rough cut cedar is a great call on this one, it gives it that rustic look and holds up outside. Glad it came together quick.
    Kevin
    Oct 16, 2026
    Turned out great. I made it 5' long. Have one more 5 footer to make, then 2, 12 foot benches. Making new benches for our church softball dougout. 34 feet in total.
    Reply from Jamison Rantz:
    Thanks Kevin! 34 feet of bench for the church softball dugout is a serious production run, love that. Glad the first 5 footer turned out great. Send a photo once the 12 footers are in, I'd love to see the whole lineup.
    PXL 20261015 010212014.MP (1)
    Steve Starrett
    Oct 14, 2026
    Wonderful wood bench design. We slightly modified for our liking, and it made it easier to construct. We also used multiple lag screws with big Torq heads to add strength. It took many days a few hours at a time to complete. We used Tung oil for the finish. Douglas fir 4x4. White wood (pine or hemlock) for 2X4. Elm wood for the bench and back, both about 1.75" thick. Turned out great.
    Reply from Jamison Rantz:
    Thanks Steve, this is awesome. Elm for the seat and back at 1.75" thick is a serious upgrade, and the Douglas fir 4x4 legs with lag screws mean that bench isn't going anywhere. Tung oil was a good call too. Love that you made it your own.
    bench 1
    bench 2
    bench 1
    +1
    Phillip Brandt
    Sep 15, 2026
    Plans delivered - got these built in what amounted to an afternoon's worth of work. Staining/finishing added to that, but the benches themselves were quick. I adjusted the plans a little, used some better lumber than the treated stuff and stained it. i also made them 8 ft long and added a center support to fit the area we were putting them. They look sturdy and have been well received. I built these for my church to replace a pair of benches which had been stolen from our entry area a couple months ago. These will be bolted down.
    Reply from Jamison Rantz:
    Going to 8ft with a center support is the right call, that's about where the span starts asking for help. Stepping up from the treated stuff and staining them, those should outlast the pair they're replacing by a good margin. Sorry about the reason you needed them, but bolted down at a church entry is a good place for these to land.
    PXL 20260908 175632925.MP
    Manny
    Sep 8, 2026
    I love the design and I love how it turned out. A perfect compliment to our new deck. There are 3 very minor issues of omission with the plan. 1. No gauge given for the lag screws - I used 3/8". 2. A standard length drill bit won't get you far drilling for the lag bolts. I bought an 8" long bit. 3. There was no mention of needing a hole saw or forstner bit for countersinking the lag bolts. Other than that, it was brilliant. Thanks.
    Reply from Jamison Rantz:
    Manny, all three of those were right, and they're fixed. The plan now specs a 3/8" x 6" structural screw instead of a vague 6" lag, and the flat head sinks itself flush, so the counterbore and the extra-long bit go away with it. Thanks for writing it out. Glad the bench suits the deck.
    Christopher Owen
    Sep 2, 2026
    Love this bench. First project ever. Biggest problem was learning how use my newly purchase miter saw. Sits around an open outdoor fire pit in of my daughters family's backyard flanked with my two newly built Adirondack chairs, which I confess took longer than the 1 hour estimate.
    Reply from Jamison Rantz:
    First project ever, and it's already sitting around a fire pit in your daughter's backyard. Hard to beat that. The new miter saw is always the learning curve, and yeah, those chairs take longer than an hour the first time through. Sounds like you've got the whole setup out there now. Appreciate you writing this up.
Add a review

Your email address will not be published. Required fields are marked *

You may also like…

Quick answers

Questions about this plan

How do I download my plan after purchase?
You will receive a download link in your order confirmation email. You can also log in at My Account → Downloads any time to re-download.
What format is the plan?
Every plan is a printable PDF designed for standard letter paper. View on screen in your shop, or print at home or your local print shop.
Can I sell what I build from this plan?
Yes — on a small scale. Most builders selling at local markets, online, or to friends are well within the license. Mass production or reselling the plan itself is not allowed. See the Plan License.
Do you offer refunds?
Digital downloads are generally final — see our Refund Policy. If there is a legitimate issue with the plan or your access, email support@rogueengineer.com.
Can I modify the plan dimensions or materials?
Yes — modify dimensions, materials, finishes, and joinery as you like for your own project. See the Plan License for what you can do with modified versions.