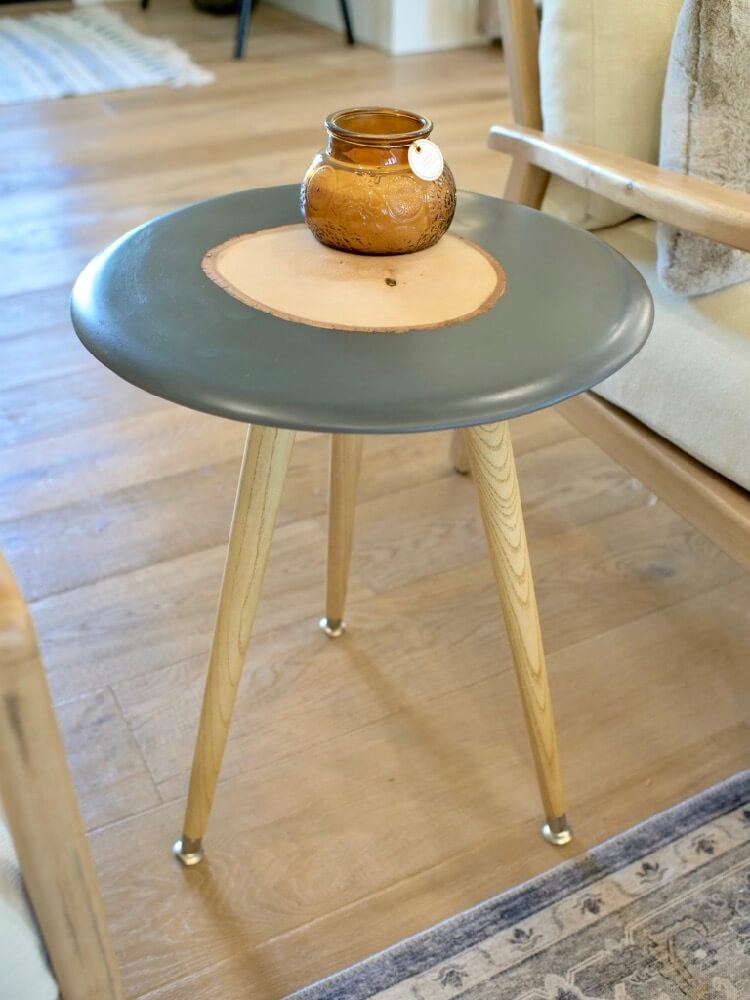
Round Epoxy Live Edge Table
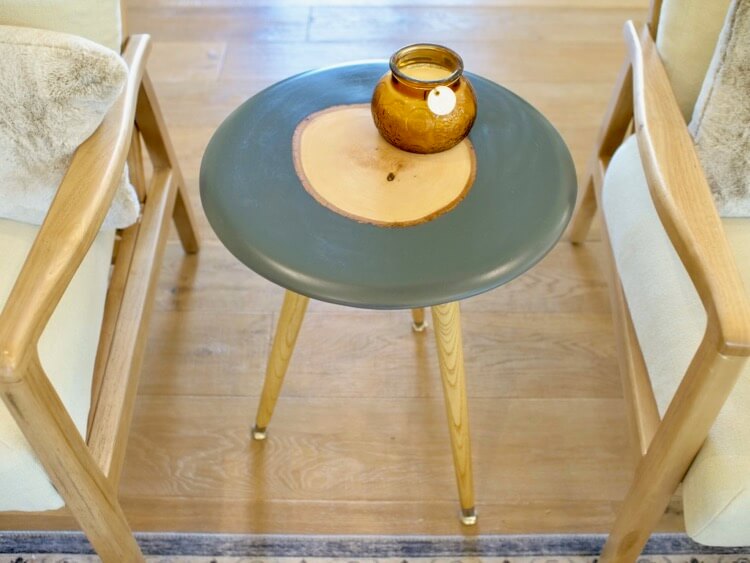
Recently, Varathane sent over their new tinted epoxy, Super Glaze, for me to try out. I wanted to combine epoxy and live edge wood because I have seen it done so many times and I think it’s a cool look. I opted to try it out on a small side table with a wood cookie in the middle. The problem was finding or building a round form that was affordable. Luckily I stumbled across this 18 inch frisbee and it made the perfect mold, plus the kids get to play with it when I’m done! I’m not super experienced with epoxy so I learned a few things along the way and hopefully I can share some of those tips with you.
If you want to see another project I used their tinted epoxy on, check out my river serving tray. Either way, I’ve got the details on both in my latest YouTube video below.
Setup
Clean the 18″ frisbee and clamp the wood cookie to the middle so it doesn’t float when pouring the epoxy.
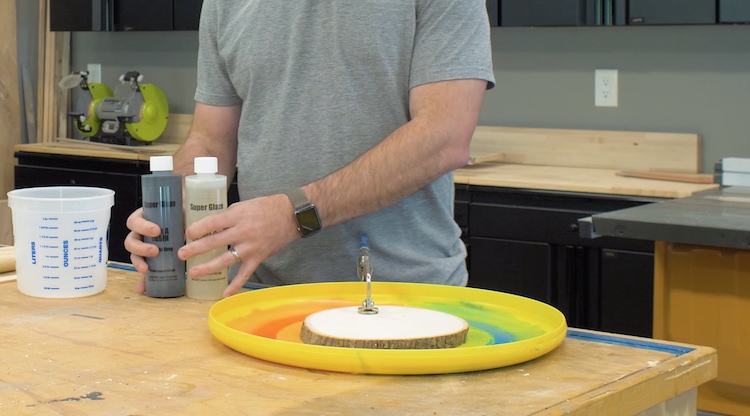
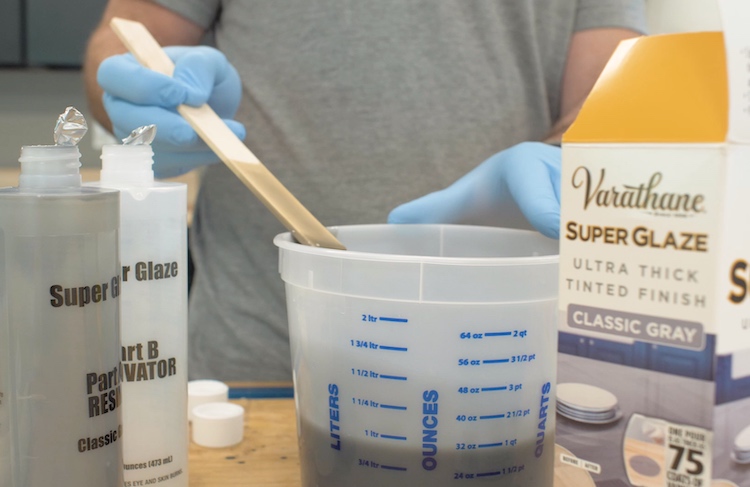
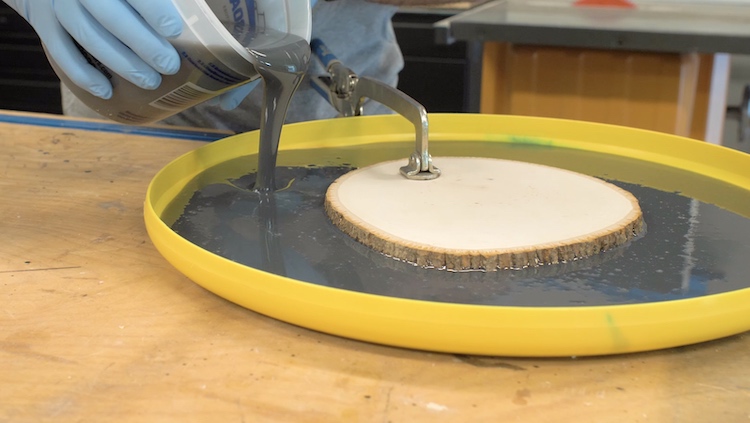
Mixing the Epoxy
After getting the mold ready to go you can start to mix the epoxy. I used Varathane’s Super Glaze In Classic Gray and I love how easy it was to use.
The Pour
After mixing the epoxy per the instructions, use a small paint brush to paint it onto the edge of the bark. This is a step that I skipped but it will help prevent air bubbles being trapped in the bark. Then pour the remainder of the epoxy into the form. I ended up using 2 kits for this project but depending on the size of your cookie you may need more or less.
I also wanted to point out that this epoxy is a solid color. This is because of the thickness of the pour. If it was a thin coating, it would be much more transparent.
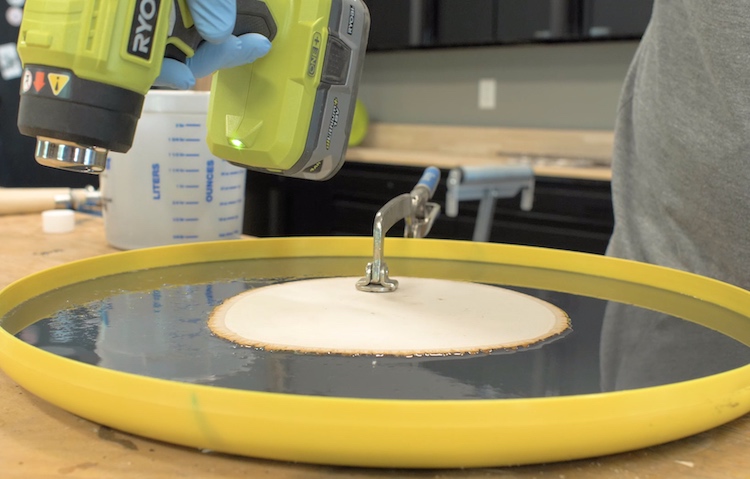
Getting the Air Bubbles Out
Most of the air should work itself out of the epoxy but to help it along you can use a heat gun or a blow dryer.
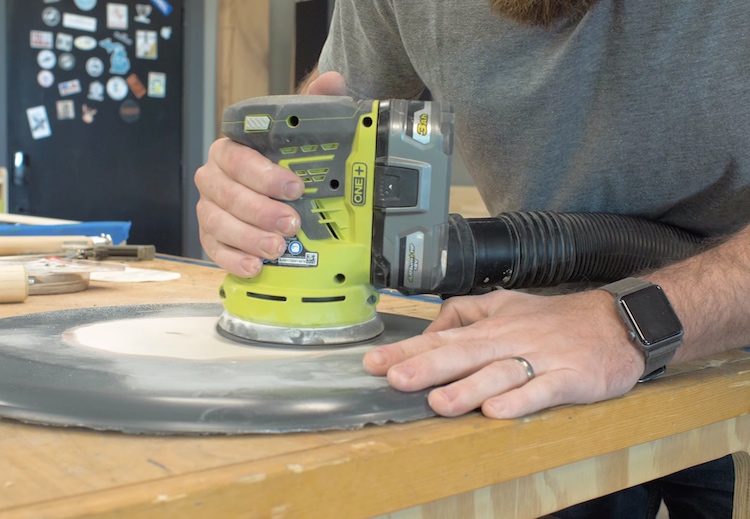
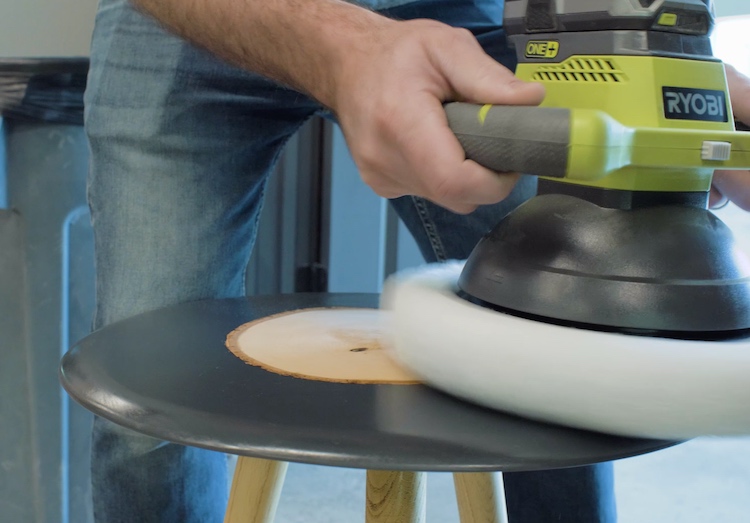
Sanding
I recommend a net type sandpaper like Diablo’s SandNet which won’t clog up as easily as traditional sandpaper. I sanded with 220 grit and finished with 400 grit to remove any defects as well as round over the bottom edge.
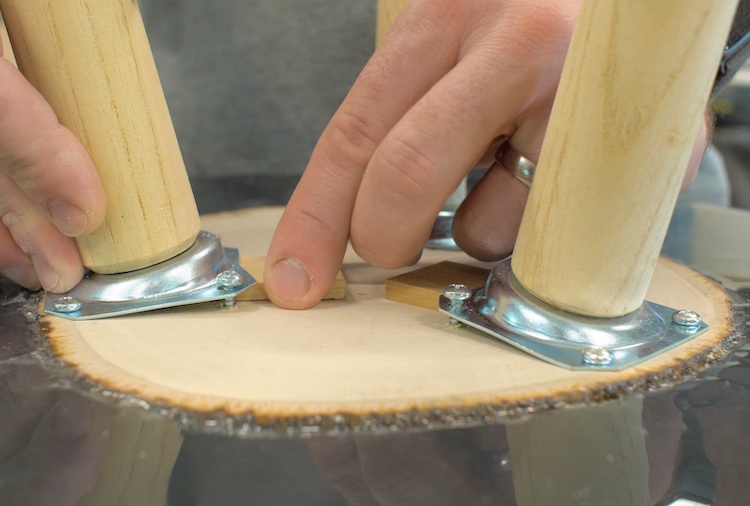
Attaching the Legs
The legs get mounted to the wood in the middle. For this I used 3 of the 15-1/2″ tapered legs with the angled top plates. The angle wasn’t quite enough to make get the stability I wanted so I increased the angle with shims.
Applying the Finish
For the legs and the top I used a wipe on polyurethane finish. Applying 3 coats in total.
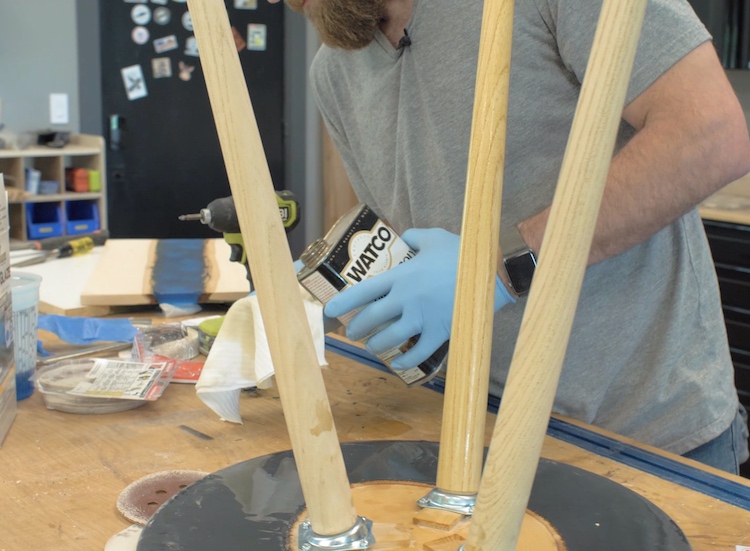
It’s a really easy to use product and will protect and accentuate the wood.
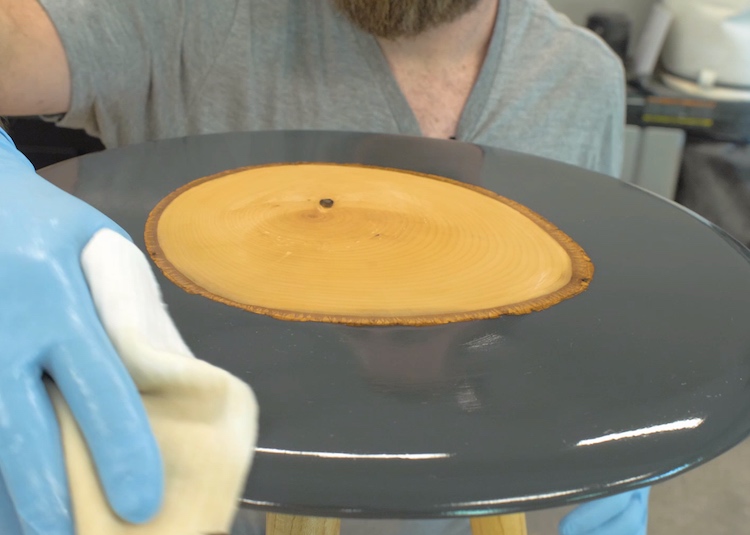
Buffing the Top
Finally, I used a buffer to put a final polish the top and it turned out great!
As I said before, I’m not super experienced with epoxy but I love how this project turned out! Let me know in the comments what you think or if you have any tips for others that might be attempting this project.