
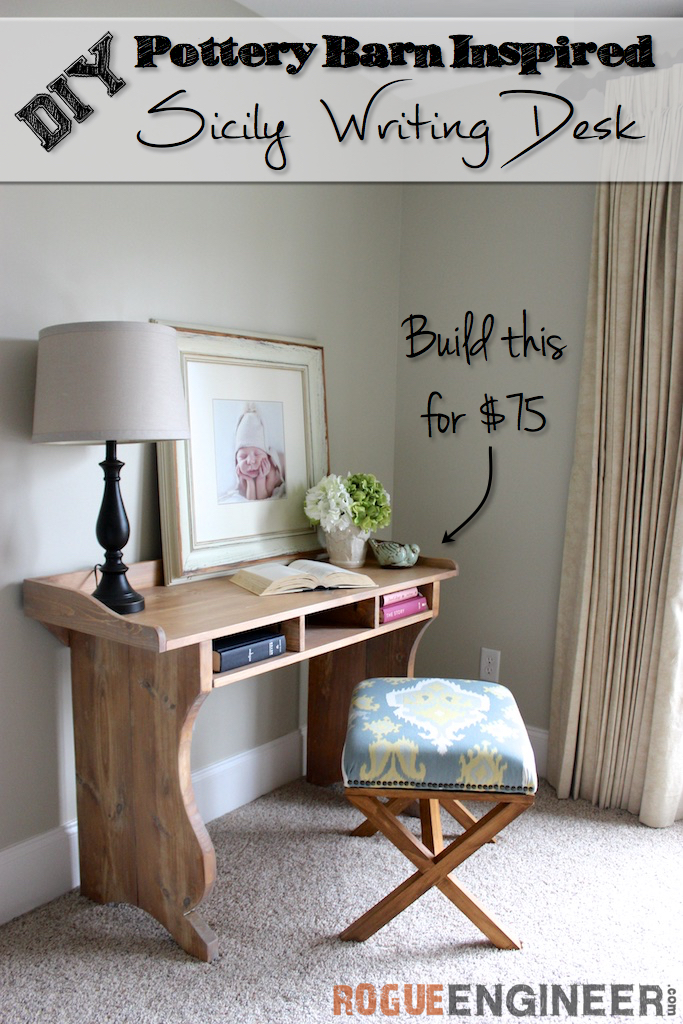
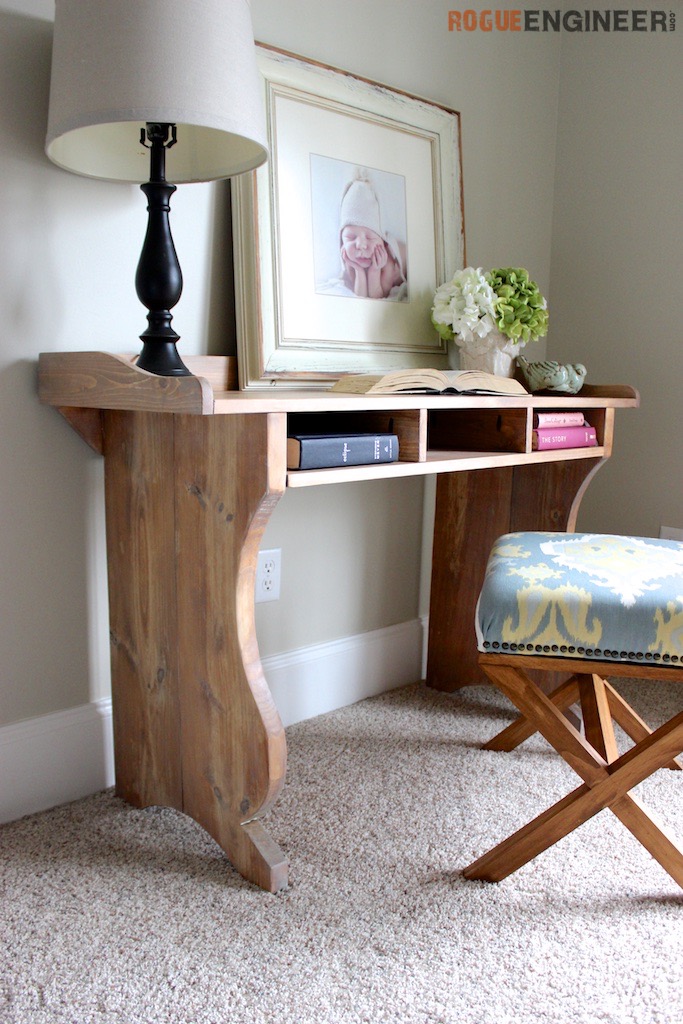
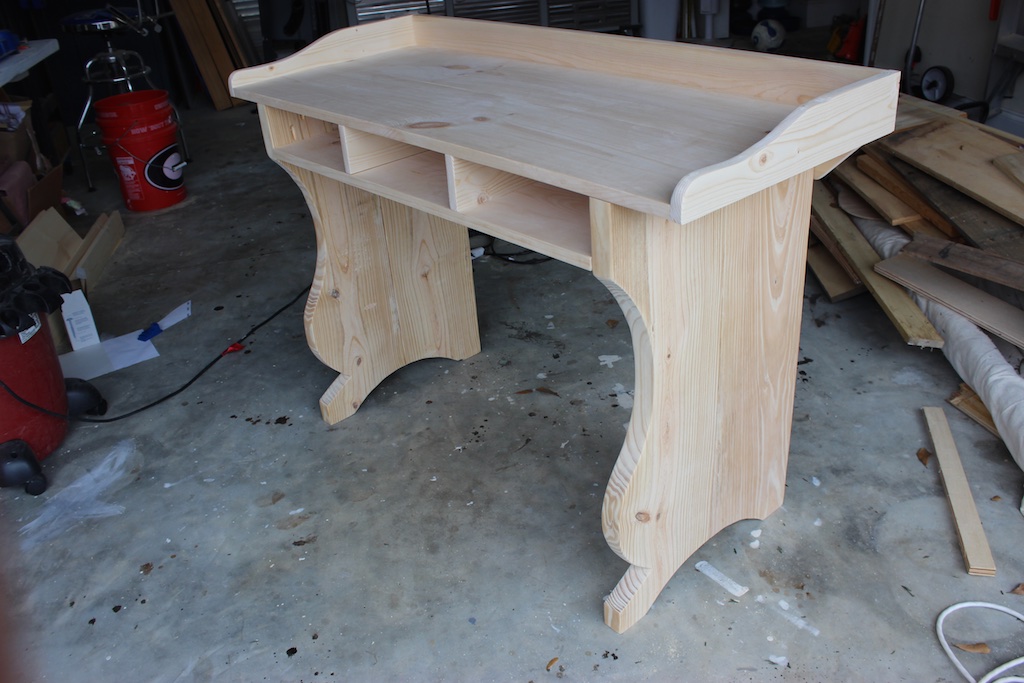
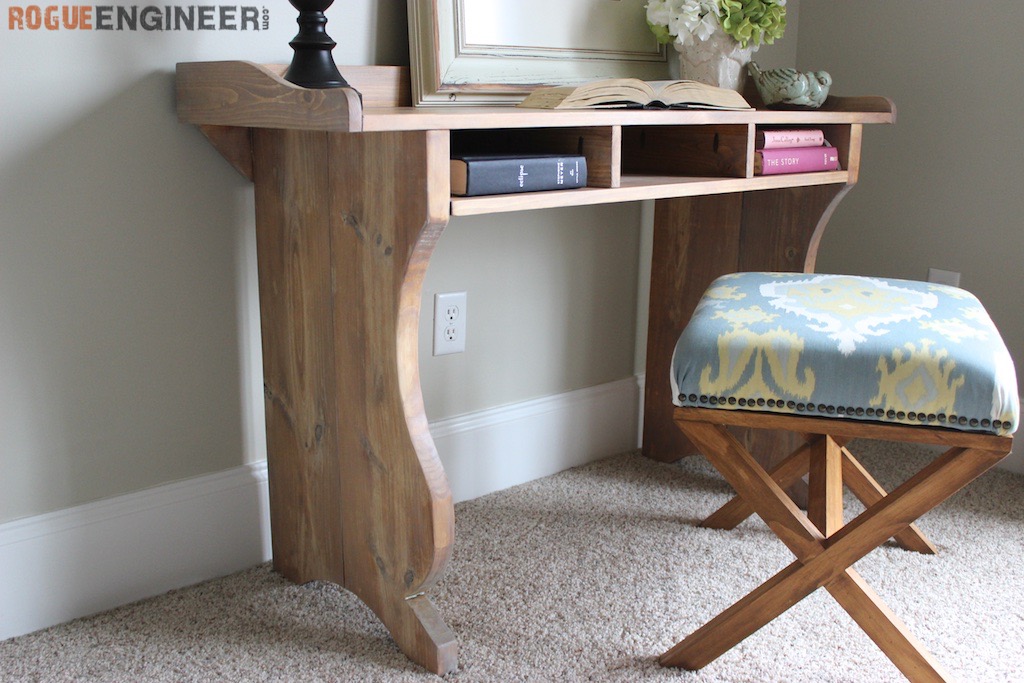
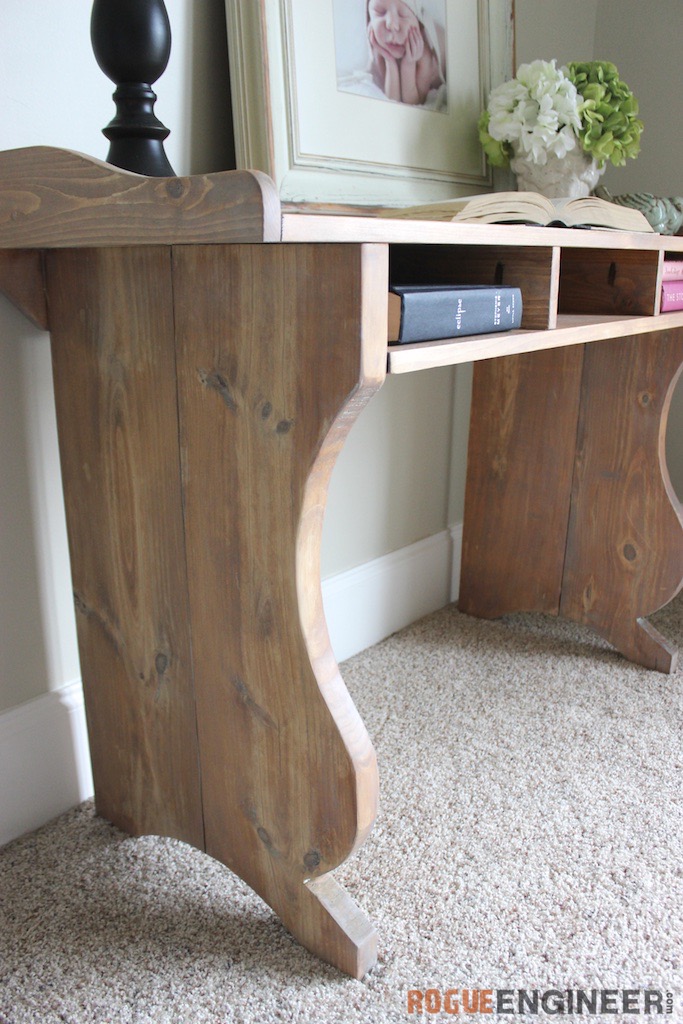
Sicily Writing Desk
A guest room makeover has become our latest project, and what better way to start it off than with this beautiful writing desk inspired by Pottery Barn. Jamie has been on the lookout for the perfect desk to build for our guestroom. She came across this Sicily console table from Pottery Barn and thought it would be great made into a desk. So there you have it, an $800 Pottery Barn console table turned into one awesome $75 desk! Beat that!
Like the upholstered X bench in the picture? Get the free plans here!
For sneak peeks of our upcoming projects be sure to…


Disclosure: The links provided in the “materials” and “required tools” sections are affiliate links. If you would like to support our site and help keep our content free come find out more about how we can make money with no extra cost to you.
Time to Complete
2 Days
Estimated Cost
$75
Skill Level
Intermediate
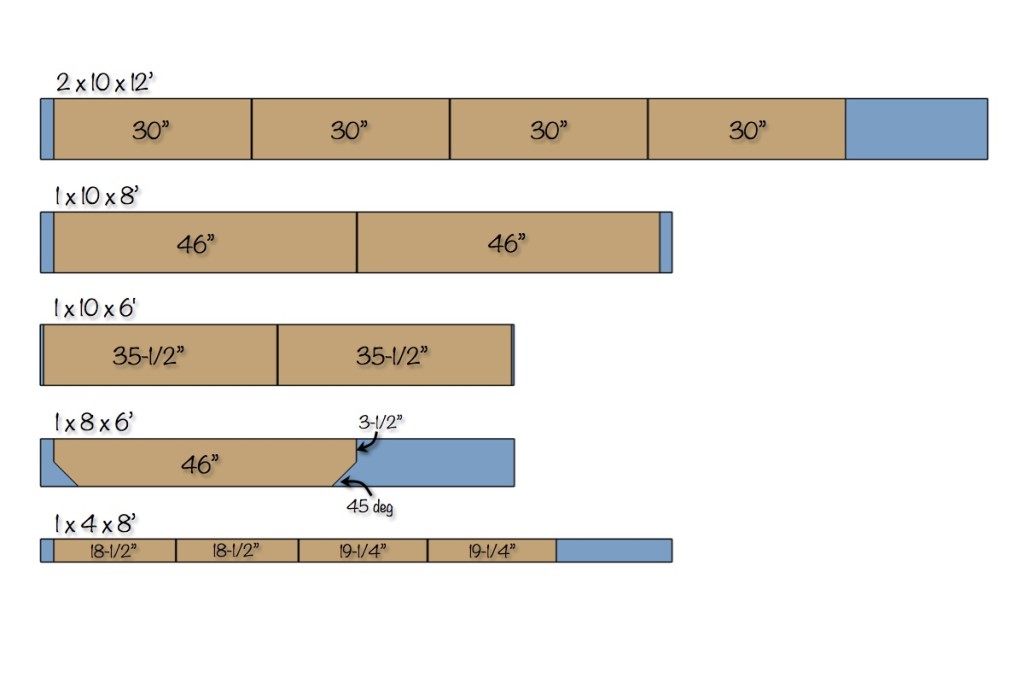
Materials
- 1x 2 x 10 x 12′ (Kiln-Dried Lumber)
- 1x 1 x 10 x 8′ (Common Board; Pine)
- 1x 1 x 10 x 6′ (Common Board; Pine)
- 1x 1 x 8 x 6′ (Common Board; Pine)
- 1x 1 x 4 x 8′ (Common Board; Pine)
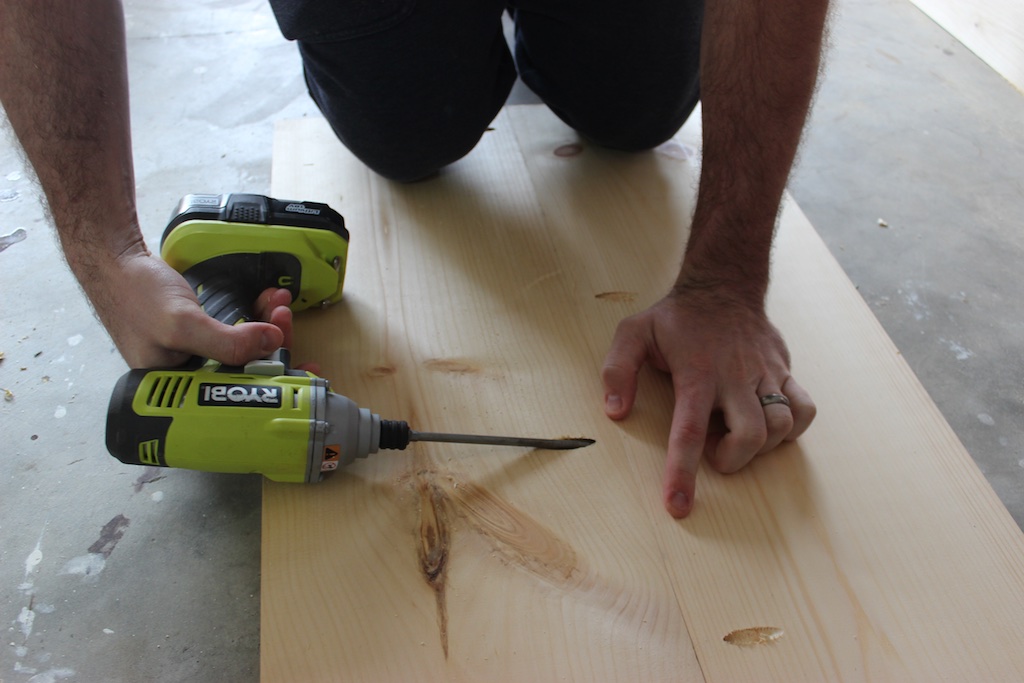
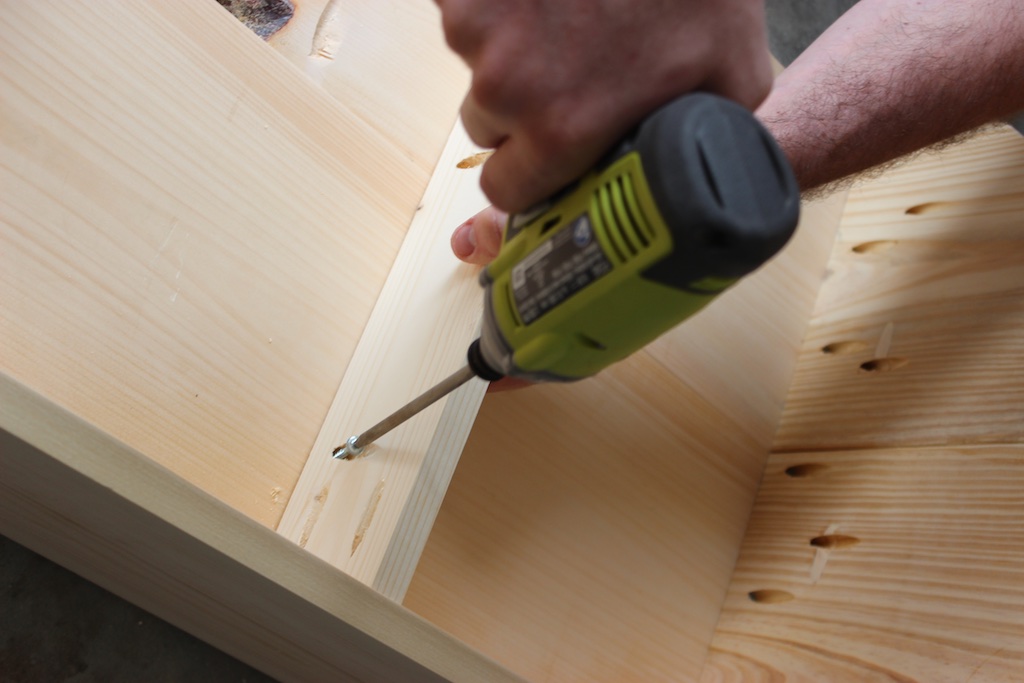
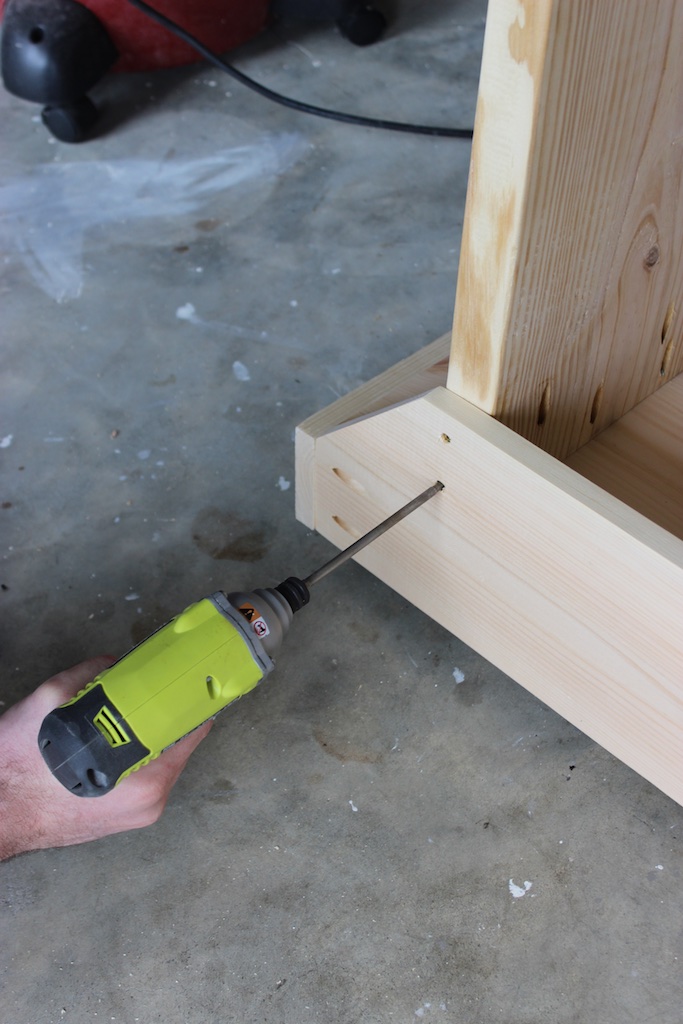
- 1-1/4″ Pocket Screws (Coarse)
- 2-1/2″ Pocket Screws (Coarse)
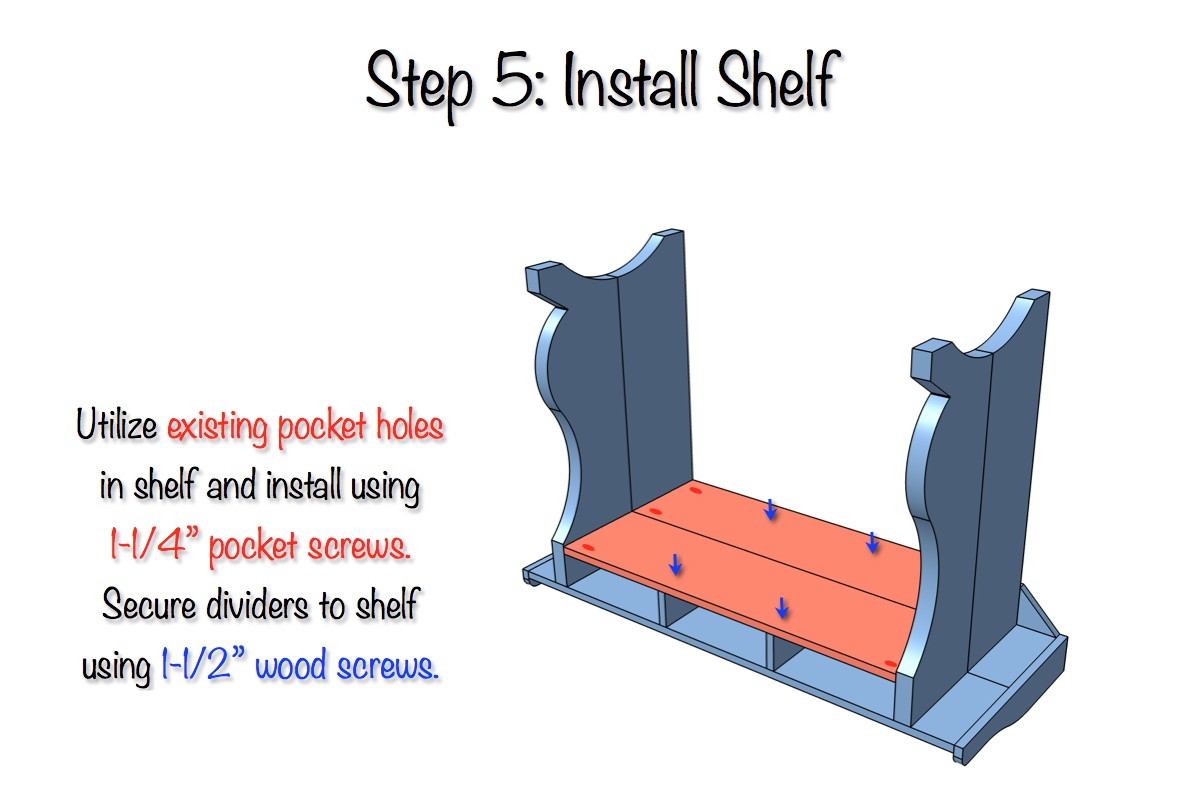
- 1-1/2″ Wood Screws
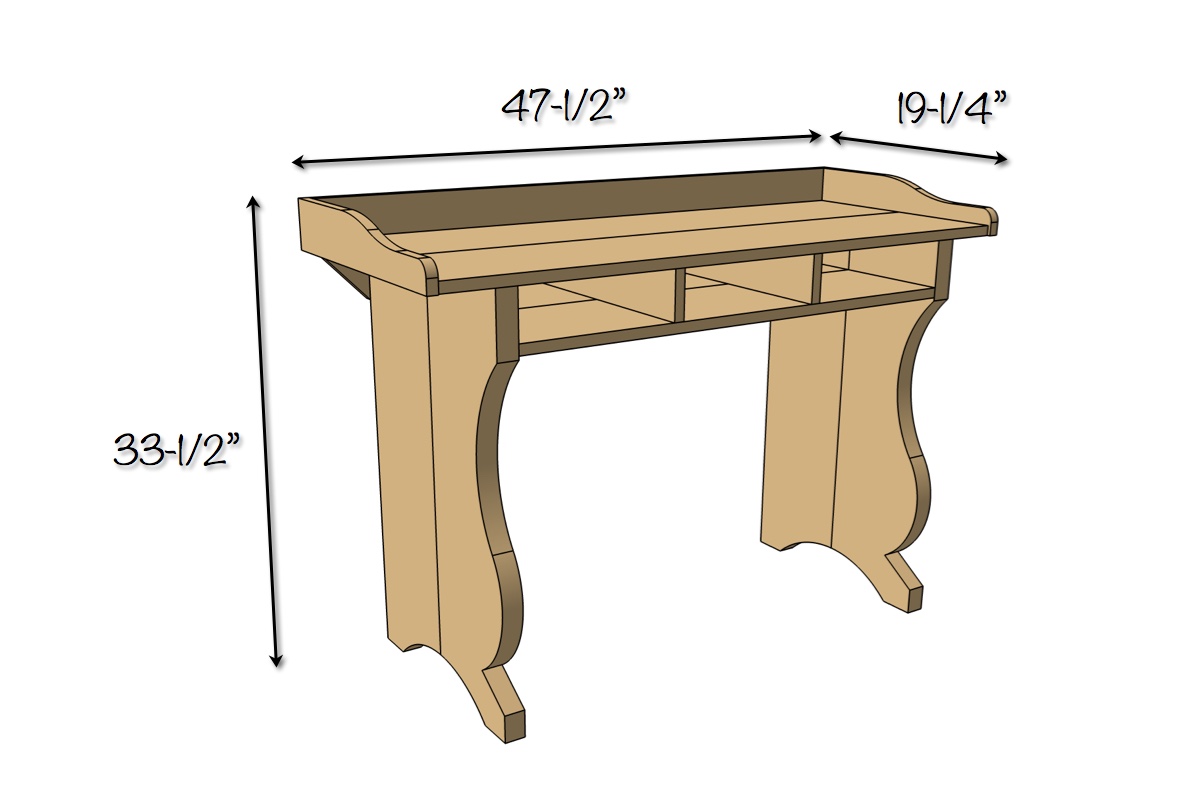
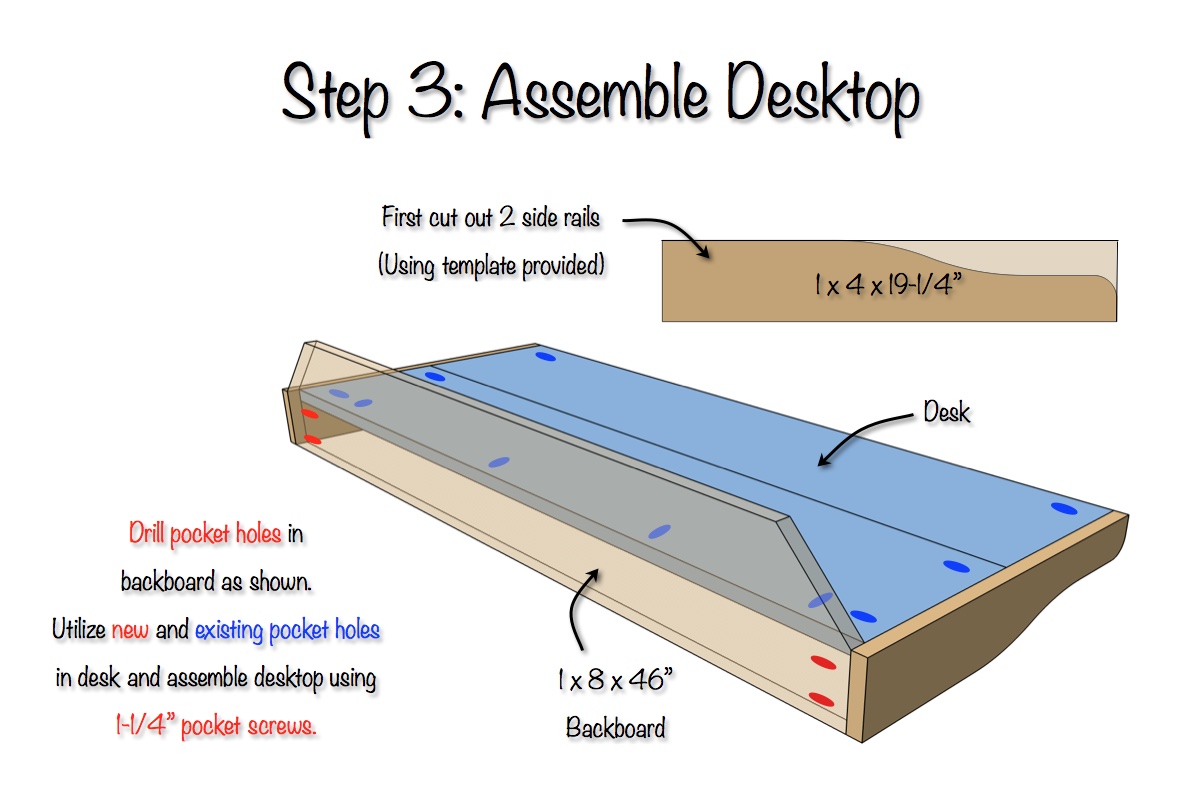
Dimensions
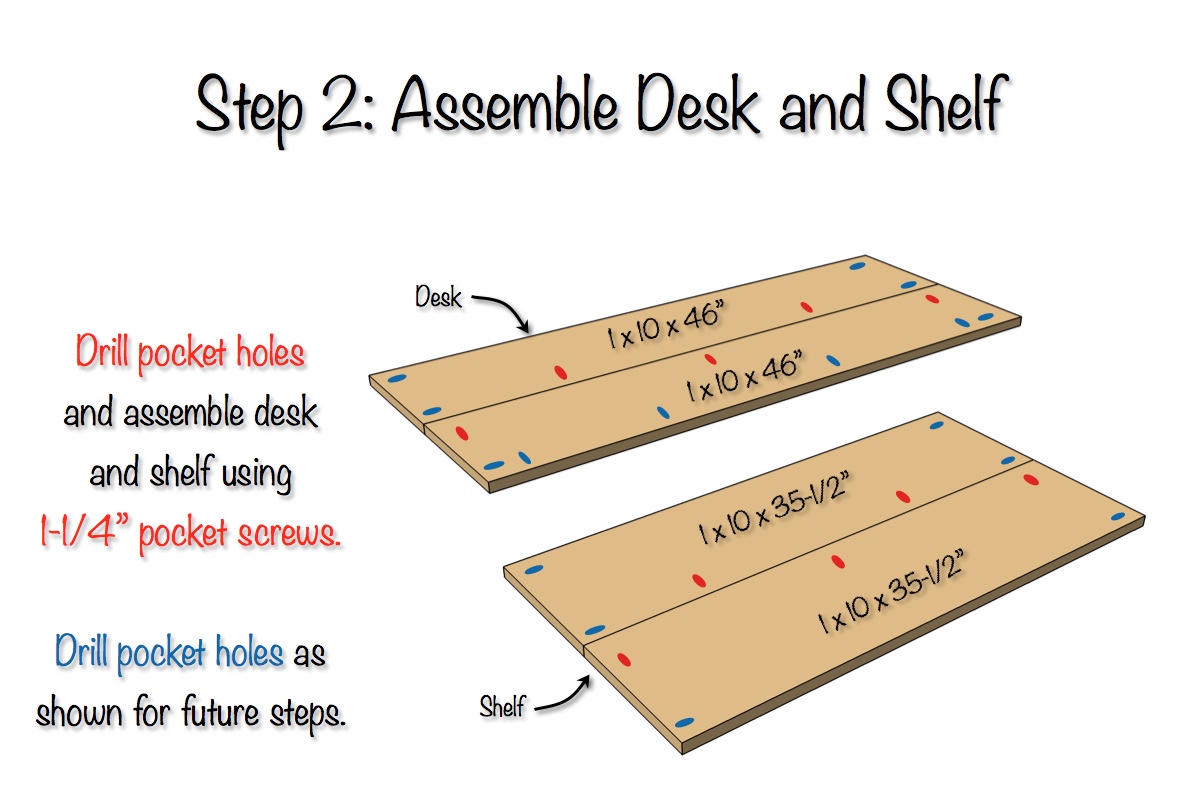
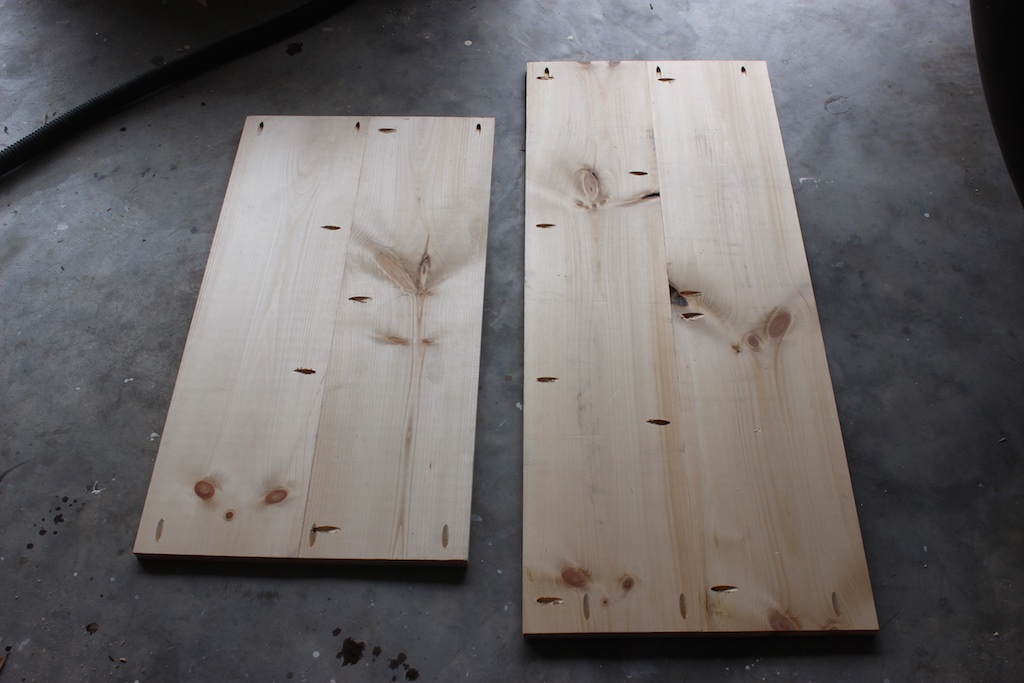
Cut List

Note: When printing set page scale to “None”
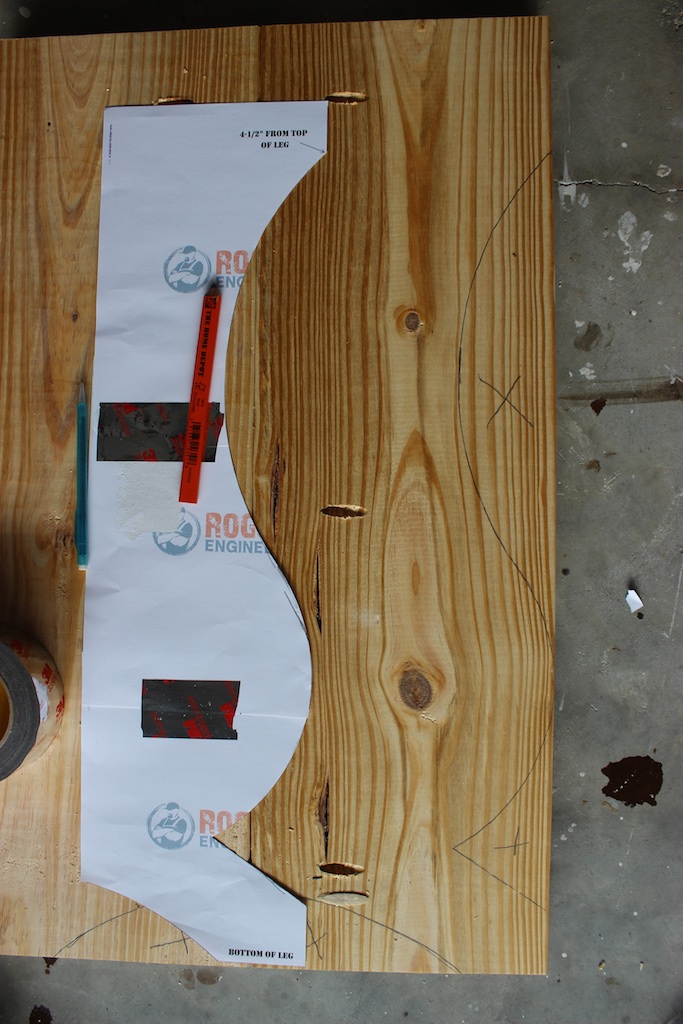
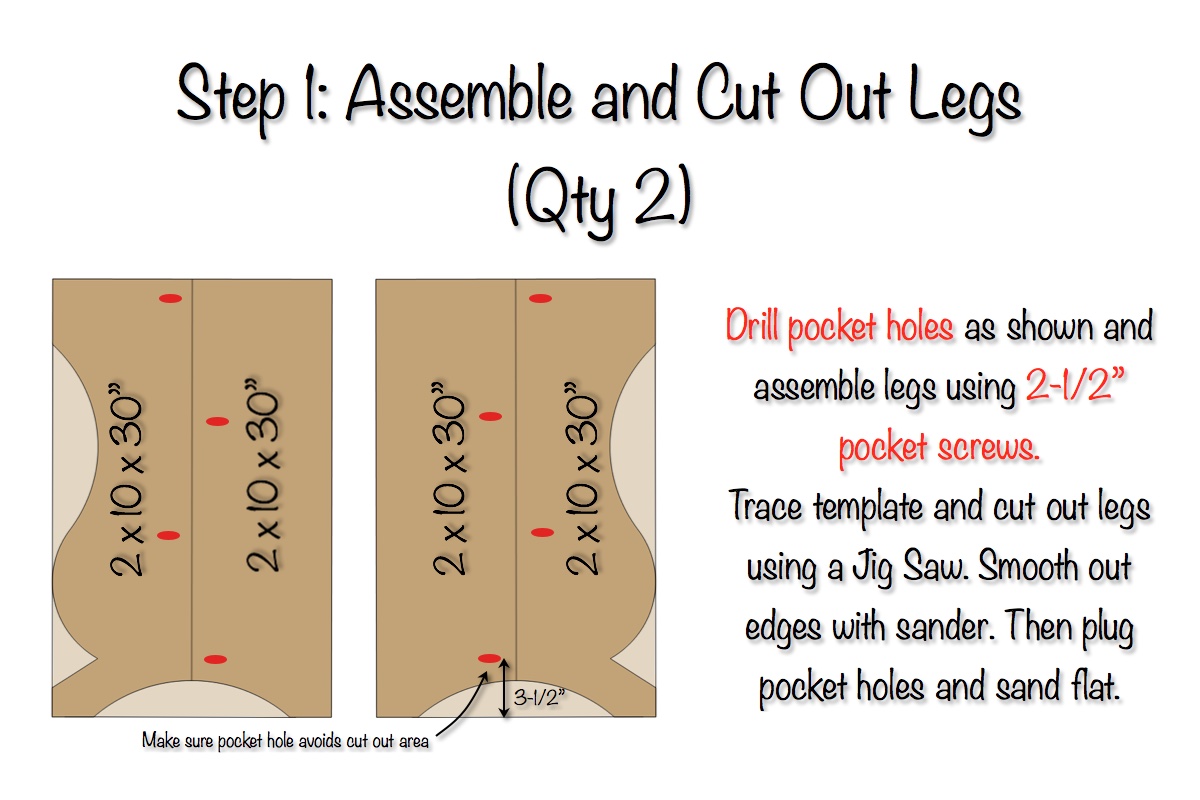
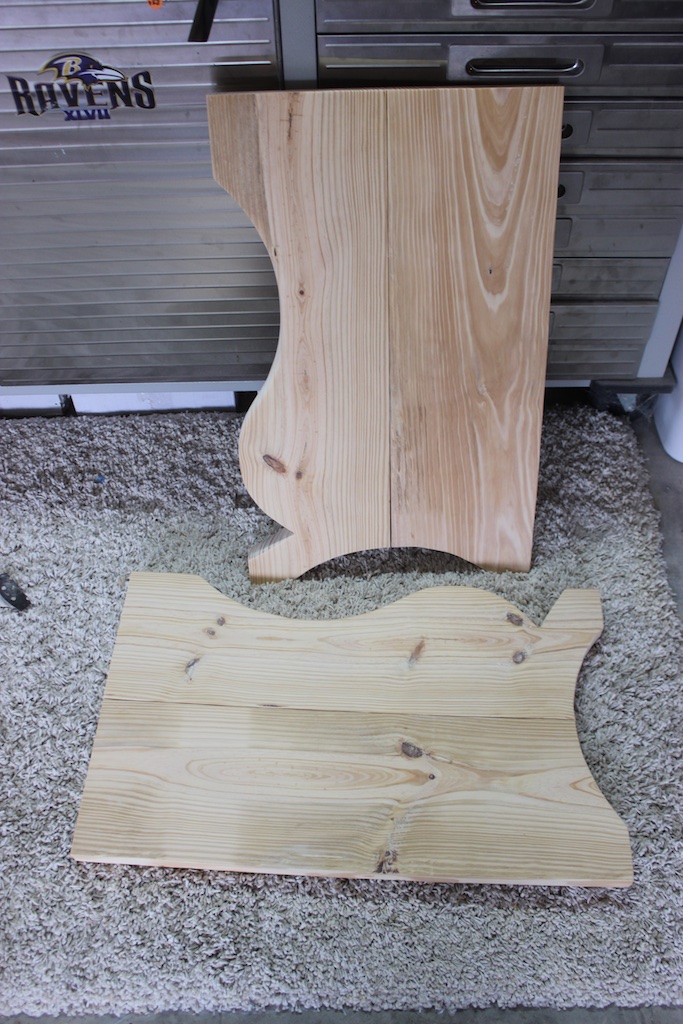
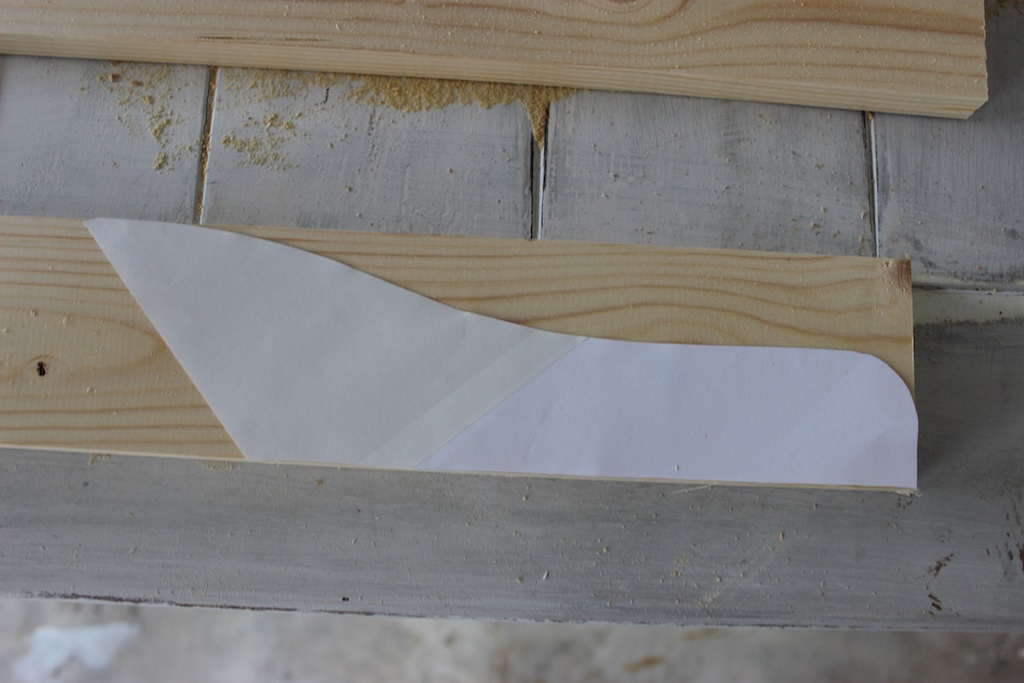
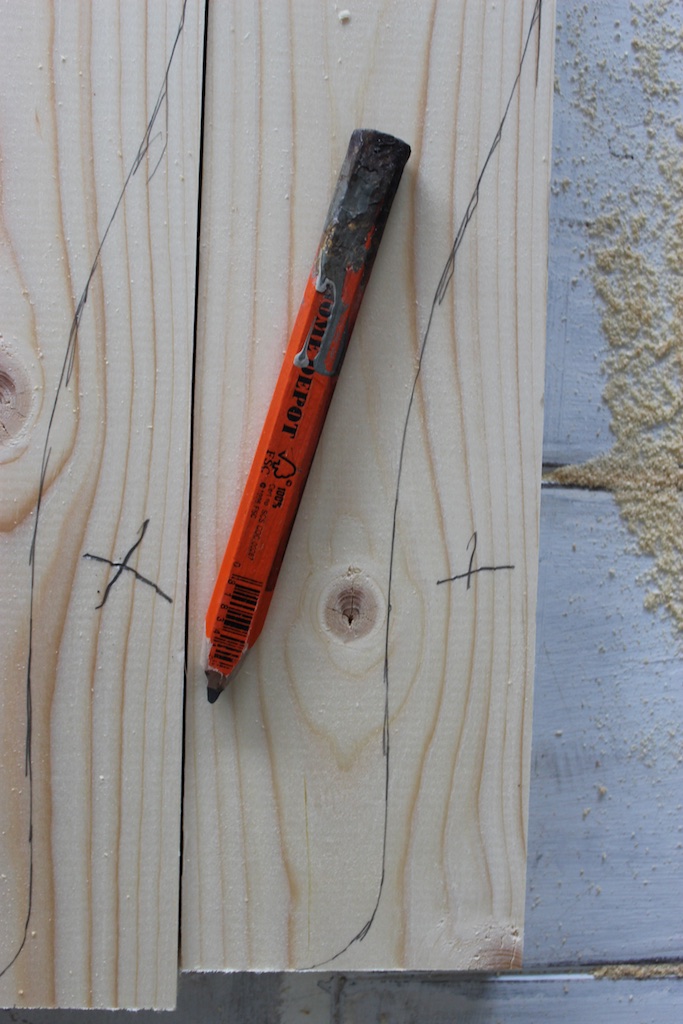
Screw together and trace pattern.
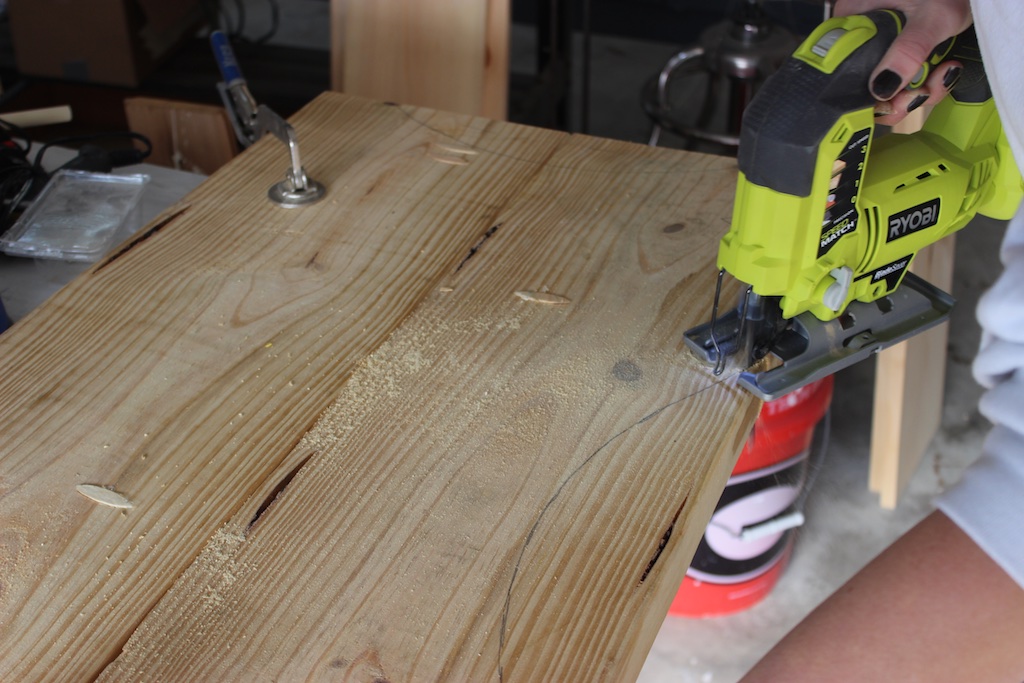
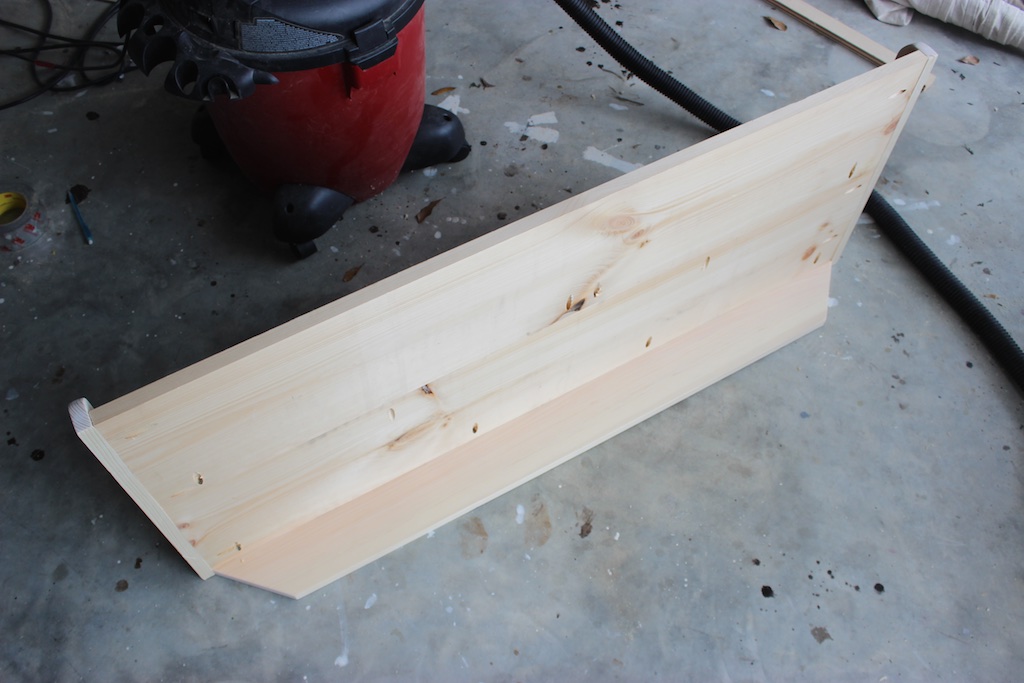
Cut it out with a jigsaw.
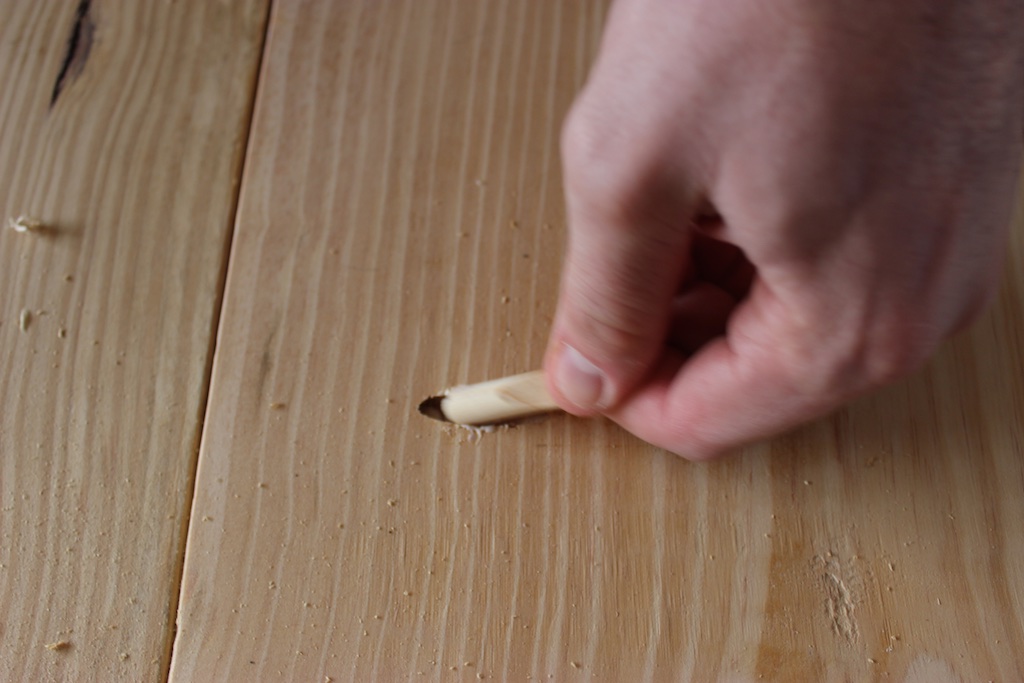
Add wood glue and insert plug
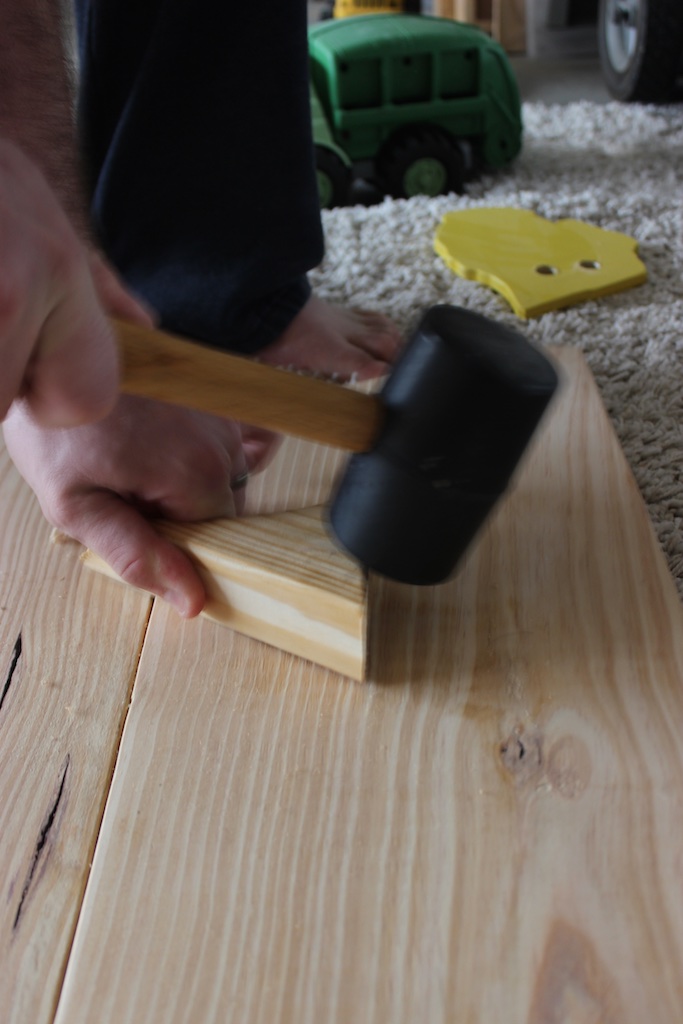
I use scrap to hammer the plugs in on an angle
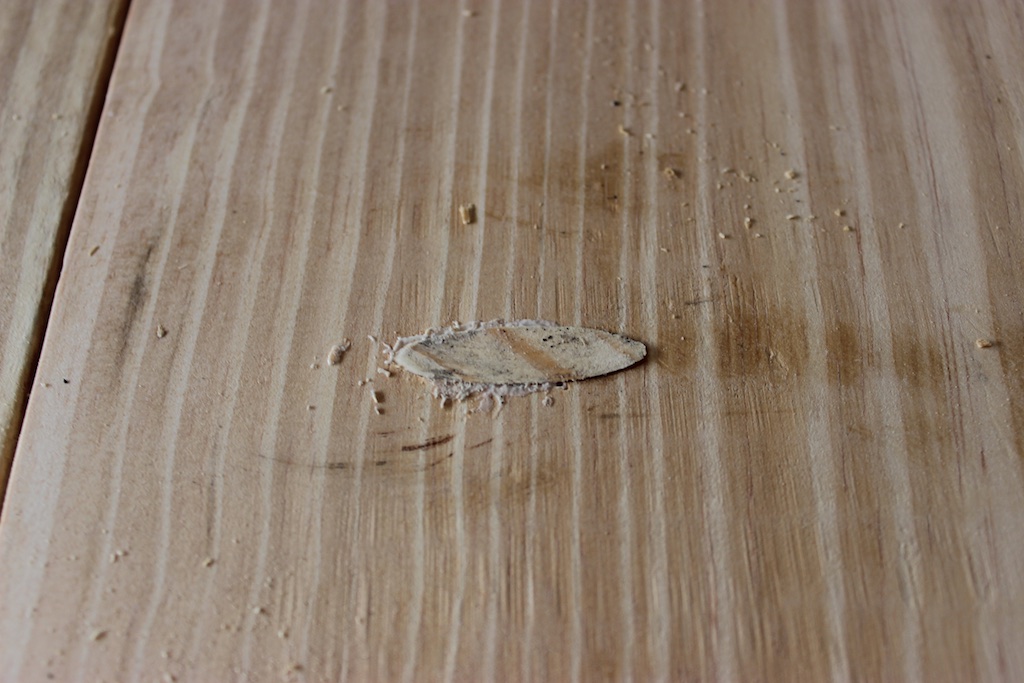
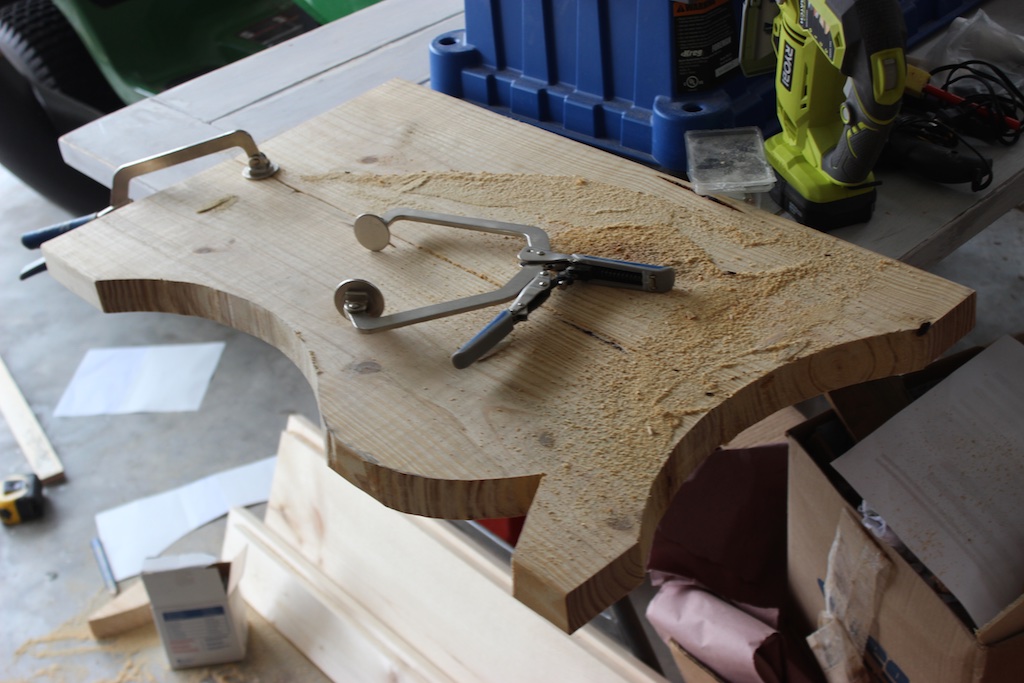
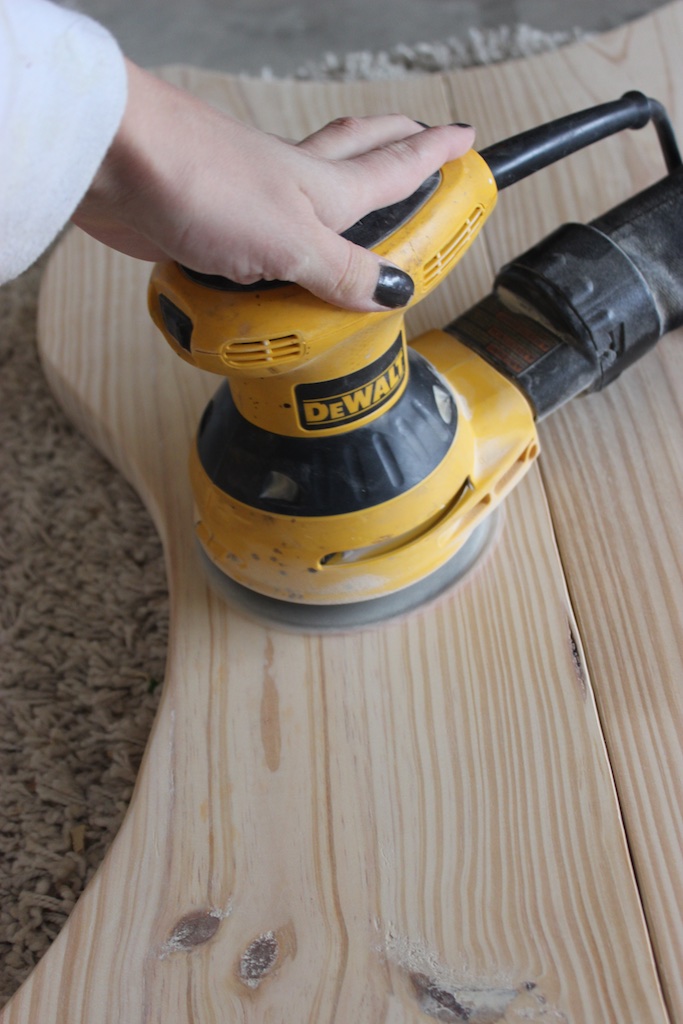
Sand it good all over
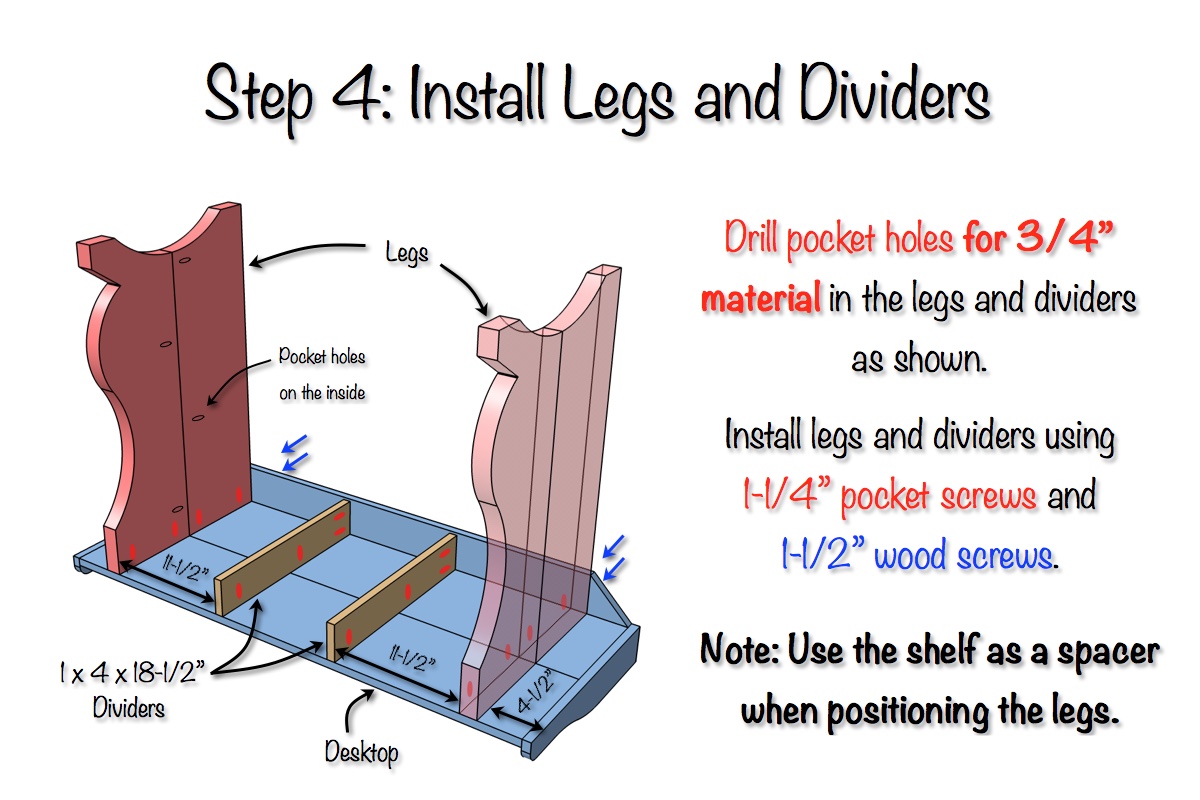
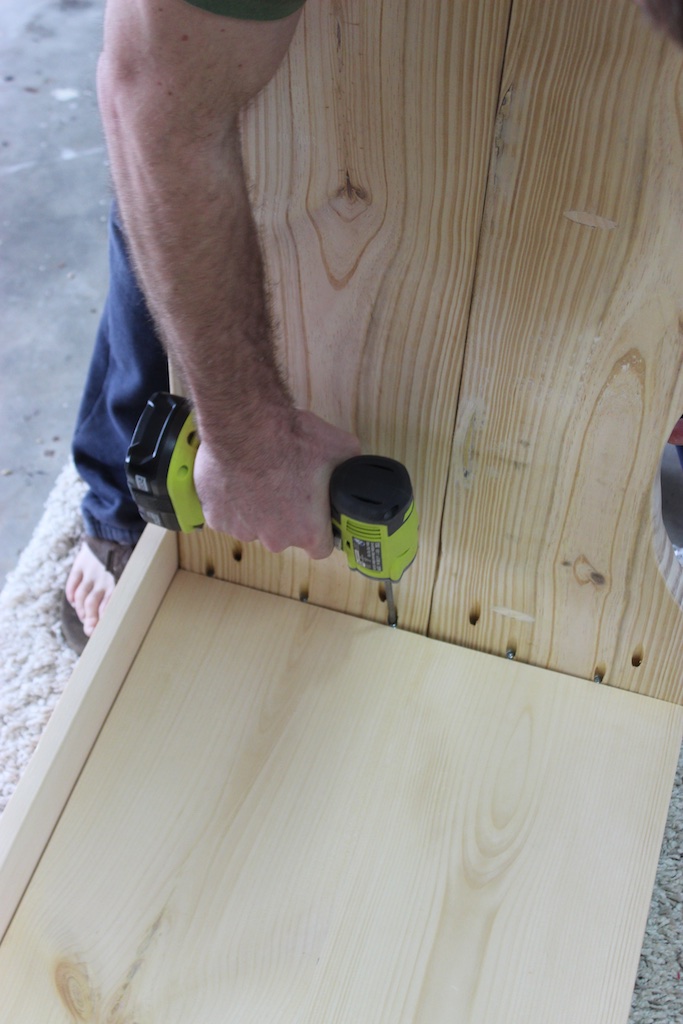
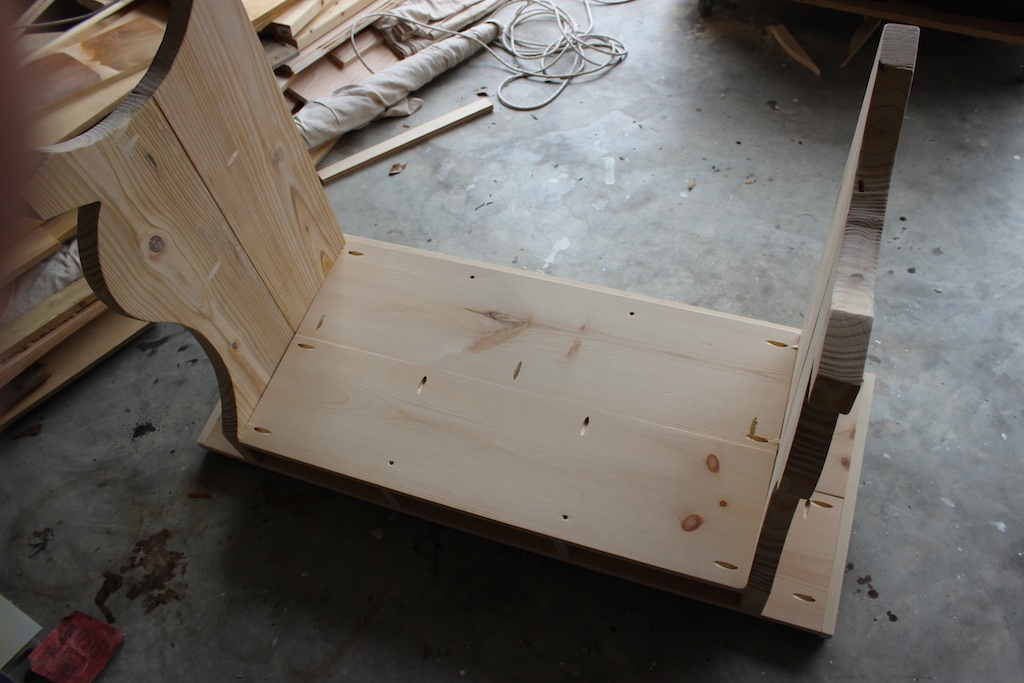
Use shelf to space the legs appropriately. (Ignore the extra accidental pocket holes)

Finishing
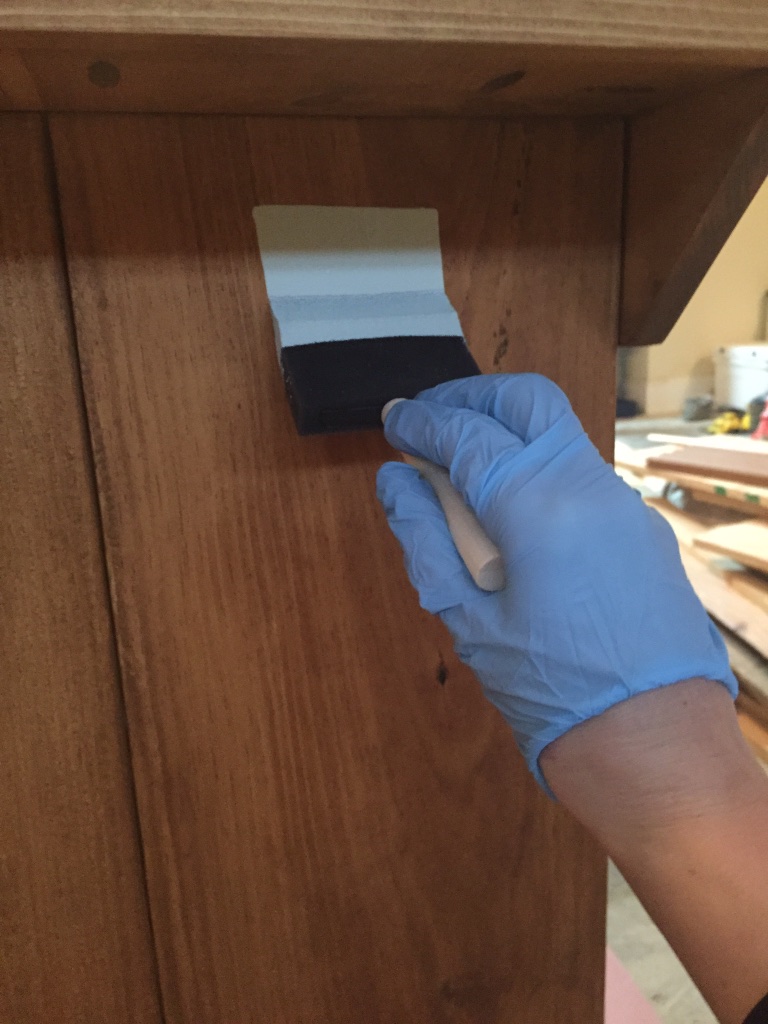
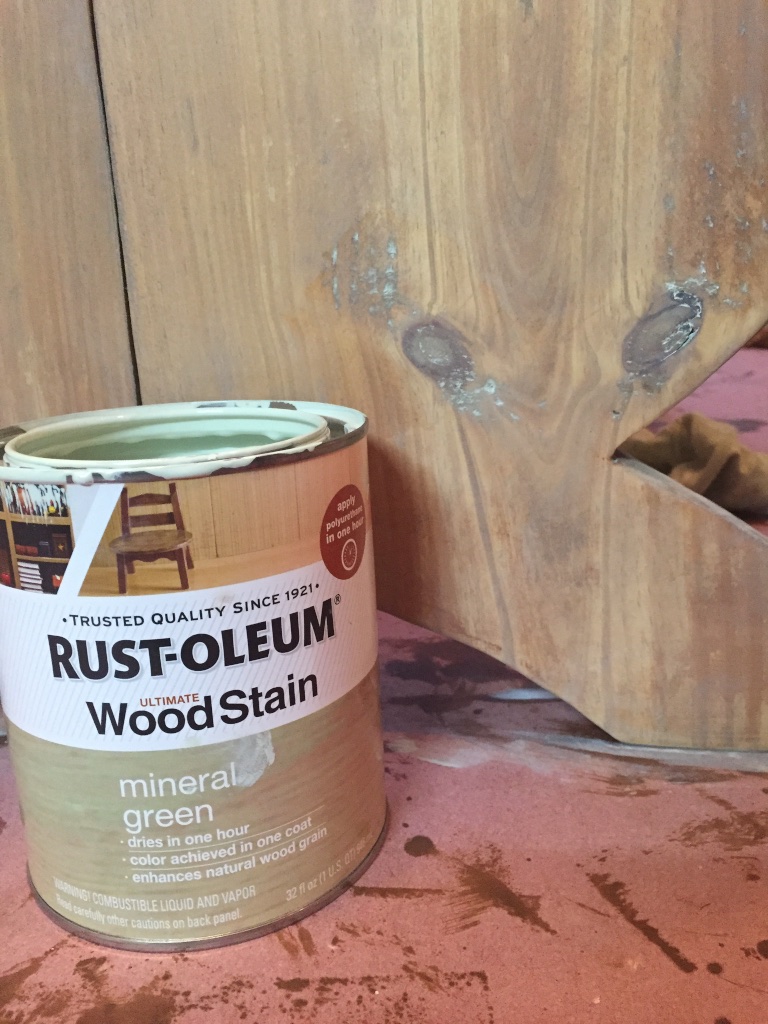
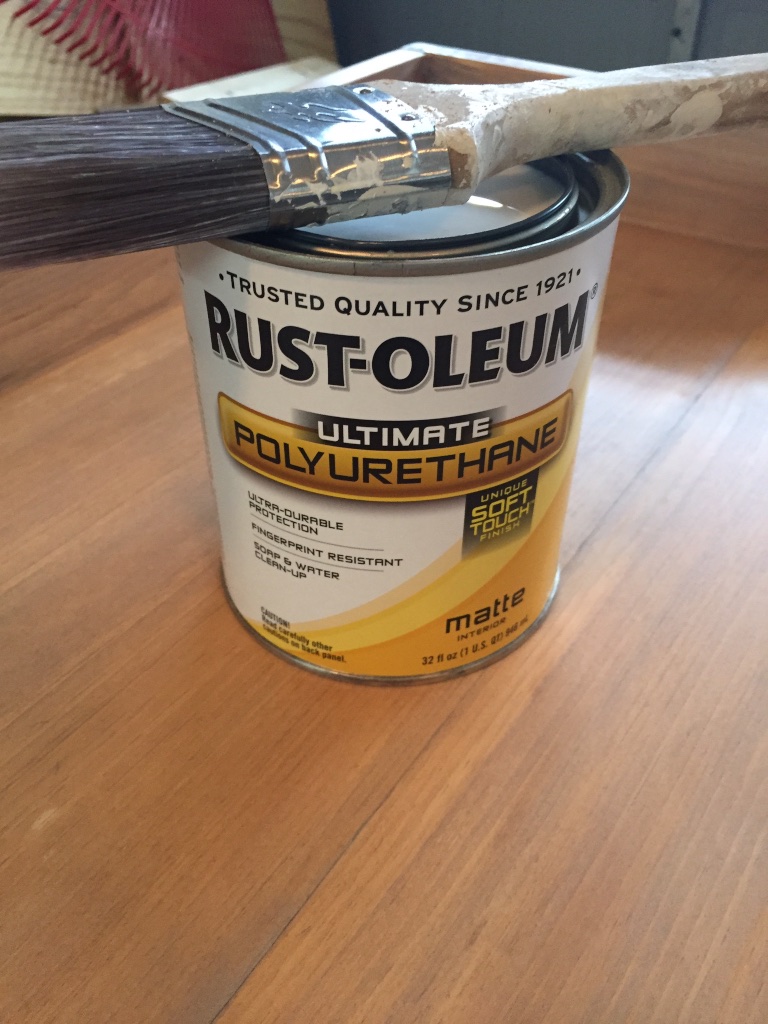
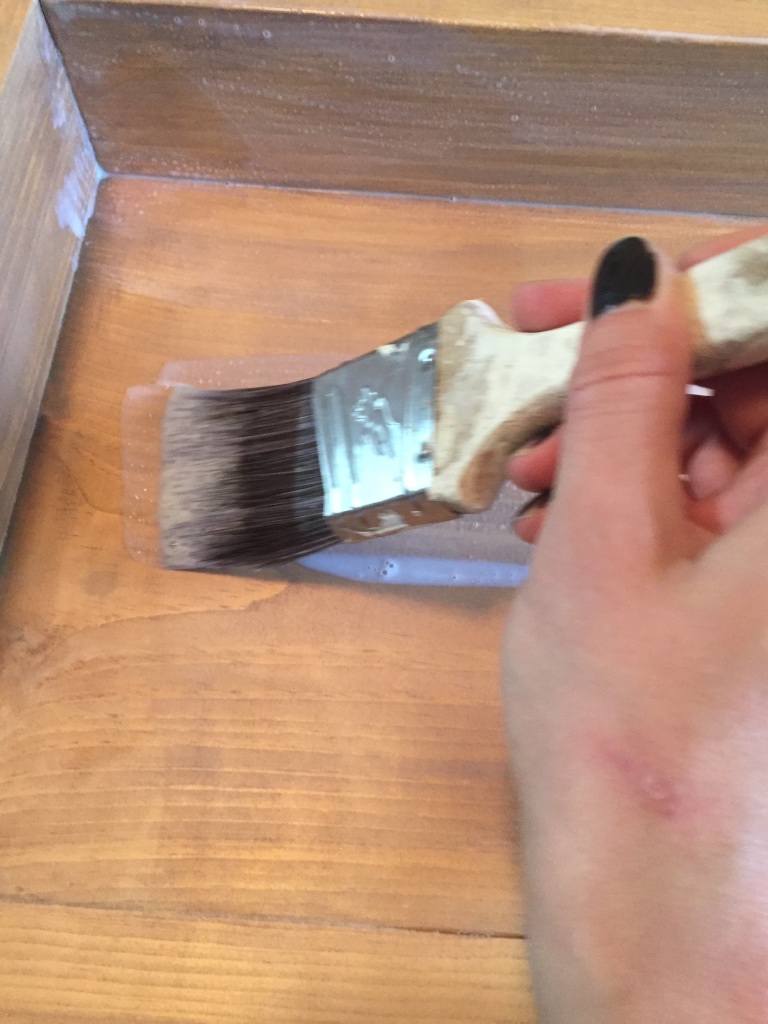
Jamie started out with a coat of Wheat wood stain from Rustoleum. After letting that sit overnight she followed it with a coat of the new Mineral Green wood stain from Rustoleum. Then she finished it off with three coats of polyurethane in a matte finish.

Questions? Comments?
As always, if you have any questions don’t hesitate to comment below and especially don’t forget to post pictures of your finished products in the comments! ENJOY!
Beautiful work you two. And that little bench seat is super cute too – diy?
Thanks Jaime! And you’re right, the Upholstered X Bench is another one of our DIY projects.
Oh my goodness! Absolutely stunning. Looking forward to making this soon. Thanks for sharing your talent!!
Thanks Kathleen! Make sure you share your work here. I would love to see how it turns out!
Hey there! Love this and have already constructed the top and shelf, but cant find the “Kiln-Dried Southern Yellow Pine Lumber” ANYWHERE in the state of WI or the surrounding area. Is there another wood type or substitute that I can use? Do you think If i glue 2 pieces of 1×10 together and then continue with the plan that it will work. I am going to stair the wood so if there is another wood species that would stain similarly to the pine I used for the rest of the desk, that would be great. LOVE it and have already made the lovely ottoman that your wife made to go with it.
That’s awesome Katie! What you need is an untreated 2x10x10′. You should be able to find it at HD or Lowes. Whatever species of wood they have in your area should work just fine.
So awesome! I love you plans, the desk is beautiful!
Thanks Mindi!
I hope to make this for a friend, but regardless, I wanted to let you know it is the best plan/tutorial I have ever seen for free. All the pics and diagrams and step by step instructions are such a help. Kudos to you for the fine job you’ve done. Thanks so much!
Vicki
Thanks Vicki! I appreciate you taking the time to say so.
hey there – I’m trying to make this desk but I am running into issues with the template. It seems the instructions to print it with “no scale” marked are out of date. I’ve tried it on two different computers and printers. Any suggestions? Thanks!
It may look different on different operating systems. Look for a button that says, “fit in page” and uncheck that.
Thanks for the quick response!… in order to uncheck “fit in page” I have to check “actual size” or “shrink oversized images” ….
Actual size is what you want
I did it! Completed this as a entry way table with distressed barn wood. I had a few errors but it’s mine and I did it.Thanks so much for the plans. I saw it in Pottery Barn for a ridiculous amount of money and made mine for about 46.00. ……and 4 Saturday’s..lol…I will try to attach a pic. On to another one of your projects!
Jess. I love how it turned out. Great job. Its so rewarding when you can make something yourself. Nothing of ours turns out perfect, we just like to say its distressed 😉
Yippe! Here it is. So proud of myself. Thanks again for easy plans!