

Wooden Star
Quick answer: This DIY wooden star is the Pottery Barn milled-log star knock-off, built from a single 1×2 × 72″ board for about $2 in 30 minutes. The hard part of a 5-point star is the geometry — so I did the CAD work for you: the cut list below gives every length and angle (the 54-degree cuts are the trick), and the pieces glue and brad-nail together in two steps. Free plans and video below. Angles solved by Jamison Rantz.
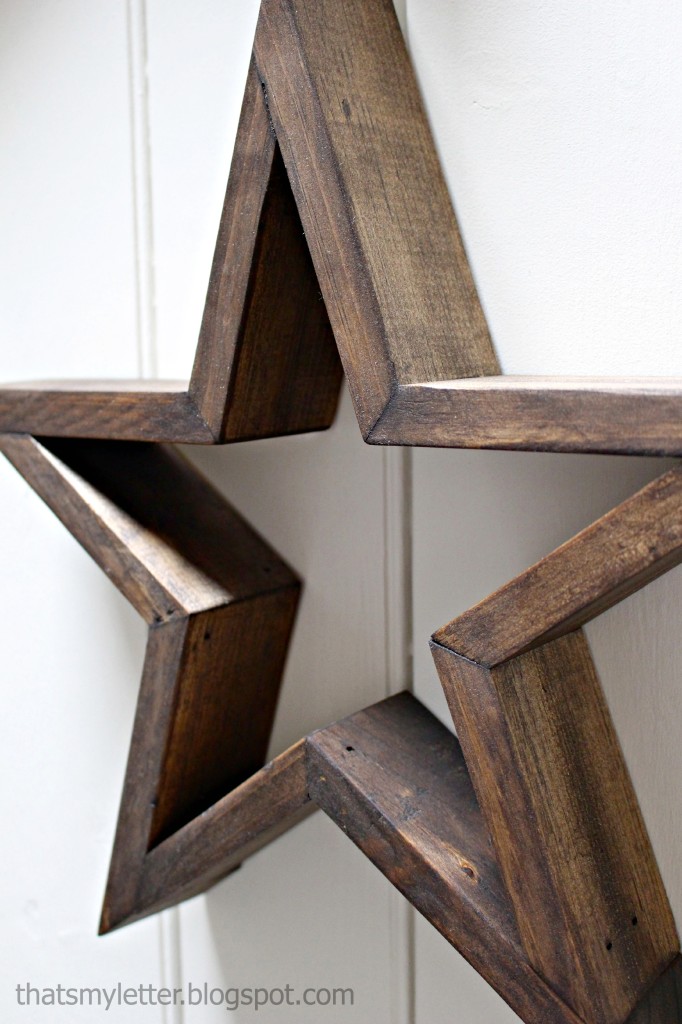
So my super talented friend Jaime from That’s My Letter ran into a little problem years ago. She was trying to build this wooden star she had seen on Pottery Barn from a 1×2 and couldn’t figure out what angles to cut the wood at to get the perfect star. I was honored that she turned to me for help and, with a little CAD, was able to quickly determine the angles that she needed. Be sure to check out her step-by-step post detailing exactly how she built her stars.
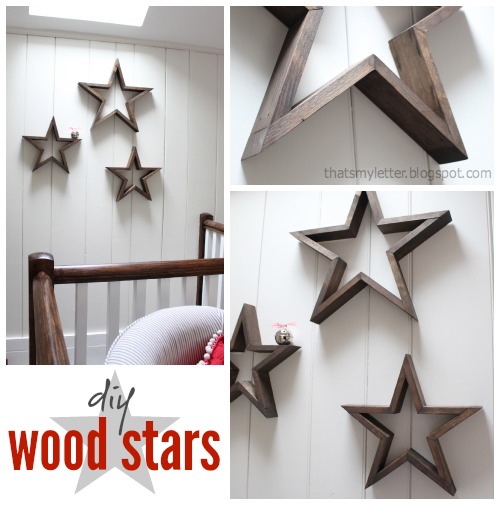
If you like the Christmas decor shown in the video, be sure to check out our Christmas Tree Shelves tutorial or the Christmas Tree Decor tutorial.
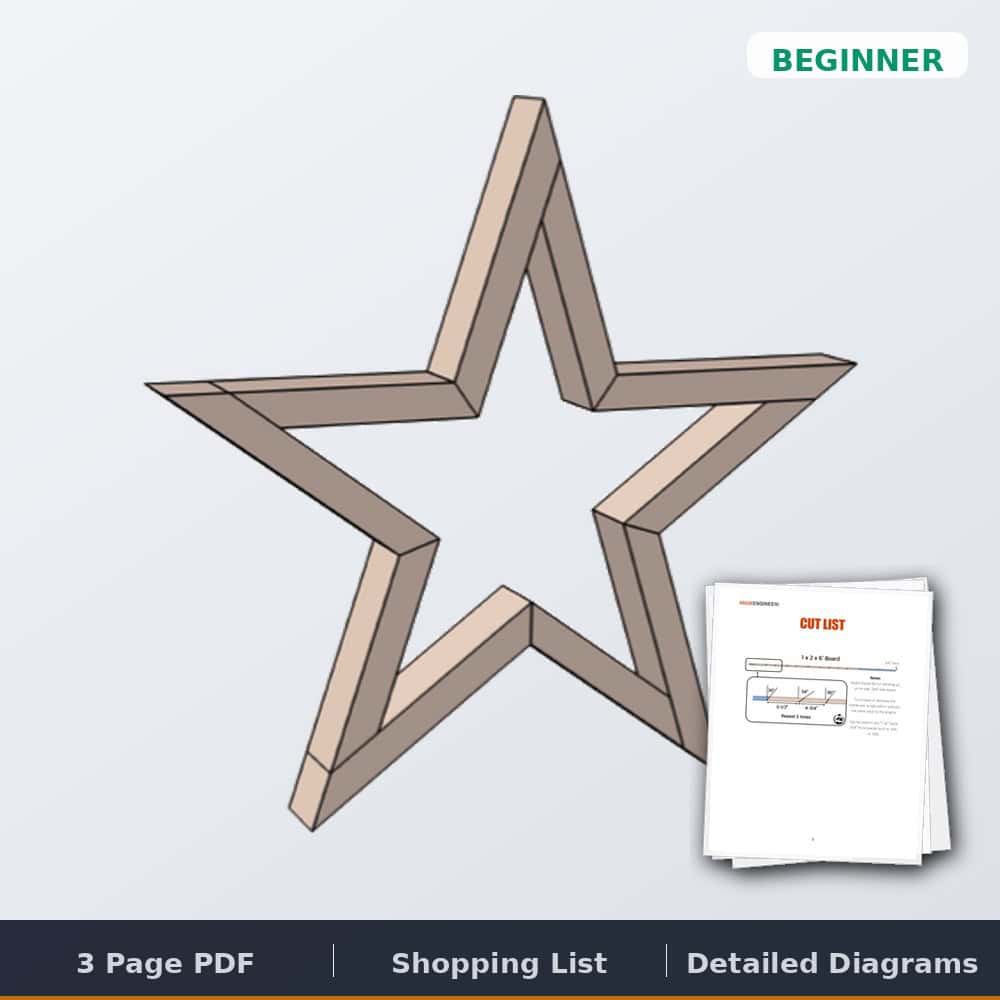
Tools & materials
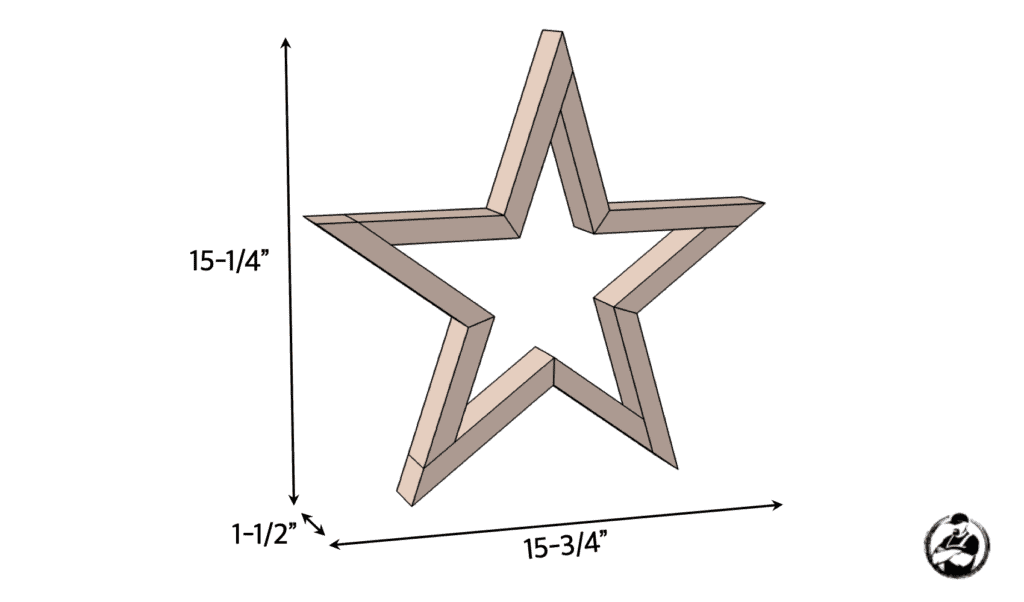
Dimensions
Cut list

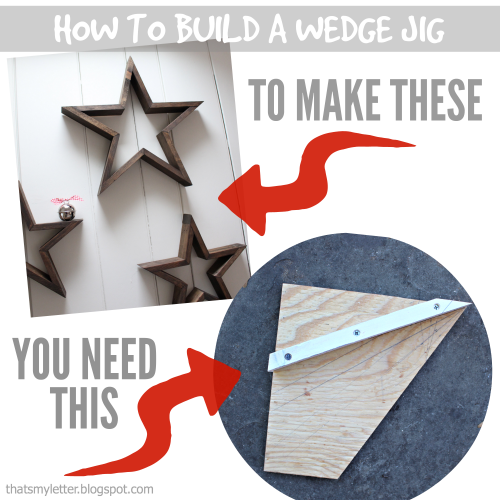
Luckily my miter saw goes to 60 degrees but you’re probably wondering how you’re going to make a 54 degree cut if your miter saw only goes to 45 or 50 degrees. Well lucky for you, Jaime shows us how to make a wedge jig here.
Free DIY wooden star plans
Total Time: 30 minutes
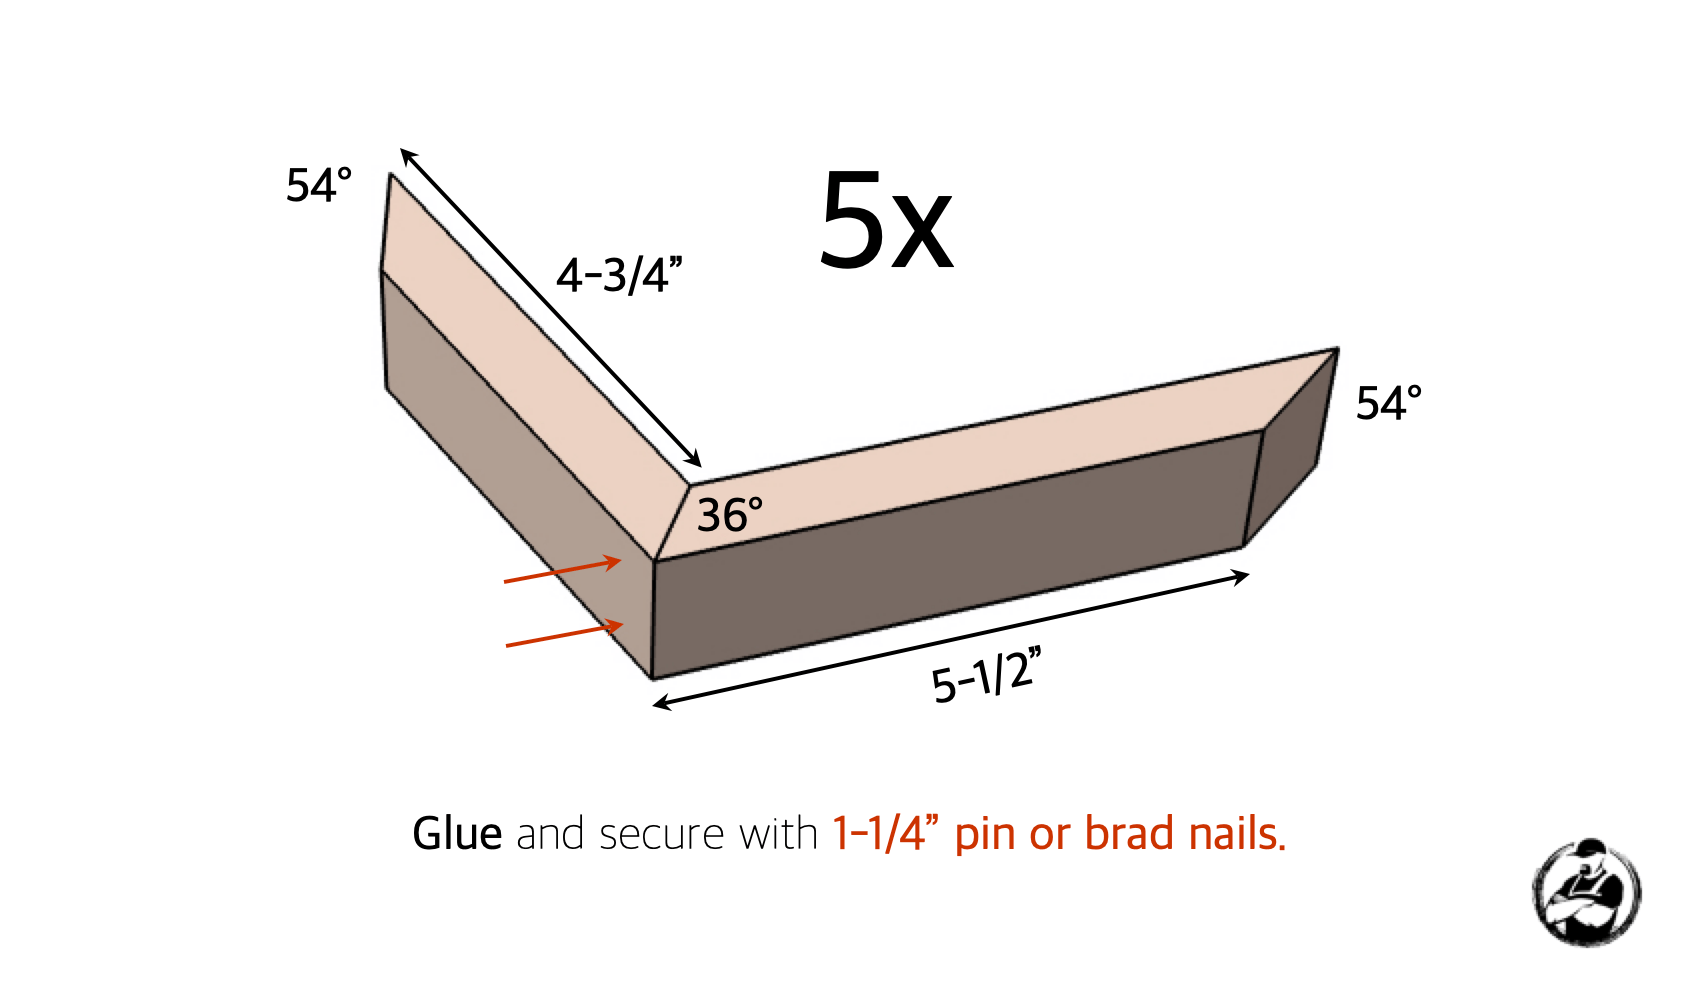
Assemble Inside Corners
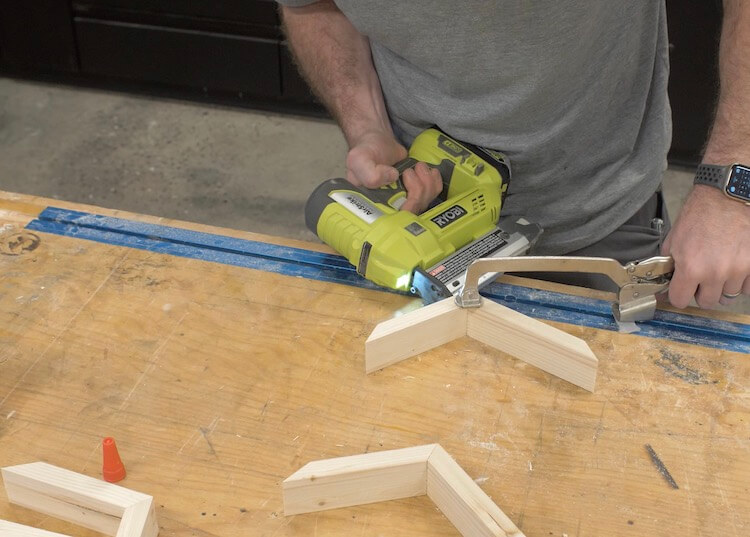
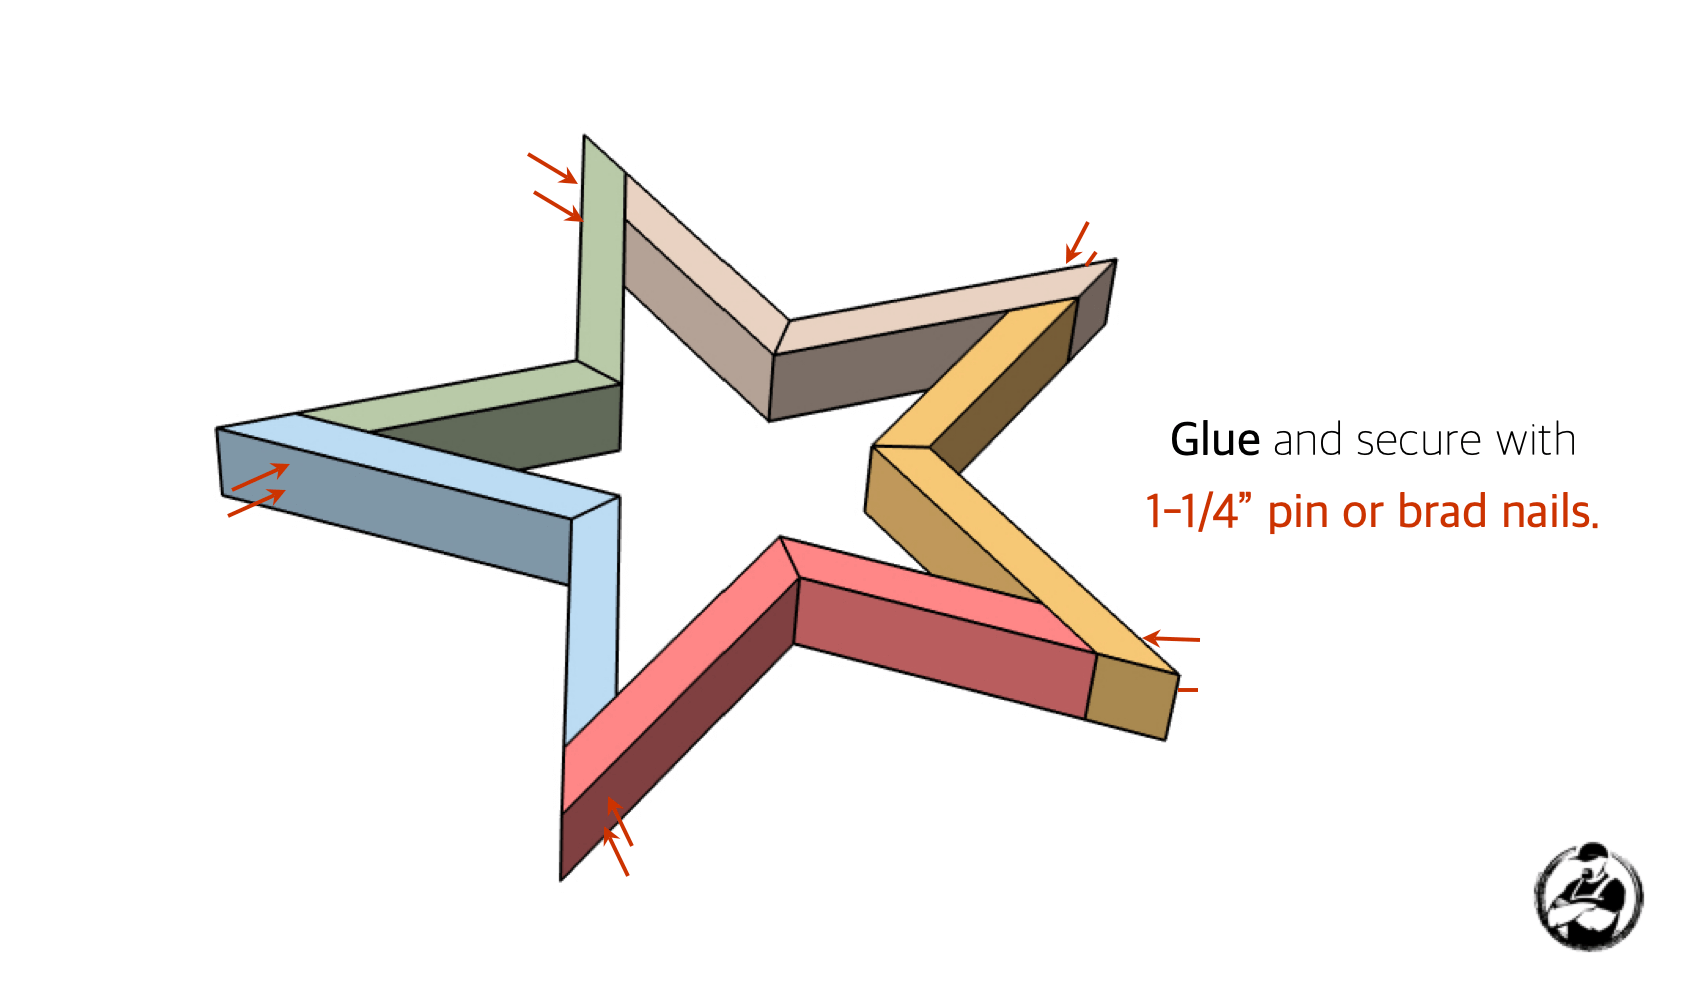
Assemble Outside Corners
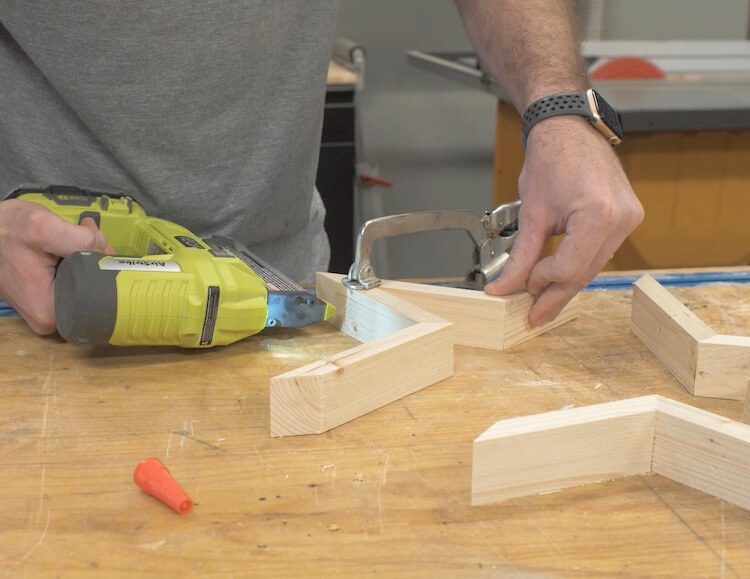
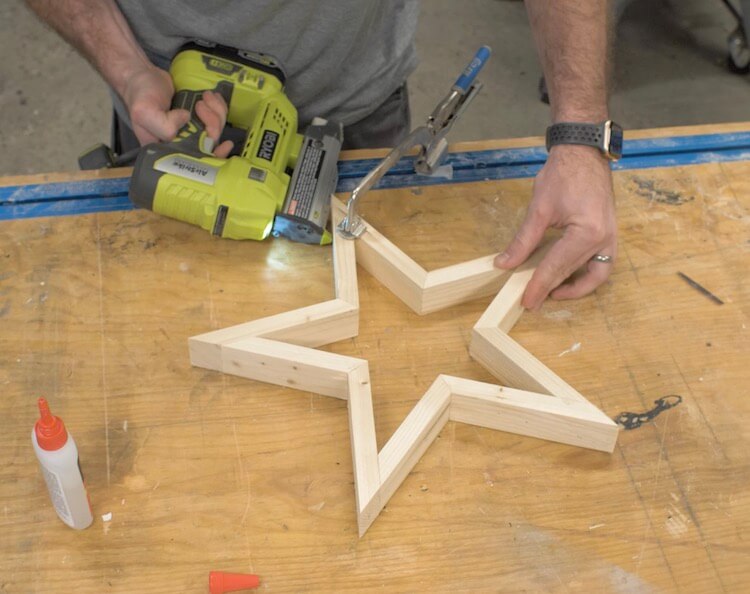
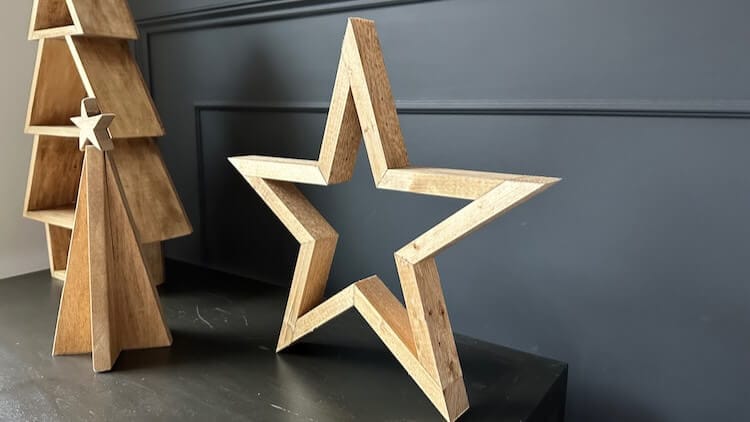
The finished stars
Wooden star questions, answered
What angles do you cut for a wooden star?
The key cuts for this 5-point star are 54 degrees (with the geometry worked out in CAD so the ten 1×2 pieces meet perfectly — every length and angle is on the cut list above). Assemble the five inside corners first, then the five outside corners.
How do you cut 54 degrees on a miter saw that only goes to 45 or 50?
With a wedge jig: a simple angled scrap block that holds the workpiece off-square so a standard saw setting reaches the effective 54-degree cut. Jaime from That’s My Letter has the wedge jig tutorial linked in the cut list section above.
How big is this wooden star and can I scale it?
As drawn it’s about 15¾″ wide × 15¼″ tall from a single 6-ft 1×2. The angles never change for a 5-point star — keep every angle the same and scale all ten lengths by the same factor for bigger or smaller stars.
How do you attach the wooden star pieces?
Wood glue plus 1¼″ brad nails (a pin nailer leaves even smaller holes). Glue the joint, pin it, and move on — that’s why a star takes about 30 minutes and $2 of lumber.
More holiday + decor builds
Questions? Comments?
As always, if you have any questions don’t hesitate to comment below and especially don’t forget to post pictures of your finished products in the comments! ENJOY!
Sweet, I was planning on making these. Now I don’t have to figure out the angles. Thanks for sharing.
Great, I look forward to seeing how yours turn out
Thanks for the plans! I’m so excited to make these… And have been stalking Jamies page since she posted the jig. Do you happen to know the cut measurements to make the smaller star? I’m guessing this would be the equivalent to the larger in the PB picture. But the grouping looks great with a large, and two small. Thanks!
Thank you Shawn! It looks like the PB stars are 20″ and 28″ in diameter so for those sizes I believe you’d need to add about 2-1/2″ (small star) and 4-1/2″ (large star) to each cut.
You’re awesome Jamison! Thank you! And by the way, I’m stalking your site now too! Love your plans! Thanks again!
Haha thanks Shawn B!
[…] That’s My Letter wanted to create wooden wall stars like those from Pottery Barn, she turned to Jamison at Rogue Engineer to figure out the angles for a perfect five-point star. Jamison had no problem tackling the […]
Going to try making one tomorrow!
I want to see it when your done! 🙂
Does the ratio stay the same if I want to build a larger/smaller star? Ie. Original star inside corner to inside corner short piece=4 1/4. Long piece 5 1/2.
4 1/4 over 5 1/2= 7 over 9 1/16.
so inside corner to inside corner short pieces would be 7 and long pieces would be 9 1/16.
am I thinking about this correctly?
Hey man, sorry for the delay. I wanted to investigate this before I got back to you. It actually not a ratio, it’s even more simple than that. If you add an inch to one board, add an inch to the other. So for your example, if the inside short board was 7, then you’ve added 2-3/4″, making the inside of the long board 5-1/2″ + 2-3/4″ = 8-1/4″.
Thank you! Thank you! Thank you!!! My husband and I have been trying to recreate these stars for a month now. So glad to finally have the angles.
Awesome Chandra! I’d love to see how yours turn out. (Post a pic here in the comments when you’re done) Also, see my reply Travis above if your interested in doing different sizes. Otherwise, good luck!!!
So inspiring! I was looking for a Christmas project, and had just about decided to make routed trivets when I came upon your stars. Brilliant! (Couldn’t resist the pun).
Anyway, with a bit if creative measuring, yesterday I made these nesting stars out if 1×2 oak. They’ll work well as trivets as we’ll as being attractive on the kitchen wall. Thanks for the detailed instructions!
That looks great Bryan! What a great idea. You should definitely enter it here for a chance to win the Ryobi 18v Brad Nailer Kit.
Trying to upload a pic
Awesome Job! Can you supply the dimensions for the smaller star? I would to make them.
Reattaching photo that was removed
[…] before me and has some wisdom to share. This time was no different. My wisdom on this DIY came from RougeEngineer.com. They had not only made the stars, but drawn up easy to follow directions and plans. And to think […]
I was working on a wood coin bank idea for my new granddaughter. As I was looking around for some ideas of how to cut a star out of a pine board, I found this post and changed my plans to use a variation of this star as the basis. I’ve posted about it on my blog here: http://henrywill4.blogspot.com/2014/12/diy-five-pointed-star-coin-bank.html
What a great idea Henry and great post! Keep up the great work!
Reattaching photo that was removed:
I have a simple question, and dwelled on it this morning. Is the angle 54° or 66° ? Going off of the actual settings of a miter saw have the blade at 0° not 90. So to cut a 54° saw at 30° would be to have the piece at a 24° angle. Really want to build one of these.
Good question Tim! It is 54 degrees according to the miter saw. And yes that is correct. For how to build the jig to make it possible I’ve linked to Jaimes post on how she did it so check that out.
Hi I don’t have a miter saw just a table saw, any help with that? please and thanks.
Hey Edgar, you should be able to cut these angles using a miter gauge on your table saw.
Thanks so much for the tut and plans. Worked like a charm!
I was having trouble holding the pieces tightly aligned while stapling and nailing. So I ended up building myself a third hand to hold the pieces in place. I cut one corner to fit the inside angle of the star (36deg) and cut out a wedge for the point of the star (56deg). Clamp it to a flat surface and you can pull the pieces tight without them slipping all around. It also acts like a spacer guide when aligning the finishing gun to the edge of the piece.
Hey Jaye,
That’s great to hear and what a great idea! Thanks for sharing and I’m sure others will appreciate as well.
Jaye, how did you get accurate angles? I have cut (2) stars to date.by making (5) V shapes and dry fitting them together. When I place the last V I have a gap that is too large to be acceptable. I am finding that the accuracy of the angles and the length of each piece is critical to final assembly. I am using a miter saw set to one angle and a radial arm saw set to the second angle. I am checking each piece with a machinist protractor and my lengths with a Vernier and a machinist 12” rule. The second star still did not assemble without a gap. I even use biscuits to assemble each V. I’m going to try a third star today and scrutinize each step until I find out where I’m going wrong.
Bruce G.
Reattaching photos that were removed
Jaye, how did you get accurate angles? I have cut (2) stars to date.by making (5) V shapes and dry fitting them together. When I place the last V I have a gap that is too large to be acceptable. I am finding that the accuracy of the angles and the length of each piece is critical to final assembly. I am using a miter saw set to one angle and a radial arm saw set to the second angle. I am checking each piece with a machinist protractor and my lengths with a Vernier and a machinist 12” rule. The second star still did not assemble without a gap. I even use biscuits to assemble each V. I’m going to try a third star today and scrutinize each step until I find out where I’m going wrong.Bruce G.
Step one: making the cuts drawing
Where are you measuring the 6″ and 51/2″ from? The dotted lines?
Having trouble with the 36 degree angle using those measurements.
Hey Lori, you should only need one of the lengths (inside or out) with the proper angles cut at both ends the opposite side should be close to the other dimension. If its not exact then don’t worry too much.
[…] Rogue Engineer […]
[…] came across this website on how to make wood stars, so we got right to work, as it looked pretty simple. This star is […]
Thanks for the plan & the link for the jig ! Just took it out of the assy jig, so it’s not sanded/finished, but it worked out pretty well. Thanks for working out all the “angles” !
Absolutely Michael! No problem, I’m glad it worked out for you.
So, let me first say that I am new at this wood working, how do I get the 56 angle?? When I hand cut the angle I can’t keep the piece of wood steady?
Check out Jaime’s wedge jig tutorial to cut the 56 degree cut on a miter saw (link in post). If you’re hand sawing it use a protractor and clamp your wood in place to avoid it moving when cutting.
im trying I brad the center but can’t mange to mine came out lookin like crap… Help?!
Sorry, I’m going to need more information
Okay so I had to brad my star the inside then do the outside bc my nail gun wouldn’t fit to get the nail the right angle to not get shit straight thru..and also it’s really flimsy and my star angles have gaps in them?! Did I do something wrong?
Yea I can see how that would be frustrating. You can can easily reverse the steps as you did. As far as the gaps, I would have to see a picture to know whats going on. You should add glue to your joints as well to strengthen.
Thanks for the plan & link for the cutting jig, it worked great. I found it easier to nail the 56 deg angle first, then the points, using a assy jig like Jaye. I’ve made a few sets of different sizes for the kids….great way to use up scrapes !
That looks awesome Michael. Thanks for sharing!
Reattaching photo that was removed:
….additional photo. (Couldn’t figure out how to send two at once)
Reattaching photo that was removed
Hi there,
Thanks for sharing theese lovely stars, they are awesome! I really, really want to try to make one 😉 But I have a little problem…I am an amateur and don’t know much about measuring (?) and since I’m from Sweden I need to convert inches to centimeters…but I’m not sure how do do that. I also want to make a bigger star (approximately 1 meter in diameter) that I can put outside in the garden and decorate with christmas lights 🙂 Is it possible to use the same degrees (36 and 54) when cutting with the jig saw?
Hey Annette from Sweden! You should be able to google a cm to inches converter. You should just be able to add whatever additional length you need to the 1x2s. The angles should be the same. Note: These plans is for 1×2 boards (actual dimensions are 3/4in x 1-1/2in). I jigsaw might be difficult to cut these with since the 1x2s need to be on their sides.
Thanks very much, Jamison 🙂 This will be a challenge , but hopefully I will have my star finished by Christmas 🙂
Hej Anette! Tips. Använd en tumstock. Då har du både tum (inches) och centimeter på den. Ibland finns det på måttband också med båda måttsystemen.
Translation: Hi Anette! Tip. Use a ruler. Then you have both inch (inches) and centimeters on it. Sometimes there on the tape also with both measurement systems.
Great Tip Eva!
Hej Eva!
Tusen tack för tipset! Det har jag inte tänkt på 🙂
Translation: Hi Eva! Thanks for the tip! I didn’t think of that 🙂
Well I had a blast making think I have accidentally made more work for myself as everyone wants some now.
Ha. That’s how it always works. As soon as you make something cool the orders start piling up.
This is almost perfect. I need a star w a solid, straight cross bar w the rest of the body built below except the one point built above. Understand? How would I modify the design to accommodate this? I’m making a Texas Flag Bookshelf & the star is gonna be a shelf.
Sorry I wouldn’t know where to start with that one.
108 degrees for the star point off the flat edge. Triangles total to 180 always so 180-36=144. 144/2=72 on inside or 108 on the outside ( measuring the larger angle.)
I’m a little confused over the lengths of the pieces. If I cut the long piece to 6” OAL and the short piece to 4 3/4 OAL and put them together(dry fit) the short piece extends much longer than the long piece. I’m thinking they need to be equal in length when assembled. I would need to make the short piece 3 3/4 to have equal lengths. Am I missing something?
It’s hard to tell but the cuts should be made on a 1×2 and should be made on the short side. I hope that makes sense. (The angle should be on the shorter side of the board).
I see what I did wrong. I was using an 1 1/4 wide piece of wood and this changes the length of the short piece if you are using 6” on the long piece so 3 3/4 is good for a 1 1/4 wide piece. On a 3/4 wide piece I used 4 11/16 on the short piece.
Yup, that would do it. The angles will be the same and it should be 6″ from the point to the outside of the interior corner. So after cutting the long piece measure the length of the cut from the point and subtract that from 6″ and that will be the length of your short piece. I hope that make sense but I understand if it doesn’t this is why I normally write in pictures. haha
Ok, I am a dreamer/newbie DIYer. I have a friend that has all the tools to do this. I am going to go his house but he does not have wifi so I can’t use my ipad to show him the tutorial. How do I print the star step by step instructions? I love these and really want them in my house:) You do fabulous work!!! Thank you for all you do!!!
Just for you, I’ve created a printable PDF and added the link to the post! Thanks for the heads up!
After two failed attempts I completed two stars, photo attached. I learned that cutting accurate angles, – + 1/2 a degree and accurate lengths, no more than 1/64 variation was key to not having gaps at each joint. The material I used was cedar baluster measuring 1 7/16 thick. I must say this project was much harder than I anticipated because of the need for accuracy and given you need to cut (20) pieces there is a lot of room for error. I also built a fixture to assemble and glue each section as Jaye did on an earlier post.
Well I must say that they turned out great Bruce! Nice work, and yes you are right, small mistakes compounded over 10 joints can have a large effect.
How do I get the angles for making a larger star? You can’t just double the length of the wood, it doesn’t work out that way. If I wanted a start double the size of the one outline above….what are the angles for cutting?
Gary… The angles are always the same. Only the length of the pieces change. I’ve built four different sizes, all using the same jigs, and they’re all perfect.
Please Provide what various lengths you used for different size stars.
The way the pieces are joined at the outside points prevents these numbers from scaling up like you are trying to do. If you cut all the pieces with a true miter on both ends. (36° on one end 28° on the other) you can just make all 10 pieces the same length and you’ll be able to scale by simply changing the lengths by the same amount.
The way the pieces are joined at the outside points prevents these numbers from scaling up like you are trying to do. If you cut all the pieces with a true miter on both ends. (36° on one end 72° on the other) you can just make all 10 pieces the same length and you’ll be able to scale by simply changing the lengths by the same amount.
Reattaching photo that was removed:
[…] you’d like to try this yourself, check out the angles and dimensions here. A few things I learned during this project that might help […]
Hi – these are awesome – but silly question – once they are made, what do you think the best way to attach them to the wall would be? I made them for over a crib, so I want to make sure they are sturdy to the wall – thanks again!!!
Thanks Jennifer! I feel your pain, we had a wooden monogram above our crib and the got knocked down pretty early on. You could add a sawtooth hanger to the back or a keyhole hanger and that should cover you pretty well.
Hi Jamison and thank you very much for putting this together.
1. I’m making your stars from different sizes (other than 1X2) and believe the angles remain the same. However, should I use the longer or shorter dimension on each piece? For example, if I use 1X4, should I use the 6″ or the 5 1/2 ” dimension. Same question for the smaller piece. I hope my question makes sense.
2: Is your 1″x2″ dimension exact or is it 0.75″X1.5″ as bought at the lumber yard (called a 1″x2″)?
Thank you again for your great design
As long at the material thickness is still the same all the dimensions should remain the same. Any 1by boards are going to be 3/4″ thick and since these boards are cut on their sides then the width doesn’t affect a thing.
Thank You for the angles/plans this was on my list for Christmas decorations. Also not being critical, but if a person does not have a mitre or table saw….Since 1, the stock is not thick 2, the cuts not long…the protractor listed along with a circular saw, handsaw or jig saw will get it done.
I am about to run out in the shop to mark and cut one with a dovetail saw before converting to a 5 ft star.
Thanks again,
No problem Joe and you are absolutely right.
Nice Saturday morning project for the little ones. Of course it takes almost an hour to assemble with three little ones nailing.
Table saw miter gauge makes this quick and no jig building.
Reattaching photos that were removed:
Looks great Doug! And good call with the table saw.
I would like to know how do you go about building larger or smaller ones. Do you have plans or is there a technique to it?
Do you have plans for a larger or smaller size. Is there a technique to it. What would be the best way to figure out the cutting lengths.
Right now I don’t but you can easily make these larger or smaller by adding or subtracting the same amount to all pieces.
@Jamison Rantz:disqus that only counts if you stay with the same wood (in size) what to calculate and measure when the wood is thicker or thinner?
i made a star the other day and it came out great…i am fortunate to have a table saw so the 56 degree cuts with the miter gauge was a breeze but i seen a few of you were having trouble with cutting each piece exactly the same and a simple fix is to clamp a stop block to your miter saw…it worked great for me and the star was gap free…thanks for taking the time and sharing this awesome project
That’s a great tip Chad, thank you for taking the time to share.
I had a Great day Building my jig then my stars but they did not work like they were supposed to I had a hard time getting the short ones and long ones so I made them all the same and they worked out just fine! They are pretty big I tried some smaller ones but gave up on them and went with what was working for me, they don’t join up quite the same and i was working with old barn wood so they are not perfect, just like me.Thank you for the great tutorial it was my first jig I have built. LOVE MY STARS!!! thank you thank you
That does look amazing! Really really great work. Thanks for sharing!
Added some bottoms for a different take on it.
They make great planters too.
That looks awesome Brian. What a neat idea! Thanks for sharing!
[…] Expert advice on woodworking and furniture making, with thousands of howto videos, stepbystep. Diy wooden star free plans rogue engineer. Free diy wooden star plans. If you decide to take on this project make sure you download the […]
These are really good, I am going to try and make them on the scroll saw
Awesome. Be sure to post some pictures when you do!
I saw in a pic nesting stars…how do you adjust the lengths to make it bigger or smaller. Do the angles stay the same?
Awesome plans! I had a question though.. what should the overall length of each piece be before the angles are cut? Is it 6″ for the bigger one and 4 3/4″ for the smaller?
That is exactly what I tried to figure out too. Beyond that, what needs to be adjusted when the wood has a different size (thickness)!?
I started making stars a couple years ago and came up with a way to make them accurately with a single 18 degree angle jig. I made an “Instructables.com” posting called
How to make a 24 inch Wooden Star with a 2×4
You can make solid, open, or beveled stars from 8″ to 48″ with a home made jig and a table saw.
The star pictured below is Black Walnut 27″ with a 12″ beveled star mounted on it. The possibilities are endless!
The 18 degree jig can be made as pictured below. The posting on Instructables tells the rest of the story and is free and you can download a PDF there as well. Happy stargazing!
Kudos to JR for his posting!
Best Regards!
Duncan
http://www.instructables.co…
Might be
This is cool, but what are the measurements if I’d like to make a larger one?
Question–do you nail the 54 degree to the 36 degree star parts? Or 54 to 54 and 36 to 36 degrees? Sorry it may be a dumb question. Thanks
I want to make a 4 foot high star. Could you give the measurements for the length of the wood from long to short as in the pic? https://uploads.disquscdn.c…
I made these for Christmas gifts…. great idea! https://uploads.disquscdn.c… https://uploads.disquscdn.c…
Quick questions did a quick cut just to see. my chop saw can cut 54 deg but the cuts don’t measure up. my pieces come up 6.6 x 5.5 with my 54 degree cut. Don’t want to make a jig when my saw cuts 54 deg but with 36 and 54 degree cuts it doesn’t measure up. thanks
Thanks so much for posting these plans! Took me one night to build the jig and 2 stars, then a few minutes the next day to paint flat black, and then that evening to mount and solder LED strips. Added a star to the top of our “tree” at church (each star is DMX controlled) and it looks great! https://uploads.disquscdn.c… https://uploads.disquscdn.c… https://uploads.disquscdn.c…