
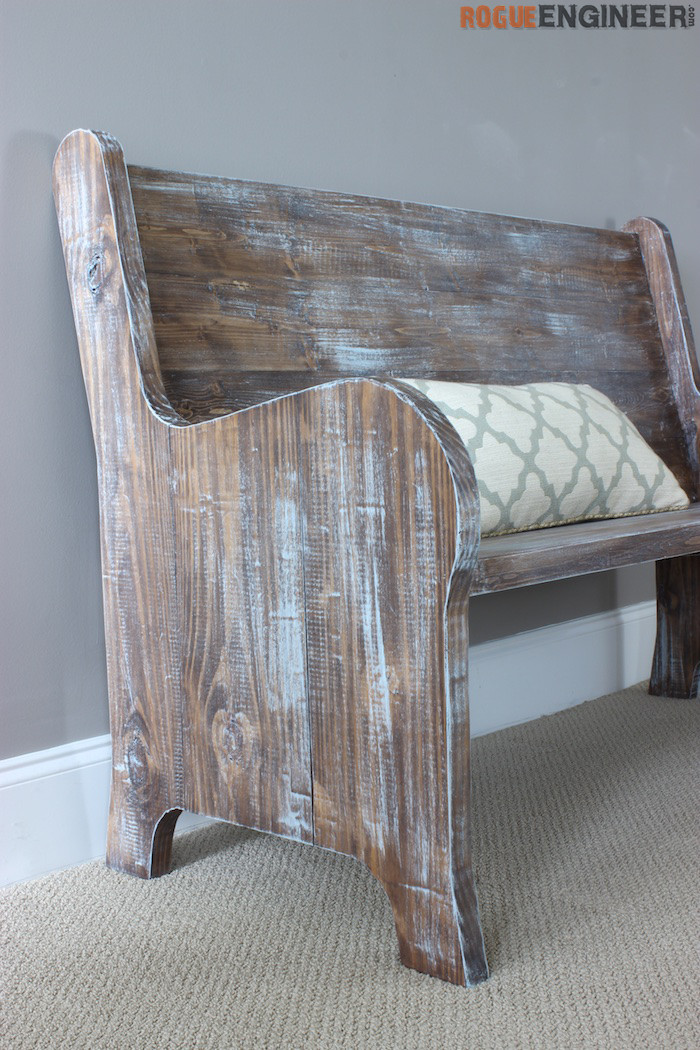
Church Pew
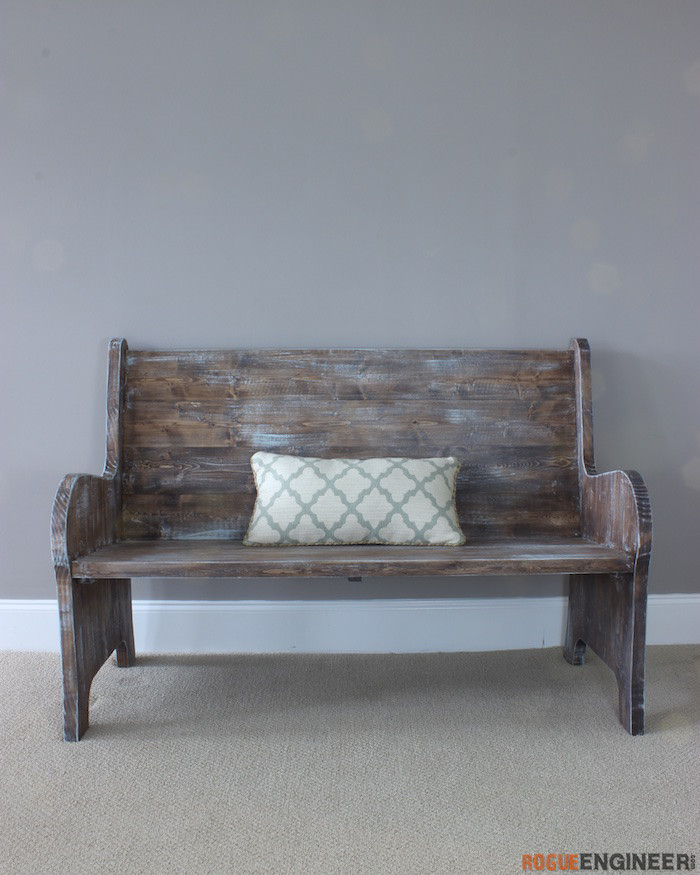
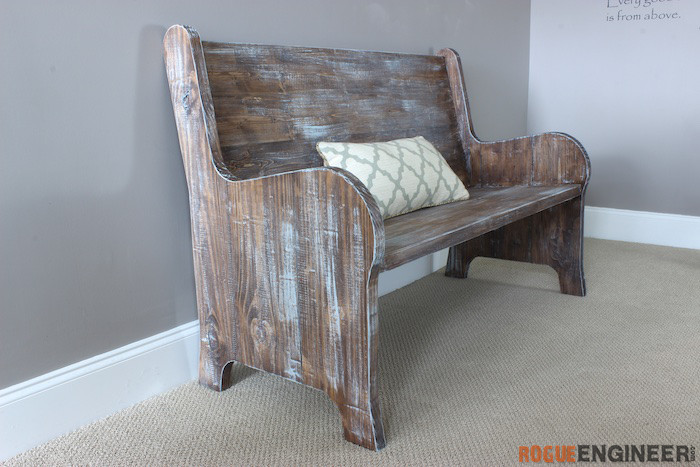
After a few requests for church pew plans I figured I would put it up for a vote on Facebook. Needless to say it was a resounding yes, so I got to work. We had picked out the one that we liked and I wanted to make it look like a weathered, old church pew that had been around for a while. We love how it turned out and I hope you do too! Enjoy!
For sneak peeks of our upcoming projects be sure to follow me on Facebook and Instagram. Also, follow me on Pinterest to get tons of projects plans from all around the web!
Time to Complete
1 Day
Estimated Cost
~$100+
Skill Level
Intermediate
Required Tools
Materials
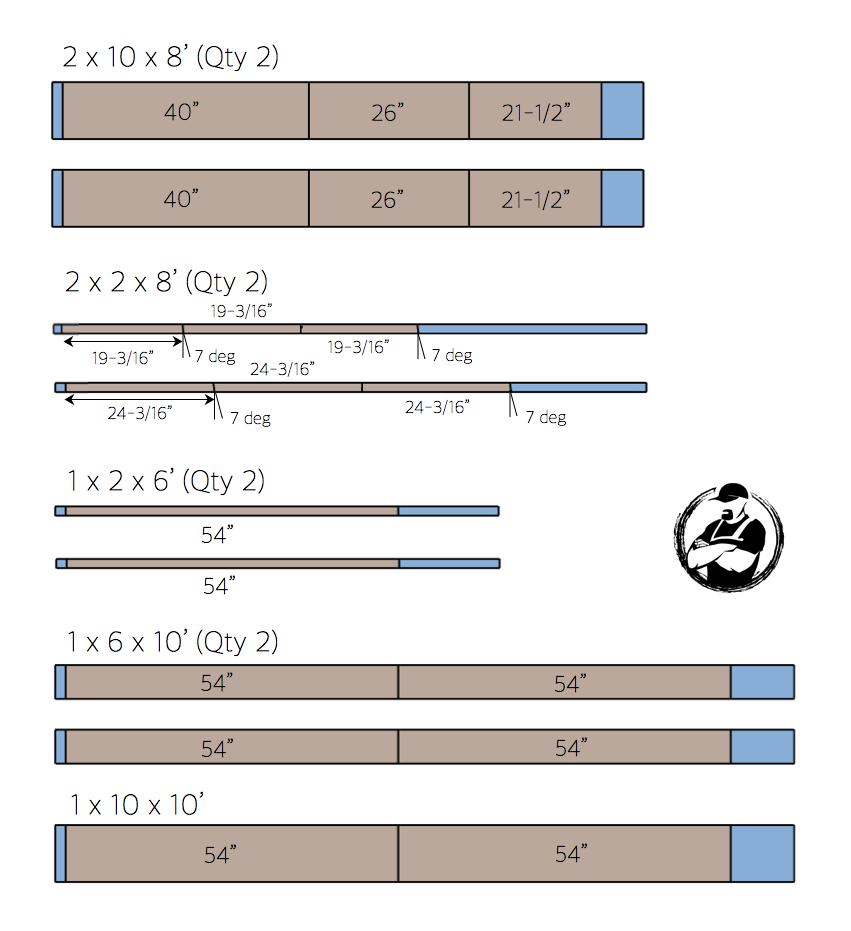
- Qty 2 – 2 x 10 x 8′
- Qty 2 – 2 x 2 x 8′
- Qty 1 – 1 x 10 x 10′
- Qty 2 – 1 x 6 x 10′
- Link is to 12′; 10′ board not listed
- Qty 2 – 1 x 2 x 6′
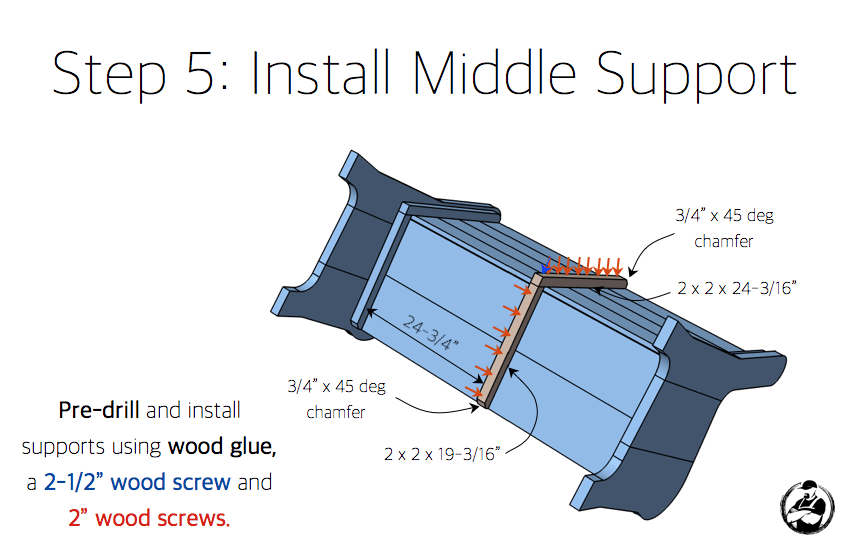
- 2-1/2″ Pocket Screws (Coarse)
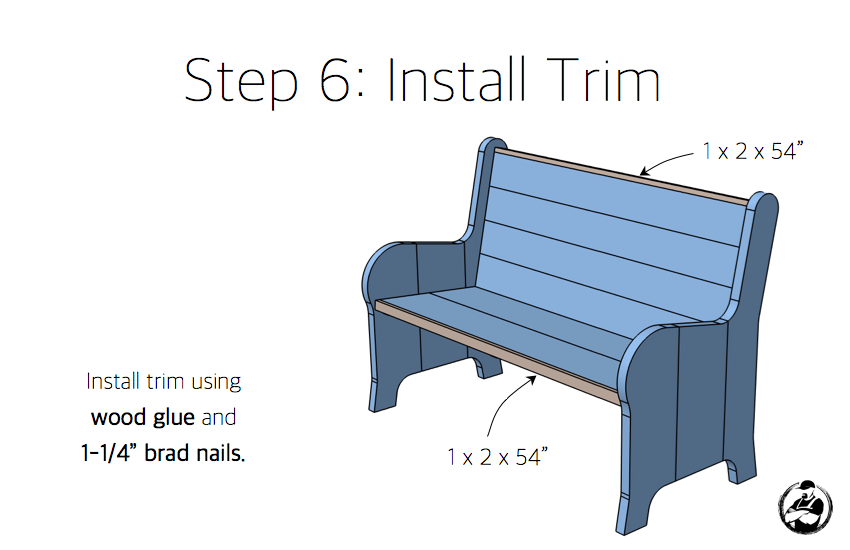
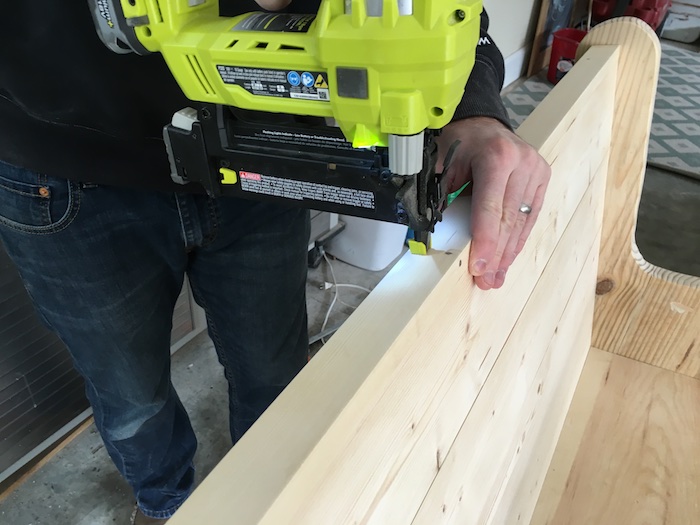
- 1-1/4″ Brad Nails
- 2-1/2″ Wood Screws
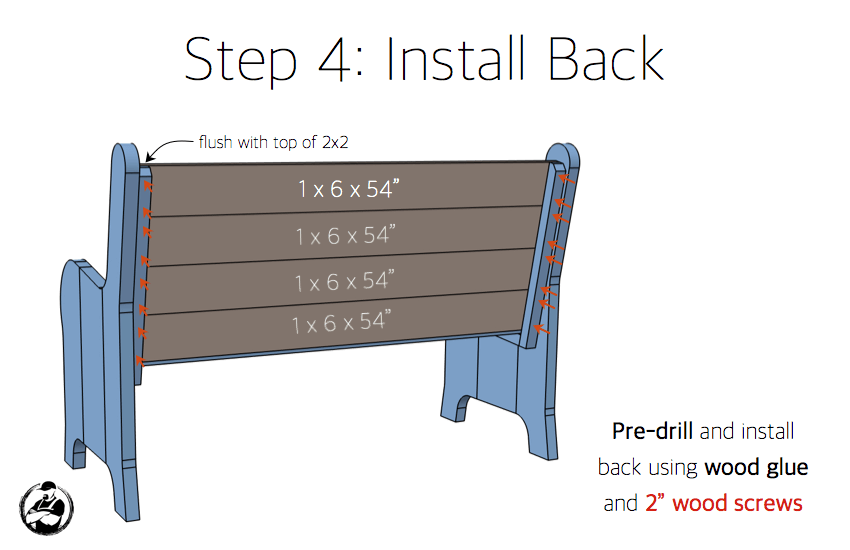
- 2″ Wood Screws
- Wood Glue
- Pine Pocket Hole Plugs
- Wood Filler
Disclosure: The links provided in the “materials” and “required tools” sections are affiliate links. If you would like to support our site and help keep our content free come find out more about how we can make money with no extra cost to you.
Dimensions

Cut List
Finishing
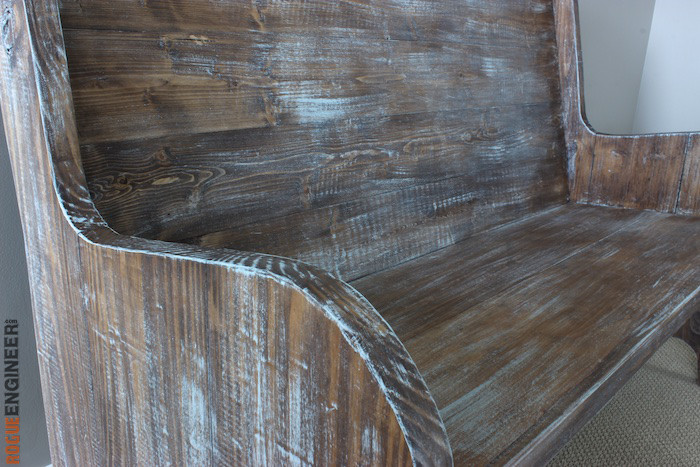
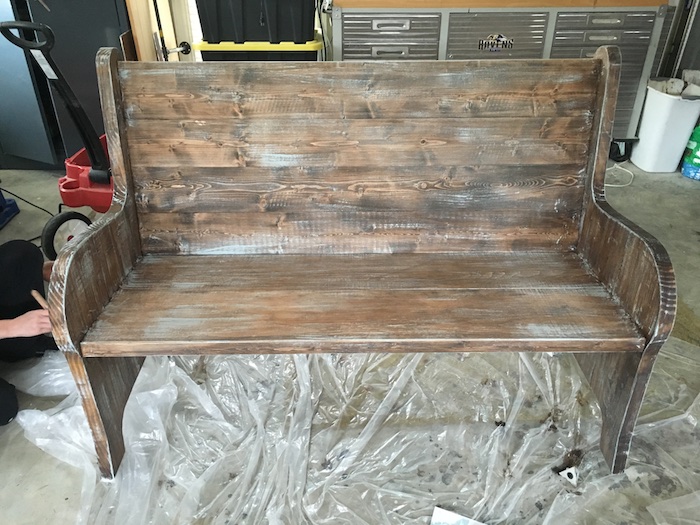
To get the old look we started by staining the entire pew with dark walnut wood stain from Varathane.

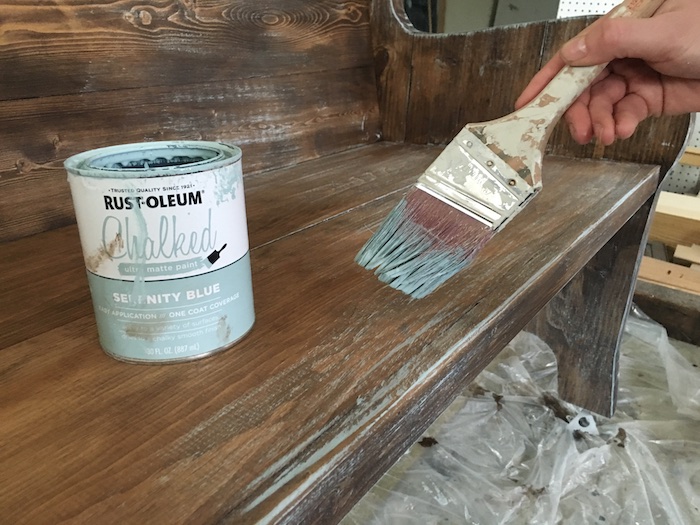
Then we Jamie dry brushed the pew with serenity blue Chalked paint from Rustoleum. The key to dry brushing is to get a very small amount of paint on the brush. I dabbed the brush on paper to make sure I got off any excess paint. Then using quick strokes, go along with the grain of the wood.
Finally, we applied 3 coats of matte polyurethane for projection.
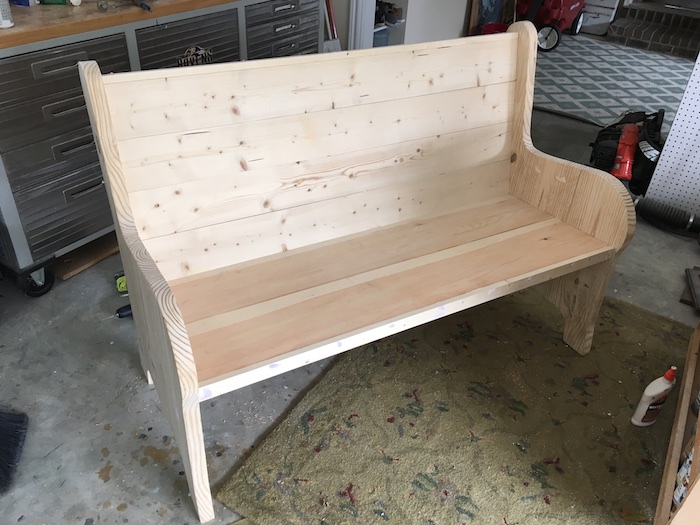
We absolutely love it. At first we were thinking of donating or selling it but I don’t think we can let this one go!
Questions? Comments?
As always, if you have any questions don’t hesitate to comment below and especially don’t forget to post pictures of your finished products in the comments! ENJOY!
Awesome project can’t wait to try it thanks for all your hard work!!!!
Thanks Bryan! I’d love to see how yours turns out!
I’ll post a pic when its finished
Beautiful job! I love it!
Thanks!
Getting the wood today for this!! So excited!
Sweet! I wanna see it when you’re done!!
Absolutely!!
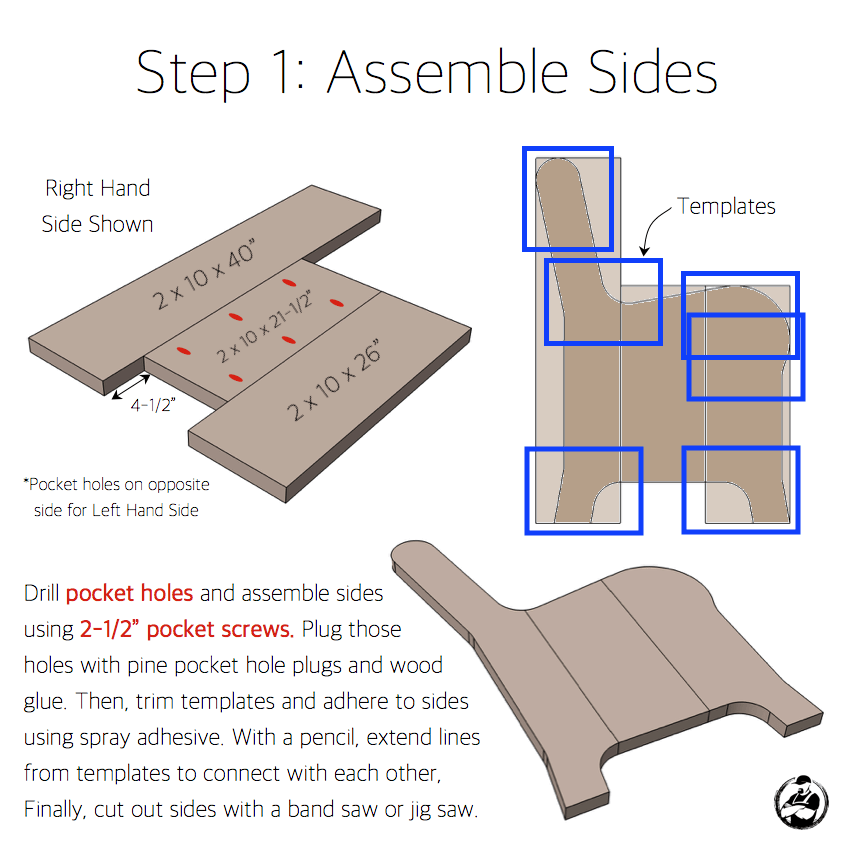
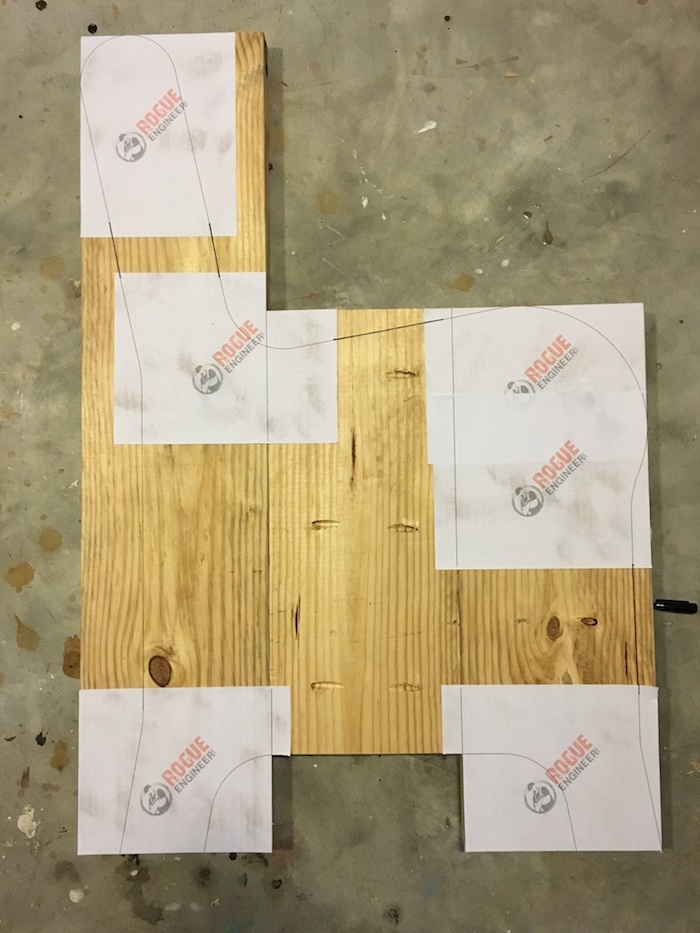
I got the plans but did not see the temples, am I missing something . Thanks
The template is included in the plans.
I have been looking for years for a church pew bench for my front entry. This is perfect! Thanks! I can’t wait to build it. I’ve been itching for a project!
Awesome. Can’t wait to see how it turns out!
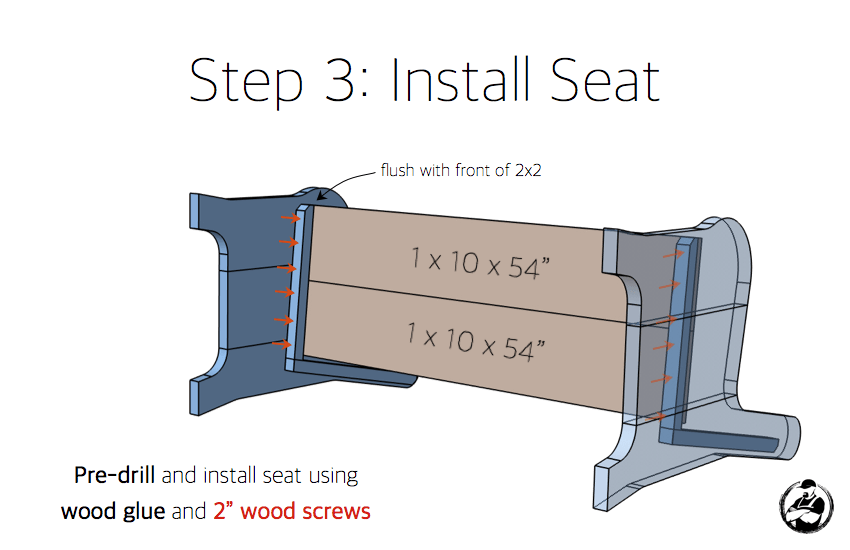
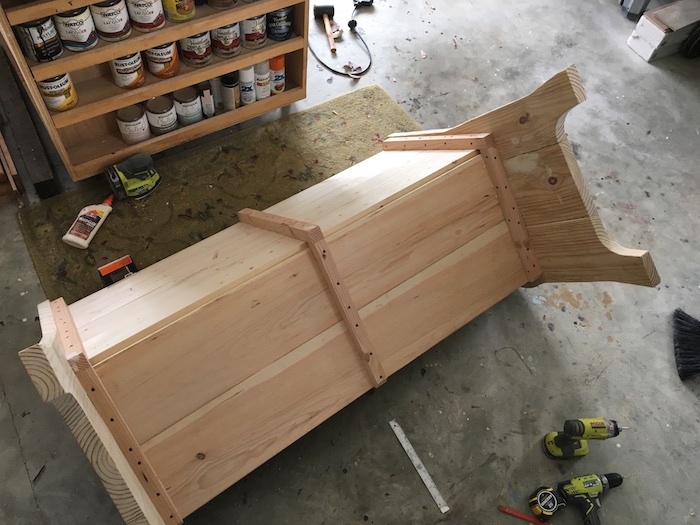
Did you pocket hole the bottom and back boards before screwing into supports or did you install one board at a time
I installed them one board at a time.
Ok just finished everything but sanding and staining. Thank you so much for these plans. This was my first project following plans and you made it so easy
Awesome! Be sure to share some finished pictures.
While taking pictures to post, I had the most appropriate guest for a church pew. A praying mantis https://uploads.disquscdn.com/images/3b34fd61971c79ea872c31ce089a0e865742044ef6c0c2d87d15d4126c2bf27e.jpg
https://uploads.disquscdn.com/images/39549594fce942bee4753eced04af53e37615aa243ac6d5d2b05edade6814ed1.jpg
That is stunning. Nice work and thank you for taking the time to share!
Thank you
Haha that is awesome!
Love ours! Such a fun and EASY build!! J &J are so awsone!
Thanks! And AWESOME job. Love how this turned out.
Now to really brag on myself. I made a curved one for my sister in law’s stairs! Bout got the best of me but I whipped it out anyways!!
THAT IS AWESOME! Thanks for sharing!
Thinking about building one eight feet long. Would putting a couple of more middle supports be enough or should I put in another leg support?
Here’s an eight footer!
https://uploads.disquscdn.com/images/1967c7acd38564cd4585c66f5377b144b10b388edc4b8a3198a663b6e0fb0ae9.jpg
Do you have plans for the 8 foot?
Sorry, no. I just winged it from the original.plans. Just used 8′ lumber for seat and back and put a middle leg that used the side pattern, except cut out to allow for seat asnd back. I did use 2×8’s for seating though.
Did you use pine boards for all of it? I can’t find pine 2x10x8’s anywhere.
2x10x8 for sides/middle support & seat, but used 1x6x8 for back. Bought my lumber from Lowes. home depot also carries that length.
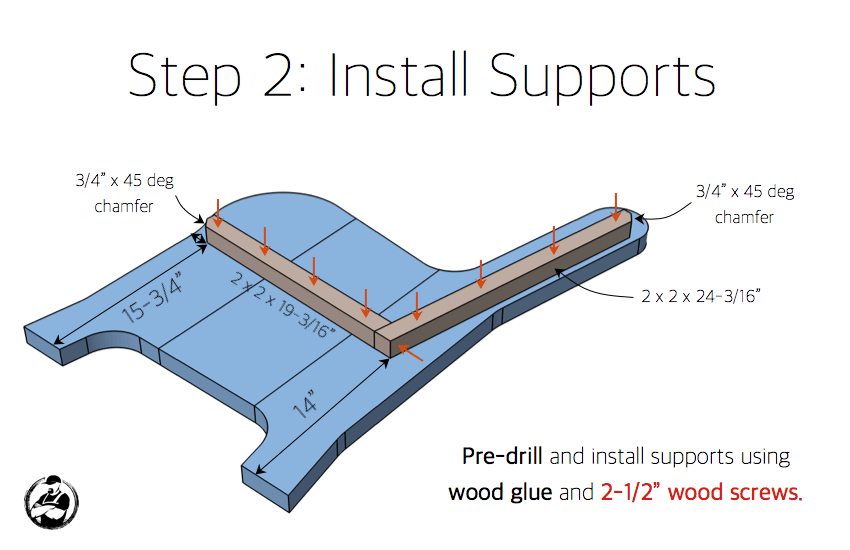
Wow! This is so beautiful. I need to make room in my house for this. It looks surprisingly easy to build. Would you mind quickly explaining how to cut a chamfer? Is it just 2 different bevel cuts with the miter saw? Thanks for sharing your plans!
This has been on my build list for awhile, I’m so excited to finally get started. Thank you so much for sharing the plans! I have a quick question though…did you rip the curve off your 2 by’s first?
What would you guess would be the weight limit?
How would I need to adjust the seat supports if I used 2×10 for the seats? I made two as written and love them but they sag a bit with heavier people.
Just finished staining, now for the matte finish, then https://uploads.disquscdn.com/images/4c9c8a659507f2001d5ecaade8e4f11479862c6a36a48b875c52256be437f1e2.jpg off to a client!
I built this today. My father in la https://uploads.disquscdn.com/images/8a10e2fd92131e8f7c196925ab2c1e44428da47c61273602e7c5eea32c91e177.jpg w is starting a church and the last tenants stole all the pews. I’m building 14 8 ft pews. This was quite the challenge when putting them all together. But I also changed the style or design a little. Done more of a gothic theme for it to look a little more original to the 1930’s built sanctuary.
did everyone use pine for this? I was thinking a 1″ pine board may break with not too much weight put on it.