

Faux Fireplace Mantel Surround
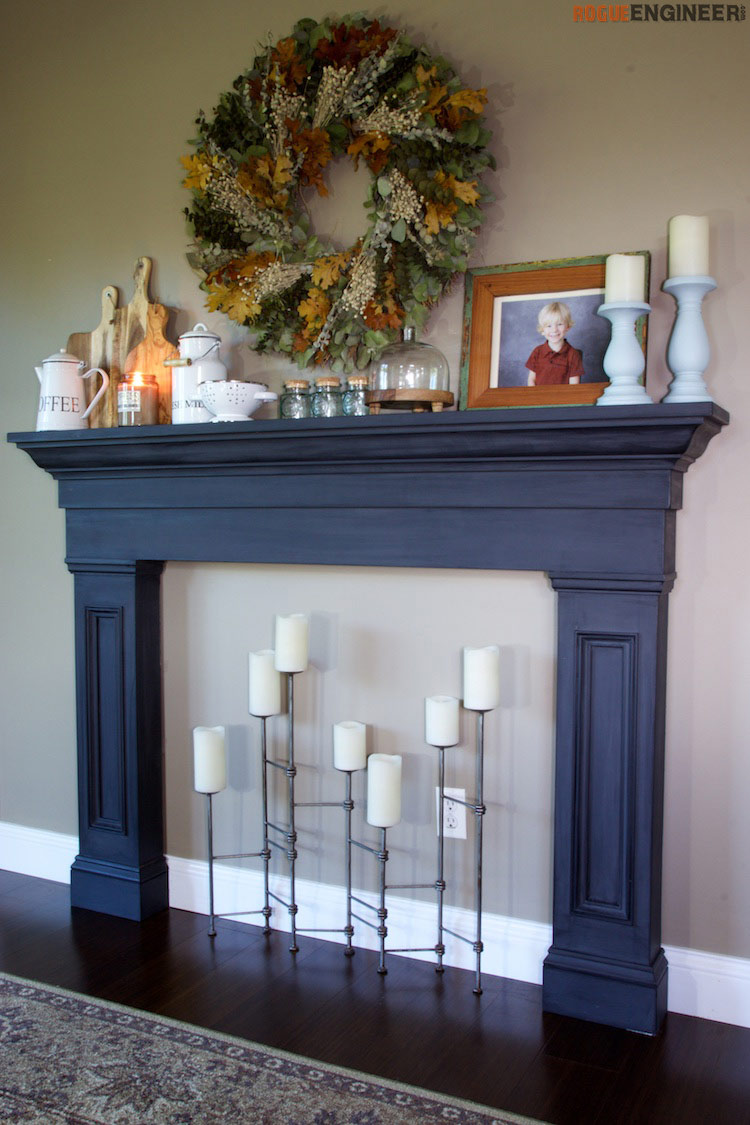
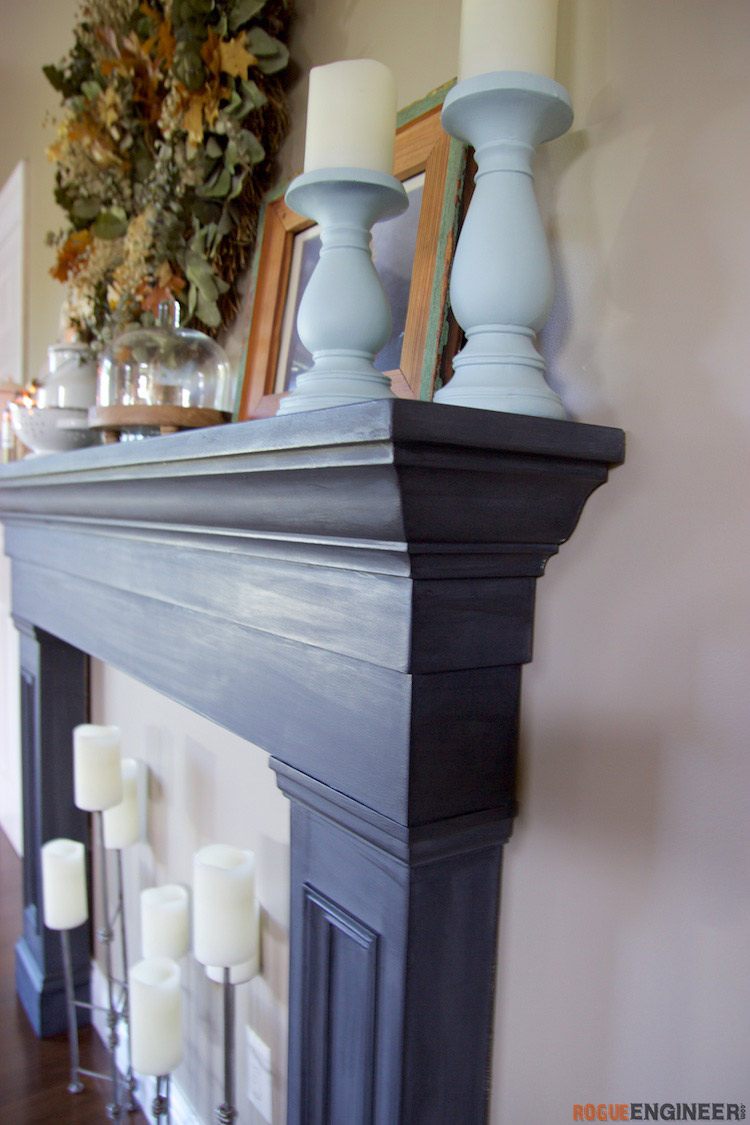
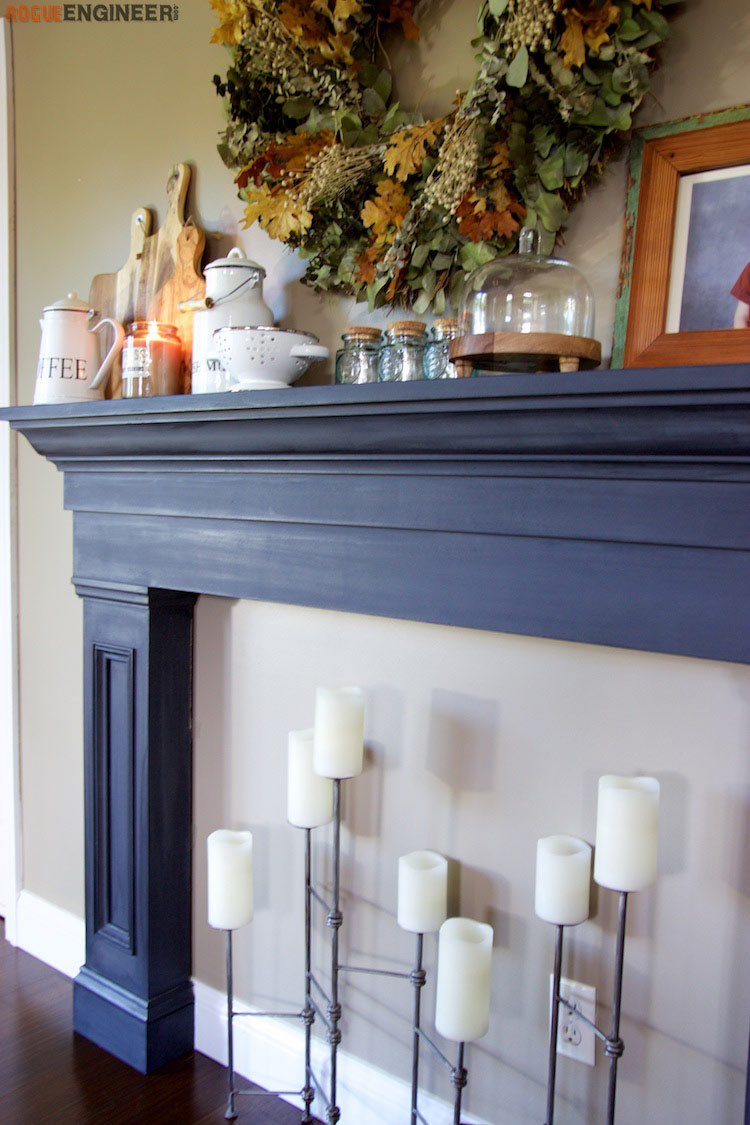
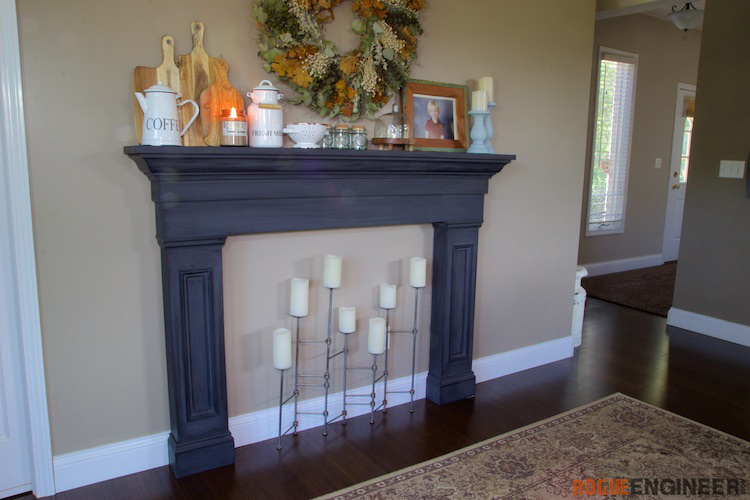
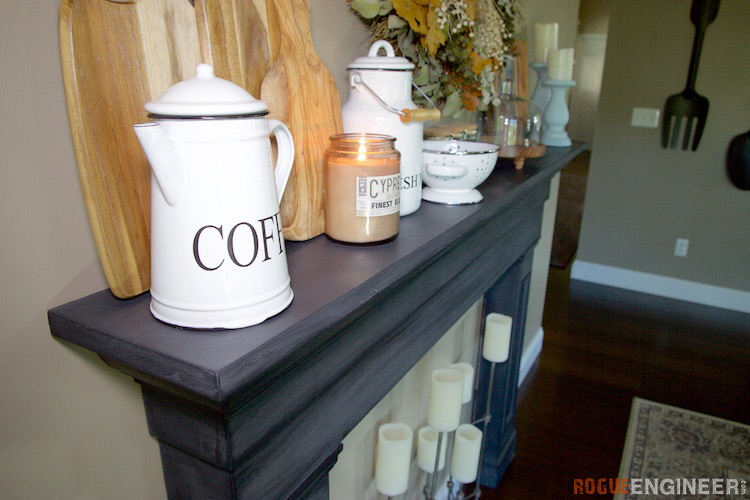
With the holidays coming up Jamie really wanted a mantel to doctorate and since our current fireplace didn’t have one we decided to build one. We built this faux fireplace surround out of one sheet of plywood, and it only cost us about $75 to build. Now we have an awesome faux fireplace to decorate for the holidays and add some charm to our dining room.
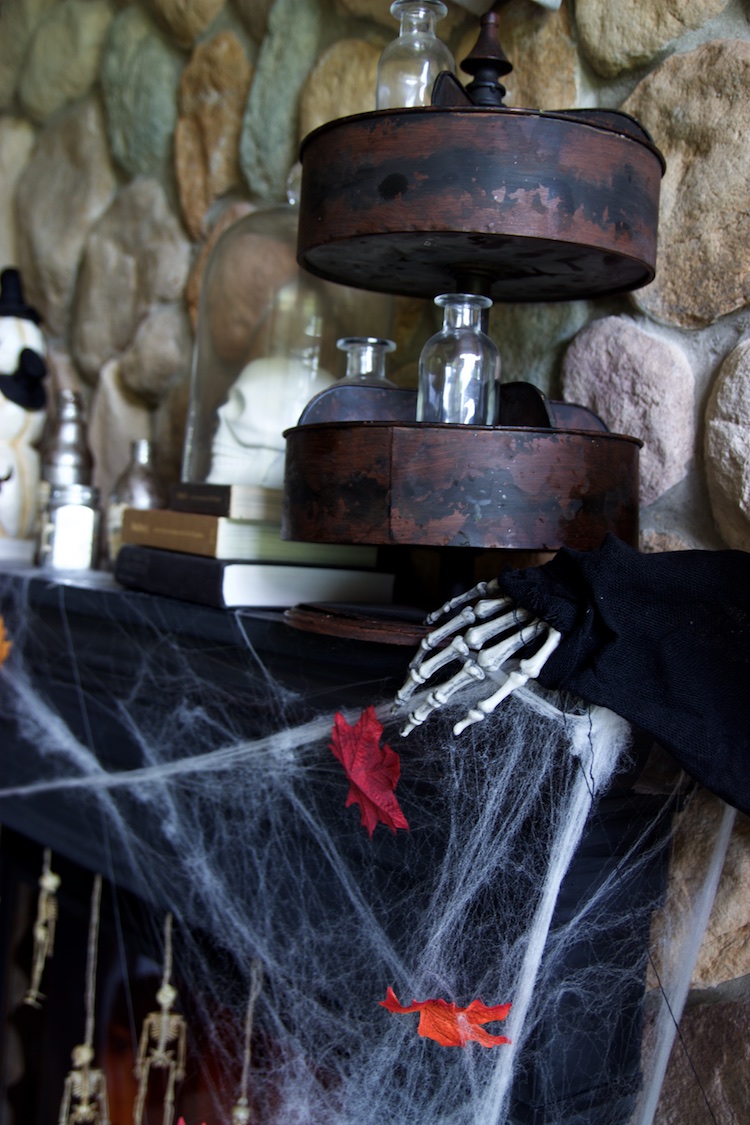
To see this faux fireplace mantel transform into a witches mantel for Halloween be sure to check it out on the Home Depot style challenge.

For sneak peeks of our upcoming projects be sure to follow me on Facebook and Instagram. Also, follow me on Pinterest to get tons of projects plans from all around the web!
Required Tools
Materials
- Qty 1 – 1/2″ x 24″ x 48″ Birch Plywood
- Qty 2 – 3/4″ x 1-1/4″ x 8′ Shoe Moulding
- 4′ – 5/8″ x 5-1/4″ Baseboard Trim
- 8′ – 5/8″ x 4-5/8″ Crown Moulding
- 4′ – 11/16″ x 1-5/8″ Shingle Moulding
- 1″ Brad Nails
- 1-1/4″ Brad Nails
- Wood Glue
- Finishing Supplies
Disclosure: The links provided in the “materials” and “required tools” sections are affiliate links. If you would like to support our site and help keep our content free come find out more about how we can make money with no extra cost to you.
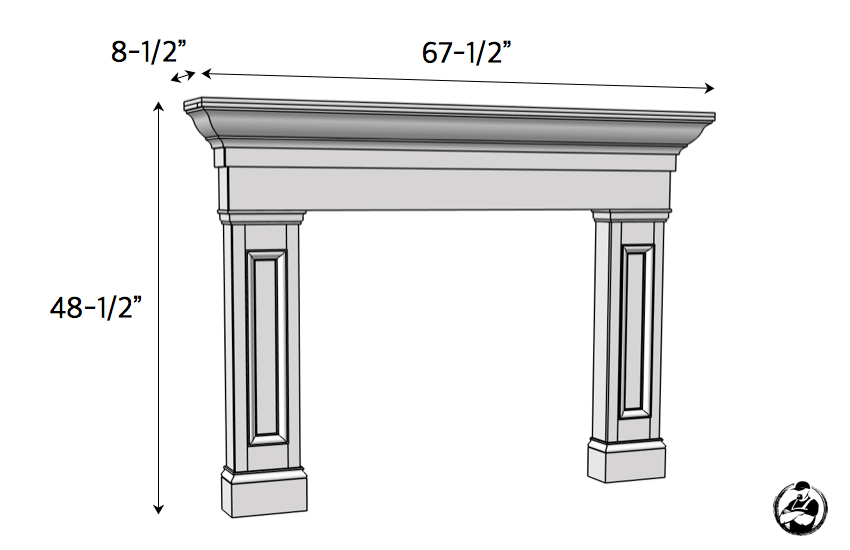
Dimensions
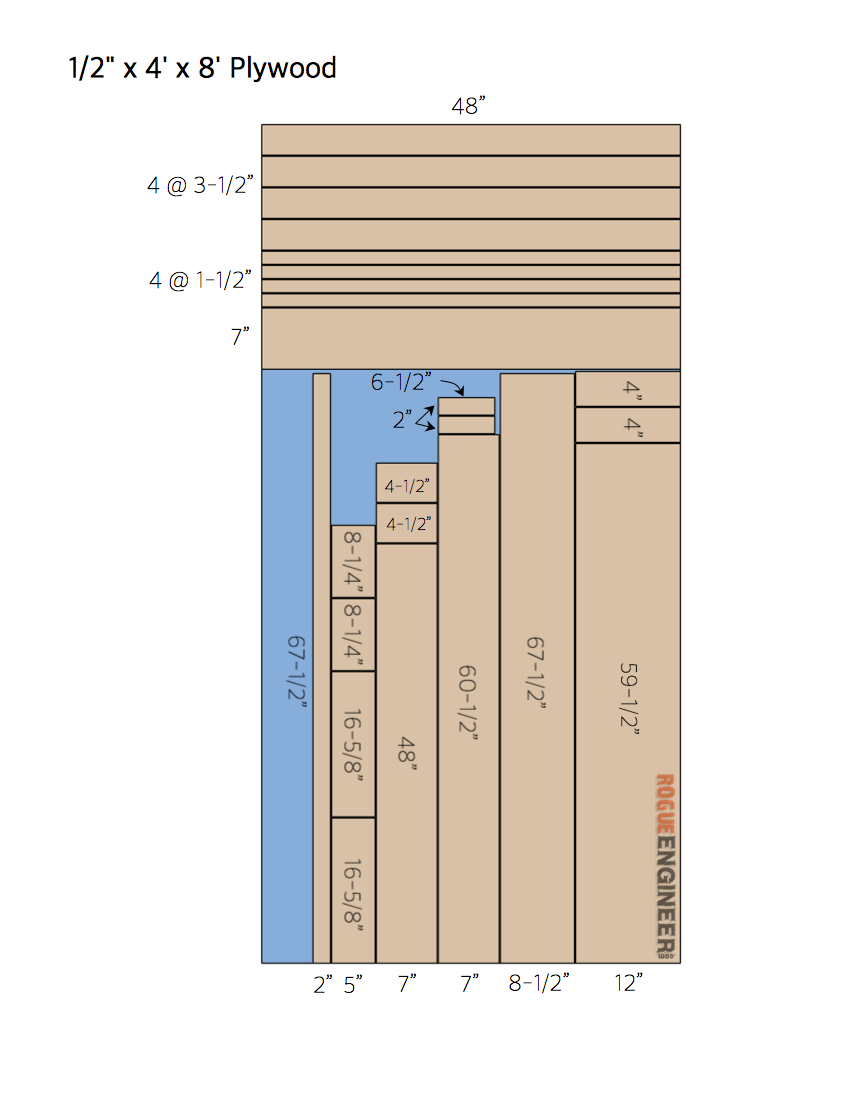
Cut List
How to Build a Faux Fireplace Mantel Surround
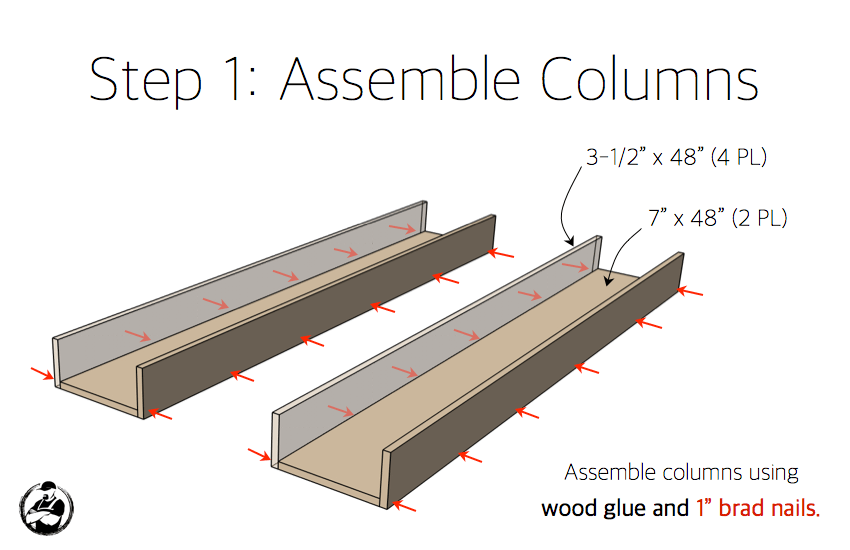
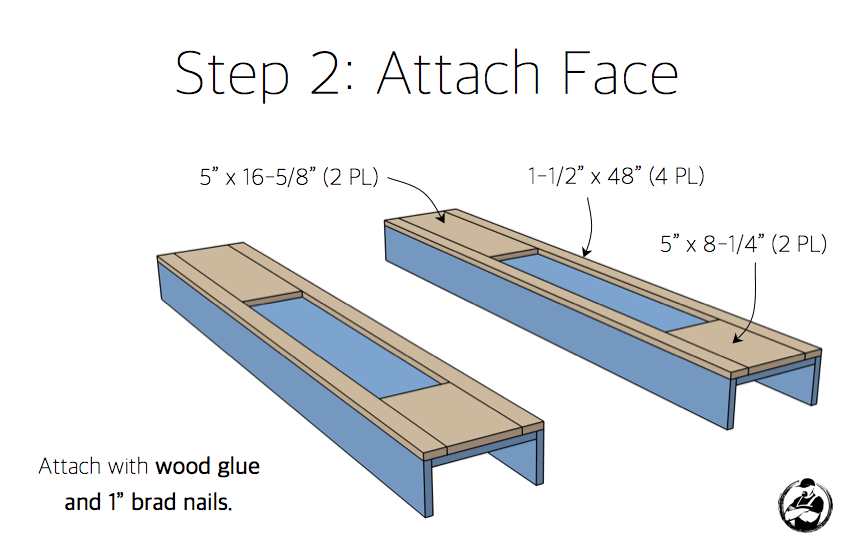
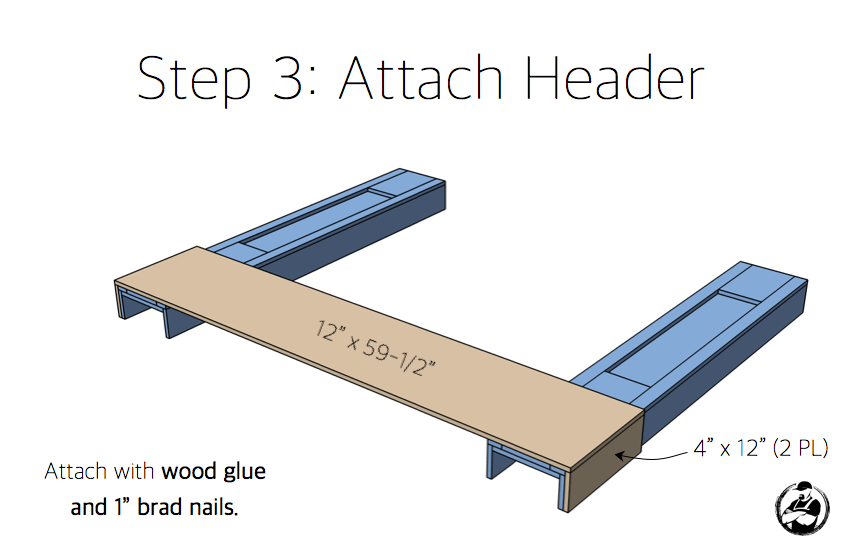
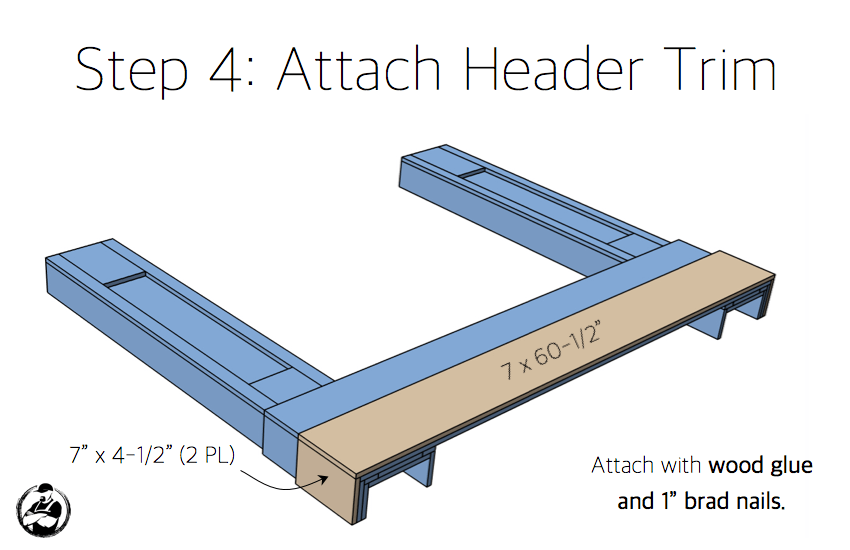
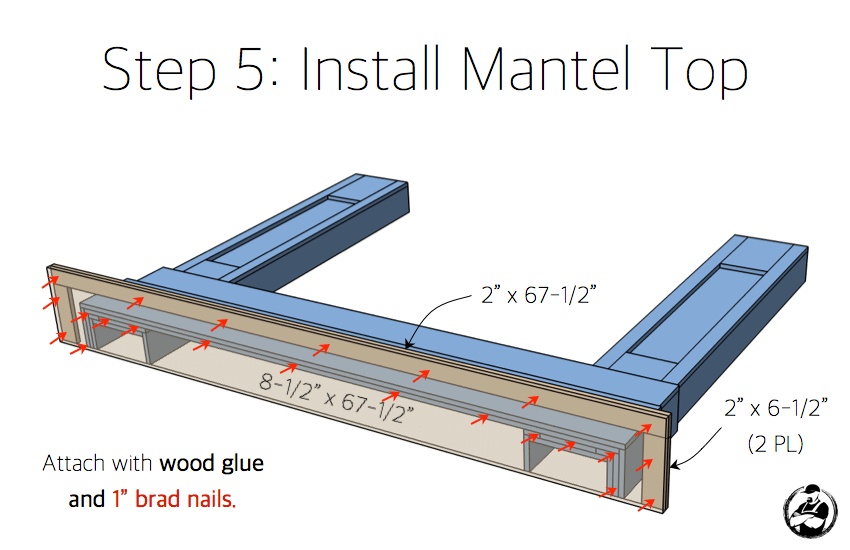
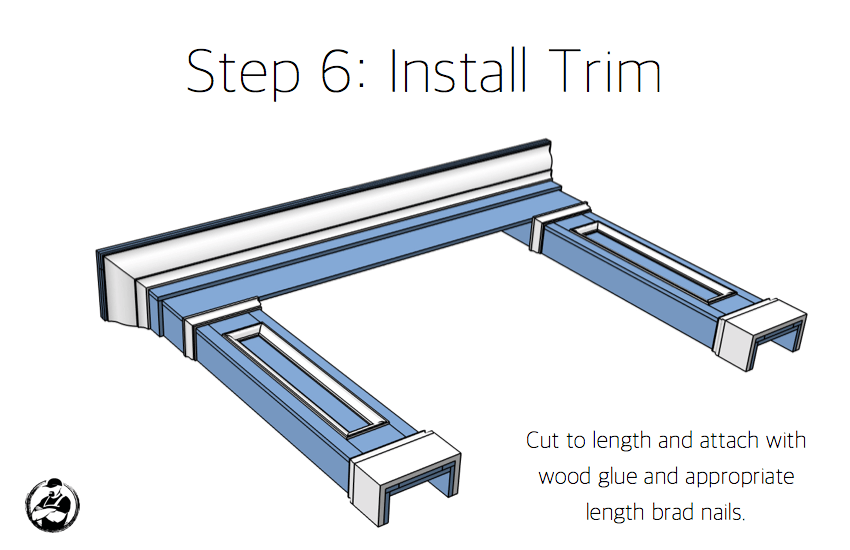
Finishing
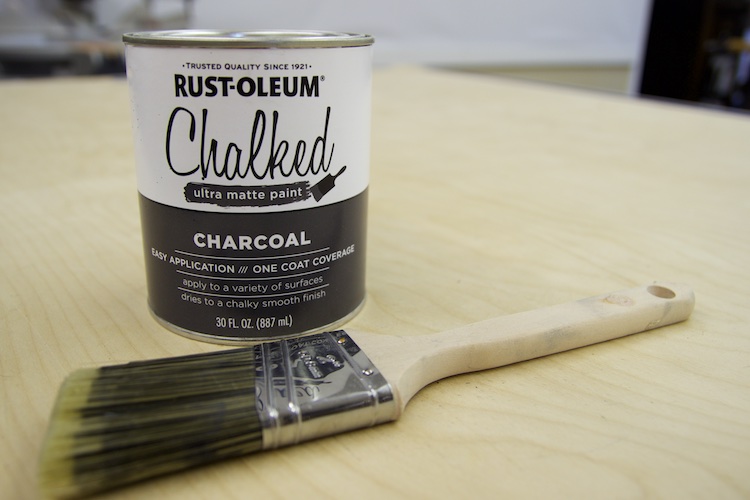
For the finish on this fireplace we went with one of Jamie’s favorites, Rust-Oleum’s Chalked Paint in charcoal. It took us two coats to get a nice even color but probably would have been good with a single coat if we had primed it first. It’s a smart idea to prime bare wood before painting but we didn’t have any on hand and were eager to see it with the Chalked paint on it. We hope you like the color as much as we do. To see a few of our furniture pieces in the charcoal color check out the Farmhouse Buffet, Industrial Bookcase, and Vision Board.
Questions? Comments?
As always, if you have any questions don’t hesitate to comment below and especially don’t forget to post pictures of your finished products in the comments! ENJOY!
What a great idea! We don’t have a fireplace in our home, and I am always struggling with how to decorate for the holidays. I would love to put this in our dining room!
I have a couple of questions:
1. Is this free standing or did you attach it to the wall? If so, how and how sturdy is it?
2. I see that it is off center on your wall. Does that bother you any? Mine would also be off center to line up with the table, but I wasn’t sure if it would bother me or not.
Thanks again for the great plans!
Thanks! To answer your questions, we attached this mantel to the wall using hooks on the back of the mantel along with picture wire and screws into the studs. It is very secure on the wall. And yes we decided to line the mantel up with the dining table and light fixture. We moved the table for the photo, but when the table is in place the mantel looks like thats is where is should be.
What changes would need to be made to use this plan as an actual fire place surround? I understand I would need to size appropriately for the fireplace I intend to surround, but what else may I be overlooking?
Great question Tim. The big thing you’d be adding is clearance to combustibles. With a real firebox, wood can’t sit right up against the opening: your local code and the fireplace’s manual will spec minimum distances for the mantel and side legs, and they get stricter the further the mantel sticks out. Typically you’d run a non-combustible facing (tile, stone, cement board) around the opening and keep the wood frame outside those clearances. The construction itself works the same as the plan, just size it around that buffer. Definitely check your local code and the manufacturer specs before cutting. Be safe and happy building.
Very cool! Nice work guys!
Thanks Matt. That sounds like an awesome idea.
This is fantastic! I love it! Where’d you get the candle holder?
Thanks Zoe! The candle holders are actually really old from Walmart. They were black but my wife spray painted them serenity blue using Rust-Oleums chalked paint.
I meant the large one one the floor? Sorry.
Hi, I just wanted to confirm that you long need one piece of plywood 1/2″ x 24″ x 48″ Birch Plywood, I only ask because then on your cut list the measurement is 1/2″ x4’x 8′? And is there option to have the instructions in metric?
Thank you
This is a fantastic DIY build! The plans are also very detailed. Thank you! I’m really impressed. Do you remember about how much you spent on just the wood materials?
Jamison and Jamie, thanks for the free plans and build video! Just finished mine in time for Christmas, and it really made a dull fireplace look great. I attached the before and after pic. Thanks again for your help!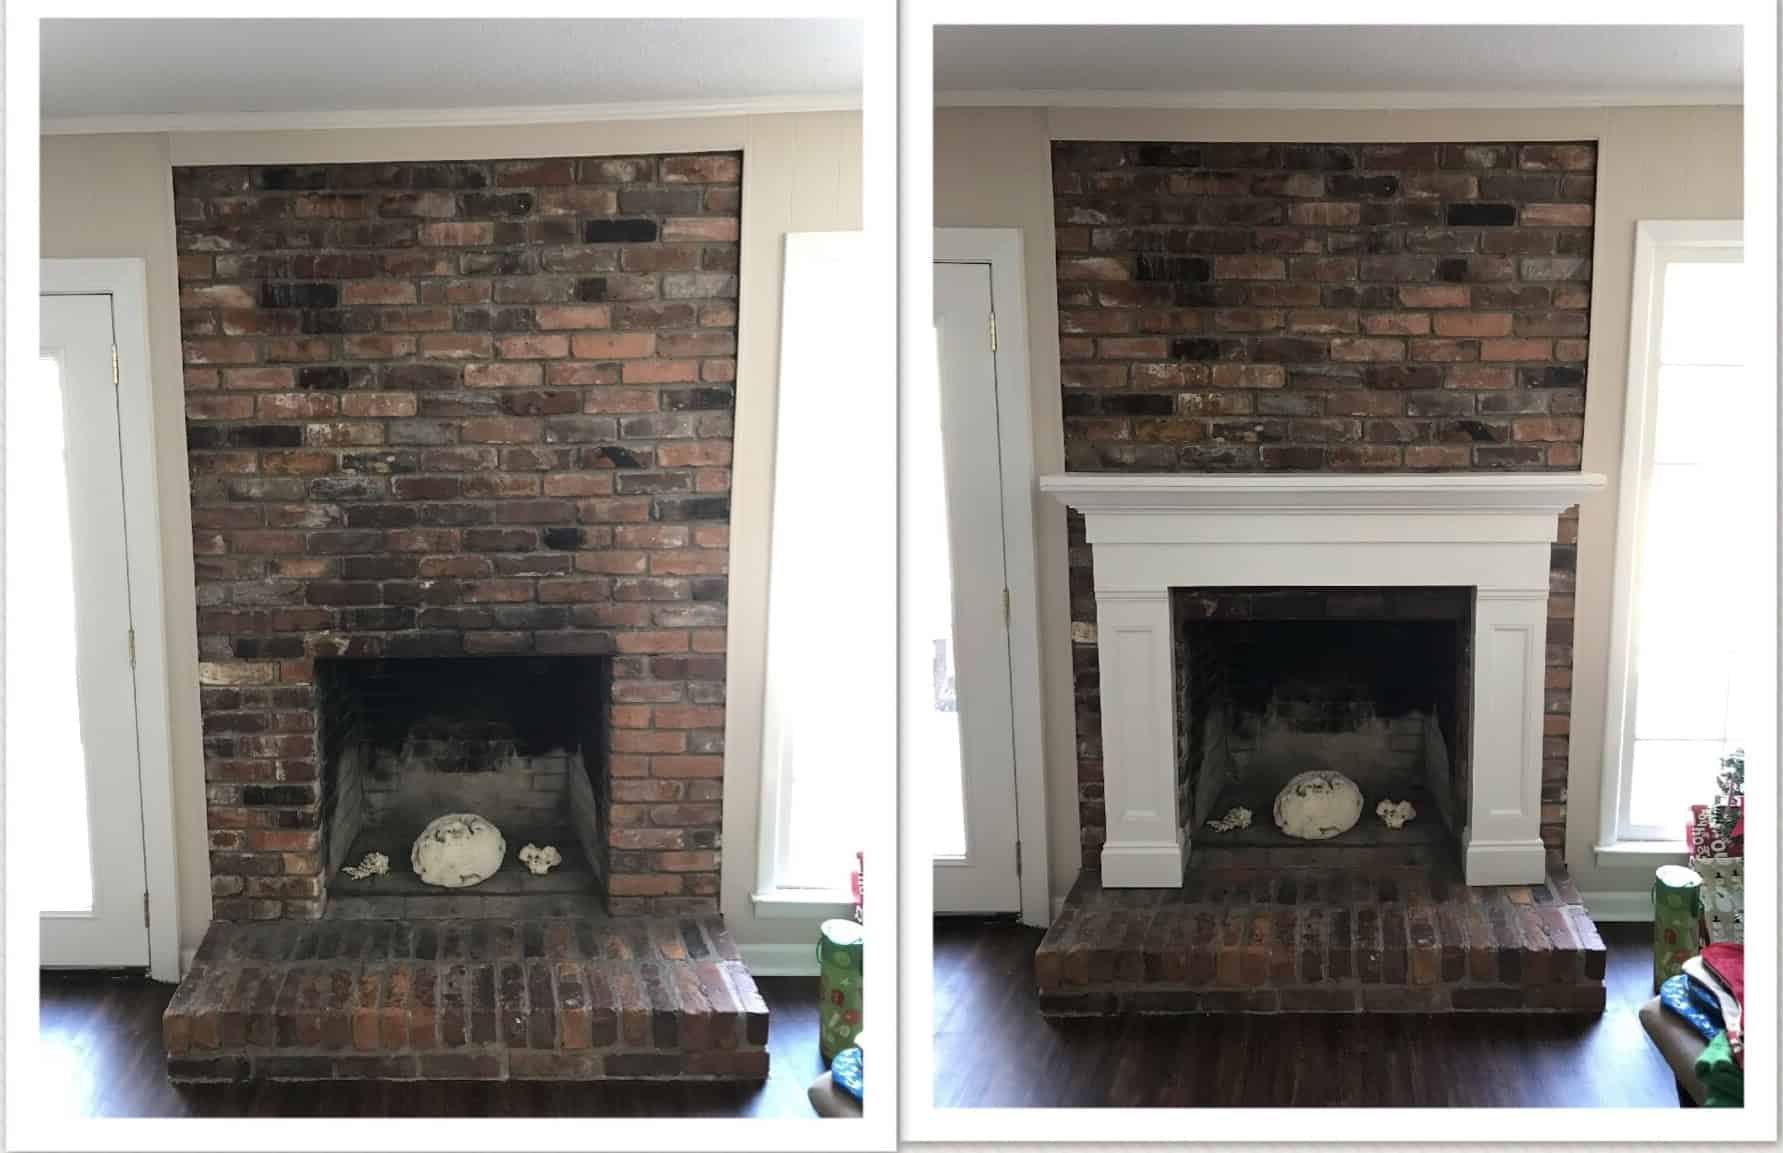
Very cool! Nice work guys! We don’t have a fireplace in our home, and I have been kicking around some ideas to build a wall mountable shelf / box which would conceal the sound bar attached to our TV. This certainly put a few other ideas in my head (faux fireplace mantel that houses the sound bar??) Thanks for sharing!
Hi, I just wanted to confirm that you only need one piece of plywood 1/2″ x 24″ x 48″ Birch Plywood, I only ask because then on your cut list the measurement is 1/2″ x4’x 8′? And is there option to have the instructions in metric?
Thank you
Hello!
Where did you get the candle holders at the bottom of the mantel? Those would be perfect for what I have!
Hello! We started this project over the weekend and we’ve gotten stuck at the crown molding part. What angles did you use to get them to line up?
He has a video on youtube.. I think he said a 45 degree angle. here’s the vid; https://youtu.be/q9QGQpU6clM
Your supply list says one sheet of 24×48 plywood, but the cut list says 48×96. Really curious how you built this for $75. Either you can magically enlarge things, or you spent more on a larger sheet of plywood.
My wife and I wanted to redo the cast stone around our fireplace and after much searching on YouTube we came across your design. The video and the printed instructions were exactly what we needed to make this project a go. This was our first woodworking project and you set us up to win.Here are some before/after pics.Can’t say thank you enough!https://uploads.disquscdn.c… https://uploads.disquscdn.c… https://uploads.disquscdn.c…