

DIY Sling Puck Game (Pucket Board) + Free Plans
The short version a sling puck game, also called a pucket game or fast sling puck, is a two player tabletop game. Each player slings pucks through a small opening in the center board with a bungee, and the first one to get every puck onto the other side wins. This one is 20″ x 16-1/2″, built from one 1×2, a 2′ x 2′ plywood panel and a 1-1/2″ dowel with glue and brad nails. It takes an afternoon and costs about $30. Documented by Jamison Rantz, November 2026.
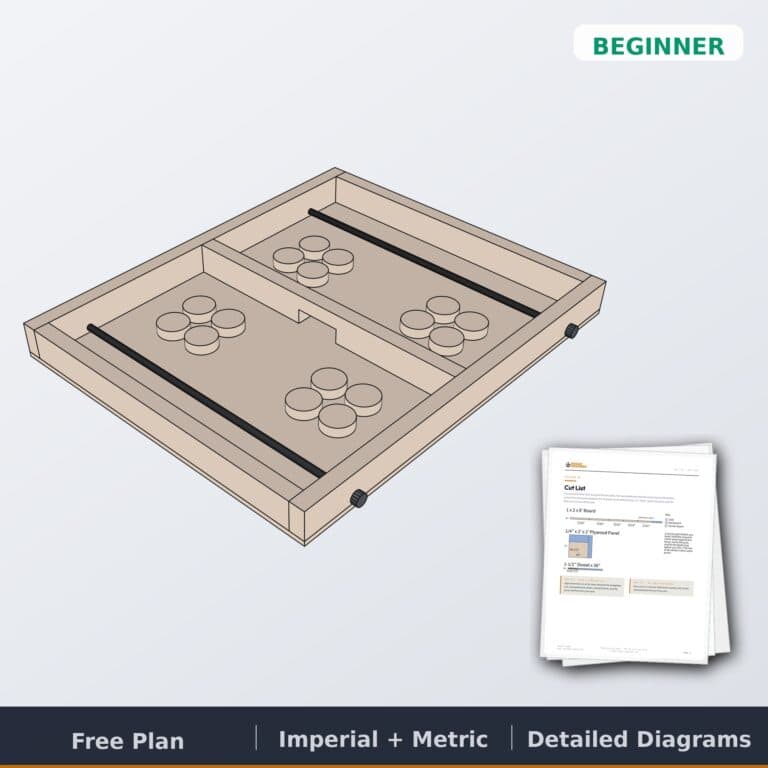
Get the free sling puck game plans
Everything below in one 7-page PDF: shopping list, cutting diagram, five illustrated steps, the game rules, an FAQ and troubleshooting. Imperial and metric.
We saw this game in a gift catalog a while back and wanted to build it ever since. It goes by a few names (sling puck, fast sling puck, pucket), but it all works the same way: a bungee at each end, a slot in the middle, and two people slinging pucks as fast as they can. I’m going to be honest here, this DIY sling puck game looks fun, but it’s even more fun in real life than you’d imagine. You can watch the whole build on YouTube.
It was a quick, cheap build, and it made a great Christmas gift. In 2016 mine came in under $15, and you could easily get carried away and make a really nice one out of oak or walnut. I’ve since rebuilt the pucket game plan from my original drawing as a free printable PDF, with a cutting diagram, five steps and the rules, so you can knock it out in an afternoon.
Sling Puck Game Size and Specs
| Spec | Sling puck game |
|---|---|
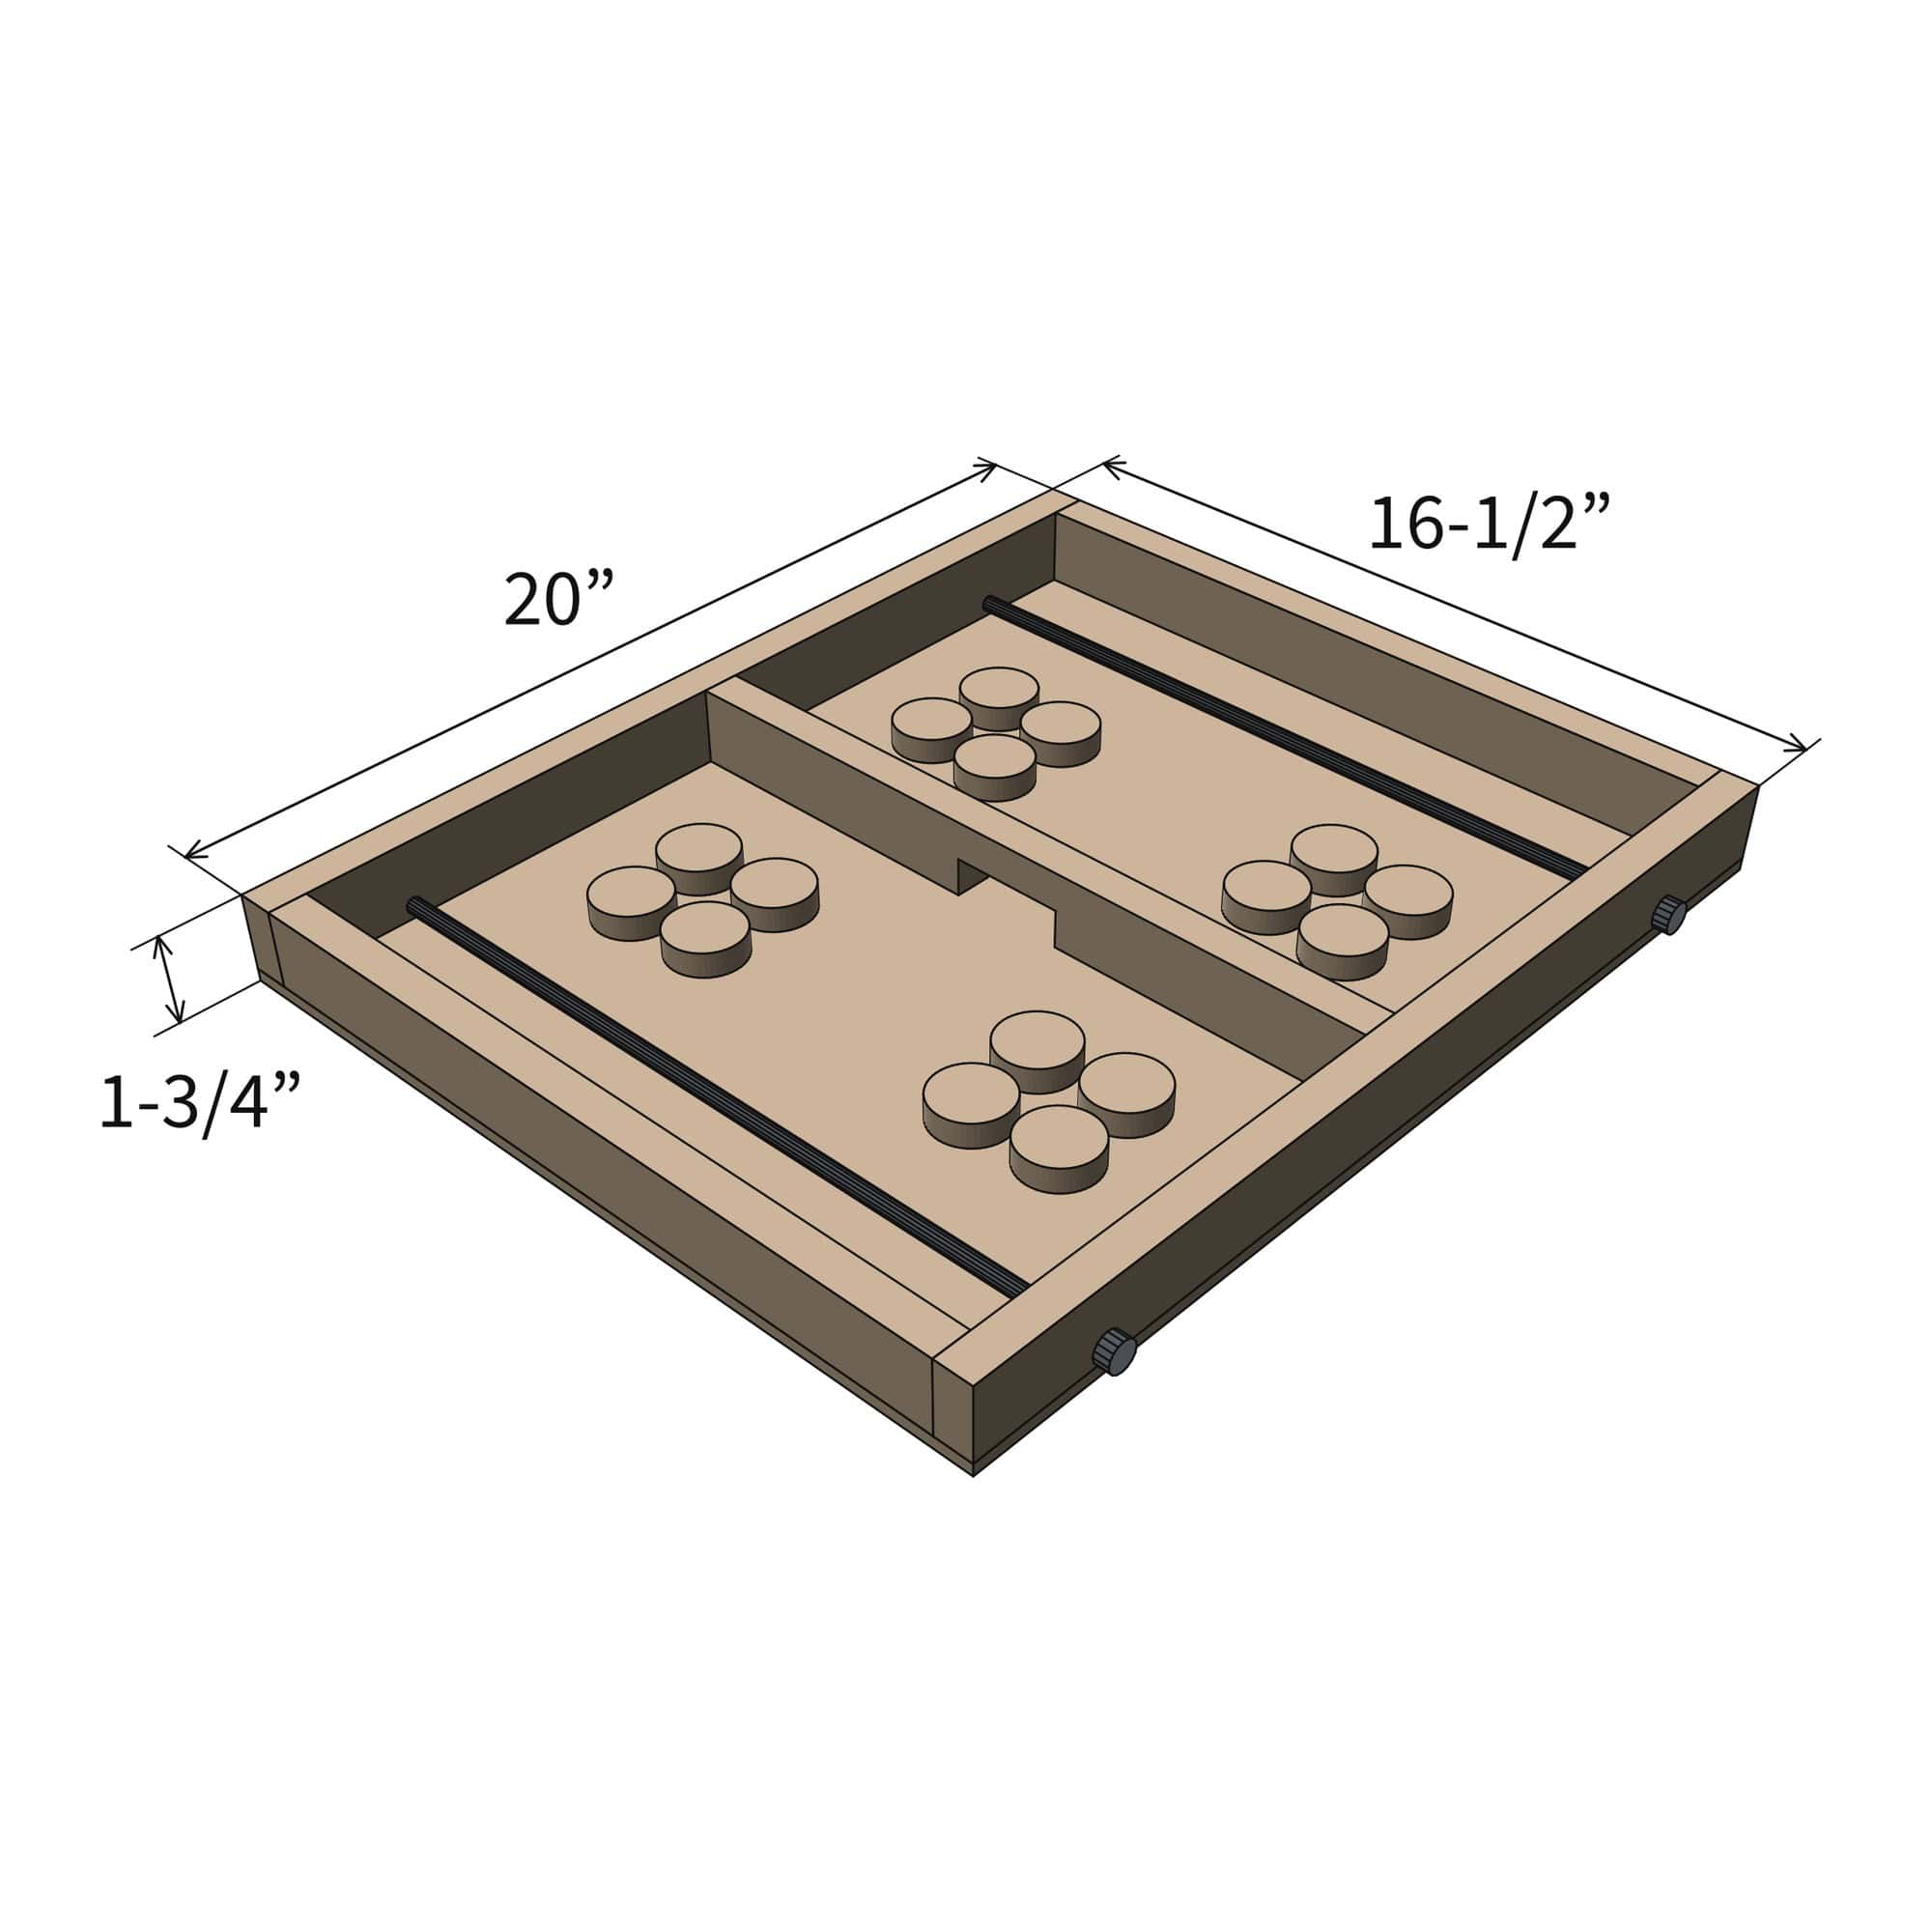
| Overall size | 20″ long x 16-1/2″ wide x 1-3/4″ tall |
| Opening | 2-1/4″ wide x 3/4″ tall, centered in the middle board |
| Pucks | 16, cut 1/2″ thick from a 1-1/2″ dowel |
| Bungees | Two 16″ pieces of a tie-down bungee, 2-3/4″ from each end |
| Players | 2 |
| Material | One 1x2x8, one 1/4″ x 2′ x 2′ plywood panel, one dowel |
| Time | An afternoon |
| Cost | About $30 |
| Skill | Beginner |
How to Play Sling Puck (Pucket Game Rules)
The rules fit on a sticky note, which is half the fun. Here’s how we play it:
- Set up: each player starts with eight pucks on their side of the board.
- Go: someone yells go and both players shoot at the same time. Pull a puck back against your bungee and let it fly through the opening.
- No pushing: you can’t push a puck forward with your hand. You can slide pucks out of the way on your side only.
- Fly-offs: if a puck flies off the board, the player who shot it has to go get it.
- Win: the first player to get all of their pucks onto the other side wins.
Play best two out of three. The loser of a round always wants a rematch anyway.
Free Printable Sling Puck Game Plans
The free sling puck game plans PDF has everything in one place: a shopping list, a cutting diagram, five illustrated steps, the game rules, an FAQ and troubleshooting. It’s 7 pages, and there’s an imperial and a metric edition. It’s free, just pick your edition at checkout.
Cut List
| Part | Qty | Size |
|---|---|---|
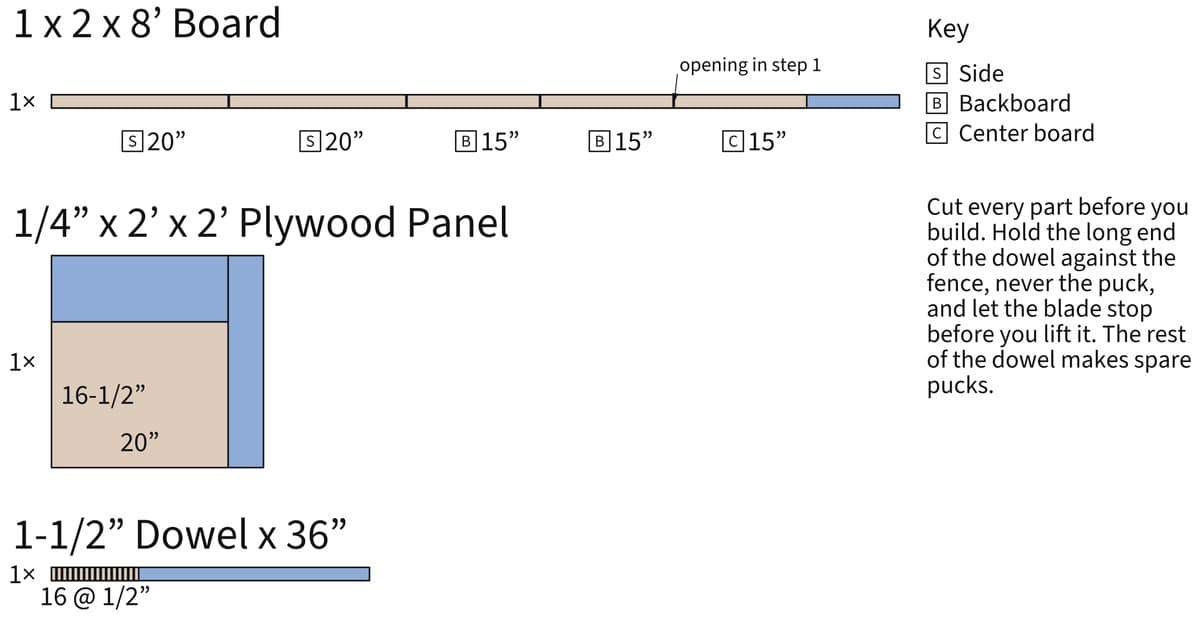
| Side | 2 | 1×2 x 20″ |
| Backboard | 2 | 1×2 x 15″ |
| Center board | 1 | 1×2 x 15″ |
| Bottom | 1 | 1/4″ plywood, 16-1/2″ x 20″ |
| Puck | 16 | 1-1/2″ dowel x 1/2″ |
| Bungee | 2 | 16″ |
Every cut is a crosscut, so you don’t need a table saw. Pick the straightest 1×2 in the pile; a bowed board makes a twisted frame, and the pucks will find every low spot.
For the pucks, clamp a stop block to the miter saw fence ahead of the blade so every puck comes out 1/2″ thick. Hold the long end of the dowel, never the puck, and let the blade stop before you lift it. The rest of the dowel makes spare pucks.
How to Build
Cut the Opening
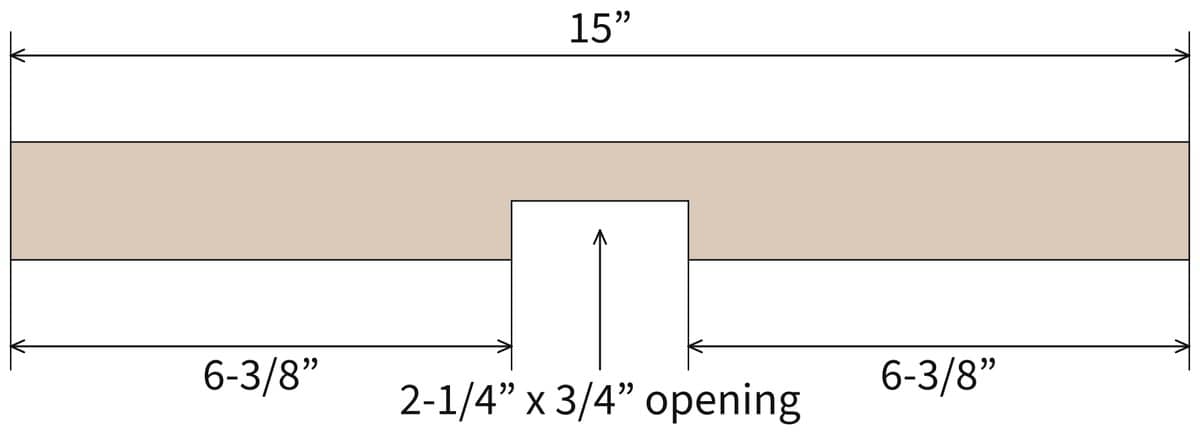
On the center board, mark 6-3/8″ in from each end along one edge, then a line 3/4″ up between the marks. That’s a 2-1/4″ opening, centered. Cut down both sides with a jigsaw or handsaw, then along the line, and sand the edges smooth.
Slide a puck through before you go any further. It should pass with room to spare, or the game stalls.
Build the Frame
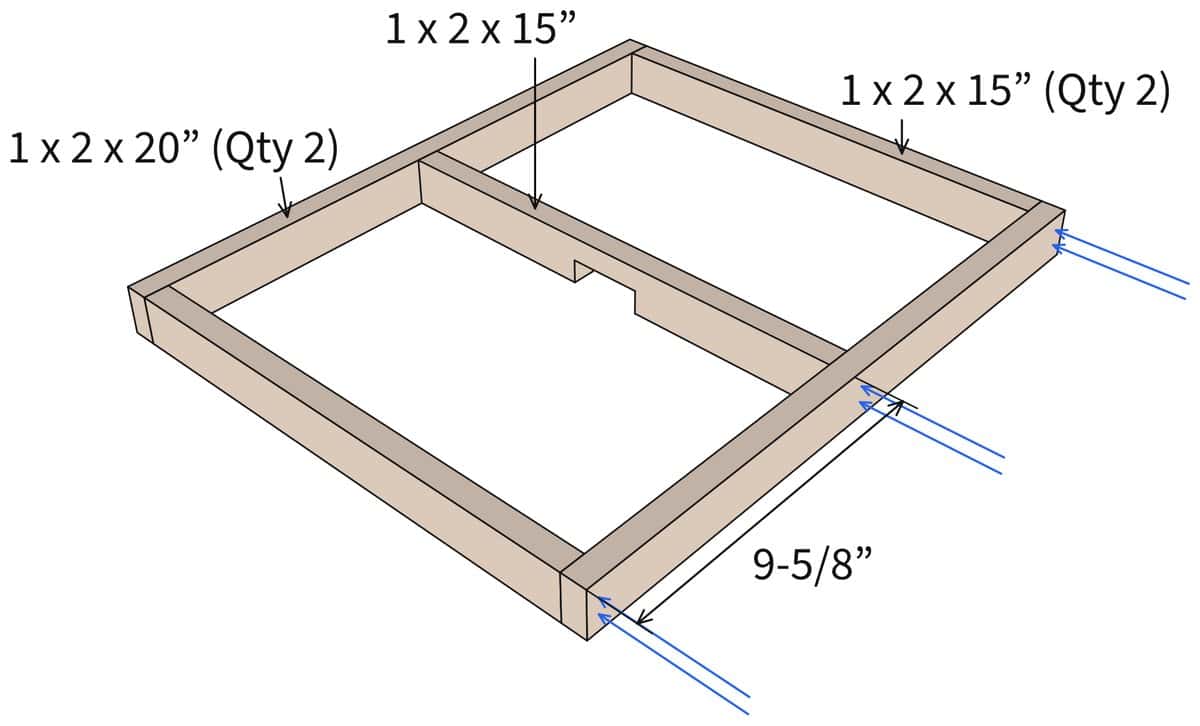
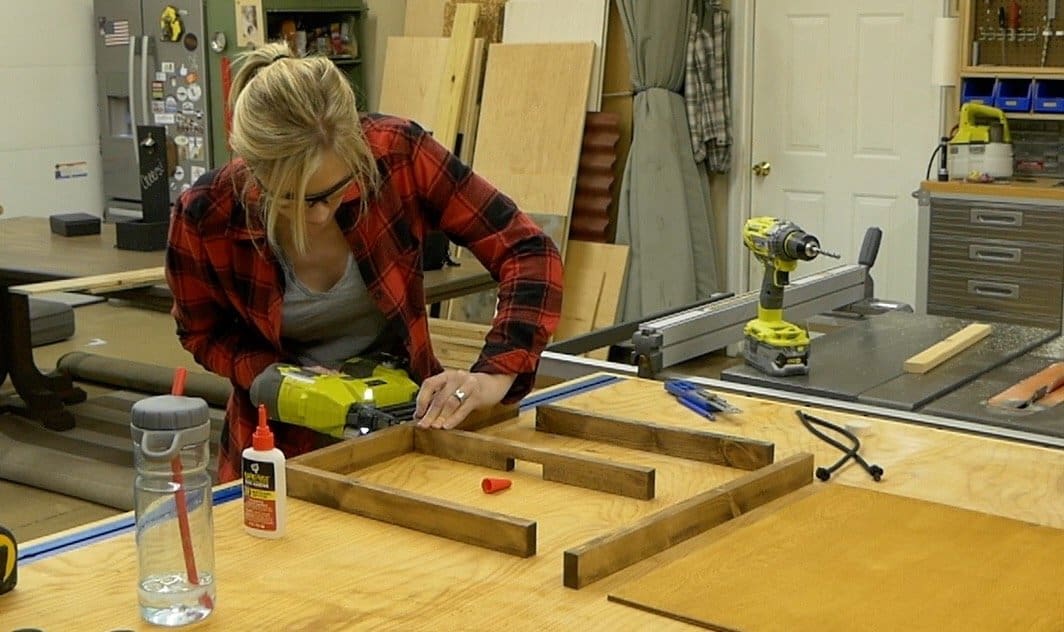
Stand the boards on edge. Glue the ends of the two backboards, set them between the 20″ sides flush at the ends, and drive two 1-1/4″ brad nails through the side into each one.
Mark 9-5/8″ in from the ends of both sides. Glue the center board in with its face on the marks and the opening down, and nail it the same way. Measure corner to corner both ways before the glue sets. Equal means square.
Attach the Bottom
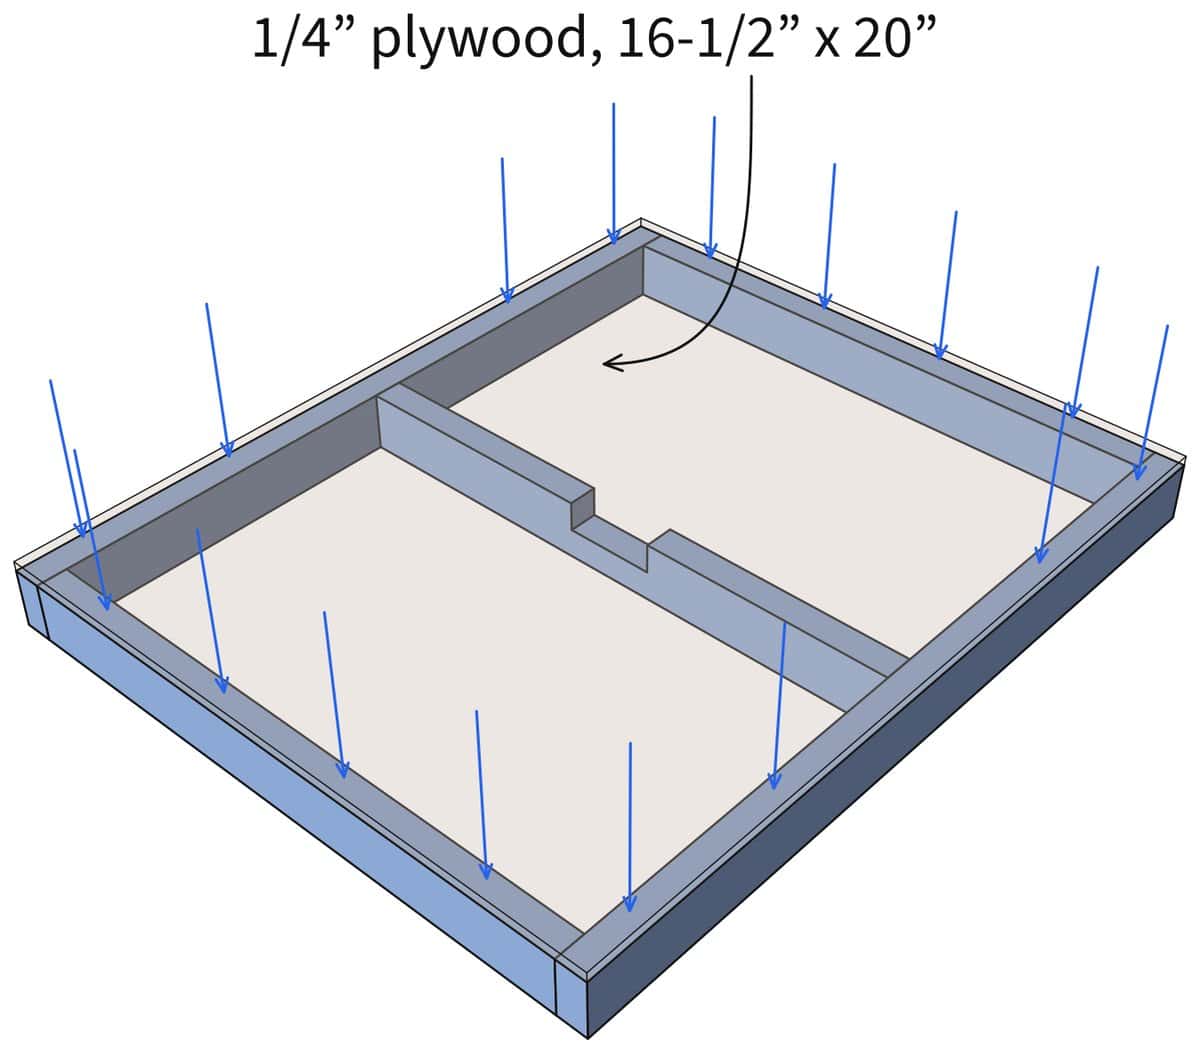
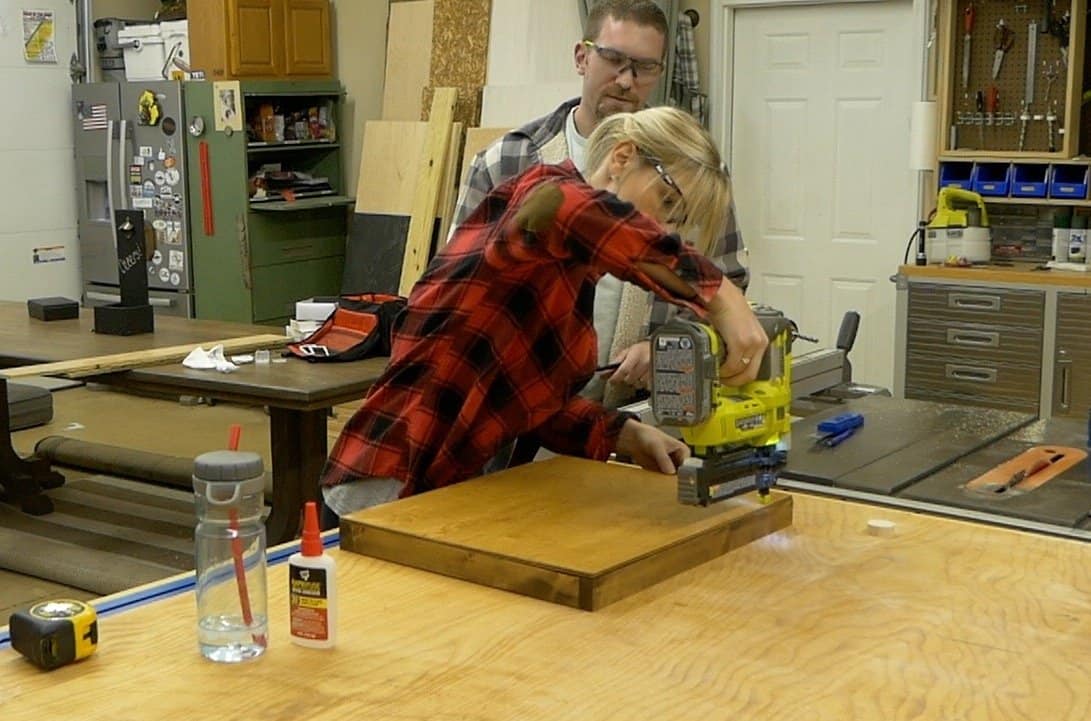
Flip the frame over and run a bead of glue along every edge, the center board included. Lay the 16-1/2″ x 20″ bottom on it and line up the corners; the bottom squares up the frame. Nail it down with 1-1/4″ brads, 4 along each side and backboard.
Wipe off any glue that squeezes out inside the frame now. A dried drip on the floor stops a puck dead.
Add the Bungees
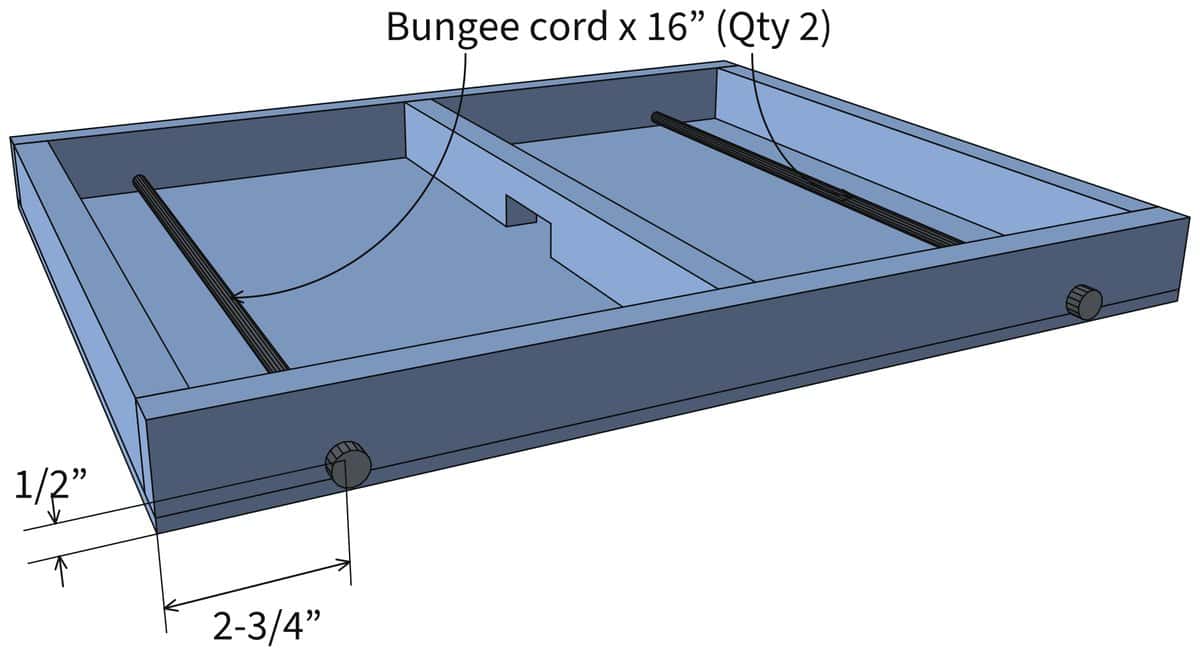
Mark both sides 2-3/4″ from each end and 1/2″ up from the bottom of the game, then drill a 3/8″ hole straight through each side at the marks.
Cut the hooks off a 40″ tie-down bungee and cut two 16″ pieces. Tie a knot in one end, thread the cord through both sides, pull it snug and tie a knot tight against the other side. Wrap the cut ends in tape so they don’t fray. If the pucks fall short, untie the second knot and pull a little more cord through.
Finish the Pucks
Sand the pucks smooth and ease their edges so they slide and don’t chip. Sand the inside of the game, then stain or finish the frame and the pucks. Leave the floor bare or give it a coat of paste wax; a slick floor makes a fast game.
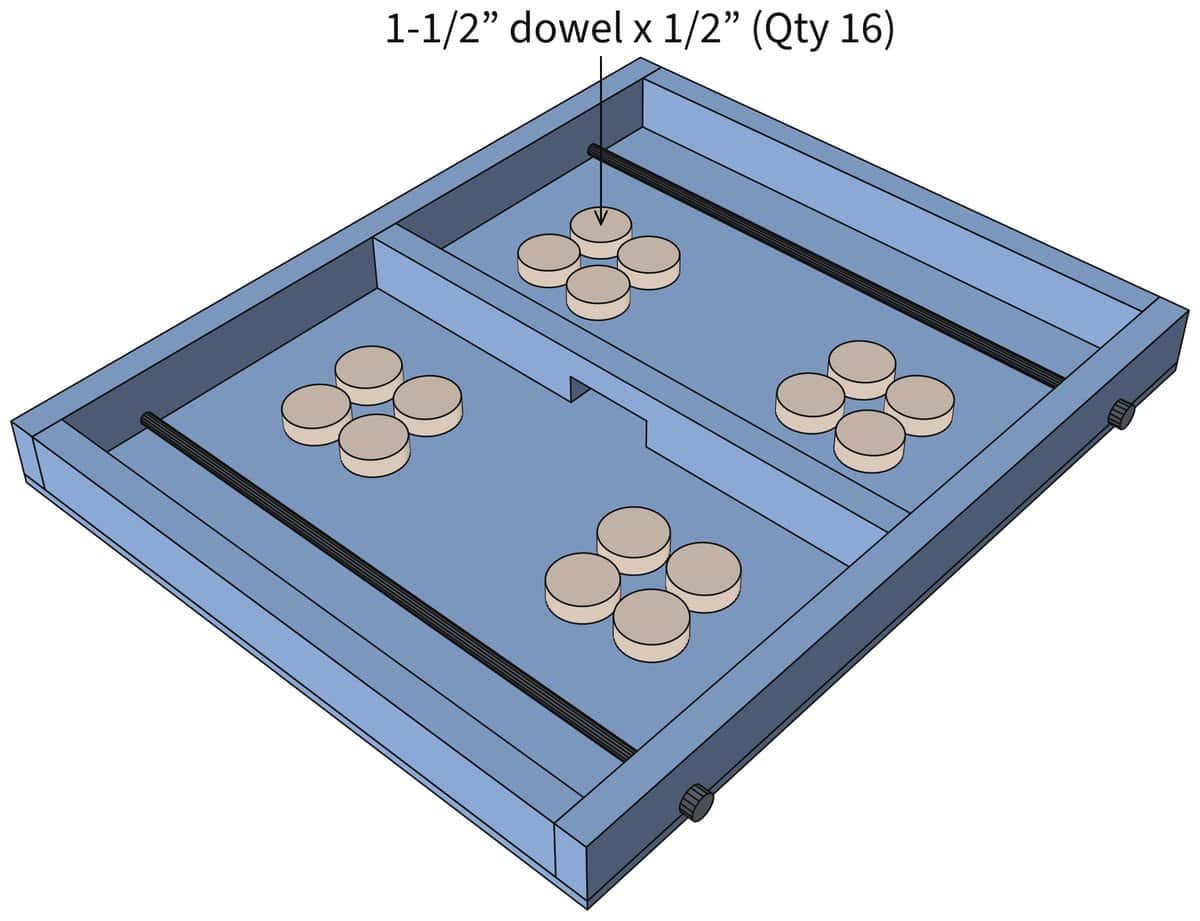
Set eight pucks on each side and play.
Final Result
We stained the pucks darker than the frame so they stand out, and left the floor slick. This pucket game was a quick and easy build, it cost next to nothing, and it’s been a hit every time it comes out. If you’re looking for a homemade Christmas gift for the kids (or for yourself), this is a good one. Build two and keep one, because there will be a rematch.


FAQ
What are the rules of sling puck?
Each player starts with eight pucks. On go, both players sling pucks through the opening with their bungee at the same time. No pushing pucks forward with your hand, and you fetch your own fly-offs. The first player to get all their pucks onto the other side wins.
How big is a sling puck board?
This one is 20″ long, 16-1/2″ wide and 1-3/4″ tall, with a 2-1/4″ x 3/4″ opening in the center board. That’s about the size of the store-bought games, and it fits on any kitchen table.
Is sling puck the same as a pucket game?
Yes. Pucket, Fast Sling Puck, Slingpuck and “speed pucks” are all names for the same game: a board split by a center wall with a small opening, a bungee at each end, and pucks you sling through. These plans build that game.
What kind of bungee do you use?
A plain tie-down bungee with hooks, the kind any home center sells. A 40″ one gives you both 16″ pieces. Most are about 5/16″ thick, which threads through a 3/8″ hole. If yours is fatter, drill the holes to match.
Do I need a table saw?
No. Every cut is a crosscut, so a miter saw or a handsaw and miter box does all of it, and a jigsaw or handsaw cuts the opening. Most home centers will cut the plywood panel for you.
How do I make the pucks slide faster?
Sand off any dried glue on the floor and give it a coat of paste wax. Ease the edges of the pucks and the opening with sandpaper so nothing catches.
Can I use a different size dowel for the pucks?
Yes, as long as the opening stays 1-1/4 to 1-1/2 times the puck’s width. With a 1-1/2″ dowel, the 2-1/4″ opening is right.
Your Move
Download the free sling puck game plans, grab one 1×2 and a dowel, and you’ll be playing by dinner. If the family wants another game, the tabletop ring toss game is the next build (same afternoon, same scraps), and the shuffleboard table is the big version of a sliding game. Post a picture of your finished game in the comments. I love seeing them.
Be safe and happy building, Jamison
please help, i can’t get the bungees tied. did you use some sort of clip?
Pull/stretch the bungee out through the hole and tie a “figure eight” knot. Check Google for directions if you don’t know how.
What is diameter of the bungee? Do you think 3/16 inch would work?
Jamison, want to build this with my grandsons. One question: What is the purpose of the bungee? Also, do you use one puck as a shooter?
Checked Google and discovered that the bungee is the shooter. Now it makes sense.
Hi, I want to build a set but I’m confused. Why is the total width of the game 16 -1/2 inches, when the backboard is 15 inches long and the sides are 1 inch thick? The bottom is also 16-1/2 inches – what am I missing? Where does the remaining half an inch go?
1×2 is actually 3/4″ x 1-1/2″
hello, I came across this game on pinterest and then this DIY. I am concerned about the original creator of this great game. isn’t this copying ? I am not trying to be negative but we really need to encourage creators and entrepreneurs and little startups. Apologies if this has been addressed already.
Lol. I can guarantee you, 3/4 of ppl who go on pinterest, copy projects. Smh
“As we benefit from the inventions of others, we should be glad to share our own… freely and gladly.” ~ Benjamin Franklinhttps://playetgames.com/ori…
Another winner set of plans, Jamison! Building this game for our grown kids for Christmas. My wife and I tested out the one I made for us… Things got intense 😉 Great job!
https://uploads.disquscdn.c… https://uploads.disquscdn.c…I saw these being advertised and thought they would be fun to create. Your plans made it really simple. I made a few tweaks: 3/4″ thick base board to make it heavier on the bottom; smaller pucks (1.25″) and opening (2″); added a matte varnish to the entire surface and pucks; and, rubber feet to prevent it from sliding on the tabletop. Thanks a bunch!
That looks awesome! Thanks for sharing!
What tools do you use to create the center opening?