

Shuffleboard Table
Quick answer: This DIY shuffleboard table is a full 14-footer built for $800–1k — a fraction of retail — using two 8-ft butcher block countertops as the playing surface, a 2x lumber frame with leveling feet, steel-tube climate adjusters to keep the top true, and an optional epoxy finish. About a week of evenings, intermediate skill. Free tutorial below; the printable plans put it all in one PDF. Designed, built, and documented by Jamison Rantz.
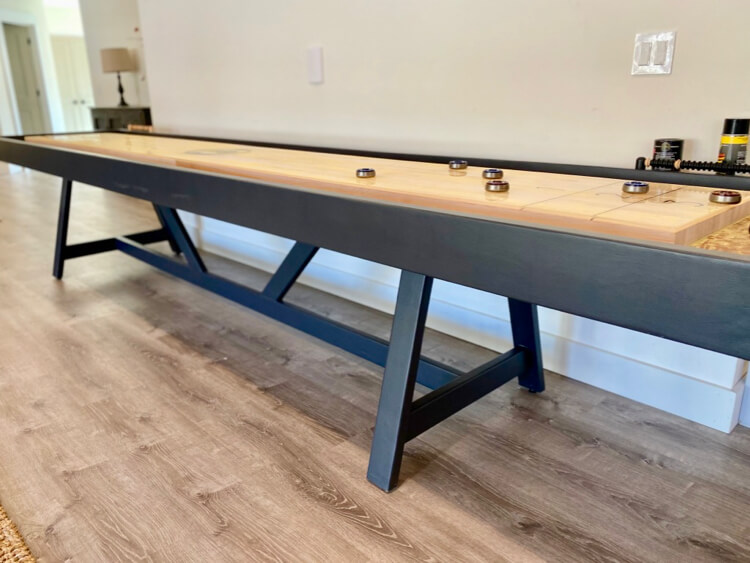
This project has been on my to-do list since we built our house. It’s something I have played in bars and always wanted in my home. Shuffleboard is a great game because the skill level of most players is not that far apart — at a gathering, a newcomer and someone who’s played for years can still compete.
The hardest task is the top. Pre-made shuffleboard tops get really expensive, but the butcher block countertops sold at Home Depot turned out to be the nicest, most affordable option. Want cheaper still? A few layers of plywood with oak flooring laid on top and sides works too.
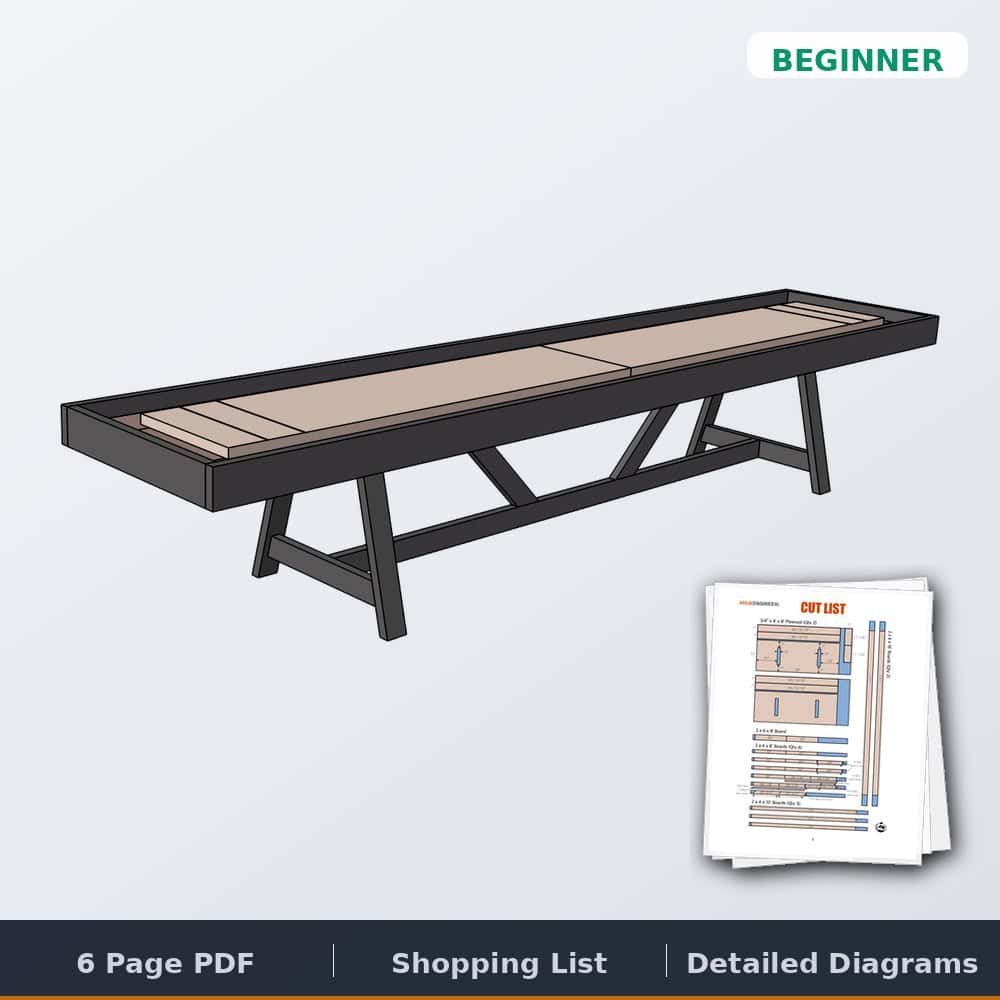
Tools & materials
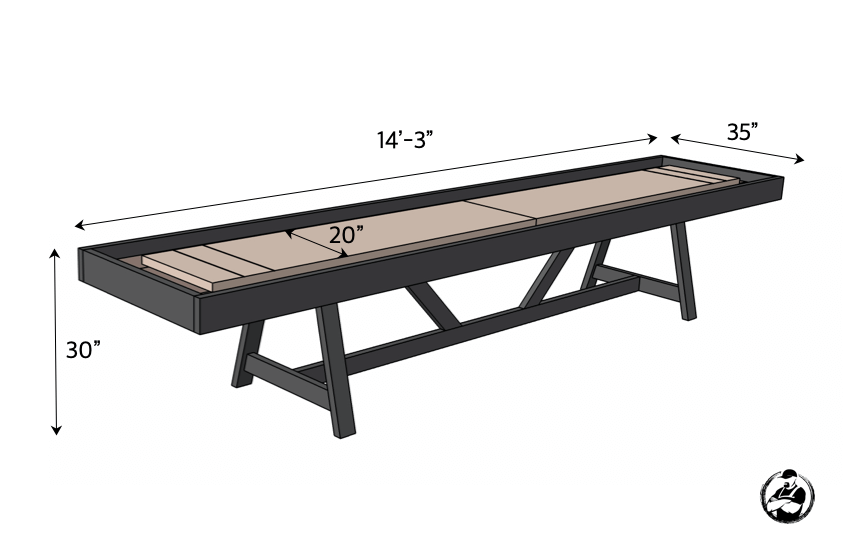
Dimensions
How to build a shuffleboard table
These plans will walk you through the process of building a 14 foot shuffleboard table for under $1k and using materials found at your local Home Depot.
Total Time: 5 days
Cut List

Leg Assembly
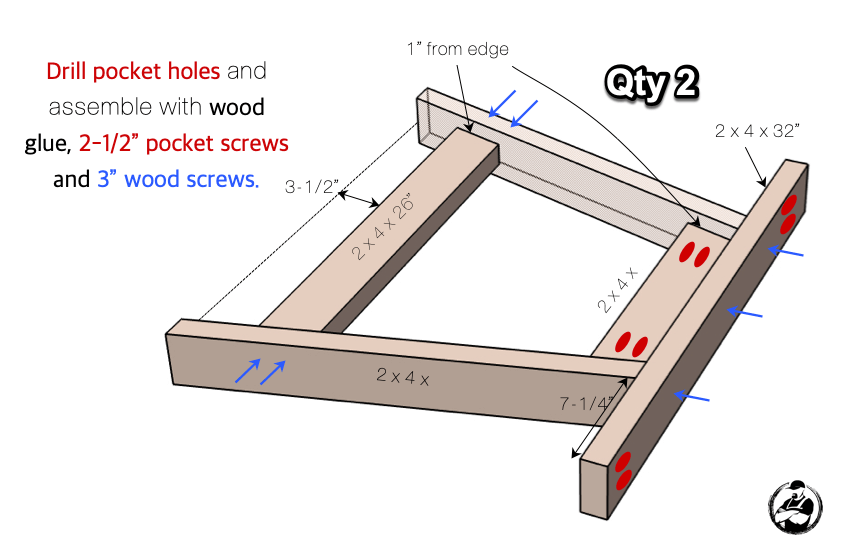
Frame Assembly
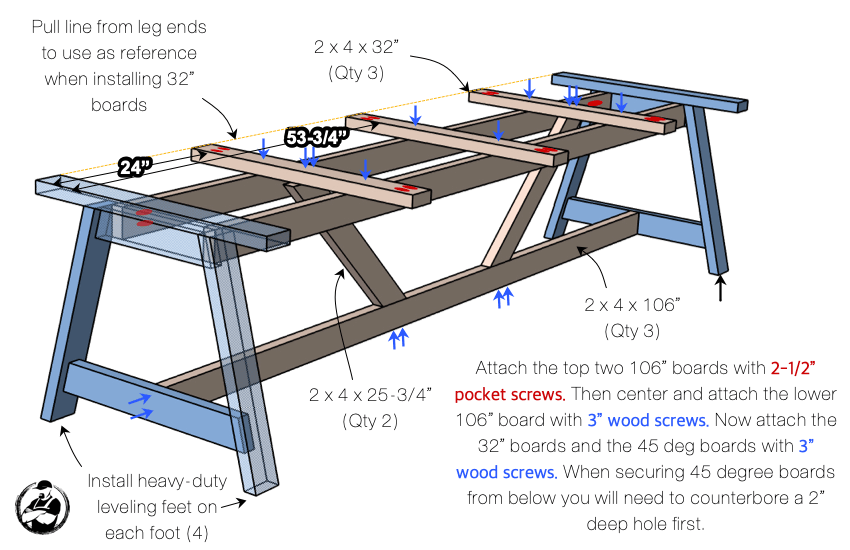
Frame Assembly (Cont.)

Frame Assembly (Cont.)
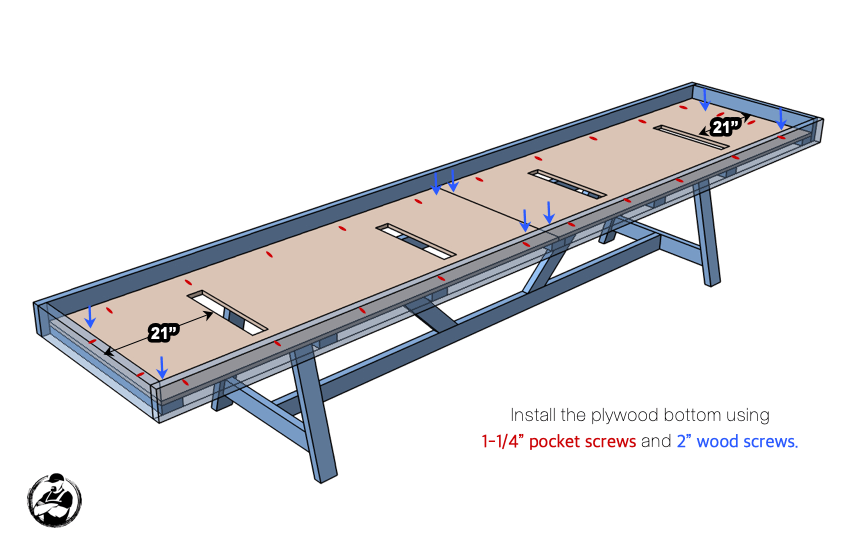
The Gutter
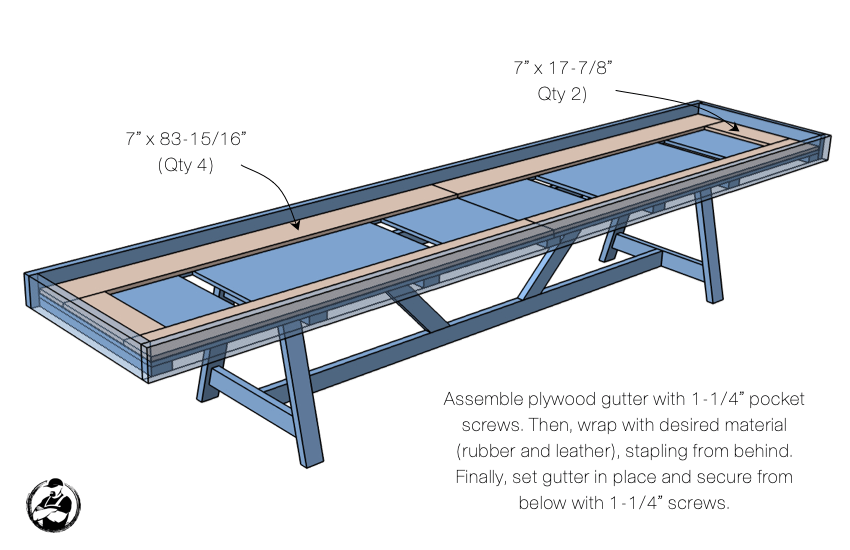
Assembling the Top

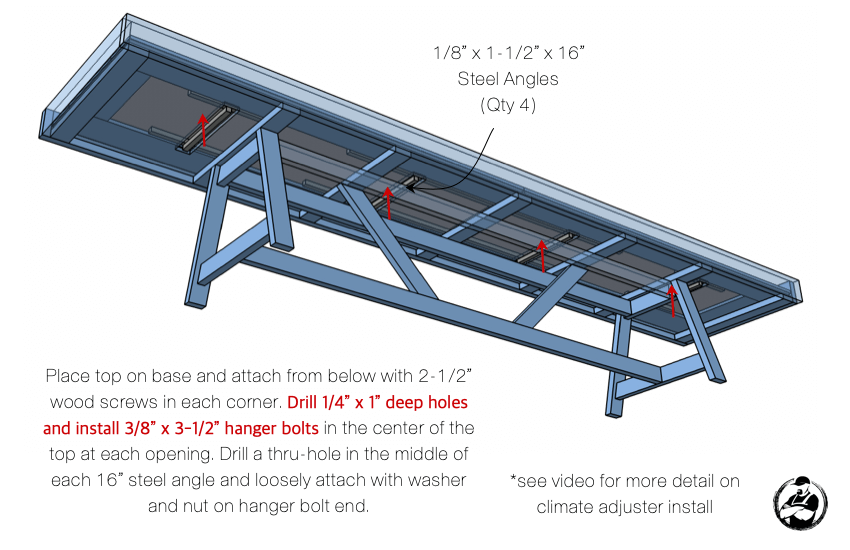
Installing the Top and Climate Adjusters
Finishing the Top

Note: We poured our epoxy top from the center and let it flow out. This resulted in a slightly convex surface (opposite of what we want). While we corrected most of it with the adjusters, the sides of the board still fall off a little bit. If you choose epoxy, I would highly recommend only using 2 gallons and start by pouring or moving the epoxy to the sides and allowing to settle in the middle to help create that concave surface.
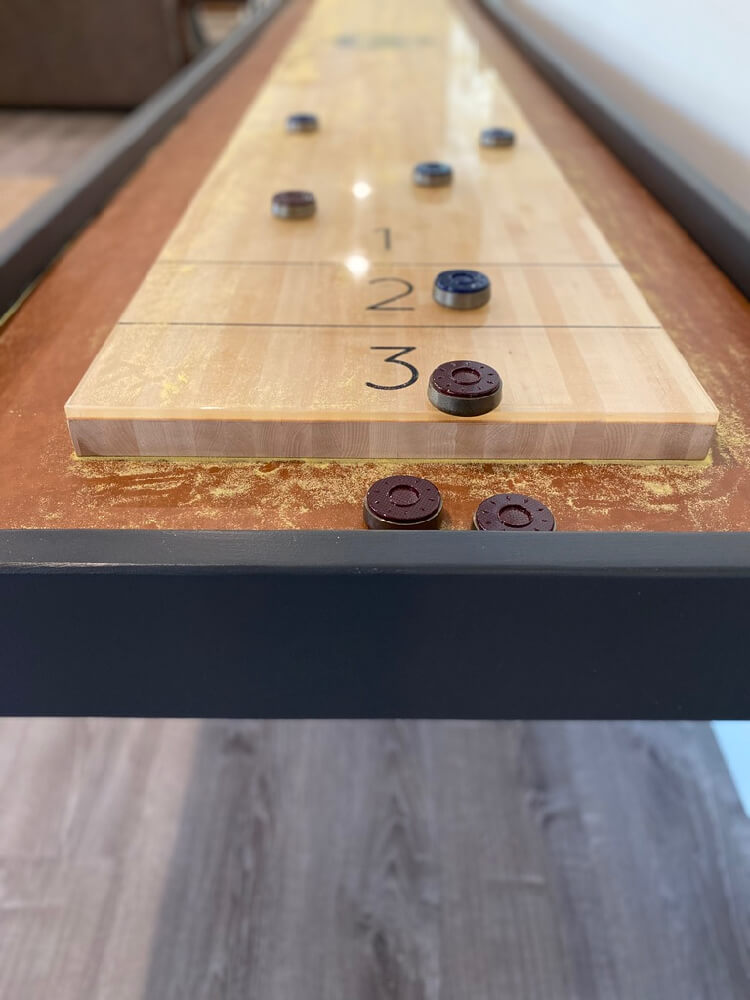
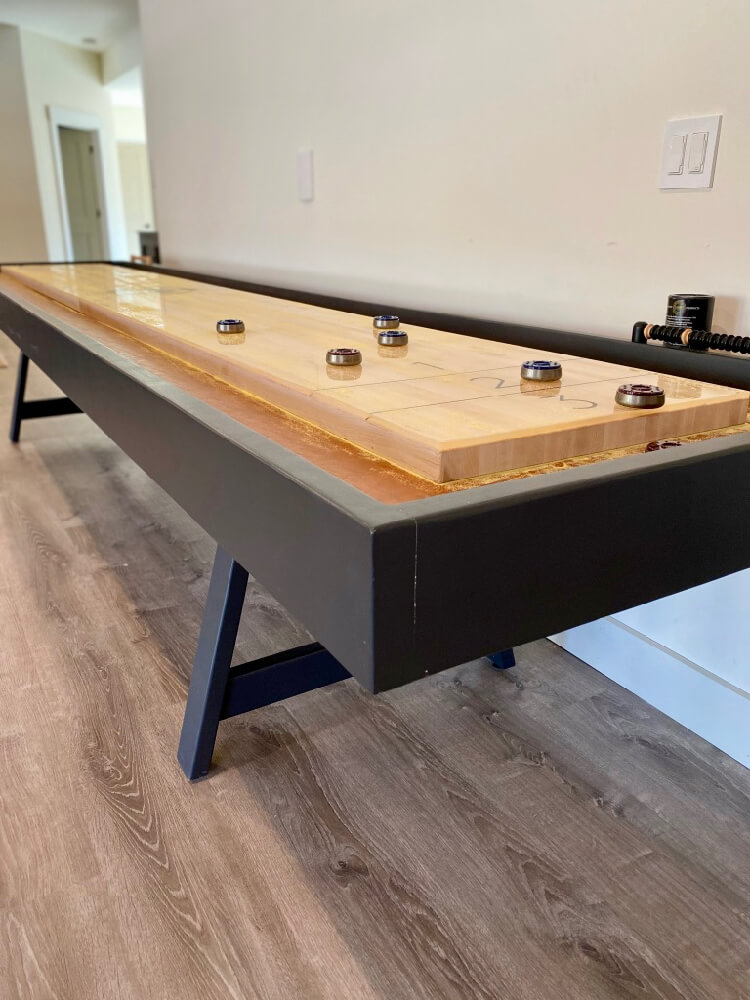
The finished table
Shuffleboard table questions, answered
How long should a shuffleboard table be?
Regulation is 22 feet, but very few homes fit that — this build is 14 feet, which plays great and fits a normal basement or garage wall. Whatever length you choose, keep the 20″-ish playing surface width and leave a few feet of throwing room at each end.
What is the playing surface made of?
Two 8-ft butcher block countertops from Home Depot, seamed and finished. Purpose-made shuffleboard tops cost more than this entire build; the budget alternative is layered plywood topped with oak flooring.
What are the climate adjusters for?
Steel tubes bolted under the top that let you dial in a slightly concave surface — the shape that keeps pucks funneling toward the center — and re-true the board as humidity swings with the seasons.
Should I finish the top with epoxy?
It looks incredible but learn from our pour: use only ~2 gallons and pour toward the SIDES, letting it settle toward the middle. We poured from the center, ended up slightly convex (the wrong direction), and spent time on the adjusters correcting it. Traditional shuffleboard finish is also fine.
Build out the game room
Questions? Comments?
If you have any questions, drop them in the comments below — and when your build is done, post a picture. That’s the good part.
So cool to see this budget-friendly approach! I JUST built a very similar table using Home Depot’s 12′ butcher block, and about 2 gallons of epoxy. SO many articles spend way too much time focused on the side rails and supports when that thick butcher block actually offers quite a bit of structural support. One of my success keys was that I poured the top when the table was in my desired play location: that way, it self-leveled. For the point value numerals, I used a home vinyl cutter. Link below is to my facebook post.
Photo/video of the build: https://www.facebook.com/share/v/1Dpmc5e6ri/
This is great info, thanks for sharing it. Pouring the top in its final spot so it self levels is a smart call. And you’re right that a thick butcher block carries a lot more structure than people give it credit for. The vinyl cutter for the numerals is a nice touch too.