Entertainment Console
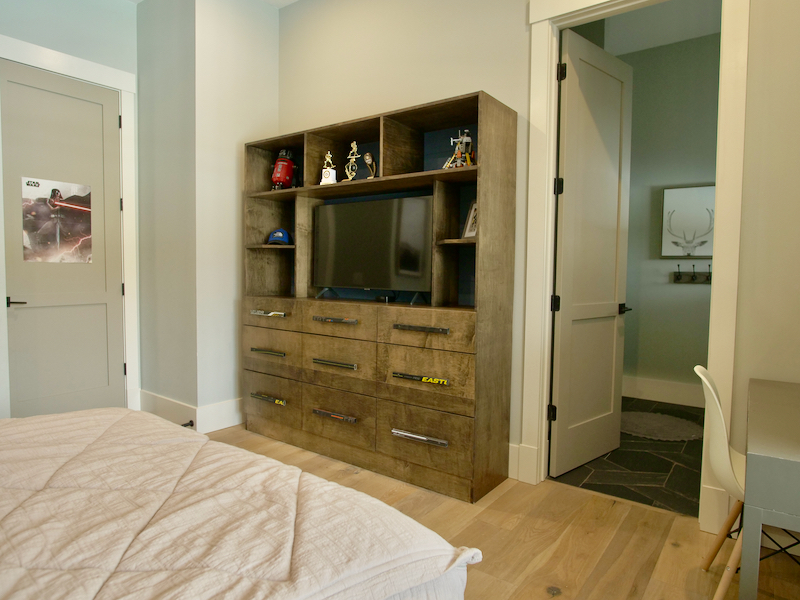
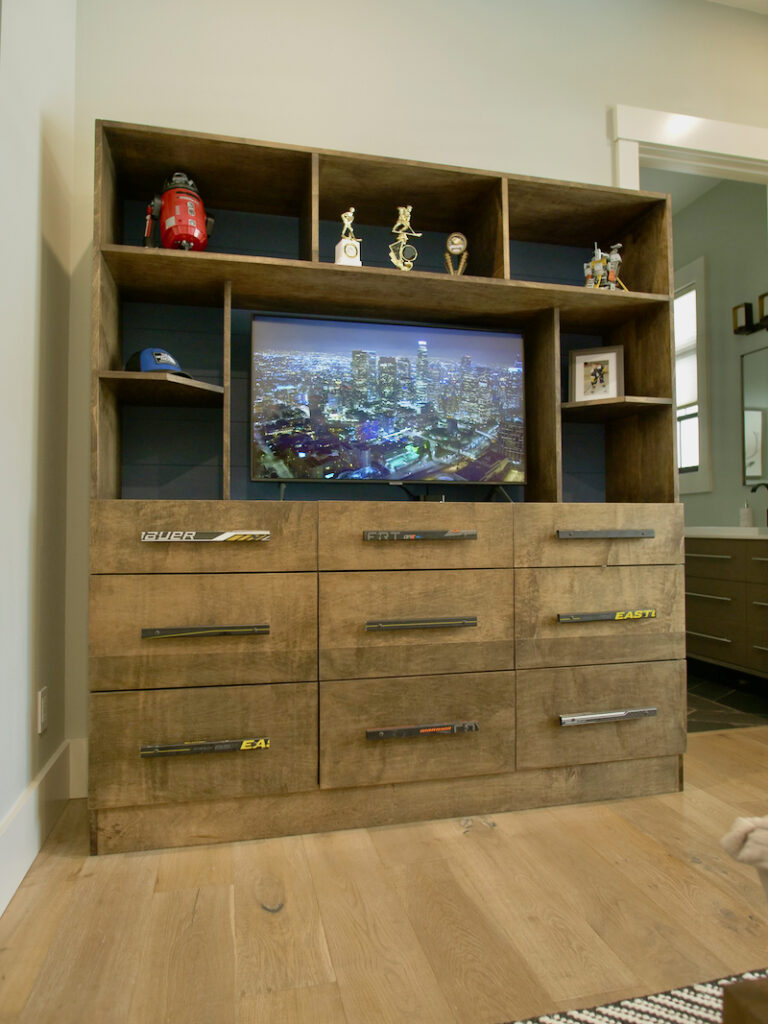
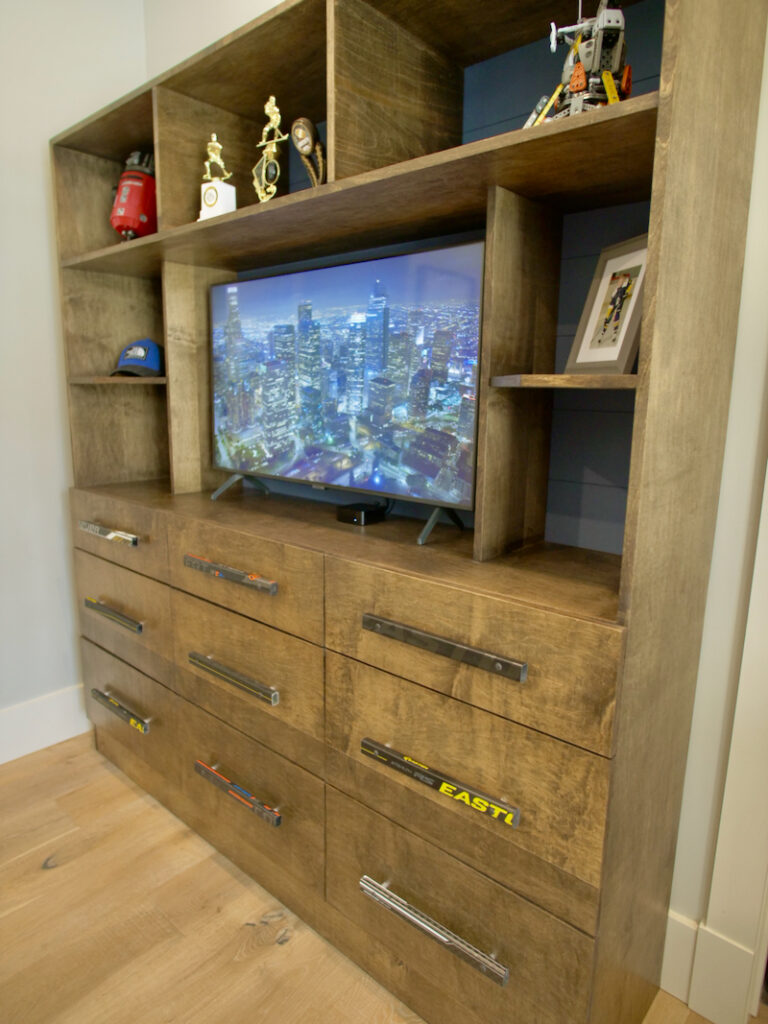
We recently built our son a new queen bed and loft to go over it. But we didn’t stop there. Since he’s always looking for a good spot to display sports trophies and lego builds, we decided to replace his dresser with an entertainment console that has the storage of the dresser built into it. The design I came up with has tons of added storage and some nice shelving space to display his things as well as a spot for a 42in TV. Read on to see how it came together and don’t forget to check out the project video!
Time to Complete
1 Wknd
Estimated Cost
$400
Skill Level
Intermediate
Tools
Materials
- (3) 3/4” x 4’ x 8’ Plywood
- (2) 3/4” x 4’ x 8’ Pre-finished UV Plywood
- 1/4” x 4’ x 8’ Plywood (for back)
- (9) 14” Drawer Slides
- (9) Drawer Pulls
- Iron-on edge banding
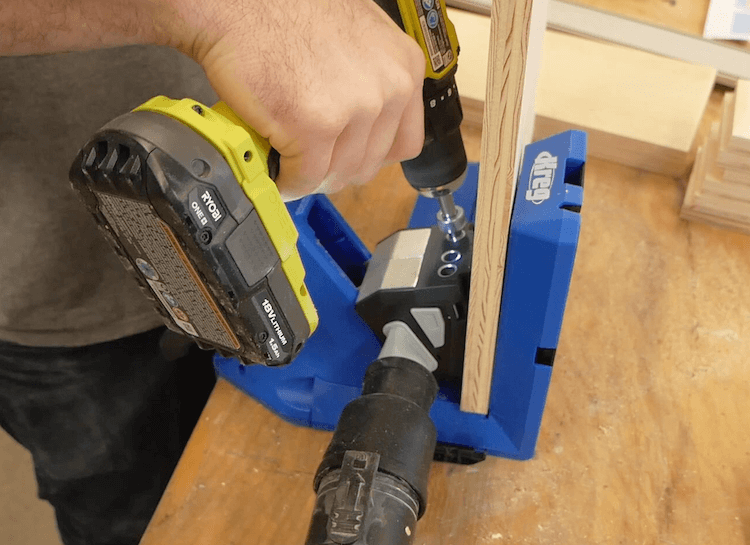
- 1-1/4″ Kreg Pocket Screws (Coarse)
- 1-1/4” Brad Nails
- Wood Glue
Disclosure: This project is sponsored by Kreg Tool Company, as well the links provided in the “materials” and “required tools” sections are affiliate links. If you would like to support our site and help keep our content free come find out more about how we can make money with no extra cost to you.
Dimensions
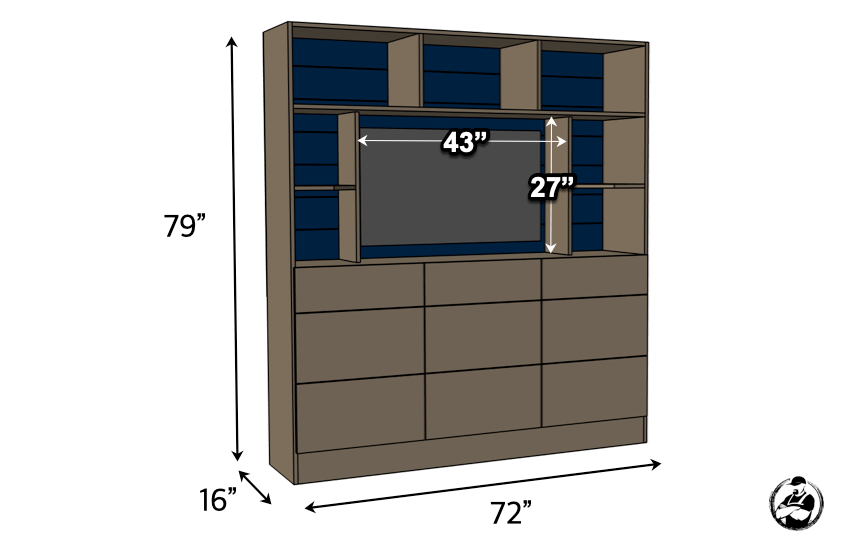
This tutorial will walk you through the steps to build an entertainment center with 9 drawers and space for a 42″ TV.
Total Time: 2 days
Plywood Cut List
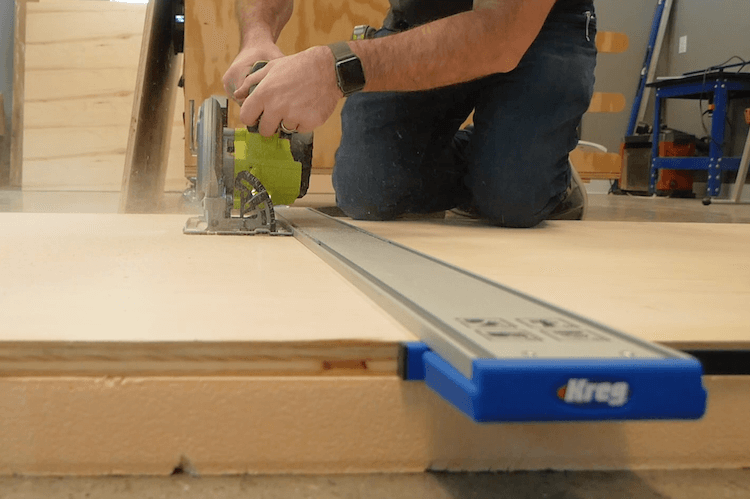
For this plywood you can go with a birch or maple, however a walnut or oak veneer would look great as well. Using a straight edge guide and a circular saw, break down the plywood as shown.

Plywood Cut List
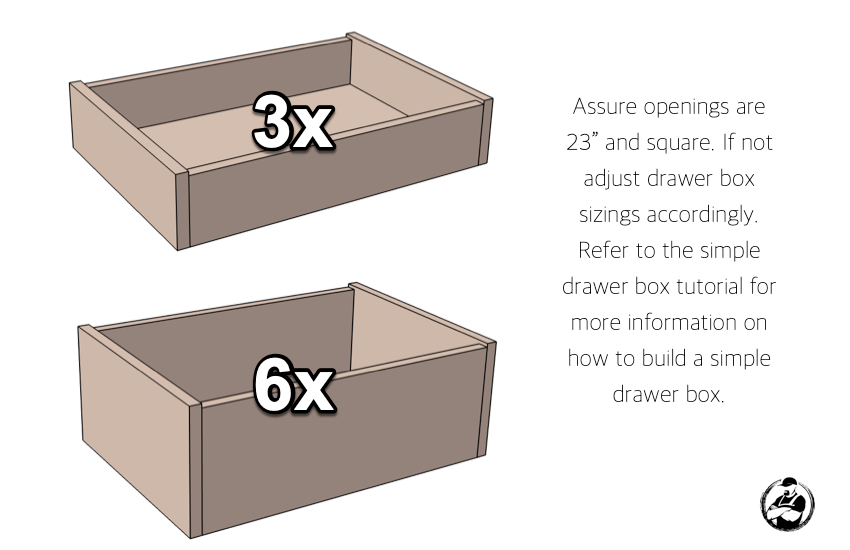
For the drawer bowes, a pre-finished UV plywood will take the finishing out of process and provide a durable, good looking drawer box. The long strips will be needed in the next step but the cuts for the drawer boxes are approximate and should be verified after step 3 is completed. See this drawer box tutorial for more info.

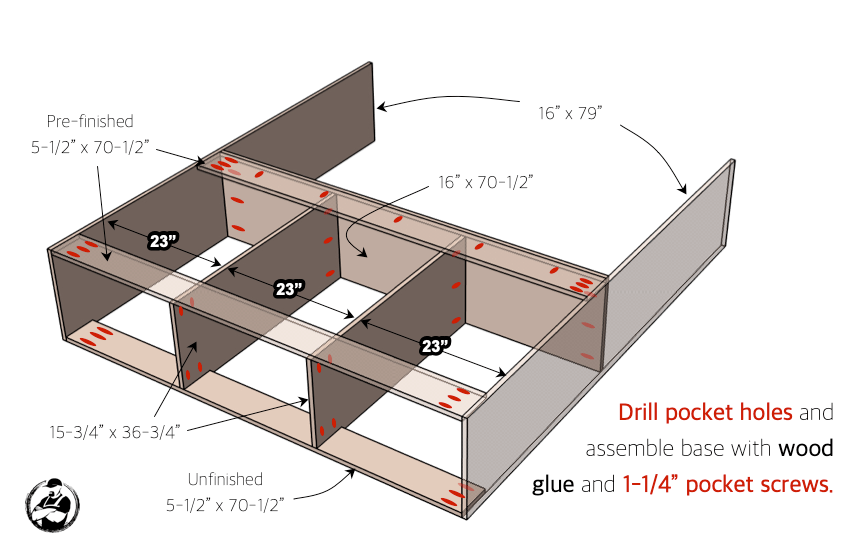
Base Assembly
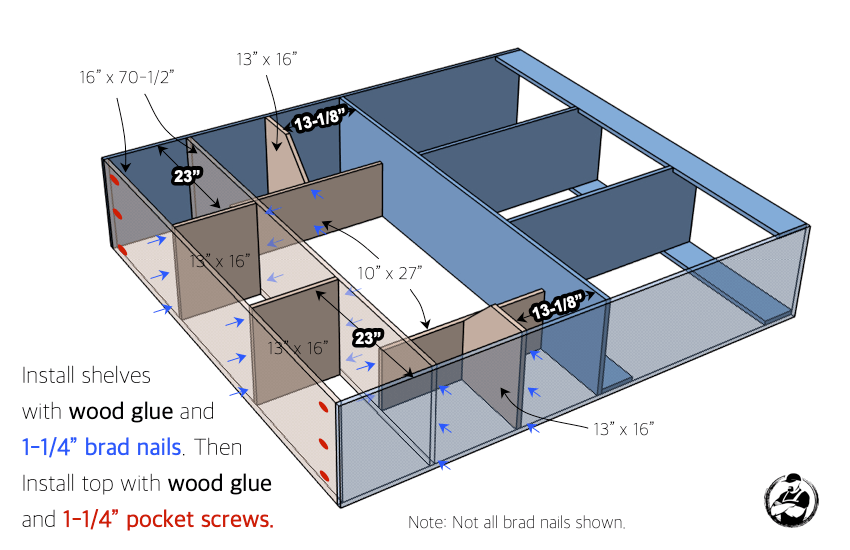
Installing Shelving
Cutting the Back

Installing the Back

Assemble Drawer Boxes
To learn more about sizing and constructing a simple drawer box please refer to the simple drawer box tutorial.
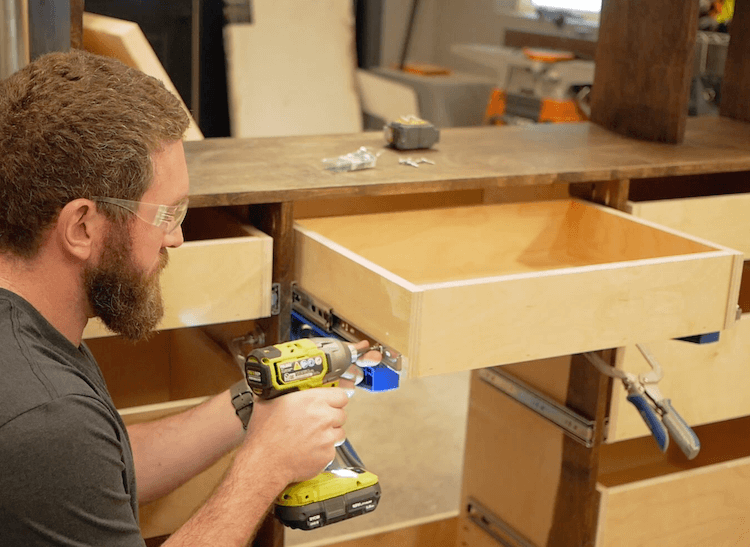
Installing the Drawer Boxes

Installing the Drawer Fronts
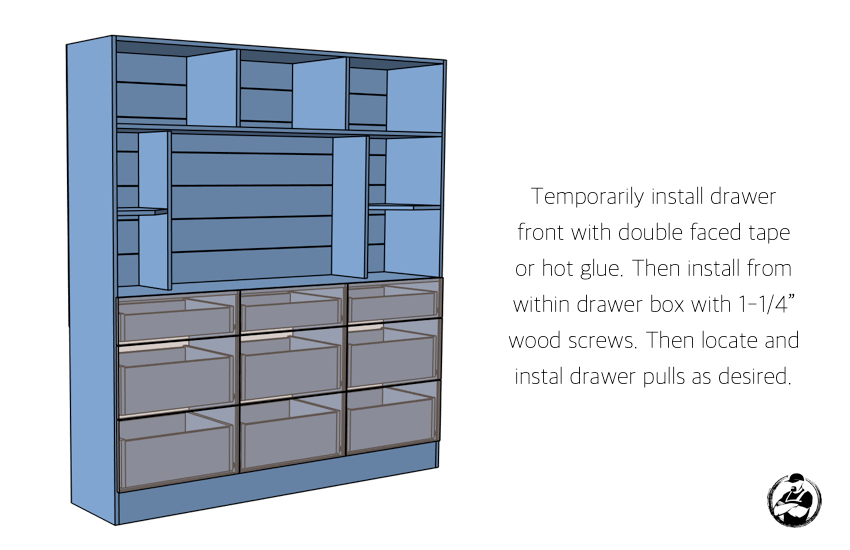
For the drawer pulls, since my son is into hockey, we made them from old broken hockey sticks. For this we used aluminum tub as spacer and screws through the sticks, spacers and into the drawer front and box.