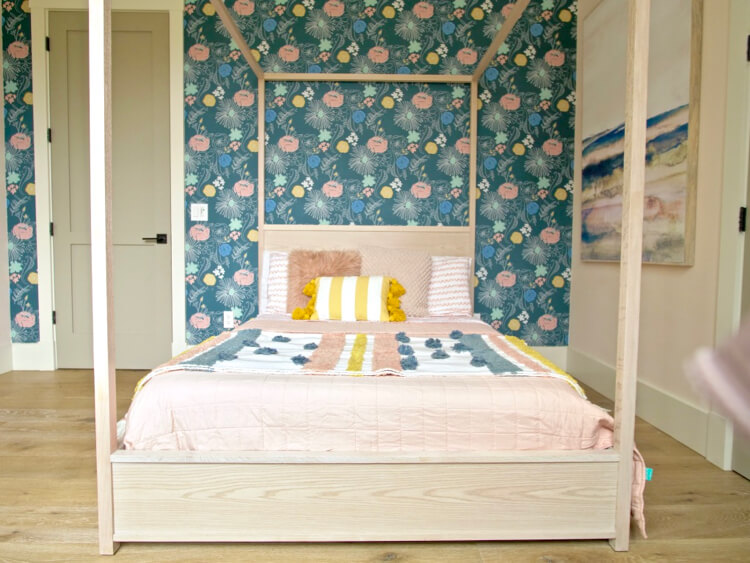
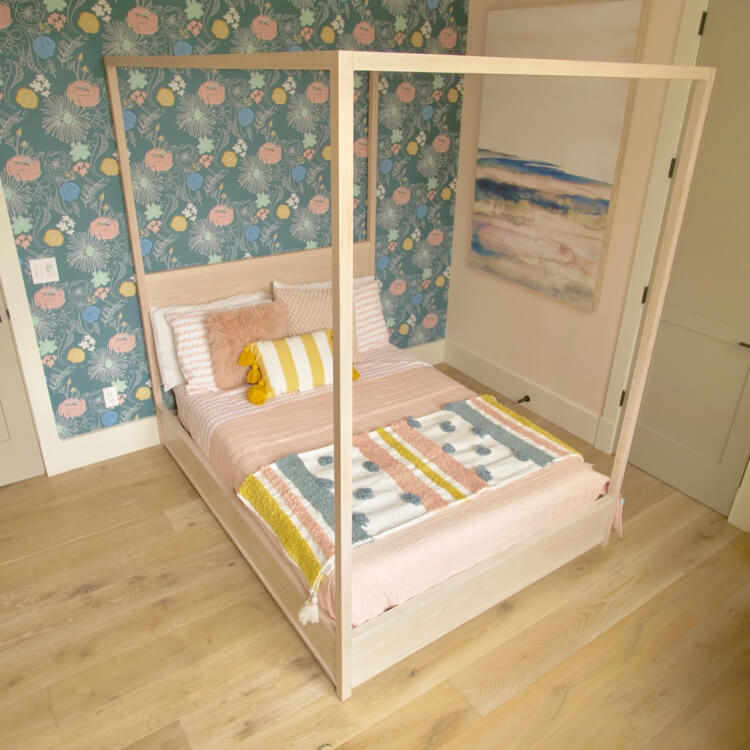
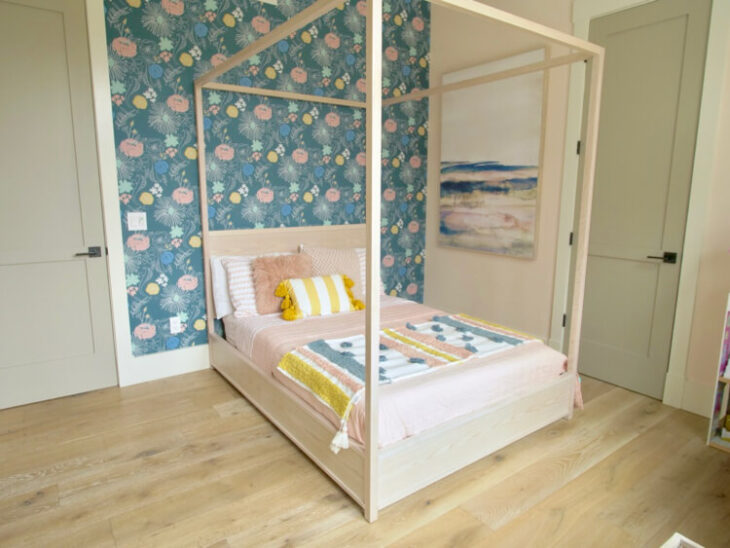
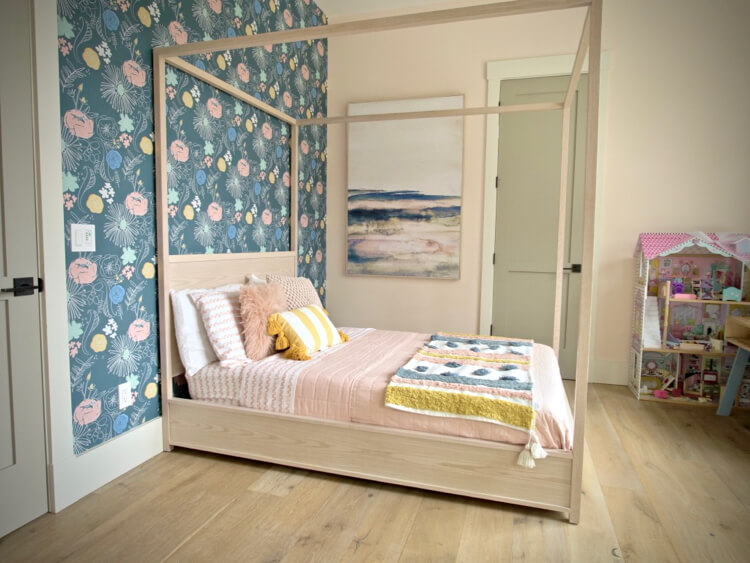
Our 7 year old daughter has had some trouble sleeping at night, worrying of what might be lurking below her bed. We knew we needed to build her a new bed for some time now and my wife has be pushing for a cute canopy bed. The design of this bed is simple but we kept the bed low to the ground so no monsters could fit under her bed and we used higher quality materials, oak in this case, for a beautiful finish! Read on to see how to build your own and let me know what you think in the comments!
If you are interested in a king size (slightly different) version check out these plans!
Time to Complete
2 Days
Estimated Cost
~$400 (far less with pine)
Skill Level
Beginner
Printable PDF
If you love this stuff as much as we do, you might want to consider following us on Instagram where we post sneak peeks and behind the scenes stuff in our stories. Also, did you know you can get tons of projects plans from all around the web when you follow us on Facebook and Pinterest!
Project Video
Tools
Materials
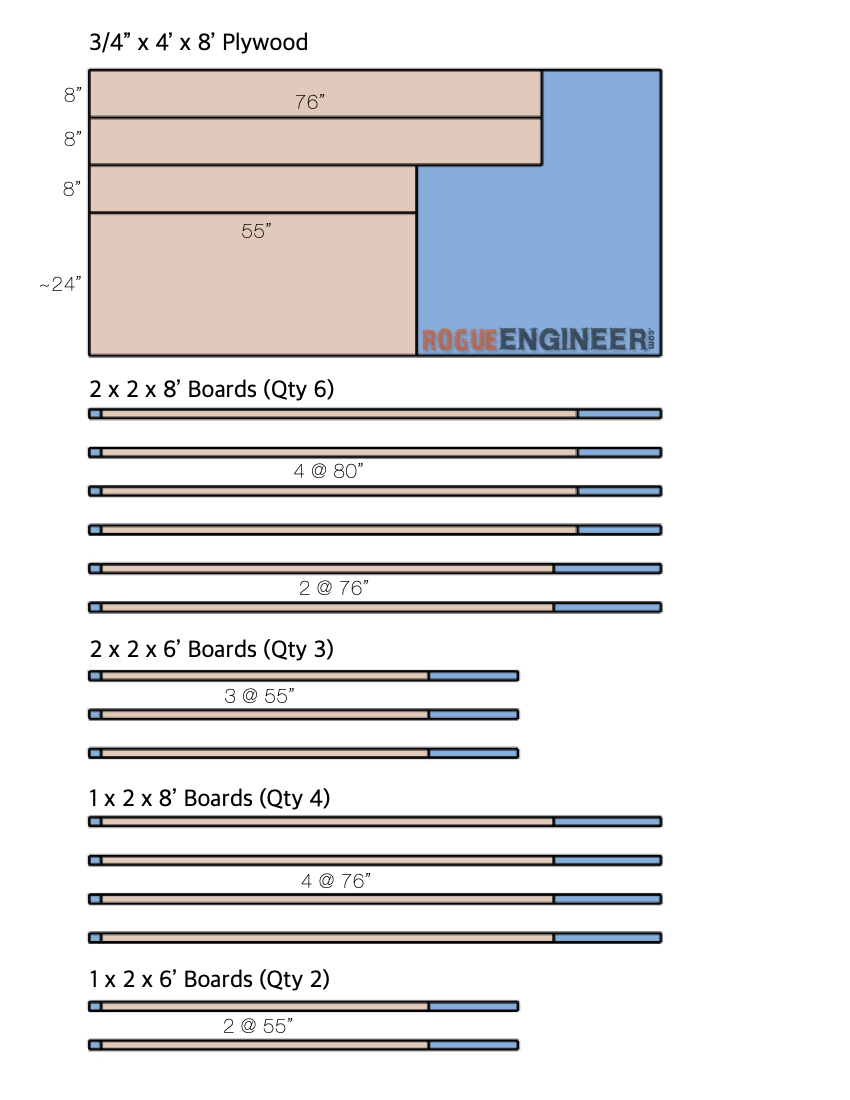
- 3/4” x 4’ x 8’ Oak Plywood
- (6) 2 x 2 x 8’ Oak Boards
- (3) 2 x 2 x 6’ Oak Boards
- (4) 1 x 2 x 8’ Oak Boards
- (2) 1 x 2 x 6’ Oak Boards
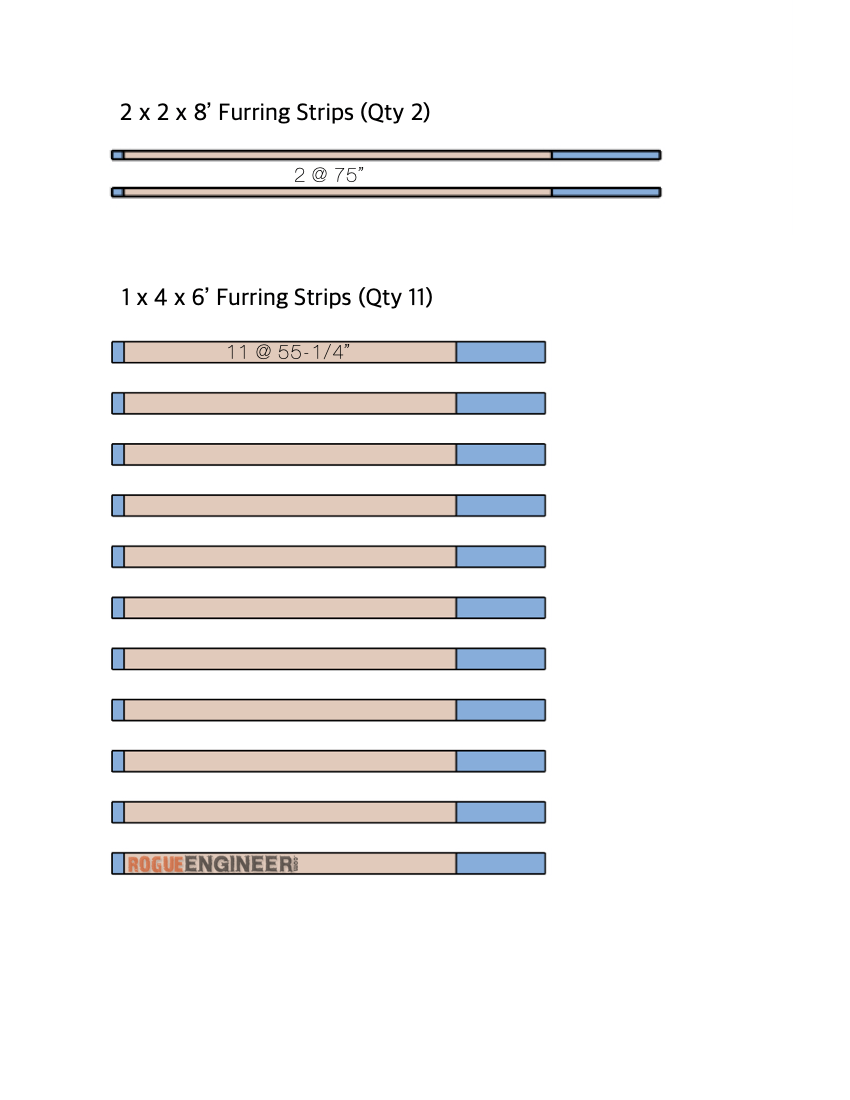
- (2) 2 x 2 x 8’ Furring Strips (11) 1 x 4 x 6’ Furring Strips
- 2-1/2” Pocket Screws
- 1-1/4” Pocket Screws
- 2” Wood Screws
- 1-1/4” Wood Screws
- (4) Nail On Furniture Glides
Disclosure: The links provided in the “materials” and “required tools” sections are affiliate links. If you would like to support our site and help keep our content free come find out more about how we can make money with no extra cost to you.
Dimensions
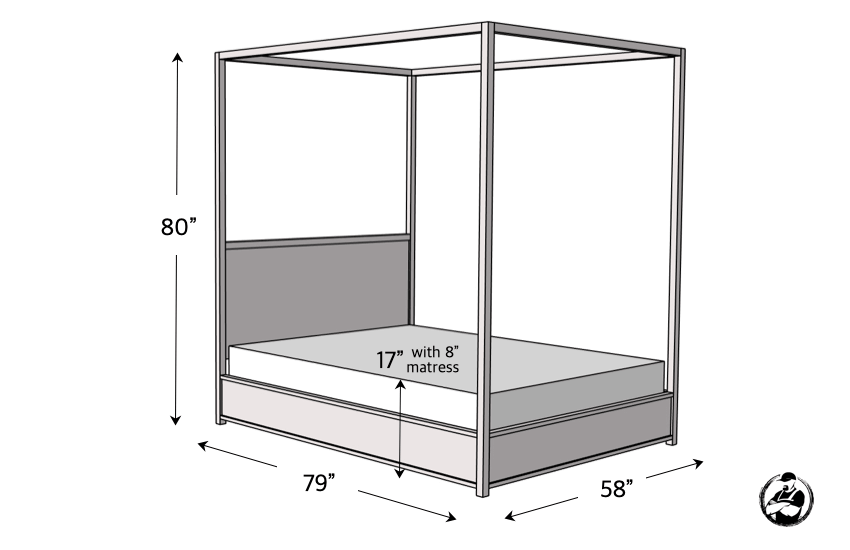
This step by step tutorial will walk you through exactly how to build a standard full size loft bed (54″ x 75″). Be sure to measure your mattress to assure it is the same, if not, make changes to suit. If you want to convert this plan to fit another size mattress, add to or take from the dimensions as required. Here is a good chart that show mattress dimensions.
- Cut List
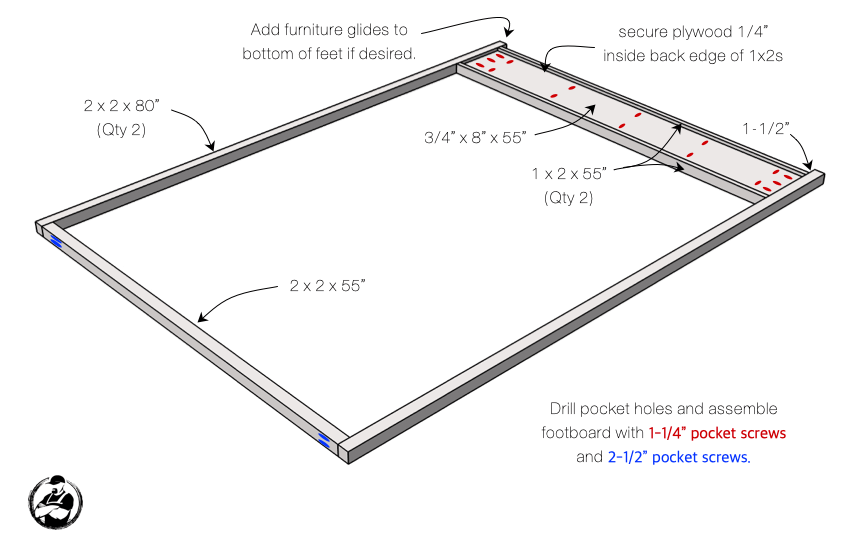
For this project I decided to go with oak, however you could save a bunch of money if you went with something like pine or poplar. If you are painting it then I would recommend select pine. - Assemble the Footboard
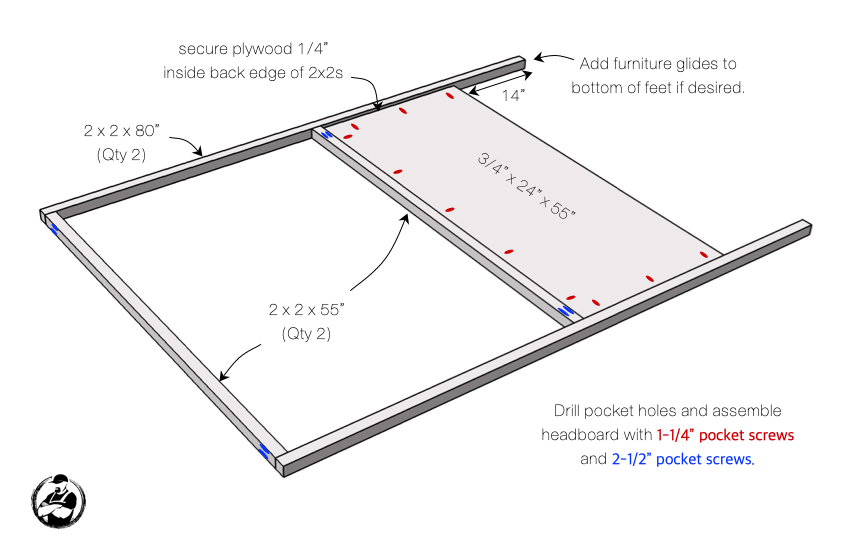
- Assemble the Headboard
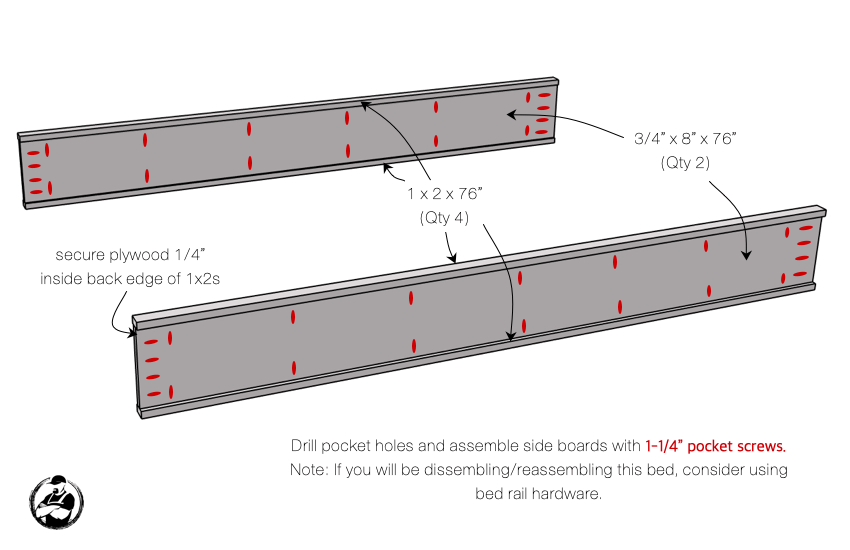
- Assemble the Side Boards
- Finishing
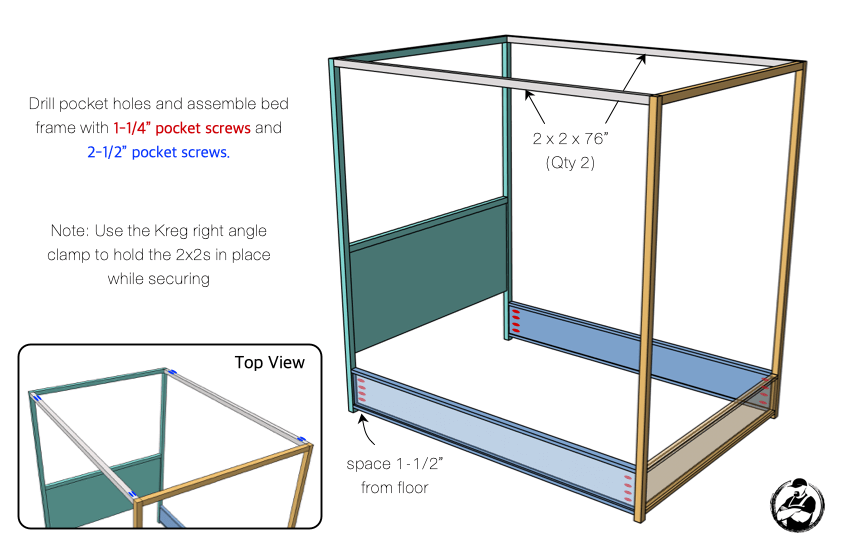
This is a good time to sand and finish the individual pieces. For this project we eased any sharp edges while sanding all surfaces to 120 grit and then applied Minwax’s simply white wood stain followed by 2 coats of satin wipe-on poly. - Bed Frame Assembly
- Bed Slat and Support Cut list
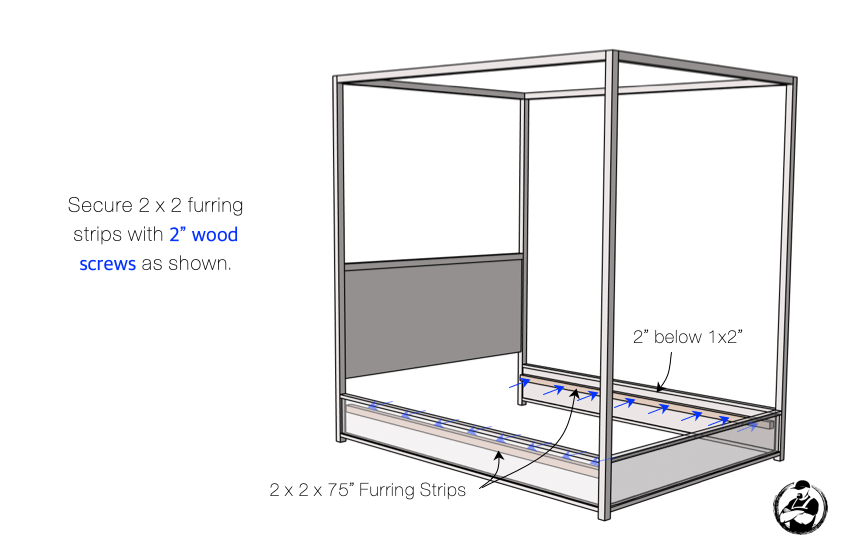
- Install Slat Supports
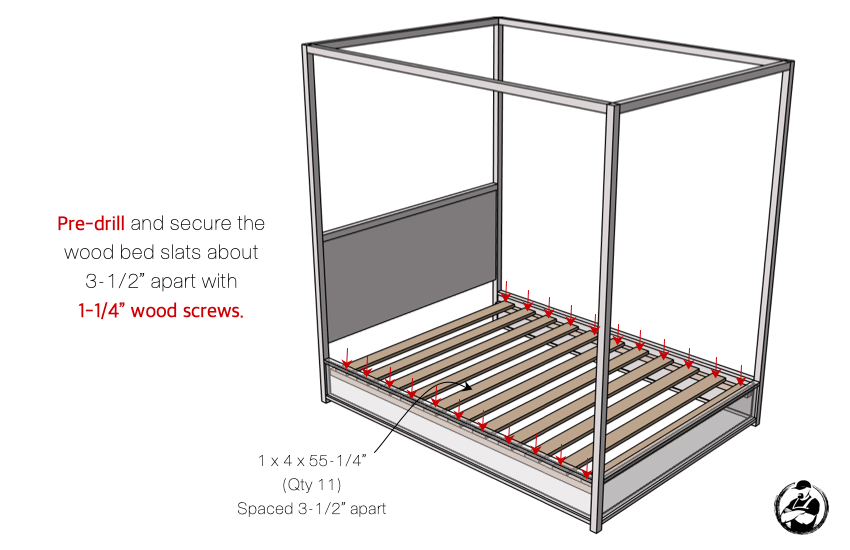
- Install Bed Slats
