
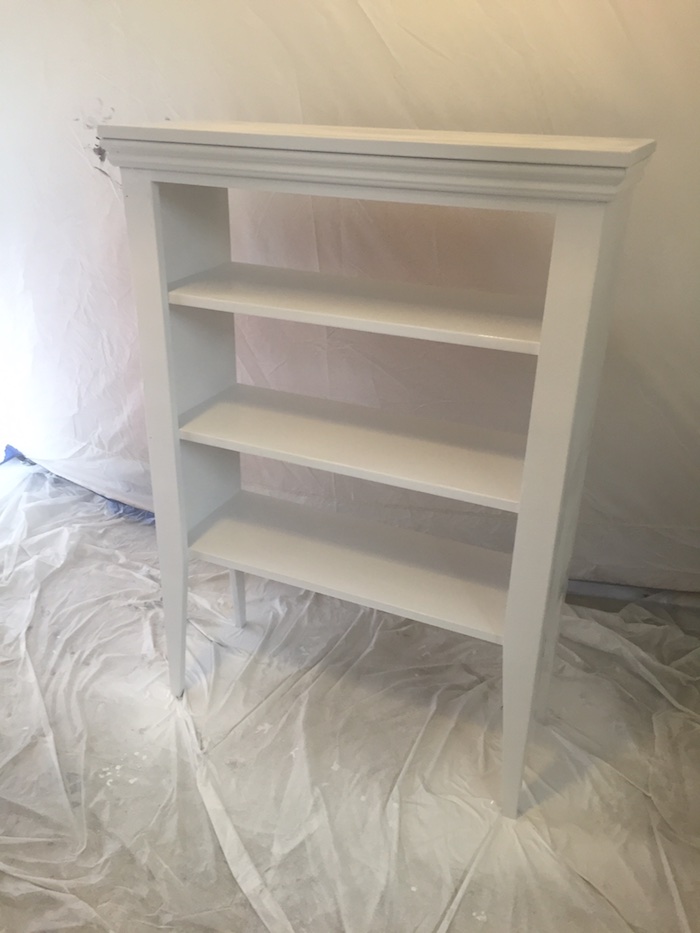
Jelly Cabinet
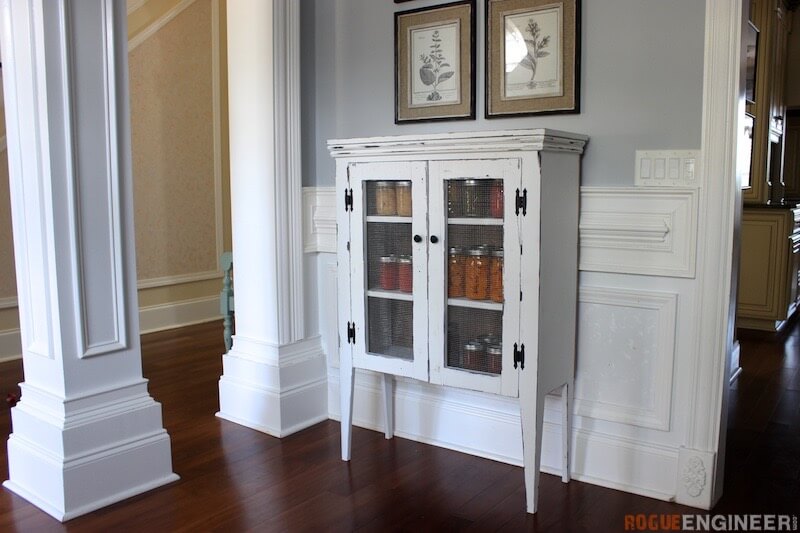
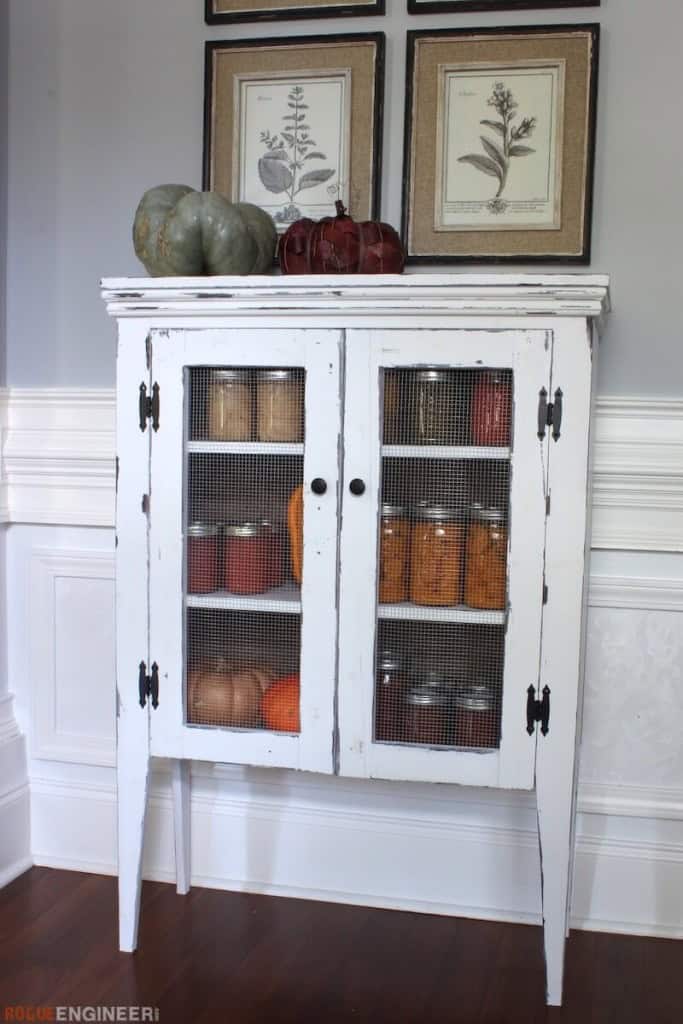
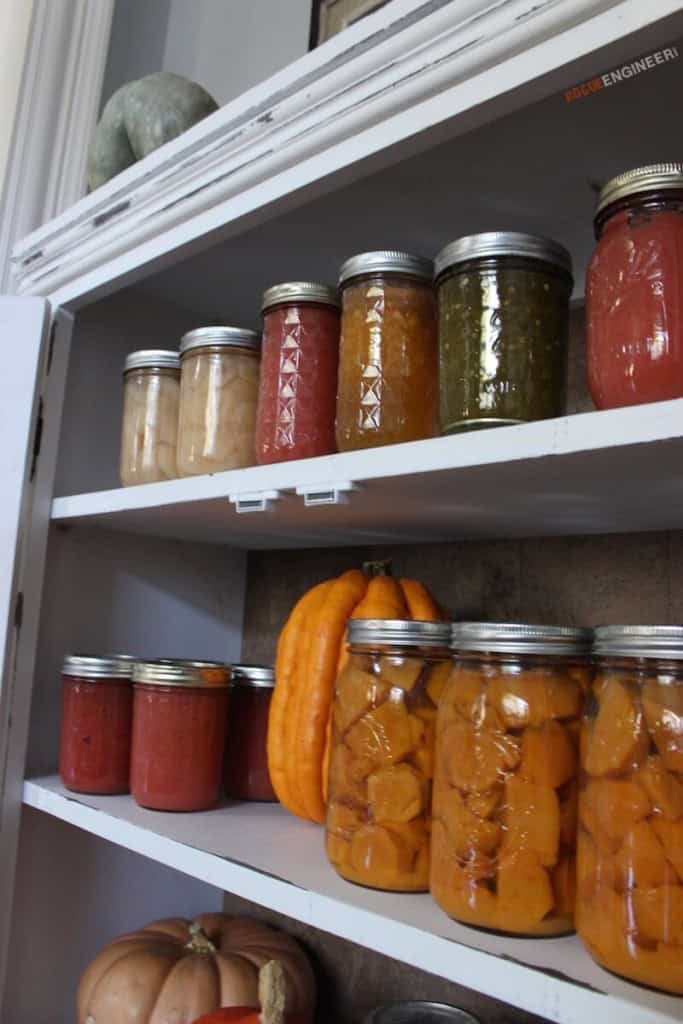
Not only does my wife love DIY projects, but she also loves to cook. A few years ago we built this awesome raised vegetable garden, and with far too many tomatoes she got into canning. And with all the work she has put into canning, I decided to build her a jelly cabinet to display her array of canned goods. Enjoy!
For sneak peeks of our upcoming projects be sure to follow me on Facebook and Instagram. Also, follow me on Pinterest to get tons of projects plans from all around the web!
Required Tools
Materials
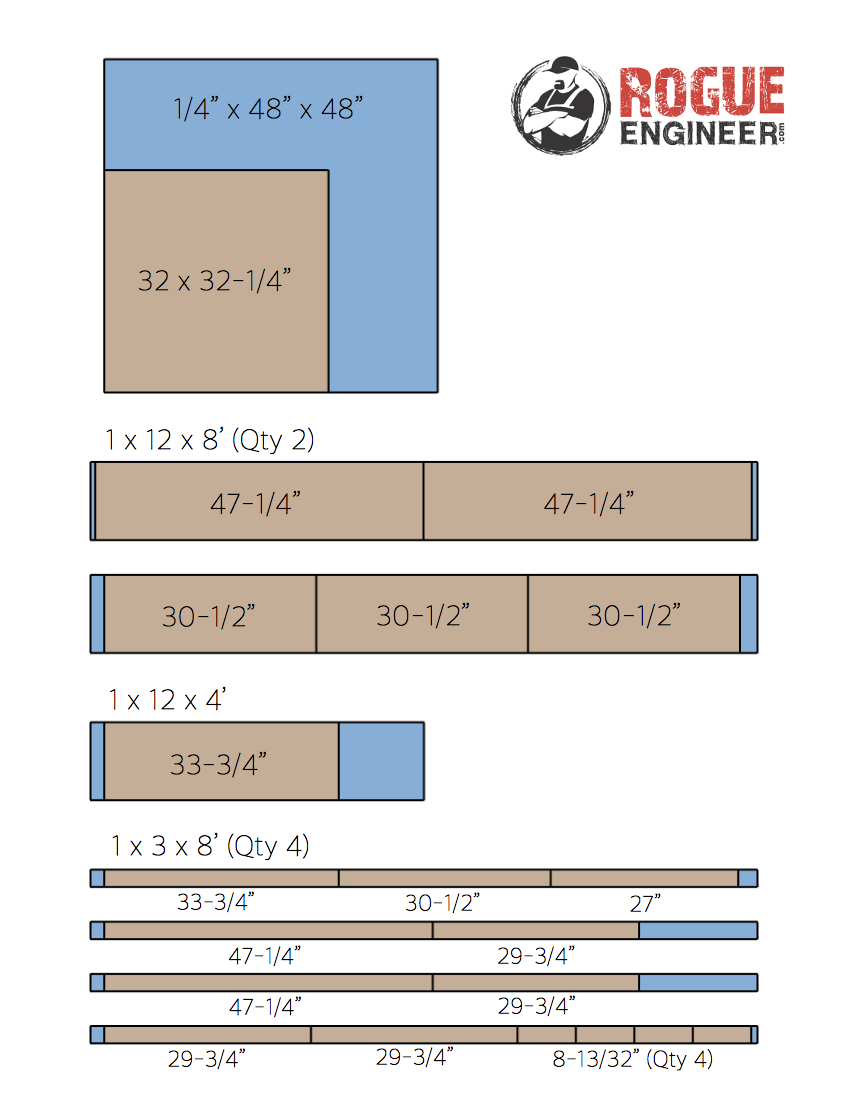
- Qty 1 – 1/4″ x 48″ x 48″ Underlayment
- Qty 4 – 1 x 12 x 8′ Common Board; Pine
- Qty 1 – 1 x 12 x 4′ Common Board; Pine
- Qty 2 – 1 x 3 x 8′ Common Board; Pine
- Can be ripped down from 1×4
- 1/4″ Hardware Cloth (3′ x 5′)
- Qty 2 – Hinges (2 Pack)
- Qty 2 – Knobs
- Qty 2 – Magnetic Catches
- 1-1/4″ Pocket Hole Screws
- 1-1/4″ Brad Nails
- 1-1/4″ Wood Screws
Disclosure: The links provided in the “materials” and “required tools” sections are affiliate links. If you would like to support our site and help keep our content free come find out more about how we can make money with no extra cost to you.
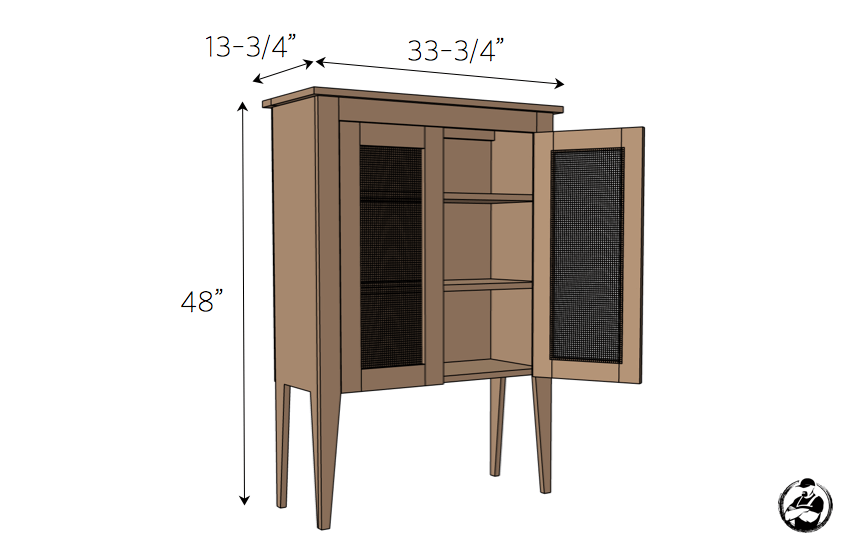
Dimensions
Cut List
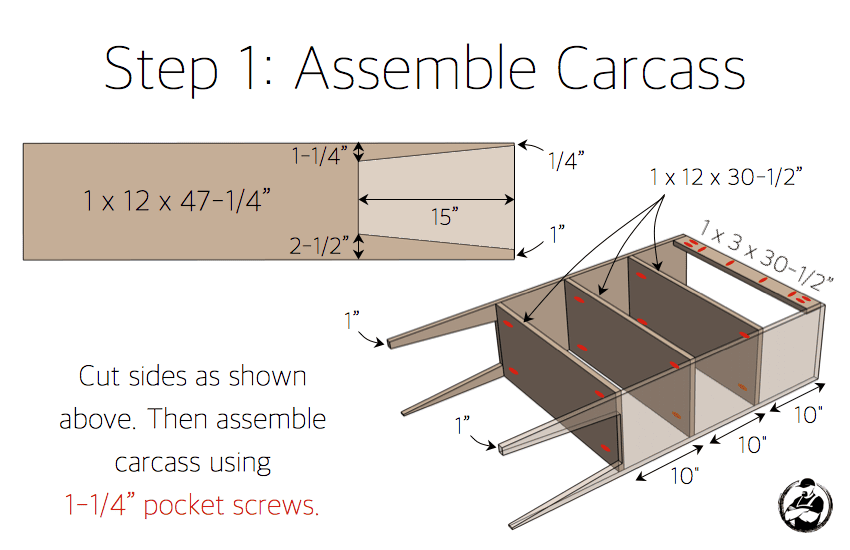
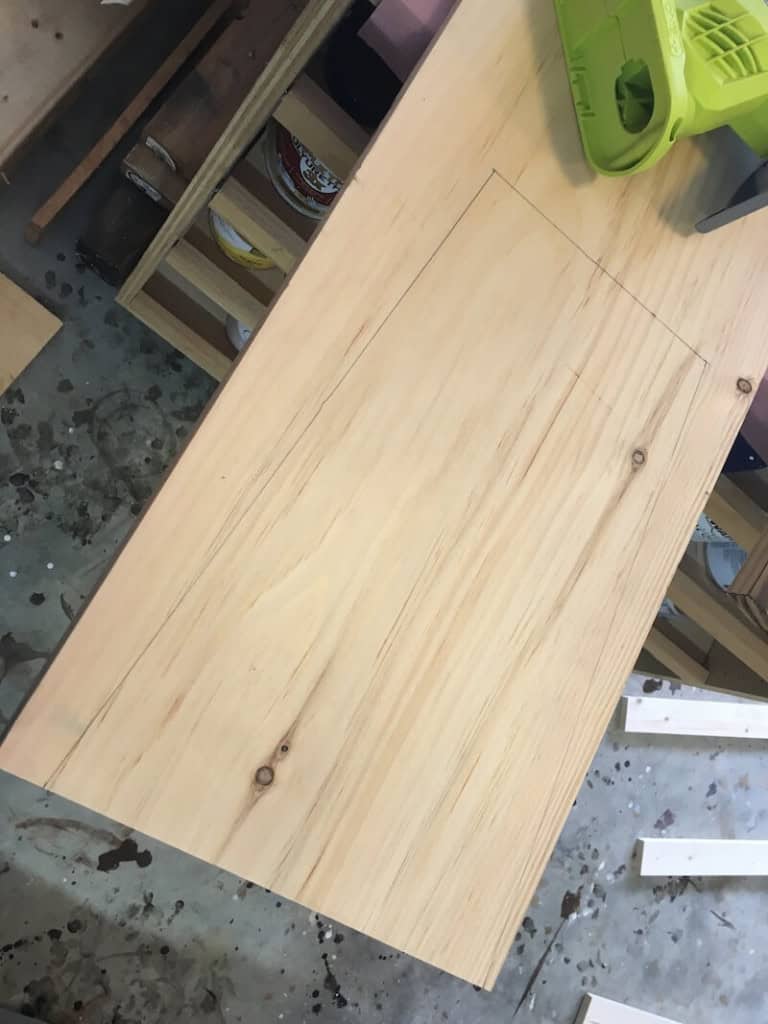
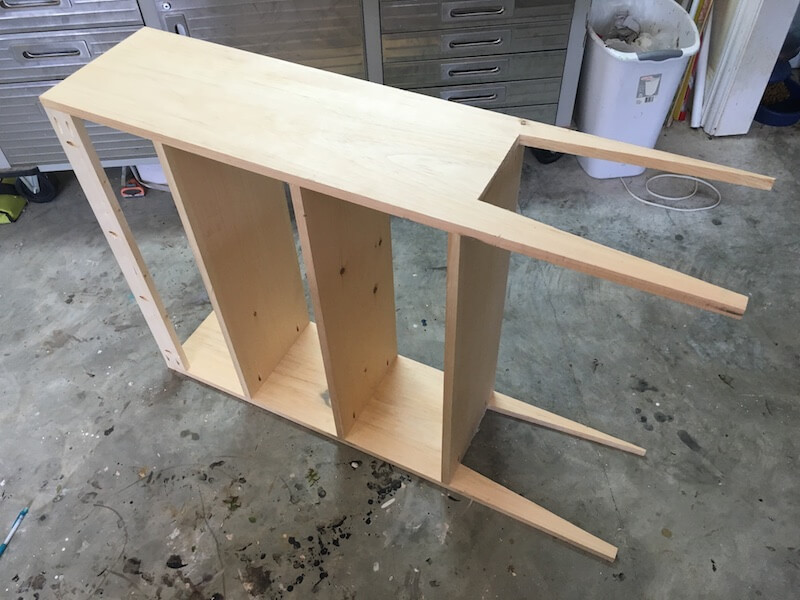
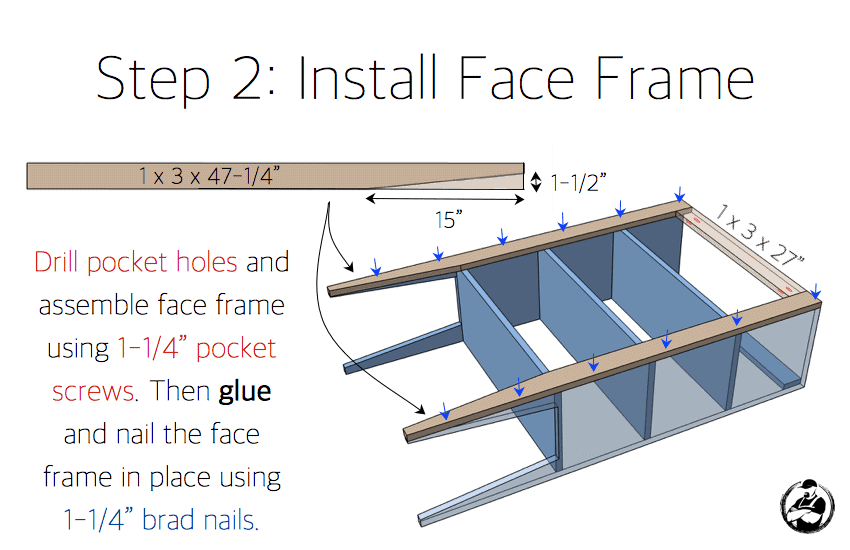
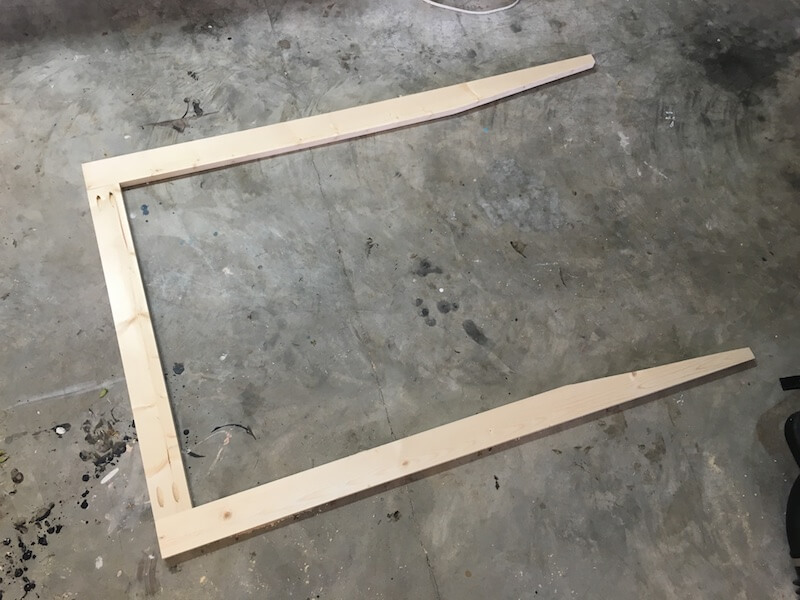
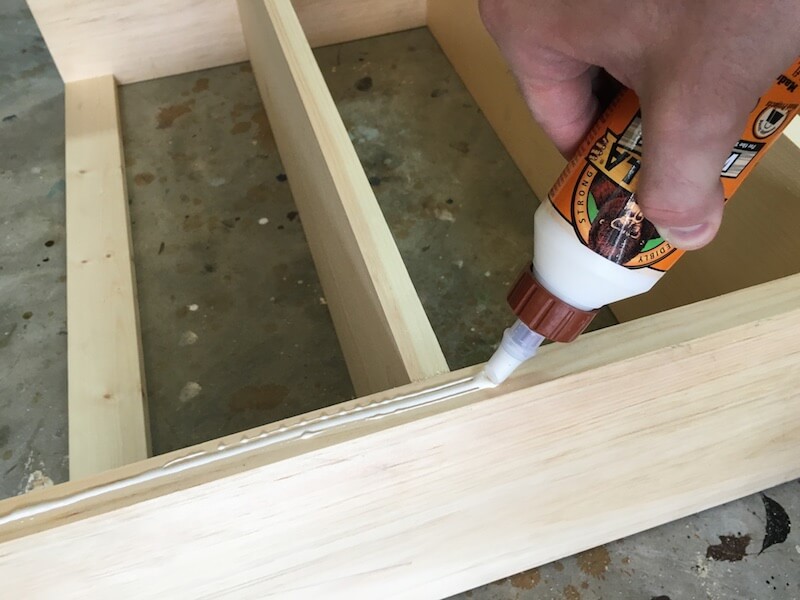
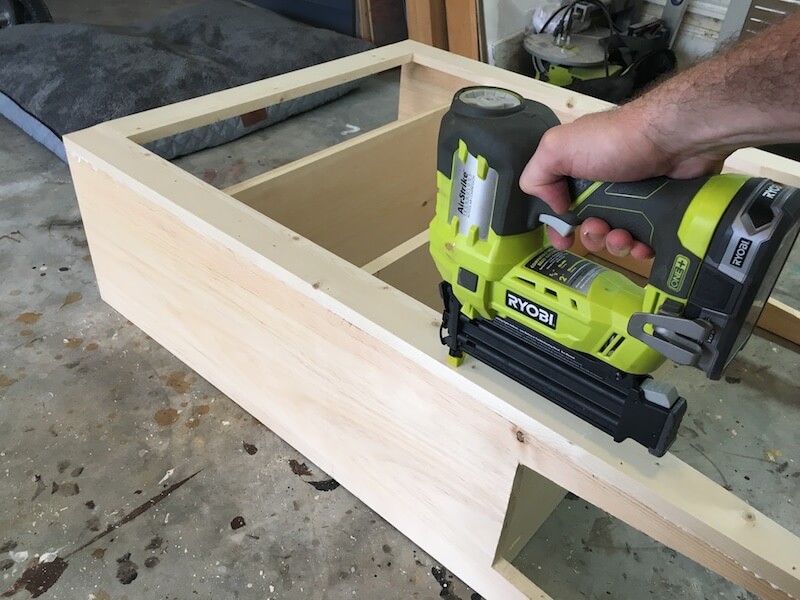
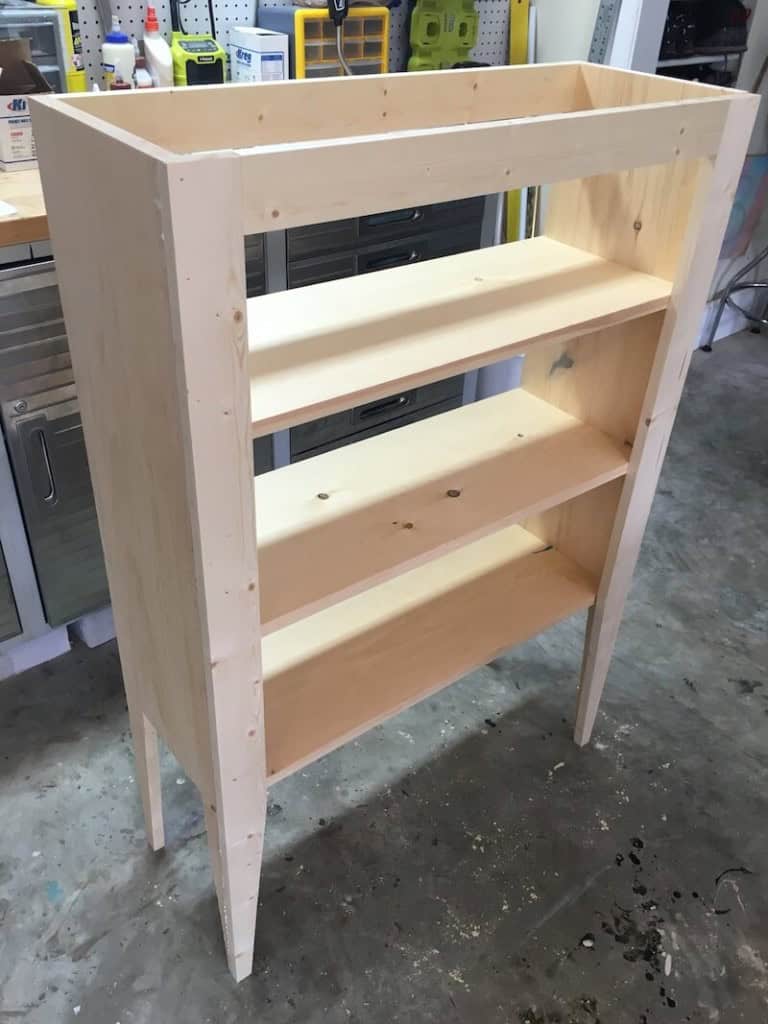
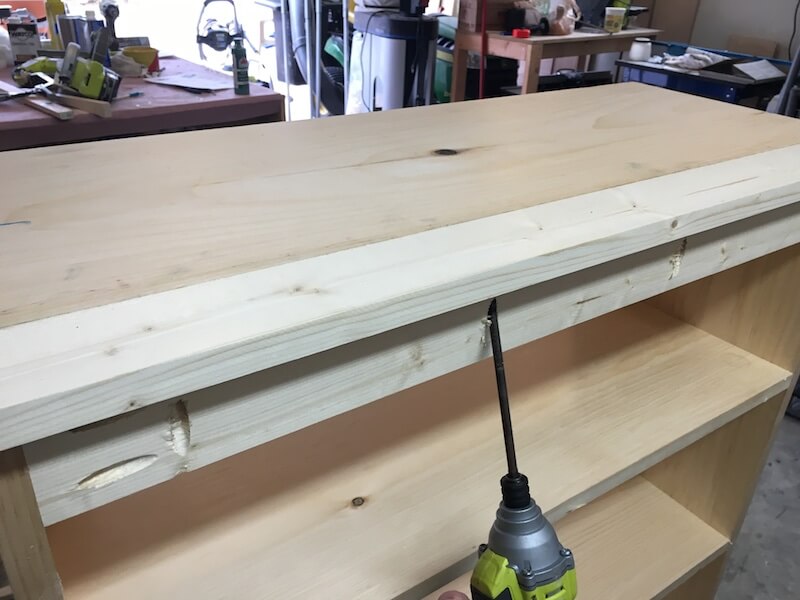
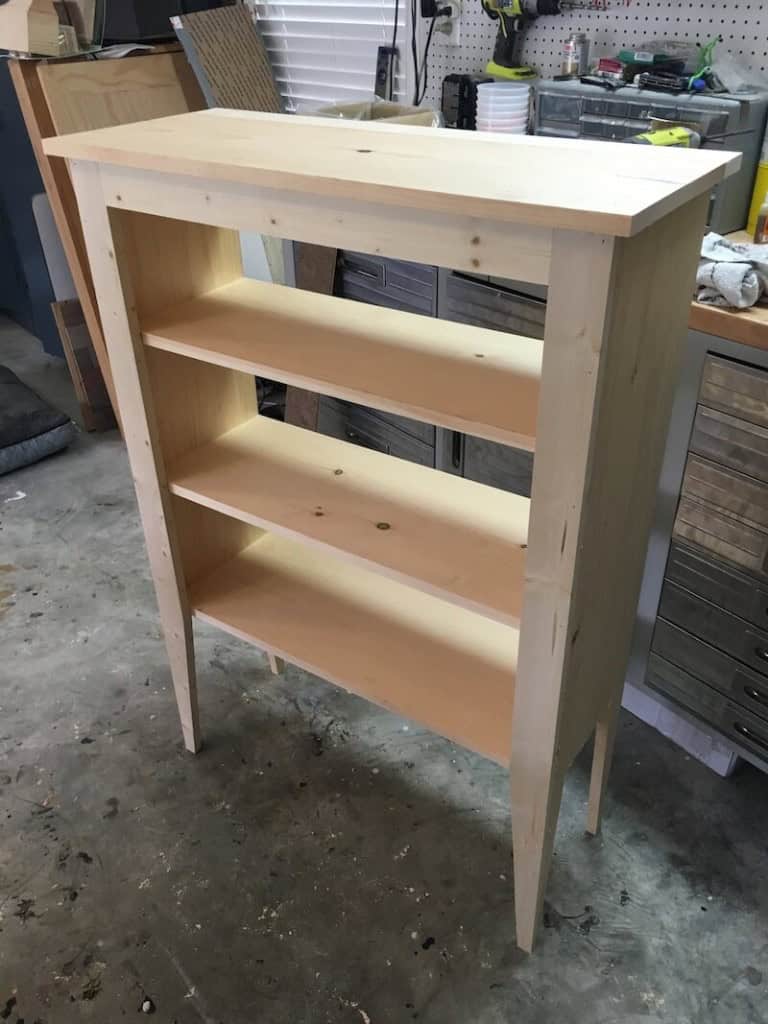
How to build a Jelly Cabinet

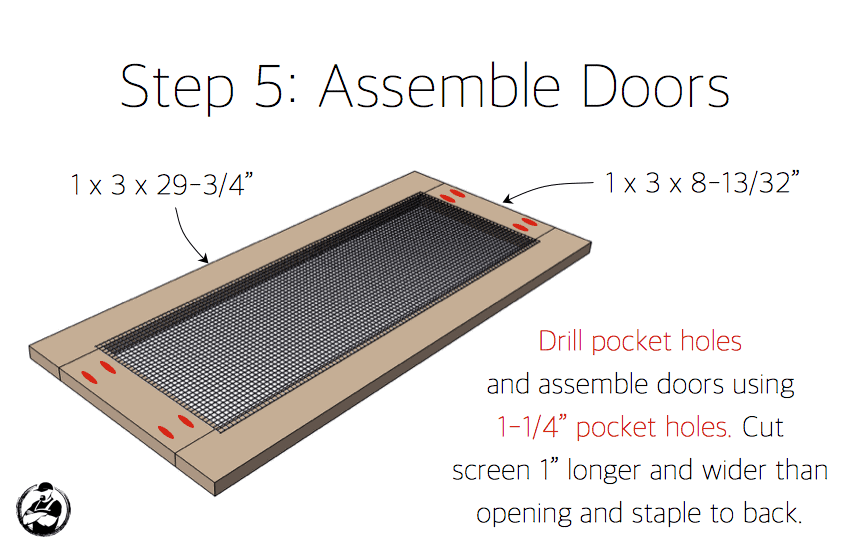
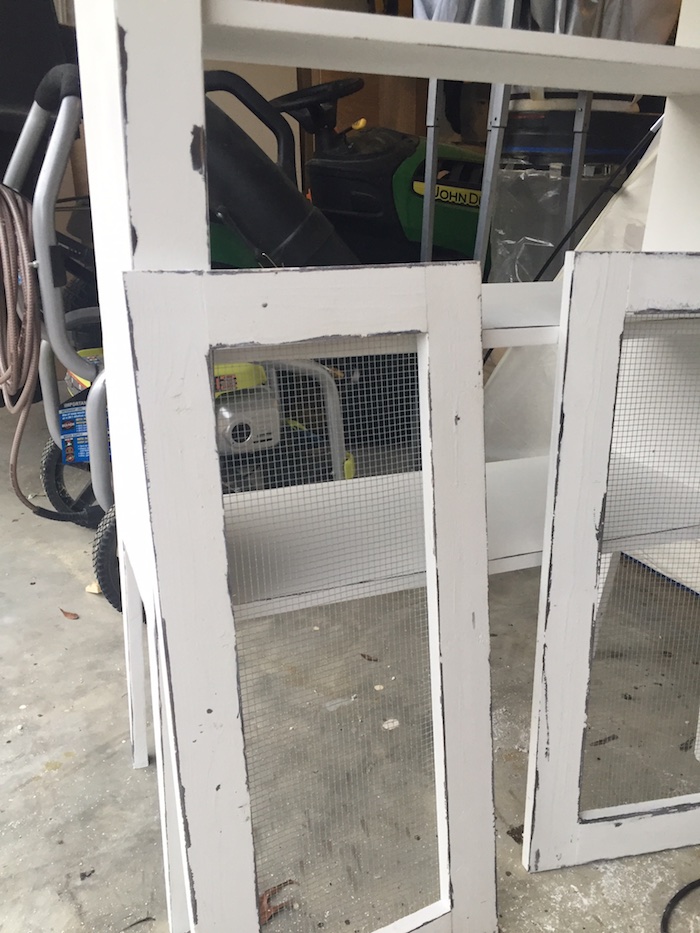
After assembling the door and before you staple on the screen, You’ll need to finish the cabinet and door frames. You’ll notice that I also added trim to the top edge. I thought it added a nice touch. To finish we started by staining the cabinet with Kona wood stain.
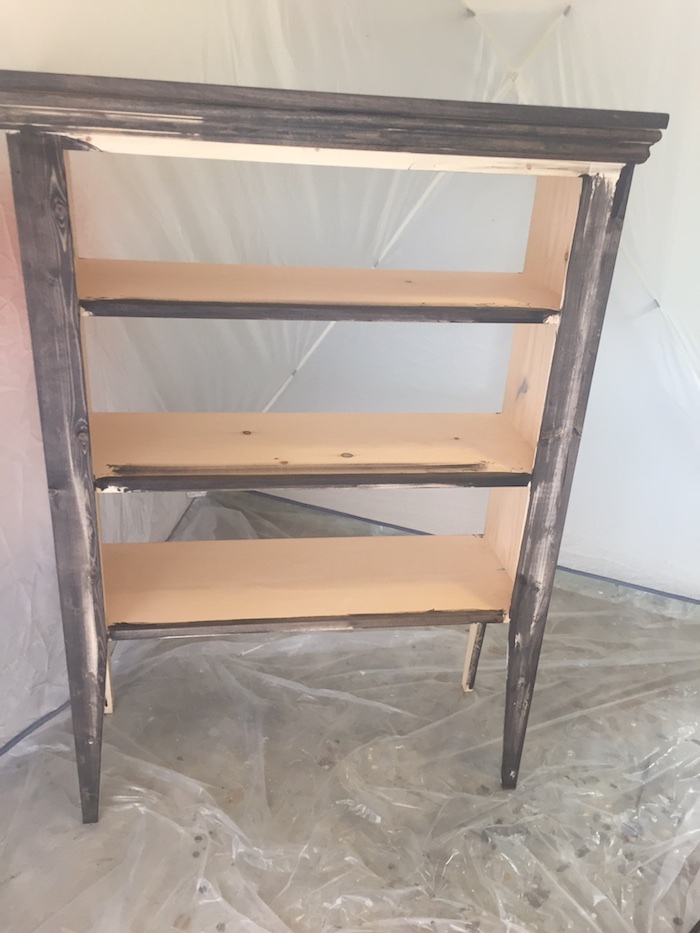
Then we applied vaseline to the edges and corners and painted the entire project with a linen white chalk paint.
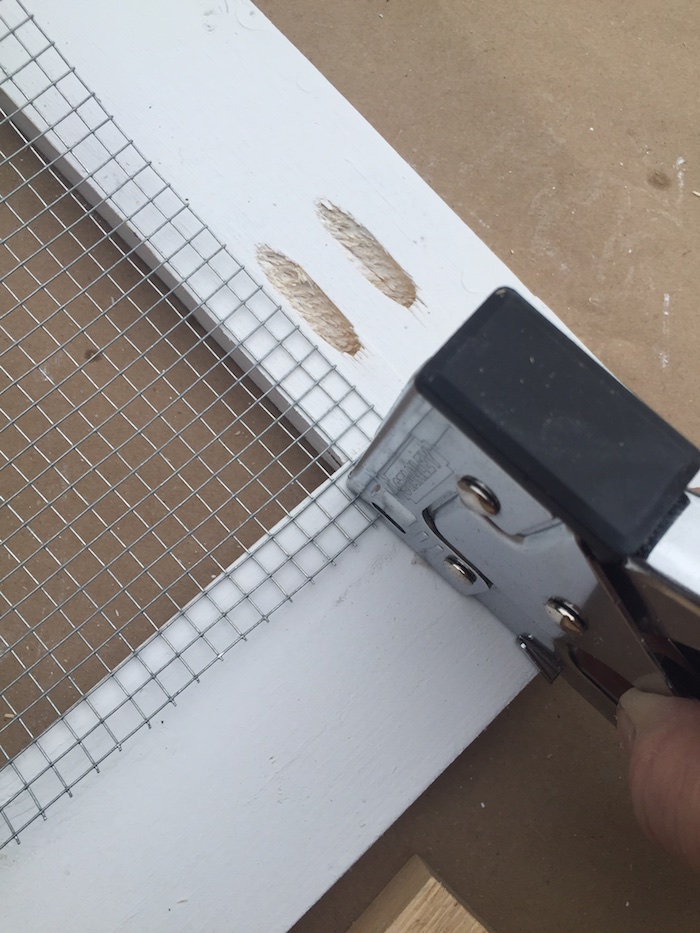
Then cut the screen slightly larger than the opening and staple in place.
Then sand and scrape away the paint in the areas where vaseline was applied to give a distressed finish.
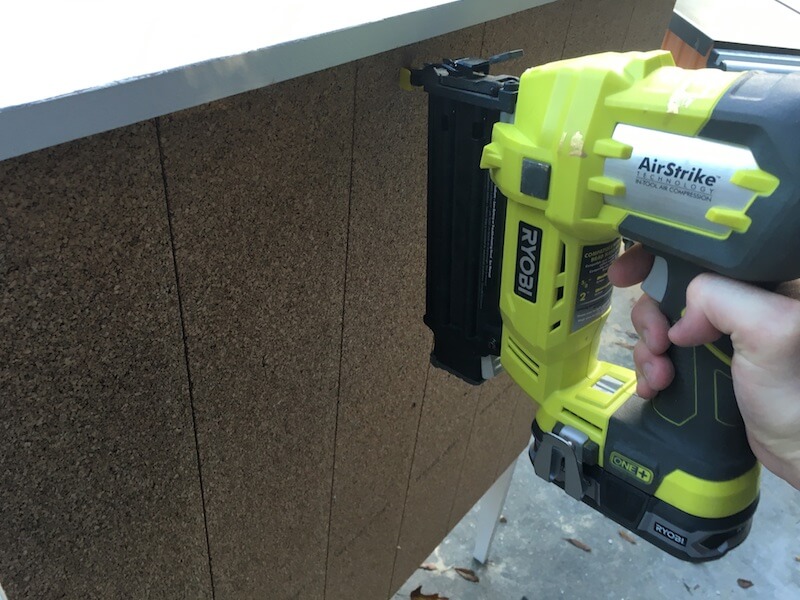
We decided to cover the back of our jelly cabinet with some leftover cork flooring so it went on after the cabinet was finished.
Questions? Comments?
As always, if you have any questions don’t hesitate to comment below and especially don’t forget to post pictures of your finished products in the comments! ENJOY!
Can’t wait to build this perfect jelly cabinet in Alaska! I’m building a cabin there, and this design is exactly what I need! Thanks so much Jamison!!
Awesome! I glad you like it. A cabin in Alaska seems like a dream. We have never been to Alaska, but really want to! Hopefully someday 🙂
I have a comment and a question that I hope you can help me with.
My comment is that I am so pleased that I accidentally found your website on the internet. I thoroughly enjoy all your emails and like the fact that most of the plans I think I could complete without any help. I don’t have much in the way of woodworking tools so your plans are great and most do not require anything fancy. Where I live, Costa Rica, I’m pretty limited with wood selection. It’s pretty much pine and laurel. The laurel is rough cut so I’d need a planer which I don’t have. I’m looking forward to getting back to the states as soon as I can sell my house. I’m saving your emails for when I get moved back as I won’t have an furniture and your plans will help me with that. Just wanted you to know how much I enjoy your email and your plans.
And my question is this. Have you ever seen or built a bed headboard that had a fold out table for a laptop? I had a friend, an elderly man, who had one. He had it built from plans. The laptop sat on an adjustable foldout table when in use but sat in a slot and folded back up into the headboard when not in use. You would have no idea the laptop was in the headboard if you didn’t know it. Unfortunately, my friend passed away before he sent me the info on where to get the plans for the headboard. I just thought with all the woodworking you do, you might have seen or built something like this. Thanks for any info you can pass along. Carole
Hey Carole! Thank you so much for the kind words! Unfortunately, I have not built a headboard like you’ve described. It sounds awesome though and I do need to add some headboard plans to my catalog so I’ll keep that idea in mind. If you come up with anything (a picture or what not) send it to me. With my brief search I wasn’t able to find what you’re describing.
Excellent. Thank you so much. Just curious, what’s the point of the Vaseline?
Josiah, the Vaseline makes distressing the piece easier. Since paint doesn’t dry well on the areas the vaseline is applied, it allows you to sand or scrap the paint off without taking off the stain underneath.
Are the 1x3s actually 3 inches wide or are they 2 1/2 inches wide. Wanted to make sure before I make too many cuts. Thanks!
1x3s are actually 2-1/2″ wide.
I presume there’s no right and wrong option, but what style of trimming did you use on the upper face??
Sorry I just saw this comment but its better late than never. We use base cap mounding I believe.
My wife and I had a lot of fun with this build, We made some changes to make it our own, like a solid Walnut top, beadboard back, and changing the doors a bit to provide some dimension. The plans were perfect and now we have a great place to show off her vintage Pyrex dishes and of course the homemade jelly….when it isn’t being consumed. It is actually a little darker than in the pictures.
Nice work man, that walnut top is awesome! And great mod to the doors that does add a nice touch.
My interpretation – thanks.
https://uploads.disquscdn.com/images/edff7de8748eaf88e92c8b66b40dfc69854a0e148205f43364be30c0c1bbb4e9.jpg https://uploads.disquscdn.com/images/d13446a25dae31d7b9b20fb5cbfb4d6e3485f4ef7557c312fe178507baa602c9.jpg
Very nice!