DIY Parquet Coffee Table
Quick answer: This parquet coffee table puts a herringbone-style parquet top on a simple 2×4 base — big design payoff from common boards and a plywood panel. Designed with Whitney from Shanty2Chic, whose build post has the styled photos. Free tutorial below; the printable plans are $5.
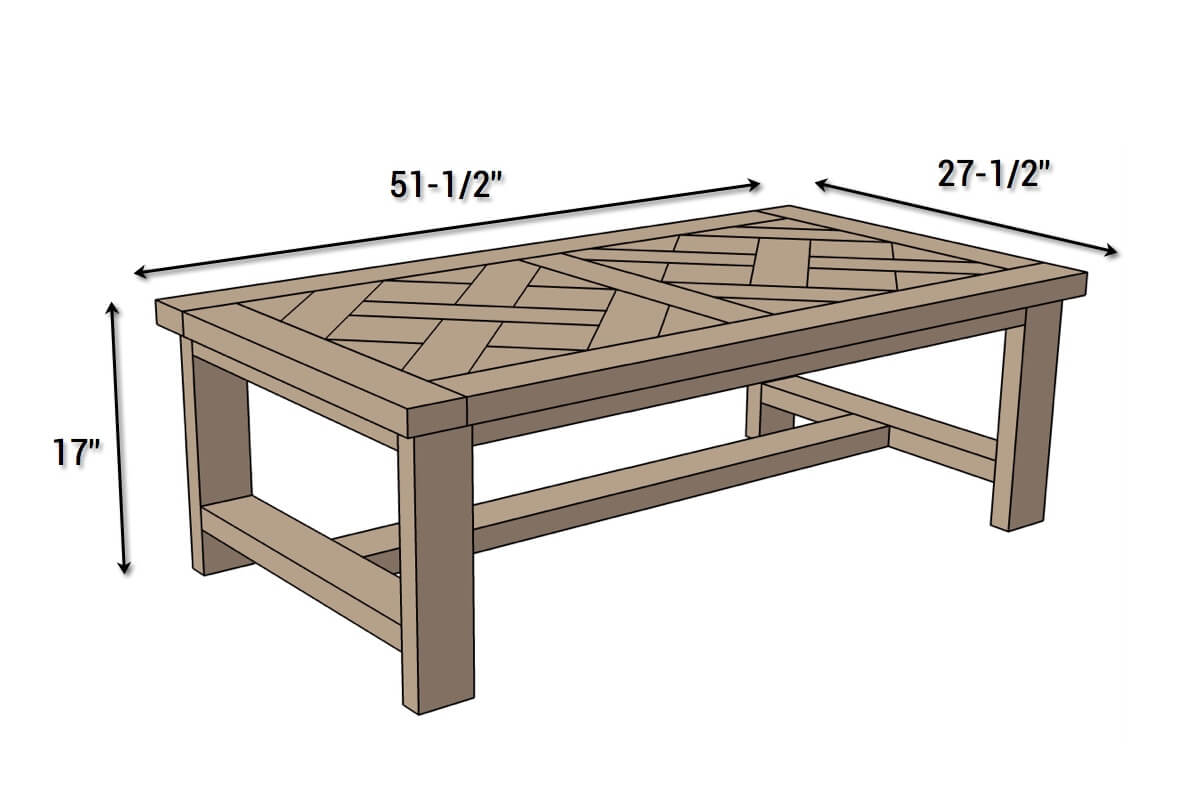
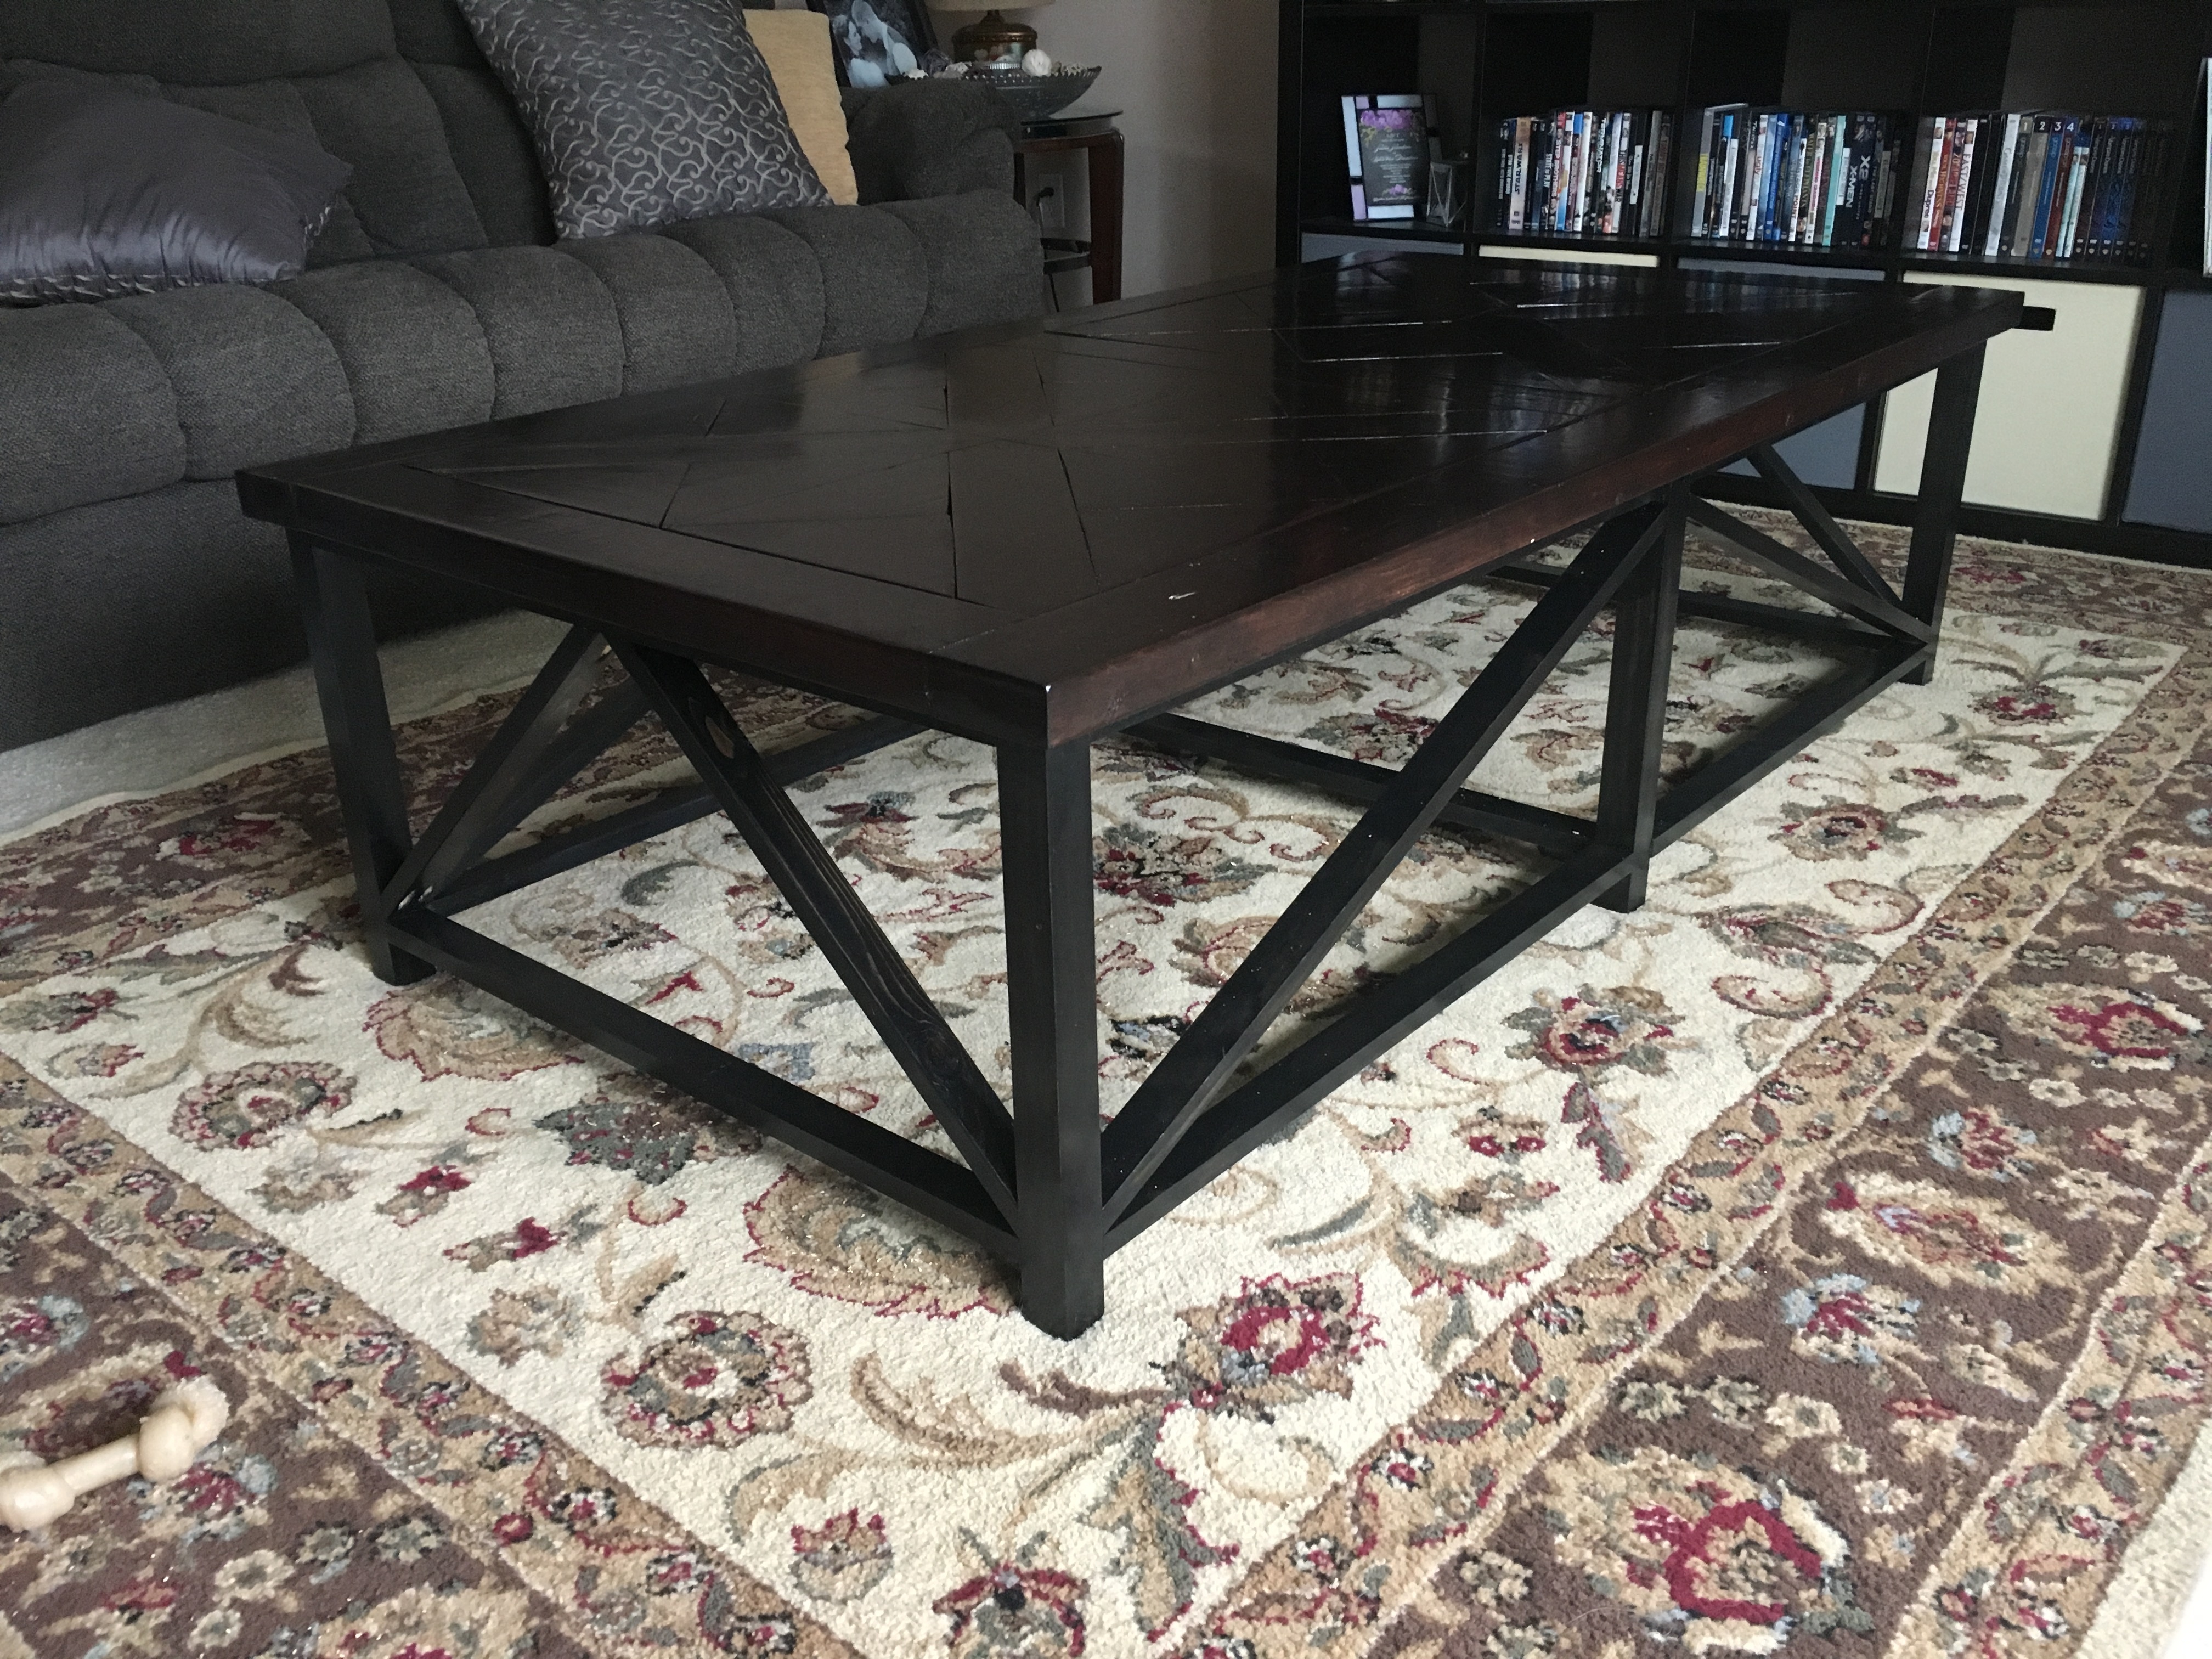
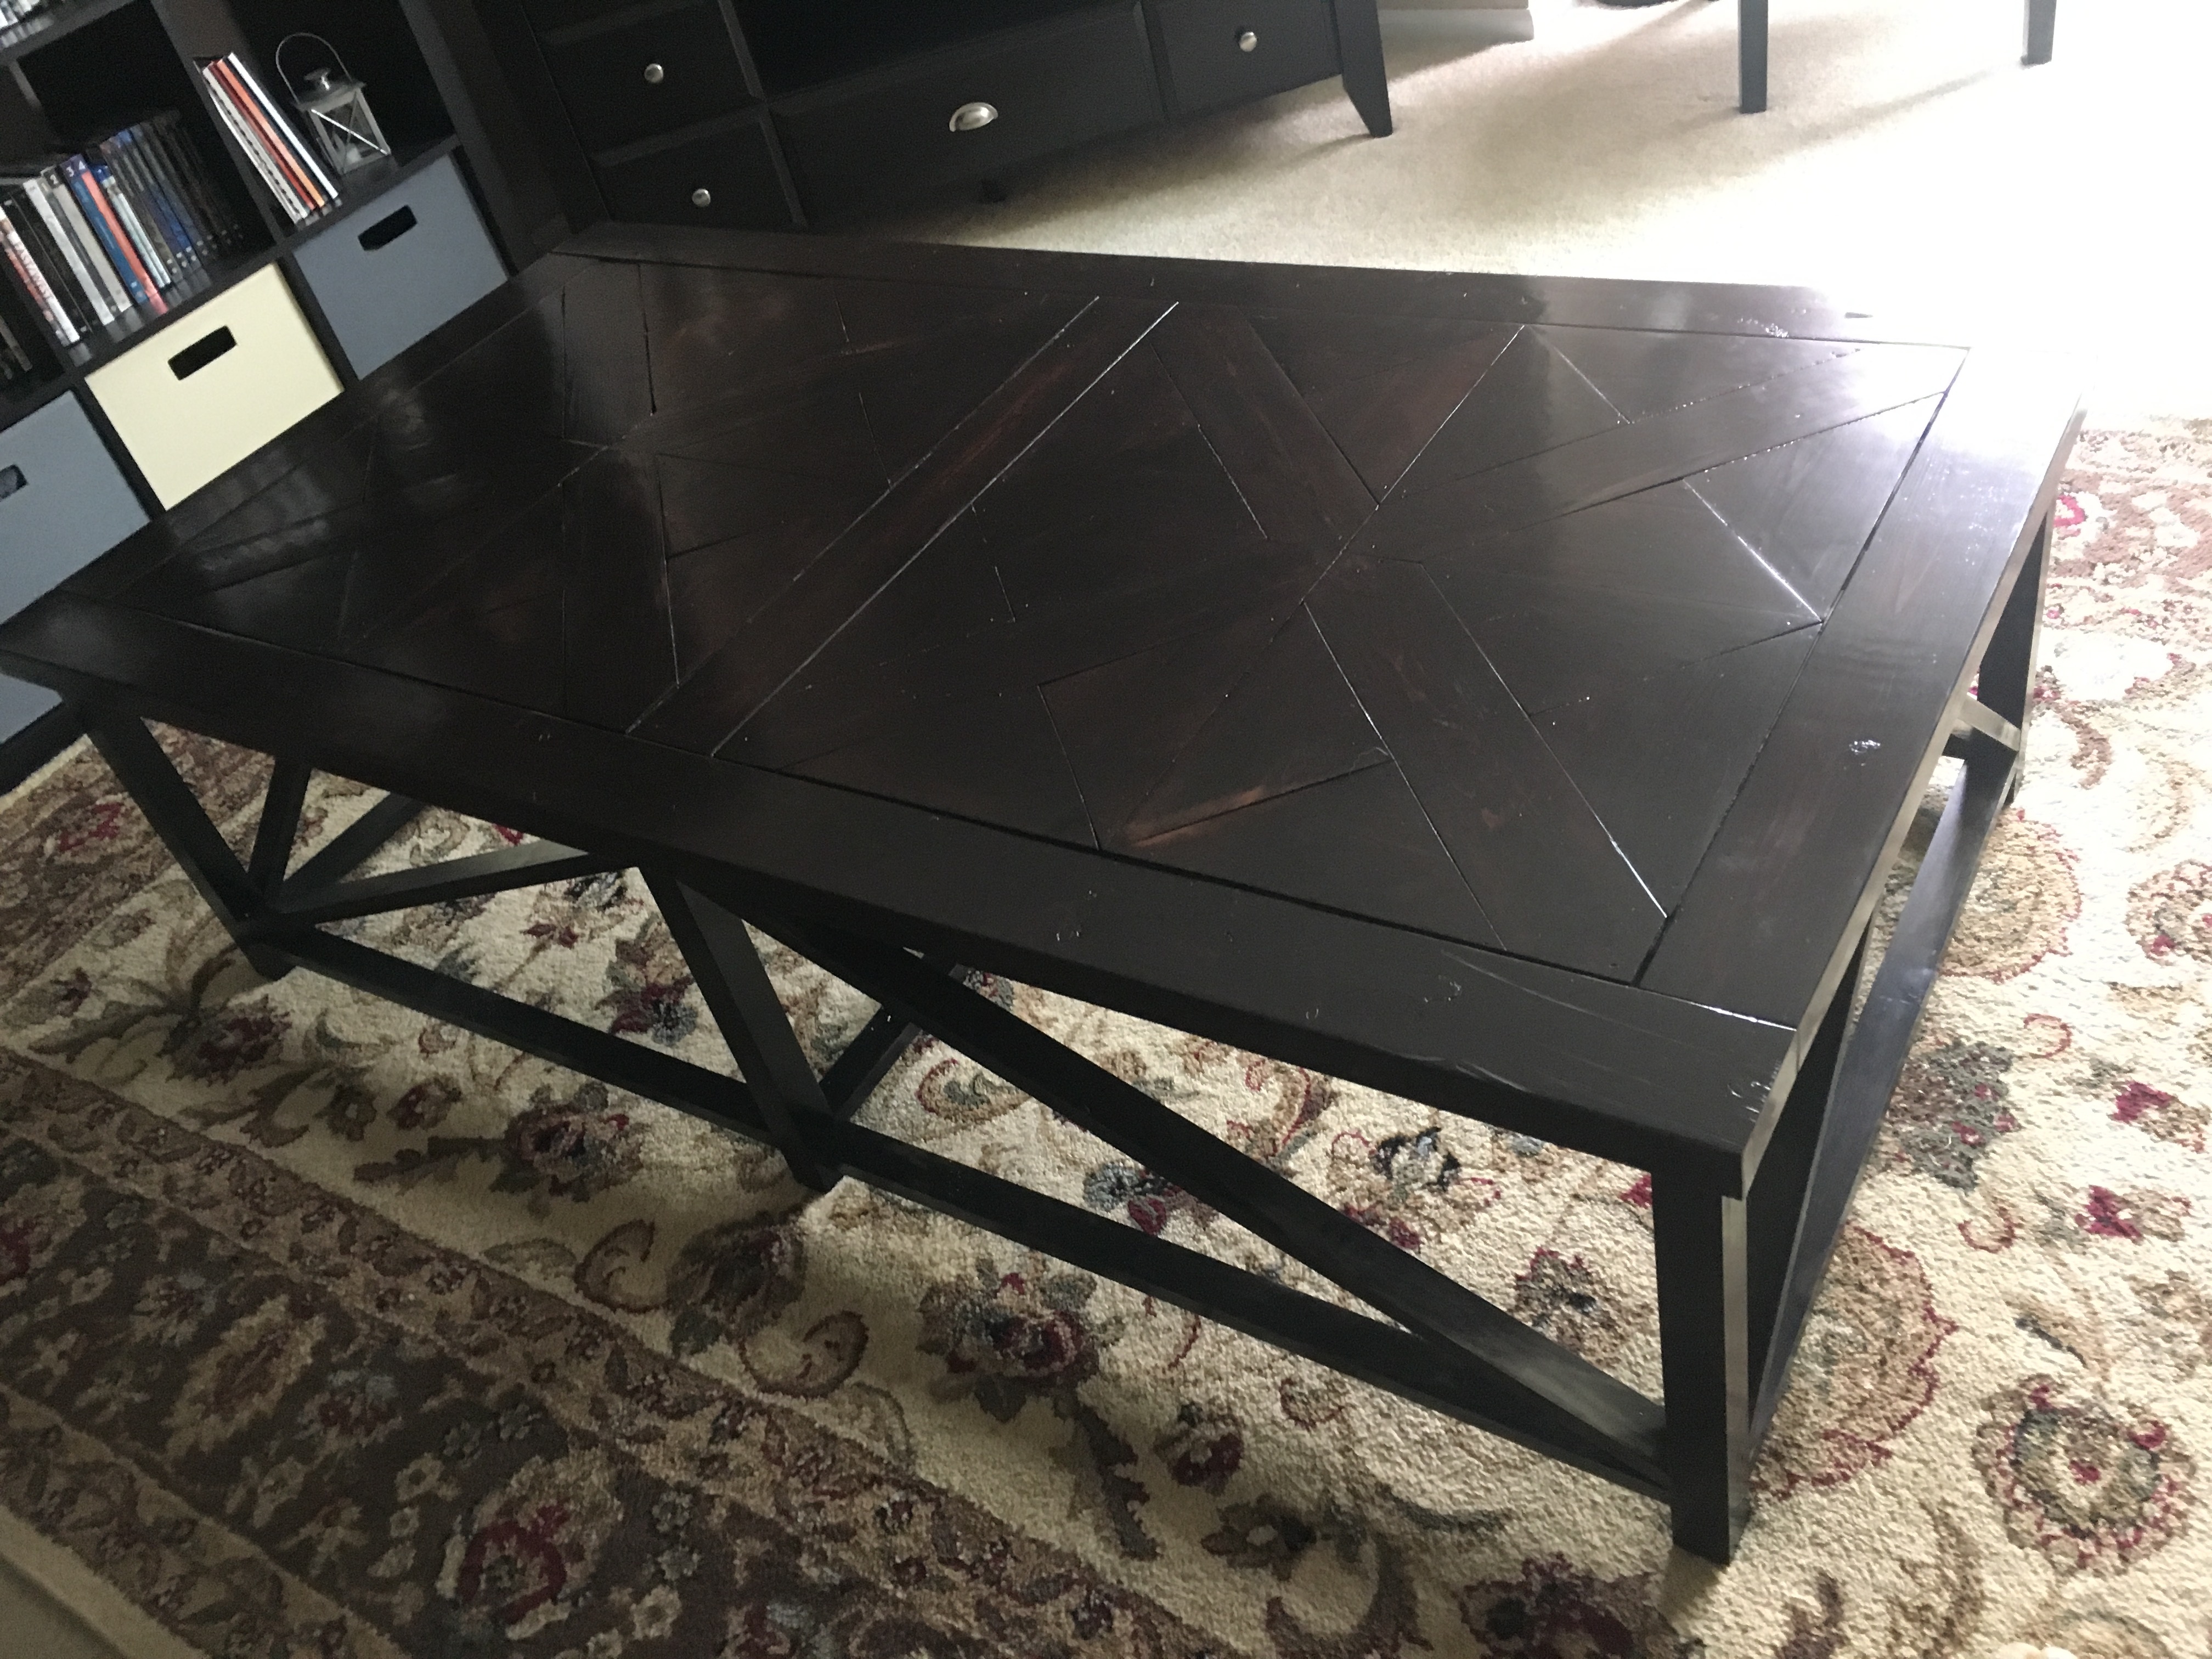
A few weeks ago Ashley from Shanty2Chic built an industrial cart coffee table — and then it was Whitney’s turn, and she knocked it out of the park with this parquet coffee table. I drew up the plans; she made it gorgeous. See her styled build at the Shanty2Chic build post.
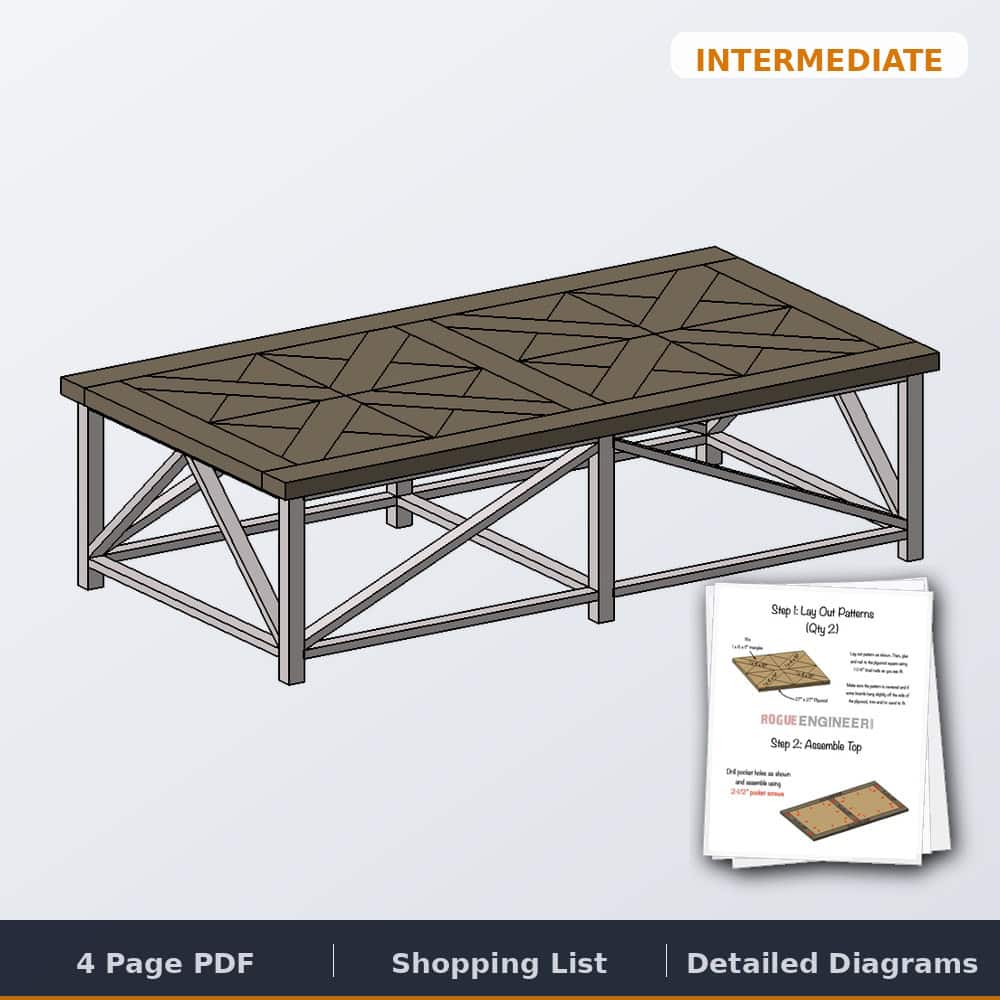
Parquet Coffee Table Plans
The complete printable PDF — full cut list, dimensioned diagrams, and all four steps for the parquet top and base.
Tools & materials
Dimensions
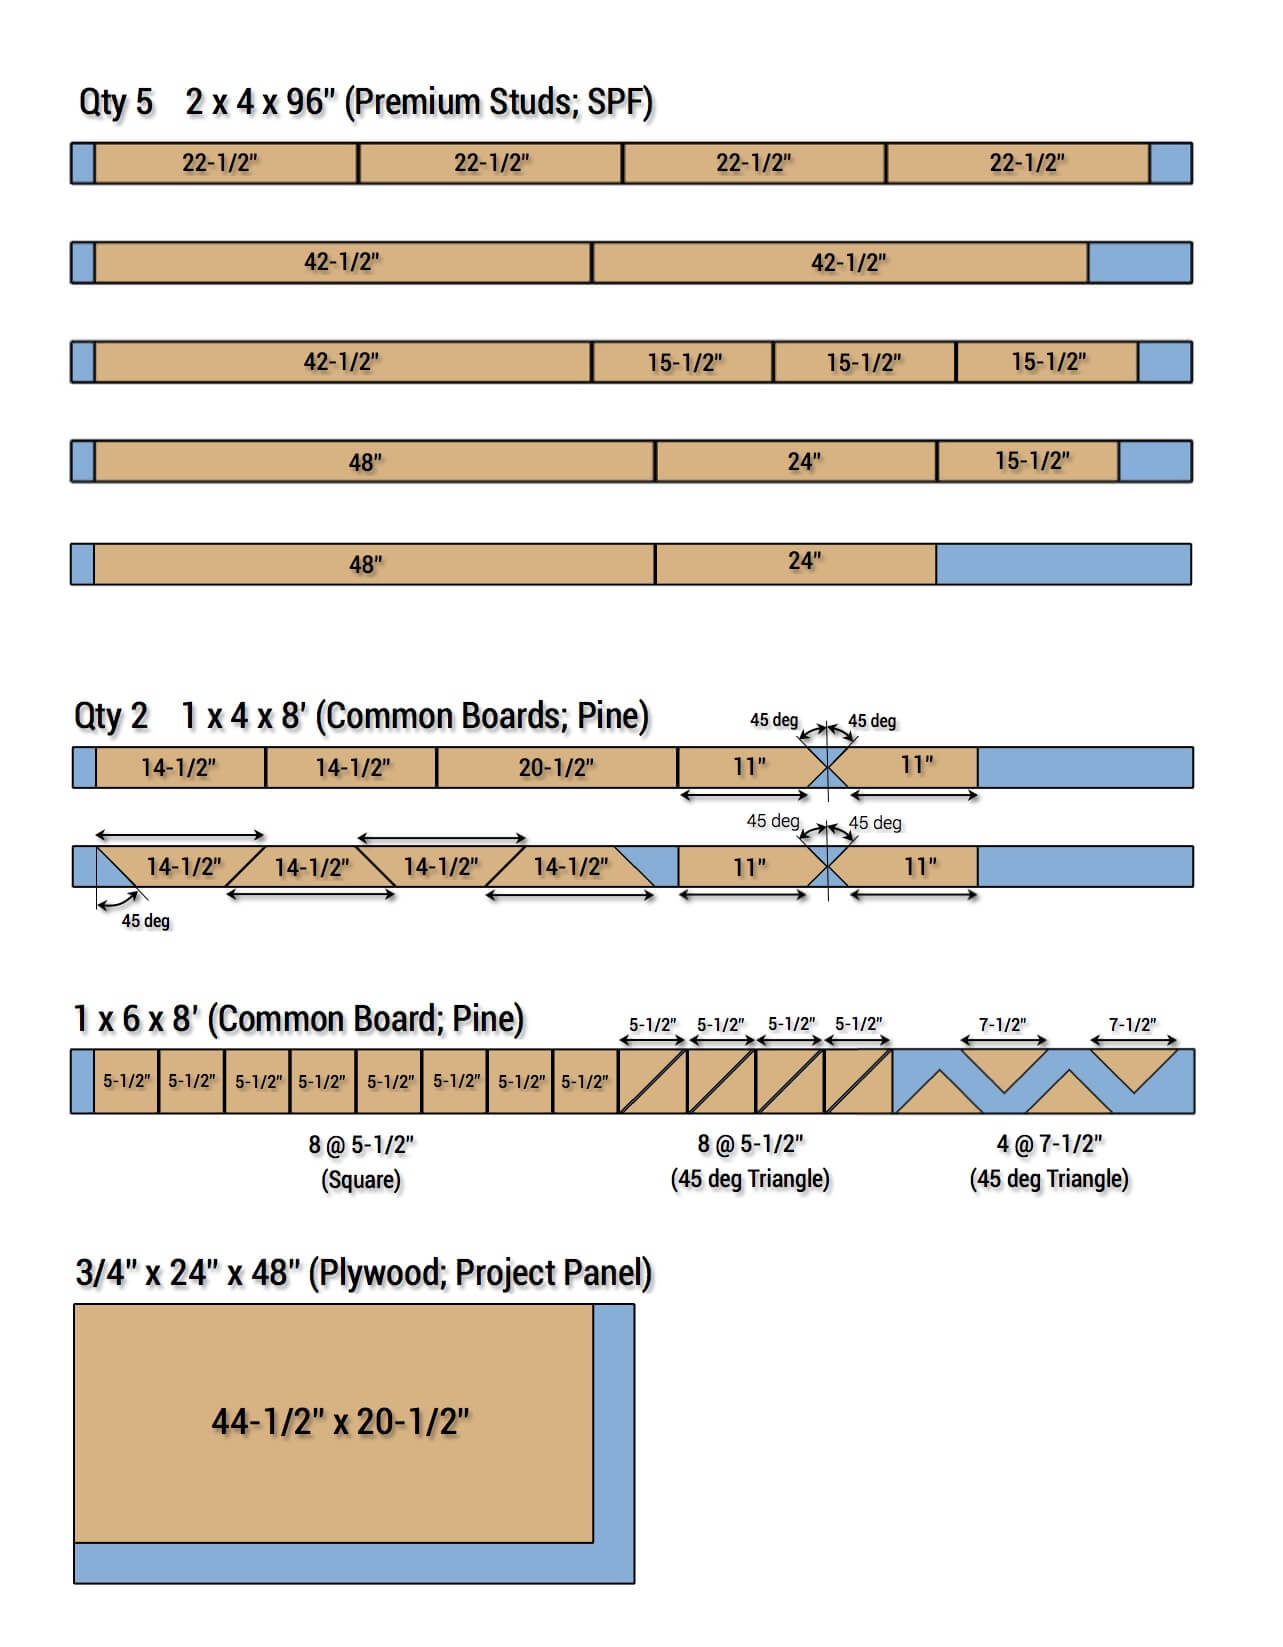
Cut list
The build, step by step
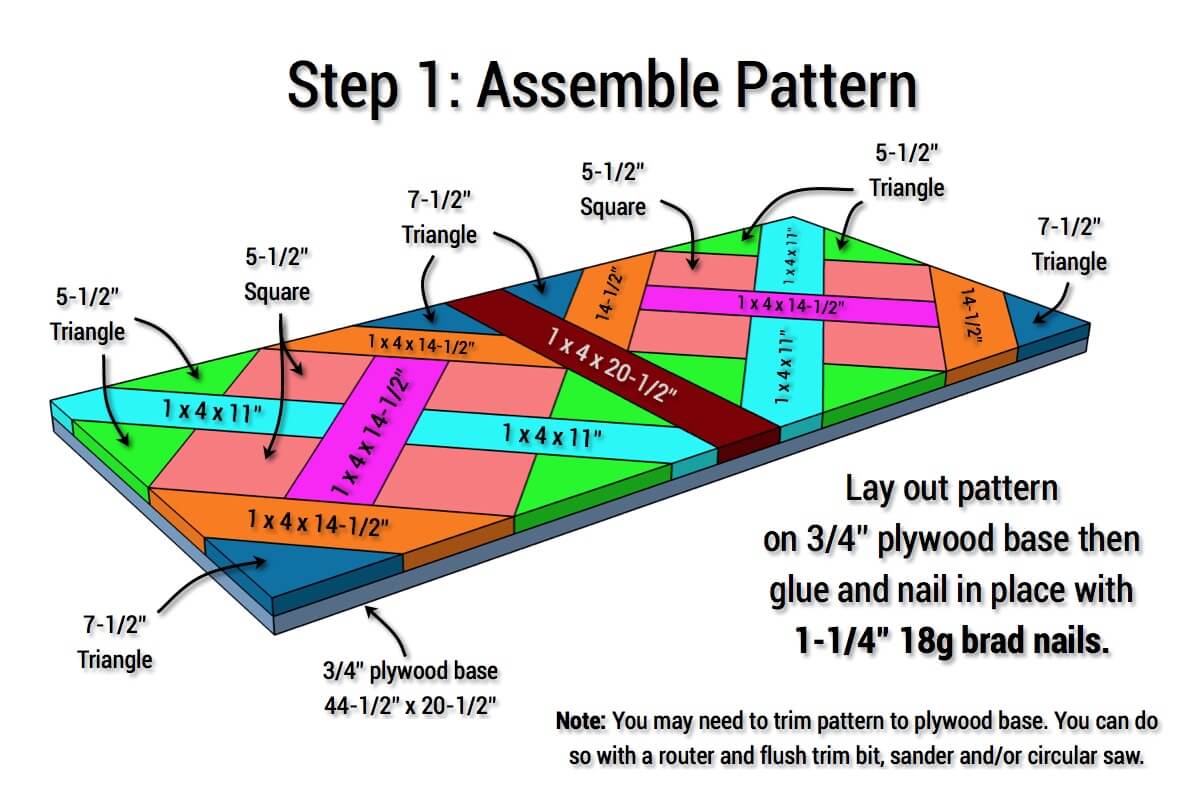
Step 1
Step 2
Step 3
Step 4
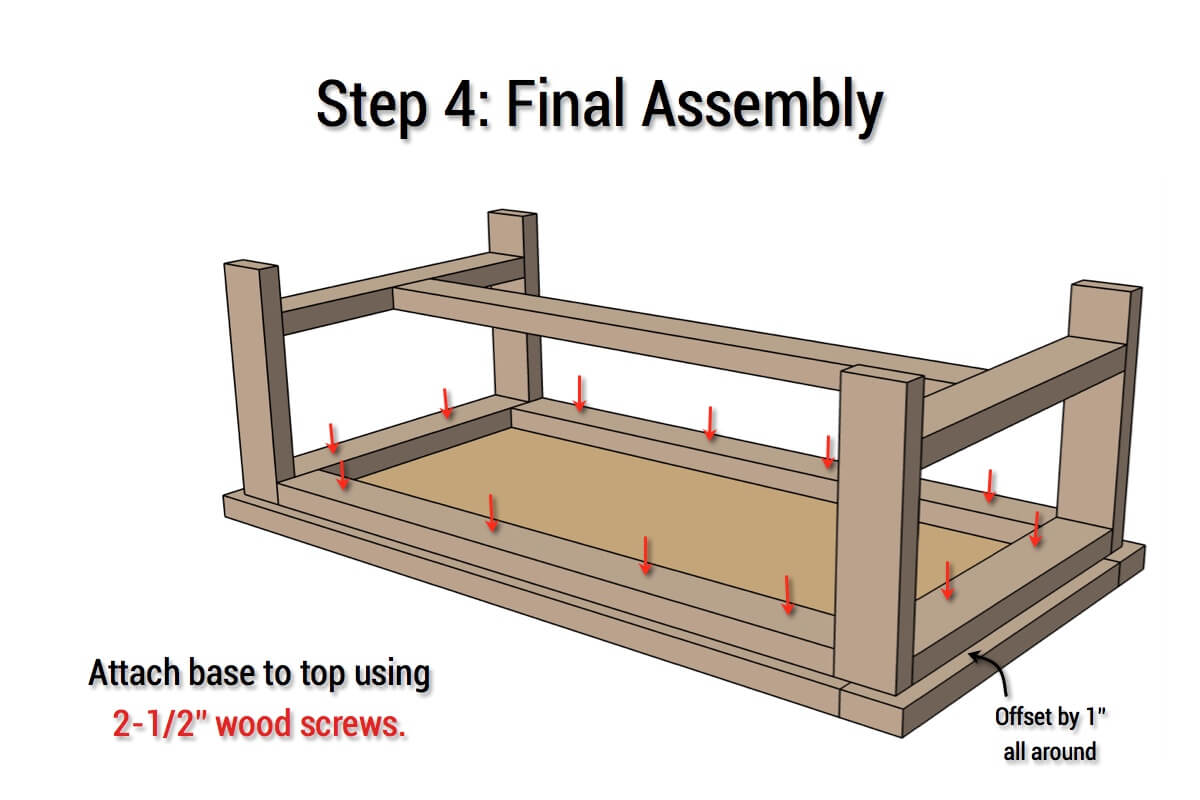
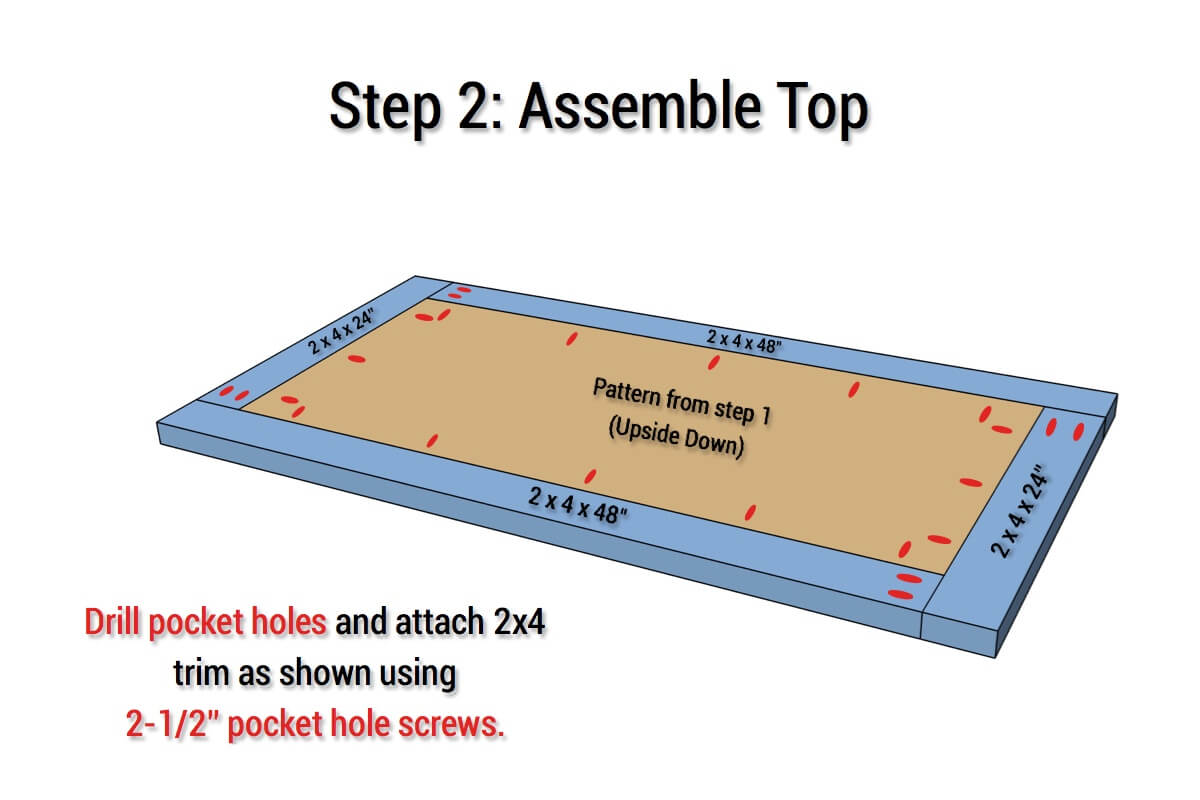
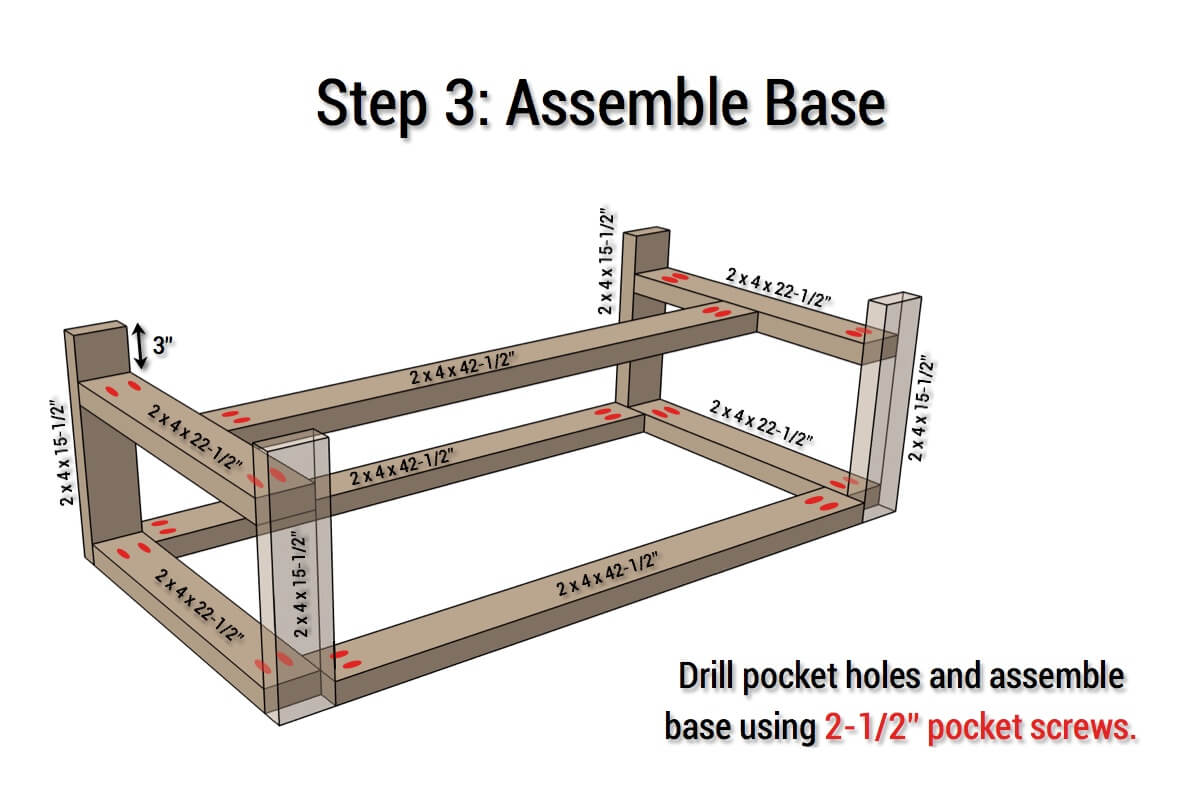
Every dimension, the full cut list, and the printable diagrams for each step are in the plans above.
Parquet Coffee Table Plans
The complete printable PDF — full cut list, dimensioned diagrams, and all four steps for the parquet top and base.
Questions? Comments?
As always, if you have any questions don’t hesitate to comment below — and don’t forget to post pictures of your finished tables in the comments! ENJOY!
this might be a dumb question, but is there anything other than the height to consider if i’m wanting to make this a kitchen table rather than a coffee table?
Not a dumb question at all. The only other thing to consider is if you wanted it a little longer and wider. Which could be an issue with this pattern.
Sarah, I am trying to make this into a kitchen table as well. I just worked out the plans to include six of the 20 1/2″ x 20 1/2″ parquets bordered with the 2 x 4s and the table comes out to 75 1/2″ x 51 1/2″. Not a bad size table.
Did you end up building the table? How did it work? I’m wanting to do the same thing and want a fairly large table. I would love to see how yours turned out if you wouldn’t mind sharing!
I did! I still have about four hours of sanding and staining ahead of me (mine won’t be as distressed, and I made it from oak for durability) but it came out great! The dimensions wound up being 40″ x 75 1/2″. You could extend the border if you want it any larger. My fiancé increased the plan size in AutoCAD software, so it gave us rough estimates – but we drew the parquet onto the plywood substrate and cut as we went to make sure everything would fit. It wasn’t easy! I did it at a woodworking studio in NY so I had seriously awesome teachers to help me, but I am going to do a matching coffee table at home as well. I’ll post pictures of where I am so far, and I am putting it on an industrial pipe base.
Here are my rough plans – we did deviate a bit on the measurements as we went…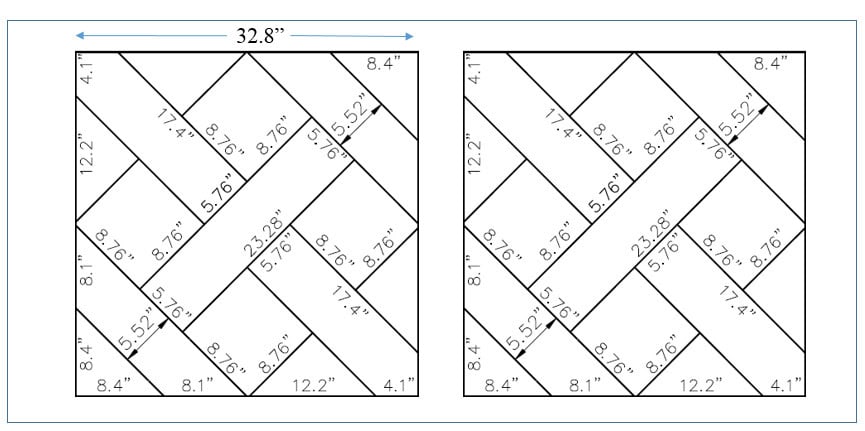
It looks amazing! You did a great job! Thank you for sharing. I’d love to see the final produce when you are finished!
Thank you! I’LOL definitely post when it’s done. 🙂
Can you post what you used for all materials and dimensions? I’m wanting to make a table top like this as well! Thanks!
the measurements are right in this thread
Looks awesome!
I don’t know if you have access to the dimensions of the steel bottom but if you do I’d love to have them. This piece was my inspiration to get into welding! Any help would be greatly appreciated.
Hey Taylor, unfortunately I don’t know those dimension. I do think however, that they would be pretty close to the overall dimensions that I provided in the plan. Maybe try reaching out to the Shanty Sisters on their post at http://www.shanty-2-chic.com/2015/04/diy-metal-and-wood-coffee-table.html
LOVE this! Great job. I too would like to make a kitchen table just like this. I’m wondering if there is an easy way to multiply or enlarge your dimensions to create a table top that is 72″ x 36″. How did you come up with the measurements for your pattern?
Unfortunately, I designed this table around the pattern and using stock wood dimensions. You could grow the dimensions but it would require a lot more cutting and odd wood sizes. Sorry I could be more help.
Thanks! Did you use some sort of software to figure out the sizes? Or just engineering genius? 🙂 I wish there was design software to accomplish this, but if not, I’m thinking I can figure it out using newspaper templates. Or trying to translate your dimensions using 1 x 6’s instead of 1 x 4s. Thanks for the great idea! Really enjoying your site.
Same idea! I doubled all the non border pieces, and took o https://uploads.disquscdn.c… ut the center piece, ends up about 7ftx4ft. I also rotated one half of the pattern by 90degrees. I am doing diffferent scheme for base, though. Just keep in mind that x12’s are actually more than double the width of x6’s, so you’ll have to trim 1/4” off all the x12 widths. Turning out good, though!
I love how this table turned out! I get a lot of compliments on the design! Thank you!